RSS

Category Archives: Breads

Enjoy Those Spring Vegetables – Awesome Asparagus Soup

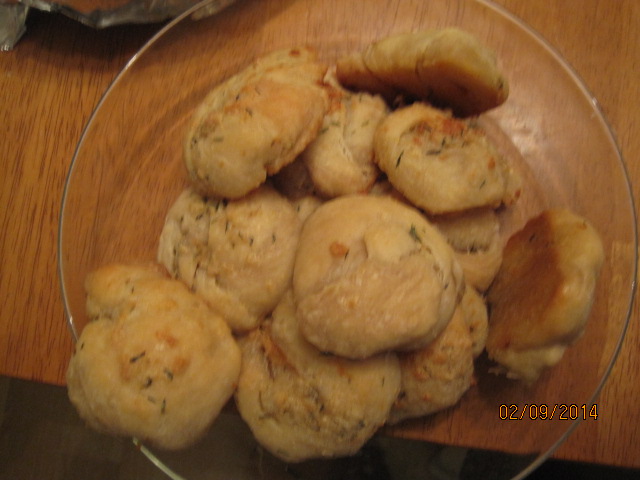
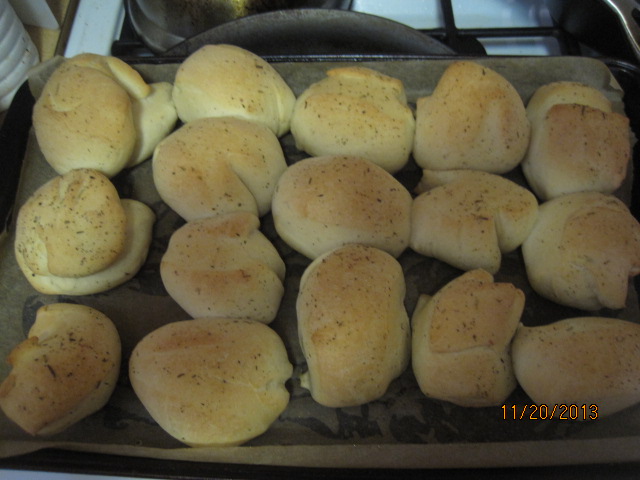
We love asparagus in our household so it is great when it is in season and you can get lost of it at a really good price around here. It has such great flavor and there are so many different recipes you can make with it (we love it roasted; if you haven’t tried it that way, give it a shot). Couple the spring asparagus with the ridiculous cold weather we still have here in New York, and it seemed like a great time to make this great soup recipe I picked up from the food network. This recipe also makes some Parmesan breadcrumbs, which I did not make, but they sound pretty good to me. I opted to make some biscuits instead, but you could just as easily do the breadcrumbs.

Asparagus Soup:
1 tablespoon olive oil
1 shallot, minced
Kosher salt and freshly cracked black pepper
3 bunches pencil asparagus, trimmed and cut into 1 1/2-inch pieces
1 cup thawed, frozen peas or 1 cup shelled fresh English peas (about 1 pound unshelled)
1/4 cup dry white wine
2 cups lightly packed baby spinach

For the Parmesan Breadcrumbs:
Four 1/8-inch slices day-old sourdough bread (about 3 ounces)
Olive oil, for drizzling
1 1/2 tablespoons chopped fresh thyme
Kosher salt and freshly cracked black pepper
One 3-ounce wedge Parmesan

Garnishes for the Soup:
Creme fraiche
Finely chopped fresh chives
Fresh cilantro leaves
Lime wedges
Asparagus tips
Preheat the oven to 425 degrees F.

For the soup: In a large soup pot or Dutch oven, bring the oil to medium heat. Add the shallot and salt and pepper to taste. Sweat the shallots until they are translucent, about 1 minute, being careful not to brown them. Add the asparagus to the pot and sweat the asparagus until it is beginning to soften, about 3 minutes. Add the peas and sweat for another minute. Pour in the white wine and deglaze the pot. Add 5 cups of water and continue simmering until the asparagus are crisp-tender, about another 10 minutes. Remove the pot from the heat and set it aside.

Working in batches (and carefully as the liquid will be hot), puree the soup until it is smooth in a blender. In the last batch, add the baby spinach and puree; this will give the soup a vibrant green color. Strain the soup back into the pot through a fine mesh sieve. Return the soup to a simmer until it is slightly thickened, about 4 to 6 minutes. Season the soup with salt and pepper to taste. Remove the soup from the heat.

For the Parmesan breadcrumbs: While the soup simmers, pulse the bread in a food processor until you have very coarse crumbs. Once processed, transfer the breadcrumbs to a medium mixing bowl. Drizzle the breadcrumbs with a generous amount of olive oil. Toss the breadcrumbs with the thyme. Season the mixture with salt and pepper. Transfer the breadcrumbs to a parchment-lined sheet tray. Using a grater, finely grate a few tablespoons of Parmesan over the breadcrumbs. Place the breadcrumbs into the oven and bake until they are golden and crispy, about 7 to 10 minutes. Remove the breadcrumbs from the oven and cool.

To serve: Ladle the soup into shallow serving bowls. Sprinkle the soup evenly with a few teaspoons of Parmesan breadcrumbs and top with a dollop of creme fraiche, if desired. Garnish with chopped chives, cilantro leaves, asparagus tips or a squeeze of a lime wedge and a splash of extra-virgin olive oil, if desired.Serve immediately.

The soup has great flavor from all of the vegetables and looks a great green color, just right for spring. One thing to remember when you are blending hot liquids, is to first let cool for 5 minutes or so, then transfer it to a blender, filling the blender only halfway. Put the lid on, but leave one corner open so you don’t have a vacuum that can make the whole thing explode on you. It’s dangerous and messy if you don’t do this. Make sure you  cover the whole thing with a towel too while you are blending to catch any splatters that can happen along the way as well. It’s a great soup that is very easy to make. The Parmesan breadcrumbs would be a nice addition because the soup does need the salt and pepper to get really good flavor and the breadcrumbs can give you that and more.

That’s all I have for today. Check back next time for another recipe. Until then, enjoy the rest of your day and enjoy your meal!

IMG_0486


Tags: , , , , ,

A Bevy of Beguiling Irish Dishes for St. Patrick’s Day

A Happy St. Patrick’s Day to you all! While for most people who think of Irish cooking as simply corned beef and cabbage and nothing more, I can tell you there are a lot of great Irish dishes you can try beyond that typical meal. There are some great meals you can choose from all over the Internet and I have posted a lot of Irish recipes on here, being he good Irish boy that I am. I have always wanted to see the cuisine beyond the corned beef and when Michelle and I went to Dublin we got to see, smell and taste a lot of different things. So if you are looking for some things to try this St. Patrick’s Day, here are some Irish meals I have posted on the blog that you can check out, including the classic corned beef and cabbage.

Beef and Barley Broth

Irish Cream and Coffee Cookies

Irish Onion Soup

Dark Chocolate Guinness Cake with Bailey’s Buttercream Frosting

Whiskey Glazed Carrots

Irish Mussels in Guinness Cream Sauce

Beef & Guinness Stew

Guinness Chocolate Truffles

Traditional Irish Stew

Guinness Brown Bread

Blood Pudding

Lemon Tart

Irish Coffee

Irish Spiced Beef

Corned Beef and Cabbage in the Pressure Cooker

Corned Beef and Cabbage

Colcannon

Guinness Mustard

Grasshopper Pie

Homemade Shamrock Shake

Potato and Leek Soup

Irish Soda Bread

There are also lots more great recipes out there on the Internet that you can check out from some great sources if you are looking for something a little different. I will be making the corned beef and cabbage in the pressure cooker, along with some Colcannon, cabbage and the brown bread. Of course there will be Guinness and Irish coffee later on as well.

That’s all I have for today. Check back next time for some more great recipes. Until then enjoy the rest of your day, have a happy St. Patrick’s Day and enjoy your meal!

IMG_0472


Tags: , , , , , , ,

Simple Southern Sides, Part 1 – Sweet Potato Corn Bread

I had made a Mardi Gras dinner last week at Sean’s request so I tried to find some recipes for some good side dishes that fit the theme we were going for and were going to be easy to make. Since I was making gumbo as the main part of the meal, I wanted to have some bread to go with it and what would be better than some corn bread? Well I found this recipe on Epicurious for a sweet potato corn bread that sounded really tasty and very easy to make, so I thought I would give it a shot.

Sweet Potato Corn Bread

1 1/4 pounds sweet potatoes

4 eggs

1 1/2 cups buttermilk

2 1/3 cups yellow cornmeal

1 cup all-purpose flour

1/2 cup granulated sugar

1 tablespoon baking powder

1 1/2 teaspoons salt

1/2 teaspoon baking soda

1/4 teaspoon ground ginger

1/2 cup (1 stick) chilled butter, cut into 1/2-inch pieces

Preheat the oven to 375 degrees. Butter a 9 inch by 9 inch baking pan. Pierce the sweet potatoes in several places with a fork. Microwave the sweet potatoes on high until they are tender to the touch, turning once, about 12 minutes. Cut open the potatoes and allow the flesh to cool. Mash enough of the potatoes to yield 1 cup packed. Reserve the extra mashed sweet potatoes for another use. Place the 1 cup of mashed sweet potatoes in a large bowl. Whisk in the eggs and the buttermilk.

Blend the cornmeal, flour, granulated sugar, baking powder, salt, baking soda and ground ginger in the food processor. Add the pieces of chilled butter and blend in the food processor until the mixture resembles a coarse meal. Add the cornmeal mixture to the egg mixture and stir until they are just blended. Transfer the mixture to the prepared baking pan.

Bake the corn bread until it is a deep golden color on top and a toothpick or tester inserted into the center of the corn bread comes out clean, about 45 minutes. Cool the corn bread in the pan on a baking rack. Serve or let stand at room temperature and serve when you are ready.

Cooking the sweet potatoes in the microwave saves you at least an hour of cooking time in the oven and helps you get the corn bread made a lot faster. I think the bread came out really well. it was not at all dry like some corn bread can be and had a great flavor from the sweet potatoes. If anything, it maybe could even used a bit more sweet potato for extra flavor. This recipe makes a lot of cornbread and says it will serve 10 to 12 people. I actually cut the recipe in half and made a smaller batch for us and we still had plenty to last for the week. I think I would make this one again as it seemed better than some of the traditional cornbread recipes I have tried.

That’s all I have for today. Check back tomorrow for another recipe. I still have a couple of good southern sides to share – a red rice recipe and a baked beans recipe from Jamie Deen, along with the gumbo I made for Mardi Gras, some parfaits, a new pulled pork recipe, beef stroganoff, chicken fingers, 3 pork burgers and a whole lot more. Until next time, enjoy the rest of your day and enjoy your meal!

IMG_0454


Leave a comment

Posted by on March 11, 2014 in Breads, Cooking, Side Dishes


Tags: , , , , , ,

Never Mind the McRib! Try This Smoky BBQ Riburger on Cheesy Garlic Bread

I can honestly say that I have never had the McRib sandwich, as un-American as that may sound. The whole idea of it kind of grosses me out, so I have stayed away from it, however I do like the idea of having a rib sandwich. As much as I would like a rib sandwich, I don’t know if I want to go through all of the trouble of cooking boneless ribs for hours just for a sandwich either, saw when I saw this recipe from Jeff Mauro, the Sandwich King on Food Network, I thought it sounded good and was certainly worth a try. He calls it a smoky barbecued riburger that uses a homemade barbecue sauce and some ground pork to make a burger-type sandwich. Put it on some garlic bread and you seem to have something pretty irresistible to me.

Smoky BBQ Riburger on Cheesy Garlic Bread

For the Chipotle Pineapple BBQ Sauce:
1 tablespoon vegetable oil
1 clove garlic, grated
1/2 medium onion, minced
2 cups ketchup
1/2 cup crushed pineapple with juice
3 tablespoons molasses
3 tablespoons apple cider vinegar
2 tablespoons light brown sugar
2 tablespoons Dijon mustard
2 tablespoons Worcestershire sauce
2 chipotle peppers in adobo
For the Ground Pork BBQ Riburger:
2 pounds ground pork
Kosher salt
For the Garlic Bread:
1 stick melted butter (1/2 cup)
2 tablespoons minced garlic
One 32-inch French loaf, split and halved
3 cups grated fresh mozzarella
Dill pickles, sliced on the bias or to your liking, for garnish

For the barbecue sauce: Heat the vegetable oil in a medium saucepan over medium heat. Add the garlic and the onions and saute until they are soft, about 4 minutes. Add the ketchup, crushed pineapple, molasses, vinegar, sugar, mustard, Worcestershire and the chipotles. Simmer uncovered, stirring often, until the mixture is thickened, about 15 to 20 minutes. Remove the sauce from the heat and blend it with an immersion blender until it is mostly smooth. Reserve.

For the pork burgers: Preheat a grill pan or skillet to medium-high to high heat.

Form the ground pork into long and rectangular patties that fit the shape of the bread, keeping in mind that there will be 2 patties per half of bread. Sprinkle the exterior of the patties with salt and place them on a hot grill top for 3 minutes. Flip the patties and cook them for another 3 minutes. Turn off the heat and baste the patties generously with the barbecue sauce. Flip the patties and continue cooking for about 2 or 3 more minutes, continuously flipping and basting the burgers.

For the garlic bread: Place a rack in the middle of the oven and set the oven to broil. Mix the melted butter with the garlic and brush the mixture on the cut sides of the bread. Top with the mozzarella cheese and place the bread under the broiler just until the edges are lightly crisped, about 2 minutes.

For the sandwich build: After your garlic bread is done, place 2 burgers on each bottom half of bread. Top the burgers with some pickles and the top half of the garlic bread. Slice each portion in half, yielding 4 sandwiches. Serve with the remaining BBQ sauce on the side.

These burgers were very easy to make and tasted great. They offer a nice change from a traditional burger and the barbecue sauce had a nice flavor with the mix of pineapple, molasses, Worcestershire and chipotles. You could certainly skip making the barbecue sauce and use your own favorite bottled sauce instead if that is what you are going for. We all really enjoyed having the burgers on the garlic bread, which seemed to make them even better and I had enough sauce leftover that I can use it for other things like ribs. It’s definitely a recipe worth giving a try. I served the sandwiches with some German potato salad and a new coleslaw recipe I tried, which I will be sharing tomorrow.

That’s all I have for today. Check back tomorrow as I will be sharing a couple of side dishes I made with burgers this week – a buttermilk coleslaw with bacon and cornmeal crusted onion rings, both very tasty and easy to do. Until then, enjoy the rest of your day and enjoy your meal!

IMG_0445 IMG_0441 IMG_0443

 
Leave a comment

Posted by on March 2, 2014 in Breads, Cooking, Dinner, Grilling, Pork, Sauce


Tags: , , , ,

It’s a Snack Attack, Part 2 – Buttery Garlic Knots

Here is the second of the snacks I decided to try out this past weekend. This one is really easy and comes from Kelsey Nixon on the Cooking Channel. It is for a batch of very easy to make buttery garlic knots. This is one that you can use with some quick made pizza dough in the food processor or you can just as easily use some store-bought pizza dough and whip these up in no time at all. The actual preparation of the garlic knots and the cooking takes no time at all, so this is a great quick snack you can make just about anytime you want.

Buttery Garlic Knots

1 recipe Food Processor Pizza Dough, or 1 package of store-bought pizza dough

16 tablespoons (2 sticks) butter, room temperature

2 tablespoons fresh thyme leaves, minced

2 tablespoons fresh rosemary leaves, minced

3/4 cup grated Parmesan cheese, divided

8 cloves garlic, grated

All-purpose flour, for dusting

2 teaspoons kosher salt

Prepare the recipe for the food processor pizza dough or take the store-bought pizza dough and let it come to room temperature. Preheat the oven to 375 degrees.

Mix the softened butter with the thyme, rosemary, 2 tablespoons of the Parmesan cheese and the grated garlic. Set the mixture aside.

Turn the pizza dough out onto a lightly floured work surface. Stretch the pizza dough into a rectangle. Spread half of the butter mixture on half of the dough. Fold the dough in half, covering the butter with the pizza dough. Using a pizza wheel, divide the dough into 18 strips. First cut through the middle of the dough and then you can cut each half into 9 separate pieces to get your 18 strips. Stretch each strip of dough and then tie it into a knot and tuck the ends underneath the center of the knot. Place the knots on a baking sheet.

Sprinkle the knots with some of the Parmesan cheese and bake until they are a golden brown color, about 15 to 20 minutes. Meanwhile, in a small saucepan over low heat, melt the remaining herb butter. Once the knots come out of the oven, baste them with the melted butter and sprinkle them with the remaining Parmesan cheese. Serve warm.

I actually basted the knots with some of the butter after they had been baking for about 10 minutes and then again at the end of the baking so they had a really nice baked in garlic flavor. They came out perfectly and has a nice crunch on the outside with a soft and buttery inside. These would go great with any Italian dinner you might be having like spaghetti and meatballs, baked ziti, lasagna, pizza, sausage and peppers or really just about any meal. They also make a great snack or appetizer and you could even put some together as a great afterschool snack for something a little different. You could certainly do a lot of different things with it and even use different herbs if there are some you would prefer instead, like basil or oregano.

That’s all I have for today. Check back next time for another recipe. I have one more good snack I tried recently to come for tomorrow so check back for that one. Until then, enjoy the rest of your day and enjoy your meal!

006

 
2 Comments

Posted by on February 11, 2014 in Appetizers, Breads, Cooking, Pizza, Snacks


Tags: , , , , ,

It’s a Chicken Invasion, Part 4 – Fried Chicken Biscuits

So yesterday was for a basic fried chicken sandwich from Cook’s Country, which was very tasty. Today is something that is just as easy, might taste even better and is a little more homemade. The recipe id for fried chicken biscuits and is from Bon Appetit, who got the recipe from the Pies-N-Thighs restaurant in Brooklyn, New York. The recipe sounded too good to pass up – delicate and spicy fried chicken on a nice fluffy homemade biscuit with honey butter. How could you not at least give it a try?

Fried Chicken Biscuits

For the Fried Chicken:
1 cup buttermilk
1 tablespoon hot sauce
½ teaspoon kosher salt
¼ teaspoon freshly ground black pepper
¼ teaspoon cayenne pepper
4 skinless, boneless chicken cutlets (about 1½ lb. total), pounded to ¼” thickness

For the Biscuits:

3 teaspoons baking powder
2½ teaspoons kosher salt
1 teaspoon sugar
¼ teaspoon baking soda
5½ cups all-purpose flour, plus more
1½ cups (3 sticks) chilled unsalted butter, cut into pieces
1½ cups chilled buttermilk
1 large egg, beaten to blend
For the Honey Butter and Assembly:

½ cup (1 stick) butter, room temperature
¼ cup honey
½ teaspoon kosher salt, plus more
Vegetable oil, for frying; about 2½ cups
2 cups panko Japanese breadcrumbs
Freshly ground black pepper
4 Pies-N-Thighs Biscuits (recipe above)
Hot sauce, for serving

For the chicken cutlets, combine the buttermilk, hot sauce, salt, black pepper, and cayenne in a resealable plastic bag; add the chicken. Seal the bag, turn the bag several times to coat, and chill the chicken in the refrigerator for at least 3 hours.

For the biscuits, preheat the oven to 375°. Pulse the baking powder, salt, sugar, baking soda, and 5½ cups of flour in a food processor. Add the butter and pulse until the texture is of coarse meal with a few pea-size pieces of butter remaining.
Transfer the mixture to a large bowl. Mix in the buttermilk with a fork, then gently knead the dough just until a shaggy dough comes together.
Pat out the dough on a lightly floured surface until it is about 1¼ inches thick. Cut out the biscuits with a 3” biscuit cutter, re-rolling the scraps once.
Place the biscuits on a parchment-lined baking sheet and brush the tops with egg. Bake the biscuits until they are golden brown, about 30–35 minutes.
To make the honey butter, mix the butter, honey, and ½ a teaspoon of the salt in a small bowl until smooth; set the honey butter aside.
To prepare the chicken, pour the vegetable oil into a large skillet, preferably cast iron, to a depth of ½ an inch and heat the pan over medium-high heat until the oil bubbles immediately when a little panko is added.
Meanwhile, place the panko bread crumbs in a shallow bowl. Remove the chicken from the marinade; season it with salt and pepper. Dredge the chicken in the panko, shaking off any excess. Working in 2 batches and maintaining the oil temperature, fry the chicken until it is golden brown, crisp, and cooked through, about 3 minutes per side. Transfer the chicken to a paper towel–lined baking sheet to drain.
Split the biscuits and spread each side of the biscuits with 1 tablespoon of the. reserved honey butter. Build the sandwiches with biscuits, chicken, and hot sauce, if desired and serve.
Just a couple of things about these recipes. I used chicken tenders that I had bought on sale this past week instead of the chicken breasts and they seem to work out just fine for me. I think you could probably just as easily use boneless thighs as well if you like them better. i did have a little trouble with the panko bread crumbs not sticking very well to all of the chicken pieces. I think I might flour them a little next time after they come out of the marinade to make them stick better, but overall the flavor was really good. To me, the real winner here is the biscuits. They tasted really good and were nice and fluffy. The recipe calls for you to use a 3 inch biscuit cutter, which seemed too big to me so I made them smaller, using a 2 inch cutter and got more biscuits out of the batch so we were able to use them for other meals. Everyone loved the biscuits so I know I’ll be making this one again. I made a little cole slaw to go along with the biscuits. I tried a different recipe this time, which I will post soon, but you can use any cole slaw recipe you like best.
That’s all I have for today. Check back next time for another recipe. until then, enjoy the rest of your day and enjoy your meal!
012 011
 
2 Comments

Posted by on February 1, 2014 in Biscuits, Breads, Cooking, Dinner, Poultry, Sandwiches


Tags: , , , , , , ,

When it’s This Cold, Part 2 – This Time It’s Soup – Alton Brown’s Lentil Soup

It is still freezing cold here in New York and today it is snowing again. It seemed even colder yesterday and the day before that. It would be nice if we got a little bit of a break in the weather and I cannot wait for winter to be over already. For now, we’ll just have to deal with it and that means more warm and hearty meals. Yesterday it was the bean stew recipe, today it is a recipe for lentil soup. Again, I was going for soup recipes that were quick and easy and didn’t need all day to cook or prepare. I found this one from Alton Brown for a simple lentil soup and I wanted to give it a try.

Alton Brown’s Lentil Soup

2 tablespoons olive oil

1 cup finely chopped onion

1/2 cup finely chopped carrot

1/2 cup finely chopped celery

2 teaspoons kosher salt

1 pound lentils, picked and rinsed

1 cup peeled and chopped tomatoes

2 quarts chicken or vegetable broth

1/2 teaspoon ground coriander

1/2 teaspoon ground cumin

1/2 teaspoon ground grains of paradise

Place the olive oil into a large Dutch oven and set it over medium heat. Once the pot is hot, add the onion, carrot, celery and kosher salt and sweat the vegetables until the onions are translucent, about 6 to 7 minutes. Add the lentils, chopped tomatoes, chicken or vegetable broth, coriander, cumin and grains of paradise and stir the mixture until it is well combined. Increase the heat to high and bring the mixture just to a boil. Reduce the heat to low, cover the  pot and cook the soup at a low simmer until the lentils are tender, about 35 to 40 minutes. Using a stick blender, puree the soup to your preferred consistency and serve.

Just a few points about this recipe. First, you are probably wondering what the heck grains of paradise is. I love Alton Brown, but he can make use of some unusual and really hard to find ingredients sometimes. Grains of paradise is a spice from West Africa that is very much like a mix of pepper, cardamom and coriander. For the amount needed for this recipe, I couldn’t see myself going out and buying it since it can be quite expensive and the odds are pretty good I would not be able to find it locally anyway. Instead, I looked around on the Internet and saw that as a substitute many people use freshly ground black pepper or cardamom. I decided to go with the black pepper myself and just used that. Also, this time of year the tomatoes in this area are not very good, so I simply substituted a cup of canned diced tomatoes instead and I think they worked out just fine anyway. You also want to make sure that you pick over your lentils before you use them. Most of the time there is no issue at all, but rinsing and picking over them just to check for pebbles and such is always a good idea when you are using dried beans like this. Nothing spoils a meal faster than getting a rock in your soup. As for the soup itself, I love lentil soup and this one had a nice flavor from the coriander and the cumin. It was very filling and hit the spot and took no time at all to make. I made some cream biscuits to go along with the meal and we were all good to go with leftovers for another day.

That’s all I have for today. Check back next time for another recipe. until then, enjoy the rest of your day, keep staying warm, and enjoy your meal!

001


Tags: , , , , ,

Need Biscuits for That Soup or Stew? Try These Quick Cream Biscuits

Since it is winter and plenty cold enough around here, we have been making a lot of soups and stews lately for dinner. Not only are they warm and hearty but you can get many lunches and dinners out of one batch of soup, which can really help you stretch your budget. If you are going to have soup or stew, it is always nice to have some warm bread or biscuits to go along side of them. I have been making a lot of my own bread, rolls and biscuits lately and this might be the easiest recipe of all of them save using Bisquick to make some drop biscuits. This recipe comes from Bon Appetit and is for cream biscuits. You only need a few ingredients and a little bit of cooking time and you can have some great, easy biscuits with your meal.

Cream Biscuits

4 cups all-purpose flour, plus more

2 tablespoons sugar

1 1/2 tablespoons baking powder

1 tablespoon kosher salt

1/2 cup (1 stick) chilled butter, cubed

1 1/2 cups (or more) heavy cream plus more for brushing

Preheat the oven to 375 degrees. Whisk 4 cups of the all-purpose flour with the sugar, baking powder and kosher salt in a large bowl until blended. Add the chilled butter and blend the mixture with your fingers until pea-size pieces begin to form. Add 1 1/2 cups of the heavy cream; stir the mixture until the dough begins to form, adding more cream by tablespoons if the dough seems too dry. Transfer the dough to a lightly floured work surface. Roll out the dough to a 3/4-inch thickness. Using a biscuit cutter, cut the dough into rounds. Repeat the process until you have used all the dough to make the biscuits.

Transfer the biscuits to a parchment pare-lined baking sheet. Brush the tops of the biscuits with heavy cream and transfer the baking sheet to the oven. Bake the biscuits until they are golden brown, about 25 to 30 minutes. Serve the biscuits while warm.

These biscuits go great with a lot of different things. They have a wonderful taste thanks to the heavy cream and are incredibly easy to make. As long you have the 6 ingredients on hand you can have these any night of the week without any trouble. These would be perfect for breakfasts as well if you wanted them to go with sausage and gravy or just to use for an egg sandwich or even just with a little bit of jam, jelly or preserves in the morning for a quick breakfast. I plan to make these more often because they are so easy to do.

That’s all I have for today. Check back next time for some more recipes as there are always lots of new things going on around here. I also have some things to share that I got for Christmas this year for the kitchen and a new feature I am hoping to start adding to the blog as well. Until next time, enjoy the rest of your day and enjoy your meal!

002

 
2 Comments

Posted by on January 9, 2014 in Biscuits, Breads, Cooking


Tags: , , ,

Some Filipino Flair With Dinner – Pan de Sal (Sweet Filipino Bread Rolls)

I just received the latest issue of Saveur Magazine the other day where they list their 100 favorite things and in that issue was a little blurb by Kellie Evans about these wonderful rolls that she used to east after church that were made by the Filipino women in her community. They had a picture of these rolls and the description was so good I knew I had to try them out and find the recipe. Luckily, the recipe was in Saveur a little further back and these could not be much easier to make. There is minimal kneading you need to do and you get wonderful rolls from it.

Pan de Sal

6 cups bread flour, plus more

1 cup plus 1 tablespoon granulated sugar

1 1/2 teaspoons kosher salt

2 1/2 cups milk, heated to 115 degrees

1 tablespoon dry active yeast

4 tablespoons unsalted butter, melted, plus more

1 egg

1 cup plain bread crumbs

Whisk the bread flour, 1 cup of the sugar, and the salt in a bowl. Stir the remaining 1 tablespoon of the sugar, 1 cup of the milk and the yeast in another bowl; allow the mixture to sit until it is foamy, about 10 minutes. Add the remaining milk, plus the melted butter and the egg; whisk until it is smooth. Slowly stir in the dry ingredients until the dough comes together. On a lightly floured surface, knead the dough until it is smooth, about 3 minutes. Transfer the dough to a lightly greased bowl and cover it loosely with plastic wrap, Set the bowl in a warm place until it has doubled in size, about 1 hour.

Place the bread crumbs on a plate. On a lightly floured work surface, divide the dough into 4 equal pieces. Working with 1 piece at a time, pat the dough into a 4 inch by 9 inch rectangle about 1/2 an inch thick. Working from one long end, roll the dough into a tight cylinder. Cut the dough crosswise into five 1 1/2 inch rolls. Gently coat the cut sides of the rolls with the bread crumbs. Place the rolls cut side up on a parchment paper-lined baking sheet spaced about 2 inches apart. Cover the rolls loosely with plastic wrap and set the sheets in a warm place until the rolls have doubled in size, about 1 hour.

Heat the oven to 350 degrees. Bake the rolls until they are golden brown, about 15 to 20 minutes. Serve.

These rolls are incredibly soft and very sweet. They went really well with the soup I made for dinner last night and I think they would perfect for just about dinner or great for sandwiches at lunch or dinner. I actually cut the recipe in half because the original recipe I have shared makes 20 rolls. I cut mine a little smaller and got 14 rolls out of the batch and they still proofed up to be big so I think you can make them even smaller if you want to get more from the batch. One thing to remember about this recipe is that you do not want to overwork the dough and knead it too much so it you get the nice fluffy rolls.

That’s all I have for today. Check back next time for another recipe. until then, enjoy the rest of your day and enjoy your meal!

002

 
1 Comment

Posted by on January 3, 2014 in Breads, Cooking


Tags: , ,

You Gotta have Bread for Thanksgiving – Easy New Orleans French Bread and Focaccia Rolls

I have been branching out more and more into the world of bread and making my own at home when I can. It just plain tastes better and works out to be a lot cheaper than what you pay for it in the stores. While I do try to keep things simple with what a make, I just recently tried a couple of recipes that are easy to do, with few ingredients, and will go well not just with your holiday meal plans but are great for any time. The first I tried is New Orleans French bread from Saveur magazine.

New Orleans French Bread

2 tablespoons sugar

2 1/4-ounce packages active dry yeast

2 tablespoons vegetable shortening

6 cups bread flour

1 tablespoon kosher salt

Place 1 tablespoon of the sugar, the yeast and 2 cups of water heated to 115 degrees in the bowl of a stand mixer fitted with a dough hook; let the mixture sit until it is foamy, about 10 minutes. Add the remaining sugar and the shortening and then add the flour and salt. Mix on low-speed until the dough forms; increase the speed to medium-high and knead the dough until it is smooth, about 8 to 10 minutes. Remove the bowl from the mixer and cover it with plastic wrap. Let the dough sit until it has doubled in size, about 1 1/2 to 2 hours.

Uncover the dough and transfer it to a floured work surface. Knead the dough briefly to form a ball. Divide the dough into quarters and shape each quarter into a 16-inch long thick rope. Place two ropes each on a parchment paper-lined baking sheet and cover with plastic wrap. Allow the loaves to sit until they have doubled in size, about 1 to 1 1/2 hours.

Heat the oven to 375 degrees. Using a sharp knife or cutting blade, slash a long line down the center of each loaf. Bake the loaves until they are light brown and an instant read thermometer inserted into the center of each loaf reads between 208 to 212 degrees, about 30 minutes. Let the loaves cool for 15 minutes before serving.

Of course, we couldn’t resist and cut into one of the loaves right out of the oven and it was great. These French bread loaves are crunchy and delicious and perfect for many uses. Not only are they great to go with your entrée, but they would be great for appetizers like crostini, or just dipped in some olive oil. They are also ideal for sandwiches of all kinds. I’ll definitely make these again.

The other bread I tried this week is a simple recipe I came across for focaccia rolls. I wanted to make something that could be used for dinner rolls or also used for sandwiches and the like and this recipe was easy enough and seemed to fit my needs the best.

Focaccia Rolls

1 1/4 cups warm water (105 to 115 degrees)

1 teaspoon honey

1 tablespoon active dry yeast

1/4 cup olive oil, divided

2 teaspoons salt

1 1/2 teaspoons Italian seasoning, divided

3 1/2 cups bread flour

In the bowl of a stand mixer, stir together the warm water, honey and the yeast. Allow the mixture to proof until it id frothy, about 10 minutes. Add 2 tablespoons of the olive oil, the salt, 1 teaspoon of Italian seasoning and mix together.

In a small bowl, mix together the remaining olive oil and herbs and set aside.

Attach the dough hook to the mixer and add the flour to the mixture in the bowl. Knead the mixture on medium speed for 10 to 12 minutes until the dough is smooth and elastic and does not stick to your hands.

Oil a large bowl and add the dough. Cover the bowl with a damp towel or plastic wrap and place it in a draft-free area to rise for 1 1/2 to 2 hours or until the dough has doubled in size.

Once the dough is risen, punch it down and divide it into 12 equal size balls. Place the balls on a greased baking sheet, cover it with a damp towel and allow it to rise for 30 to 40 minutes.

Heat the oven to 400 degrees. Using the remaining olive oil and her mix, brush the top of each roll. Place the baking sheet in the oven and bake for 20 to 25 minutes, until the tops of the rolls are golden brown and the rolls sound hollow.

I actually got more than 12 rolls out of this batch as I made some smaller and some larger so we could use some for dinner rolls and some for hamburgers. They have great flavor to them and I really liked them with the burgers. The small ones are perfect as dinner rolls for your holiday meals. I’ll be making these again as well.

That’s all I have for today. Check back again next time for more recipes. I still have a few Thanksgiving ideas if you are looking for something, so stayed tuned. Until next time, enjoy the rest of your day and enjoy your meal!

IMG_0389 002 003 IMG_0388

 
Leave a comment

Posted by on November 23, 2013 in Breads, Cooking, Holidays


Tags: , , , , ,

 
National Day Calendar

Fun, unusual and forgotten designations on our calendar.

Jennifer Probst

a little bit naughty a little bit nice

Laissez Faire

Letting Life Lead

simple cooking recipes

a blog to share with you the best