RSS

Category Archives: Cooking

Ciabatta, Ciabatta, You Bet!

I have always kind of shied away from making bread. I don’t really have any counter space to roll and knead dough out properly. Our kitchen is about the size of a closet with one small counter to do work on, so I have always been limited in what I can do. That being said, I have tried to get a little more adventurous and try some dough that can be done in the food processor or in a stand mixer. I love ciabatta bread, so that was immediately one of the first that I tracked down a recipe for. After finding a good one, I set about making it. You need to know you are doing this one a day in advance, so make sure you give yourself time to do it. It takes a lot of waiting but it’s worth it.

Homemade Ciabatta Bread

1/8 teaspoon active dry yeast

2 tablespoons warm water

1/3 cup warm water

1 cup bread flour

1/2 teaspoon active dry yeast

2 tablespoons warm milk

2/3 cup warm water

1 tablespoon olive oil

2 cups bread flour

1 1/2 teaspoons salt

To make the sponge: In a small bowl, stir together the 1/8 teaspoon of yeast and the 2 tablespoons of warm water and allow it to stand for 5 minutes, or until creamy. In a medium bowl, stir together the yeast mixture, the 1/3 cup of warm water and 1 cup of bread flour. Stir together for 4 minutes, then cover the bowl with plastic wrap. Allow the sponge to stand at a cool room temperature for at least 12 hours and up to 1 full day.

To make the bread: In a small bowl, stir together the 1/2 teaspoon of the dry yeast and the milk and allow it to stand for 5 minutes, or until it is creamy. In the bowl of a standing electric mixer fitted with a dough hook, blend together the milk mixture, the sponge, water, olive oil and flour at low-speed until the flour is just moistened; add the salt and mix the dough until it is smooth and elastic, about 8 minutes. Scrape the dough into an oiled bowl and cover it with plastic wrap.

Let the dough rise at room temperature until it has doubled in bulk, about 1 1/2 hours. The dough will be sticky and full of air bubbles. Turn the dough out onto a well-floured work surface and cut it in half. Transfer each half to a parchment sheet and form it into an irregular oval about 9 inches long. Dimple the loaves with floured fingers and dust the tops of the loaves with flour. Cover the loaves with a dampened kitchen towel. Let the loaves rise at room temperature until almost doubled in bulk, about 1 1/2 to 2 hours.

At least 45 minutes before baking the ciabatta, place a baking stone on the oven rack with the lowest position in the oven and pre-heat the oven to 425 degrees.

Transfer 1 loaf on its parchment paper to a rimless baking sheet with a long side of the loaf parallel to the far edge of the baking sheet. Line up the far edge of the baking sheet with the far edge of the baking stone in the oven and tilt the baking sheet to slide the loaf with the parchment onto the back half of the baking stone. Transfer the remaining loaf to the front half of the stone in a similar manner. Bake the ciabatta loaves for 20 minutes, or until a pale golden brown. Cool the loaves on a wire rack.

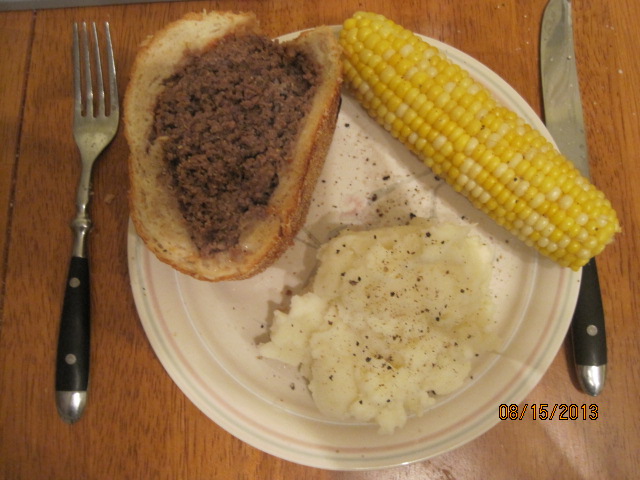
I was a little skeptical before I even tried the recipe how this would come out, but it was really good. The crust is perfectly crunchy with a great texture to the bread itself. Sean and I each had a slice while it was still warm and it was awesome. I then made a sandwich with the bread later on for dinner and it was fantastic. Michelle took a sandwich for lunch herself today. The only thing I might change is the shaping of the loaves. I did not shape them in the oval as recommended and went for a little bit of a longer loaf. I think the oval would work out much better and give you larger slices to work with. I will definitely be making this again. I know around here they get about $4.00 a loaf for ciabatta and I figure the cost of making two loaves at home is about a dollar, so it is certainly worth the time you put in. Most of the time is actually waiting for the dough to rise, so you don’t have a lot of effort to put in for great results and savings.

That’s all I have for today. Check back next time for another new recipe that I have tried this week. We have tried several already, so I have a bunch of new ones to choose from. Until next time, enjoy the rest of your day and enjoy your meal!

007


3 Comments

Posted by on September 4, 2013 in Breads, Cooking


Tags: ,

A Sweet Treat – Heath Bar Brickle Drop Cookies

My wife makes great cookies. I don’t know what it is about them when she makes them, but they just come out better than anyone else’s cookies, most of all mine. That is why I leave the cooking baking to her. She is the expert. Michelle knows how much I like Heath Bars. Heath bars are really the only candy bar that I can say I really like and would eat regularly. I just love the English toffee in them. When we saw the Heath bar brickle bits in the supermarket not that long ago, Michelle knew right away I was going to want to try them out and have some cookies. This is the recipe that is right on the back of the package and is also available through Hershey’s website (the maker of Heath bars).

Heath Bar Brickle Drop Cookies

1 cup (2 sticks) butter, softened

1 cup granulated sugar

1 cup packed light brown sugar

1 teaspoon vanilla extract

1/2 teaspoon salt

3 eggs

3 1/2 cups all-purpose flour

2 teaspoons baking soda

2 teaspoons cream of tartar

1 1/3 cups (1- 8 ounce package) Heath Bits ‘O Brickle Toffee Bits

Preheat the oven to 350 degrees. Lightly grease a cookie sheet or line it with parchment paper.

Beat the butter, granulated sugar, brown sugar, vanilla and salt in a large bowl until blended. Add the eggs; beat well. Stir together the flour, baking soda and cream of tartar; gradually add the flour mixture to the butter mixture, beating until well blended. Stir in the toffee bits. Drop by heaping teaspoons onto the prepared cookie sheet.

Bake the cookies for 8 to 10 minutes or until lightly browned. Cool slightly and remove them to a wire rack to cool completely. Repeat the process with the remaining cookie dough.

The recipe says it makes about 6 dozen cookies, which seems to be about right. These cookies come out most and chewy and have the great toffee flavor to them. They go great with a nice cup of coffee or just as a midnight snack when you have to get up and walk the dog at night. For me, they rank right up there with Michelle’s chocolate chip cookies and her oatmeal raisin cookies, both family favorites around here.

That’s all I have for today. check back again to see what recipes come up next. I do have recipes for some polenta with roasted vegetables, a homemade Shake N’ Bake pork chops recipe, and I have the dough for the ciabatta bread proofing right now, so we’ll have that one this week as well and anything else that may come along that strikes my fancy. Until next time, enjoy the rest of your day and enjoy your meal (or your cookies)!

IMG_1661

 
2 Comments

Posted by on September 3, 2013 in Cookies, Cooking, Dessert


Tags: , , , ,

Rainy Labor Day? Make Some Indoor Beer Can Chicken

It looks like it is going to be a rainy, cloudy and muggy day here for Labor Day today, which may put a damper on some people’s plans for picnics or cookouts. While you may not be able to have the barbecue you were hoping for on the last unofficial day of summer, you can still have food that tastes just as great. I came across this recipe in the New York Times awhile back and have been waiting for the right time to use it and with the rain we had yesterday and the fact that I found a whole chicken on sale for $4.00 the time was right to give it a try. I have done beer can chicken outdoors before, but I had never ventured to try it in the oven.

Indoor Beer Can Chicken

1 whole chicken, about 4 to 5 pounds

4 tablespoons sweet paprika

2 tablespoons chili powder

2 tablespoons ground cumin

1 tablespoon ground coriander

1 tablespoon brown sugar

1 tablespoon granulated white sugar

1 tablespoon freshly ground black pepper

1 tablespoon kosher salt

1 tablespoon red pepper flakes, or to taste

1 can beer, ideally yellow in color, with the top half consumed or poured off

Remove the top rack from the oven and preheat the oven to 425 degrees. Remove the neck and giblets from the chicken. Rinse the chicken well in cold water and pat dry thoroughly with paper towels.

Combine all the spices together in a large bowl and blend. Apply the dry rub to the chicken both inside and outside. Place the beer can on a solid surface such as a counter top or tabletop. Pick up the chicken and, taking a leg in each hand, put the cavity of the chicken over the beer can and slide the bird down the can. Carefully transfer the bird and the can to a roasting pan and place the pan carefully in the oven.

Roast the chicken for about 1 1/4 to 1 1/2 hours until the breast meat registers 165 degrees on an instant read thermometer or until the legs of the chicken feel very loose in their sockets. You can tent the chicken with foil after 45 minutes of cooking if you want to try to keep the skin from getting too dark. Carefully remove the chicken from the oven, remove the can from the chicken and allow the chicken to rest, tented loosely with foil, for about 10 minutes before carving.

The one I cooked was literally falling off the bone. It was very moist on the inside and the spices not only added great flavor but made for a super crispy skin that everyone just loved. You could easily just use this spice rub if you want to just roast some chicken pieces or do some chicken on the grill. You could also baste the chicken with barbecue sauce along the way as it roasts if you want that flavor, but I chose to just go with the dry rub this time. We had the chicken with some mashed potatoes, corn on the cob and biscuits and it was delicious. I’ll definitely be making this one again.

That’s all I have for today. Check back again during the week to see what else comes up. I have a few things on hand to make this week and I am going to get to the lemon icebox pie, ciabatta bread, some homemade pizza rolls, a new pork chop recipe and a nice polenta with roasted vegetables recipe I got from Williams-Sonoma. Until next time, enjoy the rest of your day and enjoy your meal!

003 001


2 Comments

Posted by on September 2, 2013 in Cooking, Dinner, Grilling, Poultry


Tags: , , ,

Having an Easy London Broil Meal

London broil is one of those  cuts of meat that cries out for seasoning and marinade. When you cook it and season it right it can be a great meal at a very reasonable price. Leave it plain and overcook it and you might as well just eat a sneaker. I had picked up a London broil on sale recently and decided to make it for dinner last night using this recipe I picked up from Food Network. All that’s really required is the time to let the meat sit in the marinade; the cooking time itself is only about 15 minutes.

London Broil with Herb Butter

3/4 cup beef broth

3 tablespoons extra-virgin olive oil

1 tablespoon soy sauce

1 tablespoon Worcestershire sauce

2 tablespoons fresh lemon juice

Kosher salt and freshly ground black pepper

1 top round London broil steak (about 2 pounds)

4 tablespoons butter, softened

1 1/2 tablespoons chopped fresh chives

1 tablespoon chopped fresh parsley

1 tablespoon chopped fresh tarragon

Kosher salt and freshly ground pepper

1 tablespoon fresh lemon juice

Prepare the steak: Pour the beef broth into a medium bowl and whisk in 2 tablespoons of the olive oil, the soy sauce, Worcestershire sauce, lemon juice, 1 teaspoon of salt and 1/2 teaspoon of pepper. Place the steak in a large resealable plastic bag, pour in the marinade and seal, squeezing out the air. Refrigerate the steak for at least 4 hours and up to 1 day.

Prepare the herb butter: Mix the butter with the chives, parsley, tarragon, a pinch of salt, 1/2 teaspoon of pepper and the lemon juice in a bowl.

About 30 minutes before cooking, remove the meat from the bag and discard the marinade. Dry the steak well with paper towels and bring it to room temperature. Heat a large skillet over high heat, about 2 minutes. Rub the steak with the remaining 1 tablespoon of olive oil. Sprinkle 1 tablespoon of salt over the surface of the pan; add the meat and set a heavy skillet on top to weigh it down. Sear the steak for about 7 minutes; turn the steak, replace the weight over the steak and cook until a thermometer inserted into the side of the steak registers 110 degrees for medium-rare, about 5 minutes.

Transfer the steak to a cutting board, brush with some of the herb butter, tent with aluminum foil and allow the steak to rest for about 10 minutes. Thinly slice the steak against the grain and top with more of the herb butter.

The herb butter adds a really nice flavor to the steak and the marinade is tasty but not overpowering at all. You want to make sure that you don’t overcook this cut of meat. It gets very chewy pretty quickly, even if you marinade to help break the meat down some before cooking. I actually added 1 tablespoon of Montreal steak seasoning and rubbed it into both sides of the steak before cooking just to get some extra flavor and it was great. I served this steak with mashed potatoes, some mixed vegetables and I whipped up some caramelized onions right in the pan I had cooked the steak in.

Caramelized Onions

1 onion, sliced

1/4 cup beef broth

1 tablespoon balsamic vinegar

1 tablespoon butter

Add the sliced the onions to the pan you cooked the steak in along with the beef broth. Turn the heat to high and scrape up any browned bits on the bottom of the pan. Cook until the onion is softened, about 3 minutes. Add the balsamic vinegar and stir, allowing to cook down, about 1 minute. Add the butter to the pan and swirl to melt and coat the onions.

It’s a quick little side dish that makes up some great onions. You can try it anytime you cook any type of beef or change things up and use chicken broth when you make some chicken.

That’s all I have for today. Check back next time to see what recipe comes along. I am starting to plan some things out for next week so check and see what I decide to make. Until next time, enjoy the rest of your day and enjoy your meal!

003 001

 
Leave a comment

Posted by on August 31, 2013 in Beef, Cooking, Dinner, Sauce, Vegetables


Tags: , , , ,

A Quick Dinner of Beef Tacos

I am always on the lookout for quick weeknight meals that taste great. Sean had requested we have tacos for dinner a few nights ago. I like to make taco dinners because they are simple to make and clean up from and always taste great. The nice things about tacos are that, like fajitas, you can use any protein you like best for your main component. I have made and posted fish taco recipes before, but this time I thought I would keep it simple and use the ground beef we had on hand to make some beef tacos using this recipe from America’s Test Kitchen.

Beef Tacos

1 tablespoon vegetable oil

1 onion, minced

3 garlic cloves, minced

2 tablespoons chili powder

1 teaspoon cumin

1 teaspoon coriander

1/2 teaspoon oregano

1/4 teaspoon cayenne pepper

1 pound ground beef

1/2 cup tomato sauce

1/2 cup chicken broth

2 teaspoons cider vinegar

1 teaspoon light brown sugar

Taco shells

Heat the vegetable oil in a medium skillet over medium heat until shimmering. Add the onion and cook until it is softened, about 5 minutes. Stir in the garlic, spices, and 1 teaspoon of salt and cook until fragrant, about 30 seconds.

Stir in the ground beef and cook, breaking it up with a wooden spoon, until it is no longer pink,about 5 minutes. Stir in the tomato sauce, broth, vinegar and brown sugar and simmer until the mixture is thickened, about 10 minutes. Season with salt to taste.

Divide the filling evenly among the taco shells and serve, putting out any toppings or accompaniments that you wish.

If you have ever bought any of those packaged taco kits, you know that they come with a seasoning packet. Perhaps you have even bought a packet separately to use to make tacos. Do yourself a favor and just use the spice mix listed here in this recipe. It tastes a lot better than anything you will buy. Also, instead of adding the water like the packet asks you to do, you can add the tomato sauce and broth used here and get much better results and flavor.

I always serve tacos with some homemade salsa, sour cream, shredded cheese and lettuce for toppings. Very often I also have guacamole to serve as well, which I did not have this time. I made some Mexican rice to go along with it, which makes an excellent side dish for tacos.

That’s all I have for today. it’s just a simple and quick recipe today. Check back next time as I will have a recipe for london broil with herb butter that sounds pretty tasty. I also hope to have some other recipes this weekend that I have been promising to make but just haven’t had the time to get to yet. You’ll want to check back for those as the lemon icebox pie looks great and I am anxious to try making the ciabatta bread. Until then, enjoy the rest of your day and enjoy your meal!

010


1 Comment

Posted by on August 29, 2013 in Beef, Cooking, Dinner, Rice


Back Home For Some Pork Chops and Applesauce

As fun as vacation was. it is always nice to be back home. It also means it’s back to the kitchen for some cooking, which I did for the first time in a week last night. Anyone who is my age remembers the Brady Bunch episode where Peter talked about pork chops and applesauce. They seem like a perfect pairing and since I had picked up some early season apples and some pork chops yesterday when shopping, it made for the perfect dinner last night.

Sautéed Pork Chops with Brandy-Apricot Sauce

4 bone-in rib pork chops

Salt and pepper

1 tablespoon plus 2 teaspoons vegetable oil

1 shallot, minced

1/2 cup bourbon

1/2 cup dried apricots, chopped medium

1 cup chicken broth

2 teaspoons minced fresh thyme

2 tablespoons red wine vinegar

Pat the pork chops dry with paper towels then season them well with salt and pepper. Heat the 2 teaspoons of oil in a large skillet over medium-high heat until just smoking. Brown the pork chops on the first side, about 3 minutes.

Flip the chops over and reduce the heat to medium. Continue to cook the chops until the center of the chops away from the bone registers 135 degrees on an instant-read thermometer, about 5 to 10 minutes.

Transfer the chops to a clean plate and tent with foil, allowing the pork chops to rest until the pork reaches an internal temperature of 145 to 150 degrees before serving, about 5 to 10 minutes.

While the pork chops rest, add the remaining 1 tablespoon of vegetable oil and return the skillet to medium-high heat until the oil shimmers. Add the shallot and cook until it is softened, about 2 minutes. Stir in the bourbon and the apricots, scraping up any browned bits still in the pan. Add the chicken broth and the thyme and simmer until the mixture is thickened, about 8 minutes. Stir in any accumulated pork juices from the plate the pork has been resting on and the red wine vinegar. Season with salt and pepper to taste. Spoon the sauce over the pork chops before serving.

The pork was cooked perfectly and this pan sauce was great. I really like the flavor you get from the apricots and bourbon and the vinegar gives it just that hint of bite and acid. it’s a very simple meal that you can make on a weekend or a weeknight with little effort at all.

Now for the applesauce. Everyone has their own version of the applesauce thhey make, often passed down through families. Applesauce itself is pretty basic to make and all I did was follow America’s Test Kitchen recipe for a very simple sauce.

Old-Fashioned Applesauce

4 pounds apples (about 8 to 12 apples), peeled, cored and cut into 1 1/2-inch chunks

1 cup water, plus extra if needed

1/4 cup sugar, plus extra if needed

Pinch salt

1/4 teaspoon ground cinnamon

Combine the apples, water, sugar and salt in a large Dutch oven. Cover and cook over medium-low heat, stirring occasionally, until the apples begin to break down, about 15 to 20 minutes.

Mash the cooked apples with a potato masher or against the side of the pot with the back of a wooden spoon. Season with extra sugar or add more water to adjust the consistency to your own liking. Add the cinnamon to the sauce and mix well. Serve warm or cool to room temperature, about 1 hour.

You can make the applesauce as chunky or smooth as you like it or even run it through a food mill instead of mashing it if you have a food mill. We all like the cinnamon in the applesauce, but you could just as easily leave it out if you prefer just the great apple flavor on its own.I also made some plain white rice and xorn on the cob to round out the meal.

That’s all I have for today. Check back next time for more recipes. I do have some things planned for this week that I didn’t get to before I left on vacation, such as the lemon icebox pie, the ciabatta bread and a few other recipes. Keep checking back to see what is next. Until next time, enjoy the rest of your day and enjoy your meal!

IMG_1647

 
1 Comment

Posted by on August 26, 2013 in Cooking, Dinner, Fruit, Pork, Sauce


Tags: , , , , , ,

Perfect Summer Dip Recipes for Parties : Cooking Channel

Perfect Summer Dip Recipes for Parties : Cooking Channel.

looking for some great dip ideas for a summer barbecue, party or just to have around the house for yourself? Cooking Channel has put together some great dips from basic to different for you to try out for your next party. Check it out!


Tags: , , , ,

Grilling Season Home Stretch: 20 Recipes To Know And Love | Food Republic

Grilling Season Home Stretch: 20 Recipes To Know And Love | Food Republic.

As summer starts to wind down, there is still plenty of opportunity for you to make good use of your grill and make some great dishes and meals. Food Republic has put together 20 recipes that make great use of your grill and cover everything from vegetables to fish to meat to dessert. Check it out!

 
Leave a comment

Posted by on August 20, 2013 in Cooking, Cooking Websites, Dinner, Grilling


Tags: , ,

10 Ideas For Dinner Tonight: Rice | Food Republic

10 Ideas For Dinner Tonight: Rice | Food Republic.

We make a lot of rice in our house so it is always good to try and come up with some new ideas of this to make that incorporate rice into the meal well. Here’s some great ideas from Food Republic with 10 different rice uses in your meal. You can always use some new ways to make rice. Check it out!

 
Leave a comment

Posted by on August 19, 2013 in Cooking, Cooking Websites, Dinner, Rice


Tags: , , ,

Meat Loaf in a Loaf

Finding new recipes to use to make meat loaf has proven to be pretty easy. Everyone seems to have their own variation on a meat loaf recipe depending on how they like it or what they grew up with. I try to make it a little different each time I make it, trying out a new spice or herb or blend of meat. This time, I turned to a recipe I had used a long time ago and haven’t tried in quite a while. It takes the meat loaf and places it inside a loaf of bread.

Meat Loaf in a Loaf

1 pound meatloaf mix (this is a mix of beef, pork and veal that you can get at most grocery stores)

1 teaspoon dry mustard

1 teaspoon celery salt

2 teaspoons Worcestershire sauce

1/4 teaspoon dried oregano

1/4 teaspoon pepper

1 teaspoon onion powder (or you could use 1 onion, chopped fine and sautéed)

3/4 cup fresh breadcrumbs (or dried, if you’re using store-bough)

1 large egg

1/2 cup ketchup

Tomato paste

1 loaf of French or Italian bread

Adjust an oven rack to the middle position and heat the oven to 350 degrees. Mix the meatloaf mix, dry mustard, celery salt, Worcestershire, oregano, pepper and onion powder  until evenly blended. Add in the breadcrumbs and egg and mix again until blended, then add in the ketchup and mix again (I mix this all by hand to really work things in. It’s messy, but the results are worth it). Form the mixture into a free-form loaf.Coat the mixture with tomato paste (as much or as little as desired. I use more to get a nice coating on it). Slice the loaf of bread in half lengthwise. Using your hands hollow out the bottom and top halves of the bread to make room for the meat loaf. Place the meat loaf on the bottom half of the bread and cover it with the top half. Wrap the entire loaf well in foil and place it on a rimmed baking sheet. Bake the loaf until it reaches an internal temperature of 160 degrees, about an hour and 15 minutes to 1 1/2 hours. Place the wrapped loaf on a cutting board and allow it to rest for 5 minutes. Unwrap the foil from around the loaf and slice into individual portions and serve.

One thing you can certainly do is take the bread you have hollowed out from the loaf and mash it with a little milk and use that as your binder instead of the breadcrumbs in this recipe. You can use any meatloaf recipe you like really and just hollow out the bread and make it that way. I love the way it comes out with the nice, crunchy bread around the loaf, almost like you have a small meatloaf sandwich with each slice. I served this with mashed potatoes and corn on the cob, but your really could make it like a warm meatloaf sandwich and make a little beef gravy to go along with the sandwich and the potatoes.

That’s all I have for today. I’ll be away all week starting tomorrow as we are vacationing in the Outer Banks, so my posts are going to be posts and links to other sites that have some recipes I like for the week. You can check back during the week to see what comes up. Until the next time, enjoy the rest of your day and enjoy your meal!

IMG_1646 IMG_1644

 
Leave a comment

Posted by on August 16, 2013 in Beef, Cooking, Dinner


Tags: , ,

 
National Day Calendar

Fun, unusual and forgotten designations on our calendar.

Jennifer Probst

a little bit naughty a little bit nice

Laissez Faire

Letting Life Lead

simple cooking recipes

a blog to share with you the best