RSS

Monthly Archives: June 2013

Down by the Bay Scallops

I don’t often buy bay scallops for myself. While they are the cheaper alternative to good sea scallops, most of the time bay scallops are soaked in solution and chemicals and they just don’t taste very good. The exception is if you can find “dry” or chemical-free bay scallops to use. These can be a lot better and can actually make for a great tasting and inexpensive seafood meal if you can catch them at just the right price. The trick can often be finding them dry and on sale, and I happened to stumble across them when I was shopping this past week so I picked up a pound. Bay scallops are great just sautéed over with some garlic, butter, white wine and parsley over rice or pasta, but I was looking to do something a little different this type out. I found a recipe from Ina Garten, the Barefoot Contessa of the Food Network and this recipe sounded like it would taste great and took no time at all to make.
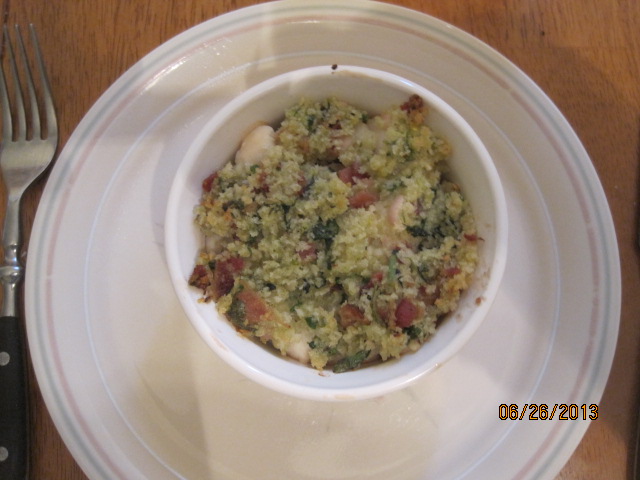
Bay Scallop Gratin

6 tablespoons butter, at room temperature

6 garlic cloves, minced

2 medium shallots, minced

2 ounces thinly sliced prosciutto, minced

4 tablespoons minced fresh parsley, plus extra for garnish

2 tablespoons freshly squeezed lemon juice

2 tablespoons Pernod

2 teaspoons kosher salt

1 teaspoon freshly ground black pepper

6 tablespoons olive oil

1/2 cup panko bread crumbs

6 tablespoons dry white wine

2 pounds bay scallops

Lemon, for garnish

Preheat the oven to 425 degrees. Place 6 (6-inch round) gratin dishes on a sheet pan.

To make the topping, place the butter in the bowl of an electric mixer fitted with the paddle attachment (you can also use a hand mixer). With the mixer on low-speed, add the garlic, shallot,prosciutto, parsley, lemon juice, Pernod, salt and pepper and mix until combined. With the mixer still on low, add the olive oil very slowly as though making a mayonnaise, until combined. Fold the panko bread crumbs in with a rubber spatula and set aside.

Place 1 tablespoon of the white wine in the bottom of each gratin dish. With a small, sharp knife, remove the white muscle and membrane from the side of each scallop and discard (many times this is already done with bay scallops, but if it’s not, you should do it). Pat the scallops dry with paper towels and distribute them evenly among the dishes. Spoon the garlic butter mixture over the top of the scallops. Bake for 10 to 12 minutes, until the topping is golden and sizzling and the scallops are barely done. If you want the top crustier, place the dishes under the broiler for 2 minutes, until they are browned to your liking. Finish the dish with a squeeze of fresh lemon juice and a sprinkling of chopped parsley over each dish and serve with crusty French bread.

Just a couple of things about this recipe. Since I was only making this for 3 of us, I cut the recipe in half and found that a pound of bay scallops was more than enough for 3 dishes. The recipe does call for a couple of items most people may not have on hand for cooking, but there are substitutions available. I do not have prosciutto on hand most times, so I simply fried a couple of pieces of bacon beforehand and crumbled them up to use in the dish. If you don’t have any white wine on hand or don’t like to cook with alcohol, don’t fret. I didn’t have any white wine either and just dotted the bottom of each dish with some extra-virgin olive oil. You could easily leave it out of the dish altogether. The same can be said of the Pernod, which is a particular brand of anise flavored liqueur. If you have anisette, ouzo or Sambuca, you can use them in the recipe instead if you really want the licorice-like flavor you get from them. I didn’t have any of them on hand, so I simply left it out and I don’t think it hurt the dish at all. One final thing about scallops in general – don’t overcook them. Scallops, whether sea scallops or bay scallops, need to be barely cooked cooked, just until they are opaque, otherwise it will feel like you are eating pencil erasers.

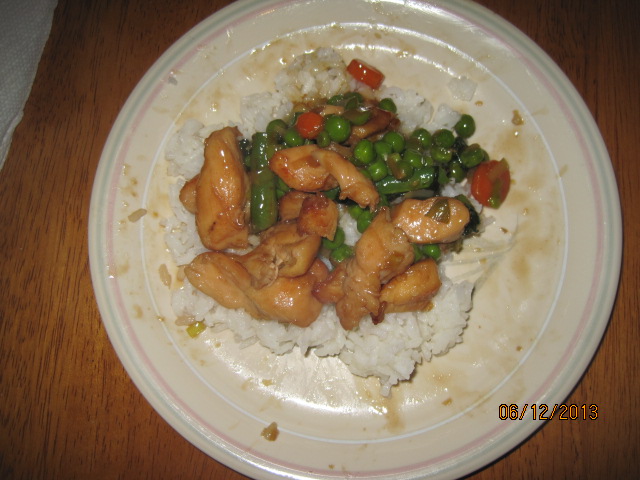
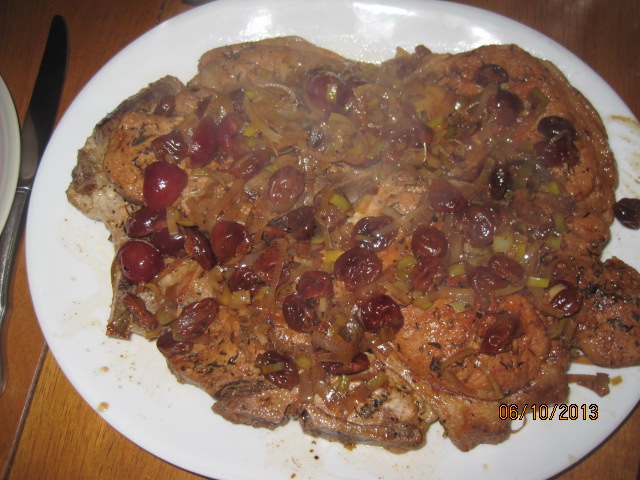
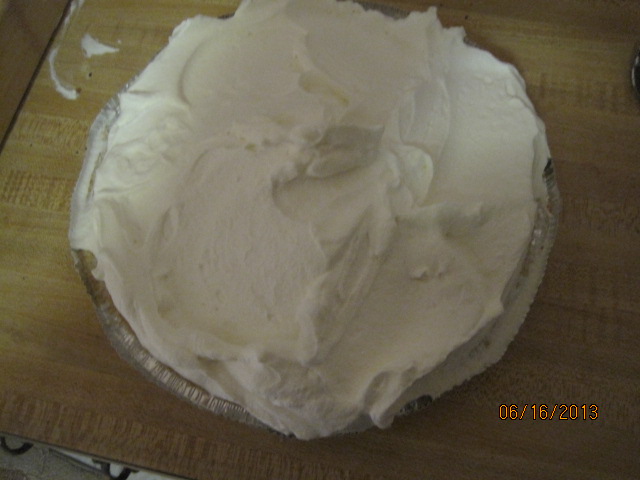
That’s all I have for today. Check back next time for some new recipes I have been trying, including a polenta pizza, a new chicken dish and a few other things I have planned. Until next time, enjoy the rest of your day and enjoy your meal!002

Advertisement
 
1 Comment

Posted by on June 29, 2013 in Cooking, Dinner, One Pot Meals, Seafood


Tags: , , ,

Party or Picnic Panzanella Salad

Quite often in the summertime I find myself invited to a barbecue or a party and looking for something to make to bring over. A lot of the time it may be a last-minute get-together and I will not have a lot of time to put something together or not have all the ingredients needed to make something like a pie or fruit salad. If you want to make something that will hold up well in any type of weather then a good alternative for you is to try this recipe for an Italian bread salad, or Panzanella Salad. You can find all kinds of recipes for this, but I used this very simple one from the Cook’s Illustrated Cookbook and it worked out great.

Panzanella Salad (Italian Bread Salad)

1 (1-pound) loaf Italian or French bread, cut or torn into 1-inch pieces (about 6 cups)

1/2 cup extra-virgin olive oil

Salt and pepper

1 1/2 pounds tomatoes, cored, seeded, and cut into 1-inch pieces

3 tablespoons red wine vinegar

1 cucumber, peeled, halved lengthwise, seeded and sliced thin

1 shallot, sliced thin

1/4 cup chopped fresh basil

Adjust an oven rack to the middle position and heat the oven to 400 degrees. Toss the bread pieces with 2 tablespoons of the olive oil and 1/4 teaspoon of salt; arrange the bread in a single layer on a rimmed baking sheet. Toast the bread pieces until they are just starting to turn a light golden color, about 15 to 20 minutes, stirring the bread halfway through the baking process. Set the bread aside and allow it to cool to room temperature.

Gently toss the tomatoes and 1/2 teaspoon of salt in a large bowl. Transfer the tomatoes to a colander set over a bowl; set it aside to drain for 15 minutes, tossing the tomatoes occasionally.

Whisk the remaining 6 tablespoons of olive oil, the red wine vinegar, and 1/4 teaspoon of pepper into the reserved tomato juices. Add the bread pieces, toss to  coat and let stand for 10 minutes, tossing occasionally.

Add the tomatoes, cucumber, shallot and basil to the bowl with the bread pieces and toss to coat. Season with salt and pepper to taste.

There are a couple of things that can really make this easy recipe great. Since this is the time of year you will start to see some really good, fresh local tomatoes, use the best that you have or can find for a recipe like this. The flavor of the tomatoes makes all the difference. Even if you don’t have whole tomatoes on hand, if you have some great, fresh cherry tomatoes, simply halve those and use them and it will turn out fine. Using a really good olive oil here can make a big difference too. I keep a good extra-virgin olive oil on hand for flavoring things like this and the fruity flavor it adds really helps this dish. Also, use only fresh basil here, not the jarred spices. There’s nothing like some fresh basil with tomatoes. Just the smell alone is usually good enough for me, but it adds great flavor too. If you have a really dense loaf of bread, you may find that you do not need to use all of it for this recipe. Adjust the amount of bread you use based on that.

That’s all I have for today. Check back next time for some other recipes I have done or am working on.  I have a great bay scallop recipe I just tried the another night to put up here and I have lots of good things to choose from in the freezer right now to make some great meals, so keep checking back. Until next time, enjoy the rest of your day and enjoy your meal!

001

 
1 Comment

Posted by on June 28, 2013 in Cookbooks, Picnic Fare, Salad, Side Dishes


Tags: , , ,

25 Ways to Grill Chicken Better: BA Daily: Bon Appétit

25 Ways to Grill Chicken Better: BA Daily: Bon Appétit.

Want to cook some chicken on the grill this summer but are never happy with the results? Bon Appetit Magazine has 25 great tips, tricks and recipes for you that center only chicken and the grill. They cover everything you need to know to make sure that you have great tasting chicken each time you use it on your grill. Check it out!


Tags: , , , , ,

Back to School: A Cook’s Illustrated Stir Fry Primer

I make a stir fry dinner about once a week, mainly because it is one of the easiest meals you can put together in a short amount of time. While any stir fry can come out tasting okay, you want yours to taste great every time you make one so it seems different and special. While it’s true that a stir fry often stems from trying to use up the leftovers in the refrigerator, you can also put some planning and strategy into what you use and how you make it. In the latest issue of Cook’s Illustrated Magazine, they have a wonderful article on steps you can take and follow to make a great stir fry every time.

A good stir fry usually starts with three basic components – some type of protein, vegetables and some type of sauce. Of course, you can vary this to fit any type of taste, but ideally you want to try to mix up texture and color as much as you can to create a vibrant, enticing plate. Another thing to remember is that while having lots of color can make the plate look nice, having too much can really clutter things up for you. If you can limit the types of produce you use to three at the most it will help avoid this and advance the flavor of your dish.

For proteins, you want to keep the quantity to around 1 pound of whatever you choose and select tender cuts that will soften up faster with this type of cooking. Sirloin tip steaks, boneless, skinless chicken breasts, pork tenderloin or shrimp are just some ideal examples that you can use. To make things even easier for yourself, try freezing your protein before cutting it so you can slice easier and get more uniform cuts. Generally about 30 minutes of freezing should suffice. You also want to make sure you take some time to pre-treat the protein you are using. it can really help to tenderize the protein and give it more flavor.Try soaking the protein for 15 minutes in 1 teaspoon of baking soda dissolved in 2 tablespoons of water. Don’t go longer than the 15 minutes or it will start to break down the protein too much and be sure you rinse the protein off before you start marinating it.

You want to marinate the protein in some type of salty liquid. This will help to brine the meat and boost the flavor. Just make sure you drain it well before you cook so you can make sure the meat will brown nicely and not steam in any excess liquid. Soaking the meat for 15 minutes in just 2 tablespoons of soy sauce or fish sauce can make a big difference. For shrimp, salty marinades can be a bit overwhelming. Cook’s Illustrated recommends using a simple mix of 3 tablespoons of oil, 6 cloves of minced garlic and 1/2 teaspoon of salt for 30 minutes to get great flavor from the shrimp.

For vegetables, again you want to stick to about a 1 pound limit of whatever combination you choose. Some vegetables, like broccoli, carrots, snap peas or cauliflower, need longer cooking times, about 3 to 7 minutes. Softer vegetables like mushrooms, onions, snow peas, peppers or asparagus need only about 1 to 3 minutes of cooking time. Smaller, more tender vegetables such as frozen peas, scallion greens, water chestnuts, tomatoes, bean sprouts or greens like spinach only need 30 to 60 seconds. Try to cut everything to a uniform size so that it all cooks evenly.

Lastly, you want to have some type of sauce to cook it all in. The sauces you buy in the jars in the store may work fine for some people, but I find them to be very sweet and loaded with salt. You can very easily make your own sauce in a minute or two with a few ingredients. A classic sauce, which I used in the chicken stir fry recipe below, has chicken broth, dry sherry, hoisin sauce, soy sauce, cornstarch and sesame oil.

I followed this simple recipe for a great chicken stir fry, but you can follow the same pattern for beef, fish or even tofu.

Easy Chicken Stir Fry

Sauce:

1/2 cup chicken broth

1/4 cup dry sherry

3 tablespoons hoisin or oyster sauce

1 tablespoon soy sauce

2 teaspoons cornstarch

1 teaspoon sesame oil

Chicken:

1 pound boneless, skinless chicken breasts, cut into 1/4-inch slices

1 teaspoon baking soda

2 tablespoons water

2 tablespoons soy sauce

6-8 teaspoons vegetable oil

1/3 pound broccoli, trimmed and cut into 1/4-inch slices

1/3 pound carrots, peeled and sliced into 1/4-inch slices

1 small onion, sliced

1 red bell pepper, seeded, cored and cut into 1/4-inch slices

1/3 cup frozen peas

3 garlic cloves, minced

1 tablespoon ginger, grated

For the sauce, whisk all the ingredients together in a small bowl and set aside. Heat a large, nonstick skillet over high heat. Add 1 1/2 teaspoons of oil and heat until just smoking. Add half of the chicken slices, breaking up any clumps, until browned, about 3 minutes. Transfer the chicken to a bowl and cover it to keep it warm. Repeat the process with another 1 1/2 teaspoons of oil and the remainder of the chicken. Remove the chicken to the bowl and cover to keep warm.

Add another 2 teaspoons of oil to the pan. Add the broccoli and cook until seared, about 3 to 5 minutes.Remove the broccoli from the skillet and add the carrots and cook, stirring occasionally, until seared, about 3 to 5 minutes. Remove the carrots and add the onion and bell pepper, stirring occasionally, until seared, about 1 to 3 minutes.Remove the onions and peppers from the skillet and add the frozen peas to the skillet and heat until seared, about 30 to seconds.Add the broccoli, peppers and onion back to the skillet and toss.

Clear the center of the pan and add the garlic, ginger and 1 teaspoon of vegetable oil. Mash the mixture until fragrant, about 15 to 30 seconds, then mix it into the vegetables. Return the chicken to the pan. Whisk the sauce to re-combine, then add it to the skillet and toss constantly until the liquid is thickened, about 30 seconds. Pour the stir fry into a serving bowl and serve with white rice or fried rice.

There are a few other tips you may want to follow when making a stir fry. First, as I have said before, while it is nice to have a wok, I don’t think they are very effective for cooking at home. unless you have a professional stove with the right kind of burners, a round-bottomed wok won’t work nearly as well as a large skillet when it comes to browning. Second, don’t put too much in the pan all at once. A crowded skillet won’t give you the searing that you want for a stir fry; it is just going to steam everything. Take the time to cook everything in batches and you will be well rewarded with nice browning. Third, try not to stir everything too much. I know it’s called a stir fry and everything tells you that you should be stirring constantly, but the thing is that most stoves don’t give you the kind of heat you get at an Asian restaurant’s stove or flat top so by moving things around all the time you don’t allow them to brown well. Give them a chance to cook and stir infrequently. Finally, remember that you don’t have to cook everything fully during the searing process. You want to remove items just before they are done. Everything is going to finish cooking in the end when you add it back into the pan with the sauce.

Of course you can do things in many combinations or try different sauces instead of this classic sauce if you want something different. You can vary things up each time by using different seasonal vegetables as well to make things different or top the final product with scallion greens, toasted seeds or nuts or whatever herbs or oils you may find appropriate or like. The combinations are endless here, so you can have a  lot of fun with it.

That’s all I have for today. Check back next time for some new recipes I have tried recently, including a very simple Italian bread salad and a great bay scallops I used recently. Until then, enjoy the rest of your day and enjoy your meal!

001


Tags: , , , , ,

Pork Tenderloin is the Night

The grilling gods must not be on my side yet this summer. Every time I intend to go out and use the grill, we seem to get hit with rain and thunderstorms. The same thing happened to me last night, so I had to make some adjustments to the way I was going to cook this particular recipe that I found in bon appétit magazine. I’d seen this one a while ago and have intended to make it, I just haven’t gotten around to it until now. It is for a pork tenderloin with plum chutney. I have to admit I was a little skeptical as to how the chutney would come out, but it tasted awesome and I could see using that for other pork dishes down the road.

Pork Tenderloin with Plum Chutney

4 red or black plums
1 tablespoon olive oil
1 large shallot, sliced lengthwise
1/2 cup (packed) light brown sugar
1/4 cup sherry vinegar or apple cider vinegar
1 tablespoon chopped garlic
1 tablespoon mustard seeds
2 teaspoons grated peeled ginger
1/2 teaspoon freshly ground black pepper
1 bay leaf
Kosher salt
1 tablespoon minced fresh rosemary
2 teaspoons herbes de Provence
2 teaspoons olive oil
1 pork tenderloin (about 1 pound)
Kosher salt and freshly ground black pepper
6 thin slices pancetta (Italian bacon) or prosciutto

For the plum chutney, peel the plums and halve and pit them. Cut the plums into half-inch wedges. Heat the olive oil in a medium saucepan over medium heat. Add the shallot and cook, stirring occasionally, until the shallot begins to soften, about 2 minutes. Add the brown sugar, vinegar, garlic, mustard seeds, ginger, black pepper, and bay leaf and 1/4 cup of water. Cook, stirring occasionally, until the mixture is fragrant, about 2 minutes. Stir in the plums. Cover and simmer over medium heat, stirring occasionally, for 8 minutes. Uncover the pan and continue cooking, stirring occasionally, until the fruit is soft and the juices have thickened, about 20 to 25 minutes. Season to taste with salt. Allow the mixture to cool slightly. The chutney can be made up to one week ahead of time. Cover and chill and then re-warm it slightly before serving.

For the pork, stir the rosemary, herbes de Provence, and oil in a small bowl. Rub the mixture all over the pork; season the pork with salt and pepper. Wrap the pancetta slices around the pork and tie it at 2 inch intervals with kitchen twine to hold it together.

If you are using a charcoal grill, build a medium-hot fire; push the coals over to one side of the grill. If using a gas grill, heat all but one burner to high. Grill the tenderloin over the hot part of the grill, turning frequently, until a crisp brown crust forms on all sides, about 8 to 10 minutes. Move the tenderloin to the cooler part of the grill to gently cook through; cover and cook until an instant-read thermometer inserted into the middle of the loin registers 145°, about 15 to 20 minutes longer.

Transfer the tenderloin to a cutting board. Allow it to rest for 10 minutes. Slice thinly and serve with the plum chutney alongside.

Since I had to cook this in the oven, I had preheated the oven to 375° and placed the tenderloin in a cast-iron pan and roasted it for 25 to 30 minutes until the desired crispness and temperature were reached. I think it would’ve come out a little crisper on the grill, but it tasted just fine when I did it in the oven. I also used regular bacon since I did not have any pancetta and I think it turned out just fine. There is also a bit of a trick if you want to easily peel the plums. Bring a saucepan of water to a boil and using the tip of a paring knife make to shallow 1 inch cuts to form an X on the bottom of the pieces of fruit. Add the fruit to the water and cook just until the skin begins to peel back at each X, about 30 to 60 seconds. Remove the fruit with a slotted spoon to a bowl of ice water so they can cool. You can then simply take a paring knife and your fingers and easily pare back the skin. If you aren’t that worried about the presentation of the dish you could also just simply either use a paring knife on your own and remove the skin or even use your vegetable peeler.

That’s it for today. Check back again tomorrow and see what recipe I have posted. I still have a couple of things that I made last week that I want to post and I do have a few new recipes planned for this week, including a new chicken dish and one for bay scallops. Until next time, enjoy the rest of your day, tried to stay cool and enjoy your meal!

003 002

 
Leave a comment

Posted by on June 25, 2013 in Cooking, Dinner, Pork, Sauce, Side Dishes


Tags: , , , ,

Light Summer Desserts Recipes : Cooking Channel

Light Summer Desserts Recipes : Cooking Channel.

While I am not a big dessert eater myself, I do like to have something every now and then and few of us actually want to do any baking during the warm summer months. The Cooking Channel has provided 30 great light summer dessert recipes using fruit, which is always a favorite of mine any time of year. They all seem easy to make and are a great alternative to sugary snacks and heavy desserts. Check it out!

 
Leave a comment

Posted by on June 25, 2013 in Cooking Websites, Dessert, Fruit


Tags: , , ,

Taking the High (Roasted Chicken) Road

While this may not be the recipe you want to try while going through a heat wave as we seem to be here in New York the last couple of days, there are times where high roasting a chicken can be an ideal strategy. When you may not have a great amount of time to spend roasting a chicken and would like  that wonderfully crispy skin that you can get from roasting you can give it a try. The danger with high roasting of course is that you can really dry out the meat and create a lot of smoke if you aren’t careful. This recipe, from the Cook’s Illustrated Cookbook, combats both problems. They butterfly the chicken so it stays moist and roast it on a broiler pan over potatoes so that potatoes absorb the dripping fat, thus no smoke and a very nice side dish is created all in one.

Crisp-Skin High-Roast Butterflied Chicken and Potatoes

1 (3 1/2 to 4-pound) whole chicken, giblets removed

Salt and pepper

1/2 cup sugar

2 1/2 pounds russet or Yukon Gold potatoes, peeled and sliced to 1/4 inch thick

2 tablespoons olive oil

2 tablespoons butter, softened

With a pair of kitchen or poultry shears, cut along both sides of the backbone of the chicken to remove it. Flatten the breastbone and tuck the wings behind the back. Dissolve 1/2 cup of salt and the sugar in 2 quarts of cold water in a large container. Submerge the chicken in the brine, cover and refrigerate for 1 hour (if you are using a kosher chicken you can skip this step).

Adjust an oven rack to the lower-middle position and heat the oven to 500 degrees. Line a broiler pan bottom with aluminum foil. Toss the potatoes with 1 tablespoon of olive oil, 1/2 teaspoon of salt and 3/4 teaspoon of pepper in a bowl. Spread the potatoes evenly in the prepared broiler pan bottom and cover them with the broiler pan top.

Remove the chicken from the brine, rinse it thoroughly and pat it dry with paper towels. Using your fingers, gently loosen the center portion of skin covering the breast and thighs. Place the softened butter under the skin directly on the meat in the center of each side of the breast and on the thighs. Gently press on the skin to distribute the butter over the meat.Rub the skin with the remaining 1 tablespoon of olive oil and season well with pepper. Place the chicken on the broiler pan top and push each leg up to rest between the thigh and the breast.

Roast the chicken until the skin has crisped and turned a deep brown, the breast registers 160 degrees and the thighs register 175 degrees, about 40 to 45 minutes, rotating the pan halfway through the roasting. Transfer the chicken to a carving board and allow it to rest for 10 minutes.

While the chicken rests, remove the broiler pan top and, using paper towels, soak up any excess grease from the potatoes. Transfer the potatoes to a serving platter. Carve the chicken, transfer it to a platter with the potatoes and serve.

There’s nothing like really crispy chicken and this recipe sure gives it to you. The potatoes were also a great treat as well since they absorb some of the flavor of the chicken as well. I actually put them under the broiler for a few minutes while the chicken rested to crisp them up a bit before they were done. I had also put one sliced onion in with the potatoes for some extra flavor. I think you could try this if you have a lot of chicken pieces you are looking to cook, but you need to keep a close eye on them as they will cook faster than the whole chicken and you don’t want to dry them out. It’s a great way to get a juicy, whole bird with great skin in under an hour. Unfortunately I forgot to take a picture of this one when I cooked it so I don’t have one to display, but trust me, it was great.

That’s all for today. Check back next time for some more recipes, including a chicken stir fry, pork tenderloin, a panzanella salad and more. I am planning to cook out on the grill some this week since it is warm here right now, so we’ll see what we can do. Until next time, enjoy the rest of your day, and enjoy your meal!


Leave a comment

Posted by on June 24, 2013 in Cooking, Dinner, One Pot Meals, Poultry


Tags: , , ,

It’s Cherry Season – Braised Pork Chops with Cherries

Cherry season really only comes around for a couple of months and I do try to advantage when they are around and get some in. They make a great snack or an addition to a fruit salad, and of course you can make great things like a cherry pie or cherry turnovers, which are both awesome. You can also try incorporating them into your entrée to give some amazing flavor to your weeknight meals. I came across this recipe from Williams-Sonoma a couple of weeks back and knew I just had to give it a try to jazz up the usual pork chop dinner.

Braised Pork Chops with Cherries

4 bone-in, center-cut pork loin chops, each about 1 inch thick

Salt and freshly ground black pepper

1 tablespoon minced fresh rosemary

3 tablespoons butter

2 leeks, white and pale green parts only, halved lengthwise and thinly sliced

1 cup chicken broth

1/4 cup Port wine

2 tablespoons balsamic vinegar

1 cup fresh pitted cherries, halved or 1/2 cup dried cherries

Season the pork chops with salt and pepper and sprinkle with the rosemary., patting the seasonings firmly so they adhere to the meat well. In a large saute pan with a lid, melt 2 tablespoons of the butter over medium-high heat. Add the pork chops and cook, turning once, until the chops are golden brown on both sides, about 6 minutes. Transfer the chops to a plate.

In the same pan, melt the remaining 1 tablespoon of butter over medium heat. Add the leeks sand saute until they are softened and beginning to brown, about 3-4 minutes. Stir in the broth, stir to scrape up any browned bits on the bottom of the pan, and cook for 1 minute. Stir in the Port wine, vinegar and cherries.

Return the pork chops to the pan along with any accumulated juices and spoon the liquid over the chops. Cover the pan, reduce the heat to medium-low and simmer until the pork is tender and barely pink in the center, about 15 minutes. Divide the chops among the plates, spoon the cherry mixture over the tops of the chops and serve.

I love the flavor the cherries give to the entire dish. They make the braising liquid taste great and they add some extra flavor to the pork chops themselves. Not everyone has Port wine around the house and it may seem expensive to go out and buy if you only need 1/4 of a cup and don’t drink port. It does add a lot of flavor to the mixture and goes well with the balsamic vinegar, so if you have some you should use it or just buy a very small bottle to use. If not, I think you can simply omit it from the recipe altogether. I served the dish with some corn on the cob, wild rice and some nice, crusty bread.

That’s all I have for today. Check back again for some other recipes in the coming days, including a high-roasted chicken recipe, a stir fry 101 primer, and a pork tenderloin recipe, among others I am looking to try. The local farmer’s market has started up again for the summer so I plan on going tomorrow to see what I can get as far as some fresh fruit and vegetables. That should affect what I make for dinner next week so check back and see what I come up with. Until then, enjoy the rest of your day and enjoy your meal!

005 004

 
Leave a comment

Posted by on June 20, 2013 in Cooking Tips, Dinner, Fruit, Pork, Sauce


Tags: , , , ,

Fine Food for Father’s Day Part 2 – Banana Cream Pie

One of my top 5 all-time favorite desserts is banana cream pie. We don’t have it too often, mainly because it’s not the healthiest of desserts but it tastes really good and since it was Father’s Day, Michelle decided that it was a nice treat for me to have for the day. I had looked at recipes for banana cream pie, namely because I was a little disappointed in the traditional flavor you get out of making the pie with your standard, boxed banana pudding and some with cream. I wanted something that had a little more of an intense banana flavor, and I came across this recipe in Cook’s Country and thought it would be really good to try.

Banana Cream Pie

5 ripe bananas
4 tablespoons butter
2 1/2 cups half-and-half
1/2 cup plus 2 tablespoons granulated sugar
6 large egg yolks
1/4 teaspoon salt
2 tablespoons cornstarch
1 1/2 teaspoons vanilla extract
1 store-bought or homemade pie crust
2 tablespoons orange juice
1 cup heavy cream
2 tablespoons confectioners’ sugar

Peel 2 of the bananas and slice them into 1/2-inch-thick pieces. Melt 1 tablespoon of butter in a medium saucepan over medium-high heat. Add the sliced bananas and cook until they begin to soften, about 2 minutes. Add the half-and-half, bring to a boil, and boil for 30 seconds. Remove from the heat, cover, and allow to sit for 40 minutes.

Whisk the granulated sugar, egg yolks, and salt together in a large bowl until smooth. Whisk in the cornstarch. Strain the cooled half-and-half mixture through a fine mesh strainer into the yolk mixture – do not press on the bananas – and whisk until incorporated; discard the cooked bananas.

Transfer the mixture to a clean medium saucepan. Cook over medium heat, whisking constantly, until it is thickened to the consistency of warm pudding (180°), about 4 to 6 minutes. Remove the pan from the heat; whisk in the remaining 3 tablespoons of butter and 1 teaspoon of vanilla. Transfer the pastry cream to a bowl, press greased parchment paper directly against the surface, and allow it to cool for about one hour.

Meanwhile, roll the pie dough into a 12-inch round on a lightly floured counter. Transfer the dough to a 9-inch pie plate, fold the edge of the dough under itself so the edge of the fold is flush with the outer rim of the plate, and flute the edges. Refrigerate for 40 minutes, then freeze for 20 minutes. Adjust an oven rack to the lower-middle position and heat the oven to 375°.

Line the chilled pie shell with a 12-inch square of aluminum foil, folding the foil over the edges of the dough. Fill with pie weights and bake for 20 minutes. Carefully remove the foil and the weights, rotate the plate, and continue baking until the crust is golden brown, about 7 to 11 minutes. Allow it to cool to room temperature.

Peel and slice the remaining 3 bananas to about 1/4-inch-thick and toss them with the orange juice. Whisk the pastry cream briefly, then spread half over the bottom of the pie shell. Arrange the sliced bananas on the pastry cream. Top with the remaining pastry cream.

Using a stand mixer fitted with a whisk, whip the cream, confectioner’s sugar, and the remaining 1/2 teaspoon of vanilla on medium-low speed until foamy, about 1 minute. Increase the speed to high and whip until stiff peaks form, about 1 to 3 minutes. Spread the whipped cream evenly over the top of the pie. Refrigerate the pie until it is set, at least 5 hours and up to 24 hours.

I have to say that the pastry cream that you make for this recipe gave the pie a much better flavor than any other pie that I had had before. You want to make sure that you use bananas that are not green or overripe. If they have just the right amount of yellow with a few brown spots, you will get the best banana flavor out of them. Cooking them in the half-and-half mixture really leeches all of the flavor out of the bananas themselves and pulls the taste right in. If you didn’t want to go through everything with the pie crust, you could certainly use a simple, store-bought, pre-made crust that you could just pour the mixture into, but it does add more to the flavor if you follow the recipe exactly. I would certainly make pie this way again instead of using the banana pudding that you buy in the store.

That’s all there is for today. Check back again later on in the week to see what of the recipes I post. As I said, I do have a few other recipes that I have made recently that I do want to get on here, so check back and see what comes up next. Until then, enjoy the rest of your day and enjoy your meal!

005 003 004


Leave a comment

Posted by on June 18, 2013 in Cooking, Dessert, Pie


Tags: , , , ,

Fine Food for Father’s Day, Part 1 – Strip Steak with Brandied Mushrooms and Sweet Potatoes

Father’s Day dinner is always treat. Michelle and Sean get to do all the cooking and I get to pick out what I would like to have for dinner. I picked something simple this year since it was just the 3 of us. Michelle had picked up some New York strip steaks and we had some other things around the house that could make for a simple yet elegant meal. We thought about using the grill, but the weather was kind of iffy at the time we were eating dinner so we thought on the safe side we would just do it inside. The recipe for the steaks comes from Tyler Florence.

New York Strip Steak with Brandied Mushrooms and Fresh Thyme

4 New York strip steaks, each about 1 1/2 inches thick
Extra-virgin olive oil
Kosher salt and freshly ground black pepper
2 pounds mushrooms, trimmed, brushed clean with the towel and stemmed
Leaves from 2 sprigs fresh thyme
2 cloves garlic, chopped
1/4 cup brandy
1/2 cup heavy cream

Remove the steaks from the refrigerator and allow them to come to room temperature. Heat 2 tablespoons of oil in a large sauté pan over medium-high heat until smoking. Sprinkle the steaks all over with salt and pepper. Put the steaks in the pan and cook, turning to brown all sides completely, until medium-rare, about 8 to 10 minutes depending on how thick the steaks are. Remove the steaks to a platter with tongs and cover loosely with a tent of aluminum foil to keep the meat warm while you make the sauce.

Put the sauté pan back over medium-high heat and add 1/4 cup olive oil. When the oil is smoking, add the mushrooms and cook, stirring, about 10 minutes, until golden brown. Add the thyme and the garlic, and season well with salt and pepper. Toss a few more times to cook the garlic, then dump the mushrooms out onto a platter. Take the pan off the heat, add the brandy, return the pan to the heat, and cook until almost evaporated. Add the cream and cook that down to 2 to 3 minutes until reduced by about one half and thickened. Return the mushrooms to the pan with whatever juices have collected on the platter and simmer the entire thing another 2 minutes until thickened again. Season with salt and pepper. Slice the steaks thin against the grain. Taste the sauce for salt and pepper and serve.

I loved the mushrooms sauce that came with the steaks. The steaks were cooked perfectly and the sauce added just the right amount of flavor with the mushrooms and the brandy. We did not have to pounds of mushrooms on hand, so we actually ended up about halving the recipe and cut down the amount of olive oil used to about 2 tablespoons and cut the brandy down to about 1/8 of a cup and the heavy cream to about one-fourth.

Besides making some corn on the cob to go with the steaks, we also used a recipe from Bobby Flay of the Food Network for grilled sweet potatoes with lime and cilantro. Even though we didn’t actually grill the potatoes, I think they still came out pretty nicely for indoor cooking. It’s very easy to make this recipe and takes next in no time at all.

Grilled Sweet Potatoes with Lime and Cilantro

3 sweet potatoes, unpeeled
Kosher salt
2 teaspoons finely grated lime zest
Pinch of cayenne pepper
1/4 cup canola oil
Freshly ground pepper
1/4 cup finely chopped fresh cilantro

To par-cook the potatoes, place the potatoes in a large pot of water and boil until fork tender, about 8 minutes. Allow the potatoes to cool completely. Slice each potato lengthwise into eighths.

Preheat the grill to medium or place a cast-iron grill pan over medium heat. Mix 1 tablespoon of salt, the lime zest and the cayenne pepper in a small bowl and set aside.

Brush the potato wedges with the oil and season well with salt and pepper. Grill the potatoes until they are golden brown on all sides (including the skin) and just cooked through, about 1 1/2 to 2 minutes per side. Transfer the potatoes to a platter and immediately season with the salt mixture and sprinkle with cilantro.

We simply made the potatoes in the cast-iron pan instead of dragging the grill pan out and I think they turned out just as well. Par-cooking them is really necessary here because you want to make sure the potatoes are going to be cooked all the way through when you make them this way. If you just put them in raw, they are not going to be done in one to 2 minutes and will burn. I really liked the mixture of the lime and the salt with the cayenne pepper; it really help to bring out the flavor of the potatoes and I actually used some of the salt on my piece of corn on the cob as well.

That’s all there is for today. Next time I will post the recipe Michelle used to make banana cream pie for dessert for Father’s Day. I can tell you it was pretty darn good and I really enjoyed it. Check back for that one as well as some of the recipes that I have done recently and plan to post on the blog. Until next time, enjoy the rest of your day and enjoy your meal!002


Tags: , , , , , , ,

 
National Day Calendar

Fun, unusual and forgotten designations on our calendar.

Authentic Autograph Source, LLC

Licensed autographs and collectibles dealer in the Pacific NW! We have a wide range of sports, celebrities, and more!

Jennifer Probst

a little bit naughty a little bit nice

Laissez Faire

Letting Life Lead

%d bloggers like this: