RSS

Monthly Archives: December 2014

30 Quick, Last-Minute Appetizers for New Year’s Eve Slideshow – Bon Appétit

30 Quick, Last-Minute Appetizers for New Year’s Eve Slideshow – Bon Appétit.

There’s still time for you to put together some quick and easy appetizers for yourself or for a get-together you may be having for New Year’s Eve tomorrow. Bon Appetit has put together 30 last-minute appetizer recipes to fill every niche and wow your guests for a late-night party. Check it out!

Advertisement
 
Leave a comment

Posted by on December 30, 2014 in Appetizers, Cooking, Cooking Websites, Holidays, Snacks


Tags: , , , , , ,

Best New Year’s Eve Recipes : Food Network

Best New Year’s Eve Recipes : Food Network.

New Year’s Eve is just two days away and if you are planning a party, big or small, Food Network has some great recipe ideas for you for appetizers, snacks, main courses, cocktails and more so you can ring in the New Year. Check it out!

I will be back with more of my own recipes once the holidays are are all over with so stay tuned for some great, exciting new things to try for the New Year. Thanks for following!


Tags: , , , , , ,

Butter Up Some Cinnamon-Raisin Swirl Breakfast Loaf

For me, many mornings for breakfast are nothing more than a cup of coffee and a piece of fruit, but occasionally I also love to have a piece of toast along with it. It does not matter to me if it is an English muffin, a bagel, a roll or a piece of any kind of bread, I just really like to have a piece of toast, particularly with an egg, for breakfast. Ever since I was a kid I always really enjoyed cinnamon raisin bread as a piece of toast. That warm bread with the warm, plumped up raisins and the hint of cinnamon across the bread just smells great while it is toasting and tastes even better with a little bit of soft butter on it. This made me want to try to make my own cinnamon raisin bread so we could have some for Christmas morning this year after we opened presents. I found this recipe from Williams-Sonoma and it seemed to fit everything perfectly, so I gave it a try.

Cinnamon-Raisin-Swirl Breakfast Loaf

1/2 cup milk

1/2 cup sugar

4 tablespoons butter, at room temperature, plus 2 tablespoons melted butter for brushing

1 package (2 1/4 teaspoons) quick-rise yeast

3 cups bread flour, or as needed

1 teaspoon salt

2 teaspoons ground cinnamon

1/2 cup raisins

In the bowl of a stand mixer fitted with the paddle attachment, combine 1/2 cup of cold water, the milk, 1/4 cup of the sugar, the 4 tablespoons of room temperature butter and the yeast. Add 2 1/2 cups of the bread flour and the salt. With the mixer on medium-low speed, add enough of the remaining to make a soft dough that does not stick to the bowl. Remove the paddle attachment and fit the stand mixer with the dough hook attachment. Knead the dough on medium-low speed, adding more flour if needed, until the dough is smooth but soft, about 6 to 7 minutes. Shape the dough into a ball.

Lightly butter a large bowl and add the dough and turn to coat it with the butter. Cover the bowl tightly with plastic wrap. Let the dough rise in a warm spot until it doubles in bulk, about 1 1/4 to 1 1/2 hours.

Lightly butter a 9-by-5-inch loaf pan. Punch down the dough and turn it out onto a floured work surface. Dust the top of the dough with flour. Roll out the dough into a 9-inch square. In a small bowl, mix together the cinnamon, the raisins and the remaining 1/4 cup of the sugar. Sprinkle the cinnamon mixture evenly over the dough, leaving a 1/2-inch border around all sides. Roll up the dough into a log and pinch the seam to seal it. Transfer the dough to the loaf pan, seam side, and lightly press the top of the dough to evenly fill the pan. Loosely cover with plastic wrap. Let the dough stand in a warm spot until the dough rises to the top of the pan, about 1 hour.

Preheat the oven to 350 degrees. Brush the loaf gently with the melted butter. bake the bread until the top of the loaf is golden brown and the bottom, when the loaf is carefully removed from the pan, sounds hollow when rapped on the bottom with your knuckles, about 35 to 40 minutes. Transfer the loaf to a wire rack and allow it to cool in the pan for 10 minutes. Invert the loaf onto the rack, then invert it again and let it cool for at least 30 minutes before slicing.

The bread came out perfectly and let it sit overnight, wrapped, before slicing it on Christmas morning and it sliced perfectly. There was a nice swirl throughout the bread and the bread had great chew and texture with a nice crust. Of course, the true test for me was when it was toasted and it was perfect. I loved the smell of the bread as it was baking in the oven, but it seemed even better in the toaster and made great toast for Christmas morning. I would make this bread any time as it was pretty easy to do and turned out a great loaf.

That’s all I have for today. Check back next time for another recipe. Until then, enjoy the rest of your day and enjoy your meal!

cinnamonraisinbread cinnamonraisintoast

 
Leave a comment

Posted by on December 26, 2014 in Breads, Breakfast, Cooking


Tags: , , , ,

Christmas Brunch Recipes and Ideas : Food Network

Christmas Brunch Recipes and Ideas : Food Network.

There’s still time to put together some ideas for a great Christmas breakfast or brunch. Food Network gives you some ideas that are easy to put together and look fantastic. I’ll be back after the Christmas holiday with some fun recipes I have tried. I hope you all have a very Merry Christmas and thanks for following along!


Tags: , , , , ,

Christmas Dinner Recipes & Ideas : Cooking Channel

Christmas Dinner Recipes & Ideas : Cooking Channel.

You still have time to plan a great Christmas dinner if you have been sidetracked with other holiday chores and haven’t come up with some ideas yet. Cooking Channel has 70 dinner recipes and ideas for you to cover everything that you will need to make a memorable Christmas meal. Check it out!


Tags: , , , , , , ,

Have a Pre-Holiday Holiday Meal – Holiday Turkey Burgers

Everyone gets into a bit of frenzy as holidays get nearer and you feel like you have a million things to take care of and plan. I know that is the way it is around here right now as we try to get all of the last-minute things done before the Christmas holiday really sets in. That usually does not leave you with a lot of time to make detailed meals in the days leading up to the holiday as you want to try to keep things as easy as possible. Sure, take-out is always an option when you are looking for something, but an easy alternative is to make some burgers of your own. You can have any type you like of course, but since it is the holidays why not try something different and have this holiday turkey burger, which uses ground turkey and turkey sausage together with some other holiday ingredients for a very different type of burger. I got this recipe from Serious Eats and tweaked it a little to make it my own.

Holiday Turkey Burgers

1 sweet potato

1 tablespoon butter

1/3 cup finely chopped yellow onion

1/4 cup finely chopped celery (about 1 small stalk)

2 teaspoons finely chopped fresh sage leaves

1 teaspoon finely chopped fresh thyme leaves

1 teaspoon finely minced garlic

1 pound ground turkey

1/3 pound loose turkey sausage or pork sausage

4 rolls

Cranberry relish, for topping

Turkey gravy, for topping

Fresh spinach. for topping

Fried onions, for topping

Using the tines of a fork, poke holes all over the sweet potato. Place the potato on a plate and microwave it on high until a paring knife can be inserted in the middle of the potato without any resistance, about 9 to 12 minutes, checking and flipping the potato every 3 minutes. Alternatively, place the potato in a 425 degree oven and cook until a paring knife can be inserted in the middle of the potato with no resistance, about 1 hour. Split the potato open and allow it to cool slightly, about 5 to 10 minutes. Using a spoon, scoop out the flesh into a small bowl and discard the potato skin.

Melt the butter in a skillet set over medium heat. When the foaming subsides, add the onion and celery and cook, stirring occasionally, until the vegetables have softened, about 5 to 7 minutes. Stir in the sage, thyme and garlic and cook until the garlic is fragrant, about 30 seconds. Remove the mixture from the skillet and allow it to cool for 5 to 10 minutes.

Place the turkey, sausage, 1/4 cup of the sweet potato flesh and the vegetable mixture in a medium bowl and mix the mixture with your hands until it is well incorporated. Form the mixture into 4 patties and season each patty with salt and pepper to taste.

In the now-empty skillet, heat the skillet over medium-high heat and add 1 tablespoon of butter. When the butter has melted and the foaming has subsided, place the burgers in the skillet and cook the burgers until an instant-read thermometer inserted into the center of the burger registers at least 145 degrees, flipping the burger halfway through the cooking process to cook it on both sides, about 4 to 5 minutes per side.

Using the rolls (you can lightly toast them if you like), top each bottom half of the bun with a burger and then add the condiments you wish, such as cranberry relish, turkey gravy, spinach and fried onions.

You can get the complete flavor of your traditional holiday meal with this burger. The sweet potato adds to the density and taste of the burger and you get a bit of a stuffing flavor thanks to the sage and thyme in the mixture. Add on the gravy, relish, onions and spinach and you have everything to make a holiday meal right on the bun. It is a nice and different alternative to a regular hamburger if you want something a little different for a quick meal.

That’s all I have for today. Check back next time for another recipe. Until then, enjoy the rest of your day and enjoy your meal!

turkeyburgers

 
2 Comments

Posted by on December 22, 2014 in Cooking, Dinner, Grilling, Holidays, Poultry, Sandwiches, Turkey


Tags: , , ,

Best Christmas Main Dish Recipes : Cooking Channel

Best Christmas Main Dish Recipes : Cooking Channel.

If you are thinking about making something stunning for your Christmas meal, Cooking Channel has put together these fantastic main dish recipes that are sure to draw applause for your magnificent efforts. Check it out!


Tags: , , , , , , , ,

Is This the Best Chicken Parmesan Recipe Ever?

I admit I am no real expert when it comes to any type of Italian cooking. Since I don’t eat cheese or pasta myself I am hard one to ask to judge whether the dish is good or not so I have to rely on my pasta and cheese eaters Sean and Michelle to let me know whether the dish is worth making again or not. I had seen this recipe for chicken Parmesan on the Internet from Serious Eats that says it is the best chicken Parmesan recipe out there and was curious about it. What makes this recipe better than any other. in my opinion, chicken Parmesan is a pretty basic dish on its own that anyone can make pretty successfully, so what made this one stand out? The difference with this seems to lay in the use of a buttermilk brine for the chicken and a whole lot of Parmesan cheese in the breading, along with some buttermilk in the breading to change things up. The results were pretty impressive.

The Best Chicken Parmesan

3 boneless, skinless chicken breast halves

1 3/4 cups buttermilk, divided

2 garlic cloves, minced (about 2 teaspoons)

Kosher salt and freshly ground black pepper

1/2 loaf crusty Italian bread, crust removed, sliced into 1/2 inch slices

5 ounces grated Parmesan cheese, plus more for serving

1 1/2 cups all-purpose flour

2 eggs

1/2 cup vegetable or canola oil

1 quart tomato sauce, homemade or your favorite store-bought brand

10 ounces mozzarella cheese, cut into 1/2-inch chunks

2 tablespoons minced fresh parsley, basil or a mix of herbs

With a sharp knife, split the chicken breasts in half horizontally. Working with one piece at a time, place the chicken inside a plastic zipper-lock bag and pound the chicken with a meat pounder or the bottom of a heavy skillet until the chicken is an even thickness of about 1/4-inch. Transfer the chicken to a large bowl and repeat the process until all of the chicken pieces have been pounded.

Add 1 1/2 cups of the buttermilk and the minced garlic to the bowl with the chicken. Season with 2 tablespoons of kosher salt and 1 teaspoon of freshly ground black pepper. Turn the chicken with your hands until the salt, pepper and garlic are evenly incorporated and all of the chicken is coated in the buttermilk mixture. Transfer the contents of the bowl to a large zipper-lock bag, press the air out of the bag and seal the bag. Refrigerate the chicken for at least 4 hours and up to overnight.

Meanwhile, place the Italian bread slices on a rack set in a rimmed baking sheet. Leave out the bread on a counter for at least 4 hours and up to overnight until it is mostly dried. The next day, break the bread into rough pieces and combine the bread with 4 ounces of Parmesan cheese in a food processor. Season the mixture with black pepper. Process the bread until it is finely ground, about 20 seconds. Transfer the mixture to a large shallow bowl or pie plate.

Place the flour in a second shallow bowl or pie plate. Whisk the eggs, 2 tablespoons of the buttermilk and 1 tablespoon of the flour in a third pie plate. Drizzle the remaining 2 tablespoons of the buttermilk over the breadcrumb/Parmesan cheese mixture and incorporate it with your fingertips. The mixture should be mealy, but hold together in clumps if you squeeze it together with your hands.

Working with one piece of chicken at a time, remove a piece of chicken from the bag and add it to the flour. Turn the chicken to coat it, shaking off any excess, and then add it to the egg mixture. Turn the chicken to coat it, letting the excess egg mixture drip off, and then add it to the breadcrumb mixture. Turn the chicken to coat it, piling crumbs on top of the piece and pressing down firmly so a thick layer of breadcrumbs adheres to the chicken piece. Transfer the coated chicken to a wire rack set inside a rimmed baking sheet and repeat the process with the remaining chicken breast pieces.

Preheat the oven to 425 degrees. Place the sauce in a medium saucepan and heat it over low heat, stirring occasionally until it is barely simmering. Remove the sauce from the heat and set it aside.

Heat the vegetable or canola oil in a large non-stick or cast iron skillet set over medium-high heat until the oil registers 375 to 400 degrees on an instant-read or deep-frying thermometer. Working in batches so you do not crowd the skillet, carefully add the chicken pieces by lowering the cutlets away from you into the oil. Add as many cutlets as will fit in one layer (depending on the size of your skillet, this can be anywhere from 2 to 4 pieces). Cook, swirling the pan gently and using a thin flexible spatula to loosen the chicken if it sticks, until the chicken is golden brown and crisp on the bottom side, about 2 to 3 minutes. Using a thin metal spatula and a fork, carefully flip the chicken and cook until it is golden brown on the second side, about another 2 minutes. Transfer the chicken to a paper towel-lined plate to drain and repeat the process with the remaining chicken pieces.

Spoon 1/3 of the tomato sauce onto the bottom of a casserole or oven-safe serving dish. Shingle the chicken pieces on top of the sauce. Top the chicken with more sauce, forming a line down the center. Combine the mozzarella cheese and the remaining 1 tablespoon of Parmesan cheese in a large bowl and toss to coat. Lay the cheese mixture over the chicken in a straight line down the center. Transfer the dish to the oven and cook until the cheese is melted and bubbly, about 20 minutes. Remove the dish from the oven and immediately grate fresh Parmesan cheese on top. Allow the dish to rest for about 3 minutes, top with the chopped herbs and serve immediately.

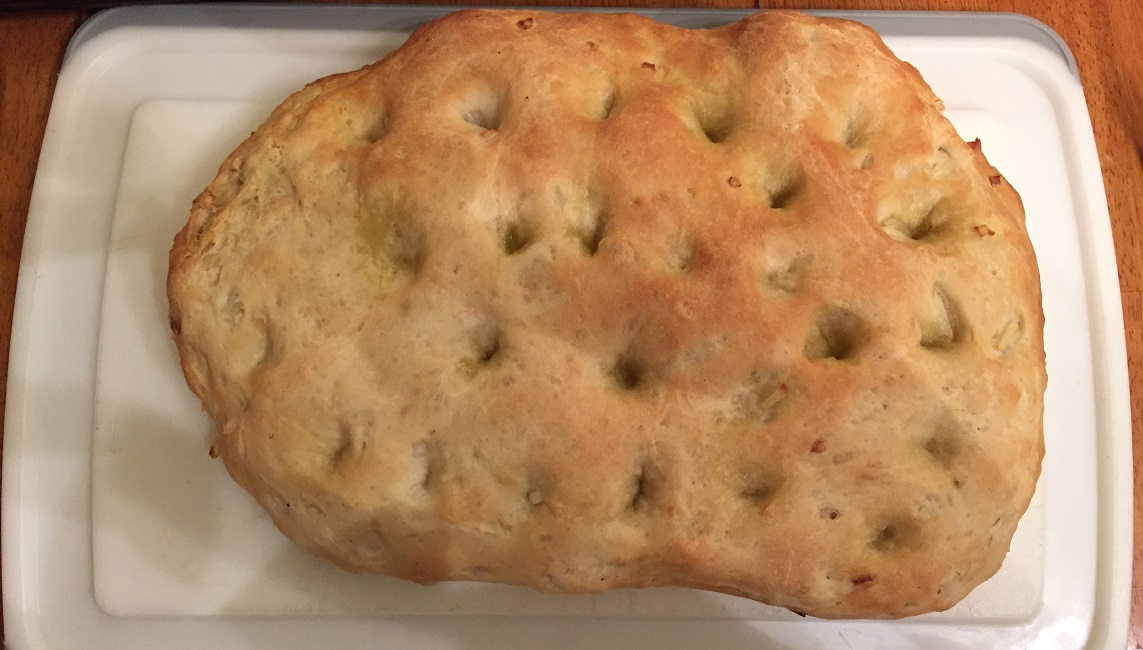
I did try a little bit of the chicken and I have to immediate using the buttermilk brine does improve the overall flavor and the tenderness of the chicken. Sean and Michelle both really enjoyed the breading on the chicken and the cheese combination of the mozzarella and the Parmesan was just right for the meal. As I said, I am not an eater of dishes like this, so I did have a piece of chicken I kept separate with just the breading and I thought it was great. They both enjoyed the meal over pasta and I served it alongside of the onion focaccia bread I had made. I would certainly do this recipe again, though you do need to plan this one ahead to do the brining if you want the taste difference.

That’s all I have for today. Check back next time for another recipe. Until then, enjoy the rest of your day and enjoy your meal!

chicken parm

 
Leave a comment

Posted by on December 20, 2014 in Cooking, Dinner, Pasta, Poultry


Tags: , , , ,

A Fine Feast of Onion Focaccia

I was making chicken Parmesan last week for dinner one night (for which I will be posting the recipe tomorrow) and wanted to make some bread to go alongside of the meal but I wasn’t sure what I really felt like. I didn’t want something that was too labor intensive since I have been  pretty busy with work and the holidays and with Michelle traveling a lot recently, so I decided on this recipe I found on Williams-Sonoma for a basic onion focaccia. I have made focaccia from them before and the recipe turned out pretty well and this one seemed just as easy so i thought I would give it a try to see how everything came out.

Onion Focaccia

1 tablespoon active dry yeast

1 tablespoon sugar

1 1/2 cups warm water (105 to 115 degrees)

1/2 cup olive oil, plus more for brushing

1 1/2 teaspoons table salt

4 to 4 1/4 cups bread flour, plus more as needed

1/2 cup chopped yellow onion

Coarse sea salt for sprinkling

In the bowl of a heavy-duty stand mixer fitted with a paddle attachment, dissolve the yeast and a pinch of sugar in 1/2 cup of the warm water. Let this stand at room temperature until the mixture is foamy, about 10 minutes. Add the remaining water and sugar, 1/4 cup of the olive oil, the table salt and 1 cup of the bread flour. Beat the mixture at medium speed until it is creamy, about 1 minute. Add 1 cup of the bread flour and beat on medium-low speed for 2 minutes. Stir in the onion and switch the mixture attachment to a dough hook.

On low-speed, beat in the remaining bread flour, 1/2 cup at a time, until a soft dough forms and starts to pull away from the bowl. Knead the dough on low, adding flour 1 tablespoon at a time if the dough sticks, until it is moist, soft and slightly sticky, about 6 minutes. Cover the bowl loosely with plastic wrap and allow it to stand for 20 minutes.

Line a heavy rimmed baking sheet with parchment paper and brush the parchment paper with olive oil. Turn the dough out onto the prepared sheet and with oiled fingers press and flatten the dough into an oval about 1 inch thick. Cover the dough loosely with oiled plastic wrap and allow it to rise at room temperature until it has doubled in bulk, about 1 hour.

With your fingertips, make deep indentations, about 1 inch apart, all over the surface of the dough. Drizzle the remaining olive oil over the dough. Cover the dough again loosely with plastic wrap and let it rise again at room temperature for about 30 minutes.

Place a baking stone on the lowest oven rack and preheat the oven to 425 degrees. Sprinkle the bread lightly with coarse salt. Place the pan on the stone and bake until the bottom of the bread is lightly browned, about 20 to 25 minutes. Serve the bread warm or at room temperature.

The focaccia went perfectly with the chicken and even though it does not seem like a lot of onion in the recipe the onion flavor really comes through in the bread. The dough rises quite a bit so I had a very large focaccia and ended up freezing some so we could have it at a later date. You could easily sprinkle a little cheese on top before you bake it if you wanted to go that route, but I think it turns out perfectly just the way it is and it makes an excellent addition to all kinds of Italian dishes.

That’s all I have for today. Check back next time for another recipe. Until then, enjoy the rest of your day and enjoy your meal!

focaccia

 
1 Comment

Posted by on December 19, 2014 in Breads, Cooking, Side Dishes


Tags: , , ,

Christmas Dinner Recipes | SAVEUR

Christmas Dinner Recipes | SAVEUR.

When we think of Christmas dinners, many of us immediately think of having a nice roast for the family and guests. There are all kinds of great roasts you can make (I’ll be making a prime rib roast this year) and Saveur has put together 28 Christmas dinner recipes using various roasts of pork, lamb, beef, turkey and chicken. You can find something to fit every type of meal you are looking to make. Check it out!


Tags: , , , , , ,

 
National Day Calendar

Fun, unusual and forgotten designations on our calendar.

Authentic Autograph Source, LLC

Licensed autographs and collectibles dealer in the Pacific NW! We have a wide range of sports, celebrities, and more!

Jennifer Probst

a little bit naughty a little bit nice

Laissez Faire

Letting Life Lead

%d bloggers like this: