RSS

Monthly Archives: January 2014

It’s a Chicken Invasion Part 3 – Fried Chicken Sandwiches

This recipe is actually the first of two chicken sandwiches that I tried this past week. I think they are great simple sandwiches for dinner or for lunch, but they are also great to use for football Sunday if you want something easy that is a great snack alternative. This first recipe is for a fried chicken sandwich recipe that I got from the latest issue of Cook’s Country magazine. it’s a pretty simple one that tries a little bit of a different method for the coating for the chicken, but I think it worked out pretty well.

Fried Chicken Sandwiches

1 1/2 teaspoons kosher salt

1 teaspoon paprika

1 teaspoon pepper

1 teaspoon garlic powder

1/2 teaspoon dried thyme

1/2 teaspoon dried sage

1/4 teaspoon cayenne pepper

2 boneless, skinless chicken breasts, trimmed and halved crosswise

1 1/2 cups all-purpose flour

1 teaspoon baking powder

3 tablespoons water

2 egg whites, lightly beaten

2 quarts vegetable oil (I didn’t use this much oil, but the recipe calls for it)

4 sandwich rolls

Combine the salt, paprika, pepper, garlic powder, thyme, sage and cayenne pepper in a bowl. Measure out 1 tablespoon of the spice mixture and set it aside. Pat the chicken dry with paper towels. Using a meat pounder, gently pound each piece of chicken to about 1/2-inch thickness between two pieces of plastic wrap. Season the chicken all over with the remaining 2 3/4 teaspoons of the spice mixture.

Whisk the flour, baking powder, and the reserved 1 tablespoon of the spice mixture together in a large bowl. Add the water to the flour mixture and rub it together with your fingers until the water is evenly incorporated and shaggy pieces form. Place the egg whites in a shallow dish.

Set a wire rack in a rimmed baking sheet. Working with 1 piece of chicken at a time, dip the chicken in the egg whites to thoroughly coat them, letting any excess drip back into the dish, then dredge the chicken in the flour mixture, pressing on the flour to make sure it adheres. Transfer the chicken to the prepared wire rack and refrigerate the pieces for at least 30 minutes and up to 1 hour.

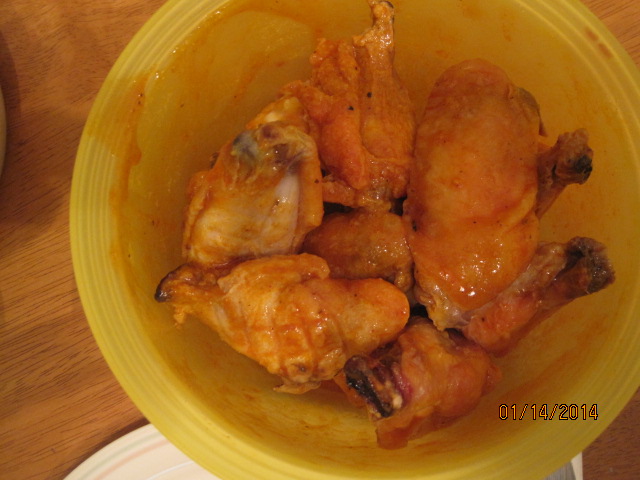
Add the vegetable oil to a large Dutch oven until it measures about 1 1/2 inches deep and heat the oil over medium-high heat to 375 degrees. Add the chicken to the hot oil. Adjust the burner, if necessary to maintain the oil temperature between 325 and 350 degrees. Fry the chicken, stirring gently to prevent the pieces from sticking together, until the chicken is golden brown and registers 160 degrees on an instant-read thermometer, about 4 to 5 minutes, flipping the chicken pieces halfway through the frying. Transfer the chicken to a clean wire rack and allow the pieces to cool for 5 minutes. Serve on the rolls.

Adding that little bit of liquid to the seasoned flour makes the flour clumpy, which gives it a lot more texture when it has cooked. To me it seemed a lot more like good fried chicken pieces and had better crunch to it than a typical fried chicken sandwich, which was great. As I said, I hate using that much oil for frying and I pretty much cut the amount in half and still got good results. I just don’t like to use that much myself and it is a pain to dispose of, so I try to get away with less when I can but if you want to follow the recipe exactly, go for it. I got good results with less but maybe you get a better fry with more oil. I served the sandwiches with some pickles, lettuce and bacon and some french fries, but some cole slaw would have been great with this. I actually made a cole slaw with the other chicken sandwich I made, so you’ll see that recipe next time :). Overall, I think it was a good recipe with a really crispy crunch, which was great.

That’s all I have for today. Check back next time for another chicken recipe. until then, enjoy the rest of your day and enjoy your meal!

005 004

Advertisement
 
Leave a comment

Posted by on January 31, 2014 in Cooking, Dinner, Poultry, Sandwiches


Tags: , , , , , ,

It’s a Chicken Invasion, Part 2 – Pan Seared Chicken Breast with Herb Jus and Potato Vegetable Hash

For the next chicken meal for the week I decided again to try to keep something simple and different. I find I don’t but chicken breasts very often, but I saw some on sale recently and picked up a package because it was on sale. Usually the bone-in chicken breasts are pretty large and end up cutting them in half so we get more meals out of them. That is what I did this time and then I decided I was going to try this recipe that I saw from Robert Irvine of the Food Network. it is for a simple pan seared chicken breast with herb jus and a really tasty potato vegetable hash. it’s a simple recipe that’s easy enough to make during the week for a nice dinner.

Pan Seared Chicken Breast with Herb Jus and Potato-Vegetable Hash

For the Chicken:

2 tablespoons vegetable oil

2 skin-on, bone-in chicken breasts, cut in half

Salt and freshly ground black pepper

1 cup dry white wine

1 clove garlic, minced

1 tablespoons minced fresh thyme leaves

1 teaspoon chopped rosemary leaves

1 teaspoon chopped fresh parsley leaves

2 tablespoons butter

1 tablespoon minced fresh chives

For the Potato-Vegetable Hash:

1 potato

1 zucchini

1 yellow squash

1 small red onion, thinly sliced

1 egg, beaten

2 tablespoons all-purpose flour

1 clove garlic, minced

1 teaspoon minced fresh thyme leaves

1 teaspoon minced fresh tarragon leaves

1 teaspoon Cajun spice

Vegetable oil

Salt

For the chicken, heat a large saute pan over high heat and add the vegetable oil. Heat the vegetable oil until it is shimmering. Season both sides of the chicken breasts with salt and pepper to taste. Sear the chicken, skin side down, until the skin is a golden brown, about 5 to 6 minutes. Reduce the heat to medium, flip the chicken breasts over, cover the pan and cook on the second side for 7 to 8 minutes.

After the second side has been cooked, add the white wine, the garlic, thyme, rosemary and parsley and continue to cook the chicken until the liquid is reduced by half, about 7 minutes. Transfer the chicken to a serving platter and cover it loosely with aluminum foil to allow it to rest.

Remove the saute pan from the heat and whisk in the butter, scraping up any browned bits from the bottom of the pan.

For the potato-vegetable hash, using a box grater, shred the potato, zucchini and yellow squash and add them to a large bowl. Stir in the red onion, egg, flour, garlic, thyme, tarragon and the Cajun spice. Blend the mixture well and add more flour if the mixture seems too wet. The mixture should hold its shape when it is squeezed.

Heat a large saute pan over medium heat and add two tablespoons of vegetable oil. Heat the oil just until it is shimmering and portion the potato mixture into cakes, gently patting and forming them in your hands. Cook the cakes until they are golden brown on one side, about 2 to 3 minutes. Flip the cakes over and cook until the other side is browned, about another 3 minutes. Remove the cakes from the pan and set them on a paper towel-lined plate and season with salt to taste.

Serve the potato vegetable hash warm with a chicken breast piece on time and some of the herb jus sauce.

This was a very simple meal that makes good use of the white meat of the chicken if you need a new recipe. Sean is a big white meat-eater so he really liked this meal. The sauce for me was the winner as it had great flavor and everyone really liked the potato-vegetable hash, which was the real hit of the meal. The combination of the potato, zucchini and squash was perfect with the herbs and spices and it wasn’t cooked so long that it got all dried out. It was nice and flavorful from the vegetables with some crispness. It was definitely one I would make again.

That’s all I have for today. Check back next time for the next chicken recipe. I have some fried chicken sandwiches, an oven roasted turkey breast, a skillet roasted chicken and more still to come. Until next time, enjoy the rest of your day and enjoy your meal!

003 002

 
Leave a comment

Posted by on January 29, 2014 in Cooking, Dinner, Poultry, Sauce, Vegetables


Tags: , , , , , ,

It’s a Chicken Invasion! Part One – Bourbon Glazed Chicken

It seems like every time I go to the grocery store lately for the last few weeks there is chicken on sale and I come home with a lot of it. We have been making a lot of chicken lately and cutting back on red meat where we can to try to be a little healthier and let’s face it – no matter where I seem to shop lately beef is very expensive so we may as well have some poultry. I have a lot of chicken recipes to use, so there is always plenty for me to try, so we’ll be doing chicken recipes all week this week. First up was a simple dish that I saw from Bon Appetit that they actually use for their wings but I simply adapted it to use with chicken thighs and drumsticks instead. It is for bourbon glazed chicken and the glaze tastes delicious.

Bourbon Glazed Chicken

2 tablespoons butter

1 cup chopped onion

3 garlic cloves, peeled, thinly sliced

1 cup bourbon, divided

1 cup ketchup

1/2 cup hot sauce

1/4 cup tomato paste

3 tablespoons packed light brown sugar

4 pounds bone-in chicken parts (thighs, drumsticks and wings)

Melt the butter in a large heavy saucepan over medium-high heat. Add the chopped onion and garlic and saute until golden brown, about 5 to 6 minutes. Add 3/4 of a cup of the bourbon and boil the mixture until most of the liquid is absorbed, about 6 to 8 minutes. Whisk in the remaining 1/4 cup of the bourbon, the ketchup, hot sauce, tomato paste, and the brown sugar until it is well blended. Reduce the heat and simmer until the sauce thickens slightly, stirring occasionally, about 10 minutes. Season the marinade with salt and pepper to taste. Remove the marinade from the heat and allow it to cool to room temperature.

Place the chicken parts in a large glass baking dish or roasting pan. Pour the marinade over the chicken parts and turn the chicken to well coat it. Cover the chicken and refrigerate it overnight.

Preheat the oven to 375 degrees. Line a baking sheet with foil or with parchment paper. Place a cooling rack on top of the prepared baking sheet. Arrange the chicken pieces on the cooling rack, spacing each piece slightly apart. Spread any of the remaining marinade from the dish over the chicken parts. Sprinkle the chicken with salt and pepper. Bake the chicken on the cooling rack in the baking sheet until the parts are cooked through and an instant read thermometer inserted into the thickest part of a thigh registers 165 degrees and the skin is browned, about 45 to 50 minutes. Transfer the chicken to a serving platter and serve.

I can see that this recipe would work really well with chicken wings and I think it tasted great with the chicken parts. The bourbon gave a nice sweetness and with the brown sugar, the ketchup and the hot sauce it was like a nice barbecue sauce with a little heat and sweetness. I would certainly use this recipe again for any chicken parts. It might even be better if you can use it on the grill. Marinading it really makes a big difference with this one as it really enhances the flavor, so let it sit overnight if you can. I served the chicken with some wild rice and fresh green beans.

That’s all I have for today. Check back next time to see the next chicken recipe. until then, enjoy the rest of your day and enjoy your meal!

007 006


4 Comments

Posted by on January 27, 2014 in Cooking, Dinner, Poultry, Sauce


Tags: , , , , ,

When it’s This Cold, Part 2 – This Time It’s Soup – Alton Brown’s Lentil Soup

It is still freezing cold here in New York and today it is snowing again. It seemed even colder yesterday and the day before that. It would be nice if we got a little bit of a break in the weather and I cannot wait for winter to be over already. For now, we’ll just have to deal with it and that means more warm and hearty meals. Yesterday it was the bean stew recipe, today it is a recipe for lentil soup. Again, I was going for soup recipes that were quick and easy and didn’t need all day to cook or prepare. I found this one from Alton Brown for a simple lentil soup and I wanted to give it a try.

Alton Brown’s Lentil Soup

2 tablespoons olive oil

1 cup finely chopped onion

1/2 cup finely chopped carrot

1/2 cup finely chopped celery

2 teaspoons kosher salt

1 pound lentils, picked and rinsed

1 cup peeled and chopped tomatoes

2 quarts chicken or vegetable broth

1/2 teaspoon ground coriander

1/2 teaspoon ground cumin

1/2 teaspoon ground grains of paradise

Place the olive oil into a large Dutch oven and set it over medium heat. Once the pot is hot, add the onion, carrot, celery and kosher salt and sweat the vegetables until the onions are translucent, about 6 to 7 minutes. Add the lentils, chopped tomatoes, chicken or vegetable broth, coriander, cumin and grains of paradise and stir the mixture until it is well combined. Increase the heat to high and bring the mixture just to a boil. Reduce the heat to low, cover the  pot and cook the soup at a low simmer until the lentils are tender, about 35 to 40 minutes. Using a stick blender, puree the soup to your preferred consistency and serve.

Just a few points about this recipe. First, you are probably wondering what the heck grains of paradise is. I love Alton Brown, but he can make use of some unusual and really hard to find ingredients sometimes. Grains of paradise is a spice from West Africa that is very much like a mix of pepper, cardamom and coriander. For the amount needed for this recipe, I couldn’t see myself going out and buying it since it can be quite expensive and the odds are pretty good I would not be able to find it locally anyway. Instead, I looked around on the Internet and saw that as a substitute many people use freshly ground black pepper or cardamom. I decided to go with the black pepper myself and just used that. Also, this time of year the tomatoes in this area are not very good, so I simply substituted a cup of canned diced tomatoes instead and I think they worked out just fine anyway. You also want to make sure that you pick over your lentils before you use them. Most of the time there is no issue at all, but rinsing and picking over them just to check for pebbles and such is always a good idea when you are using dried beans like this. Nothing spoils a meal faster than getting a rock in your soup. As for the soup itself, I love lentil soup and this one had a nice flavor from the coriander and the cumin. It was very filling and hit the spot and took no time at all to make. I made some cream biscuits to go along with the meal and we were all good to go with leftovers for another day.

That’s all I have for today. Check back next time for another recipe. until then, enjoy the rest of your day, keep staying warm, and enjoy your meal!

001


Tags: , , , , ,

When It’s This Cold, It Has to Be Soup or Stew. This Time It’s Stew…

Yikes it has been crazy cold here the last few days. I get up and start working at about 5:30 AM and for the last few days it has been zero or less outside when I get up. it has been so cold I have been using fingerless gloves while I type in the morning just to keep my hands warm! Anyway, when the weather is this cold all you want to eat is something warm and hearty, and for us that means soup or stew. I found this recipe from Giada De Laurentiis of the Food Network about a week ago and it seemed perfect to make when it was this frosty outside. it is for a cannellini and sausage stew. The recipe is easy, it uses easy ingredients and you can have the whole thing done in about 35 or 40 minutes, so you can’t ask for a meal much better than that!

Cannellini and Sausage Stew

Vegetable oil cooking spray

2 tablespoons extra-virgin olive oil

2 medium fennel bulbs, outer layers removed, chopped

1 medium onion, chopped

1 1/2 teaspoons kosher salt

One 28-ounce can diced tomatoes

One 15-ounce can cannellini beans

One 10-ounce bunch kale, center rib removed, leaves chopped into 1/2-inch pieces

1 cup chicken broth

4 turkey or chicken Italian sausage links

Place an oven rack in the center of the oven and preheat the oven to 375 degrees. Spray a grill pan with the vegetable oil cooking spray.

In a Dutch oven, heat the olive oil over medium-high heat. Add the fennel bulbs, onion and 1 teaspoon of the kosher salt. Cook, stirring constantly, until the vegetables are soft, about 5 minutes. Add the tomatoes plus the juices, the cannellini beans, the kale and the chicken broth. Bring the mixture to a boil and then cover the pan with a tight-fitting lid and transfer the pot to the oven. Cook the stew until the vegetables are tender and the kale has wilted, about 25 to 30 minutes.

While the stew is cooking, place the grill pan over medium-high heat. Add the sausages to the grill pan and cook, turning occasionally, until the sausages are cooked through, about 20 to 25 minutes. Cool the sausages and cut them into 1/2-inch thick slices and set them aside,

Remove the pot from the oven and add the cooked sausage slices to the stew. Season the stew with the remaining 1/2 teaspoon of kosher salt. Spoon the stew into bowls and serve.

I did make a few minor changes to the recipe. Instead of using kale, I had spinach on hand and used that instead. I actually prefer the flavor of spinach to the kale and I think it worked just as well in the stew, so the choice is yours as to which you like better. Giada also puts in 1/2 teaspoon of red pepper flakes, which I left out. My family is not too big on the heat so I didn’t see the need to put the flakes in, but if you like the stew a little hot (and I think it would be good with some heat) I think you could put it in or even use hot sausage instead of regular sausage. I loved the flavor you got from the mix of the beans, sausage and spinach and the tomatoes and broth added just enough liquid to the mix. The fennel gave the whole dish a great flavor too. I will definitely be making this one again.

That’s all I have for today. Check back next time for another recipe. I actually have a soup recipe I am making tonight that I’ll be happy to share. It’s Alton Brown’s take on lentil soup and it smells pretty darn good right now. Until next time, enjoy the rest of your day, try to stay warm and enjoy your meal!

009 008


1 Comment

Posted by on January 24, 2014 in Cooking, Dinner, One Pot Meals, Sausage, Soups & Stews


Tags: , , , , , ,

Fancy Roasted Turkey…Okay, Roasted Turkey Breast… I Mean Roasted Half a Turkey Breast

Half a turkey breast may not even sound like a lot of meat for you, but for just the three of us it worked out fine and there were even leftovers for sandwiches the next day. If you have a  small family or are just cooking for yourself, using just a half a breast is ideal. They may not always be easy to find but if you look around in the meat area of your supermarket or ask your butcher, you may be able to find one. I actually got ours for only $4.00 and we got a full dinner and several lunches out of it, making it really worthwhile. I had to hunt around a bit to try to find a unique recipe for a piece this small. You could simply roast it in the oven, but this recipe that I found from Sweet and Crumby was just perfect and gave some great flavor to the meat.

Roasted Half Turkey Breast

1 half bone-in turkey breast with skin, rinsed and patted dry

2 teaspoons dry rosemary

2 teaspoons dried thyme

2 teaspoons dried sage

2 teaspoons salt

1 teaspoon freshly ground black pepper

2 tablespoons freshly squeezed orange juice

2 tablespoons olive oil

1 orange, thinly sliced

2 whole sprigs rosemary

4 large washed but unpeeled carrots

1-2 cups chicken broth

4 tablespoons butter

Preheat the oven to 325 degrees. In a small bowl mix together the dried rosemary, thyme, sage, salt and pepper. Squeeze in the orange juice and drizzle in the olive oil. Mix everything together to form a paste. Rub the paste all over the meat and skin of the turkey breast and then underneath the turkey skin.

Take the thinly sliced orange slices and tuck them under the turkey skin. in a single layer. Tuck 2 sprigs of the rosemary under the skin as well. Cut the butter into small pats and place single pats of butter all over the turkey skin and meat. Place the carrots lined up in a small roasting pan, casserole dish or cast iron skillet and the place the turkey breast on top of the carrots. Pour the chicken broth into the roasting pan, but not over the turkey and drop any remaining pieces of the orange into the pan as well. Tent the turkey with the aluminum foil and roast for 45 minutes. Remove the foil and let the turkey roast for another 30 minutes or until an instant read thermometer inserted into the thickest part of the breast registers 165 degrees.

Remove the turkey from the oven and tent with a fresh piece of aluminum foil. Allow the turkey to rest for 10 to 15 minutes before slicing.

Roasting time here will really depend on how big of a piece of turkey you have. The breast I had was just over two pounds and was done in just over an hour. A 3 or 4 pound breast will take longer, perhaps as long as 90 minutes, so you will want to check the temperature to be on the safe side. I liked the flavors from the paste and from the orange slices. It really added something nice to the dish that you might not normally think of. You’re not going to get much in the way of juices in the pan with this one, even with adding broth to the pan, but if you add some after you remove the turkey you can make a little bit of gravy or au jus for your meal as well. Overall I would say it is a great inexpensive way to have turkey during the week for a little bit of a change from chicken.

Speaking of chicken, I have lots of chicken recipes we have used lately to share, so keep an eye out for those among the recipes I will be sharing. That’s all I have for today. Check back again next time for a new recipe. Until then, enjoy the rest of your day, stay warm, and enjoy your meal!

003 002

 
7 Comments

Posted by on January 22, 2014 in Cooking, Dinner, Poultry, Turkey


Tags: , , , , ,

Need Wings for the Big Game? Buffalo and Ginger-Soy Wings

Wings are great any time as a snack, appetizer or even for dinner, but having them as something for snacking during the football game is like a national pastime now. I have a standard wing recipe that I use most of the time and often just toss them with some hot sauce and I am done, but I decided to incorporate that wing recipe with a couple of sauces and glazes that I saw from Bon Appetit to change things up a little bit and to give an option to those who may not like the spiciness of the Buffalo wings that I like to make. These at least give you a little bit of a choice when making your wings.

Crispy Baked Chicken Wings

For the wings:

5 pounds chicken wings, tips removed, drumettes and flats separated

2 tablespoons baking powder

1 teaspoon kosher salt

1/2 teaspoon freshly ground black pepper

For the Buffalo Sauce:

1 tablespoon butter, melted

1/4 teaspoon cayenne pepper

1/4 teaspoon freshly ground black pepper

1/4 teaspoon kosher salt

1/4 cup hot pepper sauce

For the Ginger-Soy Glaze:

1/4 cup honey

2 tablespoons soy sauce

3 large garlic cloves, crushed

1 2-inch piece of ginger, peeled and sliced

Adjust two oven racks to the upper-middle and the lower-middle positions and heat the oven to 250 degrees. Set  a wire rack in an aluminum foil–lined rimmed baking sheet. Pat the chicken wings dry with paper towels and transfer them to  a large 1-gallon zipper-lock bag. Combine the baking powder, salt and pepper, add these to the wings, seal the bag, and toss the wings to evenly coat them.

Arrange the wings, skin side up, in a single layer on the prepared wire rack. Bake the wings on the lower-middle oven rack for 30 minutes. Move the wings to the upper-middle rack, increase the oven temperature to 425 degrees, and roast until the wings are golden brown and crispy, about 40 to 50 minutes longer, rotating the baking sheet halfway through the baking process.

While the wings are baking, prepare the sauces. For the Buffalo sauce, mix the melted butter, cayenne pepper, black pepper and kosher salt in a medium saucepan over low heat. Allow the mixture to stand for 5 minutes. Whisk in the hot sauce and keep the mixture warm until you are ready to coat the wings. For the ginger-soy glaze, combine the honey, soy sauce, garlic cloves and ginger with 1/4 cup of water in a small saucepan and bring the mixture to a boil, stirring to dissolve the honey. Reduce the heat to low and simmer, stirring occasionally, until the mixture is reduced to 1/4 cup, about 7 to 8 minutes. Strain the glaze into a medium bowl and allow it to sit for 15 minutes to thicken slightly.

After 40 minutes, remove the baking sheet from the oven and let the wings stand for 5 minutes. Line another rimmed baking sheet with foil and top with a wire rack. Add half of the wings to the ginger-soy glaze and toss them evenly to coat. Place these wings in a single layer on the prepared rack and bake until the glaze is glossy and lightly caramelized, about 8 to 10 minutes. Toss the remaining half of the wings in the bowl with the Buffalo sauce toss to coat, and serve.

Making the wings this way lets the wings get a nice crunchy coating to them thanks to the baking powder. I think you get the same kind of crunch as you do as when you fry them and you don’t have to deal with the mess of frying and all that oil. The Buffalo sauce is my favorite since I like the hot wings, but the ginger-soy glaze has great flavor as well thanks to the combination of the honey, ginger and soy. Sean really liked these and gobbled them up pretty quickly when we had them so it gives you a nice choice when making wings.

That’s all I have for today. Check back next time for some more recipes. I have been trying a few new things lately so I’ll have even more to share with everyone. Until next time, enjoy the rest of your day, stay warm (it is snowing here right now) and enjoy your meal!

008 006

 
Leave a comment

Posted by on January 21, 2014 in Appetizers, Cooking, Poultry, Sauce, Snacks


Tags: , , , , , ,

Another Soup (Sans Picture) – French Onion Soup

It really bothers me now when I make something and forget to take a picture of it. It doesn’t happen nearly as often as it did when I first started the  blog, but it still happens on occasion. It’s easy when you caught up in cooking and trying to get the meal on the table and you’re talking about homework, what happened at school, work or anything else going on and sometimes by the time I remember there is nothing left to take a picture of. Such is the case when I made French onion soup not that long ago. French onion soup is a personal favorite of Michelle’s and there are lots of recipes out there for it, but this one from America’s Test Kitchen is our personal favorite. It takes longer to cook, but it is so worth it to get the deep, rich onion flavor that you get from cooking the onions this way.

French Onion Soup

3 tablespoons butter, cut into 3 pieces
6 large yellow onions (about 4 pounds), halved and cut pole to pole into 1/4-inch-thick slices 
Table salt
2 cups water, plus extra for deglazing
1/2 cup dry sherry
4 cups chicken broth 
2 cups beef broth
6 sprigs fresh thyme, tied with kitchen twine
1 bay leaf
Ground black pepper
1 small baguette, cut into 1/2-inch slices
8 ounces shredded Gruyère cheese (about 2 1/2 cups)
Adjust an oven rack to the lower-middle position and heat the oven to 400 degrees. Generously spray the inside of a heavy-bottomed large (at least 7-quart) Dutch oven with nonstick cooking spray. Place the butter in the pot and add the onions and 1 teaspoon of salt. Cook, covered, for 1 hour (the onions will be moist and slightly reduced in volume). Remove the pot from the oven and stir the onions, scraping the bottom and sides of the pot. Return the pot to the oven with the lid slightly ajar and continue to cook until the onions are very soft and golden brown, about 1 1/2 to 1 3/4 hours longer, stirring the onions and scraping the bottom and sides of the pot after 1 hour.
 Carefully remove the pot from the oven and place it over medium-high heat. Using oven mitts to handle the pot, cook the onions, stirring frequently and scraping the bottom and the sides of pot, until the liquid evaporates and the onions brown, about 15 to 20 minutes, reducing the heat to medium if the onions are browning too quickly. Continue to cook, stirring frequently, until the pot bottom is coated with dark crust, about 6 to 8 minutes, adjusting the heat as necessary. Scrape any fond that collects on the spoon back into the onions. Stir in 1/4 cup water, scraping the pot bottom to loosen the crust, and cook until the water evaporates and the pot bottom has formed another dark crust, about 6 to 8 minutes. Repeat the process of deglazing 2 or 3 more times, until the onions are very dark brown. Stir in the sherry and cook, stirring frequently, until the sherry evaporates, about 5 minutes.
Stir in  the chicken and beef broths, 2 cups of water, thyme, bay leaf, and 1/2 teaspoon of salt, scraping up any final bits of browned crust on the bottom and sides of the pot. Increase the heat to high and bring the mixture to simmer. Reduce the heat to low, cover, and simmer for 30 minutes. Remove and discard the herbs, then season with salt and pepper.
 While the soup simmers, arrange the baguette slices in a single layer on a baking sheet and bake in a 400-degree oven until the bread is dry, crisp, and golden at the edges, about 10 minutes. Set the bread aside.
To serve, adjust an oven rack 6 inches from the broiler element and heat the broiler. Set individual broiler-safe crocks on a baking sheet and fill each with about 1 3/4 cups of soup. Top each bowl with 1 or 2 baguette slices (do not overlap slices) and sprinkle evenly with the Gruyère cheese. Broil the soup until the cheese is melted and bubbly around the edges, about 3 to 5 minutes. Let the soup cool  for 5 minutes before serving.
Admittedly, making the onions this way is a much longer process than some other recipes but I think the flavor you get out of them is worth it. I have had French onion soup before where you can tell the onions were not cooked long enough and taste bitter. That won’t happen with this recipe. You want to make sure that the crocks you use are safe for the broiler to avoid any broken glass in the oven. You could also do all of this in advance if you want to use the soup for a dinner party. The soup will actually have better flavor if it sits for a day or two. You then just need to put it in the crocks under the broiler with the bread and cheese to finish it off. I used homemade broth in mine because I had some around, but if you want to use store-bought it will work just as well here. The flavor for this one is coming mostly from the onions.
That’s all I have for today. Check back next time for another recipe, and I promise to have a picture of it for sure. Until then, enjoy the rest of your day and enjoy your meal!


Tags: , , , ,

Leftover to Warm Your Heart (and Stomach) – Turkey Rice Soup

The weather keeps fluctuating around here from unseasonably warm to bitter cold and then back again. It’s amazing that we haven’t all come down with lots of colds yet this winter and the weather really does seem to affect the way I want to cook. On a nice day you feel like having something like ribs or burgers or some chicken and then on the cold days we want soups and stews. Luckily, I try to cook larger meals with the intent that we will get many meals out of the leftovers. Such is the case when I made some turkey recently and then made stock with the leftover carcass and we used the leftover meat to make some nice turkey rice soup. The rice adds a nice heartiness to the dish and you can use all your leftovers or frozen vegetables to help flavor the soup and make the cooking even easier than ever.

Turkey Rice Soup

2 tablespoons olive oil
1 onion, chopped
1 leek, white and light green parts halved lengthwise, sliced thin crosswise
2 celery ribs, chopped
1 pound cooked turkey meat, white and dark meat, chopped
6 cups turkey or chicken broth
2 sprigs fresh thyme
2 bay leaves
2 carrots, peeled, quartered lengthwise, and sliced ¼ inch thick
1/2 cup white rice
Salt and pepper
1 cup frozen peas
2 tablespoons minced fresh parsley

 Heat 1 tablespoon of the olive oil in a Dutch oven over medium-high heat until shimmering. Add the onion leeks carrots and celery and cook until just beginning to brown, about 5 minutes. Add the turkey meat and heat the meat through until it is beginning to brown, about 1 to 2 minutes. Remove the contents from the Dutch oven to a separate bowl and set it aside.
Wipe out the now-empty Dutch oven with paper towels and heat the remaining 1 tablespoon of olive oil over medium-high heat until shimmering. Add the white rice and cook, stirring frequently, until the edges of the rice become translucent, about 2 minutes.Add the turkey mixture back to the Dutch oven and heat through for about 1 minute. Add the turkey or chicken broth and 1 teaspoon of salt and bring the mixture to a boil. Reduce the heat to medium-low add the thyme and bay leaves and simmer, covered, stirring occasionally, until the rice is tender, about 12 to 14 minutes. Stir in the frozen peas and cook until they are heated through, about 5 minutes. Stir in parsley and season with salt and pepper to taste. Serve.
You can just as easily do this with leftover chicken instead of turkey or even with a rotisserie chicken that you can pick up at the store to save you some effort. The great thing about using a rotisserie chicken is that you can then use that carcass to make your own stock and get the great flavor from that. It doesn’t even have to cook all day; you really only need to add some onion, celery and carrot with the carcass and a bay leaf and let it cook for about 30 minutes and you can have flavorful stock. Other leftover veggies will work in this soup as well if you want and I added some leftover green beans we had. Sauteing the rice briefly does make a difference here as it helps to keep the rice firm by firming the starches before you add the liquid so the rice will not bloat. it makes for a great quick dinner you can do any night of the week and get good flavor from your leftovers.
That’s all I have for today. Check back next time for another new recipe. There’s still lots of good stuff to come, including a lamb recipe, a quick turkey breast recipe, baked ziti, a couple of different wings to try, skillet pizza and more. until next time, enjoy the rest of your day and enjoy your meal!
001


Tags: , , , ,

Just Because It’s Winter Doesn’t Mean You Can’t Have Great Spare Ribs

I love spare ribs no matter what time of year it may happen to be and for me living in a condo, I can’t really do any grilling of ribs anyway so I turn to making them in the oven to get the best results. i have a standard recipe that I have used often but I was looking for something a little different this time to maybe get a  different flavor. I came across this recipe from theKitchn, a blog that I check out often. They offered up a very simple recipe for cooking great ribs indoors any time of year with a nice smoky flavor and a little zip to them.

Oven Baked Spare Ribs

4 to 5 pounds pork spare ribs or baby back ribs

1/4 cup Dijon mustard

2 teaspoons liquid smoke

1 cup dry spice rub

1 cup barbecue sauce, store-bought or homemade

Line a baking sheet with aluminum foil and set a rack on top of the foil on the baking sheet. Lay the ribs on top of the rack in a single layer. This will allow for the heat to better circulate on all sides of the ribs so they cook evenly.

Mix the Dijon mustard and the liquid smoke in a small bowl and brush the mixture on both sides of the ribs. Sprinkle the ribs with the dry rub and pat the ribs gently to make sure the rub adheres well to the rib meat. For an even deeper flavor, try doing this step a day ahead of time and wrapping the ribs in plastic wrap and refrigerate them until the next day.

Heat the broiler and place an oven rack a few inches right below the broiler heating element. Make the meaty side of the ribs is facing up. Broil the ribs for about 5 minutes, until the sugar in the dry rub is bubbling and the ribs are evenly browned.

Heat he oven to 300 degrees. Move the ribs to an oven rack set in the middle position of the oven. Roast the ribs for 2 1/2 to 3 hours for spare ribs or 1 1/2 to 2 hours for baby back ribs. Halfway through the cooking process, cover the ribs with aluminum foil to protect them from drying out.

Remove the foil from the ribs and brush the ribs with barbecue sauce. Place the ribs back in the oven and continue to cook them for another thirty minutes. The ribs are done when a knife slides easily into the thickest part of the rib meat. Allow the ribs to rest, covered with foil, for about ten minutes, and then cut between the bones to separate the individual ribs. Serve with extra barbecue sauce for dipping.

There are all kinds of spice rub recipes you can use for your ribs, and I have given the link to the one I use most often, but you can also buy some from the store if you have a personal favorite. I actually used a rub that was sent to me by Pepper Mary, who sells spices on her website. I used the Mesquite Blend, which was perfect for the ribs and added a nice mesquite wood flavor to the meat. This is a perfect spice blend for ribs or pulled pork if you are looking for something easy to use. Adding the liquid smoke makes a big difference in the smell and flavor as well. This recipe is very easy to do if you want ribs any time of year and don’t have a gas or charcoal grill to use. Any of the typical rib sides are perfect for this meal, such as baked beans, corn bread or cole slaw or even homemade fries.

That’s all I have for today. Check back next time for another recipe. Until then, enjoy the rest of your day and enjoy your meal!

005 004


1 Comment

Posted by on January 17, 2014 in Cooking, Dinner, Pork, Sauce, Spices


Tags: , , , , , , ,

 
National Day Calendar

Fun, unusual and forgotten designations on our calendar.

Authentic Autograph Source, LLC

Licensed autographs and collectibles dealer in the Pacific NW! We have a wide range of sports, celebrities, and more!

Jennifer Probst

a little bit naughty a little bit nice

Laissez Faire

Letting Life Lead

%d bloggers like this: