RSS

Tag Archives: Alton Brown

Make a Mess of These Meatball Sliders

I am always on the lookout for different meatball recipes. It is just one of those meal items that I like to tinker with and I am looking to add new flavors to meatballs to jazz them up a little bit. Whether it is for a simple meal with spaghetti in tomato sauce, as an appetizer for a buffet or party, to have in gravy over rice or noodles or to make a nice sub or sandwich meatballs are one of those things that you can do a lot of things with and make them in wide variety of ways with many different ingredients. I came upon this recipe from Alton Brown for meatball sandwiches on Parmesan parsley biscuits and thought it sounded great, but to me they are perfect meatball sliders for an appetizer, party or dinner. it’s a very easy recipe that gives you some basic meatballs with great tasting biscuits and a nice spaghetti sauce to boot.

Alton Brown’s Meatball Sandwiches (Meatball Sliders)

For the Meatballs:

1 pound ground beef
1 pound ground pork
1 pound ground veal
1 egg
1/2 small onion, chopped
1 teaspoon dried parsley
1 teaspoon granulated garlic
1 teaspoon dried oregano
1 teaspoon salt
1/2 teaspoon freshly ground black pepper
Parmesan Parsley Biscuits, recipe follows
Spaghetti Sauce, recipe follows
Provolone cheese, thinly sliced

For the Parmesan Parsley Biscuits:
3 cups all-purpose flour
1 cup grated Parmesan
1/4 cup sugar
2 tablespoons baking powder
1/2 teaspoon salt
1/2 teaspoon freshly ground black pepper
1 stick chilled unsalted butter, cut into cubes
1/4 cup chopped fresh parsley or chives
1 cup whole milk, chilled

For the Spaghetti Sauce:
1 medium onion, chopped
2 cloves garlic, minced
2 tablespoons olive oil
2 (14-ounce) cans diced tomatoes
20 fresh basil leaves, chopped

Preheat the oven to 375 degrees.

For the meatballs,in a large bowl, combine the beef, pork, veal, egg, onion, parsley, garlic, oregano, salt, and pepper and mix all of the ingredients until they are well combined. Scoop the mixture into mini muffin tins or onto a wire rack set over a rimmed baking sheet. Bake the meatballs until they are browned and cooked through, about 15 to 20 minutes.

For the Parmesan parsley biscuits:
Preheat the oven to 400 degrees.

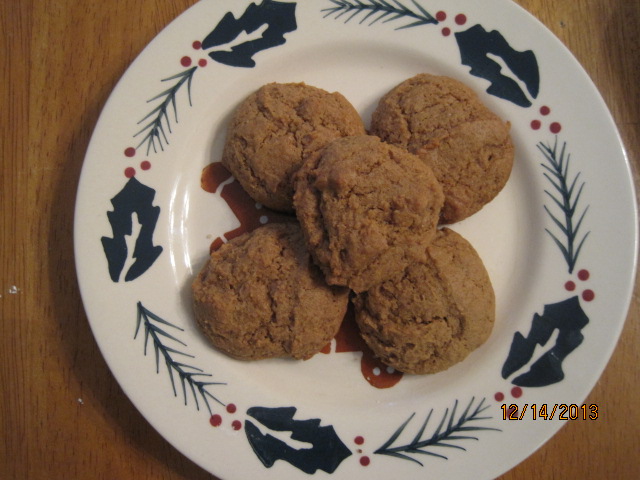
In a large bowl, combine the flour, 1/2 cup of the Parmesan, sugar, baking powder, salt, and pepper. Whisk until everything is well blended. Add the butter and combine the mixture with your fingertips until a coarse meal forms. Mix in the parsley. Gradually add the milk, tossing the mixture with a fork until moist clumps form. Add extra milk if the mixture is too dry. Put the dough on a floured work surface, folding 8 to 10 times until it becomes firm. Let the dough rest for 10 minutes under a damp towel. Roll out the dough on a lightly floured work surface. Using a 2-inch-diameter biscuit ring, cut out the biscuits and put them on a parchment paper-lined baking sheet. Sprinkle the tops of the biscuits with the remaining 1/2 cup of Parmesan cheese and bake until the biscuits are puffed and golden, about 15 minutes.

For the spaghetti sauce, in a medium pan set over high heat, saute the onion and the garlic in olive oil until both are softened, about 3 minutes. Add the tomatoes and allow the mixture to simmer until it is slightly reduced and thickened, about 25 minutes. Stir in the fresh basil just before serving.

To build the sliders, slice a biscuit in half and place a meatball on the bottom half of the biscuit. Cover the meatball with as much spaghetti sauce as you like and top each meatball with a slice a provolone cheese. Place the biscuit top on top of the meatball and continue until all of the biscuits are filled.

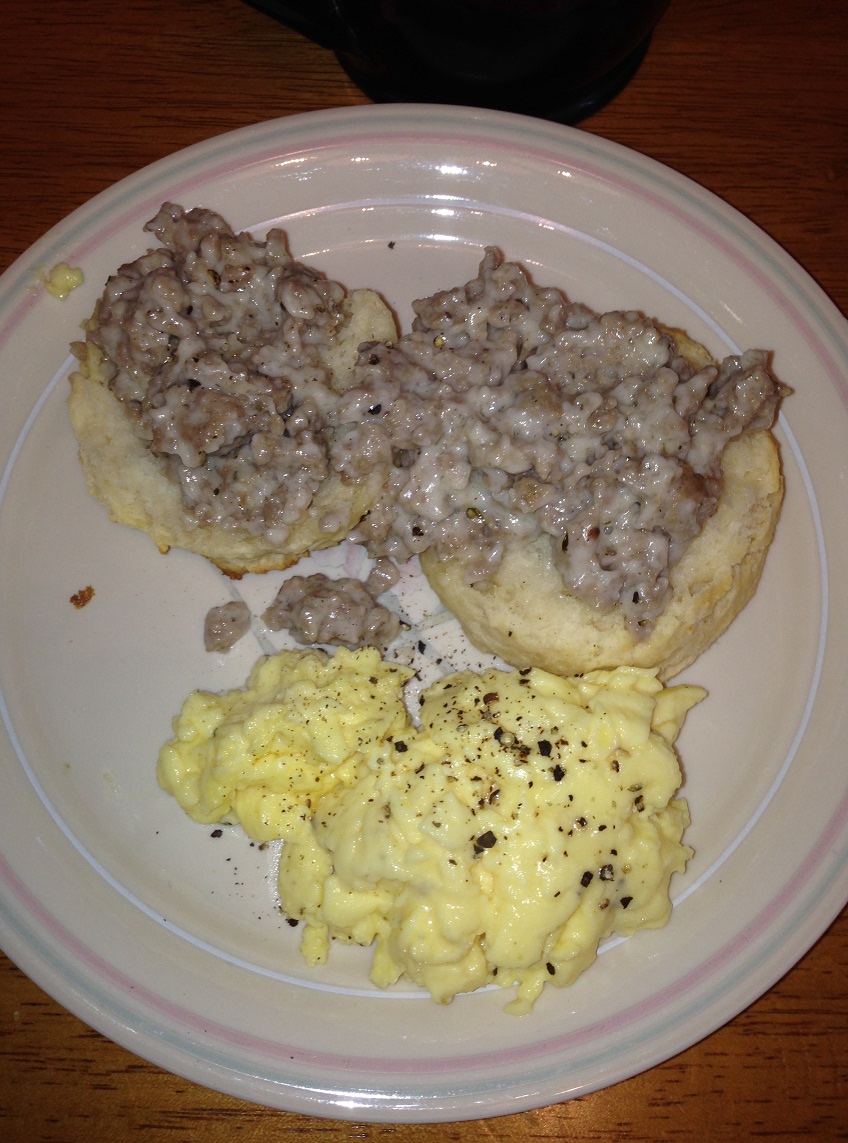
I have to say I really liked these. While the meatball recipe is very basic, it does taste good and produces a moist meatball that goes well with the sauce. The real star of this one I think is the Parmesan biscuit, which comes out perfectly and goes really nicely with the meatballs as a slider. The biscuit has great flavor and is really easy to make so you can make this to go with other meals besides this one. we even used some to make breakfast sandwiches with some bacon or sausage and egg. Of course the meatballs and sauce can be for anything that you would use meatballs for as well besides just sliders if you want a nice, basic and easy meatball recipe.

That’s all I have for today. Check back next time for another recipe. Until then, enjoy the rest of your day and enjoy your meal!

IMG_0730

Advertisement


Tags: , , , , , , ,

Try Guacamole the Alton Brown Way!

I have been using the same basic recipe for guacamole that I make for years. Everyone seems to like it and I haven’t really deviated from that since I went with the old adage if it isn’t broken don’t fix it. National Guacamole Day was just recently (yes, there really is such a thing, and it seems pretty much everything and everyone has a day now, but that’s a topic for another time) I saw some other recipes for guacamole come up and I hit upon this one from Alton Brown, who is always one of my favorites and hasn’t steered me wrong yet with a recipe. His recipe for guacamole is very simple, as most of them are, but does seem to give you extra layers of flavor as well.

Alton Brown’s Guacamole

3 Haas avocados, halved, seeded and peeled

1 lime, juiced

1/2 teaspoon kosher salt

1/2 teaspoon ground cumin

1/2 teaspoon cayenne pepper

1/2 onion, diced

1/2 jalapeno pepper, seeded and minced

2 Roma tomatoes, seeded and diced

1 tablespoon chopped cilantro

1 clove garlic, minced

In a large bowl place the scooped avocado pulp and the lime juice and toss the avocado pieces to coat them well. Drain the bowl, reserving the lime juice, after all of the avocado pieces have been coated. Using a potato masher, add the salt, ground cumin and cayenne pepper and mash the avocados. Fold in the onions, jalapeno pepper, Roma tomatoes, chopped cilantro and the minced garlic to gently blend the ingredients together. Add 1 tablespoon of the reserved lime juice. Let the guacamole sit at room temperature for 1 hour and then serve.

A couple of things I noticed about this recipe. One, you get great flavors of everything and can get the freshness of the avocado, the lime, the cilantro and the onions and tomatoes with every bite. Two, using a potato masher does make a big difference as it allows you to get chunky guacamole so you get pieces of avocado with each bite instead of the results you get from a food processor or blender where you just get green liquid. I had always used a potato masher in the past when I made it anyway, so this made good sense to me. Coating he avocados with the lime juice before you mash them makes a difference in the flavor and seems to help with preventing the guacamole from turning brown quickly, just as adding the lime juice back in at the end does as well. Also, I had always refrigerated my guacamole right after I made it, but Alton Brown suggests that the cold refrigerator mutes the flavors of the guacamole, while when left at room temperature all you will need to do is give it a gentle mix and maybe add some salt and lime juice to adjust the seasoning. It is important to remember that even though you added lime juice, oxidation is still going to occur if you leave the guacamole uncovered while its resting. Make sure you cover it with plastic wrap, pressing it right down onto the top of the guacamole, and this will help it from turning brown. it’s a great and versatile dip that goes well with chips, crackers, tacos, quesadillas, hamburgers and countless other meals.

That’s all I have for today. Check back next time for another recipe. Until then, enjoy the rest of your day and enjoy your meal!

IMG_0695

 
2 Comments

Posted by on September 24, 2014 in Appetizers, Cooking, Picnic Fare, Produce, Snacks, Vegetarian


Tags: , , , , ,

Alton Brown’s Backyard Baby Back Ribs – Sort Of

For me, finding new and different ways to cook ribs mostly means finding a new sauce or glaze to use on the ribs themselves. Since I am limited to just the use of my oven, I don’t have the options of a gas grill, charcoal grill or smoker at my disposal to use different methods to bring out different flavors. When I saw this recipe for Alton Brown’s backyard baby back ribs, I knew I wanted to try it, but I didn’t have the backyard methods to use like he does in the recipe. I also didn’t have any baby back ribs on hand; I only had some St. Louis spareribs in the freezer. I really liked the sound of the rub and the marinade on the ribs however so I decided to adapt it for my purposes. I’ll show you the original recipe here and then tell you what I did to change things around after.

Alton Brown’s Backyard Baby Back Ribs

2 full racks/slabs (about 4 1/2 pounds) baby back pork ribs
Kosher salt
6 tablespoons Rub Number Nine, recipe follows
1/2 cup orange juice (not fresh squeezed)
1/2 cup margarita mix
1/3 cup honey
1/3 cup ketchup
1 tablespoon Worcestershire sauce
1 teaspoon espresso powder or instant coffee powder
1/8 teaspoon cayenne pepper

Rub Number Nine:
1 1/4 cups dark brown sugar
3/4 cup chili powder
1/4 cup garlic powder
2 tablespoons ground thyme
1 tablespoon cayenne pepper
1 tablespoon allspice

Place each rib rack on a sheet of extra-wide, heavy-duty aluminum foil. (The foil should be 4 inches longer than the ribs on either end.) Season the rib racks liberally with kosher salt and sprinkle each rack with 3 tablespoons of the rub. Turn the ribs, meat side down, and tightly seal each foil pouch. Place on a half sheet pan and refrigerate the ribs overnight.

The next day, heat the oven to 250 degrees.

Combine the orange juice and margarita mix in a liquid measuring cup. Open 1 end of each pouch and evenly divide the liquid between the 2 pouches. Reseal the pouches and place the sheet pan in the oven for 2 hours. Remove the ribs from the oven, carefully open 1 end of each pouch and pour the braising liquid into a heatproof measuring cup. Reseal the pouches and place them and the measuring cup of liquid into the refrigerator for up to 8 hours.

The fat in the braising liquid will have solidified on the top and can be removed at this time. Transfer the liquid to a small saucepan and add the honey, ketchup, Worcestershire sauce, espresso powder and cayenne pepper. Whisk the ingredients until they are well combined. Set the saucepan over medium-high heat and reduce the mixture to a glaze, about 10 minutes.

Set a gas grill to medium-high and allow it to heat for 10 minutes. Cut each slab of ribs in half and place them on the grill, flesh side down, close the lid and decrease the heat to medium. Leave everything alone for 3 minutes. Flip and cook the ribs for another 3 minutes. Flip and cook the ribs for 3 minutes on each side 1 more time or until each rib has a nice char. Remove the ribs from the grill to a cutting board. and cut the slabs into 2 rib portions, using kitchen shears. Add the ribs and half the glaze to a large serving bowl and toss the ribs to thoroughly coat them. Serve the remaining glaze on the side.

For the rub, place all of the ingredients in an airtight container and shake to combine. Store for up to 3 months.

Really the only change I made in the recipe comes in the final step. I heated the glaze in a small saucepan while I baked the ribs in a 375 degree oven for 25 minutes. I then glazed the ribs, turned the heat up to 400 and baked them for another 15 minutes before glazing them a final time and putting them under the broil for 2 or 3 minutes to get the char on them. Keep in mind I was using the St. Louis ribs, which are thicker and larger than baby back ribs, so they do take longer to cook through properly. It may not turn out the same as it would with a gas grill, but the ribs were still cooked well and tasted great. I really love the glaze and although I was skeptical with the use of the margarita mix in the whole thing, it did work quite nicely along with the orange juice, honey and the espresso powder. I would certainly give these ribs a try again. I apologize for the fuzzy picture; I didn’t realize it had not turned out well and didn’t take another one, but trust me, they are good!

That’s all I have for today. Check back next time for another recipe. Until then, enjoy the rest of your day and enjoy your meal!

IMG_0663


4 Comments

Posted by on August 28, 2014 in Cooking, Dinner, Grilling, Pork, Sauce, Spices


Tags: , , , , ,

It’s National Pretzel Day! Make These Alton Brown Soft Pretzels!

Since there seems to be a day for just about everything you can make or cook these days, I shouldn’t be surprised that it is National Pretzel Day today. There is nothing like a soft pretzel when you want a tasty snack. One of my favorite memories of all-time is getting a hot pretzel on the streets of New York City or just outside of Shea Stadium when we would go to see a ballgame. Guys would heat them right in a shopping cart and while it may not have been the most sanitary thing in the world, the taste and the smell were fantastic. I have made soft pretzels before, but when I saw this recipe from Alton Brown it sounded easier than what I had done in the past and they looked great, so I had to give them a try today.

Homemade Soft Pretzels

1 1/2 cups warm (110 to 115 degrees F) water
1 tablespoon sugar
2 teaspoons kosher salt
1 package active dry yeast
22 ounces all-purpose flour, approximately 4 1/2 cups
2 ounces unsalted butter, melted
Vegetable oil, for pan
10 cups water
2/3 cup baking soda
1 large egg yolk beaten with 1 tablespoon water
Salt

Combine the water, sugar and kosher salt in the bowl of a stand mixer and sprinkle the yeast on top. Allow the yeast to sit for 5 minutes or until the mixture begins to foam. Add the flour and butter and, using the dough hook attachment of your mixer, mix on low-speed until the dough is well combined. Change the mixer to medium speed and knead until the dough is smooth and pulls away from the side of the bowl, approximately 4 to 5 minutes. Remove the dough from the bowl, clean the bowl and then oil it well with vegetable oil. Return the dough to the bowl, cover it with plastic wrap and sit in a warm place for approximately 50 to 55 minutes or until the dough has doubled in size.

Preheat the oven to 450 degrees. Line 2 half-sheet pans with parchment paper and lightly brush the pans with the vegetable oil. Set the pans aside.

Bring the 10 cups of water and the baking soda to a rolling boil in an 8-quart saucepan or roasting pan.

In the meantime, turn the dough out onto a slightly oiled work surface and divide the dough into 8 equal pieces. Roll out each piece of dough into a 24-inch rope. Make a U-shape with the rope, holding the ends of the rope, cross them over each other and press onto the bottom of the U in order to form the shape of a pretzel. Place the pretzels onto the parchment-lined half sheet pan.

Place the pretzels into the boiling water, 1 by 1, for 30 seconds. Remove them from the water using a large flat spatula. Return the pretzels to the half sheet pan, brush the top of each pretzel with the beaten egg yolk and water mixture and sprinkle each pretzel with the salt. Bake the pretzels until they are dark golden brown in color, approximately 12 to 14 minutes. Transfer the pretzels to a cooling rack for at least 5 minutes before serving.

Wow, those were really easy to make and they taste fantastic! You can throw these together in under two hours and have a great snack anytime you want them for a party, watching the game or just because you feel like having them. Michelle, Sean and I loved them and we still have a few left over to enjoy tomorrow, if they last that long. I will definitely be using this recipe from now on when I make pretzels.

That’s all I have for today. Check back next time for another recipe. Until then, enjoy the rest of your day and enjoy your meal!

IMG_0525 IMG_0524

 
2 Comments

Posted by on April 26, 2014 in Cooking, Snacks


Tags: , , , , ,

Sunday Breakfast with Alton & Bobby – Southern Biscuits and Sausage Gravy

I’ve had a craving for biscuits and gravy lately and yesterday stopped over at Adam’s Farms and got some of their homemade bulk breakfast sausage so I could make some this morning for our Sunday breakfast. Sunday breakfast is usually the only day during the week where Sean, Michelle and I get to eat breakfast together, so we try to make it something different and special each week. I was looking for something quick and easy to use for the sausage gravy and for the biscuits, but I wanted homemade biscuits, not the stuff you get out of the refrigerated can. I turned to Food Network and found a good biscuit recipe from Alton Brown for southern biscuits to go alongside of the sausage gravy recipe I got from Bobby Flay. Both are really easy to make so you can get a different taste for breakfast in no time at all.

Alton Brown’s Southern Biscuits

2 cups flour
4 teaspoons baking powder
1/4 teaspoon baking soda
3/4 teaspoon salt
2 tablespoons butter
2 tablespoons shortening
1 cup buttermilk, chilled

Preheat the oven to 450 degrees.

In a large mixing bowl, combine the flour, baking powder, baking soda and salt. Using your fingertips, rub the butter and shortening into the dry ingredients until the mixture looks like crumbs.Try to do this quickly so that the fat does not completely melt. Make a well in the center of the mixture and pour in the chilled buttermilk. Stir just until the dough comes together. The dough will be very sticky.

Turn the dough onto a floured surface, dust the top of the dough with flour and gently fold the dough over on itself 5 or 6 times. Press into a 1-inch thick round. Cut out the biscuits with a 2-inch cutter, being sure to push straight down through the dough. Place the biscuits on baking sheet so that they just touch. Reform the scrap dough, working it as little as possible and continue cutting. 

Bake until the biscuits are tall and light gold on top, about 15 to 20 minutes.

Bobby Flay’s Sausage Gravy and Biscuits

1 1/2 pounds bulk breakfast sausage or mixture of hot and mild bulk sausage
4 tablespoons flour
1/2 gallon milk
Salt
Pepper
Biscuits, store-bought or homemade (see Alton Brown’s Southern Biscuit recipe above)

In a large pot, add the sausage and cook until it is browned and cooked through. Drain the grease and add the flour to the sausage. Cook the sausage in the flour over medium-high heat until the sausage is well-coated with the flour. Add the milk and stir until the gravy has the  desired thickness and add salt and pepper, to taste. Serve with the biscuits.


I did change up the sausage gravy recipe a little and did not use the 1/2 gallon of milk. I only use about 3/4 of a cup along with a 1/4 cup of heavy cream because we like a gravy that is much thicker for the sausage, and it turned out perfect. The real star here though is the biscuits. These are really easy to make, smell great and taste awesome. You could use these for all kinds of breakfast sandwiches that you like if you didn’t want the sausage gravy, like bacon, eggs, ham or anything else. They are also a great dinner biscuit and I plan to use the rest to go along with dinner tonight. You could even just have one warm with some butter to go with your tea or coffee in the morning and you would be all set.

That’s all I have for today. Check back next time for another recipe. Until then, enjoy the rest of your day and enjoy your meal!

IMG_0506 IMG_0505

 
4 Comments

Posted by on April 13, 2014 in Biscuits, Breads, Breakfast, Cooking, Gravy, Pork


Tags: , , , , , , , , , , ,

When it’s This Cold, Part 2 – This Time It’s Soup – Alton Brown’s Lentil Soup

It is still freezing cold here in New York and today it is snowing again. It seemed even colder yesterday and the day before that. It would be nice if we got a little bit of a break in the weather and I cannot wait for winter to be over already. For now, we’ll just have to deal with it and that means more warm and hearty meals. Yesterday it was the bean stew recipe, today it is a recipe for lentil soup. Again, I was going for soup recipes that were quick and easy and didn’t need all day to cook or prepare. I found this one from Alton Brown for a simple lentil soup and I wanted to give it a try.

Alton Brown’s Lentil Soup

2 tablespoons olive oil

1 cup finely chopped onion

1/2 cup finely chopped carrot

1/2 cup finely chopped celery

2 teaspoons kosher salt

1 pound lentils, picked and rinsed

1 cup peeled and chopped tomatoes

2 quarts chicken or vegetable broth

1/2 teaspoon ground coriander

1/2 teaspoon ground cumin

1/2 teaspoon ground grains of paradise

Place the olive oil into a large Dutch oven and set it over medium heat. Once the pot is hot, add the onion, carrot, celery and kosher salt and sweat the vegetables until the onions are translucent, about 6 to 7 minutes. Add the lentils, chopped tomatoes, chicken or vegetable broth, coriander, cumin and grains of paradise and stir the mixture until it is well combined. Increase the heat to high and bring the mixture just to a boil. Reduce the heat to low, cover the  pot and cook the soup at a low simmer until the lentils are tender, about 35 to 40 minutes. Using a stick blender, puree the soup to your preferred consistency and serve.

Just a few points about this recipe. First, you are probably wondering what the heck grains of paradise is. I love Alton Brown, but he can make use of some unusual and really hard to find ingredients sometimes. Grains of paradise is a spice from West Africa that is very much like a mix of pepper, cardamom and coriander. For the amount needed for this recipe, I couldn’t see myself going out and buying it since it can be quite expensive and the odds are pretty good I would not be able to find it locally anyway. Instead, I looked around on the Internet and saw that as a substitute many people use freshly ground black pepper or cardamom. I decided to go with the black pepper myself and just used that. Also, this time of year the tomatoes in this area are not very good, so I simply substituted a cup of canned diced tomatoes instead and I think they worked out just fine anyway. You also want to make sure that you pick over your lentils before you use them. Most of the time there is no issue at all, but rinsing and picking over them just to check for pebbles and such is always a good idea when you are using dried beans like this. Nothing spoils a meal faster than getting a rock in your soup. As for the soup itself, I love lentil soup and this one had a nice flavor from the coriander and the cumin. It was very filling and hit the spot and took no time at all to make. I made some cream biscuits to go along with the meal and we were all good to go with leftovers for another day.

That’s all I have for today. Check back next time for another recipe. until then, enjoy the rest of your day, keep staying warm, and enjoy your meal!

001


Tags: , , , , ,

A Classic Side Dish From a Master – Alton Brown’s Best Ever Green Bean Casserole

You wouldn’t think there would be too much that you can actually do to change up this holiday classic, so when I noticed Alton Brown’s recipe for green bean casserole I had to check out what makes it so different from the classic you see on holiday tables each year. The biggest difference really is that everything is made from scratch. No canned fried onions, no cream of mushroom soup, no canned french green beans. I have nothing against the traditional way many people make this dish, but for me personally if you can use all fresh ingredients without preservatives and such that go into canned products, you are much better off and the taste will be a lot better. I made this dish for our Christmas meal and it was well worth the extra effort to put into it.

Alton Brown’s Best Ever Green Bean Casserole

For the topping:

2 medium onions, thinly sliced

1/4 cup all-purpose flour

2 tablespoons panko bread crumbs

1 teaspoon kosher salt

Nonstick cooking spray

For the beans and sauce:

2 tablespoons plus 1 teaspoon kosher salt, divided

1 pound fresh green beans, rinsed, trimmed and halved

2 tablespoons butter

12 ounces mushrooms, trimmed and cut into 1/2-inch pieces

1/2 teaspoon freshly ground black pepper

2 cloves garlic, minced

1/4 teaspoon freshly ground nutmeg

2 tablespoons all-purpose flour

1 cup chicken broth

1 cup half-and-half

Preheat the oven to 475 degrees. Combine the onions, flour, panko bread crumbs, and salt in a large mixing bowl and toss to combine. Coat a sheet pan with nonstick cooking spray and evenly spread the onions on the pan. Place the pan on the middle rack of the oven and bake until they are golden brown, about 30 minutes. Toss the onions 2 or 3 times during the cooking process to ensure they brown evenly. Once they are done, remove the onions from the oven and set them aside so that they are ready to use. Turn the oven down to 400 degrees.

While the onions are cooking, prepare the green beans. Bring a gallon of water and 2 tablespoons of kosher salt to a boil in an 8-quart saucepan. Add the green beans and blanch the beans for 5 minutes. Drain the beans in a colander and immediately plunge the beans into a large bowl of ice water to stop the cooking. Drain the beans and set them aside.

Melt the butter in a large cast-iron skillet set over medium-high heat. Add the mushrooms, 1 teaspoon of kosher salt and pepper and cook, stirring occasionally, until the mushrooms begin to release some of their liquid, about 4 to 5 minutes. Add the garlic and nutmeg and continue to cook for another 1 to 2 minutes. Sprinkle the flour over the mixture and stir to combine. Cook the mixture for 1 minute. Add the chicken broth and simmer for 1 minute. Decrease the heat to medium-low and add the half-and-half. Cook until the mixture thickens, stirring occasionally, about 6 to 8 minutes.

Remove the mixture from the heat and stir in 1/4 of the onions and all of the green beans. Top with the remaining onions. Place the skillet in the oven and bake until the casserole is bubbly, about 15 minutes. Remove the casserole from the oven and serve.

I have tried different recipes for this casserole before, but I think this one had the freshest taste of any I have made. I have never been a big fan of the canned condensed soups, so I was glad for the fresh mushrooms and half-and-half. I think this recipe had much better flavor than any others i have tried and it was definitely worth a little extra effort. Making your onions was quick and easy and they tasted great. The onions would be ideal just for burgers, let alone this casserole. I will definitely make this again, and not just for holiday meals.

That’s all I have for today. Check back next time for some more recipes. Until then, enjoy the rest of your day and enjoy your meal!

011

 
2 Comments

Posted by on January 2, 2014 in Cooking, Holidays, Side Dishes, Vegetables, Vegetarian


Tags: , , , , ,

Christmas Cookie Ideas, Part 3: Alton Brown’s Gingersnap Cookies

Okay, so now that we have covered Sean’s cookie and Michelle’s cookie, it is time for the cookie that I made. There are a bunch of cookies I like that we eat fairly often, like chocolate chips, oatmeal raisin cookies and even Heath bar brickle cookies, but there is something about ginger snaps that I really enjoy. I love the deep ginger flavor a good one has, almost tasting spicy with a little bite to it. I can remember eating them out of the box when I was a little kid and just the smell of them alone is enough to get me thinking about them. I have made ginger snaps before, but I came across this recipe from Alton Brown a while back and had been holding back on it so that we  could use these for part of our Christmas cookies. The best thing is that they are really easy to make. One thing to note about this recipe is that Alton uses weight measurements for a few of the ingredients instead cup measurements. I don’t have a kitchen scale, but if you do you can make good use of one here. I did some research online to get some conversion rates and they seemed to work out fine, so I have included the conversions here.

Alton Brown’s Ginger Snaps

9 1/2 ounces (2 1/4 cups) all-purpose flour

1 1/2 teaspoons baking soda

1 tablespoon ground ginger

1/2 teaspoon ground cardamom

1/2 teaspoon ground clove

1/2 teaspoon kosher salt

7 ounces (1 cup) dark brown sugar

5 ounces butter, room temperature

3 ounces (1/4 cup) molasses

1 egg, room temperature

2 teaspoons finely grated fresh ginger

4 ounces (2/3 cup) finely chopped candied ginger

Preheat the oven to 350 degrees. In a medium bowl, whisk together the flour, baking soda, ground ginger, cardamom, clove and kosher salt.

Place the dark brown sugar and the butter in the bowl of a stand mixer fitted with the paddle attachment and beat on low-speed until the mixture is light and fluffy, about 1 to 2 minutes. Add the molasses, egg and fresh ginger and beat on medium speed for 1 minute. Add the crystallized ginger and, using a rubber spatula, stir the mixture to combine. Add the dry ingredients to the wet ingredients and stir the mixture until it is well combined and the dough has formed.

With a 2-teaspoon sized scoop, drop the cookie dough onto a parchment paper-lined cookie sheet or half sheet pan approximately 2 inches apart. Bake the cookies on the middle rack of the oven for 12 minutes for slightly chewy cookies or for 15 minutes for more crisp cookies. Rotate the pan halfway through the baking process to ensure even cooking and browning.

Remove the pan from the oven and allow the cookies to stay on the sheet pan for 30 seconds before transferring them to a wire rack to cool completely. Repeat the process with the remaining cookie dough. Store the cookies in an airtight container for up to 10 days.

You can even freeze the cookie dough if you want to make it ahead of time and then use it closer to your desired date for the freshest possible cookies. Just scoop and freeze the cookie dough on a sheet pan and once it is frozen place the  cookie dough in a resealable bag to store in the freezer. You can then bake the cookies directly from the freezer as the recipe instructions suggest.

One more thing about the recipe. The conversions can be a little confusing if you don’t have a scale and you may question if you have too much or too little of a particular ingredient.This recipe showed me that it is probably a good idea to have a kitchen scale for recipes like this. In any case, when I first mixed the dough it seemed way too loose and dry, as if it had too much flour. After some consideration, I decided to add another egg to help balance things out since that was the only liquid in the recipe other than the molasses. I think I could have added more molasses too and still have gotten good results but the taste might have been a lot stronger than I wanted. The extra egg seemed to even things out and the results were perfect. A very ginger-tasting cookie with just the right texture was what I ended up with.

That’s all I have for today. Check back next time for some more recipes. I made a nice Cuban pork shoulder and black beans in the slow cooker last night that was a great recipe that I will be sharing. Until next time, enjoy the rest of your day and enjoy your meal!

001


2 Comments

Posted by on December 21, 2013 in Cookies, Cooking, Dessert, Holidays


Tags: , , , , , , ,

A Side Dish for the Kids (and Adults Too) – Alton Brown’s Baked Macaroni and Cheese

Let me preface this post by saying I do not like macaroni and cheese. I don’t eat pasta, I don’t eat cheese, so this dish really does nothing for me personally. That being said, it’s always a great idea to have something on the table that you know little ones are going to eat up, and macaroni and cheese always seems to be one of those dishes no matter what the occasion. Why not give the kids something special and offer this one up for them? Also, most adults I know love the stuff as well, so the big batch that this recipe makes might actually be just the answer you need for everyone and you may not even have that much left. According to Alton Brown, this is the most downloaded recipe of all-time at Food Network, so we had to give it a try to see what it was all about.

Baked Macaroni and Cheese

8 ounces elbow macaroni

1 tablespoon kosher salt

3 tablespoons butter

3 tablespoons all-purpose flour

1 tablespoon powdered mustard

1/2 teaspoon paprika

1/2 cup finely diced onion

1 bay leaf

3 cups whole milk

1 egg

12 ounces sharp Cheddar cheese, shredded, divided

1 teaspoon kosher salt

Pepper

1 cup panko breadcrumbs

3 tablespoons butter, melted

Heat the oven to 350 degrees. For the pasta, In a 4-quart pot, cover the macaroni and salt with 1 inch of cold water. Bring the water to a boil over medium heat. When the pasta comes to a boil, begin testing it for doneness. Cook the pasta until it is al dente. Drain the pasta in a colander and rinse it with cold water to stop the cooking.

For the cheese sauce, while the pasta is cooking, melt the butter over medium heat in a large saucepan. Once the butter stops bubbling, whisk in the flour and cook until the mixture is pale blonde, stirring occasionally, about 3 minutes. Add the mustard, paprika, onion and bay leaf and whisk to combine. Add the milk, whisking continually for 7 to 8 minutes or until the mixture is slightly thickened. Remove the saucepan from the heat and discard the bay leaf.

In a small bowl, lightly beat the egg. Add a few ounces of the milk mixture to the egg and whisk it to combine. Add another few ounces of the milk mixture to the egg and thoroughly combine. Then add the egg mixture back to the milk mixture and whisk vigorously. Stir in 3/4 of the cheese and season well with salt and pepper. Fold the macaroni into the mix and pour it into a 4-quart casserole dish. Top the macaroni with the remaining cheese. Toss the breadcrumbs with the melted to butter to coat the crumbs. Sprinkle the macaroni with the breadcrumb mixture in an even layer.

Bake the macaroni and cheese for 30 minutes. Remove it from the oven and allow it to rest for 5 minutes before serving.

As I said, I don’t like it, so I didn’t try it. That task was left to my macaroni and cheese experts, Michelle and Sean, who both adore the meal. They both liked the added texture you got from the breadcrumbs and both really enjoyed the cheese sauce. Their only critique is that they felt the onion was a little too overpowering in the dish. I think for the next go round on this one, we’ll be leaving the onion out of the equation all together. If you like the flavor yourself, and I am sure many people do, by all means leave it in. I think it’s a great idea to have this on your Thanksgiving menu so it gives something a little different to eat for everyone and maybe appeals to the finicky kids who may not eat anything else. It’s certainly worth a try.

That’s all I have for today. Check back next time for some more recipes. I do have one more stuffing recipe to share and then some ideas for leftovers, including a turkey pot pie and some turkey soup. I already made about 12 cups of stock from the turkeys I have used over the past week or so, so there are plenty of soup options. Until next time, enjoy the rest of your day and enjoy your meal!

003 001 002

 
Leave a comment

Posted by on November 26, 2013 in Cooking, Dinner, Holidays, One Pot Meals, Pasta, Vegetarian


Tags: , , , , , ,

An Alton Brown Special – Slow Cooker Pepper Pork Chops

Alton Brown’s recipes are always among my favorites. He seems to take the time to make sure everything is going to be cooked just right so that you get the best taste and flavor out of your dish. This was particularly true of the dinner I made last night that uses his recipe for slow cooker pepper pork chops. Granted, part of the dish is actually made on the stove top before it makes its way over to the slow cooker, but this helps you to get great browning for the pork chops and onions before they go into the slow cooker to get that falling-off-the-bone flavor and texture to them. There is some prep work that needs to go into this one beforehand, which includes brining the pork chops for 24 hours, but it is well worth the effort.

Slow Cooker Pepper Pork Chops

2 cups vegetable broth or water

1/2 cup kosher salt

1/2 cup light brown sugar

2 tablespoons black peppercorns, slightly crushed

1 pound ice

4 (1 to 1 1/2-inch thick) bone-in pork chops

2 teaspoons kosher salt

1/3 cup dried apple slices

2 tablespoons olive oil

1 large onion, julienned

1 1/2 cups chicken broth

1 tablespoon coarsely ground black pepper

1 teaspoon dried thyme

Combine the vegetable broth, 1/2 cup of kosher salt, brown sugar and the crushed peppercorns in a medium saucepan and set it over medium-high heat. Cook just until the salt and sugar have dissolved then remove the mixture from the heat and add the ice to the saucepan. Place the pork chops in a large zip-top plastic bag along with the mixture and seal the bag. Place the bag in a plastic container and refrigerate the pork chops overnight.

Remove the chops from the brine, rinse and pat them dry. Season both sides of the chops with kosher salt and set them aside.

Place the apple slices in the slow cooker. Heat 1 1/2 tablespoons of the olive oil in a large saute pan or skillet over medium-high heat. Saute the pork chops on both sides until they are golden brown, about 5 to 6 minutes per side. Once they are browned, place the pork chops into the slow cooker on top of the apple slices.

Add the remaining 1/2 tablespoon of olive oil to the saute pan followed by the onions ans saute the onions until the begin to brown, about 3 to 4 minutes. Add the chicken broth to the pan to deglaze. Add the black pepper and the dried thyme and stir the mixture to combine. Transfer the entire mixture to the slow cooker, set the slow cooker to high, cover and cook for 1 1/2 hours. Decrease the heat to low and continue cooking for another 4 1/2 hours or until the pork is tender and falling away from the bone. Serve.

The brine really helps to add some great flavor to the pork. If you aren’t a big fan of pepper, you might want to skip this one because the pepper flavor from the brine certainly permeates the pork well. I thought it had fantastic flavor and loved the taste of the pepper with the onions and apples. I served this with some simple white rice and I also made a mashed butternut squash, which was a great side dish for the pork and one that you can easily use as a side dish for your Thanksgiving plans. I’ll be posting the recipe for that dish tomorrow.

That’s all I have for today. Check back next time for more recipes. I am working on a lot of things, including a bunch of dishes that are perfect for Thanksgiving that I will be highlighting throughout the month of November. Michelle’s birthday is at the end of this coming week, so we’ll be doing some Thanksgiving dishes for her birthday since I am not cooking at home this holiday. I’ll also be trying my hand at her birthday cake this year, so we’ll see how that turns out as well. Keep checking to see what is next. Until next time, enjoy the rest of your day and enjoy your meal!

001

 
2 Comments

Posted by on November 2, 2013 in Cooking, Dinner, Pork, Slow Cooker Meals


Tags: , , , ,

 
National Day Calendar

Fun, unusual and forgotten designations on our calendar.

Authentic Autograph Source, LLC

Licensed autographs and collectibles dealer in the Pacific NW! We have a wide range of sports, celebrities, and more!

Jennifer Probst

a little bit naughty a little bit nice

Laissez Faire

Letting Life Lead

%d bloggers like this: