RSS

Monthly Archives: December 2013

A Great New Year’s Eve Snack – Pulled Pork Nachos

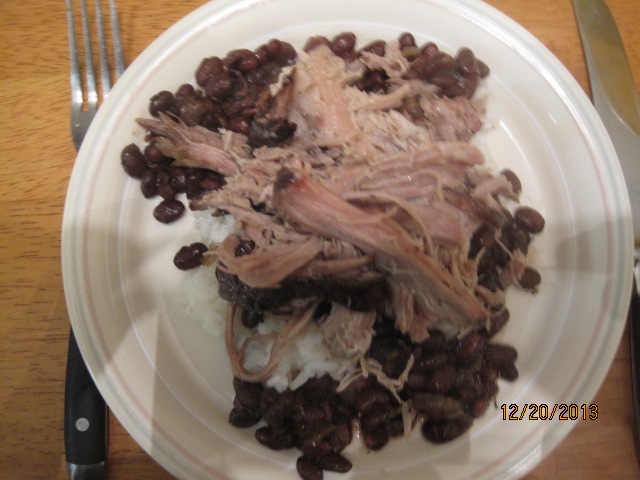
This snack is actually great for all kinds of occasions, but it seemed like a pretty good one to make for New Year’s Eve as well if you want something different for your party guests or for yourself. Ideally, you would want to make the pulled pork well ahead of time so you have it on hand and ready to go. When I made these, I had some leftover pulled pork that I used from the dinner we had and it fit perfectly with the nachos. If you want to try the recipe and find you do not have the time to make the pulled pork yourself, you can always try buying pulled pork that has been pre-made and heating it up for use. It may not taste as good, but it will get the job done. My recommendation is if you have the time, go for it. If you can’t do it for this New Year’s Eve, keep it in mind for football playoff games, Super Bowl parties or they next time you just want a really good snack and what to take your nachos dish to the next level. I got this recipe from Food Republic, but you can certainly do different variations on this, as I did.

Pulled Pork Nachos

For the Pork Rub:

1/4 cup smoked paprika


1/4 cup kosher or sea salt
1/4 cup brown sugar 
1/4 cup chili powder
1/4 cup ground cumin
2 teaspoons ground black pepper

For the Pork:

1 4-5 pound pork shoulder or butt

1 bottle of your favorite beer

For the Barbecue Sauce:

2 cups ketchup

1 cup whole-grain mustard

1/2 cup apple cider vinegar

1/4 cup bourbon

1/4 cup reserved pork rub

For the Nachos:

1 bag tortilla chips

1 can black beans, drained and rinsed

shredded Monterrey jack
red onion, sliced or diced
thinly sliced scallion
thinly sliced Fresno or other mildly hot peppers

For the barbecue sauce: Combine all your ingredients in a small pot, and whisk them for a bit to get everything incorporated together. Put the pot on the stove over medium heat, and wait for the sauce to start bubbling, stirring occasionally.Let it bubble for about a minute (while stirring a little bit), and then pull it off the heat and set aside, or refrigerate if making ahead.

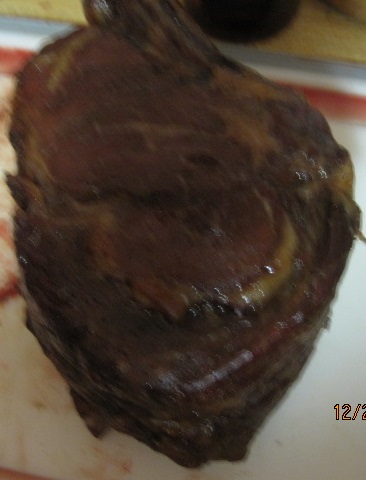
For the pulled pork: Preheat the oven to 300 degrees, and then combine all the dry ingredients for your pork rub, making sure you mix the ingredients well so that everything is evenly distributed. Rub down your pork. There’s a possibility you’ll have more rub than you need depending on how big your pork butt is, but that’s more good news than bad and you can always store it for another use.

Place the pork in a baking dish and pour in the beer. Cover with foil and place it in the oven. Every hour after the first couple of hours you can go in and baste it a little. Depending on your oven and the size of your pork it will take about 5 to seven hours to cook completely.

Pull the pork out of the oven and let it cool off a bit before you start pulling it apart with your fingers and removing any unsavory bits such as any bones or large pieces of fat. Mix the pulled pork with enough barbecue sauce (reheated if made ahead) to coat to your liking.
To assemble the nachos:  Preheat the oven to 350 degrees, then arrange a thick layer of tortilla chips on a foil-wrapped cookie sheet or in a pie plate, spreading the chips out for as close to 100% cookie sheet or pie plate coverage as possible.

Top your nachos in this order, or choose however you like them best:

  • Pork
  • Red onion
  • Beans
  • Jack cheese
  • Scallions
  •  Peppers

Once the cheese is fully melted and just starting to crisp the nachos should be done. Bake for about 20 to 30 minutes to achieve a nice, crispy level. Serve with salsa, sour cream and guacamole.

You can use all kinds of cheese when making these nachos; it is really up to you as far as preference. You can also make some changes and add things like tomato or black olives or even try making it with some barbecue baked beans for a really different flavors. They are nachos after all, so it is pretty hard to go wrong with them. The plate I made was on a pie plate so I had layered everything a couple of times before putting it in the oven. Needless to say, there weren’t any left after I put them out; they went pretty quickly.

That’s all I have for today. Check back again for more new recipes. I hope everyone has a safe New Year’s Eve and enjoy wherever you are going to be and whomever you are going to ring in the new year with. Thanks for making 2013 such a great year for my blog. it has blown up to be a lot bigger than I had ever thought it would get and I am so glad so many people enjoy sharing the recipes and fun with me. I am looking forward to an even better and more fun 2014. Enjoy the rest of your day and enjoy your meal! Happy New Year!

006


Advertisement
 
1 Comment

Posted by on December 31, 2013 in Cooking, Holidays, Leftovers, Pork, Snacks


Tags: , , , , ,

It’s Never Too Cold For Barbecued Baked Beans

I have actually made this recipe a few times over the last several weeks because we like it so much. Even though it may seem like a good summer side dish, I think good baked beans can go well with any type of beef or pork dish at all. I actually made these as part of my birthday dinner when we made pulled pork and I made them again just this past weekend for a family party we were going to. The recipe is from Cook’s Illustrated and you do not need a ton of ingredients. All you really need is a lot of time in the oven or you can make them ahead of time if you know you have any occasions and refrigerate and reheat them.

Barbecued Baked Beans

4 slices bacon, chopped fine

1 onion, minced

4 cloves garlic, minced

1 pound dried small white beans (2 cups), rinsed and picked over

8 cups water

1 cup black coffee

1/2 cup barbecue sauce, plus extra for seasoning

1/4 cup packed dark brown sugar

4 1/2 teaspoons brown mustard

1 tablespoon molasses

Tabasco sauce or hot sauce, for seasoning

Adjust an oven rack to the lower-middle position and heat the oven to 300 degrees. Cook the bacon in a large Dutch oven over medium heat until it is beginning to crisp, about 5 minutes. Stir in the onion and cook until the onion is softened, about 5 minutes.

Stir in the garlic and cook until the garlic is fragrant, about 15 seconds. Stir in the beans, the water, the coffee, the barbecue sauce, the dark brown sugar, the mustard, the molasses, 1/2 teaspoon of Tabasco or hot sauce, and 1 1/4 teaspoons of salt. Bring the entire mixture to a boil,scraping up any browned bits. Cover the pot and transfer it to the oven. Bake, stirring every hour, until the beans are tender, about 4 hours.

Remove the lid from the Dutch oven and continue to bake, uncovered, until the liquid has thickened to a syrupy consistency, about 1 to 1 1/2 hours. Season the beans with additional barbecue sauce, Tabasco or hot sauce, and salt and pepper to taste before serving.

This makes a lot of beans, with the serving recommendations of 6 to 8 people, but I think it can easily feed more than that, so if you know you are having a crowd than this is a great side dish you can plan on using. I think it goes great with pulled pork, ribs, hamburgers and hot dogs, steak or even just is a great side for sandwiches. I used Navy beans for the recipe, but any white bean here will do and make sure you use dried beans for this and not canned. The canned beans will just turn to mush because of the long cooking. You do not need to pre-soak the beans either for this recipe since they are cooking for such a long time and will get tender on their own.

That’s all I have for today. Check back next time for some more recipes to try. With the new year creeping up on us, I will have lots of new things to try out and share along the way. Thanks for following along and reading. Enjoy the rest of your day and enjoy your meal!

002

 
4 Comments

Posted by on December 30, 2013 in Cooking, Rice, Side Dishes


Tags: , , , ,

Help Me, I’m Melting (Potatoes)!

When we decided to make the prime rib dinner this past Christmas, the natural inclination would seem to go with mashed potatoes as a standard side dish. I wanted to try something a little different with the starch we were going to serve and try to keep things easy at the same time. I love mashed potatoes, but unless you make them ahead of time and re-heat them they can be a chore during holiday cooking when you have to stop and mash them perfectly. I thought a roasted potato would be just perfect and then I found in the same issue of Cook’s Country that I found the prime rib recipe this wonderfully easy recipe for melting potatoes, which are roasted potatoes that are popular in the United Kingdom and sometimes called fondant potatoes.

Melting Potatoes

3 pounds Yukon Gold potatoes, peeled

6 tablespoons butter, melted

1 tablespoon minced fresh thyme

1 teaspoon salt

1/2 teaspoon pepper

1 1/2 cups chicken broth

2 garlic cloves, lightly crushed and peeled

Adjust an oven rack to the upper-middle position and heat the oven to 500 degrees. Square off the ends of the potatoes and cut them crosswise into 1-inch thick disks. Toss the potatoes with the melted butter, the thyme salt and pepper. Arrange the potatoes in a single layer in a 13 by 9-inch baking pan.

Roast the potatoes until the bottoms are beginning to brown around the edges, about 15 minutes. Remove the pan from the oven. Using a flat metal spatula and tongs, loosen the potatoes from the bottom of the pan and flip them. Return the potatoes to the oven and continue to roast them until they are browned on the second side, about 15 minutes longer.

Remove the pan from the oven and flip the potatoes once more. Add the chicken broth and the garlic to the pan. Return the potatoes to the oven and roast until the potatoes are tender and the sauce has reduced slightly, about 15 minutes. Baste the potatoes with some of the sauce before serving.

This is a great side dish not just for the holidays but for anytime you want potatoes. I did alter things slightly. Since I had the roast out resting for an hour and was already roasting vegetables at 425 degrees, I put the potatoes in as well and let them cook for a few minutes longer to make up for the temperature difference. They may not have been the super crispy that is described in the recipe but they were still very crispy and the sauce had thickened nicely around the potatoes. They were a great brown color and the ideal compliment to the prime rib and roasted vegetables. I think they would just as well with any other type of roast or poultry and I plan to give them a try when it is just the three of us for a meal and see how it goes.

That’s all I have for today. Check back next time for another recipe from our holiday meal. There is still lots to come as we had appetizers, sides and desserts galore to choose from and I had made some things just before the holidays that I haven’t even gotten to yet. Until next time, enjoy the rest of your day and enjoy your meal!

013

 
Leave a comment

Posted by on December 29, 2013 in Cooking, Holidays, Potatoes, Vegetables


Tags: , , , , , ,

Getting Primed for the Holidays: One-Pan Prime Rib and Roasted Vegetables

When we decided to host Christmas dinner this year, I knew immediately that I wanted to make a classic prime rib dinner. To me, nothing says Christmas better than a prime rib roast, and I had just seen a recipe in  December issue of Cook’s Country that seemed perfect to try out and that would save some room in the oven as well. This is a recipe for prime rib and roasted vegetables all in one pan. The vegetables get roasted at a high temperature while the meat is resting so everything can be done at the same time perfectly.

One-Pan Prime Rib and Roasted Vegetables

1 (7-pound) first-cut beef standing rib roast (3 bones), fat trimmed to 1/4-inch

Kosher salt and pepper

Vegetable oil

2 pounds carrots, peeled, cut into 2-inch lengths, halved or quartered lengthwise to create 1/2-inch-diameter pieces

1 pound parsnips, peeled and sliced to 1/2-inch thick on bias

1 pound Brussels sprouts, trimmed and halved

1 red onion, halved and sliced through the root end into 1/2-inch wedges

2 teaspoons minced fresh thyme

Using a sharp knife, cut through the roast’s fat cap in a 1-inch crosshatch pattern, being careful not to cut into the meat. Rub 2 tablespoons of kosher salt over the entire roast and into the crosshatch. Transfer the roast to a large plate and refrigerate, uncovered, for at least 24 hours and up to 96 hours.

Adjust an oven rack to the lower-middle position and heat the oven to 250 degrees. Season the roast with pepper and arrange the roast, fat side up, on a V-rack set inside a large roasting pan. Roast the meat until it registers 115 degrees for rare, 120 degrees for medium-rare or 125 degrees for medium, about 3 to 3 1/2 hours. Transfer the V-rack with the roast to a carving board, tent the roast loosely with aluminum foil and allow it to rest for about 1 hour.

Meanwhile, increase the oven temperature to 425 degrees. Pour off all but 2 tablespoons of fat from the pan. If there is not enough fat in the pan, add some vegetable oil to equal 2 tablespoons. Toss the carrots, parsnips, Brussels sprouts, onion, thyme 1 teaspoon of kosher salt and 1/2 teaspoon of pepper with the fat in the pan. Roast the vegetables, stirring halfway through the roasting process, until they are tender and browned, about 45 to 50 minutes.

Remove the pan from the oven and heat the broiler. Carefully nestle the V-rack with the roast among the vegetables in the pan. Broil the roast until the fat cap is evenly browned, rotating the pan if necessary, about 5 minutes. Transfer the roast to the carving board, carve the meat from the bones and cut the meat into 3/4-inch-thick slices. Season the vegetables with salt and pepper to taste and serve the roast with the vegetables.

This prime rib tasted amazing. It was buttery soft to cut and tasted amazing, as prime should. The vegetables were perfectly roasted as well to get great flavor from them. Don’t forget to save those bones once you cut them away as well. you can go ahead and make some incredible beef stock with those for soups later on.

I also made a quick chimichurri sauce to go with the beef. This recipe was with the prime rib recipe in Cook’s Country and really gave a nice bold taste to the dish as a whole. It is very easy to put together and would be great to go with any type of steak,

Red Chimichurri Sauce

1 onion, chopped fine

1/2 cup minced fresh parsley

1/2 cup red wine vinegar

1/2 cup extra-virgin olive oil

3 garlic cloves, minced

1 tablespoon paprika

1/2 teaspoon kosher salt

1/4 teaspoon red pepper flakes

Whisk all the ingredients together in a bowl. Cover with plastic wrap and let stand at room temperature at least 30 minutes. Whisk again before serving.

You can make the sauce up to 3 days in advance and just let it come to room temperature while the meat rests. It is also a great addition to your morning scrambled eggs. One more thing about the roast: don’t skip out on the salting a few days before or at least one day before. It really makes a difference in drawing out the moisture of the beef so that it is nice and dry and browns really nicely at the low cooking temperature and the final 5 minute browning under the broiler really finishes it off.

That’s all I have for today. Check back next time for another recipe as I still have lots to share from my holiday cooking. Until then, enjoy the rest of your day and enjoy your meal!

016 014

 
4 Comments

Posted by on December 27, 2013 in Beef, Cooking, Dinner, Holidays, Sauce, Vegetables


Tags: , , , , , , , ,

While Shepherd’s Watch By Night, They Eat Shepherd’s Pie

I hope everyone had a wonderful Christmas yesterday. We had a great day filled with lots of love and laughs and plenty of good food, which I will be getting to over the next few days or so. It was a packed meal with lots of great recipes that I have to share. in the meantime, I do have a recipe to share that I made just before the holidays. I had some lamb that I had used to make a meal early in the week and decided to grind it up to make some shepherd’s pie, one of our favorite meals. I actually made this one right in my trusty cast-iron skillet to make things even easier. This recipe is from Cook’s Country and was very easy to make.

Shepherd’s Pie

Filling:

2 tablespoons butter

1 large onion, chopped fine

2 medium carrots, peeled and chopped fine

2 pounds ground beef or lamb

Salt and pepper

5 tablespoons all-purpose flour

1 tablespoon tomato paste

1/4 cup heavy cream

1 3/4 cups chicken broth

3/4 cup beer

2 tablespoons soy sauce

2 teaspoons minced fresh thyme leaves

1 cup frozen peas

Topping:

2 1/2 pounds russet potatoes, peeled and cut into 2-inch pieces

Table salt

2 tablespoons butter, melted

1/3 cup heavy cream, warmed

Ground black pepper

1 egg, beaten

For the filling, heat the butter in a large skillet over medium-high heat until it is foaming. Add the onion and the carrots and cook until they are soft, about 8 minutes. Add the meat, 1/2 teaspoon of salt and 1/2 teaspoon of pepper and cook, breaking up the meat into small pieces with a wooden spoon, until browned, about 12 minutes. Add the flour and the tomato paste and cook until the tomato paste begins to darken, about 1 minute.

Add the heavy cream and cook until it spatters, about 1 minute. Add the chicken broth, beer, soy sauce and thyme leaves and simmer over medium heat, stirring frequently, until the mixture is thick but still saucy, about 15 to 20 minutes. Remove the pan from the heat, stir in the frozen peas, adjust the seasonings to taste and transfer the mixture to a broiler safe 2-quart casserole dish.

For the topping, adjust an oven rack to the upper-middle position and heat the oven to 375 degrees. Bring the potatoes, 1/2 teaspoon of salt and water to cover the potatoes to a boil in a large saucepan over high heat. Reduce the heat to medium-low and simmer until the potatoes are tender, about 15 to 20 minutes. Drain the potatoes and return them to the saucepan and mash the potatoes with the butter and heavy ream until they are smooth. Season with salt and pepper to taste.

Spread the potatoes over the filling, using a spatula to smooth out the top. Brush the topping with the beaten egg and drag a fork across the top to make ridges. Bake until the filling is bubbling, about 15 minutes. Turn on the broiler and cook until the top is golden brown, about 3 to 5 minutes. Remove the pie from the oven and cool for 10 minutes before serving.

Just a couple of quick things about this recipe. If you prefer to use ground beef instead of lamb, it is easy to substitute. For the beer in this recipe, I used a basic lager (Samuel Adams in fact) but I think any mild beer would work well here or even a nonalcoholic beer if you prefer. The flour and cream mixed with the beer and soy sauce and tomato paste make for a nice, thick filling with great flavor. The topping is really just a basic mashed potatoes recipe, so if you have any leftover mashed potatoes you could also use them instead. In the past, I have also made a layer of mashed turnip or rutabaga to really add another layer of flavor. This one is a favorite around our house and I make this a few times a year.

That’s all I have for today. Check back next time for another great recipe. I have quite a backlog of recipes to share now, so there are some great things ahead, including a roast lamb, roasted prime rib roast with vegetables and chimichurri sauce, melted potatoes, green bean casserole,French onion soup,, Swedish meatballs, homemade pizza rolls,baked beans,skillet pizza and more. I also got some new kitchen toys for Christmas to add to my arsenal and some new plans for the blog for the coming year, so keep checking back to see what is next. Until next time, enjoy the rest of your day and enjoy your meal!

004

 
1 Comment

Posted by on December 26, 2013 in Beef, Cooking, Dinner, Lamb, One Pot Meals


Tags: , , , ,

A Slow Cooked Meal Before the Holidays – Cuban Pork Shoulder with Beans and Rice

Okay, I needed room in my freezer to get things ready for all of our Christmas stuff late last week, so I knew it was time to make that pork shoulder that had been resting in the freezer. We had just had pulled pork on my birthday, so I set out to make something a little different with it this time and since I have been so busy with work and the holidays, it seemed like the perfect opportunity to make use of the slow cooker and just do everything in there. I came across this recipe at My Recipes for a Cuban pork shoulder with beans and rice that fit the bill perfectly, so I gave it a try.

Cuban Pork Shoulder with Beans and Rice

2 3/4 cups chicken broth

1 cup fresh orange juice (about 4 oranges)

1 medium orange, quartered

1/2 cup chopped cilantro stems

1 1/2 teaspoons freshly ground black pepper, divided

4 slices bacon, chopped

1 (2 1/2-pound) bone-in pork shoulder, trimmed

1 pound dried black beans

2 1/4 cups chopped onion, divided

10 garlic cloves, crushed and divided

1/4 cup chopped fresh oregano, divided

2 teaspoons paprika

2 teaspoons ground cumin

1 1/2 teaspoons crushed red pepper

1 bay leaf

1 1/2 cups chopped tomato

1 jalapeno pepper, seeded and thinly sliced

2 2/3 cup hot cooked white rice

1/4 chopped fresh cilantro

Combine the chicken stock, orange juice, cilantro stems and orange quarters in a blender. Process until the mixture is smooth. Strain through a fine mesh sieve over a bowl; discard any solids. Stir in 3/4 teaspoon of salt and 3/4 teaspoon black pepper.

Place the bacon in a large skillet over medium heat and cook until it is crisp, about 5 minutes. Remove the bacon with a slotted spoon and place it in the slow cooker. Sprinkle the pork shoulder with 1/2 teaspoon of salt and 1/2 teaspoon of black pepper. Return the skillet to medium-high heat and add the pork to the drippings in the skillet. Brown the pork on all sides, cooking for about 8 minutes. Add the pork shoulder to the slow cooker. Pour the uncooked black beans around the pork in the slow cooker.

Return the skillet to medium-high heat. Add 2 cups of the onions and 6 of the garlic cloves. Saute the mixture for 3 minutes. Add 3 tablespoons of the oregano, the paprika, the cumin, and the crushed red pepper to the pan and saute for about 1 minute. Add the orange mixture and the bay leaf to the pan. Bring the mixture to a boil and cook for 1 minute, stirring and scraping the pan to loosen any browned bits. Pout the onion mixture over the pork. Cover the slow cooker and cook on low setting for 8 hours or until the pork is very tender and the beans are done. Remove the pork from the slow cooker, shred the meat, and discard the bones. Discard the bay leaf. Stir in 1/4 teaspoon of salt to the beans in the slow cooker.

Combine the remaining 1/4 teaspoon of salt, remaining 1/4 teaspoon of black pepper, the remaining 1/4 cup of onion, the tomato and the jalapeno pepper in a bowl. Chop the remaining 4 garlic cloves and stir them into the tomato mixture. Spoon 1/3 cup of the hot rice onto each of 8 plates; top each serving with 1/2 cup of the bean mixture, about 3 ounces of the shredded pork and 3 1/2 tablespoons of the salsa. Garnish with the remaining oregano and the chopped cilantro.

I did make a couple of changes to the recipe. Since tomatoes are not so great around here this time of year, I omitted the salsa completely from the recipe. I think the dish was fine without anyway, but it would make a nice addition if you have some good tomatoes. Also, the original recipe recommends that you use the whole orange, skin and all, in the blender. Personally, I thought it would be too bitter and peeled the orange. You still get good orange flavor. I do have to say the beans and the mixture they were in is delicious, but they get a lot of heat from the red pepper flakes, so next time I might cut back on that, but if you like the heat, then it would be perfect for you. The pork was done perfectly and had great flavor and since it was in the slow cooker, it is basically a one dish meal (except for the rice) and clean up was really easy. I would make this one again since it is so easy to do.

That’s all I have for today. Check back next time for another recipe. I will try to get one on tomorrow early for Christmas Eve and then I have to prepare for Christmas day cooking. I’ll be sure to post recipes and pictures from that. Until then, enjoy the rest of your day and enjoy your meal!

002


Leave a comment

Posted by on December 23, 2013 in Cooking, Dinner, One Pot Meals, Pork, Slow Cooker Meals


Tags: , , , ,

Christmas Cookie Ideas, Part 3: Alton Brown’s Gingersnap Cookies

Okay, so now that we have covered Sean’s cookie and Michelle’s cookie, it is time for the cookie that I made. There are a bunch of cookies I like that we eat fairly often, like chocolate chips, oatmeal raisin cookies and even Heath bar brickle cookies, but there is something about ginger snaps that I really enjoy. I love the deep ginger flavor a good one has, almost tasting spicy with a little bite to it. I can remember eating them out of the box when I was a little kid and just the smell of them alone is enough to get me thinking about them. I have made ginger snaps before, but I came across this recipe from Alton Brown a while back and had been holding back on it so that we  could use these for part of our Christmas cookies. The best thing is that they are really easy to make. One thing to note about this recipe is that Alton uses weight measurements for a few of the ingredients instead cup measurements. I don’t have a kitchen scale, but if you do you can make good use of one here. I did some research online to get some conversion rates and they seemed to work out fine, so I have included the conversions here.

Alton Brown’s Ginger Snaps

9 1/2 ounces (2 1/4 cups) all-purpose flour

1 1/2 teaspoons baking soda

1 tablespoon ground ginger

1/2 teaspoon ground cardamom

1/2 teaspoon ground clove

1/2 teaspoon kosher salt

7 ounces (1 cup) dark brown sugar

5 ounces butter, room temperature

3 ounces (1/4 cup) molasses

1 egg, room temperature

2 teaspoons finely grated fresh ginger

4 ounces (2/3 cup) finely chopped candied ginger

Preheat the oven to 350 degrees. In a medium bowl, whisk together the flour, baking soda, ground ginger, cardamom, clove and kosher salt.

Place the dark brown sugar and the butter in the bowl of a stand mixer fitted with the paddle attachment and beat on low-speed until the mixture is light and fluffy, about 1 to 2 minutes. Add the molasses, egg and fresh ginger and beat on medium speed for 1 minute. Add the crystallized ginger and, using a rubber spatula, stir the mixture to combine. Add the dry ingredients to the wet ingredients and stir the mixture until it is well combined and the dough has formed.

With a 2-teaspoon sized scoop, drop the cookie dough onto a parchment paper-lined cookie sheet or half sheet pan approximately 2 inches apart. Bake the cookies on the middle rack of the oven for 12 minutes for slightly chewy cookies or for 15 minutes for more crisp cookies. Rotate the pan halfway through the baking process to ensure even cooking and browning.

Remove the pan from the oven and allow the cookies to stay on the sheet pan for 30 seconds before transferring them to a wire rack to cool completely. Repeat the process with the remaining cookie dough. Store the cookies in an airtight container for up to 10 days.

You can even freeze the cookie dough if you want to make it ahead of time and then use it closer to your desired date for the freshest possible cookies. Just scoop and freeze the cookie dough on a sheet pan and once it is frozen place the  cookie dough in a resealable bag to store in the freezer. You can then bake the cookies directly from the freezer as the recipe instructions suggest.

One more thing about the recipe. The conversions can be a little confusing if you don’t have a scale and you may question if you have too much or too little of a particular ingredient.This recipe showed me that it is probably a good idea to have a kitchen scale for recipes like this. In any case, when I first mixed the dough it seemed way too loose and dry, as if it had too much flour. After some consideration, I decided to add another egg to help balance things out since that was the only liquid in the recipe other than the molasses. I think I could have added more molasses too and still have gotten good results but the taste might have been a lot stronger than I wanted. The extra egg seemed to even things out and the results were perfect. A very ginger-tasting cookie with just the right texture was what I ended up with.

That’s all I have for today. Check back next time for some more recipes. I made a nice Cuban pork shoulder and black beans in the slow cooker last night that was a great recipe that I will be sharing. Until next time, enjoy the rest of your day and enjoy your meal!

001


2 Comments

Posted by on December 21, 2013 in Cookies, Cooking, Dessert, Holidays


Tags: , , , , , , ,

Christmas Cookie Idea, Part Two – The Easiest Peanut Butter Cookie Ever

Continuing along with the Christmas cookie theme when we had made cookies this past weekend, Michelle opted to go for a peanut butter cookie. She and Sean both love these cookies, and even though I am not a big fan, they are always a big favorite whenever they are made. Now there are lots of peanut butter cookie recipes out there and most of them are not very difficult to do anyway, but this one seems to be the easiest one I have ever come across. All you really need to do is put the ingredients together in a bowl, give it a mix, portion out the cookies, bake and you are done. This particular recipe makes use of Bisquick to help it do everything and make it even faster.

Easy Bisquick Peanut Butter Cookies

1 cup smooth peanut butter

1/4 cup butter, softened to room temperature

1/2 cup granulated sugar

1/2 cup packed light brown sugar

1/3 cup boiling water

2 cups Bisquick

Preheat the oven to 400 degrees. Line some cookie sheets with parchment paper and spray the paper with nonstick cooking spray. In a large bowl of a standing mixer fitted with a paddle attachment, combine the peanut butter, butter, granulated sugar, brown sugar, water and Bisquick. Mix all of the ingredients on medium-low speed until everything is well combined and dough begins to form, about 2 to 3 minutes.

Using a small cookie scoop or tablespoon, scoop rounded mounds of the cookie dough onto the parchment paper-lined cookie sheets. Using the back of a fork, lightly press into the cookie dough mounds to flatten slightly and make a pattern into the cookie dough. Place the cookie trays in the oven and bake the cookies for until they are a lightly golden brown, about 8 to 10 minutes, rotating the cookie sheets about halfway through the baking process. Allow the  cookies to cool on the cookie sheets for about 2 to 3 minutes. Transfer the cookies to a wire cooling rack and allow them to cool completely.

This recipe generally makes 2 to 3 dozen cookies in total, depending on how big of a cookie you like to have. Michelle and Sean gobbled these up and loved the rich peanut butter flavor. it turns out to be a rather dense cookie in my opinion, which I attribute to using Bisquick in the recipe, but if you like that kind of cookie than this one is certainly for you. The best part is that the recipe requires very few ingredients, most which people usually have on hand (which was perfect for snowstorm weather) so you can really make them any time. Michelle actually makes these often when she makes cookies.

That’s all I have for today. Check back next time when I will feature the cookie recipe that I made that day. It is another easy one and a take on the classic gingersnap cookie, always one of my personal favorites. I also have some other recipes that I have tried recently to share, including a baked ziti, a roasted boneless leg of lamb, some quick biscuits you can make any time in a snap, and more. I also have my Christmas menu planned so I will get to share that with you as well. Until next time, enjoy the rest of your day and enjoy your meal!

004

 
1 Comment

Posted by on December 19, 2013 in Cookies, Cooking, Dessert, Holidays


Tags: , , , , ,

A Christmas Cookie Idea, Part One: Lemon Crinkle Cookies

After taking a couple of days off while a stomach virus ran rampant through our household, I am back with a new post. This past weekend while we were snowed in on Saturday we each decided we were going to make a Christmas cookie of our own. All three of us scoured recipes to try to find one that we would like to make while using only the ingredients we had in the house already since we were being pelted with snow. The first one to come up with one was Sean, who found this recipe online for lemon crinkle cookies. It’s a very straightforward recipe that produced some very yummy results.

Lemon Crinkle Cookies

1/2 cup butter, softened

1 cup granulated sugar

1/2 teaspoon vanilla extract

1 egg

1 teaspoon lemon zest

1 tablespoon fresh lemon juice

1/4 teaspoon salt

1/4 teaspoon baking powder

1/8 teaspoon baking soda

1 1/2 cups all-purpose flour

1/2 cup confectioners’ sugar

Preheat the oven to 350 degrees. Grease light-colored baking sheets with nonstick cooking spray or cover them in sheets of parchment paper and set them aside.

In a large bowl, cream the butter and the granulated sugar together until the mixture is light and fluffy. Whip in the vanilla, the egg, the lemon zest and the lemon juice. Scrape the sides of the bowl and mix again until everything is well incorporated. Stir in the salt, baking powder, baking soda and flour slowly until it is all just combined. Scrape down the sides of the bowl and mix everything together again briefly. Pour the confectioners’ sugar onto a separate plate. Roll a heaping tablespoon of the cookie dough into a ball and then roll it in the confectioners’ sugar to coat. Place the cookie on a baking sheet and repeat the process with all of the remaining dough.

Place the cookie sheets in the oven and bake the cookies for 9 to 11 minutes or until the bottoms of the cookies begin to barely brown and the cookies look like they have a matte finish, not melted or shiny. Remove the cookies from the oven and allow them to cool for about  3 minutes on the trays before transferring them over to a wire cooling rack to cool completely.

This recipes makes about two to three dozen cookies, so you should get plenty from them. I really enjoyed the lemon flavor of these cookies. It is subtle and not overpowering like some lemon cookies can be and it combined nicely with the sweetness of the sugar. Best of all, it was really simple to make and doesn’t require a lot of ingredients. For most people, it may be things you already have on hand all the time so you could easily make these any time of year, not just for the holidays. We were all quite pleased with the results of this one and Sean was very happy that he made such a good cookie himself.

That’s all I have for today. Check back next time for another cookie recipe from our cookie day. Next up will be Michelle’s choice of cookie. Until then, enjoy the rest of your day, and enjoy your meal!

003

 
1 Comment

Posted by on December 17, 2013 in Cookies, Cooking, Dessert, Holidays


Tags: , , ,

A Cold Day Calls for a Good Soup – Classic Tomato Soup

We are well into the winter weather here in New York, especially over the last few weeks where it has been quite cold. Today we are getting slammed with a lot of snow, but last night was pretty darn chilly as well. The best way to combat the cold weather? Make some soup for dinner. That is what I decided to do last night and I wanted to try to keep things simple. I am a big fan of tomato soup and I found this very simple recipe from Saveur to make a tomato soup in under 45 minutes and it will have great flavor. You don’t even need a lot of ingredients for this one.

Classic Tomato Soup

2 slices bacon cut into thin matchsticks

1/2 tablespoon butter

1 small onion, thinly sliced

1 small carrot, halved and thinly sliced

1 tablespoon tomato paste

2 teaspoons all-purpose flour

2 cups chicken broth

1 1/2 cups canned diced tomatoes, well drained

2 sprigs thyme

1 bay leaf

1 garlic clove, lightly crushed

2 tablespoons heavy cream

Render the bacon over medium heat in a 3-quart saucepan until it is crisp, about 3 minutes. Remove the bacon to a paper towel-lined plate and set it aside, reserving the rendered fat in the saucepan.

Increase the heat to medium-high and add the butter. Saute the onion and carrot for 8 to 10 minutes or until they are very soft and beginning to caramelize, stirring occasionally. Add the tomato paste and continue cooking for about 2 minutes, stirring it frequently. Sprinkle the flour over the vegetable mixture, mix well and continue cooking for another minute. Gradually pour in the chicken broth, whisking constantly to prevent any lumps from forming. Add the diced tomatoes, thyme, bay leaf and garlic and bring the mixture to a boil. Reduce the heat and simmer the soup for 25 to 30 minutes, stirring occasionally.

Remove the soup from the heat. Add the heavy cream and puree the soup with an immersion blender until it is smooth. Season the soup to taste with salt and pepper and serve the soup garnished with the crisped bacon.

It is very simple to put together and gives you a nice, smooth, creamy texture. This tomato soup is better than any that you will pour out of a can and takes no effort at all. You can even make it completely vegetarian by eliminating the bacon and just adding an extra 1/2 tablespoon of butter instead. You can serve this just by itself or with a nice side salad or even some sandwiches. A lot of people love the grilled cheese and tomato soup combination. For me personally, I love a nice tuna salad sandwich or chicken salad sandwich to go along with it. You could even make some of your own croutons to sprinkle on the soup as well, or try some homemade bread.

That’s all I have for today. Check back next time for some more recipes. We’re making cookies today for the holidays, so I’ll have some cookie recipes to share this week. Until next time, enjoy the rest of your day, stay warm and dry and enjoy your meal!

002

 
Leave a comment

Posted by on December 14, 2013 in Cooking, Dinner, One Pot Meals, Soups & Stews


Tags: , , ,

 
National Day Calendar

Fun, unusual and forgotten designations on our calendar.

Authentic Autograph Source, LLC

Licensed autographs and collectibles dealer in the Pacific NW! We have a wide range of sports, celebrities, and more!

Jennifer Probst

a little bit naughty a little bit nice

Laissez Faire

Letting Life Lead

%d bloggers like this: