RSS

Category Archives: Pie

What’s a Weekend Without a Pie? Cook’s Country Tar Heel Pie

This recipe was actually pictured on the front cover of the last issue of Cook’s Country Magazine. I really like this magazine as it has great recipes that are really easy to follow, along with some other great tips throughout. It was a toss-up yesterday to try making this pie or the lemon icebox pie that is on the cover of last month’s magazine and this one won out. I’ll be making the lemon pie later on this week, so for today we can talk about the Tar Heel Pie, a North Carolina favorite for many years that combines a great fudgy flavor of a brownie into pie form.

Tar Heel Pie

1 (9-inch) single-crust pie dough

1 cup (6 ounces) semisweet chocolate chips

4 tablespoons butter

1/4 cup vegetable oil

2 tablespoons unsweetened cocoa powder

3/4 cup packed dark brown sugar

2 eggs

1 tablespoon vanilla extract

3/4 teaspoon salt

1/4 cup all-purpose flour

1 1/4 cups pecans, toasted and chopped coarse

Adjust an oven rack to the lower-middle position and heat the oven to 375 degrees. Roll the dough into a 12-inch circle on a lightly floured counter. Loosely roll the dough around the rolling pin and gently unroll it onto a 9-inch pie plate., letting the excess dough hang over the edge. Ease the dough into the plate by gently lifting the edge of the dough with one hand while pressing into the plate bottom with your other hand. Leave any dough that overhangs the plate in place. Trim the overhang to 1/2 an inch beyond the lip of the pie plate. Tuck the overhang under itself; the folded edge should be flush with the edge of the pie plate. Crimp the dough evenly around the edge of the plate using your fingers. Wrap the dough-lined pie plate loosely in plastic wrap and place it in the freezer until the dough is fully chilled and firm, about 15 minutes.

Line the  chilled pie plate with two 12-inch squares of parchment paper, letting the parchment lie over the edges of the dough, and fill the pie with pie weights.Bake the pie shell until it is lightly golden brown on the edges, about 18 to 25 minutes. Carefully remove the parchment paper and the pie weights, rotate the pie shell and continue to bake until the center of the pie shell begins to look opaque nd slightly drier, about 3 to 6 minutes. Allow the pie shell to coll completely.

Reduce the oven temperature to 325 degrees. Microwave 2/3 cup of the chocolate chips and the butter in a bowl, stirring often, until softened, about 60 to 90 seconds. Whisk in the oil and cocoa until smooth.

In a separate bowl, whisk the sugar, eggs, vanilla extract, and salt together until smooth. Whisk the chocolate mixture into the sugar mixture until it is incorporated. Stir in the flour and the remaining 1/3 cup of chocolate chips until just combined.

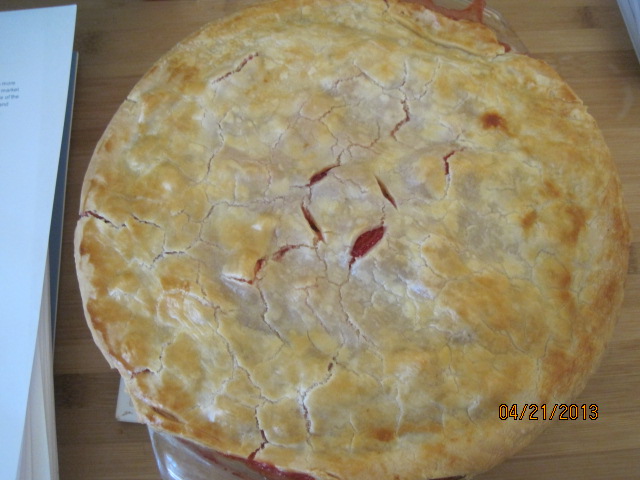
Spread the pecans in the bottom of the pie shell, then pour the batter over the top, using a spatula to level the batter. Bake the pie until a toothpick inserted into the center of comes out with a thin coating of batter attached, about 30 to 35 minutes. Let the pie cool on a wire rack until barely warm, about 1 1/2 hours. Serve. The pie can be re-heated, uncovered, in a 300 degree oven until warm throughout, about 10 to 15 minutes.

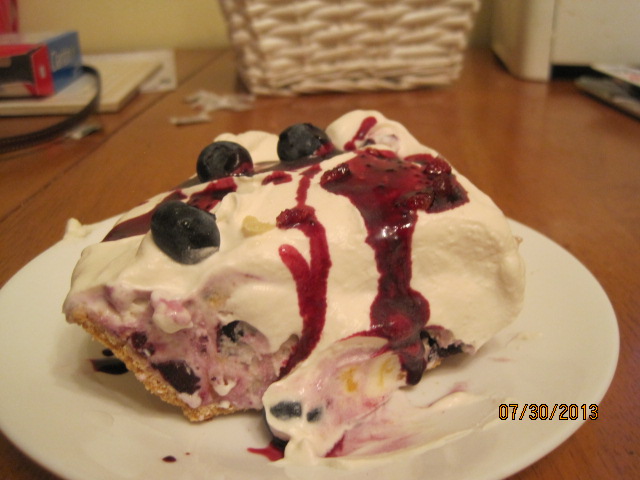
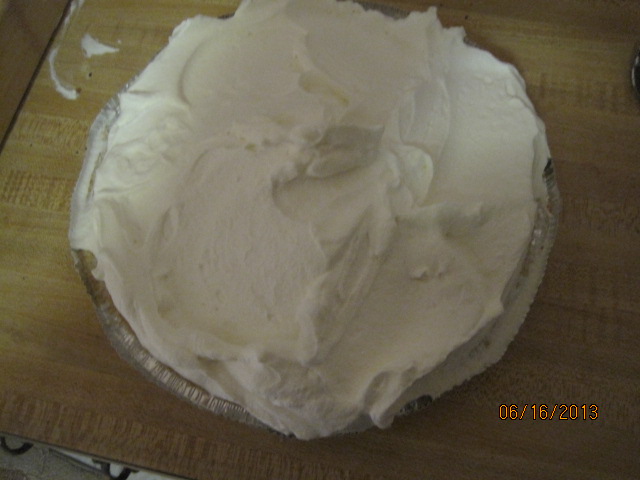
A couple of things about this recipe. I left the pecans out this time since we were bringing it over to someone’s house and I didn’t want to take a chance on any nut allergies and such. It came out fine without the pecans, but I think it would be even better with them in the pie. It was a very chocolate center, almost exactly like a brownie should be, with the added taste of a nice pie crust to go with it. We served it with some homemade whipped cream to top off each slice. As far as the pie weights, I personally do not have any in the house, but you can use many different things as a substitute. If you have any marbles around, these will work great as that is essentially what pie weights are anyway. I used some dried beans that I had on hand and they work just fine. Just remember that you can’t use the beans for cooking after that, but you can re-use them as pie weights in the future.

That’s all I have for today. Check back during the week for some more recipes. I do plan to try a few things out this week, including the lemon icebox pie and making my own ciabatta bread, so keep checking back to see those recipes. Until next time, enjoy the rest of your day and enjoy your meal!

IMG_1639

 
3 Comments

Posted by on August 11, 2013 in Cooking, Dessert, Pie


Tags: , , , ,

Feeling Peachy with Peach-Blueberry Ice Cream Pie

After taking the weekend off for some family fun, it’s back to the recipes today. Here today is long promised recipe for peach-blueberry ice cream pie. I got this recipe from a recent issue of Bon Apettit magazine and when I saw the picture of it, I knew it was going to be delicious. Of course, when I first saw the picture, I figured that this must be difficult to make, but much to my surprise this was a very easy dessert to put together and is perfect for the summertime for a barbecue or party.

Peach-Blueberry Ice Cream Pie

6 ounces gingersnap cookies

2 tablespoons butter, melted

1 tablespoon heavy cream

2 cups fresh blueberries, divided

1/3 cup sugar

1/4 cup fresh lemon juice

1 pint peach ice cream, softened in the refrigerator for 20 minutes

2 cups whipped cream (made from 1 cup of heavy cream)

1/4 cup chopped crystallized ginger

Finely grind the cookies in a food processor. You should have about 1 1/3 cups when you are done. Transfer the crumbs to a medium bowl. Add the butter and the heavy cream; stir to coat. Press the mixture firmly onto the bottom and up the sides of a 9-inch pie dish. Chill until it is firm, at least 30 minutes.

Toss 1 3/4 cups of blueberries, the sugar, and the lemon juice in a medium bowl. Allow the blueberries to macerate at room temperature for at least 1 hour.

Transfer the blueberry mixture to a large, heavy saucepan and cook over medium heat until the berries soften and the juices are released, about 10 to 15 minutes. Strain the berries through a fine-mesh sieve into a medium bowl. Cover and chill the juices and the berries separately until they are cold.

Mix the softened peach ice cream with the chilled cooked blueberries. Scrape the ice cream mixture into the crust and smooth the top. Freeze until it is firm, at least 6 hours. (You can make the pie 2 days ahead of time if you wish. Just cover it and keep it frozen)

Soften the pie in the refrigerator for 10 minutes before serving. Top the pie with the whipped cream; scatter the remaining 1/4 cup of blueberries over the top. Garnish the top with the crystallized ginger. Drizzle each slice with some of the reserved blueberry juices.

The taste of the blueberries mixed in with the peaches and ice cream are delightful. I also loved the flavor the ginger snaps give the crust and the nice complement of the crystallized ginger on the top of the pie. Drizzling the blueberry sauce over each piece is the crowning touch, and the extra sauce is also great over other ice cream or even or something like pancakes or waffles.

That’s all I have for today. Check back next time to see some more new recipes. I do have one I tried recently for a grilled hone glazed pork chops, along with a beer battered fish recipe and I think I am going to try one this week where I can make my own ciabatta bread. We’ll see how that one comes along. Keep checking back to see what comes up. If you ever have any questions, comments or a recipe you might like to see, feel free to leave a comment in the comments section here or catch up with me on Facebook or Twitter. Until next time, enjoy the rest of your day and enjoy your meal!

002 001

 
2 Comments

Posted by on August 5, 2013 in Cooking, Dessert, Pie


Tags: , , ,

Red and Blue: A Refreshing Drink and Blueberry Hand Pies

I had made a couple of quick and easy recipes a few days ago that lend themselves perfectly to the summer. Both use some great summer fruits and can be made in almost no time at all. The first was a simple drink of watermelon agua fresca, a very refreshing drink that you can make with this recipe that I got from Food Republic.

Watermelon Agua Fresca

16 cups cubed seedless red watermelon, about a 5-pound watermelon’s worth

2 cups water

2/3 cup sugar

1 bunch fresh mint

1/2 cup fresh lime juice

Club soda

Lime slices, for garnish

Blueberries, for garnish

Combine the watermelon, water, sugar and mint in a blender and puree until smooth (You may have to do this in batches to accommodate all the watermelon). Pour through a coarse strainer into a large container.

Stir in the lime juice. Refrigerate until it is well chilled, about 4 hours or overnight. To serve, fill a highball glass with ice, fill the glass 2/3 full with the watermelon mixture, and top with club soda and garnish with a lime slice. You can also add several blueberries to float on the top if you wish.

It is a very easy drink to make and you can even jazz it up a bit with some alcohol if you wanted to go that route. I thought it was great and refreshing just as it is with a strong watermelon flavor mixed with the lime.

I also got a recipe from bon appetit magazine for some blueberry hand pies. I have long had a thing for Hostess and Drake’s fruit pies, and until they are back on the market (which should be in a week or so), this is a great substitute that you can make on your own. They are perfect for any type of barbecue or picnic since you can just pick one up and dig in.

Blueberry Hand Pies

1 homemade or store-bought pie crust

All-purpose flour (for dusting)

2 cups blueberries (about 10 ounces)

1 teaspoon finely grated lemon zest

1 tablespoon fresh lemon juice

1/4 cup sugar

1/4 teaspoon kosher salt

1 large egg, whisked with 1 teaspoon water

1 tablespoon raw sugar

Preheat the oven to 375 degrees. Roll out the dough on a floured surface to a 15 x 12-inch rectangle. Cut the dough into 6 rectangles.

Toss the blueberries, lemon zest, lemon juice, sugar and salt in a medium bowl. Brush the edges of the dough rectangles with water; mound some blueberries into the center of each rectangle. Fold the dough over, and press the edges to seal. Place the pies on a parchment-lined baking sheet, brush them with the egg wash, and sprinkle the tops with the raw sugar. Cut small slits on the top for steam to escape.

Bake the hand pies, rotating the baking sheet halfway through cooking, until the juices are bubbling and the pastry is golden brown, about 35 to 40 minutes (some juices will run out onto the parchment paper). Transfer the pies to a wire rack and allow to cool for 5 minutes. Serve the pies warm or at room temperature.

I loved these pies. The are the perfect serving size and portion and make a great dessert that you could easily double or triple the recipe for a bigger crowd. I did use a store-bought pie crust and they turned out just fine, but I can see where a homemade crust would be easier to deal with and roll to the right size without making the dough too thin. In either case, I think it is a great summer dessert that doesn’t take long to make.

That’s all I have for today. Check back again for more recipes in the coming days, including one for magic bars that we recently made for a dessert. I also have several other recipes I will be trying in the next few days to post, including one for barbecued chicken, some pulled pork sliders, Cobb salad style chicken salad and more. Check back and see what comes up next. Until then, enjoy the rest of your day and enjoy your meal!

005002004


Leave a comment

Posted by on July 6, 2013 in Beverages, Cooking, Dessert, Pie


Tags: , , , , ,

Fine Food for Father’s Day Part 2 – Banana Cream Pie

One of my top 5 all-time favorite desserts is banana cream pie. We don’t have it too often, mainly because it’s not the healthiest of desserts but it tastes really good and since it was Father’s Day, Michelle decided that it was a nice treat for me to have for the day. I had looked at recipes for banana cream pie, namely because I was a little disappointed in the traditional flavor you get out of making the pie with your standard, boxed banana pudding and some with cream. I wanted something that had a little more of an intense banana flavor, and I came across this recipe in Cook’s Country and thought it would be really good to try.

Banana Cream Pie

5 ripe bananas
4 tablespoons butter
2 1/2 cups half-and-half
1/2 cup plus 2 tablespoons granulated sugar
6 large egg yolks
1/4 teaspoon salt
2 tablespoons cornstarch
1 1/2 teaspoons vanilla extract
1 store-bought or homemade pie crust
2 tablespoons orange juice
1 cup heavy cream
2 tablespoons confectioners’ sugar

Peel 2 of the bananas and slice them into 1/2-inch-thick pieces. Melt 1 tablespoon of butter in a medium saucepan over medium-high heat. Add the sliced bananas and cook until they begin to soften, about 2 minutes. Add the half-and-half, bring to a boil, and boil for 30 seconds. Remove from the heat, cover, and allow to sit for 40 minutes.

Whisk the granulated sugar, egg yolks, and salt together in a large bowl until smooth. Whisk in the cornstarch. Strain the cooled half-and-half mixture through a fine mesh strainer into the yolk mixture – do not press on the bananas – and whisk until incorporated; discard the cooked bananas.

Transfer the mixture to a clean medium saucepan. Cook over medium heat, whisking constantly, until it is thickened to the consistency of warm pudding (180°), about 4 to 6 minutes. Remove the pan from the heat; whisk in the remaining 3 tablespoons of butter and 1 teaspoon of vanilla. Transfer the pastry cream to a bowl, press greased parchment paper directly against the surface, and allow it to cool for about one hour.

Meanwhile, roll the pie dough into a 12-inch round on a lightly floured counter. Transfer the dough to a 9-inch pie plate, fold the edge of the dough under itself so the edge of the fold is flush with the outer rim of the plate, and flute the edges. Refrigerate for 40 minutes, then freeze for 20 minutes. Adjust an oven rack to the lower-middle position and heat the oven to 375°.

Line the chilled pie shell with a 12-inch square of aluminum foil, folding the foil over the edges of the dough. Fill with pie weights and bake for 20 minutes. Carefully remove the foil and the weights, rotate the plate, and continue baking until the crust is golden brown, about 7 to 11 minutes. Allow it to cool to room temperature.

Peel and slice the remaining 3 bananas to about 1/4-inch-thick and toss them with the orange juice. Whisk the pastry cream briefly, then spread half over the bottom of the pie shell. Arrange the sliced bananas on the pastry cream. Top with the remaining pastry cream.

Using a stand mixer fitted with a whisk, whip the cream, confectioner’s sugar, and the remaining 1/2 teaspoon of vanilla on medium-low speed until foamy, about 1 minute. Increase the speed to high and whip until stiff peaks form, about 1 to 3 minutes. Spread the whipped cream evenly over the top of the pie. Refrigerate the pie until it is set, at least 5 hours and up to 24 hours.

I have to say that the pastry cream that you make for this recipe gave the pie a much better flavor than any other pie that I had had before. You want to make sure that you use bananas that are not green or overripe. If they have just the right amount of yellow with a few brown spots, you will get the best banana flavor out of them. Cooking them in the half-and-half mixture really leeches all of the flavor out of the bananas themselves and pulls the taste right in. If you didn’t want to go through everything with the pie crust, you could certainly use a simple, store-bought, pre-made crust that you could just pour the mixture into, but it does add more to the flavor if you follow the recipe exactly. I would certainly make pie this way again instead of using the banana pudding that you buy in the store.

That’s all there is for today. Check back again later on in the week to see what of the recipes I post. As I said, I do have a few other recipes that I have made recently that I do want to get on here, so check back and see what comes up next. Until then, enjoy the rest of your day and enjoy your meal!

005 003 004


Leave a comment

Posted by on June 18, 2013 in Cooking, Dessert, Pie


Tags: , , , ,

Sunday Chicken and Strawberry Rhubarb Pie


I decided to get back to making a regular Sunday dinner and this week as I hadn’t done it a couple of weeks. I had picked up some chicken earlier in the week and a whole chicken makes great Sunday meal. I wanted to find a recipe that would make things a little different and I had seen this one on the Food Network about a week or so ago and thought I would give it a try. It is Garlic Chicken with Israeli Couscous. I had never made it before and it looked good on the TV so we figured what the head lets give it a try.

Garlic Chicken with Israeli Couscous

For the Chicken:
2 whole garlic bulbs
1 lemon, zest stayed and juice
1 large bunch fresh thyme, leaves only
1 tablespoon cumin seeds, toasted and ground
Pinch crushed red pepper flakes
Kosher salt
Extra virgin olive oil
1 4 to 5 pound chicken, cut into eight parts

Couscous:
Kosher salt
2 cups medium size Israeli couscous
Extra virgin olive oil
3 ribs celery, sliced thin
1 large onion, sliced
Pinch crushed red pepper flakes
1 1/2 cups dry white wine
3 tablespoons tomato paste
Large pinch saffron
2 zucchini, cut into 1/2-inch dice
2 to 3 cups chicken stock
1/2 cup pine nuts, toasted (optional)
3 scallions, white and green, sliced thin

For the garlic chicken: preheat the oven to 350°. Put the garlic bulbs straight on the oven rack and roast them until they are soft when squeezed, about thirty minutes. Remove them from the oven and allow them to cool. Turn the oven up to 375°.

While the garlic is roasting, prepare the chicken. In a food processor or bowl, add the lemon zest and juice and set aside. When the garlic bulbs are cool, slice the tops off and squeeze out the roasted garlic into the bowl or food processor along with the thyme, cumin, crushed red pepper and salt to taste. Add a little olive oil and purée or mash into a loose paste. Massage the mixture all over the chicken pieces and allow it to sit for at least one hour.

For the couscous: bring a pot of well salted water to a boil over medium heat. Add the couscous and cook until it is about two-thirds of the way cooked through, approximately 5 to 6 minutes. Drain and set aside.

Coat a large sauté pan with olive oil and heat over medium high heat. Add the chicken to the pan and brown it on all sides. Remove it to a plate, drain the fat and add the celery and onions. Season with salt and crushed red pepper. Deglaze the pan with the white wine, scraping up all the bits on the bottom of the pan, and cook for 7 to 8 minutes. Stir in the tomato paste and cook for another two minutes. Add in the saffron, zucchini, cooked couscous and chicken stock. Stir well to combine, and then taste and adjust the seasonings if needed.

Transfer the mix to a ovenproof dish. Nestle the chicken, skin side up, in the couscous and add some more chicken stock, if needed, to keep things moist and cover the pan with foil. Add some more chicken stock to keep everything moist. Sprinkle with pine nuts, if using, and cover the pan with foil. Place the baking dish on a sheet pan. Roast the chicken for approximately 20 minutes, and then remove the foil and roast for another 10 to 15 minutes. Remove the chicken from the oven and top with this scallions before serving.

The chicken came out very moist and had a nice flavor to it because of the garlic paste that was used. I had never made couscous before, so it was little different for me, but I think it came out okay. I don’t think I put enough salt in the water when I was preparing it initially because it tasted like it could use a little more seasoning. Use your best judgment and see what works well for you. I also did not use the pine nuts as they are quite expensive and not something I normally use at all so I just left them out of the recipe. Overall I think it turned out pretty well and if you didn’t want to use couscous I think you could easily substitute white rice or brown rice and this recipe and it would turn out just fine.

Earlier in the week, Sean had asked me to get some strawberries and make something for dessert with them. Of course, this time of year the first thing I thought of was strawberry rhubarb pie. I love the taste of the fresh strawberries with the rhubarb and I hadn’t made this pie before so I had to scour around for a recipe to use. I found one at Williams – Sonoma and I also found one through America’s Test Kitchen. I liked aspects of each one, although the one from America’s Test Kitchen did not include any rhubarb so I sort of combine the two recipes and used the best of both to see how it would come out.

Strawberry – Rhubarb Pie

Two rolled out rounds of basic pie dough, or store-bought pie dough
4 pints (about 3 pounds) fresh strawberries, gently rinsed and dried, hulled and quartered lengthwise
3/4 cup sugar
2 tablespoons cornstarch
1 1/2 teaspoons low sugar or no sugar pectin
Generous pinch table salt
1 tablespoon juice from one lemon
3 cups rhubarb, trimmed and sliced half-inch thick (four or five stalks)
1 tablespoon cold butter, cut into small pieces

Preheat the oven to 350°.

For the filling: Select 6 ounces misshapen, underripe or otherwise unattractive strawberries, halving those that are large; you should have about 1 1/2 cups. In a food processor, process the berries until they are a smooth purée, about 20 to 30 seconds, scraping down the sides of the bowl as needed. You should have about 3/4 cup of purée when you are done.

Whisk the sugar, cornstarch, pectin, and salt in a medium saucepan. Stir in the berry purée, making sure to scrape the corners of the pan. Cook over medium-high heat, stirring constantly with a heatproof rubber spatula, and bring to a full boil. Boil, scraping the bottom and sides of the pan to prevent scorching, for two minutes to ensure that the cornstarch is fully cooked (the mixture will appear frothy when it first reaches a boil, then will darken and thicken with further cooking). Transfer to a large bowl and stir in the lemon juice. Allow to cool to room temperature.

Meanwhile, pick over the remaining strawberries and halve any that are still large. Mix the berries and the rhubarb into the bowl with the glaze and fold gently with a rubber spatula until everything is coated evenly. Place one dough round in the bottom of the pie plate and pat it firmly into the bottom and up the sides of the dish. Transfer the berry mixture to the dough-lined pan. Dot the fruit mixture with the butter. Place the second dough round carefully over the top of the filled pie. Trim the edges neatly, leaving a slight overhang and crimp the edges to seal the pie. Brush the top crust with one lightly beaten egg. Using a small knife, cut five or six slits into the top crust to allow steam to escape during baking.

Place the pie in the oven and bake until the crust is golden and the filling is thick and bubbling, approximately 50 to 60 minutes. Transfer to a wire rack and allow the pie to cool completely to set. Serve at room temperature or re-warm in a 350° oven for 10 to 15 minutes just before serving.

I think the pie turned out great myself. It was still just a little bit runny but not much. I think using the pectin instead of tapioca did seem to really help, and it gave the strawberry pie a nice strawberry jam-like flavor to it. I think once it has been sitting in the refrigerator overnight it will have set up even more and taste even better. Of course, you want to serve this with fresh whipped cream or ice cream on the side.

That’s all there is for today. I do have a few recipes planned out for the week, so we’ll see what we can get to as far as what we want to put up here. I do know I am making fish tacos this week at some point and I have posted a couple of different recipes for them on the air, so it is likely I’ll be using one of those if you want to check out and see what the recipe is like. I do also have a recipe I want to try this week for chicken sandwiches and will have to see what else comes along during the week. Until then, enjoy the rest of your day and enjoy your meal!

002


I forgot to take a picture of the chicken to go along with this. Sorry about that 🙂


6 Comments

Posted by on April 22, 2013 in Cooking, Dessert, Dinner, Pasta, Pie, Poultry


Tags: , , , , , , , ,

Thanksgiving Dry Run

So I did a test dinner tonight that will be a lot like what I will make on Thanksgiving Day for dinner. I have to admit, I was a little skeptical about how well this recipe would go. It is one I picked up from America’s Test Kitchen on a braised turkey with gravy. The trick in this one is that you butcher the chicken so you are cooking all the parts. They also recommend brining the turkey. Now I have heard both sides of the argument on this one and I am still not sure which would be best. I know that brining does help to keep things moist, but if you are like me, you may not have the room in your refrigerator for a tub to brine a whole turkey in, so I skipped the brining process. Everything turned out really well without it so I think you can get away with not doing it.

Braised Turkey with Gravy

Salt and Pepper

1 cup sugar

1 (5-7 pound) whole bone-in turkey breast, trimmed

4 pounds turkey drumsticks and thighs, trimmed

3 onions, chopped

3 celery ribs, chopped

2 carrots, peeled and chopped

6 garlic cloves, peeled and crushed

2 bay leaves

6 sprigs fresh thyme

6 sprigs fresh parsley

1/2 ounce dried porcini mushrooms, rinsed

4 tablespoons butter, melted

4 cups chicken broth

1 cup dry wine

Gravy

3 tablespoons all-purpose flour

Salt and pepper

For the Turkey: Dissolve 1 cup of salt and the sugar in 2 gallons of cold water in a large container. Submerge the turkey pieces in brine, cover, and refrigerate for 3 to 6 hours.

Adjust an oven rack to the lower-middle position and heat the oven to 500 degrees. Remove the turkey from the brine and pat it dry with paper towels. Toss the onions,celery, carrots, garlic, bay leaves, thyme, parsley, porcini mushrooms and 2 tablespoons of butter in a large roasting pan; arrange everything in an even layer. Brush the turkey pieces with the remaining 2 tablespoons of butter and season with pepper. Place the turkey pieces, skin side up, over the vegetables, leaving at least 1/4 inch between the pieces. Roast until the skin is lightly browned, about 20 minutes.

Remove the pan from the oven and reduce the temperature to 325 degrees. Pour the broth and wine around the turkey pieces (it should come about three-quarters of the way up the legs and thighs). Place a sheet of parchment paper over the turkey pieces. Cover the roasting pan tightly with aluminum foil. Return the covered roasting pan to the oven and cook until the breasts register 160 degrees and thighs register 175 degrees, 1 3/4 to 2 1/4 hours. Transfer the turkey to a cutting board, tent loosely with foil, and let rest for 20 minutes.

For the Gravy: Strain the vegetables and liquid from the roasting pan through a fine-mesh strainer set in a large bowl. Press the solids with the back of a spatula to extract as much liquid as possible. Discard the vegetables. Transfer the liquid to a fat separator; allow it to settle for 5 minutes. Reserve 3 tablespoons of fat and measure out 3 cups of braising liquid.

Heat the reserved fat in a medium saucepan over medium-high heat. Add the flour and cook, stirring constantly, until the flour is a dark golden brown and fragrant, about 5 minutes. Whisk in 3 cups of braising liquid and bring to a boil. Reduce the heat to medium-low and simmer, stirring occasionally, until the gravy is thick and reduced to 2 cups, 15 to 20 minutes. Remove the gravy from the heat and season with salt and pepper to taste.

I’ll be honest- butchering the turkey was no easy feat, even with poultry shears and a good sharp knife. If you could get it butchered before you even bring it home, that would be ideal. If not, it took me about 20 minutes to do it. I didn’t think that was too bad, considering I had never done that with a turkey before. I think the results are well worth the work that goes into it. The turkey came out done perfectly. It was very moist and the skin was nice and crispy. I took the foil off for the last 10 minutes or so to crisp up the skin and it was great. It also made carving easy since all the parts were removed already.

There’s a stuffing recipe that goes along with this recipe so you can make use of the turkey wings (thought I forgot about them, didn’t you?). This recipe is designed to make stuffing for 10-12 people, so if you have a smaller group coming, cut the recipe down appropriately. I cut in half for today since they were only 5 of us for dinner and it was the perfect amount with just a bit left over.

Bread Stuffing with Sausage, Dried Cherries and Pecans

2 pounds hearty white sandwich bread (20 to 22 slices) cut into 1/2-inch cubes (I actually used a large loaf of french bread instead, and it came out fine, so use whatever bread you like)

3 pounds turkey wings, divided at the joints

2 teaspoons vegetable oil

1 pound pork sausage

4 tablespoons butter, plus extra for the baking dish

1 large onion, chopped fine

3 celery ribs, chopped fine

2 teaspoons salt

2 tablespoons minced fresh thyme leaves

2 tablespoons minced fresh sage leaves

1 teaspoon ground black pepper

2 1/2 cups chicken broth

3 large eggs

1 cup dried cherries

1 cup pecan halves, toasted and chopped fine

Adjust oven racks to upper-middle and lower middle positions and heat the oven to 250 degrees. Spread the bread cubes in an even layer on 2 rimmed baking sheets. Bake until the edges have dried but centers are slightly moist, 45 to 60 minutes, stirring several times during baking. (You can toast the bread up to 1 day in advance.) Transfer the cubes to a large bowl and increase the oven temperature to 375 degrees.

Use the tip of a paring knife to poke 10 to 15 holes in each wing segment. heat the oil in a large skillet over medium-high heat until it begins to shimmer. Add the wings in a single layer and cook until golden brown, 4 to 6 minutes. Flip the wings and continue to cook until golden brown on the second side, 4 to 6 minutes longer. Transfer the wings to a medium bowl and set aside.

Return the skillet to medium-high heat and add the sausage; cook, breaking the sausage into 1/2-inch pieces with a wooden spoon, until browned, 5 to 7 minutes. Transfer the sausage to a paper towel-lined plate, leaving the rendered fat in the skillet.

Heat the butter with the rendered fat in the skillet over medium heat. When the foaming subsides, add the onion, celery, and 1/2 teaspoon of salt. Cook, stirring occasionally, until the vegetables are softened but not browned, 7 to 9 minutes. Add the thyme, sage, and pepper; cook until fragrant, about 30 seconds. Add 1 cup of broth and bring to a simmer, using a wooden spoon to scrape browned bits from the bottom of the pan. Add the vegetable mixture to the bowl with the dried bread and toss to combine.

Grease a 13 by 9-inch baking dish with butter. In a medium bowl, whisk the eggs, remaining 1 1/2 cups of broth, the remaining 1 1/2 teaspoons of salt and any accumulated juices from the wings until combined. Add the egg/broth mixture, cherries, pecans and sausage to the bread mixture and gently toss to combine; transfer to the greased baking dish. Arrange the wings on top of the stuffing, cover tightly with aluminum foil, and place the baking dish on a rimmed baking sheet.

Bake on the lower-middle rack until the thickest part of the wings registers 175 degrees on an instant-read thermometer, 60 to 75 minutes. Remove the foil and transfer the wings to a dinner plate to reserve for another use. Using a fork, gently fluff the stuffing. Let it rest 5 minutes before serving.

The stuffing was great! I think putting the wings on the top was a great idea and added some turkey flavor to the stuffing. The dried cherries add just the amount of tartness to the dish and they rehydrate a bit with the broth while cooking.

I served the meal with mashed turnips and boiled potatoes, but on Thanksgiving I will be making mashed potatoes, sweet potato casserole, green bean casserole and cranberry sauce. We’ll also be starting the meal off with a butternut squash soup. I’ll be posting the recipes for the butternut squash soup, sweet potato casserole and green bean casserole over the next few days if you want to check them out.

I also made a triple berry pie for dessert, which I have posted on here before. This time I used only frozen berries, but it turned out just as well if you want to try it that way.

I hope everyone has great plans for their Thanksgiving. I’ll be posting more recipes and I promise to take pictures of everything on Thursday while I am cooking (I am very bad about remembering to do that, I apologize). Until next time, enjoy your evening and enjoy your meal.

 
4 Comments

Posted by on November 18, 2012 in Cooking, Dessert, Dinner, Gravy, Holidays, Pie, Side Dishes, Turkey


Tags: , , , , , ,

I Can Bake a Berry Pie

It was a busy weekend with lots of family events going on and we had a house full of people for a few days, so I haven’t had much of a chance to do any blogging. I also didn’t do much cooking the last few days either, although on Sunday I did make a London broil and some bratwurst on the grill. I did do some baking yesterday though, so that’s the recipe I am going with today. As I have written on here before, I am not a baker and there are many people who are much better at it than I am. I also have a very small kitchen, so I don’t really have the space to make my own dough, so I very often use store-bought pie crusts when I make a pie. This recipe I got from Pillsbury, although I did change it around a little bit. They use three berries in their pie: blueberries, blackberries and raspberries. I used blueberries and strawberries and it was a big hit. There is only a tiny bit left after yesterday, so excuse the picture (I really need to get better about remembering to take pictures of the things I make!). It’s a pretty easy pie to make and it tastes great.

Double Berry Pie

1 package Pillsbury refrigerated pie crusts, softened

1 1/2 cups sugar

5 tablespoons cornstarch

2 tablespoons quick-cooking tapioca

1/4 teaspoon salt

2 cups fresh blueberries

1 pint fresh strawberries, trimmed and quartered

1 tablespoon milk

2 teaspoons sugar

Heat the oven to 450 degrees. Place the bottom crust in an ungreased 9-inch pie plate. Press the crust firmly against the side and bottom of the plate. Trim the bottom crust along the pan edge.

In a large bowl, stir together 1 1/2 cups of sugar, the cornstarch, tapioca and salt; gently toss with the berries. Let the berries stand for 15 minutes. Spoon the filling into the bottom crust. Top with the second pie crust to make a lattice topped pie; cut the second crust into 1/2-inch wide strips. Arrange the strips in a lattice design over the filling. Trim, seal the edges and flute. Brush the crust with milk and sprinkle with 2 teaspoons of sugar.

Place the pie on the middle oven rack with a large cookie sheet on the rack below the pie pan in case of spillover.. Bake the pie for 15 minutes. Reduce the oven temperature to 375 degrees. Cover the edge of the crust with strips of foil to prevent excessive browning. Bake the pie for 40 to 45 minutes longer or until the crust is golden brown and the filling is bubbly. Let stand for 2 hours before serving.

The pie goes great with some vanilla ice cream and some whipped cream and a nice cup of coffee. I am not a dessert expert, but this one came out pretty good.

I’m not sure what the dinner plans on for the rest of the week. Sean is away for a couple of weeks so it’s just Michelle and myself for dinner, so we really haven’t planned anything out yet. When I come up with something though, I will be sure to put it on here. In the meanwhile, if you have any recipes you would like to contribute, please feel free to contact me with a comment here, via Facebook, Twitter or email at IguanaFlats@msn.com. Enjoy the rest of your day and enjoy your meal!

 
1 Comment

Posted by on July 3, 2012 in Cooking, Dessert, Pie


Tags: , ,

As Easy As (Blueberry) Pie

As I have said before, I am not much of a baker. I don’t have the kitchen space to do a lot of baking, and there are plenty of people who make better things than I do that can do it. When Sean asked me to make blueberry pie last week, I knew I could handle it. I have made it before and I have really easy recipe to use for it. I’ll state up front, I did not make a crust. I don’t have the space to roll one out and do fun things with dough, so I went with store-bought, refrigerated crust. It turned out just fine, in my opinion. It’s not homemade, but it works for me  and it makes this recipe even easier.

Easy Blueberry Pie

2 store-bought refrigerated pie crusts

1 cup sugar

1/4 cup Minute tapioca

4 1/2 cups fresh blueberries

1 lemon

4 tablespoons flour

Salt

1 large egg, lightly beaten

Remove the pie crusts from the box and, leaving in the plastic wrap, allow them to come to room temperature for 10 minutes. Preheat the oven to 350 degrees. Unfold the first pie crust and press it into the bottom of a pie dish. Place the blueberries in a strainer and rinse. Drain the berries and add them to a large bowl. Add the sugar and tapioca to the blueberries and lightly mix. Let the berries stand for 15 minutes to allow them to blend with the sugar and tapioca. Add the flour and toss to coat the berries. Add a squeeze of lemon and a dash of salt and lightly blend. Pour the berries into the pie shell. Cover the berries in the pie shell with the second crust and crimp the edges of the crust with a fork. Cut 4 small slits into the center of the top crust to allow the pie to vent while it cooks. Baste the top crust with the beaten egg. Bake the pie in the oven for 45-60 minutes or until bubbly. Serve hot or allow to cool for 1 hour and serve.

Easy, easy, easy. The tapioca makes a great thickener and binds everything up nicely so you don’t get runny berries in your pie and the egg wash helps to give you a nicely browned crust. Of course, you can serve this with some ice cream, some homemade whipped cream, or store-bought if you prefer. It’s one of my favorite desserts.

Tomorrow is Mother’s Day and we’ll be out for the day, but I will be bringing a dish over to my in-laws to serve. It’s a nice fish dish that I saw the recipe for in a recent New York Times article and wanted to give it a try. I’ll post the recipe for that on here tomorrow so you can all take a look. It’s simply called Baked Fish, Fez Style and is from a restaurant in Marrakesh. It sounds great, so we’ll see how it turns out. Until then, enjoy your day and enjoy your meal!

 
Leave a comment

Posted by on May 12, 2012 in Cooking, Dessert, Pie


Tags: , , ,

 
National Day Calendar

Fun, unusual and forgotten designations on our calendar.

Jennifer Probst

a little bit naughty a little bit nice

Laissez Faire

Letting Life Lead

What To Have For Dinner Tonight

Simple and delicious dinner inspiration