When you are looking for something quick to make on these hot summer days and may even want to stay away from the meat for a dinner or for lunch, beans can be a great alternative for you. They can provide you with plenty of protein, vitamins and fiber and taste great in salads or as a taco or wrap. I decided to do this myself for lunch a few weeks ago and then brought it back as a dinner meal when we were looking for something quick and easy one night. All the ingredients can be things that you might normally have on hand in your pantry or refrigerator so you can have this ready to go in just minutes.
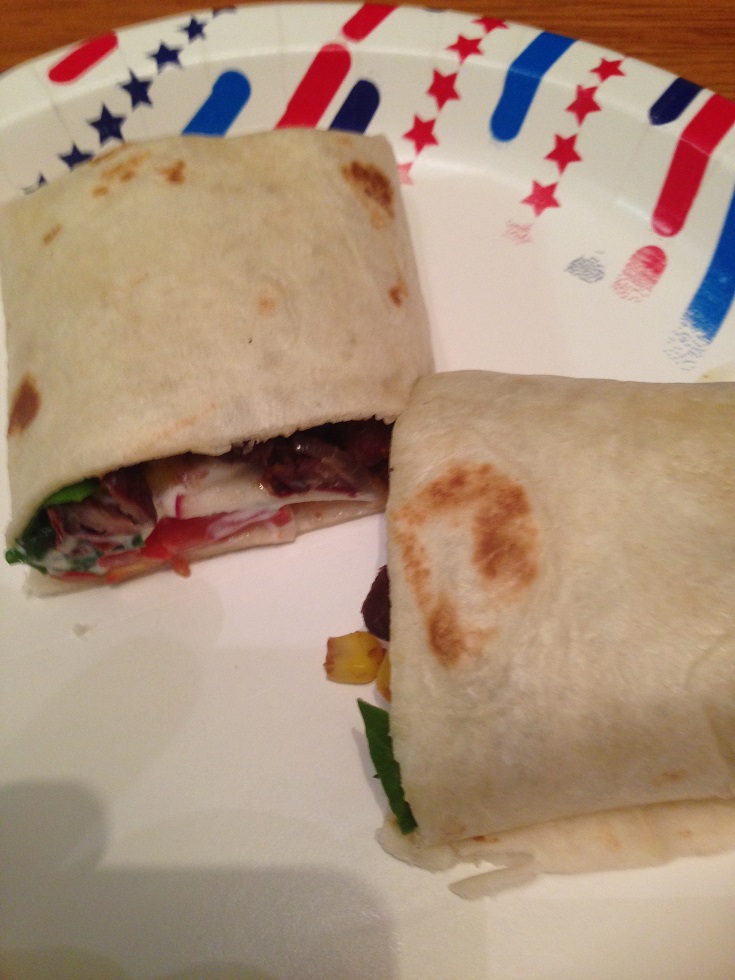
Black Bean and Corn Tacos
1 15 ounce can black beans, drained and rinsed (or 1 cup of cooked black beans)
5 teaspoons olive oil, divided
1 tablespoon fresh lime juice
1 cup frozen corn kernels, thawed
2 teaspoons ground cumin
1/2 cup onion, sliced thin
2 green onions, sliced thin
Corn or flour tortillas
Spinach leaves, for topping
Thinly sliced radishes, for topping
Sliced avocado or guacamole, for topping
Grated cheese (your choice) for topping
Sour cream, for topping
Diced tomatoes or salsa, for topping
Place the black beans and the cumin together in a small bowl and lightly mash the beans. Add 2 teaspoons of the olive oil along with the lime juice and mix together until well blended. In a saucepan set over medium heat, heat 1 teaspoon of the olive oil until it is shimmering. Add the sliced onion and saute the onion until it is tender, about 3 to 4 minutes. Add the corn kernels and the bean mixture to the onions and heat until the corn and beans are completely warmed through and fragrant, about 3 to 4 minutes. In a separate skillet, warm the remaining olive oil over medium heat. Warm the tortillas individually for about 1 minute per side. Remove the tortillas to a separate plate and place the bean and corn mixture in a separate bowl, sprinkling the beans mixture with the sliced green onions. Place any toppings you like on the table as well so people can assemble their own tacos to their specific liking.
You can really add anything you like to this dish to truly make it your own. Personally, I had tomato, avocado and radishes on mine while Sean put cheese on his and Michelle put sour cream and cheese on hers. The spinach was a nice touch as well. I actually have had this for lunch a number of times and they pack pretty well just as wraps if you didn’t want to cook the tortillas and just wanted to pack them up for a lunch on the go. you could certainly used dried beans that you have soaked and cooked beforehand in place of the canned, but the canned were convenient to use for my purposes and you can really make these with any type of beans you like, maybe throw in some chili peppers or hot sauce if you want some heat or any other type of vegetable you might like.
That’s all I have for today. Check back next time for another recipe. Until then, enjoy the rest of your day and enjoy your meal!