Thanksgiving is just a few days away now and you probably already have a plan of what you are going to do if you are hosting dinner this year or just staying home. I’m traveling this Thanksgiving so we won’t be cooking anything here, but with such a good deal on turkeys right now I couldn’t resist picking up a couple and used one this weekend to have a new turkey recipe to show for this week. If you have a smaller turkey for your meal (about 10 to 12 pounds would be small), there is a great way that you can cook your turkey, have it done in about 2 hours and have super crispy skin to go with perfectly cooked meat. If you have never tried spatchcocking a turkey before, it can seem a little intimidating at first, but all you really need is a cutting board, some poultry shears and a couple of good knives and you can make it all happen. You can also ask your butcher to do it for you if you happen to have one that you like. I decided this would be the easiest way to make our trial run turkey and came across this recipe from Serious Eats for an herb-rubbed, crisp-skinned butterflied roast turkey. I liked the recipe, but to be honest the herb rub did not overwhelm me, so I eliminated it, and went with this basic option, also from Serious Eats, that uses some basic salt, pepper and vegetable oil instead, and went ahead with this recipe. You could certainly use the herb rub if you like and follow the link for the original recipe.
Crisp Skinned Butterflied Roast Turkey
3 large onions, roughly chopped
3 large carrots, peeled and roughly chopped
4 stalks celery, roughly chopped
12 thyme sprigs
1 whole turkey (12 to 14 pounds total), butterflied, backbone, neck, and giblets reserved
2 tablespoons vegetable oil
Kosher salt and freshly ground black pepper
1 1/2 quarts homemade or store-bought chicken or turkey broth
2 bay leaves
3 tablespoons butter
4 tablespoons flour
To butterfly the turkey, pat the turkey dry with paper towels, then place it breast-side-down on the cutting board. Holding it firmly with one hand, make a cut along one side of the backbone, starting down near where the thighs meet the tail.Continue cutting, working your way around the thigh joint until you’ve snipped through every rib bone and completely split the turkey up to the neck. Use your hands the spread the turkey open slightly. Be careful, the snipped bones can be quite sharp.Make an identical cut along the other side of the backbone. This cut is a little trickier, so make sure not to get your fingers in the way of the blade. Using a clean dish towel or rag to hold on to the bird will make it easier to keep control.There may or may not be a large excess hood of fat up near the neck. If it’s there, remove it. If you wish to make carving even easier, the wish bone can also be removed by making a thin incision with the tip of a paring knife or boning knife along both sides of it, and pulling it out with your fingers.
Turn the turkey over onto what once was its back, splaying its legs out in a manner that can only be described as inappropriate. Press down hard on the ridge of the breast bone. You should hear a couple of cracks, and the turkey should now rest flatter. Flatter is better for even cooking and crisper skin.Tuck the wing tips behind the breast. This step is not strictly necessary, but it’ll prevent your turkey from looking like it wants to give you a high-five as it roasts.
Adjust oven rack to the middle position and preheat the oven to 450°. Line a rimmed baking sheet or broiler pan with aluminum foil. Scatter 2/3rds of the onions, carrots, celery and thyme sprigs across the bottom of the pan. Place a slotted broiler rack or wire rack directly on top of the vegetables.
Pat the turkey dry with paper towels and rub it on all surfaces with 1 tablespoon of the oil. Season the turkey liberally on all surfaces with salt and black pepper (if using a brined, salted, or Kosher turkey, omit the salting step). Place the turkey on top of the rack, arranging it so that it does not overlap the edges, pressing down on the breast bone to flatten the breasts slightly.
Transfer the turkey to the oven and roast, rotating occasionally, until an instant read thermometer inserted into the deepest part of the breast registers 150°, and the thighs register at least 165°, about 80 to 90 minutes.
While the turkey roasts, make the gravy. Roughly chop the neck, backbone, and giblets. Heat the remaining 1 tablespoon of oil in a 3-quart saucepan set over high heat until the oil is shimmering. Add the chopped turkey parts and cook, stirring occasionally, until they are lightly browned, about 5 minutes. Add the remaining onions, carrots, and celery and continue to cook, stirring occasionally, until the vegetables start to soften and brown in spots, another 5 minutes. Add the chicken stock, remaining thyme, and bay leaves. Bring the mixture to a boil and reduce the heat to a bare simmer. Allow the stock to cook for 45 minutes, then strain it through a fine mesh strainer into a 2-quart liquid measuring cup and discard the solids. Skim off any fat from the surface of the broth.
Melt the butter over medium-high heat in a 2-quart saucepan. Add the flour and cook, stirring constantly until the flour is golden brown, about 3 minutes. Whisking constantly, add the broth in a thin, steady stream until it is all incorporated. Bring the liquid to a boil, reduce it to a simmer, and cook the gravy until it is reduced to about 1 quart, about 20 minutes longer. Season to taste with salt and pepper, cover, and keep the gravy warm.
When the turkey is cooked, remove it from the oven and transfer the rack to a new baking sheet. Allow the turkey to rest at room temperature for about 20 minutes before carving. Carefully pour any collected juices from out of the roasting pan through a fine-mesh strainer into a liquid measuring cup. Skim off the excess fat and discard. Whisk the juices into the prepared gravy.
To begin carving, start by cutting off the first leg by slicing through the joint where the thigh meets the body. Next, find the joint between the thigh and the drumstick by rotating the drumstick back and forth. Cut through the joint with your knife, then repeat the process with the other leg. Remove the wings by locating the ball joint near the top of the breast and working the knife through it. The wings can be left whole or further separated into drumettes and flats by cutting through the first joint. Hold the breast firmly in place with one hand. A clean kitchen towel can help if you have a slippery grip or fingers sensitive to heat. Then slice down one side of the breast, using the tip of the knife to follow the contour of the bone. Continue using the tip of the knife so slowly work the meat away from the breast bone, pulling outwards at it with finger tips to separate the meat from the bone. Again, a clean towel can help if you have sensitive fingers. As you continue to slice, the breast should fall away in one complete piece. Make sure you take the tenderloin along with it. Repeat the process for the other side.
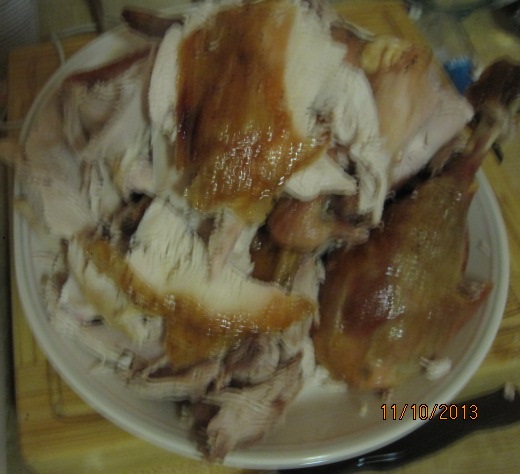
You now have two breast halves, two drumsticks, two thighs, four wing pieces, and one carcass from which to pick meat for leftovers soup. To continue cutting the breast into serving pieces, slice each breast into even slices on a bias. The hip bone is still attached to the back of the thighs and must be removed. To do this, pick up the flat bone from one side and shake it gently back and forth until the thigh bone pops out of its socket. Pry away the hip and save it along with the carcass for soup. Cut along one side of the thigh bone with the tip of your knife, removing as much meat as possible along that side. Repeat on the other side of the bone. Save the bone along with the rest of the bones for soup.Slice the dark meat across its width into thin serving portions and add it, along with the other meat, to a warm platter and serve the turkey with the gravy.
It may seem like it is complicated, but trust me it isn’t. I was able to butterfly the turkey without any trouble and it comes out perfectly, with the crispest turkey skin you might ever get. The carving does take a little getting used to, especially if you are accustomed to doing it a traditional way, but once you get into it, it goes pretty smoothly. I had an easy time with the breast meat, but the thighs were a bit of challenge. However, it is great to be able to cook a turkey this quickly so you do not have to spend countless hours cooking and if you prepare your sides ahead of schedule you will have no trouble getting dinner on the table just when you want it. The gravy, by the way, comes out fantastic. The rich stock you make while the bird is cooking is perfect for gravy and makes the meal.
That’s all I have for today. Check back next time for another recipe. Until then, enjoy the rest of your day and enjoy your meal!