RSS

Monthly Archives: October 2013

Sunday Dinner on a Saturday, Part 2 – Braised Cauliflower and Yorkshire Pudding

To go along with the slow-roasted chuck roast dinner I made this past Saturday I chose a couple of new side dishes to give a try. The first comes from the Cook’s Illustrated Cookbook and is for a browned and braised cauliflower with garlic, ginger and soy. Cauliflower is in season right now so the price is not bad for a fresh head if you can get one. I like fresh much better than frozen as the frozen seems to get very limp and soggy quickly while if you cook the fresh right it was stay nice and crisp. This is a very easy recipe that only takes a few minutes to put together.

Browned and Braised Cauliflower with Garlic, Ginger and Soy

1 1/2 tablespoons vegetable oil

1 head cauliflower (about 2 pounds), cored and cut into 1-inch florets

2 tablespoons grated fresh ginger

2 garlic cloves, minced

1 teaspoon toasted sesame oil

1/4 cup water

2 tablespoons soy sauce

2 tablespoons rice vinegar

1 tablespoon dry sherry

2 scallions, minced

Pepper

Heat the vegetable oil in a large skillet over medium-high heat until just smoking. Add the cauliflower and cook, stirring occasionally, until it is beginning to brown, about 6 to 8 minutes.

Clear the center of the skillet and add the ginger, garlic and sesame oil. Cook, mashing the mixture into the pan, until it is fragrant, about 1 minute. Stir the ginger mixture into the cauliflower and cook for 30 seconds more. Reduce the heat to low and add the water, soy sauce, rice vinegar and sherry. Cover the skillet and cook until the florets are tender but still offer some resistance when they are poked with a paring knife, about 4 to 5 minutes. Add the scallions and toss lightly to distribute. Season with pepper to taste and serve.

I really enjoyed the Asian flavor that this dish had. The ginger and soy really come through nicely and the garlic adds just the right touch, making this a great side dish. I would use this side again, perhaps with a chicken dish next time as I think it would lend itself quite nicely to that type of meal.

I also decided to take a shot at making Yorkshire pudding. Now I can remember having this as a kid and it was pretty good, but I had never attempted to make it before myself. I saw various recipes out there to give it a try, but I decided to go with this one from Alton Brown. It seemed the most basic and the one that I could least screw up, so I figured I would give it a shot. The worst that could happen is that I ended up throwing everything away. Thankfully, it all turned okay.

Yorkshire Pudding

2 cups all-purpose flour

1 1/2 teaspoons kosher salt

4 large eggs, room temperature

2 cups milk, room temperature

1/4 cup beef drippings, divided

Preheat the oven to 400 degrees. Leave 2 tablespoons of the beef drippings in the pan and place it in the oven.

Place the flour, salt, eggs, milk and the remaining 2 tablespoons of drippings into the bowl of a food processor or blender and process for 30 seconds. Pour the batter into the hot roasting pan and bake for 35 to 40 minutes or until it is puffed and golden brown. While the pudding is cooking, carve the roast and then serve the pudding with the roast.

For my first try at this, I think it went okay. The taste was there as I remembered it, but it did not puff up nearly as high as I thought it would. Everyone else thought it was okay, but I think I will need to try this one again at some point to try for better results. It could be that my oven temperature is a little off and that made the difference in the height of the puff. Whatever the case, it still turned out okay.

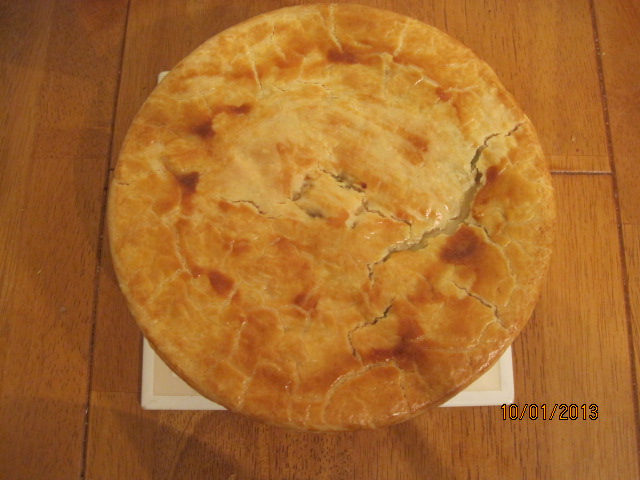
That’s all I have for today. Check back next time for some more recipes. I still have a sausage in the slow cooker recipe I tried, Michelle’s apple pie that she made this weekend, a new banana bread recipe and a few other things to try out this week. until next time, enjoy the rest of your day and enjoy your meal!

007 004


3 Comments

Posted by on October 7, 2013 in Cooking, Dinner, Side Dishes, Vegetables


Tags: , , , , ,

Sunday Dinner on a Saturday, Part 1 – Sunday Slow-Roasted Chuck Roast

For many families, having a roast on Sunday is something of a tradition. I can remember having the meal as a child either at my parents’ home or at my grandparents’ home fairly regularly. Unfortunately, really good cuts of beef for roasts have gotten very expensive, making the roast something that does not happen very often. Even just getting a cut like an eye round or top sirloin can be quite expensive unless it happens to be on a good sale. The chuck eye roast is not one I typically buy because it is quite fatty. it’s fine if you are going to cube it up for a beef stew or even use it to grind for your own hamburgers, but it can be tough to turn a quality roast dinner into this cut of beef. That is why when I saw this recipe in the latest issue of Cook’s Country magazine, it intrigued me enough to want to give it a try. They take the chuck roast and transform it into a tender roast fit for a Sunday meal.

Slow-Roasted Chuck Roast

1 (5- to 6-pound) center-cut boneless beef chuck-eye roast

5 teaspoons kosher salt

2 teaspoons pepper

2 teaspoons onion powder

2 teaspoons granulated garlic

2 tablespoons vegetable oil

1/4 cup all-purpose flour

1/2 cup red wine

1 1/2 cups beef broth

1 1/2 cups chicken broth

1/2 cup heavy cream

1/2 cup sour cream

1/3 cup prepared horseradish, drained

1 tablespoon Dijon mustard

1 garlic clove, minced

1/2 teaspoon pepper

Pat the roast dry with paper towels. Separate the roast into two pieces along the natural seam of the roast and trim the fat to 1/4-inch thickness. Tie kitchen twine around the larger roast at 1-inch intervals. Cut the smaller roast into 1-inch cubes. Combine the salt, pepper, onion powder, and granulated garlic in a bowl. Rub the surface of the tied roast evenly with half of the spice mixture and wrap it in plastic wrap. Transfer the beef cubes to a 1-gallon zipper-lock bag; add the remaining spice mixture to the bag, seal, and toss to coat the beef cubes. Refrigerate the tied roast and the beef cubes for at least 6 hours and up to 24 hours.

Adjust an oven rack to the lower-middle position and heat the oven to 300 degrees. Heat 1 tablespoon of vegetable oil in a large non-stick skillet over medium-high heat until just smoking. Brown the tied roast on all sides, about 10 to 12 minutes total; transfer to a plate.

Return the now-empty skillet to medium-high heat, add the remaining 1 tablespoon of vegetable oil and heat until just smoking. Add the cubed beef and brown on all sides, about 10 to 12 minutes. Sprinkle the flour over the meat and cook, stirring constantly, until the beef is evenly coated, about 1 minute. Add the wine and cook until the pan is dry, about 1 minute. Add the beef and chicken broths and bring to a boil, scraping up any browned bits. Cover, transfer the skillet to the oven and cook for 1 hour.

Uncover the skillet and place the browned roast on top of the cubed meat. Return the skillet to the oven and continue to cook, uncovered, until the cubed meat is fork tender and the roast registers about 150 degrees, about 1 hour longer. Transfer the roast to a carving board, tent loosely with aluminum foil and allow to rest for 20 to 30 minutes.

Using a potato masher, mash the cubed meat until it is shredded into rough 1/2-inch pieces. Transfer the shredded and gravy to a separate dish to cool completely and use for another meal.

While the roast is resting, make the horseradish sauce. Whisk together the heavy cream, sour cream, horseradish, Dijon mustard, garlic and pepper until it is smooth.

Remove the twine from the roast and slice thin. Serve the roast with the horseradish sauce.

There are a couple of things about this recipe. The cubed meat and gravy can be used for another recipe that I plan to make tomorrow that is included with this recipe in Cook’s Country. It is for roast beef po’boys and is simple to make. I did save 4 tablespoons of the drippings and also used that to make a side dish of Yorkshire pudding, the recipe I will post tomorrow. Even at rest at 150 degrees, the roast when sliced was still pink in the center and juicy and flavorful. While this is a little bit hotter temperature than usual for a medium-rare, with this cut of beef it does help to make the beef flavorful and not chewy. The twine does help to hold it together for slicing nice roast slices instead of it falling apart.It is a nice Sunday recipe to try with an inexpensive cut of beef to help save you some money and you do get extra meals out of it as well. I served this with a braised cauliflower, roasted potatoes and the Yorkshire pudding. I’ll be posting the recipes for the cauliflower and Yorkshire pudding tomorrow.

That’s all I have for today. Sadly, I forgot to take a picture of the roast after I took it out and sliced it, so I don’t have one of it to show. I apologize for that. Check back next time for the other recipes from this meal. Until then, enjoy the rest of your day and enjoy your meal!


Leave a comment

Posted by on October 6, 2013 in Beef, Cooking, Dinner, Sauce


Tags: , , ,

Thanksgiving Lite – Roasted Turkey Breast with Creamy Gravy

Even though it is only just October, before you know it we will all be thinking about Thanksgiving dinner and the different dishes we are going to prepare. The great thing about this time of year is that turkey becomes not only more available, but more affordable. For the rest of the year, the price can seem quite high for a turkey. Right about now you will start to see the price creep down little by little and you may also see the availability of different turkey parts for sale as well. I came across this half a turkey breast in the store on Monday and couldn’t pass it up. It was 2 1/2 pounds, but it only cost $4.00 and we will get a dinner and lunches out of it, so it’s a great deal. I then went looking for a recipe and found this one from Rachel Ray. I did modify it somewhat, as in the recipe she makes a cranberry pomegranate sauce and had neither cranberries nor pomegranates, so I eliminated that end of it. She also makes the recipe with two split turkey breasts and since I only had one, I had to scale things down a bit. I am posting the entire recipe she uses here for you to try.

Roasted Turkey Breast with Creamy Gravy and Cranberry Pomegranate Sauce

For the Turkey Breast:

1 full or 2 split boneless, skin-on turkey breasts

2 cloves garlic, grated or pasted

1 stick butter, softened

1/4 cup fresh herbs, such as parsley, chives, thyme, tarragon or rosemary

1 tablespoon lemon juice

Salt and black pepper

For the Cranberry Pomegranate Sauce:

One 12-ounce bag fresh cranberries

1 cup sugar

Pinch salt

1 cinnamon stick

1 strip orange rind

1 pomegranate

For the Creamy Gravy:

2 tablespoons all-purpose flour

1 1/2 cups chicken stock

1 tablespoon Worcestershire sauce

Salt and black pepper

1/3 cup heavy cream

1/4 cup freshly grated Parmigiano-Reggiano (optional)

For the roasted turkey breast: Preheat the oven to 350 degrees. Place the turkey breast on a baking rack over a baking sheet. Combine the garlic and softened butter with the herbs and lemon juice. Slather about 5 tablespoons of the garlic-herb butter over the turkey breast and sprinkle liberally with salt and pepper., reserving the remaining garlic-herb butter for the gravy. Roast the turkey in the oven for 45 minutes.

For the cranberry pomegranate sauce: Place the cranberries in a medium saucepan with the sugar, salt, cinnamon stick, orange rind and 1 cup of water. Bring the mixture to a boil and cook until all the berries pop and the sauce thickens, about 15 minutes. Cool and remove the rind and the cinnamon stick. Peel the pomegranate in a bowl of water, separating the seeds, and drain. Add the pomegranate seeds into the sauce.

For the creamy gravy: Right before serving the turkey, melt the remaining garlic-herb butter over medium heat in a saucepan. Whisk in the flour until blended, followed by the chicken stock, to thicken. Whisk in the Worcestershire sauce and season with salt and pepper to taste. Stir in the heavy cream and the cheese (if using) and keep the gravy warm until you are ready to serve.

Slice the roasted turkey breast and serve with room temperature cranberry pomegranate sauce and the warm gravy.

A couple of things about this recipe. I left the cheese out of the gravy since I don’t really care for cheese that much and I just didn’t think it went well with the dish. I think the gravy turned out fine without it, but if you want the added creaminess from the cheese, go for it. This recipe makes a lot of turkey, which is one of the reasons I cut it in half. The one split turkey breast was more than enough for the three of us and we had plenty of leftovers as well. I liked the flavor you get from the garlic-herb butter on the turkey and in the gravy and it did help to crisp up what little skin there was on the turkey. I served this with smashed potatoes (they weren’t mashed too much; I just used a potato masher for a bit on them) and some pan roasted asparagus. It was a nice meal that you can do in under an hour and satisfy that early season turkey craving.

That’s all I have for today. Check back next time for another recipe. I still have my Oktoberfest sausage to make tonight, a roast beef recipe for this weekend, and some other things to try like a new soup recipe and a new one for banana bread. Keep checking back to see what comes up next. Until next time, enjoy the rest of your day and enjoy your meal!

001

 
2 Comments

Posted by on October 4, 2013 in Cooking, Dinner, Gravy, Poultry, Sauce, Turkey


Tags: , , , , , ,

Comfort Food For Fall Weeknights – Chicken Pot Pie

We all love the classic comfort food dishes but sometimes we just don’t have the time to put in to make them during the week. Who wouldn’t love a nice pot roast dinner on a weeknight? Unfortunately, few of us have the time to pull that off unless you want to give it a try in the slow cooker. I did come across a great comfort food recipe from Williams-Sonoma the other day that you can make even easier by making use of some leftovers or store-bought items. This recipe for chicken pot pie has you making your own crust. If you don’t have time to do it, you can always use a store-bought crust to do that and save yourself even more time.

Chicken Pot Pie

For the Pie Dough:

1 1/2 cups all-purpose flour

Salt

6 tablespoons cold vegetable shortening

2 tablespoons cold butter

About 1/3 cup cold water

For the Filling:

Salt and freshly ground black pepper

1 cup sliced carrots

1 cup fresh or frozen peas

1 cup corn kernels (from 2-3 ears)

2 tablespoons butter

4 skinless, boneless chicken thighs, cut into bite-sized chunks

2 tablespoons chopped shallot

1/4 cup all-purpose flour

1 1/2 cups chicken broth

1/2 cup dry white wine

1/2 cup half-and-half

1 tablespoon chopped fresh parsley

1 egg yolk beaten with 1 teaspoon water

To make the dough, stir together the flour and 1/2 teaspoon of salt. Using a pastry blender, cut in the shortening and butter until a coarse meal starts to form. Toss with a fork while adding enough water for the dough to clump together. Form the dough into a disk, wrap it in plastic wrap, and refrigerate it for 30 minutes.

Meanwhile, preheat the oven to 400 degrees. Bring a saucepan of salted water to a boil. Add the carrots and peas and cook until tender-crisp, about 3 to 5 minutes. Using a slotted spoon, transfer the vegetables to a colander and drain, then transfer them to a bowl. Repeat the process with the corn, cooking it for 1 minute.

In a large skillet, melt the butter over medium-high heat. Add the chicken and cook, stirring occasionally, until it is browned on all sides, about 8 minutes. Add the shallot and cook, stirring, until softened, about 2 minutes. Sprinkle in the flour and stir well. Stir in the broth, wine, half-and-half and parsley and bring the mixture to a simmer. Cover, reduce the heat to low, and simmer for 10 minutes. Stir in the carrots, peas and corn. Season with salt and pepper. Transfer the mixture to a 9-inch pie plate.

On a floured work surface, roll out the dough into a round about 1/8 inch thick and large enough to fit over the pie plate. Brush some of the egg yolk mixture in a 1-inch border around the edge of the round. Place the round, egg side down, over the filling, and press the dough to the rim of the dish. Crimp or trim any overhanging dough and brush the surface lightly with the remaining egg yolk mixture. Cut a few slits in the center of the top of the pie to vent the steam.

Place the pie plate on a baking sheet and bake until the crust is golden brown, about 30 minutes. Remove from the oven and serve.

Just a few notes about this recipe. You can always use store-bough pie dough for this to save you time. I keep a package of pie dough on hand regularly in case I want to make a quick pie or something like this. You can also use frozen or leftover vegetables in this dish and vary things up, using whatever vegetables you have on hand. I put some green beans in with mine. As for the chicken, if you have leftover cooked chicken already you can save yourself another step and just heat it through in the skillet before adding the flour. You can use a rotisserie chicken instead if you have one of those as well. The meat from the chicken thighs is great for this because it is flavorful and tender, but use what you have to make things easier for you. Sean really liked this recipe and had 3 plates of it for dinner that night. The gravy created for the chicken and vegetables has really good flavor to it. By the way, I omitted the wine (I usually do in recipes) and used extra chicken broth instead and it turned out just fine.The leftovers were great for lunches too.

That’s it for today. Check back next time for some more recipes. I still have a roast beef recipe to try, Another Oktoberfest recipe using sausages, and I picked up a turkey breast the other day so I need to do something with that as well. Check back and see what comes along. Until next time, enjoy the rest of your day and enjoy your meal!

001

 
Leave a comment

Posted by on October 3, 2013 in Cooking, Dinner, Leftovers, One Pot Meals, Poultry


Tags: , , ,

Oktoberfest Meals, Part 2 – Pork Chops with Cider Glaze

It’s time for the next recipe I tried that was part of Williams-Sonoma and their post about Oktoberfest recipes. Pork is a mainstay when it comes to Oktoberfest and German cooking, and this recipe is a very simple one that makes great use of three great pieces of this type of cooking – pork chops, cabbage and apples. This one is a pork chops with cider glaze recipe that you can prepare and have on the table in under 30 minutes. If you want to take the time to brine your pork chops ahead of time, you could do that overnight and have some really flavorful chops when you are done. I’ll post the brine recipe after this recipe.

Pork Chops with Cider Glaze

4 bone-in, center-cut pork chops, each about 3/4 inch thick

Salt and freshly ground pepper, to taste

2 tablespoons olive oil

1 head red cabbage, halved, cored and thinly sliced crosswise

2 1/2 cups apple cider or apple juice

1 tablespoon apple cider vinegar

1 tablespoon fresh thyme leaves

Season the pork chops generously with salt and pepper. In a large skillet over medium-high heat, warm the olive oil. Add the pork chops and cook, turning them once, until they are golden brown, about 5 minutes total. Transfer the chops to a plate.

Add the cabbage to the skillet and cook, stirring frequently, until the cabbage is softened, about 3 to 4 minutes.

Increase the heat of the skillet to high, pour the cider and vinegar over the cabbage, and boil until the liquid is reduced to about 1 cup, about 8 to 10 minutes. Stir in the thyme leaves.

Return the pork chops to the skillet and any accumulated juices from the plate and spoon the glaze over the chops. Cover the skillet, reduce the heat to medium-low, and simmer until the pork chops are tender and barely pink inside, about 5 minutes.

Arrange the cabbage and pork chops on a platter, top them with the glaze and serve immediately.

I have to tell you that you really do need a large skillet for this if you are going to make a whole head of cabbage. I only used half of a cabbage and it more than filled the skillet I chose to use. I also added a couple of apples to the cabbage as it was cooking for even more apple flavor to the dish. I served this with just some plain white rice, but it would go well with some noodles or even some German potato salad.

If you want to make some brine for these pork chops, here is a very quick brine recipe you can put together to give some great flavor.

Pork Chop Brine

4 cups apple cider

3 cups water

1/2 cup salt

5 whole peppercorns

2 cinnamon sticks

Combine all the brine ingredients in a large bowl and stir. Immerse the pork chops in the liquid, cover and refrigerate for at least 6 hours or preferably overnight.

Brining really does make the meat more moist and adds great flavor, so if you have the time and are planning ahead, you might want to give it a try. I loved the apple flavor that permeated the chops and the cabbage in this dish and it was very easy to make.

That’s all I have for today. Check back again for more recipes I’ll be trying out. I do have some new choices for a roast beef, a roasted chicken and a whole bunch of other recipes I am planning to try. Until next time, enjoy the rest of your day and enjoy your meal!

001

 
Leave a comment

Posted by on October 1, 2013 in Cooking, Dinner, Pork


Tags: , , , , ,

 
National Day Calendar

Fun, unusual and forgotten designations on our calendar.

Jennifer Probst

a little bit naughty a little bit nice

Laissez Faire

Letting Life Lead

What To Have For Dinner Tonight

Simple and delicious dinner inspiration