RSS

Monthly Archives: November 2016

Watch Chef Jacques Pépin Demonstrate 7 Mesmerizing Knife Techniques – Bon Appétit

One thing I have always wished I could do better in the kitchen involves my knife skills. While they are better, I could still use some work and improvement. If you are like me and want to work on your knife skills, who better to learn from than cooking legend Jacques Pepin? Bon Appetit has 7 how-to videos from the master that cover different knife techniques so you can learn to be an expert at the chopping board. Check it out!

Source: Watch Chef Jacques Pépin Demonstrate 7 Mesmerizing Knife Techniques – Bon Appétit

 
Leave a comment

Posted by on November 4, 2016 in Cooking, Cooking Tips, Cooking Websites, Equipment


Tags: , , , , , ,

An Elegant, Hearty Dish – Pork Chops with Butternut Squash and Apple Stuffing

Since everyone is always so busy during the week and you may not have time for dinners that can take an hour or two to cook or to take the time to put everything together so that it looks nice when you serve it, you probably typically wait to do something like that for the weekend. I know that is what I usually do since dinners around here can sometimes be rushed or eaten late in the evening because of everyone’s schedule so you may not want to serve something heavy. On the weekends however, I tend to look for meals that I can take more time to put into and serve dishes that we may not typically have. Such is the case with this particular recipe I found from Williams-Sonoma for pork chops with butternut squash and Apple stuffing. I just happen to be shopping at Adam’s market and saw that they had some very nice, thick pork chops for a very good price and this was the perfect opportunity to try a recipe just like this. We do not normally have pork chops that are anywhere near this thick or even usually on the bones since Boneless ones can cook quicker and make an ideal choice for weeknight meals. This recipe was quite a bit more elegant, more hearty and looks great when you serve it.

Pork Chops with Butternut Squash and Apple Stuffing

1 1/2 cups peeled and diced butternut squash

1 cup diced celery

1 cup diced Granny Smith apple

6 tablespoons olive oil

Kosher salt and freshly ground pepper, to taste

1 large shallot, finely diced

1 1/2 teaspoons minced garlic

2 teaspoons chopped fresh thyme

1 1/4 cups toasted breadcrumbs

4 double-cut, bone-in pork loin chops, each about 12 ounces and 1 1/2 inches thick

1 onion, cut into 1/2-inch dice

1 Granny Smith apple, peeled, cored and cut into 1/2-inch dice

1 tablespoon all-purpose flour

2 tablespoons chicken stock

1 1/2 cups water

1 tablespoon apple cider vinegar

Preheat an oven to 400°.

In a large bowl, stir together the butternut squash, celery, apple and 2 tablespoons of the olive oil and season everything with salt and pepper. Set the bowl aside.

In a large braising pan set over medium-high heat, warm 2 tablespoons of the olive oil. Add the shallots and cook, stirring, until softened, about 1 minute. Add the garlic and thyme and cook, stirring frequently, for about 10 seconds. Add the squash mixture and cook until it is just softened, about 7 to 8 minutes. Season the mixture with salt and pepper. Remove the mixture from the heat and allow it to cool. Once it is cooled, stir in the breadcrumbs.

Season the pork chops on both sides with salt and pepper. Insert a sharp knife into the side of the chop opposite from the bone, making a long slit along the curve all the way to the bone. Wiggle the knife to form a large pocket in the pork chop. Repeat the process with the remaining chops. Stuff each chop with 1/2 cup of the stuffing, packing it into the pocket with your fingers. Feel the pork chops closed by inserting toothpicks through the opening to help keep the stuffing inside.

Set a cast-iron grill pan or large, oven safe skillet over medium-high heat. Brush the pan with 1 tablespoon of the olive oil. Working in batches, brown the pork chops, turning once, about 3 to 4 minutes per side. Return all the chops to the pan and transfer them to the oven. Roast the pork chops until an instant-read thermometer inserted into the stuffing registers 160°, about 20 to 25 minutes. Lift out the chops and transfer them to a platter. Cover the chops loosely with aluminum foil and allow them to rest for 5 minutes. Strain any pan juices into a small bowl; set the bowl aside.

In a small saucepan set over medium-high heat, warm the remaining 1 tablespoon of olive oil. Add the onion and Apple and cook, stirring, until softened, about 7 to 8 minutes. Add the flour and cook, stirring, for about 1 to 2 minutes. Add the chicken stock, water and reserved pan juices and bring the mixture to a simmer. Cook until the sauce begins to thicken, about 2 to 3 minutes, then stir in the apple cider vinegar. Using an immersion blender, purée the sauce until it is smooth. Place the pork chops on individual plates and drizzle with the sauce or serve together on a large platter.

The only changes I decided to make to the recipe were that I added some spinach to the stuffing because I had some on hand and it was a nice addition of flavor and as I was roasting the pork chops I placed them over some potatoes and root vegetables that had been parboiled ahead of time so that everything would roast together and be done at about the same time. This also allowed the potatoes and vegetables to pick up some of the juices and flavor from the pork chops. The stuffing for the pork chops was great and had excellent flavor to it, with the apples and squash really helping to enhance the stuffing. You want to make sure you remember to take the toothpicks out of the pork chops before you serve them so that no one inadvertently tries to bite into one. Along with the roasted potatoes and vegetables, I served this with some of the roasted butternut squash soup that I had previously made to make it a nice, hearty meal that was perfect for the cooler fall weather we were having. While it may not be something that you cook that often, it is a good recipe to have for your weekend arsenal, particularly when the pork chops are on sale.

That is all I have for today. Check back next time for another recipe. Until then, enjoy the rest of your day and enjoy your meal!

img_0132


2 Comments

Posted by on November 3, 2016 in Cooking, Pork


Tags: , , , ,

Another New Take on a Classic – Chicken Fajitas

Everyone has recipes that they generally try to fall back on time and again. I know for me, I very often make things like meatloaf, hamburgers or roasted chicken and just try to vary things up in different ways each time I do it so we do not get bored with the same old recipe. Such is the case with chicken fajitas. I have been making different types of fajitas for years because it has always been a family favorite. We vary the protein used-sometimes beef, sometimes shrimp, sometimes chicken-but the rest of the recipe always seems to stay pretty much the same. I was looking for something a little bit different this time to spice things up and get a little more flavor out of the dish when I came across this recipe at New York Times Cooking from Martha Shulman. This recipe adds a little bit more spice than some of the other usual recipes I have seen and it sounded like it was a good one to try.

Chicken Fajitas

Finely grated zest of 1 lime (about 2 teaspoons)

¼ cup fresh lime juice

Salt and black pepper

2 teaspoons cumin seeds, lightly toasted and ground

2 tablespoons adobo sauce from canned chipotles in adobo

1 chipotle chile in adobo, seeded and minced (optional)

¼ cup plus 2 tablespoons extra-virgin olive oil

4 large garlic cloves, minced or put through a press

1 ½ pounds boneless, skinless chicken breast

1 large red or yellow onion, halved and sliced

2 red bell peppers (or 1 red and 1 orange or yellow), seeded and sliced about 1/4 inch thick

1 green bell pepper, seeded and sliced about 1/4 inch thick

1 jalapeño or 2 Serrano chiles, minced

¼ cup chopped cilantro

4 large flour or 8 corn tortillas

1 tablespoon grapeseed or canola oil (or use olive oil)

1 romaine heart, sliced crosswise

Salsa, for serving

Queso fresco or other cheese, for sprinkling

Guacamole, for serving

Sour Cream, for serving

In a small bowl, combine the lime zest and lime juice, 1/2 teaspoon of salt, 1 teaspoon of ground cumin, the adobo sauce and optional minced chipotle, 1/4 cup of olive oil and half the garlic. Mix the ingredients well. Set aside 2 tablespoons of the marinade.

Season the chicken with salt and pepper and place it in a resealable bag. Pour in the marinade and seal the bag. Move the chicken around to coat it well with the marinade, place the bag in a bowl and refrigerate it for 30 minutes (or up to 12 hours). Flip the bag over from time to time to redistribute the marinade.

Heat a large, heavy skillet over medium-high heat and add 2 tablespoons of olive oil. When the oil is hot, add the onions and cook, stirring, until they soften and begin to color, about 3 to 4 minutes. Stir in the bell peppers and chile and cook, stirring, until the peppers begin to soften, about 3 to 4 minutes.

Turn the heat to medium, add the remaining garlic and cumin and salt to taste, and cook, stirring often, until the peppers are nicely seared, softened and beginning to caramelize, about 5 to 8 minutes.

Pour in the reserved 2 tablespoons of the marinade and scrape the bottom of the pan with a wooden spoon to deglaze the pan. Add half the cilantro, and stir the ingredients together. Taste and adjust the seasoning as needed. Remove the mixture from the heat but keep it warm.

Wrap the tortillas in foil and warm them in a low temperature oven, or wrap them in a towel and warm them in a steamer or in the microwave.

Heat the grapeseed or canola oil over medium-high heat in a large, heavy skillet. Remove the chicken breasts from the marinade, reserving the marinade, and pat the chicken breasts dry with paper towels. Add the chicken to the pan, rounded side down, and sear the breasts for about 3 to 4 minutes, until they are lightly charred. Flip the breasts over, pour in the marinade, cover the pan and reduce the heat to medium. Cook the chicken for about 12 to 15 minutes, flipping the breasts over from time to time, until a thermometer registers 160 to 165 degrees when inserted into the thickest part. Transfer the chicken breasts to a cutting board and cover them with foil. Let the chicken sit for 5 to 10 minutes, then cut the breasts across the grain into 1/2 – to 3/4-inch thick strips.

Arrange the romaine lettuce on a platter, then place the chicken next to lettuce. Tip the juices from cutting board over the chicken and sprinkle the chicken with cilantro. Serve the vegetables on the same platter or separately. Serve with warm tortillas, salsa and crumbled queso fresco or other cheese, guacamole and sour cream.

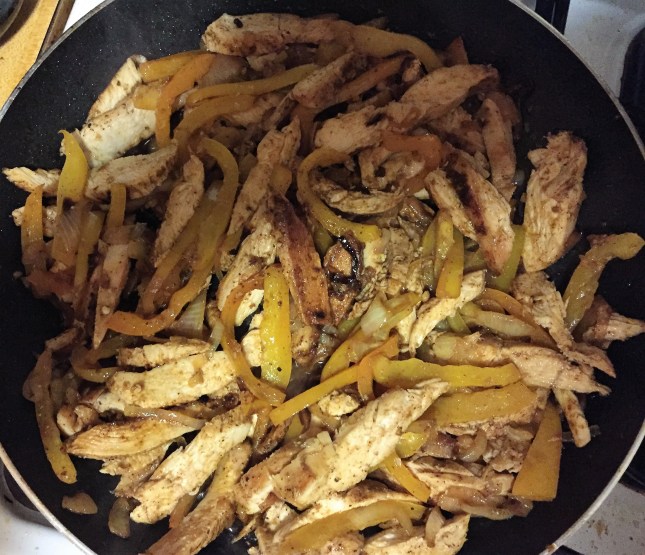
I made one slight change to the recipe as I went along and added the sliced chicken back into the pan with the vegetables so that everything could mix together and the flavors could meld, but other than that, I followed it as is. These fajitas are a bit spicier than what you might usually have because of the adobo sauce, which is usually spicy on its own even if you just use a little bit. I did add any chopped chipotle to the dish because I thought the heat might be too much for everyone, but if you like spicy then you should go for it. This recipe had the best flavor of any fajitas recipe I have tried before and I think the sauce makes a real difference in giving flavor in the marinade to the chicken and the vegetables. I think the marinade would work just as well with beef if you wanted to try it and you can certainly substitute chicken thighs for breasts if you prefer. The recipe makes plenty and we even had some leftover that I was able to have for lunch the next day. Serve the fajitas with any of your favorite fixings – lettuce, tomatoes, salsa, guacamole, sour cream, different cheeses – and you could even double the recipe if you are serving a big crowd. This one certainly went over well at our house so I’ll be using it again.

That’s all I have for today. Check back next time for another recipe. Until then, Enjoy the rest of your day and enjoy your meal!

img_0593


Leave a comment

Posted by on November 2, 2016 in Cooking, Dinner, Poultry


Tags: , , , , , ,

A New Take on a Takeout Classic – Chinese Fried Rice

Everyone always has their favorite dish when it comes to getting Chinese food. While some people will always defer to things like egg rolls, beef and broccoli, wonton soup, General Tso’s chicken or Mushu pork, there always seems to be one thing that is consistent with all Chinese food takeout orders – fried rice. The great thing about fried rice is that it goes so well with any of the entrées you might choose for takeout but it can also be an entrée all of its own. There are different varieties available from whatever place you normally get your Chinese food from but fried rice is easy enough where you can make something like this right at home to go with your favorite Asian meal or just to have as the centerpiece of your dinner. I have tried a few different fried rice recipes over the years and recently came across this one at Food.com that promise to have the taste and flavor just like you get from your favorite takeout place.

Chinese Fried Rice

3cup finely chopped onion

2 1tablespoons oil

1 egg, lightly beaten (or more eggs if you like)

3 drops soy sauce

3 drops sesame oil

8 ounces cooked lean boneless pork or 8 ounces chicken, chopped

1cup finely chopped carrot (very small)

1cup frozen peas, thawed

4 cups cold cooked rice, grains separated (preferably medium grain)

4 green onions, chopped

2 cups bean sprouts (optional)

2 tablespoons soy sauce(add more if you like)

Heat 1 tablespoon of the oil in a wok or large skillet over medium-high heat; add the chopped onions and stir-fry until the onions turn a nice brown color, about 8-10 minutes; remove the onions from the skillet.

Allow the skillet to cool slightly.

In a small bowl, mix the egg with 3 drops of soy sauce and 3 drops of sesame oil; set the bowl aside.

Add 1/2 tablespoon of the oil to the skillet, swirling to coat the surface; add the egg mixture. Working quickly, swirl the egg until the egg sets against the skillet. When the egg puffs, flip the egg and cook the other side briefly. Remove the egg from the skillet and chop the egg into small pieces. Set the egg aside.

Heat 1 tablespoon of the oil in the skillet. Add the selected meat to the skillet, along with the carrots, peas, and cooked onion. Stir-fry the ingredients for about 2 to 3 minutes.

Add the cooked rice, green onions, and bean sprouts (if using), tossing the ingredients to mix everything well and stir-fry for about 3 minutes.

Add 2 tablespoons of the soy sauce and the chopped egg to the rice mixture and fold them into the rice. Stir-fry everything together for 1 minute more and serve.

As is always the case with fried rice, you can use any type of protein you like with the dish – beef, pork, chicken, shrimp, tofu – or no meat at all and keep everything vegetarian. I did find that this recipe does seem to taste a lot like takeout rice. I am not sure if it is the amount of soy used or just the method, but the taste was really close for me. I served this with the chicken teriyaki I made and it complemented the meal perfectly, but as I said this fried dish could stand on its own as a meal if you want something easy one night and have some leftover protein and vegetables to deal with. I even threw in some leftover asparagus tips into the mix to top ours off.

That’s all I have for today. Check back next time for another recipe. Until then, enjoy the rest of your day and enjoy your meal!

img_0592


Tags: , , , , ,

 
National Day Calendar

Fun, unusual and forgotten designations on our calendar.

Jennifer Probst

a little bit naughty a little bit nice

Laissez Faire

Letting Life Lead

What To Have For Dinner Tonight

Simple and delicious dinner inspiration