RSS

Category Archives: Dinner

Oktoberfest Meals, Part 2 – Pork Chops with Cider Glaze

It’s time for the next recipe I tried that was part of Williams-Sonoma and their post about Oktoberfest recipes. Pork is a mainstay when it comes to Oktoberfest and German cooking, and this recipe is a very simple one that makes great use of three great pieces of this type of cooking – pork chops, cabbage and apples. This one is a pork chops with cider glaze recipe that you can prepare and have on the table in under 30 minutes. If you want to take the time to brine your pork chops ahead of time, you could do that overnight and have some really flavorful chops when you are done. I’ll post the brine recipe after this recipe.

Pork Chops with Cider Glaze

4 bone-in, center-cut pork chops, each about 3/4 inch thick

Salt and freshly ground pepper, to taste

2 tablespoons olive oil

1 head red cabbage, halved, cored and thinly sliced crosswise

2 1/2 cups apple cider or apple juice

1 tablespoon apple cider vinegar

1 tablespoon fresh thyme leaves

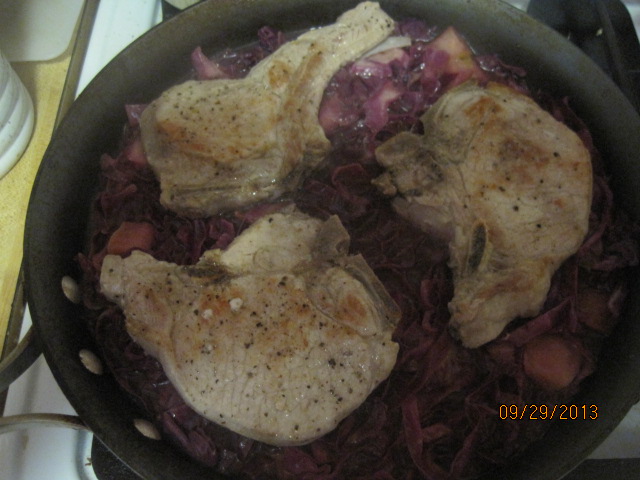
Season the pork chops generously with salt and pepper. In a large skillet over medium-high heat, warm the olive oil. Add the pork chops and cook, turning them once, until they are golden brown, about 5 minutes total. Transfer the chops to a plate.

Add the cabbage to the skillet and cook, stirring frequently, until the cabbage is softened, about 3 to 4 minutes.

Increase the heat of the skillet to high, pour the cider and vinegar over the cabbage, and boil until the liquid is reduced to about 1 cup, about 8 to 10 minutes. Stir in the thyme leaves.

Return the pork chops to the skillet and any accumulated juices from the plate and spoon the glaze over the chops. Cover the skillet, reduce the heat to medium-low, and simmer until the pork chops are tender and barely pink inside, about 5 minutes.

Arrange the cabbage and pork chops on a platter, top them with the glaze and serve immediately.

I have to tell you that you really do need a large skillet for this if you are going to make a whole head of cabbage. I only used half of a cabbage and it more than filled the skillet I chose to use. I also added a couple of apples to the cabbage as it was cooking for even more apple flavor to the dish. I served this with just some plain white rice, but it would go well with some noodles or even some German potato salad.

If you want to make some brine for these pork chops, here is a very quick brine recipe you can put together to give some great flavor.

Pork Chop Brine

4 cups apple cider

3 cups water

1/2 cup salt

5 whole peppercorns

2 cinnamon sticks

Combine all the brine ingredients in a large bowl and stir. Immerse the pork chops in the liquid, cover and refrigerate for at least 6 hours or preferably overnight.

Brining really does make the meat more moist and adds great flavor, so if you have the time and are planning ahead, you might want to give it a try. I loved the apple flavor that permeated the chops and the cabbage in this dish and it was very easy to make.

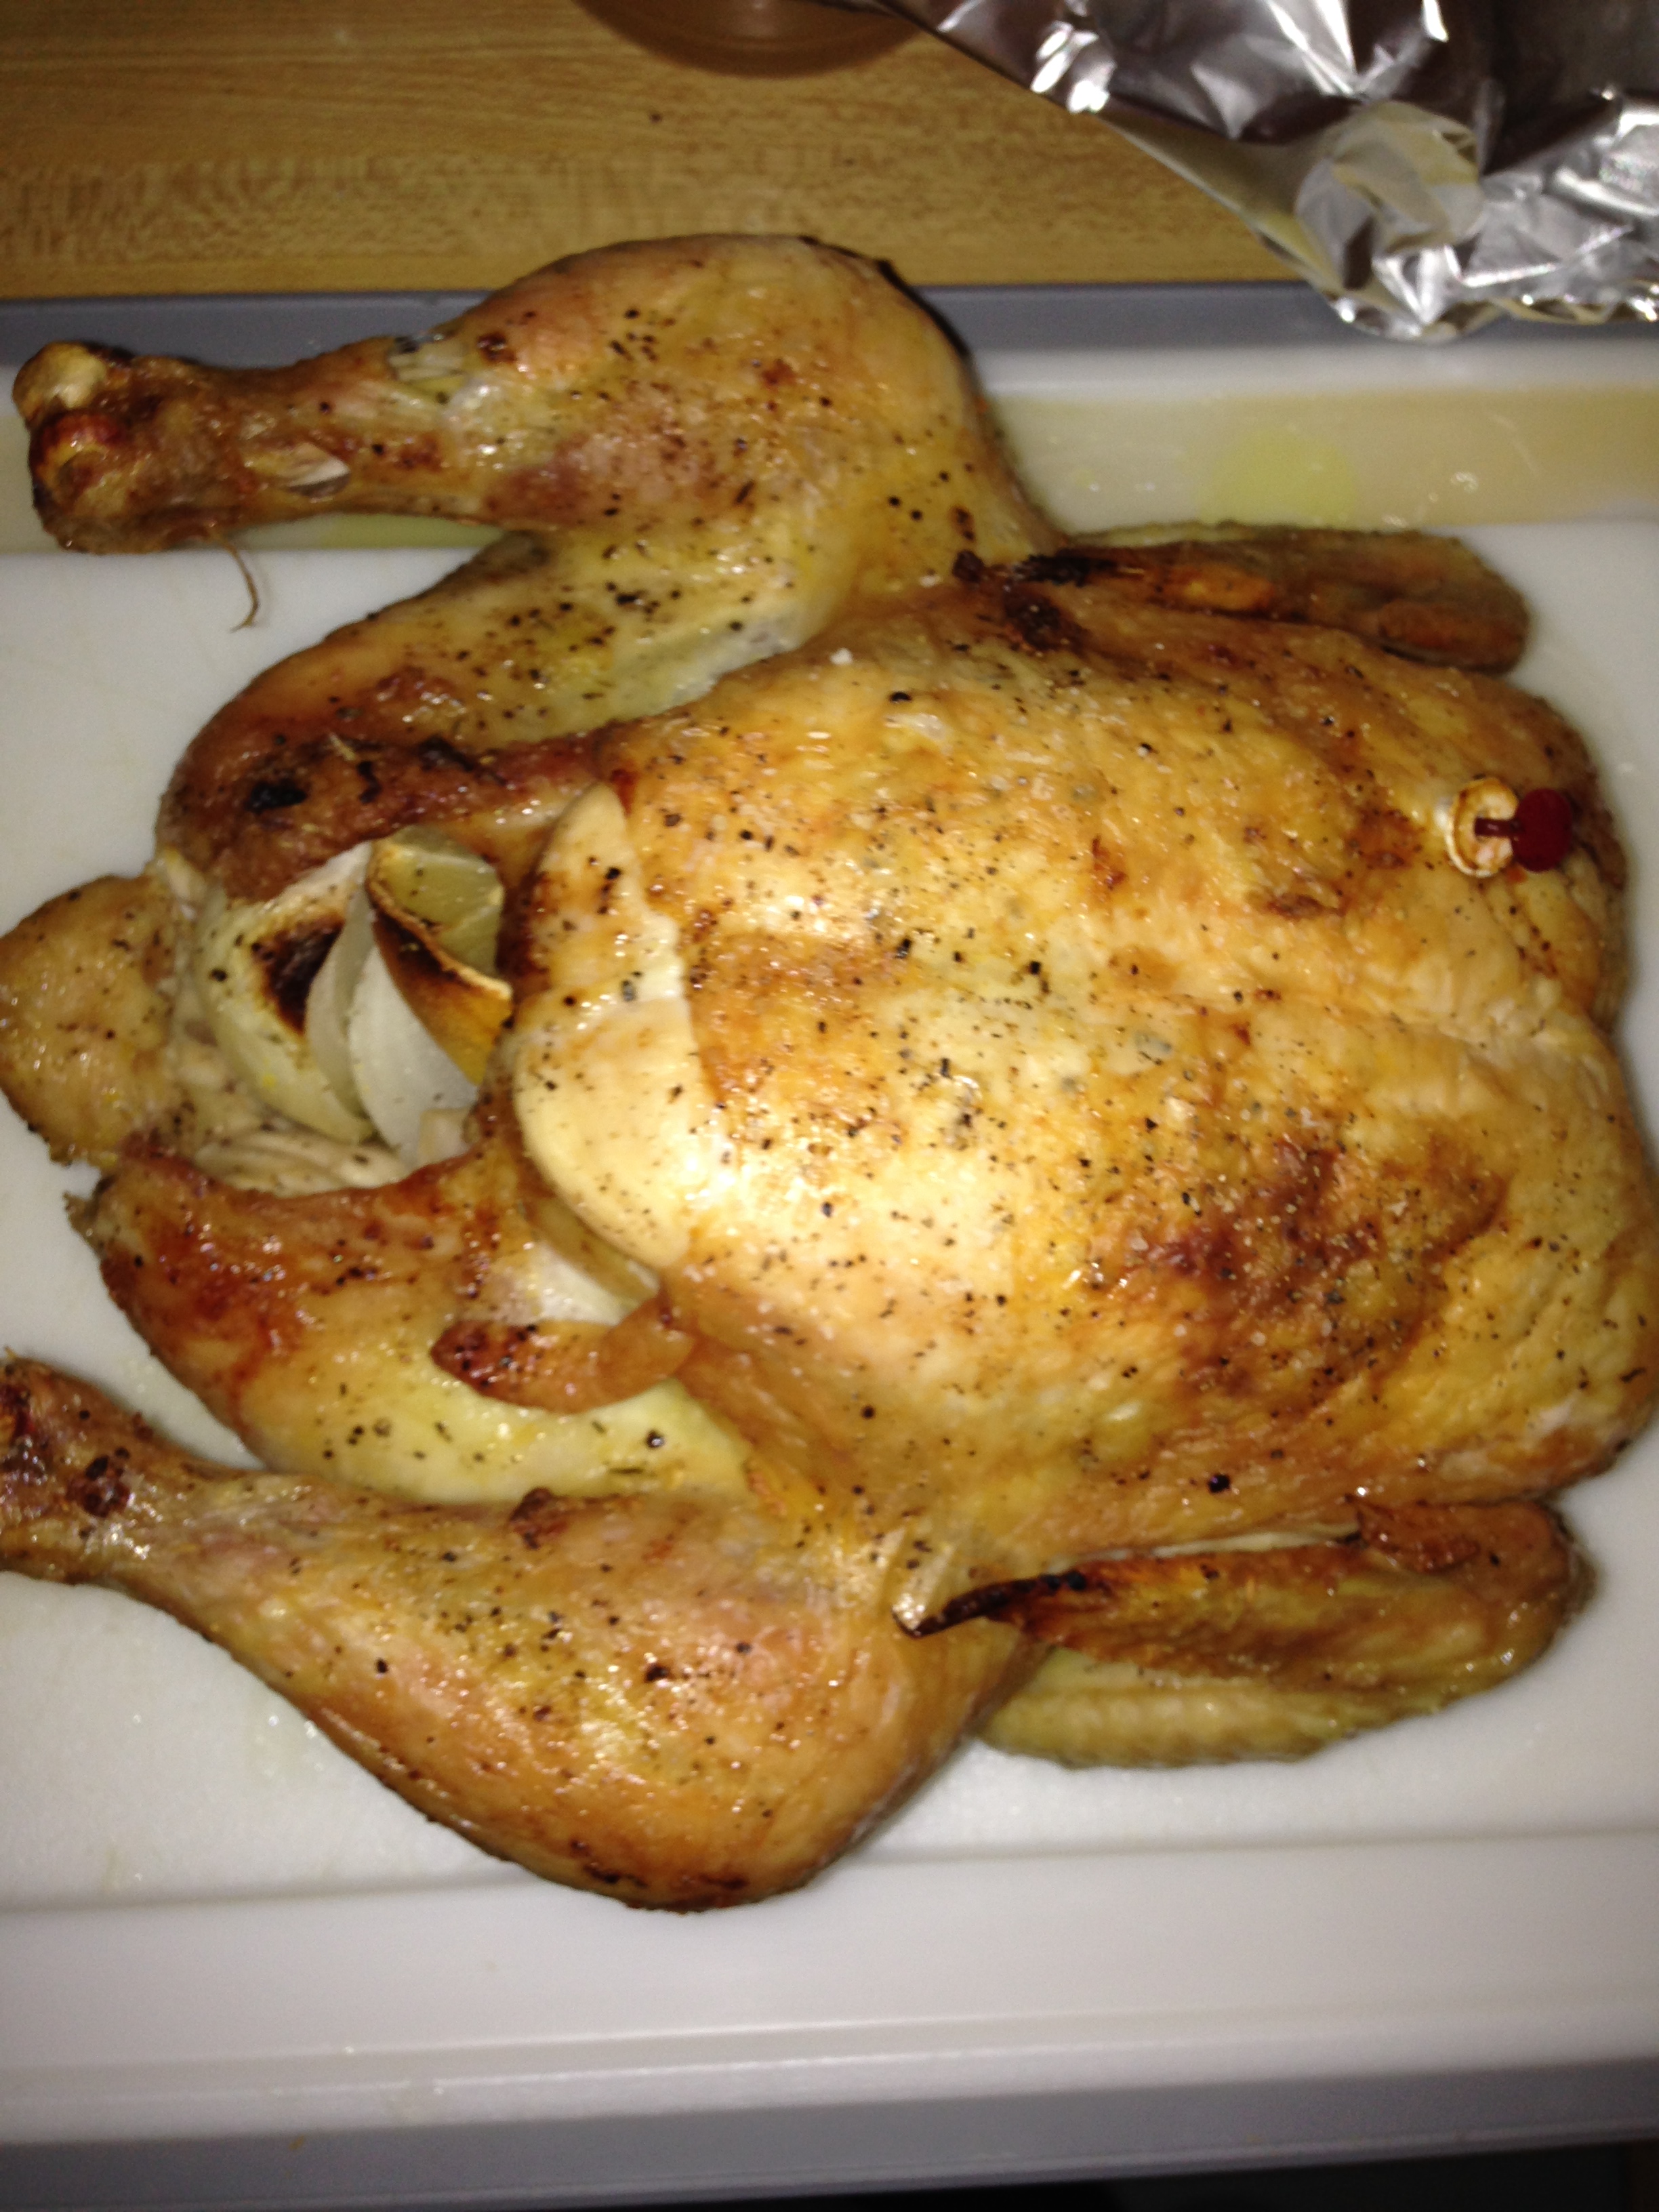
That’s all I have for today. Check back again for more recipes I’ll be trying out. I do have some new choices for a roast beef, a roasted chicken and a whole bunch of other recipes I am planning to try. Until next time, enjoy the rest of your day and enjoy your meal!

001

 
Leave a comment

Posted by on October 1, 2013 in Cooking, Dinner, Pork


Tags: , , , , ,

Oktoberfest Meals, Part 1 – Pork Shoulder with Sauerkraut and Apples

Even if you are not a beer lover or beer fan, there is some great food that goes along with a Oktoberfest celebration. Of course there are lots of meals involving sausages and wursts of various kinds, but there are also lots of uses for things like pork and cabbage. Williams-Sonoma posted some great recipes a little over a week ago that concentrated on the Oktoberfest meals and what you can make at home and I recently tried out a couple of them. The first one I tried was a nice meal of pork shoulder with sauerkraut and apples. I had picked up a very large pork shoulder on sale, cut it into two roasts, removed the bone and froze half of it. I used the other half for this recipe.

Pork Shoulder with Sauerkraut and Apples

1 boneless pork shoulder roast, about 4 to 5 pounds

Salt and freshly ground black pepper

2 tablespoons butter

2 tablespoons vegetable oil

1 onion, thinly sliced

3 Golden Delicious apples, peeled, halved and cored

1 tablespoon fresh thyme

1/2 cup dry white wine

2 pounds sauerkraut, squeezed dry

1/4 cup firmly packed brown sugar

1 tablespoon caraway seeds (optional)

Lay the pork flat, boned side up, on a cutting board. Using a sharp knife, trim away any large pockets of fat. Starting at the thinner end of the meat, roll up the pork and securely tie the roll at regular intervals with kitchen twine. Season the pork generously with salt and pepper.

In a fry pan over medium-high heat, melt the butter with the vegetable oil. Add the pork and cook, turning frequently, until it is well browned on all sides, about 10 minutes. Transfer the  pork to a platter.

Return the pan to medium-high heat, add the onion, apples and thyme, and saute until the onion and apples are lightly browned, about 5 minutes. Transfer the apple mixture to a bowl.

Pour off the fat from the pan. Return the pan to medium-high heat, add the wine and de-glaze the pan, stirring with a wooden spoon to scrape up any browned bits from the bottom of the pan.

Pre-heat the oven to 325 degrees. Cover the bottom of a large Dutch oven with the sauerkraut. Sprinkle the sauerkraut with the brown sugar and caraway seeds, if using. Place the pork on top of the sauerkraut and surround it with the apple mixture. Pour in the wine mixture. Cover, transfer to the heated oven and cook until the pork is fork-tender and shreds easily, about 4 to 5 hours.

Transfer the pork to a carving board. Using a sharp knife, cut the pork crosswise into slices about 1/2 inch thick, removing the twine from the pork as you slice. Place the sauerkraut on a large platter and top with the pork slices. Surround the pork with the apples and serve immediately.

This dish also lends itself very well to cooking in the slow cooker. All you need to do is cover the bottom of the slow cooker with the sauerkraut and sprinkle the brown sugar on top of it. Place the pork on top of the sauerkraut and surround it with the apple mixture. Pour in the wine mixture, cover, and cook on low until the pork is fork-tender, about 8 to 10 hours.

I did change a couple of things about this recipe. I did not use the caraway seeds myself. I also substituted chicken broth for the white wine. You could just as easily use water instead of wine or broth if you like. Finally, I only used 1 pound of sauerkraut and then substituted some shredded red cabbage for the rest of it to give things a bit of a different look and flavor. The 5 hour cooking time gives the cabbage and the pork incredible flavor. The meat falls and shreds much like pulled pork would but you get a nice bite of the vinegar in the sauerkraut and the taste of the apples. I think it’s a great dish. I served this with some wild rice and applesauce.

That’s all I have for today. Check back tomorrow for another Oktoberfest recipe I just tried for pork chops with a cider glaze. It was also a great recipe to try out this time of year. Until next time, enjoy the rest of your day and enjoy your meal!

002 001


Leave a comment

Posted by on September 30, 2013 in Cooking, Dinner, Pork, Slow Cooker Meals


Tags: , , ,

Another Roast Chicken Variation

You would think we would get tired of eating chicken since we have it so much. I think that is one of the reasons I am always looking for some way to do it just a little differently. Buying a whole chicken and roasting it is a great way to get several meals out of one dish. We usually have leftovers where we can use the chicken for another dinner, like a chicken salad or chicken tacos or something of that nature, chicken sandwiches for lunches and then I use the carcass to make chicken stock which we use for soups. A $6.00 chicken then turns into 4 or 5 meals, making it really worth the effort. You can also cut up the chicken yourself instead of paying extra for a package of parts in the store. It’s a little extra time and effort on your part, but it’s worth it. I made this simple roasted chicken recipe that I found from Kelsey Nixon of the Cooking Channel the other night and it came out great.

Roasted Chicken with Lemon, Garlic and Thyme

1 (6-pound) roasting chicken

4 tablespoons butter, softened

3 tablespoons fresh minced thyme, plus a handful for stuffing

4 cloves garlic, chopped

2 teaspoons fresh lemon zest

Salt and freshly ground black pepper

1 lemon, quartered

1 onion, coarsely, chopped

3 celery stalks

3 carrots, unpeeled and cut into thirds

1 onion, quartered

1 cup chicken broth

2 teaspoons all-purpose flour

Preheat the oven to 450 degrees. Rinse the chicken and pat it dry.

in a small bowl, make a compound butter by combining the softened butter, minced thyme, garlic cloves, lemon zest, salt and pepper.

Season the cavity of the chicken generously with salt and pepper. Stuff the cavity with the lemon quarters, a handful of fresh thyme and the quartered onion. Place the carrot, celery and chopped onion in the bottom of the roasting pan and place the chicken on top of the vegetables. Cross the legs and tir them with kitchen twine.

Gently lift the skin away from the chicken and spread 2 tablespoons of the compound butter mixture underneath the skin, distributing it evenly. Spread the remaining compound butter over the entire surface of the chicken and then season the chicken generously with salt and pepper.

Place the chicken in the oven and roast for 20 minutes. Reduce the oven temperature to 375 degrees and roast the  chicken until a meat thermometer inserted into the thickest part of the inner thigh not touching the bone registers 160 to 165 degrees, about 45 minutes. Transfer the chicken to a cutting board to rest for about 15 minutes. Remove the vegetables from the bottom of the roasting pan and set aside. Tent the chicken with aluminum foil to keep it warm.

Pour the pan juices into a large glass measuring cup. Spoon the fat off the top of the juices. Add the chicken broth to the roasting pan and place the pan over high heat. Bring the broth to a boil, scraping up any browned bits on the bottom of the pan.Return the pan juices to the pan and whisk the flour into the broth mixture and bring to a boil until slightly thickened, about 2 minutes. Season the sauce to taste with salt and pepper. Serve alongside the roasted chicken.

The vegetables on the bottom of the pan serve like a roasting rack and lift the chicken up so it roasts better on the bottom. The vegetables also get the benefit of a lot of those juices, so I chose to peel the carrots first and then we had the vegetables as a side dish with the chicken, along with some green beans and wild rice. I used my trusty cast iron pan to do all this to make clean up easier and making the pan sauce easier when the chicken was done. The chicken fit perfectly in there anyway, so it worked out well. The flavor the compound butter provides the chicken was great and we got some nice crispy skin to boot. The chicken was very moist and done perfectly and will work well for other meals. it was also very easy to do and everything thing was done in not much over an hour, so it was great for a weeknight meal.

That’s all I have for today. Check back next time for some more recipes. I made a nice slow roasted pork last night that has a great recipe to it that is perfect for a Oktoberfest kind of meal, so check back for that. until next time, enjoy the rest of your day and enjoy your meal!

IMG_0323

 
Leave a comment

Posted by on September 28, 2013 in Cooking, Dinner, Poultry


Tags: , , ,

Soup Day Number Two – Moroccan Lentil Soup in the Slow Cooker

I probably don’t make good enough use of our slow cooker. I always say I am going to use it more but somehow it just seems to slip my mind. The problem I have is that our kitchen is small so it is not a piece of equipment I can keep on the counter and remember to use often. It is usually when I see a recipe I like that makes use of the slow cooker that it jogs my memory. That is exactly what happened with this soup recipe that I found from A Year of Slow Cooking. This recipes uses 3 different kinds of beans, which I love, and some interesting spices to create this one pot meal.

Moroccan Lentil Soup

1 cup dried lentils

1 can garbanzo beans (chick peas), drained and rinsed

1 can pinto beans, drained and rinsed

1 onion, chopped

2 garlic cloves, smashed and chopped

1/2 cup chopped celery

1/2 cup chopped carrots

28 ounce can diced tomatoes and juice

4 cups vegetable broth, chicken broth or water

1 1/2 teaspoons garam masala

1/2 teaspoon cayenne pepper

1/2 teaspoon ground cumin

1/4 teaspoon ground nutmeg

1/4 teaspoon ground cinnamon

1 inch ginger, peeled and grated

Add the chopped onion, celery and carrot to the slow cooker and sprinkle over the bottom. Drain and rinse off the lentils, garbanzo beans and pinto beans and add them on top of the vegetables. Grate the ginger on top of the beans and then add in the garam masala, cayenne pepper, cumin, nutmeg and cinnamon. Stir in the broth or water and the diced tomatoes plus the juice. Stir the mixture to blend everything together.

Cover the slow cooker and cook the soup on low for 8 to 10 hours. Before serving the soup, use an immersible blender to pulse and blend some of the vegetables and beans together. This will help to give the soup a better texture and meld some of the flavors together.

This recipe makes a good bit of soup, so you will have leftovers for lunches or another dinner, or you  could even freeze some to use as an emergency dinner for another weeknight when you don’t feel much like cooking. Garam masala is a spice blend commonly used in Northern Indian cooking that mixes together pepper, cumin, cloves, cinnamon and cardamom. It really adds some nice flavor and fragrance to this dish. All of the spices work well together and give great taste to this soup and using the immersible blender really helps to give it a velvety smooth texture to finish off with. If you use vegetable stock or water in this dish, you can make it vegetarian. You get plenty of protein from all of the beans in the dish and I have had some for lunch after the dinner we had of this soup and the flavor does seem to get even better. If you want to save yourself even more time with the slow cooker, chop your vegetables the night before, get everything prepped on your counter, and then you can just throw it together in the morning before you run out the door to start your day.

That’s all I have for today. Check back next time for another recipe. I still have lots I have been working on, including a new roasted chicken dish I tried last night. I also have some other great recipes from the Cooking Channel, Food Network, Food Republic, Cook’s Country and Williams-Sonoma that I will be trying over the next few days and weeks, so check back for those. Until next time, enjoy the rest of your day and enjoy your meal!

IMG_0322 IMG_0321


Tags: , , , , , ,

41 Sandwiches We’d Make to Get an Engagement Ring – Bon Appétit

41 Sandwiches We’d Make to Get an Engagement Ring – Bon Appétit

I love sandwiches. There are few things better than having a good sandwich for lunch or even dinner. Bon Appetit has put together 41 recipes for several different kinds of sandwiches that will appeal to everyone and give you some great ideas of new things to try for lunch or dinner. Check it out!

 
Leave a comment

Posted by on September 27, 2013 in Cooking, Cooking Websites, Dinner, Lunch, Sandwiches


Tags: , , ,

Soup Season in Full Bloom – Roasted Butternut Squash Soup

The weather has started to get a little more Fall-like around here the last few days so I had planned to make a couple of soups this week to fit the occasion. Soups make a great dinner because they are filling, delicious and nutritious all in one. I had bought a butternut squash at our friend’s farmstand this past weekend and then I found this great recipe from Michael Chiarello for a different butternut squash soup recipe than I had made before. It makes use of some different spices to give a different flavor and roasting the squash with some of these ingredients really added something to the meal.

Roasted Butternut Squash Soup

For the Toasted Spice Rub:

1/4 cup fennel seeds

1 tablespoon coriander seeds

1 tablespoon peppercorns

1 1/2 teaspoons red pepper flakes

1/4 cup chili powder

2 tablespoons kosher salt

2 tablespoons ground cinnamon

For the Roasted Squash:

3 pounds butternut squash (about 1 large squash)

Kosher salt

Freshly ground black pepper

1/2 cup (1 stick) butter

2 tablespoons chopped fresh sage leaves

2 tablespoons granulated sugar

1/4 cup balsamic vinegar

1/4 cup dark molasses

2 teaspoons Toasted Spice Rub

For the Soup:

2 tablespoons extra-virgin olive oil

1/2 cup diced onion

1/4 cup diced celery

1/4 cup diced carrot

1 cinnamon stick

Salt and freshly ground black pepper

4 cups chicken or vegetable stock

1 1/2 cups Roasted Winter Squash

1/2 cup half-and-half

For the spice rub: Toast the fennel seeds, coriander seeds and peppercorns in a small, heavy pan over medium heat. When the fennel turns light brown, turn on the exhaust fan above your stove, add the red pepper flakes and toss the mixture vigorously. Immediately turn the mixture out into a bowl to cool.

When the mixture has cooled, place it in a blender or spice mill with the chili powder, salt and cinnamon and blend until all the spices are evenly ground. Keep the spice mix in a glass jar in a  cool, dry place.

For the squash: Preheat the oven to 400 degrees. Peel the squash with a vegetable peeler, halve lengthwise and discard any of the seeds. Cut the squash into 1-inch diced pieces. Place the squash in a large bowl and season with salt and pepper.

Heat the butter in a medium skillet over medium-high heat. When the butter stops foaming and has turned a light brown, pull the pan off the heat and add the sage, sugar, vinegar (keep your face back when you add the vinegar), molasses and the toasted spice rub. Mix well and allow it to simmer over medium-low heat for 1 to 2 minutes to meld the flavors.

Pour the  vinegar mixture over the squash and toss well. Transfer the squash to a heavy, rimmed baking sheet or baking dish large enough to hold the squash in a single layer. Place the squash in the oven and roast, tossing at least once, until it is very tender and caramelized, about 45 minutes to 1 hour. Set the squash aside until it is cool enough to handle but still warm, so the liquids are still runny.

Working in batches, if necessary, transfer the warm squash and all the cooking liquids to a food processor and process until the mixture is smooth. You can use the squash immediately or refrigerate it for up to 5 days or freeze it for up to 2 months.

For the soup: Heat the olive oil in a large saucepan over medium heat until hot. Add the onion, celery, carrot and cinnamon stick and saute until the vegetables are soft but not brown, about 10 minutes. Season with salt and pepper.

Add the chicken or vegetable stock and bring the mixture to a boil. Simmer for several minutes. Stir in the squash until it is smooth, then simmer gently, allowing the flavors to meld, about 10 minutes. Discard the cinnamon stick.

Puree the soup in a blender, in batches if necessary, until it is smooth. Return the soup to the pan and re-heat it gently. Add the half-and-half and adjust the seasoning with salt and pepper to taste. Keep warm until you are ready to serve.

A couple of things about this recipe. The toasted spice rub makes quite a bit of spice mix. If you think you will use it again later on, it’s great to have on hand. I cut the recipe in half and still had plenty leftover so you can do that if you don’t want a lot of spice mix. You can use the squash puree for other things as well if you didn’t want to make soup with it. I think it would be a great side dish for chicken or turkey just as it is. You could also use other winter squash if you prefer, like acorn squash, and I think it would do just as well. The soup itself has a very roasted, toasty flavor to it. You can certainly taste the spices coming through in the soup but they do not over power the dish at all. I loved the creaminess of the squash and found it to be a very hearty meal. If you use vegetable stock or water instead of the chicken stock, you can make this a vegetarian meal.

That’s all I have for today. Check back next time for another soup recipe I just tried. This one was made in the slow cooker and can also be a vegetarian dish, so check back for that one tomorrow. Until next time, enjoy the rest of your day and enjoy your meal!

IMG_1682


Tags: , , , , , , ,

A Quick and Easy Use of Leftovers – Open Face Turkey Sandwiches

It is getting into that turkey time of year. For most of the year, turkey is kind of expensive and not something I buy very often, unless it is ground turkey. Even just getting a turkey breast can be kind of pricey. The other problem I have is unless we are having people over for dinner, it just doesn’t make sense to buy a huge turkey for just the three of us. That being said, last week I had a hankering for some turkey and bought a 15 pound one. Needless to say, after I made it we had lots of leftovers. I was able to use the carcass to make some turkey stock, which will be used in soups this week. I also made some turkey salad for lunches for Michelle and myself. That still left us with leftover turkey, mashed potatoes, stuffing and gravy. What better way to make use of them then to make some open face sandwiches for dinner the other night?

Open Face Turkey Sandwiches

1 1/2 pounds leftover turkey meat, sliced

1/2 cup leftover turkey gravy (add some water to it if necessary)

1/2 cup leftover turkey stuffing

4 slices bread

In a medium saucepan over medium heat, mix the turkey and the turkey gravy until the gravy is heated through and bubbling. Add more water or stock to thin out the gravy if necessary. Coat the turkey slices on all sides to make sure they are covered with gravy. Add in the stuffing and toss to coat and warm through, about 2 minutes. Toast the pieces of bread to your particular liking. Cover the toasted bread with the turkey, gravy and stuffing. Serve with a side of leftover mashed potatoes.

Okay, I know it’s not really much of a recipe, but it makes a great quick meal when you have lots of leftovers and just want something simple to use them with. You can also do the same thing here if you have any leftover chicken and gravy from a roasted chicken, or even with some meat dishes like a roast beef, pot roast or even a meatloaf with some gravy. If you would rather have a turkey panini, then I you can do that as well.it’s just a good way to make use of what you already have around the house without wasting anything and it is something to keep in mind as we get closer to the holidays and will undoubtedly have leftovers to deal with.

That’s all I have for today. Just a quick post this morning before you get on with the rest of your day. I have lots of recipes planned for the coming days, including several that make use of the slow cooker as we are getting into that time of year again and a few new soup recipes as with Fall comes the season of soup around our house. I also have some good ideas for some Oktoberfest meals if you are looking to do something fun with that (you can start by trying the pretzel recipe I posted yesterday). Keep a look out for all of those in the coming days and weeks. Until next time, enjoy the rest of your day and enjoy your meal!

003

 
Leave a comment

Posted by on September 23, 2013 in Cooking, Dinner, Leftovers, Sandwiches, Turkey


Tags: , , ,

You Can Never Have Too Many Meatloaf Recipes

It seems like every time I look at a cooking magazine or cooking website, there is a new recipe for a way to make meatloaf. Don’t get me wrong; I love meatloaf and could probably eat it every week, but I would have to try new recipes just to keep it from getting boring. I think that is why I am always willing to give a new meatloaf recipe a try. I saw this one in the recent edition of Cook’s Country magazine and it looked like it would have great texture and an interesting flavor to it, so I thought I would give it a try.

Meatloaf with Mushroom Gravy

1 cup water

1/4 ounce dried porcini mushrooms, rinsed

16 square saltine crackers

10 ounces white mushrooms, trimmed

1 tablespoon vegetable oil

1 onion, chopped fine

Salt and pepper

4 garlic cloves, minced

1 pound ground pork

2 large eggs

1 tablespoon plus 3/4 teaspoon Worcestershire sauce

1 pound ground beef

3/4 teaspoon minced fresh thyme

1/4 cup all-purpose flour

2 1/2 cups chicken broth

Adjust an oven rack to the middle position and heat the oven to 375 degrees. Microwave the water and the porcini mushrooms in a covered bowl until steaming, about 1 minute. Let the porcini mushrooms sit until softened, about 5 minutes. Remove the porcini mushrooms from the bowl with a fork and mince them. Strain the porcini liquid through a strainer lined with a coffee filter and reserve 3/4 cup.

Process the saltines in a food processor until they are finely ground, about 30 seconds. Transfer the crackers to a large bowl. Pulse half of the white mushrooms in the food processor until they are finely ground, about 8 to 10 pulses.

Heat the vegetable in a large, non-stick, oven-safe skillet over medium-high heat until shimmering. Add the onion and cook until it is browned, about 6 to 8 minutes. Add the processed white mushrooms and 1/4 teaspoon of salt and cook until any liquid present evaporates and the mushrooms begin to brown, about 5 minutes. Add the garlic and cook until fragrant, about 30 seconds. Transfer the contents of the skillet to the bowl with the saltines and allow it to cool completely, about 15 minutes.

Once the mixture has  cooled, add the pork, eggs, 1 tablespoon of Worcestershire sauce, 1 teaspoon of salt, 3/4 teaspoon of pepper, and 1/4 cup of the reserved porcini mushroom liquid to the cooled saltine-white mushroom mixture and knead gently until it is mostly combined. Add the beef and knead until the mixture is well combined. Transfer the meat mixture to the now-empty skillet and shape into a 10″ x 6″ loaf. Bake until the meatloaf registers 160 degrees, about 45 to 55 minutes. Transfer the meatloaf to a cutting board using a spatula and tent it loosely with aluminum foil.

Thinly slice the remaining white mushrooms. Discard any solids from the skillet and pour off all but 2 tablespoons of fat. If you don’t have enough fat left in the pan after removing the meatloaf, you can supplement it with melted butter or vegetable oil. Heat the fat over medium-high heat until it is shimmering. Add the sliced white mushrooms and the minced porcini mushrooms and cook, stirring occasionally, until a deep golden brown, about 6 to 8 minutes. Stir in the thyme and 1/4 teaspoon of salt and cook until fragrant, about 30 seconds. Add the flour and cook, stirring frequently, until golden, about 2 minutes. Slowly whisk in the chicken broth, the remaining 1/2 cup of reserved porcini liquid and the remaining 3/4 teaspoon of Worcestershire sauce, scraping up any browned bits in the pan, and bring the mixture to a boil. Reduce the heat to medium and simmer, whisking occasionally, until thickened, about 10 to 15 minutes. Season with salt and pepper to taste. Slice the meatloaf and serve with the mushroom gravy.

I really liked this recipe. There is nothing better than having a good gravy with your meatloaf and this recipe certainly gives you that. If you’re not a fan of mushrooms, you may not go for the gravy but Michelle and Sean are not big fans of mushrooms and they loved the meatloaf. The texture of it was perfect, it sliced nicely and tasted great. Cooking in the skillet instead of a loaf pan made a big difference in keeping the meatloaf from getting soggy and falling apart.Sauteing the vegetables to mix into the meatloaf also made a big difference. You also get to do everything in one pan to help save on cleaning up. I served this with mashed potatoes and some fresh steamed broccoli. I’ll be using this recipe again.

That’s all I have for today. Check back next time for more great recipes. I still have lots to go through of recipes I have gotten from magazines and online lately, so we’ll see what comes along for next week. Until then, enjoy the rest of your day and enjoy your meal!

002 001


7 Comments

Posted by on September 20, 2013 in Beef, Cooking, Dinner, Gravy


Tags: , , , ,

Let the Soup Season Begin – Hearty Vegetable Chowder

The weather is starting to get much cooler here at night now so Fall is not far away for us. It is still warm during the day, for the most part, but the nights have been crisp and cool. For me this means that it is time to start breaking out some soup recipes. Luckily, in the newest issue of Cook’s Country magazine, there was a great looking soup that was perfect to kick off the soup-making season for me. This vegetable chowder is very easy to make and makes good use of just a few simple ingredients.

Hearty Vegetable Chowder

6 slices bacon, chopped

1 pound leeks, white and light green parts only, halved lengthwise, sliced thin and washed thoroughly

4 carrots, peeled, halved lengthwise and cut into 1-inch pieces

2 celery ribs, halved lengthwise and cut into 1/2-inch pieces

1 teaspoon minced fresh thyme

Salt and pepper

1 1/2 pounds russet potatoes, peeled and cut into 1-inch pieces

2 garlic cloves, minced

4 cups chicken broth

1 bay leaf

1/2 cup half-and-half

1 tablespoon minced fresh chives

1 teaspoon lemon juice

Cook the bacon in a Dutch oven over medium heat until the fat has rendered and the bacon is nearly crispy, about 7 to 9 minutes. Add the leeks, carrots, celery, thyme and 1 teaspoon of salt and cook until the leeks are translucent, about 8 minutes. Add the potatoes and cook, stirring constantly, until the starch begins to release from the potatoes and coat all the vegetables, about 2 minutes. Add the garlic and cook until it is fragrant, about 30 seconds. Add the chicken broth and the bay leaf and bring to a boil.

Reduce the heat to low, cover, and simmer the soup, stirring occasionally, until the vegetables are tender, about 20 minutes. Remove and discard the bay leaf. Transfer 1 cup of the vegetables (using a slotted spoon) and 2 cups of the soup broth to a blender; process until the mixture is smooth, about 1 minute. Stir the processed soup back into the pot. Stir in the half-and-half, chives and lemon juice and gently re-warm the soup. Season with salt and pepper to taste and serve.

There are a couple of things about this easy recipe. If you don’t have any leeks, I think you could easily substitute onions instead and not really lose anything. Leeks are great in a soup, but they are not always easy to get and can be a little pricey. Stirring in the potatoes really does make a difference here. The starch acts as a bit of a thickener here for the soup so that when you puree that bit of soup, you are going to end up with a nice, thick chowder. it was tasty and easy enough to make in under an hour on a weeknight all with ingredients I already had in the house. Even better, it’s a one pot meal and you could easily make it vegetarian by eliminating the bacon altogether if you want.

That’s all I have for today. Check back next time to see what recipe I’ll be making. I have been checking a few things out in the latest issue of Cook’s Country and there are a bunch of things I want to try, so we’ll see what’s next. until next time, enjoy the rest of your day and enjoy your meal!

001

 
Leave a comment

Posted by on September 19, 2013 in Cooking, Dinner, Spices, Vegetarian


Tags: , , , , ,

Start of the Week With Some Quick Chicken Chimichangas

I had actually intended to make enchiladas this weekend, but Michelle thought she might like to have chimichangas instead. In reality, I was going to take as many shortcuts as possible whatever I was cooking because I had bought a rotisserie chicken to use for something, even if it was just rotisserie chicken for dinner. I got this recipe from Food Network, though I did alter it slightly to fit our family wants from the meal. Since I don’t eat cheese, I eliminated the cheese from the ones I made for myself. Also, Michelle and Sean would not go for the green chile sauce in the recipe, so though I included it in this recipe, I didn’t actually make it myself.

Chicken Chimichangas

2 tablespoons butter

4 tablespoons vegetable oil

1 onion, chopped

3 cloves garlic, chopped

1 jalapeno pepper, diced (you can take the seeds out if you want less heat)

1 1/2 teaspoons chili powder

1/2 teaspoon ground cumin

1/4 teaspoon ground cinnamon

Kosher salt

1 tomato, chopped, plus more for topping

2 tablespoons chopped fresh cilantro

2 1/2 cups shredded rotisserie chicken

1/4 cup sour cream

1 15-ounce can refried beans

4 10-inch flour tortillas

1 cup shredded Monterey Jack cheese, plus more for topping

Shredded lettuce, for topping

Mexican rice, for serving

Green chile sauce, for topping (see recipe)

Green Chile Sauce:

1/2 cup chopped onion

2 garlic cloves, chopped

1 tablespoon vegetable oil

Pinch chili powder

Pinch cumin

Pinch granulated sugar

Pinch Kosher salt

2 4-ounce cans chopped green chiles, drained and rinsed

1 cup chicken broth

1/4 cup chopped fresh cilantro

Preheat the oven to 450 degrees. Melt the butter with 2 tablespoons of the vegetable oil in a skillet; transfer the butter mixture to a bowl. Heat the remaining 2 tablespoons of vegetable oil in the skillet. Add the onion, garlic and jalapeno and cook until soft, about 3 minutes. Add the chili powder, cumin, cinnamon and 1 teaspoon of kosher salt.; toast the spices for about 30 seconds. Add the tomato and cilantro and cook until slightly dry, about 2 minutes. Stir in the rotisserie chicken and sour cream and warm through. Remove the skillet from the heat.

Brush a rimmed baking sheet with some of the reserved butter-oil mixture. Spread 2 tablespoons of refried beans down the center of each flour tortilla, leaving a 2-inch border on both ends. Top the beans with 1 cup of the chicken mixture and 1/4 cup of cheese. Fold in the ends and roll up the tortilla.

Put the chimichangas seam-side down on the baking sheet; brush the chimichangas with the butter-oil mixture. Bake for 8 to 10 minutes per side, brushing the chimichangas again after you flip them. Top with the green sauce, more cheese, lettuce and tomato. Serve with the Mexican rice and any leftover refried beans.

For the Green Chile Sauce: Saute the onions and chopped garlic cloves in a skillet with the vegetable oil. Add a pinch of chili powder, cumin, sugar and kosher salt; cook for 30 seconds. Stir in the two cans of drained, rinsed and chopped green chiles; cook for 2 minutes. Add the chicken broth and simmer until the sauce thickens, then puree the sauce in a blender or with a stick blender. Stir in the chopped cilantro and serve over the chimichangas.

Not only was this recipe very easy to make at the very last minute (made easier by the rotisserie chicken), it tasted great. The blend of spices with the chicken really was very nice. Personally, I think it would have been even better with the green chile sauce and plan to make it next time around. Of course, you could easily make your own chicken by simply sauteing a couple of boneless chicken breasts or baking them in the oven and use the chicken meat that way.

That’s all I have for today. Check back next time for some more recipes. I made a couple of homemade snacks yesterday that I will post recipes for and am planning on a nice vegetable chowder for dinner tonight that I will post this week as well. Until next time, enjoy the rest of your day and enjoy your meal!

002

 
Leave a comment

Posted by on September 16, 2013 in Cooking, Dinner, Poultry, Rice, Sauce


Tags: , , , , ,

 
National Day Calendar

Fun, unusual and forgotten designations on our calendar.

Jennifer Probst

a little bit naughty a little bit nice

Laissez Faire

Letting Life Lead

simple cooking recipes

a blog to share with you the best