RSS

Category Archives: Side Dishes

5 Steps to Perfect French Fries | The Feed

5 Steps to Perfect French Fries | The Feed.

Okay, so they may not be the healthiest food in the world, but everyone loves french fries. At least one time in your life you need to try making homemade fries. I can promise you that it is worth the effort you put into it. It may not be something you can do all the time, but trust me, you will like them better than anything you ever bought in a store. Follow these five great tips from Cook’s Country and you will never look at Ore Ida’s the same way again. Check it out!

 
Leave a comment

Posted by on September 22, 2012 in Cooking, Cooking Websites, Potatoes, Side Dishes


Tags: , , ,

Fast Fish Tacos and Salsa

Yikes, it has been unbelievably hot and humid here in New York. Every day it’s muggy and sticky and even thunderstorms don’t seem to cool it off. It certainly doesn’t make me feel like cooking at any time – morning, afternoon or evening. I also have difficulty breathing when it’s this humid, so it really limits what I can do when it’s like this (an after effect of my illness in 2009. You can see my other blog if you’re interested in more facts). The fact is, we have to eat something. There’s only so many nights you can get away with making sandwiches and even grilling can be too much in this weather. I decided to make a meal tonight that take almost no time at all to cook. You’ll actually spend more time preparing the sides than you will the main course. I have made fish tacos before, but this is a fast version of fish tacos from Williams-Sonoma.

Fast Fish Tacos

  • 1 pound cod or other mild white-fleshed fish
      fillets
  • 1/4 teaspoon ground cumin
  • 1/4 teaspoon dried oregano
  • 1/2 teaspoon salt
  • 1 tablespoon olive oil
  • Juice from 1 lime
  • 12 corn tortillas
  • 2 cups finely shredded green cabbage
  • 1 cup fresh salsa
  • Sour cream
  • 2 tablespoons coarsely chopped fresh cilantro or fresh parsley

Directions:

Season the fish
Split the fillets lengthwise along the seam. Place the fish on a plate. In a small bowl, combine the cumin, oregano and salt. Sprinkle over both sides of the fish. Drizzle with the olive oil and lime juice.

Heat the tortillas
Preheat a cast-iron or other heavy fry pan over medium-low heat. On another burner, preheat a stovetop grill pan over medium-low heat. One at a time, warm the tortillas in the fry pan until flexible. Stack them on a plate and cover with a clean kitchen towel.

Cook the fish and assemble the tacos
Increase the heat under the grill pan to medium-high. When the pan is hot, add the fish and cook until golden, about 3 minutes. Turn and cook until golden around the edges, 1 to 2 minutes more, depending on type and thickness. Transfer the fish to a plate and cut into bite-size pieces.

Place an equal amount of the fish on each warm tortilla and top with shredded cabbage, a spoonful of salsa and a drizzle of sour cream. Sprinkle with cilantro or parsley and serve.

You could use any white fish for this recipe. I used cod because it was on sale this week, but tilapia or flounder would work just as well. I served this with sour cream, guacamole, salsa and some shredded lettuce instead of cabbage. You could also serve this with some of the black beans and rice I made last week.
I made the salsa I used myself and it is also a quick and easy recipe. The tomatoes I have purchased from Adams Farms this year have been really good so I have been using them a lot lately in many different dishes. This salsa is very easy to make and it tastes great. It will work well as a dip for chips or a topping for tacos, quesadillas or even burgers.
Tomato Salsa
1 1/2 pounds firm, ripe tomatoes, diced
1 jalapeno pepper, seeded and minced
1/2 cup minced red onion
1 small clove garlic, minced
1/4 cup chopped fresh cilantro leaves
1/2 teaspoon salt
Fresh ground black pepper
Juice of 1 lime
Granulated sugar, to taste
Set a large colander in a large bowl. Place the tomatoes in the colander and let them drain for 30 minutes. As the tomatoes drain, layer the jalapeno, onion, garlic and cilantro on top. Shake the colander to drain off the excess tomato juice. Discard the juice and wipe out the bowl.
Transfer all the contents of the colander to the now empty bowl. Add the salt, pepper and lime juice; toss to combine. Add the sugar to taste and serve.
You could make some substitutions here if you wanted. If you don’t care for cilantro (and many don’t) you could use fresh parsley instead. I have also omitted the jalapeno in the past and it still tastes great, so use it (or more of it) if that’s what you like. I have also used shallot before instead of red onion and it tastes just as good. You don’t get the bite that you often get with a red onion, but you get good flavor anyway.
That’s it for cooking for tonight. I had a bunch of bananas to use up with all this heat and got lots of ideas from people about different things to make, so I think tomorrow I will post some banana recipes that I really like. Check back and see what’s here. Until then, enjoy the rest of your evening, stay cool and enjoy your meal!
 
8 Comments

Posted by on July 17, 2012 in Cooking, Dinner, Seafood, Side Dishes


Tags: , ,

Fried Catfish Redux and Bacon Braised Green Beans

I took the weekend off from blogging to spend some time with the family and have fun, but now its back to it! Tonight I made some fried catfish. I have made catfish before, and you can find the recipe here, so today I wanted to try something slightly different. Every recipe I could find really suggests that frying catfish is the best way to make it, and while it may not be the healthiest way to go, I have to admit it does turn out good. As I was searching around, I sent a Twitter message to America’s Test Kitchen asking them for some advice, and they shot back to me this recipe from Cook’s Illustrated for Pan-Fried Catfish. I broke out my trusty cast iron for this one since the one I have has higher sides than a regular skillet and works well when frying with oil. I find myself using the cast iron pan for most everything lately. It really retains heat well and I can throw it in the oven to roast as well. Anyway, back to the catfish:

Pan-Fried Catfish

1 cup all-purpose flour

1/2 cup fine-ground cornmeal

 Salt and ground black pepper

1/8 teaspoon cayenne pepper

2 large eggs

2-3 cups vegetable oil (I didn’t use this much, I cut it in half and it was fine)

2 catfish fillets, skin and dark fatty flesh just below skin trimmed, fillets cut in half lengthwise (I didn’t do this either; since it was just Sean and I for dinner tonight, I left the fillets whole and Sean and I split one and I saved the other for another meal)

Set a wire rack over a rimmed baking sheet, place the sheet on the middle oven rack and heat the oven to 200 degrees. Place 1/2 cup of flour in a wide, shallow dish. In a separate wide, shallow dish, mix together the remaining 1/2 cup of flour, cornmeal, 1 teaspoon of salt, 1/4 teaspoon of pepper, and cayenne. in a third shallow dish, whisk the eggs with 1 tablespoon of oil until uniform.

Pat the fish fillets dry with paper towels and sprinkle each side with salt and pepper. Drop the fish in the flour and shake the dish to coat. Shake the excess flour from each piece, then, using tongs, dip the fillets in the egg mixture, turning to coat well and allowing the excess to drip off. Coat the fillets with the cornmeal mixture, shake off the excess, and lay them on another wire rack set of a rimmed baking sheet.

Heat 1/2 inch of oil in a large heavy bottomed pot or cast iron pan over high heat until the oil reaches a temperature of 400 degrees. Place two catfish fillets in the oil and fry, turning once, until golden brown, about 4 minutes. Adjust the heat as necessary to keep the oil between 385 and 390 degrees. Remove the fillets from the oil with a slotted spoon and lay them on a plate lined with several layers of paper towels; blot to help remove any excess oil. Transfer the fried fish to the wire rack in the warm oven. Bring the oil back up to 400 degrees and repeat the cooking process with the remaining fish fillets. Serve the fried fish with lemon wedges or dipping sauce.

Since I only made the two pieces, I didn’t have a second batch to make, but if you have larger pieces of catfish you may want to cut them down and do them in batches so as not to crowd them into the pan when cooking.

I had bought some fresh green beans in the store yesterday, so I thought I would make them as well and wanted to jazz them up a little bit, and what jazzes things up better than bacon? I got this recipe from the Food Network’s Anne Burrell. It’s an easy recipe, but takes a little time so you may want to get it started before whatever you are serving  it with.


Bacon Braised Green Beans

Extra-virgin olive oil

1/2 pound bacon, diced

2 garlic cloves, smashed

Pinch crushed red pepper flakes

1/2 pound button mushrooms, stemmed and sliced (I omitted these, other than me, no one in my house eats mushrooms, so out they went)

Salt

1 pound string beans, stems removed

1 cup chicken stock

Coat a large skillet with olive oil over medium heat. Add the bacon, garlic and red pepper flakes and cook until the bacon is crispy, about 5 minutes. When the garlic has become golden brown and very aromatic, remove it and discard.

Add the mushrooms (if using) to the bacon pan, season with salt, to taste, and cook until they become soft, 2 to 3 minutes. Add the beans and the chicken stock, season with salt, to taste, cover and cook over medium low heat for 40 to 45 minutes. If the liquid reduces too much during the cooking time, add some water to make up the difference. Remove the lid and cook until almost all of the liquid is reduced. Transfer to a serving bowl and serve.

It’s not hard to make, it just takes a little longer than I thought it would. I reduced the liquid all the way down to almost nothing because it allowed the bacon to crisp up again and pick up the flavor from the chicken stock. I also served the dish with some white rice. All in all, I think it turned out pretty well.

I have a steak to cook tomorrow; I’m not sure how I am going to do it yet, but I’ll come up with something. If it’s nice enough out, I may throw it on the grill. Check back tomorrow and see what happens. Until then, enjoy your evening and enjoy your meal!

 
4 Comments

Posted by on June 11, 2012 in Cooking, Dinner, Seafood, Side Dishes, Vegetables


Tags: , , ,

It’s a Pork Chop Thursday!

This is another quick and easy recipe, perfect for a weeknight dinner when you don’t have a lot of time. it is Pork Chops Agrodolce with a Herbed Bean Salad. If you want to make the whole meal really quick, you can make the bean salad a day ahead, or skip the bean salad all together and go with rice or noodles as a side dish and have a vegetable (I made green beans). This recipe is a nice mix of sweet and sour flavors with the honey and the balsamic vinegar for the glaze for the pork chops. I got the recipe from Williams-Sonoma.

Pork Chops Agrodolce

4 bone-in pork chops, about 1 inch thick

Salt and freshly ground black pepper, to taste

1 tablespoon olive oil

2 tablespoons honey

1/2 cup balsamic vinegar

1 teaspoon minced fresh thyme

1/2 cup chicken broth

2 tablespoons butter

Herbed bean salad (recipe to follow)

Season the pork chops with salt and pepper. In a large nonstick skillet over medium-high heat, warm the olive oil. Add the chops and cook, turning once, until golden brown, 3 to 4 minutes per side. Transfer the chops to a plate.

Reduce the heat to medium. Add the honey, balsamic vinegar and thyme and cook until the liquid is thickened and reduced by half, about 5 minutes. Stir in the broth and bring to a simmer. Return the chops to the pan, cover and cook for 3 to 4 minutes. Uncover and cook, turning the chops occasionally and basting with the sauce, for about 15 minutes more for medium doneness. Transfer the chops to a platter and cover loosely with aluminum foil.

Increase the heat to medium-high and simmer until the sauce is syrupy, about 3 minutes. Remove the skillet from the heat and stir in the butter until incorporated. Season with salt and pepper. Drizzle the sauce over the pork chops and serve immediately with the herbed bean salad.

Herbed Bean Salad

1 1/2 cups cannellini beans, picked over, rinsed and soaked overnight

2 fresh thyme sprigs

1/2 yellow onion, peeled

1 bay leaf

1 shallot, finely diced

1 teaspoon finely chopped fresh oregano

3 tablespoons thinly sliced fresh basil

2 teaspoons fresh lemon juice

1/2 cup extra-virgin olive oil

Salt and freshly ground black pepper, to taste

Drain the beans and rinse with cold water. Place in a Dutch oven and add the thyme sprigs, onion and bay leaf. Add water to cover the beans by 3 inches. Bring the pot to a boil over medium-high heat, reduce the heat to medium-low and simmer, uncovered, until the beans are tender, 45 to 55 minutes. Discard the bay leaf, thyme sprigs and onion. Drain the beans into a colander and rinse with cold water.

In a large bowl, whisk together the shallot, oregano, basil lemon juice and olive oil, and season with salt and pepper. Add the beans and stir to coat well with the vinaigrette. Adjust the seasoning with salt and pepper.

You could serve the bean salad warm or cold, whichever suits your tastes best. As I said, if you wanted to make this a really quick weeknight meal, you could make the beans the day before or skip them all together and make other sides instead.

For tomorrow’s dinner, Sean really wants to have the Popcorn Shrimp, so I think that is what I am going to make. I’ve never made it at home before, so it should be interesting. Check back tomorrow to find out how it goes. Until then, enjoy your evening and enjoy your meal!


Leave a comment

Posted by on May 31, 2012 in Cooking, Dinner, Pork, Side Dishes


Tags: , , ,

Picnics, a new Roast Chicken Recipe and a Refreshing Drink

It turned out to be quite a busy day yesterday, so I didn’t get a chance to do any blogging at all, so I will try to make up for it now. We ended up having some family over yesterday, so I was able to use the chickens that I bought the other day and try out a new recipe. I got this recipe from Bon Appetit and I think it turned out really well. it was Roast Chickens with Pistachio Salsa, Peppers and Corn. Admittedly it was a little warm out here to have the oven running, but it was worth it.

Roast Chickens with Pistachio Salsa, Peppers and Corn

Chickens

1/4 cup fresh lemon juice

3 garlic cloves, minced, mashed to a paste with the back of a knife

3 tablespoons chopped fresh thyme plus sprigs for stuffing

2 tablespoons chopped fresh rosemary

1 tablespoon chopped fresh sage

2 2 1/2- 3 pound whole chickens

2 tablespoons salt 1 lemon, halved
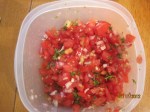
Peppers and Corn

1/4 cup olive oil

1/2 cup minced red onion

1/4 cup minced capers plus 1-2 teaspoons caper brine

Salt

8 cups thinly sliced yellow, orange and red peppers (about 5 large peppers)

4 red Fresno chiles, seeded and thinly sliced

3 cups fresh corn kernels (about 4 ears)

2 tablespoons minced parsley

2 tablespoons red wine vinegar

Pistachio Salsa

1 cup unsalted shelled pistachios, coarsely chopped

1/4 cup thinly sliced fresh chives

2 tablespoons finely grated lemon zest

1 teaspoon salt

1 cup extra-virgin olive oil

For the chickens: Whisk the lemon juice, oil, garlic, 3 tablespoons of thyme, rosemary and sage in a small bowl; set marinade aside. Season the chickens with salt and pepper inside and out. Place each chicken inside a resealable plastic bag; divide the marinade evenly between the two bags. Spread the marinade evenly over the chicken to distribute. Seal the bags and chill for at least 4 hours and up to overnight.

Preheat the oven to 450 degrees. Transfer the chickens from the bags to a small roasting pan; gently blot the excess oil from the marinade with paper towels, leaving the herbs intact on the chicken skin. Stuff each chicken with a lemon half and several thyme sprigs. Tie the chicken legs together with kitchen twine, if desired.

Roast the chickens until well browned, about 30-35 minutes. Reduce the heat to 350 degrees and continue roasting, occasionally basting the chickens with the pan juices, until an instant read thermometer inserted into the thickest part of the thigh registers 165 degrees, 20-30 minutes longer. Transfer the chickens to a carving board; let the chickens rest for 20 minutes before carving.

For the peppers and corn: Heat the oil in a large skillet over medium heat. Add the onion and capers. Season with salt and cook, stirring occasionally, until the onion is soft but not brown, about 5 minutes. Add the peppers and the chiles; season with salt and cook, stirring occasionally, until soft, about 10-12 minutes. Stir in the caper brine, corn, parsley and vinegar just before serving.

For the pistachio salsa: Combine the first 4 ingredients in a small bowl. Stir in the oil until blended.

A couple of notes on the meal. The peppers and corn turned out a lot spicier than I thought it would, so you can either tone down the chiles or eliminate them, or if you like it hot, leave it that way. It was pretty spicy, but I made some brown rice to go with the meal and if you mixed it in with the rice, it did tone done the heat some. Secondly, you can make the pistachio salsa ahead of time and cover and refrigerate it for up to 2 days before serving. Just let it come to room temperature before you serve it.

I made a nice fruit salad for dessert made of watermelon, blueberries, strawberries, mango, pineapple and kiwi that was delicious and I had quite a bit of watermelon leftover, as well as watermelon juice, so I decided to make a refreshing cocktail for a hot day.

Watermelon Martini

1 cup watermelon juice (press watermelon through a sieve or cheesecloth or blend some watermelon pieces)

4 ounces vodka

1/4 cup simple syrup

1/4 cup triple sec

3 tablespoons salt (optional)

3 tablespoons sugar (optional)

Ice

Watermelon slices, for garnish (optional)

Mix together the sugar and salt if using. Wet the rim of a chilled martini glass with a piece of watermelon. Dip the rim into the sugar and salt mixture. Repeat for another glass.

Place the watermelon juice, vodka, triple sec, and simple syrup into a cocktail shaker. Top with ice. Shake well.

Pour contents through a strainer into martini glasses.

Garnish with a wedge of watermelon if desired.

It is very tasty and refreshing if you want to give it a try. I think it’s a great adult drink for the summer.

Finally, I had asked a question on here and on my other blog, http://www.theofficeofiguanaflats.com about where you would go on a picnic and what you would bring.

I got some interesting answers, but most of them seem to tend towards the same thing of a nice, quiet backyard-type setting with lots of grass, lots of shade and lots of good food. There are so many places to choose to go for a nice picnic, I don’t know that I could pick an exact place. I can say that I too would like a nice quiet, grassy setting, someplace shaded by trees but enough so that some sun can break through and give you the nice warm feeling on your face now and then. There are probably settings like this all over, in any park or mountain hideaway. it would have to be somewhere where it wouldn’t get too hot, maybe near a lake that you could take a quick dip or do some fishing before you picnic. As for what I would bring, I would take a nice picnic basket with a comfy blanket to sit on or lay on. There would have to be some fresh fruit involved, maybe a fruit salad or just a mix of some berries and melon. I would want to make some chicken salad sandwiches, or maybe even better some peppery bacon, lettuce, tomato and avocado sandwiches on some nice fresh ciabatta bread, some really fresh half sour pickles and some fresh, homemade potato salad. I could even go lighter and just bring a fresh loaf of crunchy french bread, some really fresh, off the vine tomatoes, a little salt, some arugula and some good extra-virgin olive oil and just have some sliced tomato and pieces of bread with a little bit of the oil, yum yum. Of course we would have to have a bottle of wine, something light I think, probably a white that you would have chilled to serve with your picnic. I think that would be great.

Thanks again to everyone who answered and a special thank you to Geoffrey Zakarian, Scott Conant, Gael Greene and MyLastBite.com for offering up their answers. If you’re interested, you can check out today’s question at http://www.theofficeofiguanaflats.com to see what it is and answer if you would like. Today’s is also somewhat food-related, so you might like it.

That’s it for today. We’re taking it easy tonight and just having pizza, so there is nothing special going on in the kitchen tonight. I do hope to make the Sicilian Steak tomorrow, so check back for that. Until then, enjoy your holiday weekend and enjoy your meal!


1 Comment

Posted by on May 27, 2012 in Beverages, Cooking, Dinner, Poultry, Side Dishes, Vegetables


Tags: , , , , , ,

Grilling some BBQ Ribs and Some Meals This Week, Wow!

I Have gotten way off schedule lately. Michelle has been working a lot of hours, Sean’s school is winding down and I started a new work project that takes a lot of my time, so I haven’t had much time for blogging on either blog lately, but I also have gotten away from our meal plan for the last few weeks. We are going to try to get back to it this week, so hopefully it all works out. In the meantime, while I am not grilling today because we are getting heavy rain here in New York, I did grill yesterday and made some Barbecued Pork Ribs. Now I have made baby back ribs on here before (check here for the recipe), but spare ribs were on sale at the supermarket last week so I got some and made them yesterday and they turned out great. It’s a simple recipe, but they take a long time to cook, which actually gave me a bit of an advantage using the electric grill over charcoal and gas, although maintaining the proper heat levels on the electric grill can get a little tricky. You really have to watch the temperature gauge closely to make sure its working out. Any type of grill will work with this, you just need to keep checking and rotating the ribs. This recipe, from America’s Test Kitchen, is written for a gas grill.

Barbecue Pork Ribs

2 full racks spareribs (2 to 3 pounds each)

1/2 cup Barbecue Spice Rub (This is the same rub I used on the pulled pork a couple of weeks ago, I always make extra to have to use for ribs, burgers, steaks, chicken, etc. You can get the recipe here or I will list it below)

2 cups wood chips, soaked and drained

2 cups barbecue sauce

Massage the ribs all over with the rub and let them stand at room temperature, covered loosely with plastic wrap, for 1 hour. Place the wood chips in a disposable aluminum tray (I actually have a small cast iron smoker box I use) and rest the tray directly on top of the primary burner. Turn all the burners to high, close the lid, and heat the grill until very hot and the chips are smoking, about 15 minutes. Clean and oil the grill. Turn the primary burner down to medium and turn off the other burners.

Position the ribs over the cooler part of the grill and cover. Barbecue until the meat starts to pull away from the bones, 3 to 4 hours, flipping, switching and rotating the ribs every 30 minutes. The temperature inside the grill should remain between 300 and 275 degrees. brush the ribs with barbecue sauce during the final 15 minutes of cooking.

Since I was using the electric grill, I had to pay particular attention the temperature. There really aren’t any cool spots to speak of when using electric since the element covers a lot of the surface area, so I would have to make sure to rotate and flip and keep the ribs to the edges of the grill. It took some work, but they were fall off the bone tasty. If you want the barbecue spice rub, here it is:

Barbecue Spice Rub

1/2 cup chili powder

1/4 cup brown sugar

1/4 cup salt

2 tablespoons black pepper

2 teaspoons cayenne pepper

Mix all the ingredients until well combined. Store in an airtight container. It will last for about 1 month.

As I said, I use it for a lot of different things, like chicken, steak and shrimp and burgers, but you can use it for whatever you would like. I served the ribs with some of the leftover beans we had frozen from the pulled pork dinner, some corn on the cob, and some potato salad. It was a great Sunday meal.

As for the rest of the week, tonight I am making Pepper Steak, which I have made before on here and you can get the recipe right here. For the rest of the week, I did buy the meat necessary, I just haven’t decided what to make yet, so it will be wait and see when you check on here to see what the meal will be. I did buy some pork chops, a whole cut up chicken, some frozen shrimp and some chicken legs (I’ll probably use some of these to make chicken stock). I’ll have to see what kind of recipes I can come up with. Any suggestions? Any input at all would be greatly appreciated any time. You can leave a comment here, on my Facebook page or on Twitter. Until the next meal, enjoy your day and enjoy your meal!

 
1 Comment

Posted by on May 21, 2012 in Cooking, Dinner, Grilling, Pork, Potatoes, Side Dishes


Tags: , , , , , , , , ,

A Family Favorite: German Potato Salad

Well Wednesday turned out to be much busier than I anticipated so I didn’t get to do much of anything, let alone work on blogs. Anyway, it’s back to it today with a family favorite that I made when I made the pulled pork this past weekend. One of the dishes that I make once in a while, and very often to bring to parties, is German Potato Salad. It seems to be a crowd pleaser and a lot of people like it. I make it every once in a while for just us at home and the recipe makes so much we usually have leftovers for a week to have it with lunches or dinners. If I make when we have people over, there usually isn’t much left for that to happen. I think there is something about the flavor combination of the bacon, onions and potatoes mixed in with the bite of the vinegar that just tastes so good. Give it a try an I think you’ll be pleased with it.

German Potato Salad

3 pounds potatoes, peeled and sliced

1 pound bacon, diced

¾ cup chopped onion

3 teaspoons all-purpose flour

8 teaspoons sugar

Salt

½ teaspoon pepper

1/3 cup white wine vinegar

½ cup water

In a large pot, boil the potatoes in salted water to cover until the potatoes are just fork tender, about 12 minutes. Drain the potatoes and set them aside, allowing them to cool slightly and place in a large serving dish. In a large skillet over medium-high heat. add the bacon and fry until the bacon is just getting crispy, about 7 minutes.Add  the chopped onion and continue to cook until the onions brown lightly, about 5 minutes. Meanwhile, in a small bowl mix the flour, sugar, 1 teaspoon of salt, and the pepper until blended. Stir in the vinegar and water into the mixture and whisk until smooth. Add the vinegar mixture to the bacon and simmer until slightly thickened, about 4 minutes Pour the bacon mixture over the potatoes and gently mix until everything is well blended and serve.

This is great for parties because you can easily make this the night before, cover it and refrigerate it and then warm it up in a 350 degree oven for 20 minutes (it can get kind of dense when it’s cold, so make sure it’s heated through) and that’s it. It makes a great side dish for barbecues as well.

My next post tomorrow will be the easy blueberry pie I made on Sunday with the pulled pork. If you would like the recipes for the pulled pork, the guacamole, the cole slaw, the barbecued beans or the ranch dressing, I have posted all of them in the past and you can just click on each to go the links of their pages. Hopefully next week now that I have my computer back, I can back on schedule with everything and get us back on our meal plan so I have some recipes to post. Until tomorrow, enjoy your day and enjoy your meal!

 
4 Comments

Posted by on May 10, 2012 in Cooking, Potatoes, Salad, Side Dishes


Tags: , , , , ,

 
National Day Calendar

Fun, unusual and forgotten designations on our calendar.

Jennifer Probst

a little bit naughty a little bit nice

Laissez Faire

Letting Life Lead

simple cooking recipes

a blog to share with you the best