RSS

Tag Archives: fruit salad

Don’t Go in the Water(Melon)! Make Your Own Watermelon Shark Fruit Salad

It’s July 4th weekend. That means lots of cookouts, parties and barbecues and lots of eating, hanging out with friends and family and fun. The last thing you want to do is cook in the hot kitchen while everyone else is out having fun in the sun. As long as your cooking everything outside you want your desserts to be just as easy for you to put together. Sure you can make or buy some pies, get some ice cream (or make your own) or have a big batch of cookies, but one of my favorite things to do when the weather is warm like this is to make a nice fruit salad. There are so many great fruits that you can use that are in season right now that you can get the chance to put something really great together. If you really want to wow everyone this year, skip the fruit cocktail in a can or jar or the prepackaged fruit tray from the grocery store with the unripe melon and do it yourself. As long as you are doing it yourself, have some summer fun and make this great watermelon shark fruit salad too from Tasting Table.

Watermelon Shark Fruit Salad

1 Baby watermelon (about 2-3 pounds)

4 cups watermelon pieces (from the baby watermelon above)

2 cups bite-size mango pieces (2 mangoes)

1 cup melon pieces (cantaloupe, honeydew, casaba, whatever you like)

1 cup sliced kiwi rounds (2 kiwis, peeled)

1/2 cup blueberries

1/2 cup red seedless grapes

1/2 cup fresh pineapple chunks

¼ cup agave nectar

2 tablespoons fresh lime juice

1½ cups bite-size avocado pieces (2 avocados), optional

½ cup toasted unsweetened coconut flakes, optional

⅓ cup toasted and roughly chopped macadamia nuts, optional

Handful of Swedish fish, optional

To make the watermelon shark, take a sharp knife and cut off the wider end of watermelon so it will stand at an angle. Turn the watermelon upright so that it is standing on its base. Draw a half-moon shaped mouth on the watermelon with a marker, beginning at the stem mark as a guideline. Use a sharp paring knife to cut along your outline and remove the watermelon wedge. Save the wedge to use for the fin for the shark. Use a large spoon to scoop out all of the watermelon flesh into a separate bowl. Using a vegetable peeler, peel off about 1-inch of the outer edge of the watermelon skin, exposing the light green flesh underneath. Cut out small triangles in the exposed light green flesh of the watermelon to make the teeth of the shark. Cut a wooden skewer in half and use it to attach the shark fin to the top of the shark. Using toothpicks, take 2 blueberries and attach them to the watermelon for eyes.

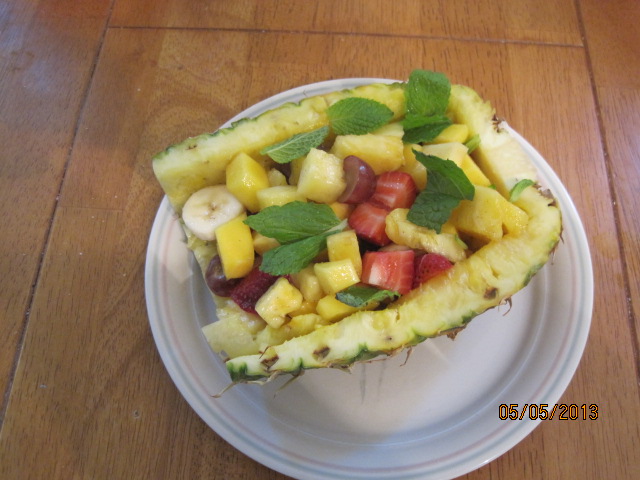
To make the fruit salad, in a large serving bowl, combine the watermelon, mango, melon, kiwi, blueberries, grapes and pineapple. Season the fruit with the agave nectar and lime juice, tossing gently to mix. Fold in the avocado pieces, if using. Garnish the salad with the coconut flakes and macadamia nuts. If you are serving the fruit salad in the shark’s head, fill the shark’s head with as much fruit as you can. Place the Swedish fish among the fruit pieces, if using, and serve.

Of course you don’t have to use the shark’s head, but hey, it’s a great centerpiece for the table, looks great and the kids love it. It’s really easy to make and Tasting Table has step by step pictures you can follow in their link. I used a baby watermelon but if you feel ambitious you could certainly use a larger one and the same thing and have much more fruit in it. Use any fruit that everyone really likes so you get a good mix of flavors, but don’t forget to use the agave nectar (or honey if you prefer) and lime juice so you get that added flavor to the fruit. The Swedish fish were just a nice touch at the end.

That’s all I have for today. Check back next time for another recipe. Until then, enjoy the rest of your day and enjoy your meal!

IMG_0466

Advertisement
 
Leave a comment

Posted by on July 3, 2016 in Cooking, Dessert, Fruit, Holidays


Tags: , , , , , ,

Dessert Special – Mango Pineapple Fruit Salad and Tapioca Pudding

Very often, I do not make desserts. We don’t usually have dessert during the week, and when I’m cooking dinner I usually don’t have a lot of energy left over to make something. On the weekends, very often Michelle will make something for dessert. Yesterday we split the duty, she made one dessert while I made another. Both were very easy to make, although the tapioca pudding did seem to take a little while as far as the procedure. The recipe I made, however, for a mango pineapple fruit salad was very easy and only took a few minutes.

Mango Pineapple Fruit Salad

1 fresh pineapple
1 pint strawberries, sliced
2 bananas, sliced
1 kiwi, peeled and sliced
1 mango, sliced
1/2 cup red seedless grapes, halved
1/3 cup honey
2 limes, juiced
1/2 teaspoon cinnamon
1/4 cup coconut flakes (optional)
1 bunch fresh mint

Cut the pineapple in half lengthwise. Carve out the insides from the pineapple halves. Save the halves to serve the fruit salad in. Dice the pineapple, discarding the core from the center. Mix the pineapple, strawberries, bananas, kiwi, mango and grapes together. In a small bowl, combine the honey, lime juice and cinnamon. Pour the mixture over the fruit and toss well. Place the fruit in the pineapple shell, sprinkle with coconut flakes (if using) and garnish with the fresh mint leaves.

Michelle it also made some homemade whipped cream which we served on the side to put on the fruit if you want to date me. I did not have a kiwi on hand so I did not use them. I also omitted the coconut flakes as none of us are really crazy about coconut here. The great thing about fruit salad is they you can really add whatever you want to and it will always taste great, so if you have any fruit on hand that you wanted to use this is the perfect opportunity for you.

We had bought the small pearl instant tapioca a few weeks ago since I use it when I am making fruit pies. We had also picked up a bag of the large pearl tapioca by accident and needed something to do with it, so naturally we simply decided to make some tapioca pudding.

Tapioca Pudding

1/2 cup large pearl tapioca
2 1/2 cups milk
1/4 teaspoon salt
1/2 cup sugar
2 eggs, separated
1 teaspoon vanilla

In a bowl, soak the tapioca in 2 cups of room temperature water overnight. Drain the water. In a double boiler, heat the milk just until no longer cold. Add the salt and the tapioca. Continue heating until small bubbles appear at the sides of the pan. Cover, turn the heat to very low and cook for one hour. Make sure that the milk mixture does not simmer or boil.

Separate the egg whites from the egg yolks. Beat the egg yolks and sugar together until light yellow in color. Add a little of the hot mixture to the egg yolks and blend thoroughly. Add the egg yolk mixture to the hot milk mixture, stirring constantly. Place the double boiler over medium heat and cook until the tapioca mixture is very thick, about 15 minutes.

Beat the egg whites until they are stiff and. Slowly fold the egg whites into the hot tapioca mixture. Stir in the vanilla. Serve the pudding warm or chilled.

Personally, I am not a big fan of putting of any flavor really. There’s a long story behind it, and it has to do with when I was in the hospital doing my recovery and was forced to eat pudding two and three times a day. Ever since then I’ve kind of gotten away from it, but Michelle and Sean both enjoy it and they really liked the large pearl tapioca.

There was the only recipes I have for today. I do have several other recipes of items I made last week and things I have planned for this week, so you can expect to see some new postings later on this week. I think the recipes are things everyone will enjoy. Until the next time, enjoy the rest of your day and enjoy your meal!

001 006

 
Leave a comment

Posted by on May 6, 2013 in Cooking, Dessert, Fruit


Tags: , , , ,

Father’s Day Brunch, Part 3: Having Your Cake and Eating Banana Bread, Too

Okay, after posting most of the meal that we had for Father’s Day Brunch, here are the dessert-like items that I made. I made a blueberry coffee cake, banana bread and a fruit salad. None of these are hard to make and they all tasted really good!

Blueberry Coffee Cake

Topping

1/3 cup packed light brown sugar

1/3 cup granulated sugar

1 tablespoon cinnamon

1 tablespoon butter, melted and cooled

Cake

3 cups all-purpose flour

1 tablespoon baking powder

1 teaspoon baking soda

1 teaspoon cinnamon

1/4 teaspoon salt

1 3/4 cups buttermilk or plain yogurt

1 cup packed light brown sugar

1 cup granulated sugar

3 large eggs

7 tablespoons butter, melted and cooled

1 cup fresh or frozen blueberries, rinsed and dried

For the topping: Mix the brown sugar, granulated sugar, cinnamon and melted butter together in a medium bowl until the mixture resembles wet sand. Set aside.

Adjust an oven rack to the middle position and heat the oven to 350 degrees. Generously coat a 9 by 13-inch baking pan with cooking spray.

For the cake: Mix the flour, baking powder, baking soda, cinnamon, and salt together in a large bowl. Whisk the buttermilk, brown sugar, granulated sugar, eggs and melted butter together in a separate bowl until smooth. Gently fold the egg mixture into the flour mixture with a rubber spatula and stir until the batter looks smooth and well combined. Stir the blueberries into the finished batter.

Scrape the batter into the prepared pan and smooth the top. Sprinkle the topping evenly over the batter. Bake until the top is golden and a toothpick inserted into the center comes out with just a few crumbs attached. about 40 to 45 minutes. Let the cake cool on a wire rack for 15 minutes before serving.

You could also substitute dried apricots, dried cherries or dried cranberries for the blueberries if you prefer. The cake comes out perfectly and tastes great even the next day or two later with your morning coffee.

The banana bread is just as easy to make. I’ve tried a few recipes and this one, from Tyler Florence, seems to work out the best with the best banana flavor.

Banana Bread

2 cups all-purpose flour

1 1/2 teaspoons baking soda

1/2 teaspoon salt

4 overripe bananas

1 cup sugar

3/4 cup (1 1/2 sticks) butter, melted and cooled

2 large eggs

1 teaspoon vanilla extract

Confectioner’s sugar, for dusting

Preheat the oven to 350 degrees and lightly grease a 9 by 5 inch loaf pan. in a large bowl, combine the flour, baking soda and salt; set aside. Mash 2 of the bananas with a fork in a small bowl so they still have a bit of texture. With an electric mixer, whip the remaining bananas and sugar together for 3 minutes; you want a light and fluffy banana cream. Add the melted butter, eggs, and vanilla; beat well and scrape down the sides of the bowl. Mix in the dry ingredients just until incorporated; no need to over blend. Fold in the mashed bananas with a rubber spatula. Pour the batter into the prepared loaf pan. Give the pan a good rap on the counter to get any air bubbles out.

Bake for about 1 hour and 15 minutes, until golden brown and a toothpick inserted into the center of the loaf comes out clean. Cool the bread in the pan for 10 minutes or so, then turn out onto a wire rack to cool completely before slicing.Dust with confectioner’s sugar and serve.

You could add some nuts to the bread when you mix the mashed bananas in if you like the nuts. Pecans or walnuts would work pretty well. My family doesn’t care for the nuts, so I left them out. You could also toast the slices lightly in a buttered skillet over medium heat if you want to give them some crunch when serving.

Finally, I also made a fruit salad to go with the brunch. You can pretty much do what you want with fruit salads, that’s one of the great things about them. Add more of the fruit you like, change out some fruit, add some fresh mint, do what you want.

Fruit Salad

1/2 seedless watermelon

1 mango, peeled and diced

1 fresh pineapple, peeled and diced

1 pint fresh strawberries, halved

1 pint raspberries

1 pint blueberries

1 can mandarin oranges, drained

Using a melon baller, hollow out the watermelon and set the balled watermelon aside. With a knife, cut away any excess in the watermelon shell, and, if necessary, flatten out the bottom of the outside of the shell so it rests comfortably on a flat surface. Add the watermelon, mango,pineapple,strawberries,raspberries,blueberries and oranges, arranging the fruit in layers. Serve immediately or cover with plastic wrap and refrigerate until serving.

You can add any fruit you like. I often top it with a sliced banana, or add some plums, peaches or apples, whatever happens to be in season.

Tomorrow I will post the recipe I made on Monday for an oven roasted trout and potatoes, and I am planning to make a flank steak with salsa verde on Friday, so check back for that one as well. That’s all for tonight. Enjoy your evening and enjoy your meal!

 
1 Comment

Posted by on June 20, 2012 in Breads, Breakfast, Cooking, Dessert, Picnic Fare, Salad


Tags: , ,

Picnics, a new Roast Chicken Recipe and a Refreshing Drink

It turned out to be quite a busy day yesterday, so I didn’t get a chance to do any blogging at all, so I will try to make up for it now. We ended up having some family over yesterday, so I was able to use the chickens that I bought the other day and try out a new recipe. I got this recipe from Bon Appetit and I think it turned out really well. it was Roast Chickens with Pistachio Salsa, Peppers and Corn. Admittedly it was a little warm out here to have the oven running, but it was worth it.

Roast Chickens with Pistachio Salsa, Peppers and Corn

Chickens

1/4 cup fresh lemon juice

3 garlic cloves, minced, mashed to a paste with the back of a knife

3 tablespoons chopped fresh thyme plus sprigs for stuffing

2 tablespoons chopped fresh rosemary

1 tablespoon chopped fresh sage

2 2 1/2- 3 pound whole chickens

2 tablespoons salt 1 lemon, halved

Peppers and Corn

1/4 cup olive oil

1/2 cup minced red onion

1/4 cup minced capers plus 1-2 teaspoons caper brine

Salt

8 cups thinly sliced yellow, orange and red peppers (about 5 large peppers)

4 red Fresno chiles, seeded and thinly sliced

3 cups fresh corn kernels (about 4 ears)

2 tablespoons minced parsley

2 tablespoons red wine vinegar

Pistachio Salsa

1 cup unsalted shelled pistachios, coarsely chopped

1/4 cup thinly sliced fresh chives

2 tablespoons finely grated lemon zest

1 teaspoon salt

1 cup extra-virgin olive oil

For the chickens: Whisk the lemon juice, oil, garlic, 3 tablespoons of thyme, rosemary and sage in a small bowl; set marinade aside. Season the chickens with salt and pepper inside and out. Place each chicken inside a resealable plastic bag; divide the marinade evenly between the two bags. Spread the marinade evenly over the chicken to distribute. Seal the bags and chill for at least 4 hours and up to overnight.

Preheat the oven to 450 degrees. Transfer the chickens from the bags to a small roasting pan; gently blot the excess oil from the marinade with paper towels, leaving the herbs intact on the chicken skin. Stuff each chicken with a lemon half and several thyme sprigs. Tie the chicken legs together with kitchen twine, if desired.

Roast the chickens until well browned, about 30-35 minutes. Reduce the heat to 350 degrees and continue roasting, occasionally basting the chickens with the pan juices, until an instant read thermometer inserted into the thickest part of the thigh registers 165 degrees, 20-30 minutes longer. Transfer the chickens to a carving board; let the chickens rest for 20 minutes before carving.

For the peppers and corn: Heat the oil in a large skillet over medium heat. Add the onion and capers. Season with salt and cook, stirring occasionally, until the onion is soft but not brown, about 5 minutes. Add the peppers and the chiles; season with salt and cook, stirring occasionally, until soft, about 10-12 minutes. Stir in the caper brine, corn, parsley and vinegar just before serving.

For the pistachio salsa: Combine the first 4 ingredients in a small bowl. Stir in the oil until blended.

A couple of notes on the meal. The peppers and corn turned out a lot spicier than I thought it would, so you can either tone down the chiles or eliminate them, or if you like it hot, leave it that way. It was pretty spicy, but I made some brown rice to go with the meal and if you mixed it in with the rice, it did tone done the heat some. Secondly, you can make the pistachio salsa ahead of time and cover and refrigerate it for up to 2 days before serving. Just let it come to room temperature before you serve it.

I made a nice fruit salad for dessert made of watermelon, blueberries, strawberries, mango, pineapple and kiwi that was delicious and I had quite a bit of watermelon leftover, as well as watermelon juice, so I decided to make a refreshing cocktail for a hot day.

Watermelon Martini

1 cup watermelon juice (press watermelon through a sieve or cheesecloth or blend some watermelon pieces)

4 ounces vodka

1/4 cup simple syrup

1/4 cup triple sec

3 tablespoons salt (optional)

3 tablespoons sugar (optional)

Ice

Watermelon slices, for garnish (optional)

Mix together the sugar and salt if using. Wet the rim of a chilled martini glass with a piece of watermelon. Dip the rim into the sugar and salt mixture. Repeat for another glass.

Place the watermelon juice, vodka, triple sec, and simple syrup into a cocktail shaker. Top with ice. Shake well.

Pour contents through a strainer into martini glasses.

Garnish with a wedge of watermelon if desired.

It is very tasty and refreshing if you want to give it a try. I think it’s a great adult drink for the summer.

Finally, I had asked a question on here and on my other blog, http://www.theofficeofiguanaflats.com about where you would go on a picnic and what you would bring.

I got some interesting answers, but most of them seem to tend towards the same thing of a nice, quiet backyard-type setting with lots of grass, lots of shade and lots of good food. There are so many places to choose to go for a nice picnic, I don’t know that I could pick an exact place. I can say that I too would like a nice quiet, grassy setting, someplace shaded by trees but enough so that some sun can break through and give you the nice warm feeling on your face now and then. There are probably settings like this all over, in any park or mountain hideaway. it would have to be somewhere where it wouldn’t get too hot, maybe near a lake that you could take a quick dip or do some fishing before you picnic. As for what I would bring, I would take a nice picnic basket with a comfy blanket to sit on or lay on. There would have to be some fresh fruit involved, maybe a fruit salad or just a mix of some berries and melon. I would want to make some chicken salad sandwiches, or maybe even better some peppery bacon, lettuce, tomato and avocado sandwiches on some nice fresh ciabatta bread, some really fresh half sour pickles and some fresh, homemade potato salad. I could even go lighter and just bring a fresh loaf of crunchy french bread, some really fresh, off the vine tomatoes, a little salt, some arugula and some good extra-virgin olive oil and just have some sliced tomato and pieces of bread with a little bit of the oil, yum yum. Of course we would have to have a bottle of wine, something light I think, probably a white that you would have chilled to serve with your picnic. I think that would be great.

Thanks again to everyone who answered and a special thank you to Geoffrey Zakarian, Scott Conant, Gael Greene and MyLastBite.com for offering up their answers. If you’re interested, you can check out today’s question at http://www.theofficeofiguanaflats.com to see what it is and answer if you would like. Today’s is also somewhat food-related, so you might like it.

That’s it for today. We’re taking it easy tonight and just having pizza, so there is nothing special going on in the kitchen tonight. I do hope to make the Sicilian Steak tomorrow, so check back for that. Until then, enjoy your holiday weekend and enjoy your meal!


1 Comment

Posted by on May 27, 2012 in Beverages, Cooking, Dinner, Poultry, Side Dishes, Vegetables


Tags: , , , , , ,

Some Delightful (and Easy) Desserts

I had promised a couple of days ago to write about desserts I made on Sunday, but my new freelance job has been taking a lot of time so I haven’t had much time to do it. Tonight, I have the time. I made two things for dessert Sunday to go after the duck dinner, and I tried to make them things that weren’t too heavy since it was a heavy meal. The first thing I made was a quick coffee cake. it was simple and easy, no mixer required, and only took about 30 minutes to bake.

Quick Coffee Cake

Topping

1/3 cup packed light brown sugar

1/3 cup granulated sugar

1/3 cup all-purpose flour

4 tablespoons butter, softened

1 tablespoon ground cinnamon

1 cup pecans or walnuts, chopped coarse

Cake

3 cups all-purpose flour

1 tablespoon baking powder

1 teaspoon baking soda

1 teaspoon ground cinnamon

1/4 teaspoon salt

1 3/4 cups sour cream

1 cup packed light brown sugar

1 cup granulated sugar

3 large eggs

7 tablespoons butter, melted and cooled

Adjust an oven rack to the middle position and heat the oven to 350 degrees. Grease two 9-inch cake pans. For the topping: Using your fingers, mix the sugars, flour, butter, and cinnamon together in a medium bowl until the mixture resembles wet sand. Stir in the pecans and set aside.

For the cake: Whisk the flour, baking powder, baking soda, cinnamon, and salt together in a large bowl. In a medium bowl, whisk the sour cream, sugars, eggs and melted butter together until smooth. Gently fold the egg mixture into the flour mixture until smooth (do not overmix).

Scrape the batter into the prepared pans and smooth the tops. Sprinkle the topping evenly over the top of both cakes. Bake until the tops are golden and a toothpick inserted into the center comes with just a few crumbs attached, 25 to 30 minutes, rotating the pans halfway through baking. Let the cakes cool on a wire rack for 15 minutes before serving.

The cake comes out nice and moist, not too dry like some coffee cakes. Since the recipe makes two cakes, we’ve been having a little in the morning with coffee or after dinner all week long.

The second dessert I made was a simple fruit salad using some of the fresh fruit I had just bought.

Gingered Honeydew, Mango and Blueberry Salad

1/2 honeydew melon, peeled, seeded and chopped medium

2 mangoes, peeled, seeded and chopped medium

1 cup blueberries

2 tablespoons minced crystallized ginger

1 tablespoon fresh lime juice

1 tablespoon sugar

1 teaspoon grated lime zest

Pinch salt

Toss all the ingredients together, cover and refrigerate to blend the flavors, about 30 minutes.

I also had some fresh pineapple that I added to the salad, but the beauty of fruit salad is that you can pretty much add whatever fresh fruit is in season and you have at the time.

So those are the desserts I made, which for me is quite a feat since I am not a dessert person. I have another post that will follow this one shortly about last night’s dinner, so check back for that one shortly!

 
Leave a comment

Posted by on April 25, 2012 in Dessert


Tags: , , , , , ,

Time for Breakfast (for Dinner)!

It’s in the sixties in January here in Harriman, which is unheard of for this time of year, but I’ll take it! Today there were two great articles that are food-related in the New York Times. The first, written by Leslie Kaufman, closely relates to what I am trying to do at home and here on the blog. She has her sons cook one meal a week, which includes the planning of the meal, detailing ingredients and doing the cooking. Her sons are 14 and  10 and do the actual cooking with a parent within earshot, but this is something I have been working on doing with Sean for a while. It’s a great way to get kids involved in the meals, gives them some responsibility, let’s them know what you have to go through every day to cook for them, and makes them more interested in doing things in the kitchen. I think it’s a great article, so take a look at it if you get the chance.

The second article is written by Mark Bittman, the author of ‘How to Cook Everything.” It’s a good article on how the Department of Agriculture is making schools change up their lunch menus to make things better for our kids. It gives you a good look as to what the changes are going to be, and while there may still be work to do on this, it’s a step in the right direction.

Now on to our meal for the day. Today is Michelle’s choice, but it also one of Sean’s favorites. We all love breakfast for dinner nights, actually. It gives us a chance to eat the breakfast food we love but don’t always have time to make during weekday mornings when things can be a bit hectic. We are making this meal our meat-free meal for the week as well, which disappoints Sean since that means no bacon or sausage tonight, but we’ll still have a great meal with Pancakes, Hash Browns and maybe an egg or two. Since a vegetable doesn’t really go too well this meal, we are going to opt for a fruit salad instead.

Pancakes are pretty easy to make, whether it is from scratch or from a box. We often use Bisquick ourselves when you need something done in a pinch. It tastes good and it’s quick, but today I am going to post a recipe for some homemade pancakes. The recipe I am using calls for buttermilk, but if you don’t have any on hand, whisk 1 tablespoon of fresh lemon juice with two cups of milk and set it aside for a few minutes to thicken, and voila, you have buttermilk. This type of buttermilk is fine for cooked applications, but I wouldn’t use it for raw recipes like the ranch dressing we made yesterday.

Pancakes

2 cups all-purpose flour

2 tablespoons sugar

2 teaspoons baking powder

1/2 teaspoon baking soda

1/2 teaspoon salt

1 large egg

3 tablespoons butter, melted

2 cups buttermilk

1 to 2 teaspoons vegetable oil

Adjust an oven rack to the middle position and heat the oven to 200 degrees. Set a wire cooling rack over a baking sheet and set aside.

Whisk together the flour, sugar, baking powder, baking soda and salt in a large bowl. In a separate bowl, whisk together the egg, melted butter, and then the buttermilk. Make a well in the center of the dry ingredients, pour the buttermilk mixture into the well, and whisk very gently until the buttermilk mixture is just incorporated (a few lumps should remain). Be careful not to overmix the batter.

Heat a large skillet over medium heat for 3 to 5 minutes. Brush the bottom of the pan with 1 teaspoon of vegetable oil. Using 1/4 cup of batter per pancake, add the batter to the skillet (only 2 or 3 pancakes will fit at a time) and cook until large bubbles begin to appear, about 2 minutes. Flip the pancakes and cook until golden brown on the second side, about 1 1/2 minutes longer. Spread the pancakes out over the wire rack on the baking sheet (they shouldn’t overlap) and hold in the warm oven. Repeat with the remaining batter, brushing the skillet with oil as needed between batches.

If you have any leftover pancakes (which we usually do) let them cool to room temperature, then wrap them in plastic wrap and freeze. They will keep for up to a week while still maintaining most of their original flavor and texture. Defrost in the refrigerator for 24 hours, then heat in a 350 degree oven until warm, about 5 minutes. I usually leave a couple on the fridge for the next day and my buddy Liam and I have them for breakfast.

Of course, there are a lot of things you can add to pancakes or top them with. I love adding bananas or blueberries; once you add the batter to the skillet, just sprinkle a few slices of banana or a few blueberries over each pancake, or just top the pancakes with the fruit after they are cooked.

We decided to make some hash browns tonight to go with our pancakes. Hash browns go great with bacon or sausage, and we’ll do that another time I am sure, but they are fun to have any time. They don’t take long to make, and I use the food processor to grate the potatoes, sparing my knuckles the use of the box grater.

Hash Browns

1 pound russet potatoes (2 medium) peeled

2 tablespoons grated onion

1 tablespoon minced fresh parsley (optional)

1/4 teaspoon salt

1/8 teaspoon pepper

1 tablespoon butter

Grate the potatoes using either the large holes of a box grater (watch your fingers!) or the shredder attachment of a food processor (you should have about 1 1/2 cups when your done grating). Wrap the grated potatoes in a kitchen towel and squeeze thoroughly of excess moisture, then toss with the onion, parsley (if using) salt and pepper.

Melt 1/2 tablespoon of the butter in a large non-stick skillet over medium-high heat until it begins to brown, swirling to coat the pan. Scatter the potatoes evenly in the skillet and press firmly into a cake. Reduce the heat to medium and continue to cook until dark golden brown and crisp on the first side, about 8 minutes. When the first side has browned, slide the potatoes onto a large plate. Carefully cover the plate with another large plate, and flip so that the potatoes are on the plate, browned-side up. Melt the remaining 1/2 tablespoon of butter, then slide the potatoes back into the skillet, browned-side up, and continue to cook over medium heat until the second side is golden and crisp, about 5 minutes longer. Slide the hash brown cake onto a plate or cutting board and cut into wedges.

There’s nothing like hash browns with some eggs. I prefer a fried egg or an egg over easy, but for tonight we’ll just whip up some scrambled eggs and save the fried egg for another time, maybe for a nice egg sandwich with some sausage or bacon.

Scrambled Eggs

8 large eggs

1/4 cup half and half (you can use milk instead, but the eggs are creamier with half and half)

1/2 teaspoon salt

1/8 teaspoon pepper

1 tablespoon butter

Whisk together the eggs, half and half, salt, and pepper. Melt the butter in a non-stick skillet over medium-high heat, swirling to coat the pan. Add the eggs and cook while gently pushing, lifting and folding them from one side of the pan to the other, using a wooden spoon or heatproof spatula, until they are nicely clumped, shiny and wet, about 2 minutes. Remove the cooked eggs from the pan quickly and serve.

We’ll get more into eggs another time when we’re using some meat with breakfast, but you can always add cheese, chives, onions, thyme or countless other herbs to add some flavor.

We’re finishing off with a simple fruit salad of what we have on hand – bananas, blueberries, blackberries, grapes and mandarin oranges, sprinkled with a little sugar and lemon juice. Of course, you can always use whatever fruits you like, are in season and taste the best to you.

Boy, for such a simple meal, I did a lot of writing today! There are lots of different variations you can do when doing breakfast for dinner. I’d love to hear what other people do when they make this for a meal. If you have any comments or questions, please feel free to leave them and I’ll try to comment as quickly as I can. Tomorrow is a leftovers night for dinner, but I have decided to write about some good ideas for Super Bowl snacking, since the game is Sunday and you want to be prepared. Let me know if you have any snacks or recipes you’d like to see to use for the big game. Have a great day!


Tags: , , , , , , , , , ,

 
National Day Calendar

Fun, unusual and forgotten designations on our calendar.

Authentic Autograph Source, LLC

Licensed autographs and collectibles dealer in the Pacific NW! We have a wide range of sports, celebrities, and more!

Jennifer Probst

a little bit naughty a little bit nice

Laissez Faire

Letting Life Lead

%d bloggers like this: