RSS

A Treat for the Whole Family – Baked Honey Barbecue Chicken Fingers

For many adults, just hearing the words “chicken fingers” is enough to make them cringe. They immediately think back to the days when the only things their young children would eat were chicken fingers, tenders, McNuggets or whatever else that happened to be called that are sold in the frozen food aisle of your grocery store, at the local fast food restaurant or any of the dozens of family style convenience restaurants around today. While you may not be thrilled with the notion of what you get in those frozen bags, there are plenty of alternatives out there that you can try making on your own that taste good so that everyone in the family will enjoy them. This particular recipe, that I picked up from Sally’s Baking Addiction, covers just that, giving you a tasty chicken fingers alternative that get away from the frying and offer you a baked alternative that tastes great.

Baked Honey Barbecue Chicken Fingers

3/4 cup barbecue sauce (whatever your favorite may be)

1/4 cup honey

1/2 cup whole wheat or all-purpose flour

1 teaspoon salt

1/2 teaspoon black pepper

1/2 teaspoon smoked paprika

2 eggs, beaten

1 1/2 cups panko breadcrumbs (or more, if needed)

1 1/2 pounds boneless, skinless chicken breasts or chicken tenders

Nonstick cooking spray

Combine the barbecue sauce and the honey in a large bowl. If you are using chicken breasts, pound the chicken breasts between two sheets of plastic wrap to 1/4-inch thickness and cut the breasts into strips. If you are using chicken tenders, cut them in half lengthwise. Add the chicken strips to the bowl with the barbecue sauce and honey and stir so all of the chicken is evenly coated. Cover the bowl tightly and marinate the chicken in the refrigerator for at least 30 minutes and up to 6 hours. The longer you marinade, the more flavorful the chicken will be.

Preheat the oven to 400 degrees. Line a baking sheet with parchment paper or a silicon baking mat or coat the sheet with nonstick cooking spray.

Combine the flour. salt, pepper and the smoked paprika in a shallow dish. Pour the beaten eggs into another shallow dish. Pour the panko breadcrumbs into a third shallow dish. Coat each chicken strip with flour, shaking off any excess. Next. dip the floured chicken in the egg and allow any excess egg to drip off. Then roll the chicken strip in the panko breadcrumbs, coating completely before shaking off any excess. Place the chicken strips on the prepared baking sheet and repeat the process until all of the chicken has been coated. Spray each chicken strip with the nonstick cooking spray to help seal the breading to the chicken, preventing the breading from staying raw and allowing it to bake into the chicken strips.

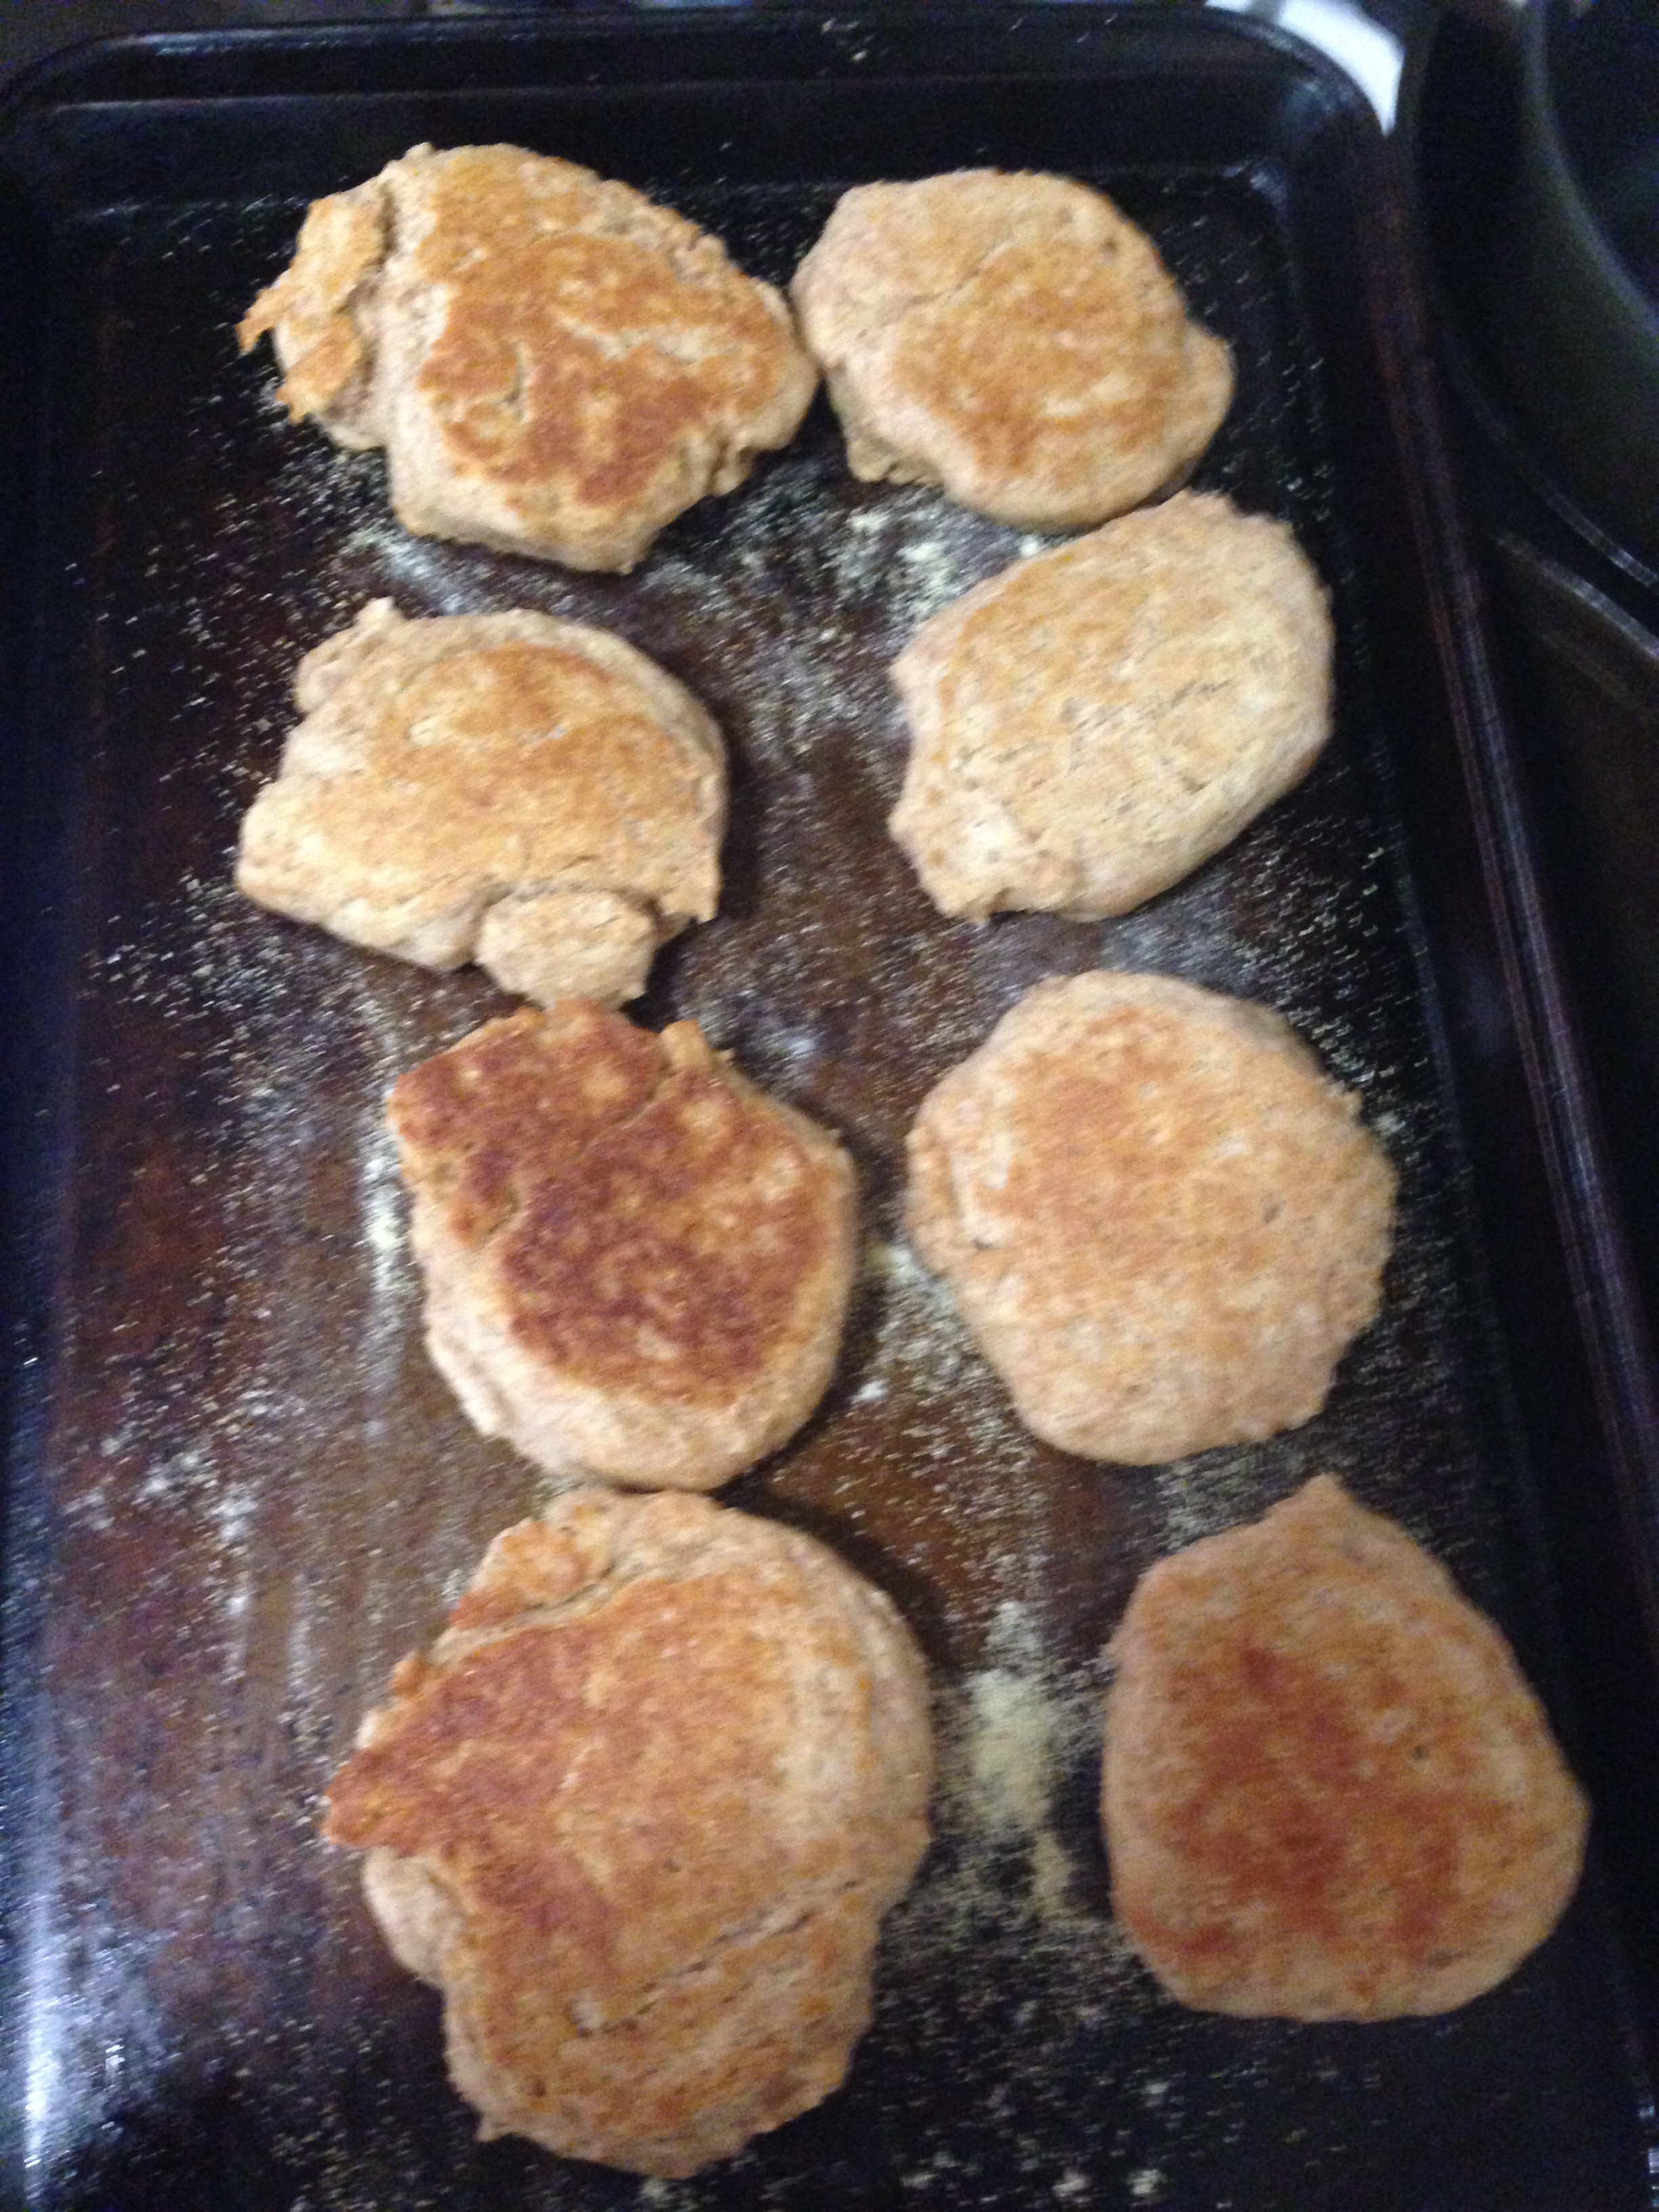
Bake the chicken fingers in the preheated oven for 10 minutes. Turn each piece over and continue baking until the outside of the chicken is crisp and the centers of the chicken pieces are cooked through, about another 10 to 12 minutes. Serve the chicken fingers with extra barbecue sauce for dipping.

The great thing about this recipe is that you can make a large batch and freeze any extras that you may have to use when you need a quick dinner for the kids or yourself or just want an easy snack. These are perfect for a meal any night with some homemade fries (I made some homemade baked sweet potato fries with ours) or you can use these for any type of buffet when you are having a party and you know kids may be around. They are also great snacks for watching the game or when you have a crowd over. You get good crunch from the breadcrumb mixture and underneath is great flavor from the barbecue sauce and the honey. This is definitely one to remember and you can experiment with this also, perhaps making the chicken fingers ranch flavored instead of barbecue with some spices, or maybe even adding some Parmesan to the breadcrumbs, eliminating the barbecue sauce and substituting tomato sauce to have an Italian-style chicken fingers. There’s lots of room to use your imagination with this one and the best part is you have control over the ingredients so you know what goes into each one, and they are baked, making them a better choice for you.

That’s all I have for today. Check back next time for another recipe. Until then, enjoy the rest of your day and enjoy your meal!

IMG_0540


Tags: , , , , , , ,

Keeping On With Chicken – Soy-Glazed Chicken with Asparagus and Scallions

In keeping up with the trend of a number of the chicken recipes that I have tried lately, this one was one of my personal favorites. I had seen this recipe in the last issue of Bon Appetit magazine and it sounded so delicious and made use of some great ingredients that I absolutely had to give it a try. While the original recipe calls for just using chicken thighs, I had a mix of thighs and drumsticks available to use so I made a little bit of both for us to have for dinner that night. This recipe for sot-glazed chicken with asparagus and scallions is easy enough to make for a weeknight meal and elegant enough for whenever you might be entertaining or want a meal that looks as great as it tastes.

Soy-Glazed Chicken with Asparagus and Scallions

2 teaspoons aniseed

4 garlic cloves, finely chopped

1/4 cup fresh lime juice, plus wedges for serving

1/4 cup soy sauce

2 tablespoons honey

8 chicken thighs (about 4 pounds)

1 bunch asparagus (about 3/4 pound), trimmed

2 bunches scallions, trimmed

2 tablespoons vegetable oil

Kosher salt and freshly ground black pepper

1/2 cup fresh cilantro leaves with tender stems

Toast the aniseed in a small dry skillet over medium heat, tossing frequently and watching to make sure it does not burn, until the aniseed is fragrant, about 2 minutes. Let the aniseed cool and then finely chop it.

Whisk the garlic, lime juice, soy sauce, honey and the chopped aniseed together in a large bowl. Add the chicken pieces and toss the mixture to coat the chicken well. Allow the chicken to sit in the marinade for at least 30 minutes.

Preheat the oven to 450 degrees. Transfer the chicken and the marinade to a foil-lined, rimmed baking sheet, making sure to place the chicken skin side down on the foil. Roast the chicken until the fat begins to render, about 15 to 20 minutes. Turn the chicken skin side up and continue to roast it, basting the chicken occasionally with the pan drippings, until the chicken is cooked through and deeply browned, about 15 to 20 minutes longer.

After turning the chicken, toss the asparagus and the scallions with the vegetable oil on another rimmed baking sheet. Season the vegetables with salt and pepper. Roast the vegetables, shaking the pan about halfway through the cooking process, until the vegetables are tender, about 10 to 15 minutes. If you have thinner stalks of asparagus or scallions, they will cook more quickly and will be done faster.

Transfer the chicken to a platter. Pour any pan juices into a glass measuring cup. Let the juices sit for a few minutes and then spoon the fat from the surface of the juices. Spoon the pan juices over the chicken and serve the chicken with the asparagus, scallions, cilantro and lime wedges.

You can always begin marinating the chicken a day ahead and simply cover the bowl and store it in the refrigerator until the next day if you want even deeper flavors. I did not have aniseed on hand but substituted fennel seed instead and got that licorice flavor that you get from either herb, so I think it worked well.The marinade is wonderful and imparts incredible flavor to the chicken thanks to the combination of the soy sauce, honey, aniseed and lime juice. I love roasted asparagus as well and with the scallions together they just seem to go really well with the chicken. It’s a great dinner that you can do in just over an hour and you get this deep brown chicken with amazing flavor and the house smells great while it is cooking.

That’s all I have for today. Check back next time for another recipe. until then, enjoy the rest of your day and enjoy your meal!

IMG_0545 IMG_0544

 
Leave a comment

Posted by on May 20, 2014 in Cooking, Dinner, Poultry, Vegetables


Tags: , , , , , , ,

A Honey of a Recipe – Honey Chili Beer Chicken

With the prices of just about everything else going up at the grocery stores, chicken is one of the few things that has remained reasonable for some of the pieces. Boneless chicken breasts remain high-priced, in my opinion, but you can get legs and thighs for a very good price, bone-in breasts are reasonable, and you can always get a whole chicken and cut it up yourself to get several meals out of it and then some stock as well. In any case, I have been stocking up on legs and thighs lately so I have also been scouring around looking for new recipes to try to get some different tastes and flavors so it doesn’t seem like we are eating the same thing several times a week. I cam across this recipe on the Internet not long ago from The Beeroness for a honey chili beer chicken that looked great, so I thought I would give it a try.

Honey Chili Beer Chicken

3 tablespoons olive oil

1/2 cup sliced onions

2 cloves garlic, minced

1 cup brown ale, divided in half

1 tablespoon balsamic vinegar

2 tablespoons honey

1/2 teaspoon red chili sauce (such as Sriracha), plus additional if desired

6 boneless, skinless chicken thighs

1/2 teaspoon salt

1 teaspoon pepper

1-2 tablespoons all-purpose flour

In a cast iron skillet over medium heat, add the olive oil and heat until the oil is shimmering. Add the onions and caramelize the onions over medium heat, mixing occasionally, until the onions are a nice golden brown, about 10 to 15 minutes.

Stir in the garlic and then add 1/2 cup of the brown ale, the balsamic vinegar, the honey and the chili sauce. Simmer the mixture until it is reduced and thickened, about 3 to 5 minutes. Remove the sauce from the pan and set the sauce aside.

Sprinkle the chicken thighs on all sides with the salt, pepper and all-purpose flour to coat the thighs well. Increase the heat of the stovetop to medium-high, place the chicken thighs in the now-empty cast iron skillet and cook the chicken thighs until they are browned on all sides, about 3 minutes per side.

Pour the sauce back into the cast iron skillet with the chicken along with the remaining 1/2 cup of the brown ale. Cover the skillet loosely with a lid, lower the heat of the stovetop to maintain a simmer in the skillet and allow the chicken to cook until the chicken thighs are cooked through, about 10 to 12 minutes, turning the chicken once during the cooking process. Remove the chicken and sauce to a platter and serve.

The sauce that you make with this chicken is really good. You get a great combination of flavors from the brown ale, the balsamic and the honey and a little bit of heat from the chili sauce to round it all out. Add in the sweetness of the caramelized onions and it seems just perfect. I am sure you could do this meal with boneless chicken breasts if you wanted to or even just make the sauce to use over something like chicken wings or drumsticks and get the same great results. The sauce might even go well with some pork chops if you wanted to give that a try as well. It was a quick, easy way to make good use of chicken and gives you some great options when you are looking for something different to try for your meal. I used a lighter ale than the recipe called for, Smithwick’s, because that is what I had on hand, but I think you could use just about any type of ale and it would work well here.

That’s all I have for today. Check back next time for another recipe. I have lots of things I have tried lately, including a bunch of chicken recipes, and I just got the latest issue of Cook’s Country (my personal favorite cooking magazine) and it has some great chicken recipes to try along with some other great options, so I will be giving a bunch of those a shot as well. until next time, enjoy the rest of your day and enjoy your meal!

IMG_0539 IMG_0538


2 Comments

Posted by on May 19, 2014 in Cooking, Dinner, Poultry, Sauce


Tags: , , , , ,

An Easy Almost Chicago-Style Deep Dish Sausage Pizza

Very often around here Friday night’s are pizza night and more often than not I make my own pizza. It seems just as easy, doesn’t take a lot of time to make, and costs less than buying 2 pizzas from our favorite pizza place nearby. I have nothing against getting a pizza now and then; we do it ourselves on nights where no one has the energy to cook,but I just think for the minimum effort it takes to make the dough or even buy the pizza dough (most times a pound of dough is only about a dollar), you can make a pretty good pizza on your own. Sean had been asking me to try making a deep dish pizza because he wanted it, and I found a pretty easy recipe on the Cooking Channel website that was a good one to try.

Chicago-Style Deep Dish Sausage Pizza

4 tablespoons extra-virgin olive oil

1 pound sweet or hot Italian sausage, sliced into thin rounds or removed from the casing and crumbled

2 tablespoons butter, softened

1 pound pizza dough, at room temperature, or 1 serving of Food Processor Pizza Dough, at room temperature

10 ounces mozzarella cheese, shredded or thinly sliced

1 cup of your favorite marinara sauce or 1 1/2 cups crushed and strained tomatoes

3 cloves garlic, minced

1 tablespoon dried oregano

1/2 cup grated Parmesan cheese

Preheat the oven to 400 degrees. Heat a skillet over medium-high heat with 2 tablespoons of the olive oil. Cook the sausage until the sausage is nicely browned and cooked through, about 8 to 10 minutes.

Grease the inside of a 12-inch cast-iron skillet with the softened butter. Place the pizza dough in the center of the skillet and spread the dough evenly towards the bottom edge and 1 1/2 inches up the sides.

Begin layering the ingredients on your pizza crust by evenly laying the sausage on the dough, followed by the mozzarella cheese and then by the tomato sauce or the tomatoes, whichever you happen to be using. Sprinkle the garlic and the dried oregano on top of the cheese and sauce. Finish the topping by adding the Parmesan cheese on top and drizzle the top with the remaining 2 tablespoons of the olive oil.

Place the cast-iron skillet on the bottom rack of the oven and cook the pizza until the edge of the crust is golden brown and crusty, about 30 to 35 minutes. Remove the skillet from the oven and allow the pizza to rest for about 5 minutes before slicing and serving.

Just a couple of quick notes about my experience with this recipe. First, you should preheat the oven for about 20 minutes or so to make sure the temperature is nice and hot before you put the pizza in. This seemed to make a big difference for me. Secondly, I didn’t get the pizza as “deep dish” as I would have liked it since I did not have quite enough dough to fully go up the sides of the pan. I had split the dough in half to make two pizzas and kind of short-changed myself, so make sure you have enough dough if you really want that deep, crispy crust. Thirdly, the sequence in the layering does seem to make a difference in getting the crisp bottom that you want. Putting the sausage on the bottom does make a difference here and helps to crisp the crust. You could, of course, use any toppings that you like for your pizza, but since we all like sausage pizza it worked well for us. This recipe is a very easy one that is perfect when you want the crunchy, deep-dish style pizza.

That’s all I have for today. Check back next time for another recipe. Until then, enjoy the rest of your day and enjoy your meal!

IMG_0532

 
Leave a comment

Posted by on May 18, 2014 in Cooking, Dinner, Pizza


Tags: , , , , , , , , ,

Summer’s Coming! Make This Simple Creamy Cucumber Salad

It seems like summer is never going to get here. after a particularly long, cold and snowy winter here in New York, Spring has been pretty dreary with lots of rain and clouds. This can all be pretty depressing, but summer is only a little more than a month away and I cannot wait for it to get here. Summer means warmer weather, sunshine and the chance to make some great summer dishes. While I don’t so a lot of cooking out myself since we can’t have a good grill here at the condo, I do make a lot of different types of salads all summer long. I try to make salads that don’t use a lot of lettuce since Michelle is not a big fan of most lettuce, or at least a lot of lettuce. I had bought some English cucumbers last week and they were quite large, so I needed to try to come up with something great to make with them besides just slicing some up with some lettuce. I saw Ina Garten make this recipe on the Food Network one day and knew it was one I had to try. It is simple, easy, uses only a few ingredients, and tastes very refreshing. This recipe makes a large quantity, so I actually cut it in half when I made it but I am posting the original recipe here.

Creamy Cucumber Salad

4 hothouse cucumbers, thinly sliced (about 3 to 4 pounds of cucumbers)

2 small red onions, thinly sliced

Kosher salt

4 cups (32 ounces) plain whole-milk yogurt

1 cup (8 ounces) sour cream

2 tablespoons champagne vinegar or white wine vinegar

1/2 cup minced fresh dill

1 1/2 teaspoons freshly ground black pepper

Mix the sliced cucumbers, sliced red onions and 1 1/2 tablespoons of the kosher salt in a large bowl. pour the vegetables into a colander and suspend it over a bowl. Wrap the bowl and the colander with plastic wrap and place them in the refrigerator to drain. Leave in the refrigerator for at least 4 hours and  up to overnight. Discard any of the liquid that accumulates in the bowl.

Pour the yogurt into a fine mesh sieve lined with a paper towel or with cheesecloth and suspend the sieve over another bowl. Wrap the bowl and the sieve in plastic wrap and refrigerate them for at least 4 hours and up to overnight so the yogurt can drain and thicken. Discard the liquid that accumulates in the second bowl.

When the cucumbers are ready, roll them up in paper towels or a dry kitchen towel and press the towel lightly to remove most of the liquid from the vegetables. Place the cucumbers and the drained yogurt together in a large bowl with the sour cream, the vinegar, fresh dill, 2 teaspoons of salt and the black pepper. Toss the mixture well and refrigerate the salad for a few hours to allow all of the flavors to blend together. Sprinkle the salad with 1/2 teaspoon of salt and 1/2 teaspoon of pepper and serve it chilled.

Granted, it may take up a lot of refrigerator space while everything drains (at least it did in my small refrigerator) but it is worth it. You will be surprised just how much moisture comes out of both the salted vegetables and the yogurt. The yogurt comes out nice and thick and creamy. Pressing the cucumbers in a towel removes even more liquid to help keep them from getting too soggy. The yogurt and cucumbers and red onions go so nicely together and it may even remind you a bit of tzatziki sauce from Greek food. It is a great salad that will be perfect for summer parties and barbecues to give you something different from the typical coleslaw or potato salad. This is a great side dish that goes really well with chicken, ribs, pork or beef so you can use it for all kinds of meals.

That’s all I have for today. Check back next time for another recipe. Until then, enjoy the rest of your day and enjoy your meal!

IMG_0542


Leave a comment

Posted by on May 16, 2014 in Cooking, Dinner, Lunch, Salad, Side Dishes


Tags: , , , ,

Ahoy! A Simple Catfish Dinner

As much as I love seafood, the price of it most of the time is a bit too much for many families so don’t get to eat it that much at home unless I can find something that is on sale at the fish market. I did happen to stumble across some catfish when I was there last and decided to pick some up since it was such a good deal. I have made catfish before and posted catfish recipes here, but I had come across one from Robert Irvine a while back and had been waiting for the right opportunity to give it a try. It is a very simple fried catfish with a nice little sauce to go with it and it only takes about twenty minutes to make the whole meal.

Catfish Dinner

For the Catfish:

4 catfish fillets
2 cups buttermilk
Vegetable oil, for frying
1 to 2 cups cornmeal
Salt and ground pepper
1 to 2 cups all-purpose flour
2 eggs, beaten for egg wash

For the Sauce:
1/4 pound (1 stick) butter
1/2 cup minced red onion
1/2 cup minced bell pepper
2 ribs celery, minced
1/4 cup all-purpose flour
2 teaspoons seafood seasoning, such as Old Bay
2 tablespoons minced garlic
2 cups heavy cream
1 pound Louisiana crawfish tails or small shrimp
2 cups cooked grits or polenta, for serving
Chopped green onions or chives, for garnish

To prepare the catfish: marinate the catfish by placing the fillets and buttermilk in a flat-bottomed container. Allow the catfish to marinate in the refrigerator for a minimum of 30 minutes and a maximum of 1 day.

Preheat a deep fryer, large cast iron skillet or Dutch oven to 350 degrees with vegetable oil. Before frying, remove the catfish from the marinade and allow any excess buttermilk to drip off. In separate bowls, place the cornmeal, seasoned with salt and pepper, the flour, and the beaten eggs to set up dredging stations. Coat a catfish fillet by dipping it into the flour, shaking off any excess, then dipping it in the egg wash, allowing any excess to drip off, and then dipping it in the seasoned cornmeal and repeat the process with the remaining fillets before frying. Fry the fist until the catfish reaches 145 degrees and is golden brown, about 4 to 5 minutes. Remove the fish from the frying oil and allow it to drain any excess oil on a plate with paper towels.

For the sauce: In a medium saucepan over medium heat, add the butter and melt it. Next, add the onions, peppers and celery and sweat the vegetables until they are translucent, about 3 to 4 minutes. Stir in the flour, seafood seasoning and garlic to thicken the butter. This will take 1 to 2 minutes.

Next, add the cream and reduce the heat to medium-low. Cook the mixture until the cream sets. Finally, add the crawfish or shrimp, if using, and whisk to blend, cooking for  the final 2 minutes.

To serve the fish, place 1/2 cup of grits or polenta on the plate, then a quarter of the prepared sauce and top with a crisp cooked catfish fillet. Finish the dish with green onions or chives.

Of course, finding crawfish tails in my neck of the woods is next to impossible, and I didn’t have any tiny shrimp on hand either, so I omitted them from the recipe, but I think they would really round things out nicely. The flavor from the sauce mixed with the catfish was fantastic and I served the meal with some polenta. The combination was great and it was all very simple to make. You could try the same dish with other types of fish if your prefer, such as flounder or tilapia.

That’s all I have for today. Check back next time for another recipe. Until then, enjoy the rest of your day and enjoy your meal!

IMG_0527

 
Leave a comment

Posted by on May 14, 2014 in Cooking, Dinner, Sauce, Seafood


Tags: , , , , , , ,

How About Some More Bread? Go Down Under for Homemade Honey-Wheat Bread

Since I have some whole wheat flour on hand I decided I wanted to try to make some good use of it and have been looking around for some recipes to try beyond just making some wheat bread or even a wheat bread crust pizza. Both would be fine, but I wanted something a little different. Then I remembered just how much Sean has always liked the bread that you get when you go to Outback for dinner. They serve these little dark loaves of bread that are warm and tasty to go along with your meal and I figured that they had to use some type of wheat flour in them, so I went searching on the Internet and came across a number of recipes that offer different ways of making a copycat of just that bread. I pulled a few together and tweaked them slightly to fit what I thought would work and the results were pretty good.

Homemade Honey Wheat Bread

1 1/4 cups warm water (at 105-110 degrees)

2 teaspoons sugar

1 package active dry yeast

2 cups bread flour

1 3/4 cups whole wheat flour

1 tablespoon cocoa powder

2 teaspoons instant coffee granules

1 teaspoon salt

2 tablespoons butter, softened

1/4 cup honey

2 tablespoons molasses

Cornmeal, for dusting

Measure the warm water into a 2-cup measuring cup. Add the sugar and the yeast and stir the mixture until the sugar and yeast dissolve. Let the yeast mixture proof for 5 minutes until it begins to bubble.

Mix the bread flour, wheat flour, cocoa powder, coffee granules and the salt together in a large bowl with a whisk. Using your fingers, incorporate the softened butter into the flour mixture until it is well blended. Make a well in the center of the dry flour mixture and add the honey, molasses and the yeast mixture. Stirring from the middle, bring the dry ingredients gradually into the wet ingredients. You can start mixing with a spoon or spatula, but at some point you are better off doing this with your hands to bring the dough together nicely.

Turn the rough dough out onto a lightly floured work surface. Knead the dough for about 10 minutes, adding small amounts of flour to the kneading surface only if needed. Let the dough rest for a few minutes while you wash and dry the bowl you were originally mixing everything in. Spray the inside of the bowl with cooking spray and place the dough into the bowl top side down and then turn it over so that the top is lightly coated with some of the cooking spray. Cover the bowl with plastic wrap and place the bowl in a warm, dry spot to rise. Let the dough rise for 1 to 1 1/2 hours until it has doubled in size.

When the dough has doubled in size, cut it into 6 portions. Form each portion into a 6-inch log or any other shape that you would like the bread to be in. Pour a small amount of cornmeal onto your work surface, moisten each dough portion lightly by wetting your hands with water, removing most of the water and rubbing your hands over the dough. Roll the lightly moistened loaves in the cornmeal to coat the loaves. Gently pat each loaf to remove any excess cornmeal.

Place the loaves on a lightly oiled baking sheet and cover them with plastic wrap and set them aside to rise for another 1 hour or until they have doubled in size.

Preheat the oven to 350 degrees. Uncover the loaves of dough and place them in the oven to bake for 35 to 40 minutes. Remove the bread from the oven and allow the loaves to cool for 10 to 15 minutes before serving.

Just a couple of things about this recipe. As far as taste, these loaves taste great and very much like the ones that you will get at Outback or other steakhouses. However, they are not going to be the same dark color that you get from the loaves at Outback. If you want that really dark brown color, all of the recipes I came across said you can add food coloring to achieve it, but to me it just isn’t worth it only so you can get that look. I can live with the lighter brown color instead of the dark, but if you want it combine 1 1/4 teaspoons of red food coloring with 1 teaspoon each of yellow and blue food coloring and stir it into the water when you are adding the yeast and you can get the dark brown. In any case, the taste was great and you can get a few mini loaves out of one recipe. I made the six loaves and froze a bunch of them just so we can have one to pull out of the freezer and bake when we feel like having one with our meal. It’s an easy recipe you can do once a week and then have bread any time you would like it without having to go out for dinner for it.

That’s all I have for today. Check back next time for another recipe. Until then, enjoy the rest of your day and enjoy your meal!

IMG_0528


3 Comments

Posted by on May 13, 2014 in Breads, Cooking


Tags: , , , ,

A Breakfast Treat – Homemade Whole-Wheat English Muffins

English muffins has always been one of those things that you love to have but never even consider making at home on your own. it just seems like they would be complicated and difficult to make and they probably would not taste as good if you made them yourself. When I saw this recipe in the New York Times a few weeks back, I could not believe how simplistic it seemed and it almost seemed like there was no way these were going to be anywhere close to the English muffins you get so used to having at diners or buying in the store. The fact is that they are really is to make, only take a few ingredients and not a lot of time or effort and you can have you own English muffins whenever you want them.

Homemade Whole-Wheat English Muffins

2 teaspoons active dry yeast

4 tablespoons butter

1/2 cup plain yogurt

1/2 cup warm milk

1/2 tablespoon honey

1 teaspoon salt

1 cup whole wheat flour

1 cup all-purpose flour

1/2 teaspoon baking soda

Cornmeal, as needed

In a small bowl, combine the yeast and 1/3 cup of warm water (registering 105 to 115 degrees) and let it rest until the yeast has dissolved, about 5 minutes.

Melt 2 tablespoons of the butter and put it in a large bowl. Whisk in the plain yogurt, milk, honey, salt and the yeast mixture. Add the whole wheat flour and all-purpose flour and the baking soda to the bowl and beat the mixture thoroughly with a spoon or rubber spatula until it is well combined. Cover the bowl with a damp towel and allow it to rest in a warm spot for 1 to 1 1/2 hours, or until the dough has doubled in size.

Heat the oven to 350 degrees. Lightly dust a small baking sheet with some of the cornmeal.

Place a large skillet over medium heat and melt 1 tablespoon of the butter. Using a large ice cream scoop or a 1/2 measuring cup, drop the batter into the skillet to form round muffins about 4 inches in diameter, mounding the batter in the center. you may have to use your fingers to help get the dough out of the scoop or cup, so be careful around the hot pan and don’t worry if they do not come out perfectly circular (English muffins aren’t perfect circles most of the time). Repeat the process until you have three muffins in the skillet, leaving the rest of the batter for a second batch. Reduce the heat to low. Cover the skillet with a lid or a baking sheet and cook the muffins for 3 to 5 minutes, until the bottoms are a golden brown. Watch them carefully to make sure they do not burn.

Uncover the skillet and flip the muffins using a spatula. Cover the skillet again and cook the muffins for 2 to 4 minutes longer or until the other sides are also golden brown. Place the muffins on the prepared baking sheet. Repeat the process using the remaining batter and another tablespoon of the butter.

Bake the muffins in the oven for 6 to 9 minutes, or until the muffins are puffed and cooked through. Split the muffins with a fork and toast before eating.

As I said, I was skeptical at first but these English muffins come out great. They are so easy to make and taste fantastic you can easily find yourself saying you will never have to buy English muffins again. You get a much better tasting muffin than what you get in the package. It is certainly fresher, comes out crisper and has a nice yeast taste to it. I am going to experiment and try making them just with all-purpose flour next time to see how they come out, but the whole wheat ones are phenomenal and it really takes no effort at all to make them. With the cost of a package of 6 English muffins between two and three dollars a pack, I made eight of my own for a fraction of that and used ingredients I have around the house. It is definitely worth making and trying these on your own.

That’s all I I have for today. Check back next time for another recipe. until then, enjoy the rest of your day and enjoy your meal!

IMG_0537


5 Comments

Posted by on May 12, 2014 in Breads, Breakfast, Cooking


Tags: , , , , , ,

Fiesta Week Part 4 – Quick Pickled Onions and Radishes and Confetti Corn

For the last of the dishes I made for our special taco night bonanza, I added a couple of more side dishes that would also go well on the tacos if you wanted to try them that way. This gave everyone lots of choices to make their tacos, whether they wanted beef, chicken, chorizo or even just vegetable to make a vegetarian taco. To go along with the guacamole, salsa, black bean and cabbage slaw and refried beans I wanted to do some kind of quick pickling that did not require a lot of effort on my part and would still give great flavor from the results. I found this recipe from Bon Appetit  for quick pickled onions and since I had some radishes on hand already I thought I would throw them in there as well since they go so well with tacos. You can get this dish done in five minutes, let it sit and you are good to go.

Quick Pickled Onions and Radishes

1/2 cup apple cider vinegar

1 tablespoon sugar

1 1/2 teaspoons kosher salt

1 red onion, thinly sliced

3-4 radishes, thinly sliced

Whisk the apple cider vinegar, sugar and salt and 1 cup of water together in a small bowl until the sugar and salt dissolve. Place the red onion and the radishes in a jar and pour the vinegar mixture over the vegetables. Let the vegetables sit at room temperature for 1 hour before serving.

You can easily make these ahead of time and store them covered in your refrigerator for days before you use them. They do get good pickling flavor to them in a short amount of time and I have been having what was left on sandwiches and in salads all week-long as well so it gives you a great option for not a lot of work.

I also wanted to make something with corn as corn seems to go well with tacos. I found this simple confetti corn recipe from Ina Garten and decided to give it a try. Even though we haven’t hit good fresh corn season around here yet, I made this work pretty well using frozen corn instead and it turned out tasting great.

Confetti Corn

2 tablespoons olive oil

1/2 cup chopped red onion

1 orange bell pepper, seeded and cut to 1/2-inch dice

2 tablespoons butter

Kernels cut from 5 ears of corn, or 4 cups frozen corn kernels, thawed

1 1/2 teaspoons kosher salt

1 teaspoon finely ground black pepper

2 tablespoons julienned fresh herbs, such as basil, chives or parsley

Heat the olive oil over medium heat in a large skillet until it is shimmering. Add the red onion and saute for 5 minutes until the onion is soft. Stir in the bell pepper and saute the vegetables for about 2 more minutes.

Add the butter to the skillet and allow it to melt, Over medium heat, add the corn, salt and pepper and cook, stirring occasionally, for 5 to 7 minutes, until the corn just starts to lose its starch. Season the mixture to taste and gently stir in the herbs and serve.

You get a great roasted flavor from the corn as the sugars come out and mix nicely with the red onion and the pepper. It has great color and flavor as a side dish for the tacos or to go right on the tacos if you wish. You could also make this as a great side for all kinds of dishes of beef, chicken, fish or pork and I think it would work really well. Everyone liked it so much I never even had a chance to take a picture of it as it was gobbled up pretty quickly.

That’s all I have for today. Check back next time for another recipe. Now that I am done with the Mexican recipes I made this week, I can get back to some other things I have tried recently that I would like to share with everyone. Until next time, enjoy the rest of your day and enjoy your meal!

photo 3

 
2 Comments

Posted by on May 9, 2014 in Cooking, Holidays, Side Dishes, Vegetables


Tags: , , , , , , ,

Fiesta Week Part 3 – Cabbage Slaw and Refried Beans

Now that you have some good taco recipes from chorizo tacos and chicken tacos, you need to have some good ides to go along with the tacos. Of course guacamole and salsa are always good choices and are pretty easy to make on your own at home. There are also a number of quality store-bought salsas and guacamole if there are some that you  like in particular and don’t have the time or energy to make them yourself. Personally, I always like the homemade better since you have more control over the ingredients and can make it just how you and your family like it the best. Anyway, I wanted to make a few different side dishes that could go well either right on the tacos themselves or right along side of them. Of course, I needed to have a classic refried beans recipe and I decided to use this one that I found on Food Network’s website from Ellie Krieger. It is very simple and can be done in minutes.

Refried Beans

1 tablespoon olive oil

1/2 medium onion, diced

2 cloves garlic, minced

1 teaspoon chili powder

1 (15-ounce) can pinto beans, drained and rinsed

2/3 cup chicken broth, plus more if needed

Salt and pepper

2 tablespoons chopped fresh cilantro leaves

Heat the olive oil in a large skillet over medium heat. Add the onion and cook until the onions are tender, about 3 minutes. Stir in the garlic and the chili powder and cook for 1 minute. Stir in the beans and the chicken broth and cook until the beans are warmed through, about 5 minutes. Mash the beans coarsely with the back of a wooden spoon or potato masher, adding more chicken broth to moisten the beans if necessary. Season the beans with salt and pepper, to taste. Stir in the cilantro leaves and serve.

The beans are very tasty and take no time at all to make. You could really do this with any type of beans that you like the best. I think black beans would be great for this well. The beans added great texture to the tacos overall and make a good side dish not just for tacos or other Mexican meals, but for things like chicken or pork entrees as well.

I also wanted to make a quick slaw to go along with the tacos, but I did not want a typical creamy coleslaw that I often make. I needed something lighter and simpler that people could put on their tacos or right on the side of their meals. This simple vegetable slaw from Bon Appetit fit the bill perfectly and only took a few minutes to make for the meal.

Black Bean and Cabbage Slaw

1 15-ounce can black beans, drained and rinsed

1/2 teaspoon cumin

2 teaspoons olive oil

1 tablespoon fresh lime juice

2 cups coleslaw mix

2 green onions, chopped

1/3 cup chopped fresh cilantro

Place the black beans and the cumin in a small bowl and partially mash the beans. Mix the olive oil and the lime juice together in a medium bowl. Add the coleslaw mix, green onions and cilantro to the oil mixture and toss them well to coat them evenly. Add the beans to the coleslaw and toss to coat. Season the slaw with salt and pepper to taste.

Again, it is a very simple recipe that has a great fresh taste and flavor. This slaw could even be used as a taco filling all on its own if you wanted to go with something as more of a vegetarian option for tacos. All you need to do is heat dome tortillas, spoon the mixture onto the tortillas, add a little cheese and any other toppings you like, and you are good to go. I have actually been eating the slaw with my lunch the rest of the week and have added it into some salad that I made for lunch yesterday for an even better variation on regular salad.

That’s all I have for today. Check back next time for another recipe. until then, enjoy the rest of your day and enjoy your meal!

photo 4 photo 2


2 Comments

Posted by on May 8, 2014 in Cooking, Holidays, Salad, Side Dishes


Tags: , , , , , , , , , , ,

 
National Day Calendar

Fun, unusual and forgotten designations on our calendar.

Jennifer Probst

a little bit naughty a little bit nice

Laissez Faire

Letting Life Lead

simple cooking recipes

a blog to share with you the best