RSS

Tag Archives: americas test kitchen

Thanksgiving Dry Run

So I did a test dinner tonight that will be a lot like what I will make on Thanksgiving Day for dinner. I have to admit, I was a little skeptical about how well this recipe would go. It is one I picked up from America’s Test Kitchen on a braised turkey with gravy. The trick in this one is that you butcher the chicken so you are cooking all the parts. They also recommend brining the turkey. Now I have heard both sides of the argument on this one and I am still not sure which would be best. I know that brining does help to keep things moist, but if you are like me, you may not have the room in your refrigerator for a tub to brine a whole turkey in, so I skipped the brining process. Everything turned out really well without it so I think you can get away with not doing it.

Braised Turkey with Gravy

Salt and Pepper

1 cup sugar

1 (5-7 pound) whole bone-in turkey breast, trimmed

4 pounds turkey drumsticks and thighs, trimmed

3 onions, chopped

3 celery ribs, chopped

2 carrots, peeled and chopped

6 garlic cloves, peeled and crushed

2 bay leaves

6 sprigs fresh thyme

6 sprigs fresh parsley

1/2 ounce dried porcini mushrooms, rinsed

4 tablespoons butter, melted

4 cups chicken broth

1 cup dry wine

Gravy

3 tablespoons all-purpose flour

Salt and pepper

For the Turkey: Dissolve 1 cup of salt and the sugar in 2 gallons of cold water in a large container. Submerge the turkey pieces in brine, cover, and refrigerate for 3 to 6 hours.

Adjust an oven rack to the lower-middle position and heat the oven to 500 degrees. Remove the turkey from the brine and pat it dry with paper towels. Toss the onions,celery, carrots, garlic, bay leaves, thyme, parsley, porcini mushrooms and 2 tablespoons of butter in a large roasting pan; arrange everything in an even layer. Brush the turkey pieces with the remaining 2 tablespoons of butter and season with pepper. Place the turkey pieces, skin side up, over the vegetables, leaving at least 1/4 inch between the pieces. Roast until the skin is lightly browned, about 20 minutes.

Remove the pan from the oven and reduce the temperature to 325 degrees. Pour the broth and wine around the turkey pieces (it should come about three-quarters of the way up the legs and thighs). Place a sheet of parchment paper over the turkey pieces. Cover the roasting pan tightly with aluminum foil. Return the covered roasting pan to the oven and cook until the breasts register 160 degrees and thighs register 175 degrees, 1 3/4 to 2 1/4 hours. Transfer the turkey to a cutting board, tent loosely with foil, and let rest for 20 minutes.

For the Gravy: Strain the vegetables and liquid from the roasting pan through a fine-mesh strainer set in a large bowl. Press the solids with the back of a spatula to extract as much liquid as possible. Discard the vegetables. Transfer the liquid to a fat separator; allow it to settle for 5 minutes. Reserve 3 tablespoons of fat and measure out 3 cups of braising liquid.

Heat the reserved fat in a medium saucepan over medium-high heat. Add the flour and cook, stirring constantly, until the flour is a dark golden brown and fragrant, about 5 minutes. Whisk in 3 cups of braising liquid and bring to a boil. Reduce the heat to medium-low and simmer, stirring occasionally, until the gravy is thick and reduced to 2 cups, 15 to 20 minutes. Remove the gravy from the heat and season with salt and pepper to taste.

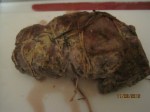
I’ll be honest- butchering the turkey was no easy feat, even with poultry shears and a good sharp knife. If you could get it butchered before you even bring it home, that would be ideal. If not, it took me about 20 minutes to do it. I didn’t think that was too bad, considering I had never done that with a turkey before. I think the results are well worth the work that goes into it. The turkey came out done perfectly. It was very moist and the skin was nice and crispy. I took the foil off for the last 10 minutes or so to crisp up the skin and it was great. It also made carving easy since all the parts were removed already.

There’s a stuffing recipe that goes along with this recipe so you can make use of the turkey wings (thought I forgot about them, didn’t you?). This recipe is designed to make stuffing for 10-12 people, so if you have a smaller group coming, cut the recipe down appropriately. I cut in half for today since they were only 5 of us for dinner and it was the perfect amount with just a bit left over.

Bread Stuffing with Sausage, Dried Cherries and Pecans

2 pounds hearty white sandwich bread (20 to 22 slices) cut into 1/2-inch cubes (I actually used a large loaf of french bread instead, and it came out fine, so use whatever bread you like)

3 pounds turkey wings, divided at the joints

2 teaspoons vegetable oil

1 pound pork sausage

4 tablespoons butter, plus extra for the baking dish

1 large onion, chopped fine

3 celery ribs, chopped fine

2 teaspoons salt

2 tablespoons minced fresh thyme leaves

2 tablespoons minced fresh sage leaves

1 teaspoon ground black pepper

2 1/2 cups chicken broth

3 large eggs

1 cup dried cherries

1 cup pecan halves, toasted and chopped fine

Adjust oven racks to upper-middle and lower middle positions and heat the oven to 250 degrees. Spread the bread cubes in an even layer on 2 rimmed baking sheets. Bake until the edges have dried but centers are slightly moist, 45 to 60 minutes, stirring several times during baking. (You can toast the bread up to 1 day in advance.) Transfer the cubes to a large bowl and increase the oven temperature to 375 degrees.

Use the tip of a paring knife to poke 10 to 15 holes in each wing segment. heat the oil in a large skillet over medium-high heat until it begins to shimmer. Add the wings in a single layer and cook until golden brown, 4 to 6 minutes. Flip the wings and continue to cook until golden brown on the second side, 4 to 6 minutes longer. Transfer the wings to a medium bowl and set aside.

Return the skillet to medium-high heat and add the sausage; cook, breaking the sausage into 1/2-inch pieces with a wooden spoon, until browned, 5 to 7 minutes. Transfer the sausage to a paper towel-lined plate, leaving the rendered fat in the skillet.

Heat the butter with the rendered fat in the skillet over medium heat. When the foaming subsides, add the onion, celery, and 1/2 teaspoon of salt. Cook, stirring occasionally, until the vegetables are softened but not browned, 7 to 9 minutes. Add the thyme, sage, and pepper; cook until fragrant, about 30 seconds. Add 1 cup of broth and bring to a simmer, using a wooden spoon to scrape browned bits from the bottom of the pan. Add the vegetable mixture to the bowl with the dried bread and toss to combine.

Grease a 13 by 9-inch baking dish with butter. In a medium bowl, whisk the eggs, remaining 1 1/2 cups of broth, the remaining 1 1/2 teaspoons of salt and any accumulated juices from the wings until combined. Add the egg/broth mixture, cherries, pecans and sausage to the bread mixture and gently toss to combine; transfer to the greased baking dish. Arrange the wings on top of the stuffing, cover tightly with aluminum foil, and place the baking dish on a rimmed baking sheet.

Bake on the lower-middle rack until the thickest part of the wings registers 175 degrees on an instant-read thermometer, 60 to 75 minutes. Remove the foil and transfer the wings to a dinner plate to reserve for another use. Using a fork, gently fluff the stuffing. Let it rest 5 minutes before serving.

The stuffing was great! I think putting the wings on the top was a great idea and added some turkey flavor to the stuffing. The dried cherries add just the amount of tartness to the dish and they rehydrate a bit with the broth while cooking.

I served the meal with mashed turnips and boiled potatoes, but on Thanksgiving I will be making mashed potatoes, sweet potato casserole, green bean casserole and cranberry sauce. We’ll also be starting the meal off with a butternut squash soup. I’ll be posting the recipes for the butternut squash soup, sweet potato casserole and green bean casserole over the next few days if you want to check them out.

I also made a triple berry pie for dessert, which I have posted on here before. This time I used only frozen berries, but it turned out just as well if you want to try it that way.

I hope everyone has great plans for their Thanksgiving. I’ll be posting more recipes and I promise to take pictures of everything on Thursday while I am cooking (I am very bad about remembering to do that, I apologize). Until next time, enjoy your evening and enjoy your meal.

 
4 Comments

Posted by on November 18, 2012 in Cooking, Dessert, Dinner, Gravy, Holidays, Pie, Side Dishes, Turkey


Tags: , , , , , ,

It’s Time For a Roast, Where’s Shecky Greene?

Okay, so it’s not really that kind of roast, but I decided I wanted to do an entire roast dinner tonight to try to make clean up as easy as possible for all of us here. Michelle had picked up a boneless leg of lamb roast that she wanted for dinner this week. I looked through some of my cookbooks for different recipes, and everything seemed pretty straightforward and not very exciting. I wanted to try something else, so I turned to my Twitter account and posed a question to some food experts to see what kind of response I would get. Bon Appetit gave me quite a list of recipes to choose from to make the lamb. America’s Test Kitchen and Christopher Kimball both gave me some good tips as well, but nothing really jumped out at me that I felt like I really wanted to try, so I kept asking. And then I got an answer I liked from Alton Brown. He gave me the link to a recipe of his called “Silence of the Leg O’ Lamb.” While this recipe does call for the lamb to be grilled, that wasn’t really an option for me in New York in November. He also uses a charcoal grill, which I do not have, so I had to modify the recipe a bit to be roasted in the oven.

Roasted Boneless Leg of Lamb

1 sirloin end leg of lamb, boned

4 cloves garlic

8 fresh mint leaves

1 tablespoon brown sugar

1 teaspoon kosher salt

2 teaspoons black pepper

5 tablespoons Dijon mustard

2 tablespoons vegetable oil

2 sprigs fresh rosemary

Preheat the oven to 400 degrees. Roughly chop the garlic cloves in the food processor. Add the mint and repeat. Add the brown sugar, salt, pepper, mustard and oil and blend into a paste. Spread the paste evenly on the meat side of the roast. Roll the leg into a roast shape and tie with butcher’s twine. Place the lamb in a shallow roasting pan and roast for about 20 minutes per pound, until the internal temperature of the lamb reaches 135 degrees. Remove the roast from the oven. Cover with foil and let the lamb rest for 15 minutes before slicing and serving.

The paste made more than enough to also do the outside of the lamb, which I also did, creating a nice crust on the outside of the lamb. It was cooked perfectly and tasted wonderful. The hint of mint coming through the mustard was great and I loved the garlicky flavor that went throughout the meat. I roasted some potatoes in the same pan with the lamb and they got some of the same mustard crust on them, which made them extra crispy on the outside.

For a vegetable, we had picked up a nice head of cauliflower. I find steamed cauliflower to be very bland and frankly, kind of smelly and not always appealing. I decided to try roasting it instead and I am glad I did. It seemed to make all the difference in the world in taste, flavor and smell and since I was roasting in the oven already anyway, it made it just as easy.

Roasted Cauliflower

1 head of cauliflower, cored and cut into florets

2 tablespoons extra-virgin olive oil

1/2 teaspoon kosher salt

Preheat the oven to 400 degrees. Arrange the cauliflower florets in a single layer on a rimmed baking sheet. Drizzle the olive oil evenly over the florets, then sprinkle with the salt. Toss to coat the cauliflower evenly, then spread the florets out evenly.

Roast the cauliflower, stirring 1 or 2 times, until golden brown and crisp-tender, 25 to 35 minutes. Transfer the cauliflower to a warmed serving bowl. Serve immediately.

I loved the way it came out this way and would make it like this all the time. I can also use some of the leftovers to make some cauliflower soup for later on this week.

That’s it for tonight. Check back later on this week to see what else I come up with for meals. I have some more chicken ideas for this week and also have some cod to make, so we’ll have to see what I can find. Until then, enjoy your evening and enjoy your meal!

 
2 Comments

Posted by on November 6, 2012 in Cooking, Dinner, Lamb, Vegetables


Tags: , , , , , , , ,

3 Tips for Roasting Vegetables | The Feed

3 Tips for Roasting Vegetables | The Feed.

I love roasted vegetables. I think it is my favorite way to make vegetables overall. You can get so much more flavor out of them through roasting than you can by steaming or making them in the microwave. Anyway, here are some tips from America’s Test Kitchen about the best way to approach roasting some of your favorite vegetables. Check it out!


Tags: , ,

A Taste of Dublin, Part 2

To pick up where I left off yesterday, we did not really have a dinner that first night in Dublin. We were so tired we had slept right through dinner and just went downstairs to the bar in the hotel to see if we could just get a drink and relax. When we arrived there, we found out that we could still order things off the var menu. Neither of us was tremendously hungry, but we did want to have a little something. We each decided to order the lemon tart with raspberry sorbet and an Irish coffee. I can tell you, all three things tasted fantastic. While I did not get the exact recipes for the lemon tart and the raspberry sorbet, I did find some recipes that I think will bring you the same tastes that we had that night.

Lemon Tart

1 fully baked warm tart shell, 9- to 9 1/2-inch (you can buy a store-bought shell if you want, or I will post  the recipe for the pastry shell following)

7 large egg yolks

2 large eggs

1 cup granulated sugar

2 tablespoons granulated sugar

2/3 cup lemon juice from 4 to 5 medium lemons

1/4 cup grated lemon zest

Pinch table salt

4 tablespoons butter, cut into 4 pieces

3 tablespoons heavy cream

Adjust an oven rack to the upper-middle position and heat the oven to 375 degrees. Place the tart pan with the shell on a cookie sheet.

In a medium non-reactive bowl, whisk together yolks and whole eggs until combined, about 5 seconds. Add the sugar and whisk until just combined, about 5 seconds. Add lemon juice, zest, and salt; whisk until combined, about 5 seconds. Transfer the mixture to a medium non-reactive saucepan and add the butter pieces, and cook over medium-low heat, stirring constantly with a wooden spoon, until curd thickens to a thin sauce-like consistency and registers 170 degrees on an instant-read thermometer, about 5 minutes. Immediately pour the curd through a single-mesh stainless steel strainer set over clean non-reactive bowl. Stir in the heavy cream; pour the curd into the warm tart shell immediately.

Bake until the filling is shiny and opaque and until the center 3 inches jiggle slightly when shaken, 10 to 15 minutes. Cool on a wire rack to room temperature, about 45 minutes. Remove the outer metal ring, slide a thin metal spatula between the bottom crust and the tart pan bottom to release, then slip the tart onto a cardboard round or serving plate. Cut into wedges and serve.

Tart Pastry

1 large egg yolk

1 tablespoon heavy cream

1/2 teaspoon vanilla extract

1 1/4 cups unbleached all-purpose flour

2/3 cup confectioners’ sugar

1/4 teaspoon table salt

8 tablespoons butter (1 stick, very cold), cut into twenty-four 3/4-inch cubes

1 tablespoon unbleached all-purpose flour for dusting

Whisk together the yolk, cream, and vanilla in a small bowl; set aside. Pulse to combine 1 1/4 cups flour, sugar, and salt in the bowl of a food processor fitted with the steel blade. Scatter butter pieces over the flour mixture; pulse to cut the butter into the flour until the mixture resembles coarse meal, about fifteen 1-second pulses. With the machine running, add the egg mixture and process until the dough just comes together, about 25 seconds. Turn the dough onto a sheet of plastic wrap and press into a 6-inch disk. Wrap in plastic and refrigerate at least 2 hours.

Unwrap the dough; lightly flour a large sheet of parchment paper or plastic wrap and place the dough in the center. Roll out  the dough and line the tart pan. Freeze the dough 30 minutes.

Meanwhile, adjust one oven rack to the upper-middle position and the other rack to the lower-middle position; heat the oven to 375 degrees. Place the chilled tart shell on a cookie sheet; press a 12-inch square of foil inside the tart shell and fill with metal or ceramic pie weights. Bake on the lower rack for 30 minutes, rotating halfway through the baking time. Carefully remove the foil and weights by gathering edges of foil and pulling up and out. Transfer the cookie sheet with the tart shell to the upper rack and continue to bake until the shell is golden brown, about 5 minutes longer.

Both of these recipes come from America’s Test Kitchen, but of the ones I looked at, these seemed to be the ones that would produce the results closest to what we had. For the raspberry sorbet, I looked around all over the place to try to find one that I thought would be close to what we had when I came across this one.

Raspberry Sorbet

1 pint fresh raspberries

1/2 cup sugar

1/2 cup water

Wash the raspberries well. Dissolve the 1/2 cup of sugar into the 1/2 cup of water. Combine the sugar-water mix and the raspberries in a blender (optional you could strain out the raspberry seeds at this point if they bother you. A lot of people don’t like them). Pour the mixture into an ice cream maker. Freeze as for making ice cream. It takes about 30 minutes in a 1 quart gel canister ice cream maker. Let the sorbet harden for an additional 30 minutes in the freezer. (Don’t leave the sorbet in the freezer too long, or it will be hard to scoop and have the texture of a popsicle.)

That’s all there is to it. It’s a pretty simple recipe that I think will produce results just like what we had. Here’s a picture of what we had at the Brooks Hotel;

The Irish coffee we had I thought would be similar to what I make but it did taste different. I have posted my recipe before if you want to see how I make it, but I watched the bartender make hers and she did it somewhat differently.

Irish Coffee

1 teaspoon light brown sugar

1 1/2 ounces Irish Whiskey

6 ounces fresh brewed coffee

Clotted cream

Pour hot water into your coffee glass. Allow the glass to get warm and then dispose of the hot water. Add the sugar and whiskey to the glass. Pour the hot coffee over the whiskey and sugar. Top with clotted cream and serve.

Now I add extras to my Irish coffee, but I have to say it tasted great this way.You could get a good taste of the Irish whiskey and the clotted cream, which we don’t really do, tasted great. We each had Irish coffees on several nights and noticed that different bartenders make it different ways at the same bar. The first bartender we had mixed the whiskey and sugar before putting the coffee in. She also topped the cream with a single coffee bean, which I thought was a nice touch. The second bartender told us when he served it that he did not mix the sugar into the whiskey and gave us spoons to do it. He said some people don’t like the sugar mixed in, so he leaves it up to the customer. You could certainly taste the whiskey more in the second bartender’s version, but both were pretty good. Here is a picture of the one we had on the first night.

Michelle liked that served each one with a piece of Irish chocolate too :). They also left a piece of chocolate on our pillows every night.

I was going to include the Irish breakfast in tonight’s post, but this one is already running long so I think I will include it in tomorrow’s post instead. It was quite a full breakfast, and unfortunately I forgot to take a picture of that one, but it was good and I’ll fill you in on all the contents tomorrow. We’ll see how long tomorrow’s post goes and what I’ll include or maybe I’ll just wait until the next day. Keep checking back to see what shows up. until then, enjoy the rest of your evening and enjoy your meal!

 
1 Comment

Posted by on October 8, 2012 in Beverages, Dessert, Eating Out


Tags: , , ,

Back in the Swing With Baked Pork Chops

Wow, it’s been a while since I have had the time to put up an actual recipe that I made for dinner! I hope to have some more to play around the blogs again, it’s just been kind of brutal the way life has a way of intruding upon things sometimes. Anyway, I do have quite a backlog of things that I have cooked recently that I hope to get up here on the blog. I am also on a diet now, so that means trying to cut back on frying and fatty things while still trying to make dinners that appeal to all of us. Tonight was a simple baked pork chops recipe from America’s Test Kitchen. I wanted to bake the pork chops instead of sauteing them tonight, and this recipe looked pretty good and better for us than the usual method.

Crunchy Baked Pork Chops

Salt

4 center-cut boneless pork chops

4 slices of white bread, torn into pieces

1 minced shallot

3 medium garlic cloves, minced

2 tablespoons vegetable oil

Pepper

2 tablespoons grated Parmesan cheese

1/2 teaspoon minced fresh thyme leaves

2 tablespoons minced fresh parsley leaves

1/4 cup all-purpose flour plus 6 tablespoons

3 large egg whites

3 tablespoons Dijon mustard

Adjust an oven rack to the middle position and heat the oven to 350 degrees. Dissolve 1/4 cup of salt in 1 quart of water in a medium container or gallon-sized zip-lock bag. Submerge the pork chops, cover with plastic wrap, and refrigerate for 30 minutes. Rinse the chops under cold water and dry thoroughly with paper towels.

Pulse the bread in a food processor until coarsely ground. Transfer the crumbs to a rimmed baking sheet and add shallot, garlic, oil, 1/4 teaspoon of salt and 1/4 teaspoon of pepper. Toss until crumbs are evenly coated with the oil. Bake until deep golden brown and dry, about 15 minutes, stirring twice during baking time. (Don’t turn off the oven).

Cool to room temperature. Toss the crumbs with the Parmesan, thyme and parsley.

Place 1/4 cup of flour in a pie plate. In a second pie plate, whisk the egg whites and mustard until combined; add the remaining 6 tablespoons of flour and whisk until almost smooth, with pea-sized lumps remaining.

Increase the oven temperature to 425 degrees. Spray a wire rack with nonstick cooking spray and place in a rimmed baking sheet. Season the pork chops with pepper. Dredge 1 pork chop in the flour; shake off the excess. Using tongs, coat with the egg mixture; let excess drip off. Coat all sides of the pork chop with the bread crumb mixture, pressing gently so the a thick layer of bread crumbs adheres to the chop. Transfer the breaded chop to the wire rack. Repeat with the remaining 3 chops.

Bake until an instant-read thermometer inserted into the center of the chops registers 150 degrees, about 17 to 25 minutes. Let rest on the rack for 5 minutes before serving.

I made some brown rice, using the recipe I linked to from the Our Best Bites blog, and some steamed spinach. The pork chops were great. Nice and moist inside and the coating was really crunchy and stayed adhered to the chops.It was much better than using Shake n’ Bake or even my own coating with an egg wash on the meat. The mixture of the flour, mustard and egg whites really made a big difference.

I have lots of recipes that have been accumulating for a few weeks with the dinners I have made, so I’ll be posting them when I get a chance. Some of them include Coq au Vin in the slow cooker, Alton Brown’s meatloaf recipe, corn and tomato salsa, a roasted corn and tomato soup, mu shu pork and even a recipe from Sean for sausage bread. I hope to start getting some of them up in the next day or two. Until then, enjoy your evening and enjoy your meal!


Leave a comment

Posted by on September 12, 2012 in Cooking, Dinner, Pork, Rice


Tags: , , , , ,

Eliminating Early-Morning Coffee Problems | The Feed

Eliminating Early-Morning Coffee Problems | The Feed.

Anyone who knows me knows I love a cup of coffee. I try to limit myself to 1 or 2 cups a day, but I want to make sure that they always taste good. Here are a couple of helpful hints from America’s Test Kitchen to make sure your morning coffee helps to get you off to a good start. Pair your cup with a nice piece of blueberry coffee cake and you are good to go. Check it out!

 
Leave a comment

Posted by on August 25, 2012 in Beverages, Cooking Websites


Tags: , , ,

How To: Make Perfect Brown Rice | Our Best Bites

How To: Make Perfect Brown Rice | Our Best Bites.

I have been trying to introduce more brown rice into my own meals, but no one ever seems too excited about it because it just doesn’t turn out right. This blog, using a method set out by America’s Test Kitchen, sounds easy and foolproof. I am going to give it a try and you should too. Check it out!

 
3 Comments

Posted by on August 8, 2012 in Cooking, Cooking Websites, Rice


Tags: , ,

Blog Post: The Truth about Salad – America’s Test Kitchen Cooking School

Blog Post: The Truth about Salad – America’s Test Kitchen Cooking School.

Here’s a great blog post from America’s Test Kitchen with some tips on how to make a great salad. Sure they are tips most of us have probably thought of before, but maybe we don’t always practice them. A good salad is great anytime for as a side for a dinner, a lunch, for a party or even a meal on its own. Check it out for yourself.

On a side note, work has kept me pretty busy lately so I haven’t had much blog time, but I do hope to get back to writing my own blog for cooking tonight instead of using others that I find interesting. Enjoy and see you later!

 
Leave a comment

Posted by on July 16, 2012 in Cooking Websites, Salad


Tags: , ,

Some Quiet Time to Read a Good Book

Sean and Michelle went to a fundraiser dinner tonight, so there’s no cooking tonight, just leftovers for me. I’ll be having some of the leftover Chicken and Dumplings I made on Sunday. I am sure I’ll put the recipe up here one day since it turned out pretty well. I know, I know, you’re saying, geez, we’re only a few days into this and we’ve only had one day of recipes. I promise, I am cooking the rest of the week so there will be stuff on here. For today, I thought I would just take a few minutes and let you know where I get a lot of my recipes from in case you want to check out these books or websites.

One cookbook that I use very often is “The America’s Test Kitchen Family Cookbook.” This cookbook covers just about everything you could ever want to know. They cover all the basics of cooking, techniques, ingredients, what works and what doesn’t, and they make lots of recommendations of brands for all kinds of different equipment and ingredients. If you want just one cookbook to start with, I would recommend this one to use. A lot of the recipes I use come from this book. The America’s Test Kitchen website has a lot of the recipes on it as well, but you have to pay to subscribe to the website (www.americastestkitchen.com), so you might as well use that money to buy the book yourself. It is available from Amazon here:http://www.amazon.com/Americas-Test-Kitchen-Family-Cookbook/dp/1933615486/ref=sr_1_1?ie=UTF8&qid=1326843698&sr=8-1

Another cookbook I use a lot is Mark Bittman’s “How to Cook Everything.” Whatever America’s Test Kitchen doesn’t cover, this one sure does. It’s a thick book that really does seem to cover everything. He also goes over lots of techniques as well as covers lots of recipes, and the newer version of the book does cover more vegetarian dishes. There are lots of variations on recipes also so you can change things up on classic recipes you have used for a while. There are over 2,000 recipes in this book, so you can find a recipe for just about any ingredient you would want to use. This book is also available on Amazon:http://www.amazon.com/Cook-Everything-Completely-Revised-Anniversary/dp/0764578650/ref=sr_1_1?s=books&ie=UTF8&qid=1326844032&sr=1-1. I also follow Mark Bittman on Facebook, where he also posts some recipes, along with other articles he writes:https://www.facebook.com/MarkBittman

Those are the two main cookbooks I use, but I also use a magazine to get recipes and ideas. We have been subscribing to Bon Appetit for years, and I have gotten lots of good recipes from them. Of course, the pictures they have look a lot nicer than what I have been able to turn out, but this magazine has dozens of recipes every month and also gives great tips for shopping, on particular techniques, wines and spirits to buy, and also where some of the best places to eat are in many different cities all over. You don’t have to subscribe to the magazine; you could also visit their website, http://www.bonappetit.com/, where they have quite a cache of recipes and articles for you to look through.

There are two other websites that I frequent to get recipes from. One is http://www.williams-sonoma.com/. I love to shop at the store and online, even if some of their prices are high. They have some great recipes on their website, but you have to keep in mind that this is also their retail website, so they include items that you can but directly from them to use in the recipes they list, They also have some recipes that are very specific to ingredients that they sell, so you have to keep an out when scanning through the recipes to make sure they aren’t using something you won’t have around. The other website I use a lot is http://www.foodnetwork.com/. They also have a very large cache of recipes from all their shows and from other sources. You can just type an item into their search box and it will pull up recipes for that item. You can then sort them based on what show they came from, how other users have rated the recipes, the method used, and even watch videos of the recipe. It’s a fantastic source of recipes. I personally use several recipes used by Ina Garten, Anne Burrell, Giada De Laurentiis and Tyler Florence. You can pretty much find a recipe for anything you want, and then read reviews of it by other everyday users to see how they liked the recipe, what worked and what didn’t. I find it a very useful website.

Do you have any particular books or websites that you like to use often? I would love to hear about them. I am always looking for new ideas and new sources of information. Please pass them along so we can all check them out.

That’s about all I have for today. It will be back to cooking tomorrow night and tomorrow night was my choice, so we are making seafood for dinner. We’ll be having sea scallops, rice, and roasted vegetables so check in tomorrow to see the recipes. Enjoy your evening!


2 Comments

Posted by on January 17, 2012 in Cookbooks, Cooking Websites


Tags: , , , , ,

 
National Day Calendar

Fun, unusual and forgotten designations on our calendar.

Jennifer Probst

a little bit naughty a little bit nice

Laissez Faire

Letting Life Lead

simple cooking recipes

a blog to share with you the best