RSS

Tag Archives: Cook’s Country

You Can Never Have Too Many Meatloaf Recipes

It seems like every time I look at a cooking magazine or cooking website, there is a new recipe for a way to make meatloaf. Don’t get me wrong; I love meatloaf and could probably eat it every week, but I would have to try new recipes just to keep it from getting boring. I think that is why I am always willing to give a new meatloaf recipe a try. I saw this one in the recent edition of Cook’s Country magazine and it looked like it would have great texture and an interesting flavor to it, so I thought I would give it a try.

Meatloaf with Mushroom Gravy

1 cup water

1/4 ounce dried porcini mushrooms, rinsed

16 square saltine crackers

10 ounces white mushrooms, trimmed

1 tablespoon vegetable oil

1 onion, chopped fine

Salt and pepper

4 garlic cloves, minced

1 pound ground pork

2 large eggs

1 tablespoon plus 3/4 teaspoon Worcestershire sauce

1 pound ground beef

3/4 teaspoon minced fresh thyme

1/4 cup all-purpose flour

2 1/2 cups chicken broth

Adjust an oven rack to the middle position and heat the oven to 375 degrees. Microwave the water and the porcini mushrooms in a covered bowl until steaming, about 1 minute. Let the porcini mushrooms sit until softened, about 5 minutes. Remove the porcini mushrooms from the bowl with a fork and mince them. Strain the porcini liquid through a strainer lined with a coffee filter and reserve 3/4 cup.

Process the saltines in a food processor until they are finely ground, about 30 seconds. Transfer the crackers to a large bowl. Pulse half of the white mushrooms in the food processor until they are finely ground, about 8 to 10 pulses.

Heat the vegetable in a large, non-stick, oven-safe skillet over medium-high heat until shimmering. Add the onion and cook until it is browned, about 6 to 8 minutes. Add the processed white mushrooms and 1/4 teaspoon of salt and cook until any liquid present evaporates and the mushrooms begin to brown, about 5 minutes. Add the garlic and cook until fragrant, about 30 seconds. Transfer the contents of the skillet to the bowl with the saltines and allow it to cool completely, about 15 minutes.

Once the mixture has  cooled, add the pork, eggs, 1 tablespoon of Worcestershire sauce, 1 teaspoon of salt, 3/4 teaspoon of pepper, and 1/4 cup of the reserved porcini mushroom liquid to the cooled saltine-white mushroom mixture and knead gently until it is mostly combined. Add the beef and knead until the mixture is well combined. Transfer the meat mixture to the now-empty skillet and shape into a 10″ x 6″ loaf. Bake until the meatloaf registers 160 degrees, about 45 to 55 minutes. Transfer the meatloaf to a cutting board using a spatula and tent it loosely with aluminum foil.

Thinly slice the remaining white mushrooms. Discard any solids from the skillet and pour off all but 2 tablespoons of fat. If you don’t have enough fat left in the pan after removing the meatloaf, you can supplement it with melted butter or vegetable oil. Heat the fat over medium-high heat until it is shimmering. Add the sliced white mushrooms and the minced porcini mushrooms and cook, stirring occasionally, until a deep golden brown, about 6 to 8 minutes. Stir in the thyme and 1/4 teaspoon of salt and cook until fragrant, about 30 seconds. Add the flour and cook, stirring frequently, until golden, about 2 minutes. Slowly whisk in the chicken broth, the remaining 1/2 cup of reserved porcini liquid and the remaining 3/4 teaspoon of Worcestershire sauce, scraping up any browned bits in the pan, and bring the mixture to a boil. Reduce the heat to medium and simmer, whisking occasionally, until thickened, about 10 to 15 minutes. Season with salt and pepper to taste. Slice the meatloaf and serve with the mushroom gravy.

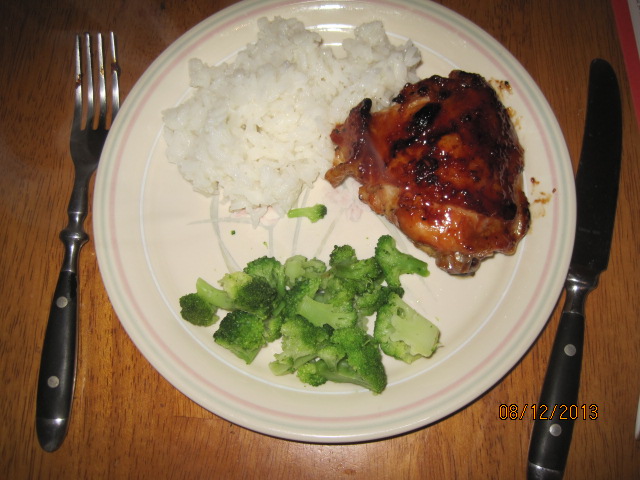
I really liked this recipe. There is nothing better than having a good gravy with your meatloaf and this recipe certainly gives you that. If you’re not a fan of mushrooms, you may not go for the gravy but Michelle and Sean are not big fans of mushrooms and they loved the meatloaf. The texture of it was perfect, it sliced nicely and tasted great. Cooking in the skillet instead of a loaf pan made a big difference in keeping the meatloaf from getting soggy and falling apart.Sauteing the vegetables to mix into the meatloaf also made a big difference. You also get to do everything in one pan to help save on cleaning up. I served this with mashed potatoes and some fresh steamed broccoli. I’ll be using this recipe again.

That’s all I have for today. Check back next time for more great recipes. I still have lots to go through of recipes I have gotten from magazines and online lately, so we’ll see what comes along for next week. Until then, enjoy the rest of your day and enjoy your meal!

002 001


7 Comments

Posted by on September 20, 2013 in Beef, Cooking, Dinner, Gravy


Tags: , , , ,

Let the Soup Season Begin – Hearty Vegetable Chowder

The weather is starting to get much cooler here at night now so Fall is not far away for us. It is still warm during the day, for the most part, but the nights have been crisp and cool. For me this means that it is time to start breaking out some soup recipes. Luckily, in the newest issue of Cook’s Country magazine, there was a great looking soup that was perfect to kick off the soup-making season for me. This vegetable chowder is very easy to make and makes good use of just a few simple ingredients.

Hearty Vegetable Chowder

6 slices bacon, chopped

1 pound leeks, white and light green parts only, halved lengthwise, sliced thin and washed thoroughly

4 carrots, peeled, halved lengthwise and cut into 1-inch pieces

2 celery ribs, halved lengthwise and cut into 1/2-inch pieces

1 teaspoon minced fresh thyme

Salt and pepper

1 1/2 pounds russet potatoes, peeled and cut into 1-inch pieces

2 garlic cloves, minced

4 cups chicken broth

1 bay leaf

1/2 cup half-and-half

1 tablespoon minced fresh chives

1 teaspoon lemon juice

Cook the bacon in a Dutch oven over medium heat until the fat has rendered and the bacon is nearly crispy, about 7 to 9 minutes. Add the leeks, carrots, celery, thyme and 1 teaspoon of salt and cook until the leeks are translucent, about 8 minutes. Add the potatoes and cook, stirring constantly, until the starch begins to release from the potatoes and coat all the vegetables, about 2 minutes. Add the garlic and cook until it is fragrant, about 30 seconds. Add the chicken broth and the bay leaf and bring to a boil.

Reduce the heat to low, cover, and simmer the soup, stirring occasionally, until the vegetables are tender, about 20 minutes. Remove and discard the bay leaf. Transfer 1 cup of the vegetables (using a slotted spoon) and 2 cups of the soup broth to a blender; process until the mixture is smooth, about 1 minute. Stir the processed soup back into the pot. Stir in the half-and-half, chives and lemon juice and gently re-warm the soup. Season with salt and pepper to taste and serve.

There are a couple of things about this easy recipe. If you don’t have any leeks, I think you could easily substitute onions instead and not really lose anything. Leeks are great in a soup, but they are not always easy to get and can be a little pricey. Stirring in the potatoes really does make a difference here. The starch acts as a bit of a thickener here for the soup so that when you puree that bit of soup, you are going to end up with a nice, thick chowder. it was tasty and easy enough to make in under an hour on a weeknight all with ingredients I already had in the house. Even better, it’s a one pot meal and you could easily make it vegetarian by eliminating the bacon altogether if you want.

That’s all I have for today. Check back next time to see what recipe I’ll be making. I have been checking a few things out in the latest issue of Cook’s Country and there are a bunch of things I want to try, so we’ll see what’s next. until next time, enjoy the rest of your day and enjoy your meal!

001

 
Leave a comment

Posted by on September 19, 2013 in Cooking, Dinner, Spices, Vegetarian


Tags: , , , , ,

Livening Up Dessert with Lemon Icebox Pie

I have had this recipe sitting idly by for a few weeks now just waiting for me to have the time to make it, and I finally got to it. I really don’t know why it took me so long to get around to it. The recipe itself is not very hard and it only takes minutes to put everything together. This recipe, for the classic lemon icebox pie, is from Cook’s Country magazine. If you have never had it before, it is very similar to a key lime pie, with of course lemons substituting for the key limes. I have seen lots of recipes out there  for this pie, but this one seems the easiest and the results are quite good.

Lemon Icebox Pie

9 whole graham crackers, broken into 1-inch pieces

3 tablespoons sugar

5 tablespoons butter, melted

2 (14-ounce) cans sweetened condensed milk

3 large egg yolks

3/4 cup plus 2 tablespoons fresh lemon juice (about 5 to 6 lemons)

1 cup heavy cream

1/2 teaspoon vanilla extract

Adjust an oven rack to the middle position and heat the oven to 325 degrees. Process the graham crackers and the sugar in a food processor until finely ground, about 30 seconds. Add the melted butter and pulse until combined, about 8 pulses. Transfer the crumbs to a 9-inch pie plate. Using the bottom of a measuring cup, press the crumbs into the bottom and up the sides of the plate. Bake until the crust is fragrant and just beginning to brown, about 15 minutes. Let the crust cool completely on a wire rack, about 35 minutes. Increase the oven temperature to 375 degrees.

Reserve 3 tablespoons of the sweetened condensed milk. Whisk the remaining sweetened condensed milk and the egg yolks together in a bowl until they are smooth. Slowly whisk in the lemon juice. Pour the filling into the cooled pie crust. Bake the pie until the edges are beginning to set but the center of the pie still jiggles when shaken, about 15 minutes. Let the pie cool for 1 hour on a wire rack. Refrigerate the pie until it is chilled and set, at least 3 hours and up to 24 hours.

Using a stand mixer fitted with a whisk, whip the heavy cream, reserved sweetened condensed milk and the vanilla extract on medium-low speed until it is foamy, about 1 minute. Increase the speed to high and whip until stiff peaks form, about 1 to 3 minutes. Spread the whipped cream evenly over the top of the pie and serve.

I really liked this pie. It was really easy to make and the taste is so refreshing and wonderful. Michelle and I both agreed maybe it could use a smidge more lemon juice for the lemon flavor to really shine, but I had a piece the next day and the flavor seemed even better, so it’s really up to your own personal tastes. You can save yourself even more time and simply buy a pre-made graham cracker crust to use for the pie and really cut your preparation time down to nothing. I’ll be making this one again for sure.

That’s all I have for today. Check back next time to see what other recipes come along. I’ll be going shopping this weekend, so we’ll see what I come back with and what recipes fit what I would like to do. The new issue of Cook’s Country has some great recipes in it, so I do plan to try some of them out next week. Check back for those. Until then, enjoy the rest of your day and enjoy your meal!

003

 
Leave a comment

Posted by on September 13, 2013 in Cooking, Dessert, Pie


Tags: , , ,

A Honey of a Recipe: Honey-Roasted Ribs

I picked this recipe up from Cook’s Country a few weeks ago and have been planning to give it a try. I finally found the ribs on sale this past week, so the opportunity really presented itself. I also had quite a bit of honey on hand for some reason, so it lent itself perfectly for making good use of this recipe. All you need is the time to put into this. The recipe itself is quite simple and easy to make.

Honey-Roasted Ribs

2 (2 1/2- to 3-pound) racks baby back ribs, membranes removed, each rack cut into 3 equal pieces

1 cup honey

5 tablespoons soy sauce

1/4 cup cider vinegar

1/4 cup Dijon mustard

4 scallions, white parts minced, green parts sliced thin

4 garlic cloves, crushed

Kosher salt and pepper

1/4 teaspoon cayenne pepper

Divide the ribs between two 1-gallon zipper-lock plastic bags. Whisk the honey, soy sauce, vinegar, mustard, scallion whites, garlic, 1 teaspoon of salt, 1 teaspoon of pepper and the cayenne pepper together in a bowl. Divide the marinade between the two bags, seal, and turn to coat the ribs evenly with the marinade. Refrigerate the ribs for at least 1 hour or up to 24 hours, turning the bags occasionally.

Adjust an oven rack to the middle position and heat the oven to 325 degrees. Line a rimmed baking sheet with aluminum foil and set a wire rack in the baking sheet. Add enough warm tap water to cover the entire bottom of the sheet (about 2 cups of water). Transfer the ribs, meat side up, to the prepared wire rack; reserve the marinade in the refrigerator. Tent the ribs loosely with aluminum foil and bake for 1 1/4 hours. Uncover the ribs and continue cooking until just tender, about 1 hour longer.

Bring the reserved marinade to a boil in a Dutch oven over medium-high heat and cook until it is thickened to a glaze consistency, about 5 minutes. Brush the ribs with 1/3 cup of the glaze, return the ribs to the oven, and continue to cook until the glaze begins to bubble and the ribs are brown, about 15 to 30 minutes. Transfer the ribs to a cutting board (leave the hot water and the baking sheet in the oven to cool), tent the ribs loosely with foil and allow them to rest for about 10 minutes.

Cut the ribs between the bones, add them to the Dutch oven and toss them to coat with the remaining glaze. Transfer the ribs to a platter and sprinkle with the scallion greens and 1/2 teaspoon of salt.

Just a couple of quick points about this recipe. I didn’t have any scallions on hand, so I omitted them this time. i don’t think they make a very big difference in the recipe anyway. I also cut the recipe in half since I only made one rack of ribs for the 3 of us to have for dinner. It is important that you put the marinade in a Dutch oven and not just a saucepan. It may seem big for a small amount of marinade, but when the honey begins to boil it will bubble and rise up and if you have it in a small pan you risk making a big, sticky mess or burning yourself n very hot sugar. Using the Dutch oven also makes it possible for you to give the ribs one last toss in the glaze to make sure they have a really nice coating. I served the meal with some broccoli and sweet potatoes. I think the honey glaze was fantastic and was not overly sweet thanks to the soy sauce and mustard. I’ll surely be making this one again.

That’s all for today. Check back next time to see what recipes come along. I do have a lot of things planned, and the latest issue of Cook’s Country just arrived at my home yesterday and there are some great recipes I want to try out and share over the coming weeks. until next time, enjoy the rest of your day and enjoy your meal!

001

 
Leave a comment

Posted by on September 11, 2013 in Cooking, Dinner, Pork


Tags: , , ,

A Week of Quick Meals: Easy Chicken Teriyaki and No-Mayo Slaw

I am trying to get everything together this week so that we can go away on vacation on Saturday, and Michelle is working late most of the week, so that means trying to make, quick, easy meals with whatever we happen to have around the house. Last night, the quick meal was a fast chicken teriyaki recipe that I found in Cook’s Country. The original recipe serves it with pineapple rings, but since I didn’t have any pineapple around, they got left out of this one.

Grilled Chicken Teriyaki with Pineapple

1/3 cup soy sauce

1/4 cup sugar

2 tablespoons mirin

1 tablespoon grated fresh ginger

1 teaspoon cornstarch

3 pounds bone-in chicken thighs, trimmed

1 pineapple, peeled, cored and cut into 1/2-inch-thick rings

Whisk the soy sauce, sugar, mirin, ginger and cornstarch together in a small saucepan. Bring the mixture to a boil over medium-high heat and cook until it is thickened, about 2 minutes.

Grill the chicken skin side up over a medium-hot fire, covered, until the underside is browned, about 8 to 10 minutes. Flip the chicken and grill, covered, until the skin is well browned and the meat registers 175 degrees on an instant-read thermometer, about another 6 to 8 minutes. Brush the chicken all over with half of the sauce and continue to grill, uncovered and flipping often, until the sauce begins to caramelize, about 2 minutes. Transfer the chicken to a serving platter and tent loosely with aluminum foil.

Brush the pineapple rings with half of the remaining sauce and grill, uncovered, until lightly charred on both sides, about 1 to 2 minutes per side. transfer to the same platter as the chicken. Pour the remaining sauce over the chicken and pineapple and serve.

I served this with a simple white rice and some broccoli. I also had made a quick recipe for a no-mayo coleslaw, which I like better this time of year for barbecues and parties because you don’t have to worry about it sitting out in the sun or anything. This one just uses a few ingredients and can be made in minutes if you choose to use a bag of coleslaw mix instead of shredding cabbage and carrots yourself. I always keep a bag of coleslaw mix around as it makes a great quick side dish that you can throw together fast.

No-Mayo Coleslaw

1/4 small red cabbage

1/2 small green cabbage

1/2 carrot, peeled and shredded

zest of 1/2 lemon

1/4 cup fresh lemon juice

1/4 cup olive oil

1 tablespoon honey

1 teaspoon salt

1/4 teaspoon freshly ground black pepper

Remove any of the tough outer leaves from both of the heads of cabbage. Trim the core and any tough stems from the cabbage and thinly slice to shred it. Add the cabbage to a bowl with the shredded carrot, lemon zest, lemon juice, olive oil, honey, salt and black pepper. Toss well to combine.

Serve right away for more of a salad dish or store in the refrigerator overnight for a coleslaw that is more pickled.

As I said, I skipped the first couple of steps and used coleslaw mix and I think it turned out great. The coleslaw picture is actually one I took from lunch with a chicken salad sandwich. I loved the lemony flavor of the dish and the honey gives it just a hint of sweetness. it went really well with the chicken as well, and the glaze on the  chicken was quick and easy to make and tasted great. This is a great recipe for a weeknight when you need something done fast and I think you could do it just as well in the oven any time of year by putting the chicken in a 375 degree oven for 10 minutes or so before you start to glaze it.

That’s all I have for today. Check back again to see what else comes up this week. I am not quite sure what I will be making; it really depends on what I pull out of the freezer. I did take some ribs out for tonight and found a recipe for that, so you can check back tomorrow for that one. Until then, enjoy the rest of your day and enjoy your meal!

IMG_1640 IMG_1641 IMG_1642

 
3 Comments

Posted by on August 13, 2013 in Cooking, Dinner, Fruit, Grilling, Poultry, Sauce, Side Dishes


Tags: , , , , , , ,

What’s a Weekend Without a Pie? Cook’s Country Tar Heel Pie

This recipe was actually pictured on the front cover of the last issue of Cook’s Country Magazine. I really like this magazine as it has great recipes that are really easy to follow, along with some other great tips throughout. It was a toss-up yesterday to try making this pie or the lemon icebox pie that is on the cover of last month’s magazine and this one won out. I’ll be making the lemon pie later on this week, so for today we can talk about the Tar Heel Pie, a North Carolina favorite for many years that combines a great fudgy flavor of a brownie into pie form.

Tar Heel Pie

1 (9-inch) single-crust pie dough

1 cup (6 ounces) semisweet chocolate chips

4 tablespoons butter

1/4 cup vegetable oil

2 tablespoons unsweetened cocoa powder

3/4 cup packed dark brown sugar

2 eggs

1 tablespoon vanilla extract

3/4 teaspoon salt

1/4 cup all-purpose flour

1 1/4 cups pecans, toasted and chopped coarse

Adjust an oven rack to the lower-middle position and heat the oven to 375 degrees. Roll the dough into a 12-inch circle on a lightly floured counter. Loosely roll the dough around the rolling pin and gently unroll it onto a 9-inch pie plate., letting the excess dough hang over the edge. Ease the dough into the plate by gently lifting the edge of the dough with one hand while pressing into the plate bottom with your other hand. Leave any dough that overhangs the plate in place. Trim the overhang to 1/2 an inch beyond the lip of the pie plate. Tuck the overhang under itself; the folded edge should be flush with the edge of the pie plate. Crimp the dough evenly around the edge of the plate using your fingers. Wrap the dough-lined pie plate loosely in plastic wrap and place it in the freezer until the dough is fully chilled and firm, about 15 minutes.

Line the  chilled pie plate with two 12-inch squares of parchment paper, letting the parchment lie over the edges of the dough, and fill the pie with pie weights.Bake the pie shell until it is lightly golden brown on the edges, about 18 to 25 minutes. Carefully remove the parchment paper and the pie weights, rotate the pie shell and continue to bake until the center of the pie shell begins to look opaque nd slightly drier, about 3 to 6 minutes. Allow the pie shell to coll completely.

Reduce the oven temperature to 325 degrees. Microwave 2/3 cup of the chocolate chips and the butter in a bowl, stirring often, until softened, about 60 to 90 seconds. Whisk in the oil and cocoa until smooth.

In a separate bowl, whisk the sugar, eggs, vanilla extract, and salt together until smooth. Whisk the chocolate mixture into the sugar mixture until it is incorporated. Stir in the flour and the remaining 1/3 cup of chocolate chips until just combined.

Spread the pecans in the bottom of the pie shell, then pour the batter over the top, using a spatula to level the batter. Bake the pie until a toothpick inserted into the center of comes out with a thin coating of batter attached, about 30 to 35 minutes. Let the pie cool on a wire rack until barely warm, about 1 1/2 hours. Serve. The pie can be re-heated, uncovered, in a 300 degree oven until warm throughout, about 10 to 15 minutes.

A couple of things about this recipe. I left the pecans out this time since we were bringing it over to someone’s house and I didn’t want to take a chance on any nut allergies and such. It came out fine without the pecans, but I think it would be even better with them in the pie. It was a very chocolate center, almost exactly like a brownie should be, with the added taste of a nice pie crust to go with it. We served it with some homemade whipped cream to top off each slice. As far as the pie weights, I personally do not have any in the house, but you can use many different things as a substitute. If you have any marbles around, these will work great as that is essentially what pie weights are anyway. I used some dried beans that I had on hand and they work just fine. Just remember that you can’t use the beans for cooking after that, but you can re-use them as pie weights in the future.

That’s all I have for today. Check back during the week for some more recipes. I do plan to try a few things out this week, including the lemon icebox pie and making my own ciabatta bread, so keep checking back to see those recipes. Until next time, enjoy the rest of your day and enjoy your meal!

IMG_1639

 
3 Comments

Posted by on August 11, 2013 in Cooking, Dessert, Pie


Tags: , , , ,

Sweet as Grilled Honey-Glazed Pork Chops and Peaches

I opened up the freezer on Sunday night looking for things I could use to make for dinner this week and I was able to come up with a few ideas for some meals, including this one I found Cook’s Country. I am always a little leery of doing pork chops on the grill because if you don’t watch them closely you end up with burnt shoe leather as your meal. This recipe lays everything out quite easily and is a fast meal, so you can grill this up any night of the week for dinner with just a few ingredients.

Grilled Honey-Glazed Pork Chops

4 (10-ounce) bone-in pork rib or center-cut chops, about 1-inch thick, trimmed

1/4 cup sugar

1 teaspoon salt

1 teaspoon pepper

2 tablespoons cider vinegar

1/2 teaspoon cornstarch

1/4 cup honey

1 1/2 tablespoons Dijon mustard

1/2 teaspoon minced fresh thyme

1/8 teaspoon cayenne pepper

Cut 2 slits about 2 inches apart through the fat and connective tissue around the outside of each pork chop. Combine the sugar, salt, and pepper in a bowl. Pat the chops dry with paper towels and rub all over with the sugar mixture.

Whisk the vinegar and cornstarch together in a small saucepan until there are no lumps remaining. Stir in the honey, mustard, thyme and cayenne pepper and bring the mixture to a boil. Reduce the heat to medium-low and simmer until the glaze is reduced to about 1/4 cup, about 5 to 7 minutes.

If you are using a charcoal grill, open the bottom vent completely. Light a chimney starter filled with charcoal briquettes. When the top coals are partially covered with ash, pour two-thirds of the coals evenly over the grill, then pour the remaining coals over half the grill. Set the cooking grate in place, cover and open the lid vent completely. Heat the grill until it is hot, about 5 minutes.

If you are using a gas grill, turn on all the burners and set them to high, cover the grill and heat the grill until it is hot, about 15 minutes. Leave the primary burner on high and the other burner(s) to medium-low.

Clean and oil the  cooking grate. Place the chops on the cool part of the grill and cook (covered if you are using a gas grill) until the meat registers 140 degrees, about 3 to 5 minutes per side. Brush the tops of the pork chops with the glaze and grill, glazed side down, over the hot part of the grill until it is caramelized, about 1 minute. Repeat the process with the second side of the pork chops. Transfer the chops to a platter, tent loosely with aluminum foil, and rest for five to ten minutes.

While the pork chops are resting, there is no better way to make use of some of those peaches you have in season this time of year by grilling them up. Grilled peaches test phenomenal and take just a few minutes to cook, so this gives you the perfect opportunity to throw a couple on the grill.

Grilled Peaches

4 ripe medium peaches

1/4 cup brown sugar

1/4 cup pure maple syrup

Cut the peaches in half and remove the pit. Drizzle each half with the maple syrup and sprinkle with the brown sugar. Grill skin side up for 3 minutes until the peaches have begun to caramelize and soften.

Of course, you don’t have to serve the peaches with your meal. You could make them for dessert and serve them with some ice cream or yogurt and you have a nice dessert. To me, they went quite nicely with the pork chops though. The chops were great and using the sugar mixture on them before putting any glaze on them really helped to keep the glaze in place and helped to brown the chops nicely. I served this dish with some green beans, wild rice, the peaches and I even toasted up a little garlic bread on the grill as well.

That’s all I have for today. Check back again later in the week for some more recipes. I’ll be posting a lighter version of a beer battered fish with roasted sweet potato fries, I plan to try my hand at some ciabatta bread if I get the time, and I also have the recipe for a wonderful looking lemon icebox pie to try out. Check back and see what comes up next. Until then, enjoy the rest of your day and enjoy your meal!

005

 
Leave a comment

Posted by on August 6, 2013 in Cooking, Dinner, Fruit, Grilling, Pork


Tags: , , ,

Cook’s Country Recipe Week Part 5 – Pan Roasted Chicken and Vegetables

If you follow along regularly with this blog, then you likely know that not only do we eat a lot of chicken, but also that I love to make roast chicken in various ways. I am always on the lookout for a new roast chicken recipe to try and when this one came along in Cook’s Country magazine, I knew right away that I would be giving it a try. The only thing that makes this recipe even better is that you can do the whole meal in just one pan and have it done perfectly in under an hour.

Pan-Roasted Chicken and Vegetables

3/4 pound Brussels sprouts, trimmed and halved

3/4 pound red potatoes, cut into 1-inch pieces

1/2 pound shallots, peeled and halved

4 carrots, peeled and cut into 2-inch pieces, thick ends halved lengthwise

6 garlic cloves, peeled

4 teaspoons minced fresh thyme

1 tablespoon vegetable oil

2 teaspoons minced fresh rosemary

1 teaspoon sugar

Salt and pepper

2 tablespoons butter, melted

3 1/2 pounds bone-in chicken pieces (2 split breasts cut in half crosswise, 2 drumsticks, 2 thighs), trimmed

Adjust an oven rack to the upper-middle position and heat the oven to 475 degrees. Toss the Brussels sprouts, potatoes, shallots, carrots, garlic, 2 teaspoons of thyme, oil, 1 teaspoon of rosemary, sugar, 3/4 teaspoon of salt and 1/4 teaspoon of pepper together in a bowl. Combine the butter, the remaining 2 teaspoons of thyme, the remaining 1 teaspoon of rosemary, 1/4 teaspoon of salt and 1/8 teaspoon of pepper in a second bowl; set aside.

Pat the chicken dry with paper towels and season with salt and pepper. Place the vegetables in a single layer on a rimmed baking sheet, arranging the Brussels sprouts in the center. Place the chicken, skin side up, on top of the vegetables, arranging the breast pieces in the center and the leg and thigh pieces around the perimeter of the baking sheet.

Brush the chicken with the herb butter and roast until the breasts register 160 degrees and the drumsticks and thighs register 175 degrees, about 35 to 45 minutes, rotating the pan about halfway through the cooking process. Transfer the chicken to a serving platter and tent loosely with aluminum foil and let it rest for 5 to 10 minutes. Toss the vegetables in the pan juices and transfer them to the platter with the chicken. Serve.

There are a few things about this recipe you want to keep in mind. Here is one time where it really pays to have a good, large rimmed baking sheet. You want a big one that will hold everything well without overcrowding so that everything roasts well instead of steams in the baking sheet. You also want one that will hold up well under high heat and not warp at all. The high heat used in the recipe lets you cook everything in under an hour, gives you great caramelization on the vegetables and makes the chicken skin crispy and perfect. Adding the herb butter the chicken really helps to give it extra flavor and crisp the skin too. The vegetables get a lot of great flavor from the drippings of the chicken. Having the Brussels sprouts in the middle of the pan makes a difference here too. Since they tend to cook faster than the carrots and potatoes, you want them in the middle and the other vegetables on the outer part of the sheet where there is more heat. Same goes for the chicken breasts. Keeping it in the cooler part of the sheet helps everything be at the right temperature at the same time.

That’s all I have for today. I hoped you liked the Cook’s Country recipes for this week. Check back tomorrow for the peach-blueberry ice cream pie recipe I have been promising all week. I am also planning some recipes for next week as well, so we’ll see what I can come up with and decide to make. until next time, enjoy the rest of your day and enjoy your meal!

IMG_1632

 
2 Comments

Posted by on August 2, 2013 in Cooking, Dinner, One Pot Meals, Poultry, Vegetables


Tags: , , , ,

Cook’s Country Recipe Week Part 4 – Easy Chicken Parmesan Subs

This may be the easiest recipe of the week from Cook’s Country, which is why it was perfect for a busy night like last night. Wednesday’s are typically my busiest day of the week so I don’t always have a lot of time to do an intricate meal. That’s why something like chicken Parmesan subs makes such great sense. it’s quick, easy and the clean up is a snap. everything can be done in about 20 minutes and you can be on with the rest of your evening.

Chicken Parmesan Subs

1/2 cup all-purpose flour

3 eggs

1 cup panko bread crumbs

Salt and pepper

4 (4-ounce) chicken cutlets

1/4 cup vegetable oil

2 garlic cloves, minced

1 (14.5-ounce) can diced tomatoes

4 (6-inch) sub rolls, split lengthwise

4 ounces shredded Italian blend cheese (1 cup)

Adjust an oven rack to the middle position and heat the oven to 400 degrees. Place the flour in a shallow dish. Beat the eggs in a second shallow dish. Combine the bread crumbs, 1/4 teaspoon of salt and 1/4 teaspoon of pepper in a third shallow baking dish.

Pat the chicken cutlets dry with paper towels and season them with salt and pepper. Dip each cutlet into the flour, then dunk in the eggs and dredge in the panko bread crumb mixture, pressing the cutlets down into the bread crumbs to make sure they adhere. Heat 3 tablespoons of vegetable oil in a large, non-stick skillet over medium-high heat until shimmering. Add the cutlets, lower the heat to medium and cook the cutlets until golden brown and crisp, about 2 minutes per side. Transfer the cutlets to a paper towel-lined plate and allow them to rest for 5 minutes. Slice each cutlet in half lengthwise.

Meanwhile, heat the remaining 1 tablespoon of vegetable oil in a medium saucepan over medium-high heat until shimmering. Add the garlic and cook just until the garlic is fragrant, about 30 seconds. Stir in the diced tomatoes and their juice and allow it to simmer until slightly thickened, about 7 minutes. Mash the mixture until only small chunks of tomato remain. Season the tomatoes with salt and pepper. Place the sub rolls on a rimmed baking sheet. Lay 2 pieces of chicken inside each roll. Cover the cutlets with tomato sauce, then sprinkle with the cheese. Bake the subs until the cheese is melted, about 3 to 5 minutes. Serve.

It’s a very simple and tasty meal that is great for a weeknight. you can serve this with a side salad and you have your meal all set. To save some time, I used some of the left over sauce from the meatballs and marinara I made the other day instead of the diced tomatoes and simply re-heated the sauce a bit before putting it on the chicken.

That’s all for today. Check back tomorrow for another Cook’s Country recipe. The next one up will be a great pan-roasted chicken and vegetables recipe that is one of the issues I received. You make everything on a simple rimmed baking sheet so it is all done in one dish – chicken, potatoes and vegetables. I haven’t forgotten about the peach-blueberry ice cream pie either. That one will be up this weekend. Until next time, enjoy the rest of your day and enjoy your meal!

IMG_1631

 
2 Comments

Posted by on August 1, 2013 in Cooking, Dinner, Poultry, Sandwiches


Tags: , ,

Cook’s Country Recipe Week Part 3 – Spicy Pork and Broccoli Stir Fry

For day three of using Cook’s Country recipes, I picked out this stir fry to give a try . I love making stir fry dinners since they are quick and easy and make good use of some  fresh vegetables. Don’t be put off by the name of this recipe; it is not very spicy at all and has great flavor to it. There aren’t a lot of ingredients in this one at all. The only item I had to go out and buy was the Asian chili-garlic sauce, and you could easily omit it or just use any chili sauce you would like as a substitute and I think it would be just fine.

Spicy Pork and Broccoli Stir Fry

3/4 cup chicken broth

2 tablespoons soy sauce

2 tablespoons cornstarch

1 tablespoon Asian chili-garlic sauce

1 teaspoon toasted sesame oil

1 (16-ounce) pork tenderloin, cut crosswise into 1/2-inch thick slices, each slice cut into 1/2-inch thick strips

3 tablespoons vegetable oil

1 pound broccoli florets cut into 1-inch pieces, stalks trimmed, peeled, and sliced 1/4-inch thick

1 tablespoon grated fresh ginger

1 garlic clove, minced

Whisk 1/2 cup of the chicken broth, soy sauce, 1 tablespoon of the cornstarch, chili-garlic sauce and the  sesame oil together in a bowl. set aside. Toss the pork, 1 tablespoon of vegetable oil and the remaining 1 tablespoon of the cornstarch together in a bowl. Heat 2 teaspoons of the vegetable oil in a large non-stick skillet over medium-high heat until just smoking. Brown half of the pork, about 3 to 5 minutes. Transfer the pork to a plate. Repeat the process with 2 teaspoons of vegetable oil and the remaining pork.

Heat the remaining 2 teaspoons of vegetable oil in a now-empty skillet until just smoking. Add the broccoli and cook until it turns bright green, about 1 minute. Add the remaining 1/4 cup of the chicken broth and cook, covered, until the broccoli is tender, about 3 minutes. Add the ginger and the garlic and cook until they are fragrant, about 30 seconds. Stir in the soy sauce mixture and cook until it is thickened, about 2 minutes. Return the pork and any accumulated juices to the skillet and cook until the pork is heated through, about 1 minute. Serve.

I did add some yellow, orange and red pepper and a shallot to the recipe, putting them in the skillet and cooking them for about a minute or two before I put the broccoli in the skillet. I think they added some nice color and flavor to the dish. The sauce adhered nicely to the pork thanks to the cornstarch and it had a good flavor with just a little kick to it. I served this dish with white rice and that was it. It is a great, simple dinner that you can have prepared and done in under 30 minutes so it is perfect for any weeknight meal.

That’s all I have for today. Check back next time for another Cook’s Country for this week. The next recipe up will be for some quick chicken Parmesan sub sandwiches that I am making tonight, so you want to check back for that one. I also have a recipe from Bon Appetit for a wonderful peach-blueberry ice cream pie that I made that I will be posting soon. You don’t want to miss that one. Until next time, enjoy the rest of your day and enjoy your meal!

IMG_1628 IMG_1626

 
Leave a comment

Posted by on July 31, 2013 in Cooking Tips, Dinner, One Pot Meals, Pork


Tags: , , , ,

 
National Day Calendar

Fun, unusual and forgotten designations on our calendar.

Jennifer Probst

a little bit naughty a little bit nice

Laissez Faire

Letting Life Lead

simple cooking recipes

a blog to share with you the best