RSS

Tag Archives: Brussels sprouts

Bring on the Brussels Sprouts – Maple Roasted Brussels Sprouts

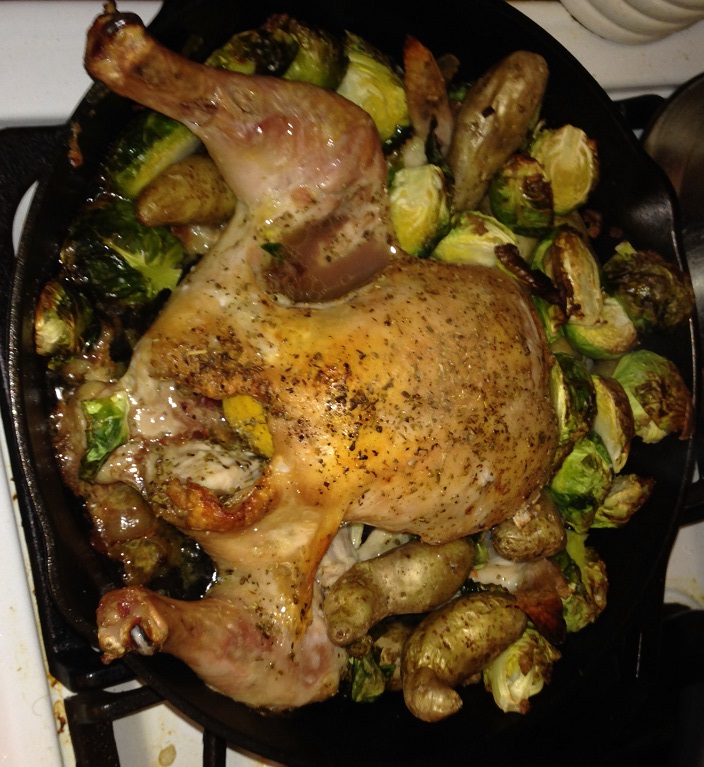
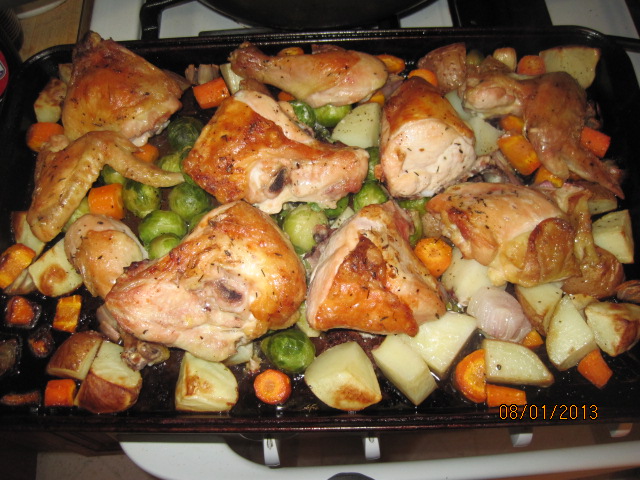
Brussels sprouts are one of those vegetables, like cauliflower and beets, that you either love or you hate. Some people just do not like the look or texture of them or the way that they smell when they are cooked. I, on the other hand, am a big fan of Brussels sprouts and love to make them just about any time of the year, though they seem particularly well suited for fall and winter meals. To me they are a great side dish for any dinner entrée and can be something different and special for your Thanksgiving meal this year. There are a number of different ways to cook them, but I find roasting them gives them the best flavor. It also gives you a chance to add something to them to have their flavor come out even better and get a fabulous green color when they are cooked. I found this recipe from Food & Wine not long ago for maple-roasted Brussels sprouts that sounded like a really tasty way to bring sprouts to the table.

Maple- Roasted Brussels Sprouts

1/4 cup canola oil

2 1/4 pounds baby Brussels sprouts or regular Brussels sprouts that are halved lengthwise

Salt and freshly ground pepper

1 stick (4 ounces) butter, cut into tablespoons and softened

2 tablespoons light brown sugar

1/4 cup Grade A pure maple syrup

1 1/2 tablespoons cider vinegar

1 cup vacuum-packed roasted chestnuts, coarsely chopped (6 ounces), optional

1 tablespoon walnut oil, optional

Heat the canola oil in a very large skillet until it is shimmering. Add the Brussels sprouts and season them with salt and pepper, then cook the sprouts over high heat without stirring until they are browned, about 2 to 3 minutes. Add the butter and brown sugar and cook the ingredients over moderately high heat, stirring occasionally, until the brown sugar is melted, about 1 to 2 minutes. Add the maple syrup and cook, stirring occasionally, until the Brussels sprouts are just crisp-tender, about 7 to 9 minutes. Stir in the apple cider vinegar. Add the chestnuts and walnut oil, if using, and cook until they are hot.

Using a slotted spoon, transfer the Brussels sprouts and chestnuts to a bowl. Boil the cooking liquid over high heat until it is thickened slightly, about 2 to 3 minutes. Pour the sauce over the Brussels sprouts and serve.

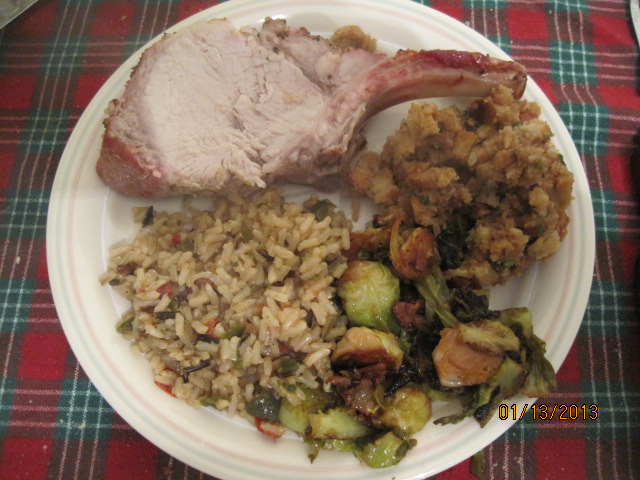
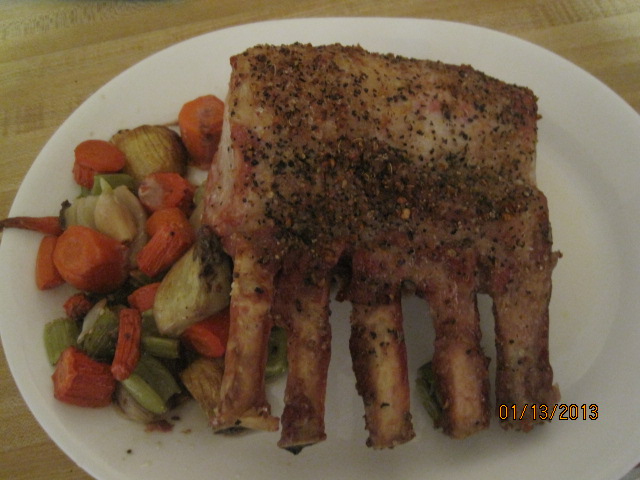
A couple of things about the original recipe. This recipe serves 10, so it is well-suited to use for Thanksgiving if you are having a lot of people over. For my purposes, I cut down the recipe significantly since they are only 3 of us for dinner. I cut everything in half and still had some leftovers. Also, the original recipe from Food & Wine doesn’t have the chestnuts and walnut oil as optional. While they might provide great crunch and flavor, I didn’t have either on hand and find both to be quite expensive for something that I would rarely use so I eliminated them and made them optional. If you love chestnuts and have walnut oil, I am sure they add to the dish but I think it was good without them. I loved the mix of the maple syrup and sprouts and the glaze created for the sprouts was fantastic. Make sure to use real maple syrup and not the pancake syrup (which isn’t really maple) to get the great taste. The Brussels sprouts were nicely browned and crisp and done just perfectly. It was the perfect side dish for the engagement chicken recipe I made the other day it was one I would make with turkey, poultry or pork.

That’s all I have for today. Check back next time for another recipe. Until then, enjoy the rest of your day and enjoy your meal!

sprouts

Advertisement
 
Leave a comment

Posted by on November 14, 2016 in Cooking, Dinner, Side Dishes, Vegetables


Tags: , , , ,

Let’s Roast Another Chicken! Cast-Iron Skillet Roasted Chicken

I know, I roast a lot of chicken, but you can get a lot of mileage out of one 4-pound chicken for a family of three. We get at least one dinner, sometimes two out of the chicken, sandwiches for lunch once or twice and then I take the bones and make chicken stock so we can get even more out of it. All in all, one 4 pound chicken that might cost five or six dollars is good for 6 or 7 meals, so we certainly get out money’s worth from it. This recipe, which I got from The Daily Meal, is even better for a couple of reasons. It is a one pot meal that does potatoes and Brussels sprouts with the chicken and it is in a cast-iron skillet, which is one of my favorites to cook with since they are so versatile and hold the heat so well. The original recipe for this use 2 small game hens, but I opted to go with 1 larger chicken instead.

Cast-Iron Skillet Roasted Chicken

1 3-4 pound chicken, rinsed and patted dry

1/2 pound fingerling potatoes, scrubbed

1 pound Brussels sprouts, trimmed and halved

3 strips bacon, chopped

3 cloves garlic, sliced thin

1 1/2 tablespoons kosher salt

2 tablespoons herbes de Provence

1/2 teaspoon freshly ground black pepper

1/2 lemon

1 tablespoon olive oil

Preheat the oven to 500 degrees with the cast-iron skillet in the oven while it is pre-heating.

Place the chicken on a large plate and coat the skin with 1 1/2 tablespoons of salt Place the chicken in the refrigerator, uncovered, and leave it there for 1 hour. Prior to cooking, remove the chicken from the refrigerator and thoroughly rinse the chicken with water and pat the chicken dry. Cut the skin between the legs of the chicken and gently disjoint the legs so that they lie flat on wither side of the body of the chicken.

Rub the olive oil all over the chicken to coat it and then sprinkle on the herbes de Provence and sprinkle some of the herbs inside the chicken as well. Sprinkle the top of the chicken with pepper. Take the 1/2 a lemon and place it inside the cavity of the chicken.

Pierce the fingerling potatoes with a fork, toss them into a medium bowl with about 1/2 an inch of water and cook the potatoes for 2 minutes on high in the microwave.

Remove the cast-iron skillet from the oven and drop the bacon pieces onto 1/2 of the pan. Place the chicken, breast side up, on the other half of the skillet. Make sure to place the legs and thighs flat against the bottom of the pan. Put the skillet back into the oven and cook for 15 minutes.

Remove the pan from the oven and add the fingerling potatoes, the garlic slices and the Brussels sprouts over the half of the pan with the bacon slices. Toss the potatoes and Brussels sprouts with the bacon pieces to coat them in some of the fat. Return the skillet to oven and continue roasting for about 20 to 25 minutes longer, or until the juices from the legs and thighs run clear when pierced with a fork. Remove the chicken and let it rest for 10 minutes before carving. Place the vegetables around the chicken on a platter and serve.

Salting the chicken for an hour ahead of time in the refrigerator helps to dry out the skin to make it nice and crunchy. This recipe roasts the chicken at a really high temperature so it does not take as long to cook as it normally might and everything gets nice and crispy, including the potatoes and Brussels sprouts. This recipe turned out quite well and of course it is great when you can make everything all in one pot to make things even easier for you for serving and clean-up. It’s a good way to get a nice roasted chicken on the table during a busy weeknight.

That’s all I have for today. Check back next time for another recipe. As always, I am always trying new things out (today I am trying my hand at making homemade challah bread), so there is always lots to share. Until next time, enjoy the rest of your day and enjoy your meal!

IMG_0485


Leave a comment

Posted by on April 9, 2014 in Cooking, Dinner, One Pot Meals, Poultry


Tags: , , , , , ,

Bend Over Backwards for Some Brussels Sprout Pizza

Admittedly, this seems like an out of the ordinary pizza, and I guess it is, but once you try it you will see just how delicious it can be. Making your own pizza at home is a pretty easy thing to do and costs a lot less than going to your local pizza place or getting delivery pizza, and you get to control the ingredients that go into it. You can make your own pizza dough, as I do often, or you can buy pre-made dough at most grocery stores and it is pretty inexpensive. This recipe is from Bon Appetit and is perfect for those who want a vegetarian pizza or those who like a pizza without any tomato sauce.

Brussels Sprouts Pizza

2 tablespoons olive oil plus more for brushing and drizzling

1 large onion, thinly sliced

Kosher salt and freshly ground black pepper

1/2 pound Brussels sprouts, trimmed, leaves removed

2 garlic cloves, finely chopped

1 teaspoon crushed red pepper flakes

All-purpose flour, for dusting

1 store-bought pizza dough or Food Processor Pizza Dough

1/2 cup grated Parmesan cheese

Preheat the oven to 450 degrees. Heat 2 tablespoons of the olive oil in a large skillet over medium-high heat. Add the onion, season with salt and pepper and cook, stirring occasionally, until the onion has softened and turned golden, about 8 to 10 minutes. Add the Brussels sprouts, chopped garlic, and crushed red pepper flakes and cook until the Brussels sprouts are wilted, about 5 minutes. Season the mixture with salt and pepper, remove the skillet from the heat and set it aside.

Lightly flour a rimmed baking sheet and stretch the pizza dough to the edges of the baking sheet. Lightly brush the dough with some olive oil and season the dough with kosher salt and freshly ground black pepper. Top the dough with 1/4 cup of the Parmesan cheese, then the Brussels sprouts mixture followed by the remaining 1/4 cup of Parmesan cheese.

Bake the pizza until the dough is crisp and the cheese is melted, about 8 to 12 minutes. Allow the pizza to cool for 5 minutes before cutting. Serve the pizza drizzled with some more olive oil.

I think this pizza had great flavor to it. The Brussels sprouts and onions went together perfectly and the red pepper flakes just gave the whole pizza a hint of heat. You could always leave the crushed red pepper flakes out of the dish completely if you did not want any heat to it. I personally enjoyed it, but Michelle and Sean both said they would just as soon leave it out. I also made a plain cheese pizza to go along with this one and I am glad I did since there was none left of this particular pie. I was surprised Sean liked it so much since Brussels sprouts aren’t always high on everyone’s list, let alone a 13-year old, but he really liked it. I’ll definitely have to keep this one on hand because it is great to make if you need a vegetarian meal or just a pizza with no sauce.

That’s all I have for today. Check back next time for another recipe. Until then, enjoy the rest of your day and enjoy your meal!

010

 
4 Comments

Posted by on January 16, 2014 in Cooking, Dinner, One Pot Meals, Pizza, Vegetarian


Tags: , , , , , ,

More Thanksgiving Day Sides: Creamed Pearl Onions and Roasted Brussels Sprouts

There seems to be an endless supply of Thanksgiving side dish possibilities. There are so many great Fall vegetables that you can use in so many different ways that the combinations you can come up with can help you to tailor your meal to fit whatever likes you may have or whoever may be coming over for dinner on that day. In my trail run dinner that I made for Michelle’s birthday, I made a lot of side dishes this year so I could try different things. One of her absolute favorites is one that often gets overlooked on the dinner table – creamed pearl onions. I actually got this very simple recipe from chef Thomas Keller and with just a few ingredients, you can have this dish made easily.

Creamed Pearl Onions

2 cups peeled pearl onions

2 cups chicken stock

1 1/2 teaspoons sugar

1/2 teaspoon kosher salt

2/3 cup heavy cream

1 tablespoon minced chives

Combine the pearl onions, chicken stock, sugar and salt in a medium saucepan over medium heat. Simmer the mixture until all the liquid has evaporated and the onions are tender, about 15 to 20 minutes. Add the heavy cream and cook until the cream has thickened. Stir in the chives and season with salt and freshly ground black pepper to taste before serving.

It is very easy to make and you can do this while your turkey is resting so you can get it ready easily or you can even make it the day before and just lightly simmer it on the stove to heat it through. You get a nice, thick creamy sauce with the great flavor of the pearl onions. If you can get frozen pearl onions, you can save yourself the aggravation of having to peel the onions yourself. I couldn’t find any frozen onions, so I did buy the fresh ones, but there is an easy way to peel them. Simply place the onions in two cups of boiling water for 2 or three minutes. Remove the onions to an ice water bath or cold water bath to cool them off when you strain them off the stove. Once they are cool enough to the touch, simply cut off the root end of the onion and give the onion a gentle squeeze and it will pop right out of the skin. It still takes some time to do all of them, but it is a lot easier than trying to peel the paper off of all those tiny onions.

I also made a simple Brussels sprouts recipe. Even though sprouts may get a bad rap, we love them in our house and they make a great Fall or holiday side dish. And nothing seems to be better than some roasted Brussels sprouts with a little bit of bacon to add some flavor. This quick recipe is from chef Marcus Samuelsson.

Roasted Brussels Sprouts with Maple Bacon

1 pound Brussels sprouts, bottom trimmed and cut in half lengthwise

1 ounce maple syrup

1 teaspoon smoked paprika

Salt and pepper, to taste

1/2 ounce olive oil

4 ounces bacon, cut into quarters in strips

Heat the oven to 400 degrees. Toss the Brussels sprouts in the olive oil, salt, peppers and smoked paprika.Place the Brussels sprouts on a baking sheet and roast until they are browned and cooked through, about 15 minutes.

In a medium skillet over medium heat, fry the bacon until it is crispy, about 5 minutes. Drain the bacon of the fat and toss it with the maple syrup and the roasted Brussels sprouts. Finish the dish with a pat of butter over the top or just serve immediately.

Again, you can roast the Brussels sprouts a day ahead of time, like I did, and while the turkey rests before carving simply place them in the oven to warm them through with any other side dishes you are also warming to save yourself some time. The maple flavor along with the smokiness of the bacon and the paprika make this a fantastic side dish. If you want to try to keep it lighter and vegetarian, you can simply omit the bacon and roast the Brussels sprouts alone on a baking sheet or even in a cast iron pan and make them that way.

Unfortunately, I had so many side dishes when I made everything that there were a few things I forgot to take pictures of in all the rush to get things on the table. Sorry about that, but the pearl onions and Brussels sprouts got away from me. I do have pictures of the next 2 sides I will be posting tomorrow though.

That’s all I have for today. Keep checking back for some more holiday recipes and ideas. Until next time, enjoy the rest of your day and enjoy your meal!

 
2 Comments

Posted by on November 16, 2013 in Cooking, Holidays, Produce, Side Dishes, Vegetables


Tags: , , , , , , ,

Cook’s Country Recipe Week Part 5 – Pan Roasted Chicken and Vegetables

If you follow along regularly with this blog, then you likely know that not only do we eat a lot of chicken, but also that I love to make roast chicken in various ways. I am always on the lookout for a new roast chicken recipe to try and when this one came along in Cook’s Country magazine, I knew right away that I would be giving it a try. The only thing that makes this recipe even better is that you can do the whole meal in just one pan and have it done perfectly in under an hour.

Pan-Roasted Chicken and Vegetables

3/4 pound Brussels sprouts, trimmed and halved

3/4 pound red potatoes, cut into 1-inch pieces

1/2 pound shallots, peeled and halved

4 carrots, peeled and cut into 2-inch pieces, thick ends halved lengthwise

6 garlic cloves, peeled

4 teaspoons minced fresh thyme

1 tablespoon vegetable oil

2 teaspoons minced fresh rosemary

1 teaspoon sugar

Salt and pepper

2 tablespoons butter, melted

3 1/2 pounds bone-in chicken pieces (2 split breasts cut in half crosswise, 2 drumsticks, 2 thighs), trimmed

Adjust an oven rack to the upper-middle position and heat the oven to 475 degrees. Toss the Brussels sprouts, potatoes, shallots, carrots, garlic, 2 teaspoons of thyme, oil, 1 teaspoon of rosemary, sugar, 3/4 teaspoon of salt and 1/4 teaspoon of pepper together in a bowl. Combine the butter, the remaining 2 teaspoons of thyme, the remaining 1 teaspoon of rosemary, 1/4 teaspoon of salt and 1/8 teaspoon of pepper in a second bowl; set aside.

Pat the chicken dry with paper towels and season with salt and pepper. Place the vegetables in a single layer on a rimmed baking sheet, arranging the Brussels sprouts in the center. Place the chicken, skin side up, on top of the vegetables, arranging the breast pieces in the center and the leg and thigh pieces around the perimeter of the baking sheet.

Brush the chicken with the herb butter and roast until the breasts register 160 degrees and the drumsticks and thighs register 175 degrees, about 35 to 45 minutes, rotating the pan about halfway through the cooking process. Transfer the chicken to a serving platter and tent loosely with aluminum foil and let it rest for 5 to 10 minutes. Toss the vegetables in the pan juices and transfer them to the platter with the chicken. Serve.

There are a few things about this recipe you want to keep in mind. Here is one time where it really pays to have a good, large rimmed baking sheet. You want a big one that will hold everything well without overcrowding so that everything roasts well instead of steams in the baking sheet. You also want one that will hold up well under high heat and not warp at all. The high heat used in the recipe lets you cook everything in under an hour, gives you great caramelization on the vegetables and makes the chicken skin crispy and perfect. Adding the herb butter the chicken really helps to give it extra flavor and crisp the skin too. The vegetables get a lot of great flavor from the drippings of the chicken. Having the Brussels sprouts in the middle of the pan makes a difference here too. Since they tend to cook faster than the carrots and potatoes, you want them in the middle and the other vegetables on the outer part of the sheet where there is more heat. Same goes for the chicken breasts. Keeping it in the cooler part of the sheet helps everything be at the right temperature at the same time.

That’s all I have for today. I hoped you liked the Cook’s Country recipes for this week. Check back tomorrow for the peach-blueberry ice cream pie recipe I have been promising all week. I am also planning some recipes for next week as well, so we’ll see what I can come up with and decide to make. until next time, enjoy the rest of your day and enjoy your meal!

IMG_1632

 
2 Comments

Posted by on August 2, 2013 in Cooking, Dinner, One Pot Meals, Poultry, Vegetables


Tags: , , , ,

Oven Roasted Rack of Pork

This week was mostly a week of meals I had already posted recipes for, so I really didn’t have anything new to write about other than this one meal that I made. I had gone shopping at Adam’s last week and they had a center cut rack of pork on sale for a really good price. I had never made one before, the rack only cost about $5.00 and would more than feed the three of us, so I figured what the heck and I bought one. Then I had to try to find a recipe to use to make it. I looked around at all the usual places I got on the Internet for recipes, but I didn’t really see what I liked, so I put my faith in Google and went looking there. That is where I turned up this recipe, on a website called A Culinary Journey With Chef Dennis. The recipe sounded good, it was easy, and I had all the ingredients, so it was the winner.

Oven Roasted Rack of Pork

1 8 bone center cut rack of pork, frenched

Olive oil

Salt and pepper

2 tablespoons Montreal Steak Seasoning

2 carrots, chopped roughly

1 onion, chopped roughly

2 stalks of celery, chopped roughly

6 cloves of garlic, peeled

Preheat the oven to 450 degrees. In a roasting pan, add the rough cut vegetables. Rinse the rack of pork and pat it dry with paper towels. Place the rack, fat side up, on top of the vegetables in the pan. Apply a liberal amount of olive oil to the pork, rubbing it into the meat. Sprinkle the entire rack with salt and pepper, and then coat with the Montreal Steak Seasoning (use more if you want more of coating to form a crust). Place the pan in the oven and roast for 15 minutes.

After 15 minutes, reduce the oven temperature to 325 degrees and continue roasting for approximately 2 hours or until the internal temperature on the outside of the rack has reached 160 degrees. This will ensure that the outside of the pork is well done while the center cuts are not quite as cooked.

Remove the rack from the oven and place it on a cutting board and tent loosely with aluminum foil. Allow the pork to rest for 10 minutes before slicing. While the rack is resting, place 2 cups of water in the roasting pan and place on the stovetop over medium-high heat. With a spoon, loosen all the baked meat scraps from the pan to help make a pan gravy. Allow to cook and reduce for 10 minutes. Strain out all the vegetable pieces.

Cut the rack along the bones, making even portions of pork and serve with the pan gravy.

It was very simple and made for a nice, elegant meal. This one might be better served for a weekend  when you have more time to cook it instead of a weeknight meal, but it is quite delicious. I served it with some wild rice and brussels sprouts and it was all very good and looked great on the plate.

Another easy meal for your arsenal! We’re going shopping so I still haven’t planned out the meals for next week yet, so we’ll have to see what comes along and is on sale for next week to make. Check back and see what I can come up with. Until next time, enjoy your evening and enjoy your meal!

003 002

 
Leave a comment

Posted by on January 18, 2013 in Cooking, Cooking Websites, Dinner, Pork


Tags: , , ,

Dinner’s Gone to Pot (Roast)

Today’s dinner is another one of my all-time favorites (and it’s already cooking by the way, since it does take some time). I love pot roast; it was always one of my favorite meals growing up. The best thing about pot roast is that shouldn’t even have to slice it. Just leaning a knife or fork up against it should make it fall apart (we always called it “the meat that falls apart” when we were growing up). The nice thing about pot roast is that it’s nearly impossible to overcook it. if you don’t think it looks right to you, leave it in a little longer. I’ve tried a few different recipes over the years, but this one from an old America’s Test Kitchen cookbook seems to give me the best results. I have cooked it in the slow cooker before and it comes out just fine also, but I like the gravy that comes out of this one better.

Simple Pot Roast

1 boneless chuck roast (about 3 1/2 pounds)

2 tablespoons vegetable oil

1 medium onion, chopped medium

1 small carrot, chopped medium

1 small rib celery, chopped medium

2 garlic cloves, minced

2 teaspoons sugar

1 cup chicken broth

1 cup beef broth

1 sprig fresh thyme

1-2 cups water

1/4 cup dry red wine

Adjust an oven rack to the middle position and heat the oven to 300 degrees. Thoroughly pat the roast dry with paper towels; sprinkle generously with salt and pepper.

Heat the oil in a large heavy-bottomed Dutch Oven over medium-high heat until shimmering but not smoking. Brown the roast thoroughly on all sides, reducing the heat if the fat begins to smoke, 8 to 10 minutes. Transfer the roast to a large plate; set aside. Reduce the heat to medium; add the onion, carrot and celery to the pot and cook, stirring occasionally, until beginning to brown, 6 to 8 minutes. Add the garlic and the sugar; cook until fragrant, about 30 seconds. Add the chicken and beef broths and thyme, scraping the bottom of the pan with a wooden spoon to loosen the browned bits. Return the roast and any accumulated juices to the pot; add enough water to come halfway up the sides of the roast. Place a large piece of foil over the pot and cover tightly with a lid; bring the liquid to a simmer over medium heat, then transfer the pot to the oven. Cook turning the roast every 30 minutes, until fully tender and a meat fork or sharp knife slips in and out of the meat, 3 1/2 to 4 hours.

Transfer the roast to a carving board; tent with foil to keep warm. Allow the liquid in the pot to settle about 5 minutes, then use a wide spoon to skim the fat off the surface; discard the thyme sprig. Boil over high heat until reduced to about 1 1/2 cups, about 8 minutes. Add the red wine and reduce again to 1 1/2 cups, about 2 minutes. Season to taste with salt and pepper.

Using a chef’s knife or carving knife, cut the meat into 1/2-inch-thick slices, or pull apart into large pieces; transfer the meat to a warmed serving platter and pour about 1/2 cup of sauce over the meat. Serve, passing the remaining sauce separately.

Yum, yum. There are variations of this recipe, of course. One adds root vegetables such as carrots, small red potatoes and parsnips after the roast is done. Just strain the liquid after you remove the roast, pour the liquid back in the pot, return the roast and the new vegetables to the pot and continue to until the vegetables are almost tender, about 20 to 30 minutes. Then remove the roast, add the wine and boil the vegetables over high heat until fully tender, about another 10 minutes. Remove the vegetables with a slotted spoon, and you are good to go.

I like to serve pot roast with mashed potatoes instead of putting potatoes in the pot with the roast. I love the mashed potatoes with the gravy produced by this roast. I have made mashed potatoes a few times on this meal plan, but if you would like the recipe, you can just click here to see it from an earlier posting.

I was going to make green beans to go with the pot roast, but when I got Adams Farms yesterday, Brussels sprouts were on sale, so I am making those instead. I love Brussels sprouts, but I admit they are an acquired taste. A lot of people don’t care for them, but we eat them regularly in our house. One of my favorite ways to cook them is to make them in a skillet with some bacon and shallots, which is what I am going to do tonight.

Skillet-Braised Brussels Sprouts with Bacon and Shallots

4 ounces bacon (4 slices), chopped fine

2 shallots, sliced thin

1 pound Brussels sprouts, stem ends trimmed, discolored leaves removed, and halved through the stem

1/2 cup water

Salt

1 tablespoon butter

1 tablespoon red wine vinegar

Pepper

Cook the bacon and shallots together in a large skillet over medium heat until the bacon is crisp and the shallots are browned, about 10 minutes. Transfer the mixture to a paper towel-lined plate to drain.

Add the Brussels sprouts, water, and 1/2 teaspoon salt to the skillet and increase the heat to medium-high. Cover and simmer until the Brussels sprouts are bright green, about 9 minutes. Uncover the pan and cook until the liquid has evaporated and the sprouts are tender, about 5 minutes longer.

Off the heat, stir in the bacon mixture, butter and vinegar. Season with salt and pepper to taste before serving.

You really need to halve the sprouts when you are braising them like this. If you leave them whole, they are just too dense and won’t cook well all the way through, making them mushy outside and nearly raw inside. Cooking them this way also eliminates the aroma sprouts can give off that seems to turn a lot of people off to them.

So that’s today’s meal. If they are any leftovers, you can make a great open-faced sandwich with the pot roast and gravy with some mashed potatoes on the side. We have tomorrow marked as a leftovers night for dinner, so we may have that ourselves. We have the meal plan for next week just about finalized, so I will be writing about that tomorrow. I will say that all the meals for next week are going to be one pot meals and two of them are specifically slow cooker meals. Check it out tomorrow to see what you have to look forward to for dinners. If you have any questions, comments or suggestions, please feel free to pass them along here. Thanks again for checking the blog out. I am pretty happy with the way things are going with it so far, so we’ll keep going! Enjoy your day and enjoy your meal tonight!

 
Leave a comment

Posted by on February 17, 2012 in Beef, Cooking, Dinner, Potatoes, Vegetables


Tags: , , ,

 
National Day Calendar

Fun, unusual and forgotten designations on our calendar.

Authentic Autograph Source, LLC

Licensed autographs and collectibles dealer in the Pacific NW! We have a wide range of sports, celebrities, and more!

Jennifer Probst

a little bit naughty a little bit nice

Laissez Faire

Letting Life Lead

%d bloggers like this: