RSS

Monthly Archives: May 2013

Ethiopian Stir Fry

I try to make a stir-fry recipe at least once a week now. It is always an easy dinner to make and comes in handy when we may not have a lot of time to put a meal together. I had seen this recipe posted on the website run by Marcus Samuelsson, who many view of probably seen on the Food Network or may have even read his book “Yes, Chef.” As soon as I saw the recipe I was intrigued about how it would turn out in new I wanted to give it a try. It is a recipe for Ethiopian-style beef stir-fry.

Ethiopian-Style Beef Stir Fry

1/4 cup vegetable oil
1 cup thinly sliced red onion
1 1/2 pounds hangar steak or beef tenderloin, cut into half-inch cubes
1 teaspoon salt, or to taste
1 tablespoon chili powder
1/2 teaspoon ground cardamom
1/2 teaspoon ground ginger
1/4 teaspoon freshly ground black pepper
3 garlic cloves, cut into quarters
3 tomatoes, chopped, or 1 1/2 cups roughly chopped canned tomatoes
2 jalapeño chili peppers, seeds and ribs removed, thinly sliced
1/2 cup dry red wine
2 red onions, sliced
1/2 cup peanuts, coarsely chopped
1 1/2 pounds baby spinach

Mix all of the dry spices in a bowl and add the meat. Toss well to combine and set aside. Heat the oil in a large skillet over high heat. Add the onions and garlic and cook, stirring constantly, until they begin to color around the edges, approximately 2 to 3 minutes. Add the meat, sprinkle with salt, and stir-fry until the meat is browned on all sides, about 3 minutes on each side. Carefully add the tomatoes, jalapeños, peanuts and wine. Allow to simmer for one minute, then season with salt if necessary. Stir in the spinach and cook until the spinach is just heated through and starting to wilt, about 2 minutes. Season with salt to taste and serve.

The combination of the cardamom, ginger and chili powder on the meat added some great flavor. You could certainly eliminate the jalapeños if you didn’t want them added to the recipe, but I think they add a nice little hint of heat to the dish and go very well with the tomatoes. Also, you could eliminate the peanuts if you have any type of allergies to deal with. I think they added a nice crunch to the meal and added them in. I served this with white rice as I do with many of the stir-fries I make, but you could certainly use brown rice instead. Chef Samuelsson actually recommends serving it either just with some crusty bread or with a side of couscous, which I think would also be quite nice. The whole meal itself literally takes minutes to prepare so it’s great for a weeknight meal.

That’s all there is for today. I hope everyone enjoys their holiday weekend and gets to do some grilling. It’s supposed to rain here in New York for most of the weekend so I don’t know how much grilling will get to do. We’ll have to see what happens. I still have to plan out next week’s menu is so I don’t really have a good idea to yet of what I’m going to try, but check back and see what comes up and what I decide to post. Until then, enjoy the rest of your day and enjoy your meal!

001


Tags: , , , ,

An Anniversary Dinner: Pan Seared Rib Eye Steak, Port Wine Sauce and Bacon Wrapped Shrimp

Okay, so I probably want a little overboard with dinner for our anniversary last night, but it was certainly worth it. It was a lot of work to get everything prepared and it was an awful lot of food for just the three of us (of course Sean joined us for dinner), but everything tasted great so I had nothing to complain about. I went to the store yesterday morning and picked out some nice-looking rib-eye steaks to make and with a little help from Denise Landis of The New York Times I was able to put together a quick port wine pan sauce to go with the steaks. Both were pretty easy to do.

Pan Seared Rib-eye Steaks

1 tablespoon vegetable oil
4 (8-to 10-ounce) rib-eye steaks, 1 to 1 1/4 inches thick
Salt and pepper
1 recipe Port Wine Pan Sauce (to follow)

Heat the oil in a large skillet over medium-high heat until just smoking. Meanwhile, pat the steaks dry with paper towels and season both sides generously with salt and pepper. Lay the steaks in the pan, leaving 1/4 inch between the steaks. Cook, without moving the steaks, until well browned, about 4 minutes. Using tongs, flip the steaks and continue to cook until the meat registers 115 to 120° (for rare) or 120 to 125° (for medium-rare), 3 to 7 minutes. Transfer the steaks to a serving platter and tent loosely with aluminum foil to rest or while preparing the pan sauce, then serve.

Port Wine Pan Sauce

1 small shallot, minced
1 small onion, minced
8 ounces mushrooms, sliced
Salt and pepper
1/2 cup ruby port
2 tablespoons butter
1/4 teaspoon chopped fresh thyme

In the same skillet that the steaks were seared in, add the shallot, onion and mushrooms. Cook, stirring occasionally, until the onions begin to soften, about 3 to 4 minutes. Remove the vegetables from the pan. Deglaze the pan with the ruby port, stirring to loosen any browned bits. Add the butter, 1 tablespoon at a time, and gently swirl into the sauce until well blended, about 1 to 2 minutes. Add the vegetables back into the pan, season with salt and pepper to taste, and stir in till slightly thickened about 1 to 2 minutes more. Off the heat, add in the fresh thyme and gently mix. Serve the sauce on the side with the steaks.

The steaks were cooked perfectly and have great flavor to them even though the only spices I added were salt-and-pepper. I actually cooked them for about 2 minutes longer so they were closer to medium, but you want to make them to your own personal preference. The pan sauce was just right for the steaks. I love the taste that the port wine adds to the sauce on it blended well with the shallots, onion and mushrooms. It also tasted great on the mashed potatoes that I made to go along on the side.

And the other dish that I made to go along with the meal was a very simple bacon wrapped shrimp. This doesn’t have to be a messy project or a big production; there are really only three ingredients to the entire recipe and most of the work goes into the preparation and not the cooking itself.

Bacon Wrapped Shrimp

24 large uncooked shrimp, shelled and deveined
6 slices bacon, cut into quarters
1 tablespoon Montreal Steak seasoning

Preheat the oven to 450°. Cover the bottom of a rimmed baking sheet with aluminum foil. Insert a wire rack into the baking sheet. Spray the baking sheet with nonstick vegetable spray. Wrap each shrimp in a 1/4 slice of bacon, being sure to wrap the bacon tightly. Secure the bacon with toothpicks if necessary. Place the shrimp on the wire rack in the baking sheet. Sprinkle the shrimp with the steak seasoning on both sides.

When the oven has come up to temperature, place the baking sheet inside the oven and bake the shrimp until opaque and the bacon has begun to crisp, approximately 10 to 15 minutes.

It doesn’t get much easier than this one. There are a couple of notes to take into mind when making this for yourself. First, make sure that you using large shrimp for this particular recipe. The size of the shrimp will take just about as long to roast in the oven as the bacon will to crisp so you won’t end up with any rubbery shrimp. If you are using smaller shrimp such as a medium-sized shrimp, you may want to think about cooking the bacon slightly before you wrap the shrimp to make sure that the bacon will be crisp at the same time the shrimp is done. You don’t have to use the steak seasoning if you don’t want to, although I think it added a nice flavor to the shrimp and the bacon. You could also use a barbecue sauce instead of the seasoning if you wanted to try something a little different. Having the shrimp up on the wire rack in the pan allows the air to get underneath and the heat to get underneath so that the bacon and the shrimp both cook on both sides. You could also put the shrimp on a skewer if you didn’t want to use toothpicks, or if you wrap the bacon tight enough, as I tried to do, you don’t really need any toothpicks at all.

I also served a side dish of roasted asparagus for the vegetable. Overall, I think it was a pretty good meal and we all seem to enjoy it. There were some leftovers of course but will be able to re-purpose them for another meal.

That’s all there is for today. Check back next time this see the recipes I use for dinner tonight. I’m hoping to get to the Ethiopian stir-fry tonight; I’m curious as to how well that one will turn out. Check back and see how it goes. Until then, enjoy the rest of your day and enjoy your meal!

001

 
Leave a comment

Posted by on May 23, 2013 in Beef, Cooking, Dinner, Sauce, Seafood


Tags: , , , , , ,

Getting Fancy with Scallops with Carrot Cream, Pickled Carrots and Herb Oil

I came across this recipe thanks to Food Republic, who had posted it on their site about a week ago. The pictures of it looked great and it sounded simple enough to try out myself so I thought I would give it a shot. It doesn’t take long to make at all, so you can even do it for a weeknight meal without any trouble.

Scallops with Carrot Cream, Pickled Carrots and Herb Oil

Carrot Cream

1/2 pound carrots, cut into a large dice (about 2 cups)

1 teaspoon salt

1/2 cup heavy cream

Freshly ground black pepper

Pickled Carrots

1 large carrot, sliced into short ribbons using a vegetable peeler (about 1 cup)

1/4 cup seasoned rice wine vinegar

Scallops

1 pound sea scallops

Salt and freshly ground black pepper

1 tablespoon vegetable oil

Herb Oil

3/4 cup packed fresh Italian parsley leaves

1 tablespoon fresh marjoram leaves

1/4 cup extra-virgin olive oil

1/4 cup vegetable oil

For the carrot cream : Add the carrots and salt to medium saucepan and cover with water. Bring to a boil and cook for 7 to 8 minutes, or until the carrots are tender. Drain the carrots and add them to a blender along with the cream and a pinch of pepper to taste. Blend until the mixture is a very smooth puree and set aside.

For the pickled carrots: In a medium bowl, toss the carrots with the rice wine vinegar. Marinate the carrots for at least 20 minutes. Drain, reserving the vinegar for another use, and set aside.

For the herb oil: In a blender, combine the parsley, marjoram, olive oil, vegetable oil and the salt. Blend until the oil turns a vibrant green color, about 3 minutes. You can strain the oil through a fine mesh strainer or leave it alone if you like it with some texture to it. Transfer the oil to a bowl or a squeeze bottle.

For the scallops: Dry the scallops thoroughly with paper towels. Place them on a plate and season them generously with salt and pepper. Heat a heavy skillet over high heat. Add the vegetable oil and, when the skillet is very hot, carefully add the scallops to the pan, being careful not to splatter oil on yourself or crowd the pan with too many scallops. Cook the scallops for 2 minutes on one side without disturbing them, or until they are caramelized, then flip them over, cooking the other side for a minute or so more.

To assemble the dish: Gently re-heat the carrot cream, then spoon some on each plate for serving. Top each plate with several scallops. Drizzle some herb oil around the scallops and garnish with a sprinkling of pickled carrots and marjoram leaves.

This dish looked very nice and tasted fantastic. The scallops were cooked perfectly and I loved the combination of the carrot cream and the pickled carrots with the scallops themselves. The herb oil added a nice contrast to the dish with the parsley and marjoram. It seemed like a perfect combination. I also had plenty of oil left over to use for other dishes down the road. I served this with some white rice and broccoli to round out the meal.

That’s it for today. Tonight is our 20th anniversary and I have a nice dinner planned, so check back for the menu for that one later this week. Until next time, enjoy the rest of your day and enjoy your meal!

001


Tags: , , , ,

A Down Home Meal: Fried Chicken and Cornbread

As soon as I saw this recipe in a recent version of the Dining section of The New York Times a few weeks ago I knew I was going to have to give it a try. It’s a very basic recipe for fried chicken without all the bells and whistles of breadcrumbs, crushed cereal, saltine crackers, and various spices. This is just good, simple ingredients that you don’t need much to do. All you need is a good cast-iron skillet, a cut-up chicken, some flour and some oil and you are good to go. The recipe almost sounded too easy and I wondered how good it was actually going to come out. I was not disappointed in the results. While the recipe was posted in the newspaper a few weeks ago, it actually comes from Southern Living.

Southern Living’s Best Fried Chicken

1 tablespoon +1 teaspoon salt
1 chicken with skin, about 2 1/2 pounds, cut up into 8 pieces
1 teaspoon black pepper
1 cup all-purpose flour
2 cups vegetable oil
1/4 cup bacon drippings (or use more oil)

Combined 1 tablespoon of the salt with 3 quarts of water in a large bowl or container. Add the chicken, cover, and refrigerate 8 hours or overnight. Drain, rinse with cold water, and pat dry.

Stir together the remaining 1 teaspoon of salt and the black pepper. Sprinkle half the mixture evenly over the chicken. In a large sealable plastic bag, combine the remaining pepper mixture and the flour. Add two pieces of chicken to the bag and shake well to coat. Remove the chicken pieces, shaking off any extra flour, and set them aside. Repeat the process with the remaining chicken.

Take a large cast-iron skillet or chicken fryer, for which you have a lid, and fit with a candy or deep-frying thermometer. Add the oil and bacon drippings and heat to 360° over medium heat; the oil will ripple and possibly give off a few wisps of smoke.

Using a pair of tongs, immediately add chicken pieces, skin side down (work in batches if necessary to avoid crowding the pan). The oil temperature will drop to about 325°, where it should stay; adjust the heat so that the oil is bubbling gently around the chicken pieces. Cover the pan and cook for 6 minutes; uncover the pan and cook for 9 minutes. Turn the chicken pieces; re-cover the pan and cook for another 6 minutes. Uncover the pan and cook for another 5 to 9 minutes, depending on the size of the pieces. If necessary for even browning, turn the pieces over a few times towards the end. Remove the pieces and drain on paper towels or in a paper bag. Repeat the process with any remaining chicken pieces. Allow the chicken to cool at least 20 minutes before serving.

There are a couple of notes that go along with this recipe that they pointed out in the article that I think to make a difference to the way the chicken comes out. First, if the chicken is larger than 2 1/2 pounds, you should cut each breast in half so that you have a total of 10 pieces. This will help for more even cooking and keep the pieces to a smaller portion size. Also, I would not use olive oil for this recipe as a substitute for vegetable oil. Olive oil tends to leave a particular taste on the food that you are cooking in it, and this is not the type of meal where you want that to happen. The article itself actually recommends using grapeseed oil, but I do not have any grapeseed oil and I find it to be very expensive to purchase. I simply used the vegetable oil, but you could also use peanut oil or canola oil instead. I did not add the bacon drippings and used more oil instead since we don’t make bacon very often around the house anymore and I didn’t see the need.

Brining the chicken for this recipe does seem to make a good difference in the flavor and the moistness of chicken after it is fried. Not everyone always has the time to do it, but if you are planning ahead and you know you’ll have the time and the space in your refrigerator, I would recommend doing it. Finally, the article highly recommends using a cast-iron skillet for this recipe. I keep mine on the stove pretty much all the time to use for a wide variety of recipes and it was perfect for the chicken. It is plenty deep enough for the amount of oil that you use (and I actually use less oil than the recipe called for and I think it turned out fine), but you do want to make sure that you have some type of cover to put over the chicken.Overall, I loved the crunch of the chicken and there was not too much crust as often happens with fried chicken that has a thick batter. The chicken itself was very moist and cooked perfectly.

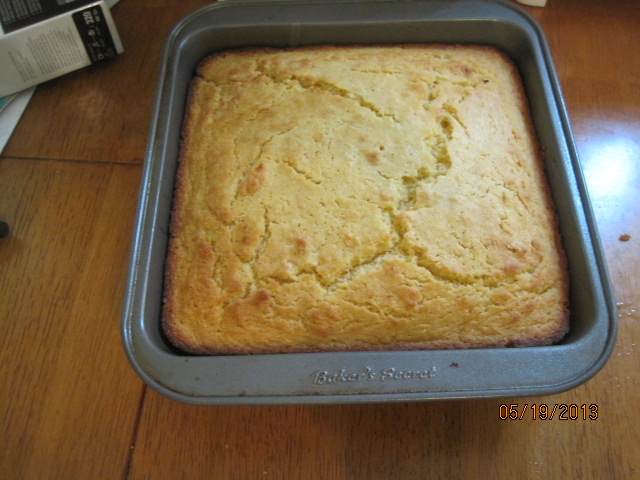
To go along with the recipe, I did make some mashed potatoes and coleslaw. I also had some extra cornmeal laying around so I decided that it would be a good opportunity to try and make some cornbread. I’ve made cornbread before and posted the recipe on this blog, but in the past I have made Southern-style cornbread that is made right in the cast-iron skillet. Since I was already using my cast-iron skillet for the chicken, I needed to find a little bit of a different recipe to use. The Cook’s Illustrated Cookbook has a good, general all-purpose cornbread recipe that you could easily use for this or use as part of a stuffing if you are going to want leftovers for that purpose.

All-Purpose Cornbread

1 1/2 cups all-purpose flour
1 cup cornmeal
2 teaspoons baking powder
1/4 teaspoon baking soda
3/4 teaspoon salt
1/4 cup packed light brown sugar
3/4 cup frozen corn, thawed
1 cup buttermilk
2 large eggs
8 tablespoons butter, melted and cooled

Adjust an oven rack to the middle position and heat the oven to 400°. Spray an 8-inch square baking dish with the vegetable oil spray. Whisk the flour, cornmeal, baking powder, baking soda, and salt in a medium bowl until well combined; set aside.

In a food processor or blender, process the brown sugar, corn kernels, and buttermilk until combined, about 5 seconds. Add the eggs and process until well combined (some corn lumps will remain), about 5 seconds longer.

Using a rubber spatula, make a well in the center of the dry ingredients; pour the wet ingredients into the well. Begin folding the dry ingredients into the wet, giving the mixture only a few turns to barely combine. Add the melted butter and continue folding until the dry ingredients are just moistened. Pour the batter into the prepared baking dish and smooth the surface with the rubber spatula.

Bake until the cornbread is a deep golden brown and a toothpick inserted in the center comes out clean, 25 to 35 minutes. Allow the cornbread to cool in the pan on a wire rack for 10 minutes, then invert the pan onto the wire rack, and turn right side up and allow the cornbread to cool until just warm, about 10 minutes longer, and serve. Leftover cornbread can be wrapped in aluminum foil and re-heated in a 350° oven for 10 to 15 minutes.

Adding the extra corn in with the cornmeal gave it up pretty nice flavor, and the combination with the light brown sugar really did give some extra sweetness to the bread. I also like the golden crust that came out on this bread. The recipe recommends using Quaker yellow cornmeal and I guess that is what the recipe was designed for. I only had a stone-ground cornmeal on hand, and the bread did come out a little bit drier, just as the recipe had indicated it might.

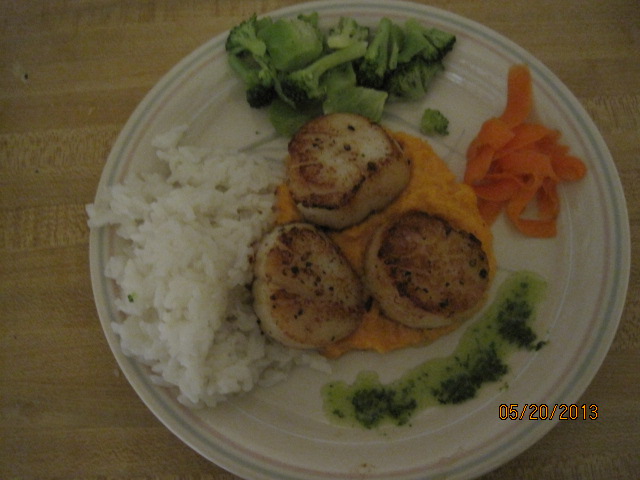
Those of the recipes for today. Next time out, I’ll be posting the recipe that I used just last night for some scallops with a carrot cream. Check back for that one and see if you like it. Until next time, enjoy the rest of your day and enjoy your meal!

005 003 004

 
1 Comment

Posted by on May 21, 2013 in Breads, Cooking, Dinner, Poultry


Tags: , , , , ,

Easy French Toast with Blueberry Sauce

Every once in a while we decided to bake something a little fancier for breakfast. Yesterday, Michelle woke up and decided she would like to have some French toast. French toast is not something I make at all really, mainly because it’s not one of my particular favorites. In my opinion, a lot of French toast that you get is pretty soggy and has too much egg for my particular taste. Anyway, I was more than happy to make some for Michelle and Sean and chose to use this recipe from the Cook’s Illustrated Cookbook.

French Toast

8 large slices hearty white sandwich bread or challah bread
1 1/2 cups milk, warmed
3 large egg yolks
3 tablespoons packed light brown sugar
2 tablespoons butter +2 tablespoons melted
1 tablespoon vanilla extract
1/2 teaspoon ground cinnamon
1/4 teaspoon salt

Adjust an oven rack to the middle position and heat the oven to 300°. Place the bread on a wire rack set inside a rimmed baking sheet. Bake the bread until it is almost dry throughout (the center should remain slightly moist), about 16 minutes, flipping the slices half way through the baking. Remove the bread from the rack and allow it to cool for five minutes. Return the baking sheet with the wire rack to the oven and reduce the temperature to 200°.

Whisk the milk, egg yolks, sugar, 2 tablespoons of melted butter, vanilla, cinnamon, and salt in a large bowl until well blended. Soak the bread in the milk mixture until it is saturated but not falling apart, about 20 seconds per side. Using a slotted spatula, pick up one bread slice and allow the excess milk mixture to drip off; repeat the process with the remaining slices. Place the soaked bread on another baking sheet or platter.

Melt half a tablespoon of butter in a large skillet over medium-low heat. Using a slotted spatula, transfer two slices of the soaked bread to the skillet and cook until golden brown, about 3 to 4 minutes. Flip the bread and continue to cook on the second side until it is golden brown about 3 to 4 minutes longer. If the toast is cooking too quickly, reduce the temperature slightly. Transfer the toast to a baking sheet in the oven. Wipe out the skillet with paper towels. Repeat the cooking process with the remaining bread, two pieces at a time, adding a half tablespoon of butter for each batch that you cook. Serve warm.

I think it came out pretty well myself considering I’m no French toast expert and Michelle and Sean both seem to really enjoy it. It was a little more work toasting the bread before you actually make the French toast, but I think it came out better because the bread isn’t nearly as soggy as I’ve seen in the past. I think between using only the yolks of the egg and adding some melted butter to liquid it gives the toast a chance to be not nearly as soggy and a little more rich.

I also decided that I wanted to make a little bit of blueberry sauce to go along with the French toast. I had just bought some blueberries at the store the other day and they looked pretty good. This recipe makes quite a bit of sauce, a lot more than what was needed for the French toast, but we have it on hand now and I think it’ll be great to use with things like ice cream, cake or even in your oatmeal in the morning.

Blueberry Sauce

2 cups fresh blueberries

1/3 cup sugar

1 tablespoon fresh lemon juice

1/8 teaspoon salt

1/2 teaspoon vanilla extract

Wash and crush the blueberries in a medium bowl. Add the sugar, lemon juice and salt and mix well. Place the mixture in a small saucepan and bring to a boil over medium heat, stirring occasionally. Boil for 1 minute and then add the vanilla. Remove from the heat and chill until serving.

It’s a pretty useful sauce that I think you find you’ll be able to work it into a lot of other areas if you want to use it. It’ll go just as well on pancakes as it would for French toast that’s for sure.

That’s all there is for today. I’ll have some more recipes for you tomorrow. I will likely be posting the fried chicken recipe I used that I got from the New York Times recently. I also have several other recipes to try out for this week, so check back in see what I use. Until then, enjoy the rest of your day and enjoy your meal!

002 001

 
1 Comment

Posted by on May 20, 2013 in Breakfast, Cooking, Sauce


Tags: , , , , ,

Let’s Get Really Garlicky with Shrimp Scampi

I usually buy shrimp about every 10 days or so because it makes a good protein and it is one form of seafood that Sean really likes. Of course, if it were up to him, I would make fried shrimp or popcorn shrimp every time, but I do like to try different things with it every now and then. I have made shrimp scampi many times before, and it is almost always the same way, so I wanted to give something a little different a try. Personally, I like a lot of garlic, so this version of shrimp scampi worked out quite nicely.

Very Garlicky Shrimp Scampi

1/2 cup flour

Salt and freshly ground pepper

2 tablespoons olive oil, plus more if needed

1 1/2 pounds extra-large shrimp, peeled and deveined, tails intact

8 tablespoons butter

4 cloves garlic, minced

1/4 cup dry white wine

Grated zest of 1 lemon

2 tablespoons fresh lemon juice

2 tablespoons fresh parsley

Lemon wedges, for serving

In a small bowl, sit together the flour, 1/2 teaspoon of salt and 1/4 teaspoon of pepper. In a large skillet, heat the 2 tablespoons of olive oil over medium-high heat. Toss half of the shrimp in the flour mixture to coat evenly, shaking off any excess. Add the shrimp to the pan and cook, turning occasionally, until the shrimp are opaque throughout, about 3 minutes. Transfer to a plate and tent the plate with foil. Repeat the process with the remaining shrimp, adding more oil to the skillet if needed.

Reduce the heat to medium-low, add 2 tablespoons of the butter and the garlic and cook, stirring frequently, until the garlic softens and is fragrant but not browned, about 2 minutes. Add the wine, the lemon zest and the lemon juice and bring to a boil over high heat. Cook until the mixture is reduced by half, about 1 minute. Reduce the heat to very low. Add the remaining 6 tablespoons of butter, 1 tablespoon at a time, letting each addition soften into a creamy emulsion before adding more.

Return the shrimp to the sauce and mix gently to coat the shrimp well. Remove the shrimp from the heat and season with salt and pepper to taste. Transfer the shrimp to a serving dish and sprinkle with the parsley. Serve with the lemon wedges.

I have to admit, it was very garlicky even though it didn’t seem like there was a lot of garlic in there. I did like coating the shrimp a bit with flour first to brown them nicely and the sauce came out nicely adding the butter in a bit at a time. I always serve shrimp scampi with white rice myself as I love the way the sauce tastes with the rice. This time though Michelle and Sean had it with pasta so you get the nice garlic and butter taste on the pasta.

That’s it for today. I have lots of recipes to use for this week, so keep checking back to see what I have for the day. Until then, enjoy the rest of the day and your weekend (even though it is rainy here in New York) and enjoy your meal!

 
1 Comment

Posted by on May 19, 2013 in Cooking, Dinner, Seafood


Tags: ,

Mother’s Day Dinner Part 4 – Wilted Spinach Salad with Warm Bacon Vinaigrette

Okay, this is the finale of the recipes that I used for Mother’s Day dinner last week. It includes our vegetable course, which was a wilted spinach salad with a warm bacon vinaigrette and a simple tomato and mozzarella appetizer to start off the meal. Let’s start with the tomato appetizer, which is quick and simple and great for any time when you have a couple of fresh tomatoes around and are looking for something to do with them.

Tomato and Mozzarella Salad with Balsamic Vinaigrette

8 ounces fresh mozzarella, sliced

3 ripe tomatoes, sliced

2 tablespoons fresh basil, chopped

1/4 cup extra-virgin olive oil

3 tablespoons balsamic vinegar

1/2 teaspoon Dijon mustard

1/4 teaspoon salt, to taste

Freshly ground black pepper, to taste

Mix the vinegar, mustard, salt and pepper together in a small bowl.Gradually add the olive oil while whisking until well blended.Spread the tomato slices on a large plate or platter and lightly salt the tomatoes. Cover the tomatoes with the mozzarella slices. Drizzle the dressing over the tomatoes and mozzarella. Sprinkle the chopped basil on top and serve.

It is super quick and easy to make anytime. You could even add some salad greens into the mix and make it as a salad course if you choose to go that way.

Now for the spinach salad. This really only works well with fresh spinach, but everyone loved the combination here, so I think this one is a keeper. I got the recipe from the Cook’s Illustrated Cookbook, so you can find it in there if you want to take a look.

Wilted Spinach Salad with Warm Bacon Vinaigrette

6 ounces baby spinach

3 tablespoons cider vinegar

1/2 teaspoon sugar

1/4 teaspoon pepper

Pinch salt

8 slices bacon, cut into 1/2-inch pieces

1/2 red onion, chopped medium

1 small garlic clove, minced

3 hard-boiled eggs, peeled and quartered (optional)

Place the spinach on a large bowl. Stir the vinegar, sugar, pepper and salt together in a small bowl until the sugar dissolves. Set aside.

Cook the bacon in a large skillet over medium-high heat, stirring occasionally, until crisp, about 5 minutes. Using a slotted spoon, transfer the bacon to a paper towel-lined plate. Pour the fat into a heatproof bowl and the return 3 tablespoons of the fat to the skillet. Add the onion to the skillet and cook over medium heat, stirring frequently, until slightly softened, about 3 minutes; stir in the garlic until fragrant, about 15 seconds. Add the vinegar mixture, then remove the skillet from the heat; working quickly, scrape the bottom of the skillet with a wooden spoon to loosen and remove any browned bits. Pour the hot dressing over the spinach, add the bacon and toss gently with tongs until the spinach is slightly wilted. Arrange the egg quarters, if using, over the top of the salad and serve.

Again, you could easily use this as a salad course or as a side dish. I chose not to use the eggs and used this as our vegetable side for the meal. One thing to keep in mind when you add the vinegar to your skillet – move your face away from it as you pour the vinegar into a hot pan. It releases a very potent vapor that can be unpleasant to get right in your face. It will surely clear out your sinuses if that is what you are looking for, otherwise, take some caution and move away. Bacon and spinach go really well together and with the spinach barely wilted you still get the nice texture of the spinach with the crisp bacon.

So that finally wraps up Mother’s Day. I have a number of other recipes to come here in the next few days and this week, including a very garlicky shrimp scampi, making spaghetti and meatballs for a crowd, some fried chicken and cornbread, the Ethiopian beef stir fry, a great new scallops recipe and more. Keep checking back to see what comes next  I promise to be better about taking the pictures from now on :). Until next time, enjoy the rest of your day and enjoy your meal!


Tags: , , , ,

Mother’s Day Dinner, Part 3- Baked Sausage and Peppers

For the third part of the dinner I made on Mother’s Day, we decided to make something for those who may not be into pasta and tomato sauce as much. I had bought some Italian sausage and was intending just to make plain sausage and peppers and have some rice to serve with it on the side. There’s not much different you can really do with sausage and peppers, but I thought it would be much better, cleaner and maybe even healthier if possible if I did the whole thing in the oven. It’s quick, it’s easy and if you use a disposable foil pan, fast clean-up too.

Baked Italian Sausage and Peppers

1 1/2 pounds sweet or hot Italian sausage links (about 6 links)

2 large onions, sliced

1 red bell pepper, sliced

1 yellow bell pepper, sliced

1 orange bell pepper, sliced

2 tablespoons olive oil

Salt and pepper, to taste

Preheat the oven to 375 degrees. Slice the onions and peppers, seeding the peppers along the way.Place the onions and peppers in the bottom of a large 9 x 13 baking dish. Toss the peppers and onions with the two tablespoons of olive oil. Season with salt and pepper. Top the vegetables with the Italian sausage links. Prick each sausage several times with a sharp knife or the tines of a fork on the bottom and the top of each link. This will help to release some of their juices to flavor the peppers and onions.

Cover the pan with foil and bake in the oven for 20 minutes. After 20 minutes, remove the foil so that the sausages can brown and bake for another 20 minutes. Turn the sausages over to brown on the opposite side and bake for another 20 minutes. Remove from the oven and serve.

That’s all there is to it. I actually added some extra pepper and onions on top of the sausages when I first put them in the pan to get even more flavor. You could certainly serve these on hoagie rolls as a traditional sandwich if you wanted to go that route. You could even do the same recipe on your grill if you wanted, perhaps getting some grill marks on the sausage before you put them in the pan to cover them. Steaming them for that 20 minutes really helps to release some flavor and then browning them for 40 minutes makes them perfect and crisp, just the way I like it. Everyone loved them and there were no leftovers at all and they were taken so fast I never got a picture of them!

I still have a couple of recipes leftover from the Mother’s Day meal that I will post tomorrow. Work kind of slowed me down this week so I didn’t get to post as often as I would like,  but tomorrow we will have the wilted spinach salad with warm bacon vinaigrette and the tomato and mozzarella. Very simple and easy recipes for both of them. I am also working on the meals for next week so I hope to get to them as well. Keep checking back and see what we come up with. Until next time, enjoy the rest of your day and enjoy your meal!

 
5 Comments

Posted by on May 17, 2013 in Cooking, Dinner, One Pot Meals, Pork, Sandwiches, Sausage


Tags: , , , ,

Mother’s Day Dinner Part 2 – Chicken Parmesan

For the second recipe that I made for Mother’s Day, we selected another meal from the Cook’s Illustrated Cookbook. This time it was a more updated version of chicken Parmesan. We wanted to make something that was not cooked directly in the tomato sauce as I have found that this can make the breading on the chicken quite soggy. I prefer to have it crisp along with the baked cheese on top. This recipe seems to fit all of these requirements. I used the exact same tomato sauce recipe as I had posted yesterday with the eggplant Parmesan.

Updated Chicken Parmesan

Recipe for Tomato Sauce (See yesterday’s post)

4 (8-ounce) boneless, skinless chicken breasts

2 large eggs
Salt and pepper
2 cups panko breadcrumbs
1/2 cup extra-virgin olive oil
6 ounces mozzarella cheese, shredded (1 1/2 cups)
2 ounces Parmesan cheese, grated (1 cup), plus extra for serving
8 ounces spaghetti

Adjust an oven rack 6 inches from the broiler element and heat the broiler. Set a wire rack in a rimmed baking sheet. Halve the chicken horizontally, then cut each half down the middle to create four pieces. Cover the chicken with plastic wrap and pound each piece to an even 1/4-inch thickness with a meat pounder.

Lightly beat the eggs and 1/2 a teaspoon of salt together in a shallow dish or a pie plate. Combine the breadcrumbs, 1/2 teaspoon of salt, and 1/2 teaspoon of pepper in a second dish. Pat the chicken dry with paper towels and season with salt and pepper. Working with one cutlet at a time, coat each piece with the egg mixture, allowing any excess to drip off. Coat all sides of the cutlet with the breadcrumb mixture, pressing gently so that the crumbs adhere. Transfer the breaded cutlets to the prepared wire rack.

Heat oil in a large skillet over medium-high heat until shimmering. Working in batches, place the cutlets in the skillet and cook until a deep golden brown and crisp on the first side, about three minutes. Flip the cutlets, reduce the heat to medium, and continue to cook until they are a deep golden brown and crisp on the second side, about two minutes longer. Transfer the cutlets to a clean wire rack set in a baking sheet and repeat the process until all the cutlets have been cooked. Sprinkle the cutlets evenly with mozzarella and Parmesan. Broil the cutlets until the cheese is melted and spotty brown, about three minutes.

Meanwhile, bring 4 quarts of water to a boil in a large pot. Add the pasta and 1 tablespoon of salt and cook, stirring often until al dente. Drain the pasta. Serve the chicken with the pasta, spooning sauce over individual portions and passing the Parmesan separately.

I did change up the recipe just a bit. After slicing the chicken horizontally, I cut it again to make smaller portions. If you want the larger portions, just eliminate the second cut.The nice thing about this recipe, besides the fact that it did not take long to cook it all, is that some people don’t like the chicken drowning in tomato sauce. This gave them the opportunity to have the chicken with as much sauce as they like or with no sauce at all. The chicken came out very crispy and tasted great.

That’s the recipe for today. Tomorrow I will post the recipe I used for the sausage and peppers that I made. I have made sausage and peppers many times in the past and posted another recipe on my blog here, but this one I found does everything exclusively in the oven, and I think it turned out much better. Check back tomorrow to see if you like it. Later on in the week I will also have recipes that I used for a wilted spinach salad and a simple tomato and mozzarella cheese appetizer. Until the next time, enjoy the rest of your day and enjoy your meal!

008

 
Leave a comment

Posted by on May 14, 2013 in Cookbooks, Cooking, Dinner, Holidays, Pasta, Poultry


Tags: , , , , , , ,

Mother’s Day Dinner, Part 1 – Eggplant Parmesan

Cooking on Mother’s Day is always a special event. I wanted to make sure I made things that Michelle really wanted to have for dinner and that would be good for the guests that we were having for the day. After some back and forth we decided on a few different things to make, but it was mostly going to have an Italian theme to it. I made a few things, so for the first day of the recipes I am going to post the recipe I used for Eggplant Parmesan that I got from the Cook’s Illustrated Cookbook. Actually, a lot of recipes that I used for the Mother’s Day meal came from this cookbook. This one, I think, was my favorite of the day.

Eggplant Parmesan

1/4 cup extra-virgin olive oil
2 garlic cloves, minced
1 (28-ounce) can crushed tomatoes
1/2 teaspoon dried basil
1/4 teaspoon dried oregano
1/4 teaspoon sugar
Salt and pepper
2 pounds eggplant, sliced into one fourth-inch-thick rounds
Kosher salt and pepper
8 slices white sandwich bread, torn into quarters
2 ounces Parmesan cheese, grated (1 cup)
1 cup flour
4 large eggs
6 tablespoons vegetable oil
8 ounces mozzarella cheese, shredded (2 cups)
1 ounce Parmesan cheese, grated (1/2 cup)
10 fresh basil leaves, roughly torn

For the tomato sauce, heat the oil and garlic in a large saucepan over medium heat. Cook, stirring often, until the garlic turns golden but not browned, about three minutes. Stir in the tomatoes, basil, oregano, sugar, 1/4 teaspoon pepper, and a pinch of salt, bring to a simmer, and cook until the sauce thickens and the flavors meld, about 10 to 12 minutes. Take the sauce off the heat, season with salt to taste and cover to keep warm.

For the eggplant, line a baking sheet with a triple layer of paper towels and set it aside. Toss the eggplant and 1 1/2 teaspoons of salt together in a bowl, then transfer it to a colander. Let it sit until the eggplant releases about 2 tablespoons of liquid, about 30 to 45 minutes. Wipe the excess salt from the eggplant, then arrange it on a prepared baking sheet. Cover the eggplant with another triple layer of paper towels and firmly press each slice to remove as much liquid as possible.

While the eggplant is draining, adjust oven racks to the upper-middle and lower-middle positions, place a rimmed baking sheet on each rack, and heat the oven to 425°. Pulse the bread in a food processor to fine, even crumbs, about 15 pulses. You should have about 4 cups of breadcrumbs when you are done. Transfer the crumbs to a pie plate or shallow dish and stir in the Parmesan cheese and a half teaspoon of pepper; set aside.

Combine the flour and 1 teaspoon of pepper in a large zipper-lock bag and shake to combine. Beat the eggs in a second pie plate or shallow ditch. Place 8 to 10 eggplant slices in the bag with the flour, sealed the bad, and shake to coat the eggplant. Remove the eggplant slices, shaking off any excess flour, then dip in the eggs, letting any excess egg run off. Then coat the eggplant evenly with the bread-from mixture. Set the breaded slices on a wire rack set in a rimmed baking sheet. Repeat the process with the remaining eggplant.

Remove the preheated baking sheets from the oven. Add 3 tablespoons of oil to each sheet, tilting the sheet to coat it evenly with the oil. Place half of the breaded eggplant on each baking sheet and a single layer; bake until the eggplant is well browned and crisp, about 30 minutes, switching and rotating the baking sheets after 10 minutes, and flipping the eggplant slices with a wide spatula after 20 minutes. (Do not turn off the oven.)

To assemble the dish, spread 1 cup of the tomato sauce over the bottom of a 13 x 9-inch baking dish. Layer in half of the eggplant slices, overlapping slices to make sure everything fits. Distribute 1 cup of sauce over the eggplant, then sprinkle with 1 cup of the mozzarella cheese. Layer in the remaining eggplant, then.with 1 cup of sauce, leaving the majority of the eggplant exposed so it will remain crisp. Sprinkle with the Parmesan cheese and the remaining 1 cup of mozzarella. Bake until bubbling and the cheese is browned, 13 to 15 minutes. Cool for 10 minutes, and scattered the basil over the top, and serve, passing the remaining tomato sauce separately.

I had never made eggplant Parmesan before, and the few times that I have had it be eggplant to me comes out to be quite soggy and full of oil. I think a lot of this is because most people just simply fry the eggplant before they put it in the oven. This technique seems to work better to me as salting the eggplant first helps draw out a lot of the moisture out of it, and then the baking process helps to keep it crisp. I actually used Panko breadcrumbs instead of making the breadcrumbs in the food processor as suggested and I think it actually came out better. Only putting a little bit of sauce on the eggplant cook in the dish also seem to help keep it nice and crisp as well. I used the same technique with the chicken Parmesan that we also made for dinner and that seemed to work really well too; you’ll see that recipe posted tomorrow. Everyone seemed to love the eggplant and it disappeared quite quickly, so fast in fact that I never even got a picture of it to take to post on here, so for that I apologize. But I will certainly make this dish again as the recipe proved to be popular even with those who are not big fans of eggplant.

That’s it for today. Time to get back to work. Tomorrow I will post the recipe for the chicken Parmesan that I need it. It is slightly different than the recipe I have posted here in the past and that everyone seemed to really like the way that came out as well so I think you’ll enjoy it. Check back tomorrow and see if you like it. Until then, enjoy the rest of your day and enjoy your meal!

 
1 Comment

Posted by on May 13, 2013 in Cookbooks, Cooking, Dinner, Holidays, Sauce, Vegetables


Tags: , , , , ,

 
National Day Calendar

Fun, unusual and forgotten designations on our calendar.

Jennifer Probst

a little bit naughty a little bit nice

Laissez Faire

Letting Life Lead

simple cooking recipes

a blog to share with you the best