RSS

Monthly Archives: August 2014

Back in the Groove with Extra-Crispy Fried Chicken

As I try to get back into the swing of things and balancing work and home after vacation, along with the heat of summertime, I am trying to get back into the kitchen as well, even with the weather may make for some sticky days in the kitchen (thank God for air conditioning!). I have really felt like have fried chicken lately and I always have plenty of chicken pieces on hand but I wanted to try a recipe that would be a little bit different from those fried chicken recipes I have tried in the past. I came across this one from Saveur magazine for an extra-crispy fried chicken that makes a flavorful brine to put the chicken in ahead of time and then does some double coating with a special batter to make things super crunchy.

Extra-Crispy Fried Chicken

¼ cup kosher salt, plus more to taste
2 tablespoons coarsely ground black pepper, plus more to taste
2 tablespoons honey
2 tablespoons sugar
15 whole cloves
6 sprigs fresh parsley
6 sprigs fresh thyme
4 bay leaves
Zest and juice of 1 lemon
1 (3½–4 pound) chicken, quartered or equivalent chicken pieces (breasts, thighs, legs)
4 cups all-purpose flour
2 tablespoons granulated garlic
1½ tablespoons cayenne pepper
1½ tablespoons onion powder
1 teaspoon paprika
1 tablespoon baking powder
Canola or vegetable oil, for frying

Boil a ¼ cup of the kosher salt and 1 tablespoon of black pepper with the honey, sugar, cloves, parsley, thyme, bay leaves, lemon zest, and lemon juice, plus 6 cups of water in a 4-quart saucepan until the salt is dissolved, about 5–7 minutes. Remove the brine from the heat and let it cool completely. Add the chicken to the brine and cover; refrigerate overnight.

The next day, drain the chicken, rinse it, and pat it dry well with paper towels. Whisk 2 cups of the all-purpose flour and half each of the granulated garlic, cayenne, onion powder, and paprika with salt and pepper in a bowl until they are combined. In another bowl, whisk the remaining flour, granulated garlic, cayenne, onion powder, and paprika with the baking powder, salt, pepper, and 2 cups of water into a smooth batter.

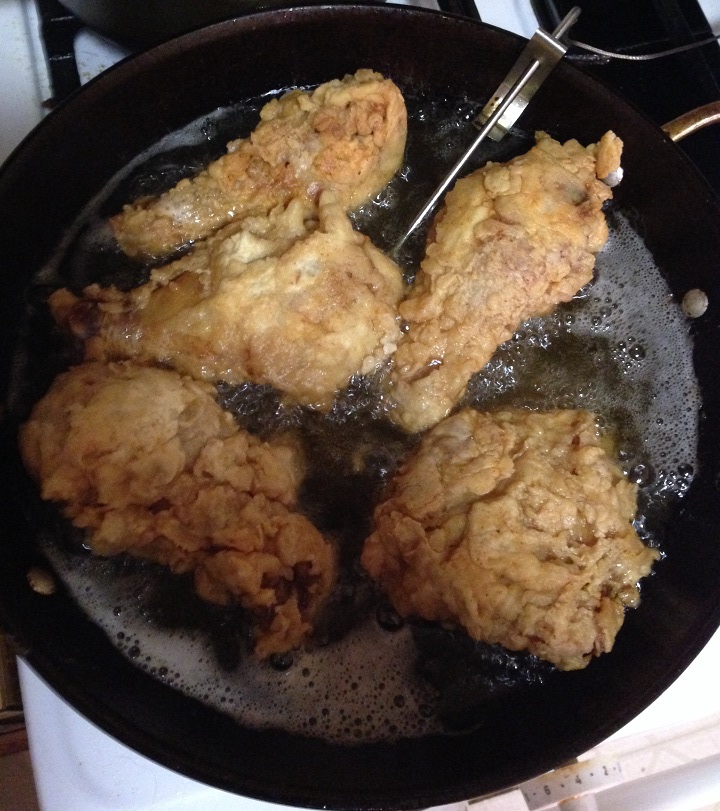
3. Pour enough oil into a large Dutch oven or cast iron pan to reach a depth of 2 inches. Heat the oil until a deep-fry thermometer reads 300 degrees. Working in batches, dredge the chicken in flour mixture, shaking off any excess, then dip the chicken in the batter, and then dredge the chicken again in the flour. Fry the chicken, flipping the pieces once, until the chicken is golden and almost cooked through, about 7–8 minutes, or until an instant-read thermometer inserted into the thickest part of the thigh reads 150 degrees. Transfer the chicken to paper towels to drain.

4. Increase the oil temperature to 350 degrees and fry the chicken again (working in batches again if needed) until the chicken is crisp, about 2–3 minutes more; drain the chicken on paper towels and season it with salt and pepper to taste before serving.

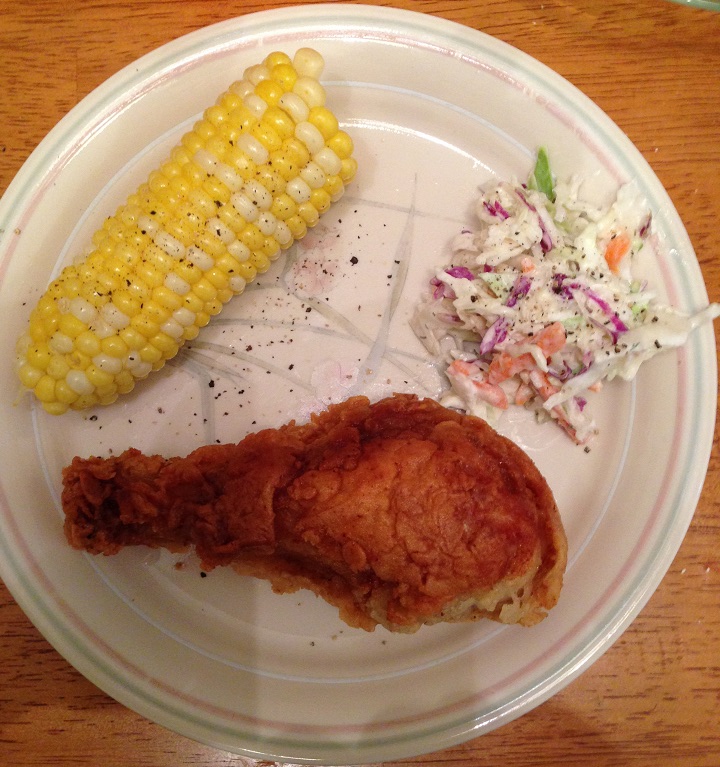
The coating from the flour and batter is really crispy and wonderful and the chicken comes out perfectly moist underneath the crust. The brining really helps here so if you have time to do it you should. It helps the chicken and adds some great flavor as well. I served the chicken with some homemade coleslaw and corn on the cob to make it a great meal. I used only thighs and drumsticks for my meal, but you could use any combination you like and it will work well here.

That’s all I have for today. Check back next time for another recipe. Until then, enjoy the rest of your day and enjoy your meal!

IMG_0633 IMG_0634 IMG_0635

 
Leave a comment

Posted by on August 6, 2014 in Cooking, Dinner, Poultry


Tags: , , , , ,

15 Takeout Recipes You Should Know How to Make at Home – Bon Appétit

15 Takeout Recipes You Should Know How to Make at Home – Bon Appétit.

Ever since I got back from vacation I haven’t had much time to try out any new recipes I have been busy with work and other commitments, but I hope to get back to it in the next day or two so I have something new to share with everyone. In the meantime, here is a posting from Bon Appetit that you may enjoy. Everyone loves takeout, but here are a few recipes from Bon Appetit that you can try to make some of your takeout favorites, like shrimp fried rice and spring rolls, right in your own kitchen to save you some money and give you great tasting dishes all of your own. Check it out!

 
Leave a comment

Posted by on August 5, 2014 in Cooking, Cooking Websites, Dinner, Eating Out


Tags: , , ,

22 Steak Recipes, from Rib Eye to Skirt Steak, Fajitas to Skewers – Bon Appétit

22 Steak Recipes, from Rib Eye to Skirt Steak, Fajitas to Skewers – Bon Appétit.

There are fewer things better than having a great steak meal for dinner, and summertime lends itself really well to making steak indoors or out. Bon Appetit has put together 22 great steak recipes of all different kinds so you can make different cuts of beef in different ways and try some new recipes out. Check it out!

 
Leave a comment

Posted by on August 3, 2014 in Beef, Cooking, Cooking Websites, Dinner, Grilling


Tags: , , , ,

Plum Good Eatin’! Plum Tarts with Honey and Black Pepper

As far as fruit goes summer is my favorite time of year. All of my favorite fruits are in season right now and I can stock up on cherries, peaches and plums and have plenty of snacks and try out all sorts of great recipes for desserts. Sure pies and cobblers are great, but I saw this particular recipe in Bon Appetit for a plum tart that was so easy and looked so delicious that I just had to give it a try myself. You can easily use peaches or apricots in this recipe instead of plums if you prefer (really any stone fruit will do well with this one) and if you keep some puff pastry around in the freezer for those last-minute desserts when you need them you put this together in under an hour, including your prep and thaw time for the pastry.

Plum Tarts with Honey and Black Pepper

1 sheet frozen puff pastry (one 14-ounce package or half of a 17.3-ounce package), thawed per package instructions

1 pound red plums, pitted and cut into 1/2-inch wedges

1/4 cup sugar

Freshly ground black pepper

1 tablespoon honey

Sea salt

Preheat the oven to 425 degrees. Cut the puff pastry into six 4-inch squares and place them on a parchment paper-lined baking sheet, making sure to prick the pastry all over with a fork so it does not puff up while it is cooking. Top the pastry with the plum wedges, leaving a 1/2-inch border around the edge if possible. Sprinkle the plums with the sugar and then season them with a few grinds of freshly ground black pepper.

Bake the tarts, rotating the pan halfway through the baking process, until the edges of pastry are puffed and golden brown, about 25 to 30 minutes. Drizzle the tarts with honey and sprinkle each tart with some sea salt just before they are served.

You can make these tarts a few hours ahead of time and just keep them at room temperature and they will be perfect for dessert. Don’t be afraid to maybe add a little bit of homemade whipped cream on the side when you serve them either. You get great flavor from the plums and the honey and black pepper really bring out some great additional flavor to the whole dish. This one was so easy to do and tasted and looked great so I am sure I’ll be making it again before the summer is over, either with plums again or maybe I’ll give it a whirl with some fresh peaches.

That’s all I have for today. Check back next time for another recipe. Until then, enjoy the rest of your day and enjoy your meal!

IMG_0629

 
Leave a comment

Posted by on August 1, 2014 in Cooking, Dessert, Fruit


Tags: , , , , ,

 
National Day Calendar

Fun, unusual and forgotten designations on our calendar.

Jennifer Probst

a little bit naughty a little bit nice

Laissez Faire

Letting Life Lead

What To Have For Dinner Tonight

Simple and delicious dinner inspiration