RSS

Category Archives: Cooking

Our Favorite Hamburger Recipes – Photo Gallery | SAVEUR

Our Favorite Hamburger Recipes – Photo Gallery | SAVEUR.

There is nothing at all like a good burger and with the warm weather a burger makes a great meal to make outdoors or indoors. To try some different burger options, check out this article from Saveur Magazine with several different, new and tasty burger options. Check it out!

 
Leave a comment

Posted by on July 23, 2014 in Beef, Cooking, Cooking Websites, Dinner, Grilling, Lunch


Tags: , , , , ,

24 Summer Recipes Everyone Should Know How to Cook – Bon Appétit

24 Summer Recipes Everyone Should Know How to Cook – Bon Appétit.

There are plenty of classic summer recipes that people are always looking for when you are having a cookout, barbecue, picnic, outdoor party or just want to make a classic for yourself and your family. Bon Appetit has put together 24 summer classic recipes for you to use during the warm weather or really anytime of year. Check it out!


Tags: , , ,

12 Easy Smoothies for Hot Days — Recipes from The Kitchn | The Kitchn

12 Easy Smoothies for Hot Days — Recipes from The Kitchn | The Kitchn.

Smoothies can be a quick and refreshing snack, breakfast or lunch any time, but particularly during the hot summer months where you may not feel like making anything for breakfast or lunch and just want some cool that is easy to make. The Kitchn has put together 12 easy smoothie recipes for you that are perfect for you and your family during the summer. Check it out!


Tags: , , , ,

16 Sunday Dinner Ideas for Summer – Bon Appétit

16 Sunday Dinner Ideas for Summer – Bon Appétit.

Sunday suppers can be as detailed or as simple as you want it but you can get the option of doing a nice Sunday dinner even when the weather is warm and it may not seem like you want a big project. Here are 16 great summer Sunday dinner ideas from Bon Appetit that can help to give you the inspiration to have a great Sunday meal. Check it out!

 
Leave a comment

Posted by on July 20, 2014 in Cooking, Cooking Websites, Dinner


Tags: , , ,

Easy Vacation Recipes For Beach Houses, Lake Escapes, and More – Bon Appétit

Easy Vacation Recipes For Beach Houses, Lake Escapes, and More – Bon Appétit.

Since I am on vacation myself, this seems like the perfect link to post from Bon Appetit. You can try out these easy vacation recipes if you are renting a house somewhere this summer and make use of all that is local to have it coming out tasty and fresh. Check out the recipes!

 
Leave a comment

Posted by on July 19, 2014 in Cooking, Cooking Websites, Dinner


Tags: , , ,

A Quick Summer Meal That is Meat Free – Black Bean and Corn Tacos

When you are looking for something quick to make on these hot summer days and may even want to stay away from the meat for a dinner or for lunch, beans can be a great alternative for you. They can provide you with plenty of protein, vitamins and fiber and taste great in salads or as a taco or wrap. I decided to do this myself for lunch a few weeks ago and then brought it back as a dinner meal when we were looking for something quick and easy one night. All the ingredients can be things that you might normally have on hand in your pantry or refrigerator so you can have this ready to go in just minutes.

Black Bean and Corn Tacos

1 15 ounce can black beans, drained and rinsed (or 1 cup of cooked black beans)

5 teaspoons olive oil, divided

1 tablespoon fresh lime juice

1 cup frozen corn kernels, thawed

2 teaspoons ground cumin

1/2 cup onion, sliced thin

2 green onions, sliced thin

Corn or flour tortillas

Spinach leaves, for topping

Thinly sliced radishes, for topping

Sliced avocado or guacamole, for topping

Grated cheese (your choice) for topping

Sour cream, for topping

Diced tomatoes or salsa, for topping

Place the black beans and the cumin together in a small bowl and lightly mash the beans. Add 2 teaspoons of the olive oil along with the lime juice and mix together until well blended. In a saucepan set over medium heat, heat 1 teaspoon of the olive oil until it is shimmering. Add the sliced onion and saute the onion until it is tender, about 3 to 4 minutes. Add the corn kernels and the bean mixture to the onions and heat until the corn and beans are completely warmed through and fragrant, about 3 to 4 minutes. In a separate skillet, warm the remaining olive oil over medium heat. Warm the tortillas individually for about 1 minute per side. Remove the tortillas to a separate plate and place the bean and corn mixture in a separate bowl, sprinkling the beans mixture with the sliced green onions. Place any toppings you like on the table as well so people can assemble their own tacos to their specific liking.

You can really add anything you like to this dish to truly make it your own. Personally, I had tomato, avocado and radishes on mine while Sean put cheese on his and Michelle put sour cream and cheese on hers. The spinach was a nice touch as well. I actually have had this for lunch a number of times and they pack pretty well just as wraps if you didn’t want to cook the tortillas and just wanted to pack them up for a lunch on the go. you could certainly used dried beans that you have soaked and cooked beforehand in place of the canned, but the canned were convenient to use for my purposes and you can really make these with any type of beans you like, maybe throw in some chili peppers or hot sauce if you want some heat or any other type of vegetable you might like.

That’s all I have for today. Check back next time for another recipe. Until then, enjoy the rest of your day and enjoy your meal!

IMG_0592


Tags: , , , ,

It’s Tomato Time! Use Those Summer Tomatoes for a Simple Tomato Tart

There are few things better than when tomatoes are in season. Getting a really fresh tomato from the local farmer’s market can be a treat all of its own and there are lots of different varieties that you get to choose from this time of year. Around here in my area, the tomatoes get very reasonable in price so you can load up and make all kinds of different things with them. They are great to use to make your own tomato sauce, perfect for a Margherita pizza, ideal for any type of BLT that you might want to make, you can dice them up for some panzanella salad, just have them in a nice salad or even just eat them alone as a sandwich all of their own. I decided to take a few tomatoes that I had and make use of this really easy recipe from Food Republic for a very simple tomato tart.

Simple Tomato Tart

4 ripe tomatoes

2 tablespoons Dijon mustard

1 package puff pastry, thawed

2 teaspoons fresh thyme leaves, chopped

1 tablespoon butter

Salt

1/4 cup balsamic vinegar

Preheat the oven to 400 degrees. Slice the tomatoes in 1/4-inch slices and salt the tomatoes heavily. This so as much excess water as possible comes out of the tomatoes and this will help keep the tart from getting soggy. Leave the salted tomatoes aside for 10 minutes. After the 10 minutes have passed. use paper towels to wipe off the extra salt on the tomatoes and pat the tomatoes dry to pick up any excess moisture that may be left.

Arrange the thawed puff pastry in a pie plate or a baking dish. Make sure to add a little bit of butter into the dish before laying the puff pastry down in the dish to prevent the pastry dough from sticking to the dish. Spread the Dijon mustard evenly over the pastry dough. Add 1 teaspoon of the chopped thyme leaves and then arrange the tomatoes on top of the Dijon mustard and the thyme leaves. Add the other teaspoon of the chopped thyme leaves over the tomatoes. Drizzle the balsamic vinegar over the top of the tomatoes. Garnish the tart with a few sprigs of thyme.

Bake the tart in the oven for 45 minutes or until the pastry has achieved a deep caramel color. Take the tart out of the oven just before the edges of the tart begin to char and not sooner. Allow the tart to coll for 15 minutes before serving or allow it to cool at room temperature and serve when you are ready.

I loved the simplicity of this dish and you really get the deep flavor of the tomatoes that have been roasted in the balsamic vinegar and the Dijon mustard adds just a hint of flavor to the dish. This is a great side dish to make to go along with any type of meal you might serve in the summer or to go along with a barbecue. you could certainly use this as a dish to bring to any summer party you might attend as well. I’ll be making this one again as the summer goes on.

That’s all I have for today. Check back next time for another recipe. Until then, enjoy the rest of your day and enjoy your meal!

IMG_0603


Leave a comment

Posted by on July 15, 2014 in Cooking, Side Dishes, Vegetables, Vegetarian


Tags: , , , , ,

Everyone Screams for These Homemade Ice Cream Sandwiches

Summertime and ice cream just go hand in hand, though some people will tell you that ice cream is pretty much perfect any time of the year. I am not a huge ice cream eater myself but I do appreciate it every now and then and Michelle and Sean both love it, so I decided to make a simple and easy treat of some homemade ice cream sandwiches. The recipe is from Bon Appetit and when I first saw the picture of their finished product and how easy it was to make these I knew I would have to give it a try. They take a little time, but if you start them in the morning you can have your own ice cream sandwiches for dessert that same night.

Homemade Ice Cream Sandwiches

3/4 cup plus 2 tablespoons all-purpose flour

1/4 cup unsweetened cocoa powder

1/2 teaspoon baking soda

1/2 teaspoon kosher salt

6 tablespoons (3/4 stick) butter, room temperature

1/2 cup sugar

1 tablespoon light corn syrup

1 egg yolk

1 teaspoon vanilla extract

1 tablespoon sour cream

1 pint ice cream (any flavor)

Whisk the flour, cocoa powder, baking soda and kosher salt together in a medium bowl. Using an electric mixer, beat the butter, sugar and corn syrup together in another medium bowl until the mixture is light and fluffy, about 3 minutes. Add the egg yolk and vanilla and beat until they are well combined.

Reduce the mixer speed to low and add the dry ingredients; mix the ingredients until they are just combined. Mix in the sour cream. Form the dough into a 3/4-inch square and wrap it tightly with plastic wrap. Chill the dough in the refrigerator until it is firm, about 2 to 3 hours.

Preheat the oven to 350 degrees. Roll out the dough between 2 sheets of parchment paper to about 1/8-inch thickness. Transfer the dough (still between the sheets of parchment paper) to a large baking sheet and chill the dough again in the refrigerator until it is firm, at least for about 30 minutes. Remove the top sheet of the parchment paper. If the dough is well chilled the top sheet will remove very easily. Trim the dough into a 14-inch by 10-inch rectangle. Bake the dough until it is dry and just set at the edges, about 8 to 10 minutes. Transfer the baking sheet to a wire rack and let the dough cool completely.

Trim the cookie to a 12-inch by 9-inch rectangle, then cut the cookie into twelve 3-inch squares. Scoop some ice cream into a medium bowl and mix it until it is just softened, about 2 to 3 minutes. Turn 6 cookies bottom side up. Dividing the ice cream evenly, scoop the ice cream on top of the cookie and press down on it lightly. top the ice cream with the remaining cookies, pressing down gently. Place the ice cream sandwiches on a parchment paper-lined baking sheet and freeze them until they are firm, at least 4 hours. Cut the sandwiches in half diagonally to make triangles, if you wish. Wrap the sandwiches in parchment, if desired, and freeze them until you are ready to serve them.

They are very easy to make and I can tell you that the dough smells and tastes just like what you get if you bought an ice cream sandwich from a store or the ice cream man. The best part is that you can make them with any type of ice cream that you like, so you can really vary them to suit your particular liking or your family’s and make them in different flavors if you wish. I cut them small to make smaller sandwiches, just he right bite-size snack that we could all enjoy. Of course you could always make them completely homemade and make your own ice cream to put inside them, but any of your favorite flavors work just as well.They are very easy to make and worth the wait, so I would certainly make these again.

That’s all I have for today. Check back next time for another recipe. Until then, enjoy the rest of your day and enjoy your meal!

IMG_0600


Leave a comment

Posted by on July 11, 2014 in Cooking, Dessert, Snacks


Tags: , , , ,

Save Time and Effort with Pulled Chicken Sandwiches

While the temperature and humidity around here have eased a bit today, it is typical for July around these parts of New York to be very sticky and humid, making it uncomfortable all day long and making you feel like you really do not want to put much effort into dinner. Nights like that for use are usually good for really simple meals that involve little or no cooking at all, which means making things like sandwiches, salads, hot dogs and the like for dinner. Sure you can always get take out or go out if you like, but that gets expensive to do too much and you don’t have control over the ingredients you are eating. You can always compromise somewhere in the middle and buy some pre-cooked items, such as a rotisserie chicken, and make good use of that in a meal for you and your family in a bunch of ways. One thing I recently did was use a rotisserie chicken to make some pulled chicken sandwiches for a meal. You can do this just as easily with leftover chicken and simply shred it yourself and even use your favorite bottled barbecue sauce if you like, but I decided to make my own sauce to get the flavor we really like. The basis of this recipe comes from Ellie Krieger on the Food Network site.

Pulled Chicken Sandwiches

1 tablespoon vegetable oil
1 onion, chopped
3 cloves garlic, minced
1 (14-ounce) can tomato sauce
1/4 cup tomato paste
1/2 cup water
1/3 cup apple cider vinegar
5 tablespoons molasses
1/4 teaspoon ground black pepper
1/2 teaspoon liquid smoke
1 whole rotisserie chicken, skin removed, meat shredded into thin strips (about 4 to 4 1/2 cups)
6 hamburger rolls
Lettuce leaves, for garnish

Pickle slices, for garnish

Coleslaw, store-bough or homemade, for garnish

Heat the vegetable oil in a large saute pan set over medium heat. Add the onions and cook until they are soft and translucent, about 5 minutes. Add the garlic and cook for 1 minute more until the garlic is fragrant. Add the tomato sauce, tomato paste, water, cider vinegar, molasses, pepper and liquid smoke and bring the mixture to a boil. Reduce the heat to medium-low and simmer for 15 minutes. Add the chopped chicken, return the mixture to a simmer, and cook for an additional 10 minutes.

Split the hamburger rolls. Place a leaf of lettuce on each roll, then pile on 3/4 cup of the chicken mixture onto the roll and top with pickle slices, coleslaw and additional sauce, if desired.

That’s all there is to it and it tastes great. You get a nice barbecue sauce to simmer the chicken in without a lot of work and the liquid smoke adds great aroma and flavor to the sauce. I used the pickleback slaw recipe I have made before as the coleslaw for a topping and we just had the sandwiches with some chips on the side to keep things simple, though they would go well with some potato salad, macaroni salad or even just a simple side salad. You could even make these as sliders if you wanted to use them for a buffet or party and have them done in minutes.

That’s all I have for today. Check back next time for another recipe. Until then, enjoy the rest of you day and enjoy your meal!

IMG_0579

 
Leave a comment

Posted by on July 10, 2014 in Cooking, Dinner, Leftovers, Lunch, Poultry, Sandwiches


Tags: , , , , , , ,

A Chicken Dinner Thanks to Bobby Flay – Pan-Roasted Chicken with Mint Sauce

Trying to find new things to do with chicken can get tricky after a while. I am always on the lookout for new ways to try making poultry with new sauces and flavors. because we eat so much chicken, you really have to try to vary things now and then so everyone does not get bored with just he same old meal. I found this recipe from Bobby Flay listed on the New York Times Cooking site (which is a great site and resource for recipes and articles by the way) and not only did it seem really simple but looked to use some different flavors to change things up for your chicken dinner. It is a very simple recipe for pan roasted chicken with a mint sauce. Bobby Flay uses bone-in chicken breasts for the recipe, but I used a combination of breasts and thighs and it worked out just as well I think.

Bobby Flay’s Pan-Roasted Chicken with Mint Sauce

For the Chicken:

4 bone-in, skin on chicken breasts

Kosher salt

2 tablespoons paprika

2 teaspoons ground cumin

2 teaspoons ground mustard

2 teaspoons ground fennel seed

1 teaspoon freshly ground black pepper

3 tablespoons extra-virgin olive oil

For the Mint Sauce:

1 cup fresh mint leaves

1/2 cup fresh parsley leaves

4 cloves garlic, peeled and roughly chopped

1 Serrano chile, seeds removed and roughly chopped

1 tablespoon honey

1 tablespoon Dijon mustard

1/2 cup extra-virgin olive oil

Kosher salt and freshly ground black pepper

Preheat the oven to 425 degrees. Rinse the chicken well, then dry it with paper towels. Season the chicken generously with kosher salt. Combine the paprika, cumin, ground mustard, ground fennel seed and black pepper in a small bowl and rub the mixture all over the skin of the chicken.

Heat the olive oil in a large, oven-safe saute pan or skillet set over medium heat. When the oil is shimmering, put the chicken breasts into the pan skin side down and cook, unattended, until the skin is golden brown, about 6 to 8 minutes. Using tongs. turn the chicken breasts over and then place the pan in the preheated oven. Roast the chicken until it is golden brown all over and the meat is cooked entirely through, about 12 to 15 minutes. Remove the chicken to a warmed platter and allow it to rest.

Meanwhile, place the mint, parsley, garlic and Serrano chile into a food processor and pulse the mixture into a paste. Add the honey and the Dijon mustard and pulse the mixture again until it is combined. With the motor running, slowly add the olive oil until the mixture has become emulsified. Transfer the mixture to a bowl, and if necessary, whisk in a few tablespoons of water to thin the sauce. Season the sauce with salt and pepper to taste.

Spoon some of the sauce over each of the chicken breasts and serve, with the remaining sauce on the side.

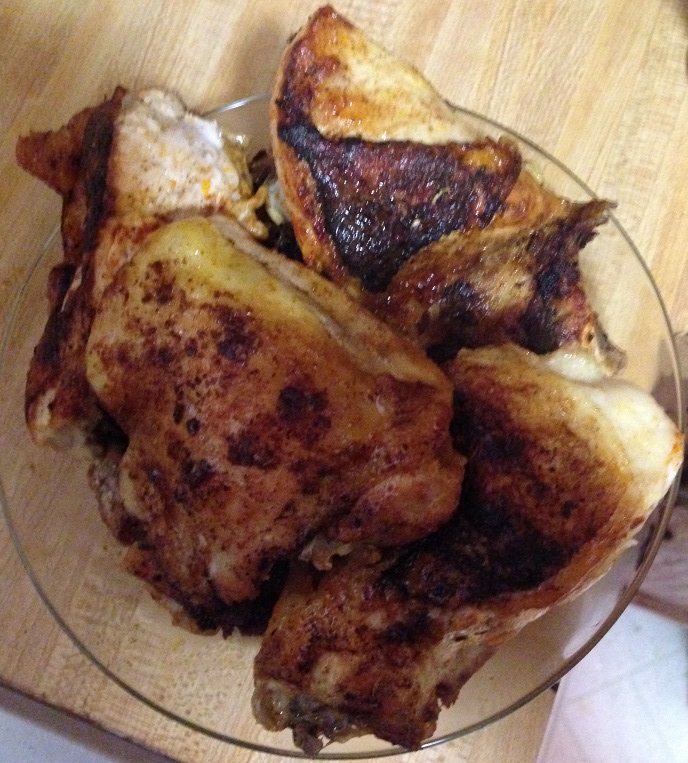
The chicken turns out perfectly browned and crispy and the mint sauce is an excellent addition. It does have a little heat to it from the Serrano chile, so be aware of that if you are making it for anyone who doesn’t like a lot of heat. You could just as easily leave it out of the sauce. I served this with roasted potatoes and some roasted asparagus and it made for a perfect meal without a lot of fuss or work.

That’s all I have for today. Check back next time for another recipe. Until then, enjoy the rest of your day and enjoy your meal!

IMG_0593

 
Leave a comment

Posted by on July 8, 2014 in Cooking, Dinner, Poultry, Sauce


Tags: , , , , ,

 
National Day Calendar

Fun, unusual and forgotten designations on our calendar.

Jennifer Probst

a little bit naughty a little bit nice

Laissez Faire

Letting Life Lead

simple cooking recipes

a blog to share with you the best