RSS

Category Archives: Dessert

A Lazy Day of Leftovers – Chicken Tarragon Pot Pie

If you are like me, there are probably many nights during the week where you make a meal and then end up with a bunch of different leftovers that you may or may not know how to use. It is not unusual to get tired of having the same meal two or three times a week just because you do not want to throw away perfectly good food but are not sure what you can do with those leftover chicken pieces or leftover vegetables. It is times like this where potpie can come to the rescue. Potpie is a great meal to put together just about any time of the year and you can do it with any type of protein (or no protein at all if you are vegetarian) and vegetables. The only real effort that goes into it is making the pie dough and even then, if you have no problem using store-bought pie dough you can get the meal together even quicker. Very often I will use store-bought pie dough simply because it is easy, I do not really have the room to make pie dough and for potpie purposes it tastes just fine. I decided to use this recipe from New York Times Cooking for a chicken-tarragon potpie and make a simple dinner.

Chicken-Tarragon Pot Pie

For the crust:

2 cups all-purpose flour

14 tablespoons (1 3/4 sticks) cold unnsalted butter, cut into pieces

1 tablespoon cold vegetable shortening

Scant 1/2 teaspoon salt

Scant 1/2 teaspoon sugar

1 egg

For the Filling:

5 tablespoons butter

1 cup chopped carrot

1 cup chopped celery

1 cup thinly sliced leeks

1 tablespoon chopped fresh tarragon, or 1 1/2 teaspoons dried tarragon

1 cup frozen baby green peas

4 tablespoons all-purpose flour

2 ½ cups chicken broth

1 cup heavy cream

¼ teaspoon salt

¼ teaspoon freshly ground pepper

3 cups leftover roast chicken, cut into 1/2-inch chunks

To make the crust, combine the flour, butter, shortening, salt and sugar in a food processor. Pulse the ingredients together just until the mixture is crumbly and the butter is broken into small pieces. Pour 1/3 cup of ice water into the machine, and pulse 3 or 4 times. Squeeze a little dough in your hand to see whether it clumps together and is evenly moist. If not, add another tablespoon of water, and pulse 1 or 2 times more. Don’t overmix so that the dough forms a ball.

Turn out the dough on a large sheet of plastic wrap. Lift the ends of the plastic to gather the dough together inside. Press the dough into a large disk, and wrap it tightly in plastic wrap. Refrigerate the dough until you are ready to use it, up to 2 days.

To make the filling, melt 2 tablespoons of butter in a large skillet set over medium-high heat. Add the carrot, celery, leeks and tarragon, and cook, stirring, just until slightly softened but not browned (reduce the heat if necessary to prevent browning), about 3 to 4 minutes. Transfer the cooked vegetables to a bowl, wipe out the skillet, and place it back on the stove.

Add the remaining 3 tablespoons of butter, and melt it over medium heat. Whisk in the flour, and cook, whisking, until the mixture bubbles and smells cooked. Do not let it brown. Whisk in 2 cups of chicken broth, and cook, whisking, for about 1 minute. Whisk in the cream, and cook 2 or 3 minutes, just until the mixture is thickened. Add the salt and pepper. If the sauce is too thick, whisk in the remaining broth.

Heat the oven to 400 degrees. Add the cooked vegetables and peas, the chicken and the sauce to an 8-inch deep pie dish or other baking dish, mix the ingredients gently, and taste for seasoning.

If you are using store-bought dough, take the dough out of the refrigerator and allow it to come to room temperature for about 10 to 15 minutes. If you are using your own homemade dough, flour a work surface. Remove the dough from the refrigerator. Roll out the dough, turning and flouring often, and cut a shape approximately the size of your baking dish plus 1 1/2 inches overlap all around.

Roll the dough up onto the rolling pin, and unroll it over the baking dish, so it rests evenly on top of the filling. Fold the edges under and crimp the edges. Poke the tip of a knife through the crust to create 3 vent holes near the center. Whisk the egg with a teaspoon of cold water. Use a pastry brush to lightly coat the entire crust with egg wash. Place the pie pan or baking dish on a cookie sheet, and place it in the oven.

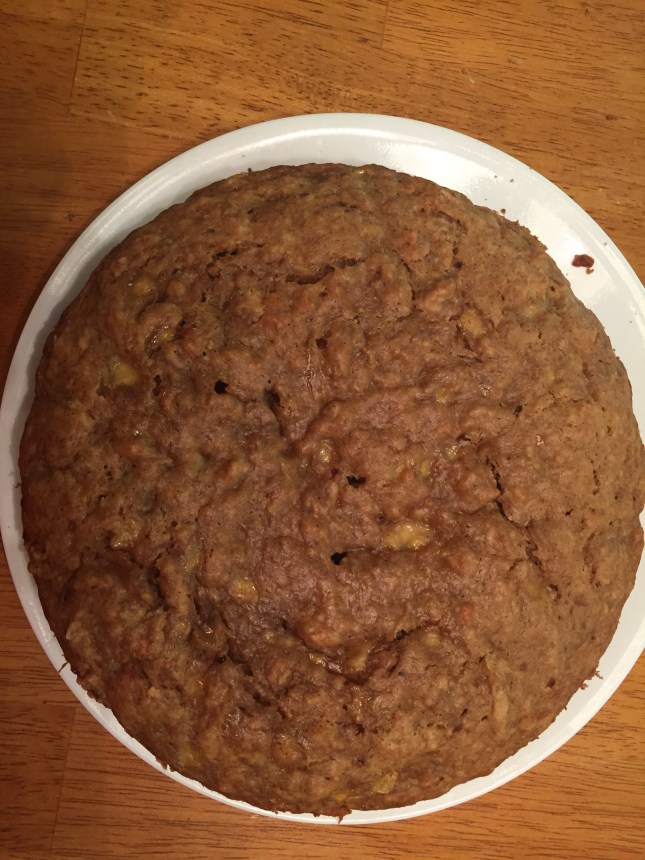
Bake the pie for 20 minutes, then reduce the oven temperature to 375 degrees. Bake the pie for 25 to 30 minutes more, until the crust is golden and the filling is bubbling through the vents. Let the pie rest for 10 minutes before serving.

One of the great things about this recipe is that you can make use of any type of vegetables you want in a pot pie. I used the vegetables recommended but I also had some leftover broccoli that I put in as well. Pot pie works well with chicken, turkey, beef and pork that you may have leftover so you can make just about anything with it. I find pot pie tastes even better the next day and often have any leftovers for lunch, after the sauce and the flavors have had even more time to come together. It can be a great dinner to put together in under an hour.

That’s all I have for today. Check back next time for another recipe. Until then enjoy the rest of your day and enjoy your meal!

img_0568


Tags: , , , , , ,

Kitchen Pantry Cooking Essentials – Key Ingredients and Recipes – Food.com

The key to good cooking and easy cooking is having some basics in your pantry all of the time. When you have the right ingredients around you can put together a meal in no time at all. Food.com has a list for you of the 50 most common cooking essentials you want in your pantry so you can do anything at any time. Check it out!

Source: Kitchen Pantry Cooking Essentials – Key Ingredients and Recipes – Food.com


Tags: , , , , , ,

Yes We Have Some Bananas – We Have Banana Fritters Today

One of the fruits we regularly go through, no matter what time of year it may be, is bananas. Michelle eats a banana every morning as part of her routine I have one also on most days. But even as fast we can go through them, there is always a time where it seems you end up with a couple of bananas that enter that stage where they are a bit overripe and not ideal for just picking up and eating. Instead of just tossing them in the garbage, take them, peel them and then freeze them in a zip-lock bag and then you will have them to use for all kinds of great things, like smoothies, ice cream, banana pudding for banana cream pie or for this recipe I just came across from Marcus Samuelsson for banana fritters. They are easy to make, only use a few ingredients you probably have on hand and are a great snack.

Banana Fritters

2 ripe bananas, mashed

2 eggs

2 tablespoons water

1 tablespoon melted butter

1 tablespoon ground pumpkin pie spice mix(allspice, nutmeg, cinnamon)

1 cup all-purpose flour

1 teaspoon baking powder

Pinch of salt

3 tablespoons granulated sugar

Vegetable oil, for frying

Cinnamon sugar, for dusting

In a medium bowl combine the bananas, eggs, water, melted butter, and the spice mix until the ingredients are well combined.

Add the all-purpose flour, baking powder, salt and granulated sugar to the mashed banana mixture and stir everything together until all of the ingredients are well combined.

In a heavy bottomed pan or Dutch oven pour about one inch of vegetable oil and heat the oil over medium heat until it registers 375 degrees on a candy thermometer or instant-read thermometer.

Drop spoonfuls of the fritter batter into the hot oil and allow it to cook, flipping once, until the fritters are golden brown, about 2 to 3 minutes on each side. Cook them in batches so you do not overcrowd the pan.

Drain  the fritters on paper towels and repeat the process with the remaining batter. Sprinkle the fritters with cinnamon sugar before serving, if desired.

These are really easy to make and taste great while they are still warm. I dusted mine with confectioner’s sugar instead of using cinnamon sugar, but I think either would taste great. I did not have pumpkin pie spice mix so I just used a teaspoon each of ground allspice, nutmeg and cinnamon mixed together to get the same flavor mix and it was fine. Sean and I enjoyed these as dessert with dinner one night and they are great with a cup of coffee in the morning. Mine came out a little darker than I would have liked but the oil was a bit too hot I believe and I did not watch it as closely as I should have, but they still were very good. You can easily warm them up again in a warm oven for a few minutes if you want to get the warm flavor again. This was a great use for those leftover bananas and I think the same recipe would work well with all kinds of different fruits, though you might want to change-up the spice mix or eliminate it to get the right flavor.

That’s all I have for today. Check back next time for another recipe. Until then, enjoy the rest of your day and enjoy your meal!

IMG_0550

 
Leave a comment

Posted by on August 24, 2016 in Breakfast, Dessert, Fruit, Snacks


Tags: , , , , ,

Make the Homer Simpson in You Proud – Strawberry Glazed Buttermilk Donuts

It is hard to deny my passion for donuts. I know they aren’t good for me and I don’t eat them very often because when I do I have a hard time controlling myself with wanting them all. Every once in a while I will get one as a special treat. I rarely make them at as well, only because they take some work and deep-frying them, along with being unhealthy, leaves a lot of clean up behind it. I invested in a donut pan from King Arthur Flour a few months back with the intention of making some oven-baked donuts but I was waiting for a really good recipe to come along to try out. I found one in this recipe from Saveur for strawberry glazed buttermilk donuts and they gave me another good use for some of the locally-grown strawberries I had just picked up from the farmers’ market.

Strawberry Glazed Oven-Baked Buttermilk Donuts

1 14 cups all-purpose flour, sifted
34 cup  granulated sugar
12 teaspoon baking soda
12 teaspoon kosher salt
23 cup canola oil, plus more for greasing
12 cup buttermilk
1 egg
12 teaspoon white vinegar
12 teaspoon vanilla extract
12 cup finely chopped strawberries
2 cups confectioners’ sugar
Heat the  oven to 350 degrees. Combine the flour, sugar, baking soda and salt in a  large bowl; make a well in the center of the mixed ingredients and set the bowl aside. Whisk the canola oil, buttermilk, egg, vinegar, and vanilla in a separate medium bowl; add the wet ingredients to the well in the dry ingredients and mix all the ingredients together until they form into a smooth batter. Stir in half of the strawberries and set the batter aside. Lightly grease a nonstick donut pan then spoon 2 tablespoons of the batter into each mold. Bake until the donuts are golden and a toothpick inserted into a donut comes out clean, about 13 to 15 minutes. Invert the donuts onto a baking sheet with a wire rack set in it to let the donuts cool completely.
Whisk the remaining strawberries, confectioners’ sugar, and 2 tablespoons of water together in a medium bowl until the mixture is smooth until smooth. Dip the tops of the donuts into the glaze and return the donuts to the wire rack until the glaze is set.
The recipe states that you will get 18 donuts from the ingredients; I got about 15 but I guess it depends on how accurate you are about placing the batter into the mold. I tried to fill each until it was about 2/3 of the way up the mold. In any case, the donuts came out very nice and having that little bit of strawberry mixed into the batter added just the right touch to them. The glaze was great as well, though it’s not quite as pink as you might see in the donuts as donut shops. I suppose you could add more strawberries to the mix to brighten the color more or even add a bit of food coloring if you really wanted it, but I thought the glaze came out just right and was not overly sweet but had good taste to it. These were easy enough to make and while they may not taste the same as the deep-fried donuts you love, they are still pretty good.
That’s all I have for today. Check back next time for another recipe. Until then, enjoy the rest of your day and enjoy your meal!
IMG_0543
 
2 Comments

Posted by on August 15, 2016 in Breakfast, Brunch, Cooking, Dessert, Fruit, Snacks


Tags: , , , , , ,

Decadent, Delightful and Delicious – White Chocolate Raspberry Cupcakes with Raspberry Buttercream

I am not much of a baker myself but I do like to try to make things every now and then beyond the pies that I make. That being said, there are people I know that are much better at baking and do things a lot more extravagant than I can do. It has to be a recipe that really interests me for me to want to venture over to the baking side and make things, but it does happen now and then. That is what happened when I saw this recipe from Williams-Sonoma for white chocolate raspberry cupcakes with a raspberry butter cream. They just looked too good not to try to when I looked over the recipe it looked like something that I could actually make a pretty good go of without trouble. I actually combined this recipe with a recipe I saw for raspberry buttercream because I wanted to have a more predominant color to the frosting.

White Chocolate Raspberry Cupcakes with Raspberry Buttercream

For the cupcakes:

2 cups (10 oz./315 g) all-purpose flour

2 teaspoons baking powder

1/4 teaspoon salt

1/2 cup (4 oz./125 g) unsalted butter, at room temperature

1 cup (8 oz./250 g) granulated sugar

3 large egg whites, at room temperature

1/2 cup (4 fl. oz./125 ml) milk, at room temperature

2 oz. (60 g) white chocolate, chopped and melted

1 container (6 oz./185 g) fresh raspberries

For the raspberry buttercream:

1 cup fresh raspberries

½ cup butter, softened

2 cups powdered sugar

Chunk of white chocolate, for shaving (optional)

Preheat an oven to 350 degrees. Line 12 standard muffin cups with paper liners.

To make the cupcakes, in a large bowl, whisk together the flour, baking powder and salt.Using an electric mixer, beat together the butter and sugar on medium speed until the mixture is light and fluffy, about 3 to 5 minutes. Add the egg whites and beat until they are blended, scraping down the bowl as needed. Add the flour mixture in 3 additions alternately with the milk in 2 additions, starting and ending with the flour mixture. Beat the mixture just until it is combined. Stir in the white chocolate just until it is blended, then gently fold in the raspberries. Spoon the batter into the prepared muffin cups, dividing the batter evenly among the cups.

Bake the cupcakes until they are puffed and light golden and the center springs back slightly when touched, about 25 minutes. Let the cupcakes cool completely on a wire rack, about 30 minutes.

To make the raspberry buttercream, add  the raspberries to a food processor. Pulse the raspberries  until they become a thick sauce. Push the raspberry puree through a sieve to extract the juice and get rid of the seeds. Set the raspberry sauce aside.

In a stand mixer with the paddle attachment, cream the butter on high for about 2-3 minutes to get a creamy fluffy texture. Add in the powdered sugar and raspberry sauce on low-speed until they are combined. If the frosting is too runny add more powdered sugar. If it is too thick add some milk.

Spoon the buttercream into a pastry bag fitted with a star tip and pipe the buttercream onto the cooled cupcakes. Shave curls from the chunk of white chocolate and sprinkle over the cupcakes if desired or top with a fresh raspberry, if desired.

The cupcakes can be stored on the counter at room temperature for a day or two and in the refrigerator for up to 5 days.

I admit it was a bit of work to get the raspberry sauce through a sieve to get all of the seeds out but the hard work is well worth it to give you a smooth raspberry sauce for the frosting. These cupcakes are very tasty, with the raspberry and white chocolate shining through. If you prefer to have cupcakes without a whole raspberry inside, you could certainly take the whole raspberries and make a sauce from them and then pipe it into the center of the cupcakes so you get the raspberry flavor without the whole raspberry in there, but I liked it with the raspberry inside. I think they came out well and tasted better being in the refrigerator where the buttercream firmed up and had a great texture. This makes a great summer dessert as an alternative to making a cake or pie.

That’s all I have for today. Check back next time for another recipe. Until then, enjoy the rest of your day and enjoy your meal!

IMG_0356


Tags: , , , , , , ,

You Can Bake a Cherry Pie Very Long John, Just Bake This One

The season for fresh cherries is pretty short so if you like cherries you want to make the most of the time you have them, which is right now. For me cherries are great to just snack on, but there are lots of great things you can do with them as well. They make a great addition to dishes using duck or pork, but naturally everyone thinks of dessert right away when they think of cherries. I am a big pie fan myself, so making cherry pie seems like the natural thing to do. Now the idea of pitting several pounds of cherries does not really appeal to me, as I am sure it doesn’t for a lot of people. However, if you really like cherry pie and want to make some of your own, you can make a good compromise and use some frozen cherries mixed with fresh cherries. The frozen cherries, like most frozen fruit, are packaged and frozen when the cherries are ripe so they have good flavor and the pitting has already been done for you. If you mix this together with some fresh cherries you pit yourself, it makes things a lot easier. If you really want to streamline things, and I did, it is worth investing in a good cherry pitter. I have one from OXO that does a fantastic job instead of doing it myself with a paring knife and ending up with cherry stained hands and cramps in my fingers. Once you have a plan for your cherries, you want to try this cherry pie recipe from Serious Eats. It’s the best cherry pie recipe I have ever tried.

Homemade Cherry Pie

For the Filling:

5 heaping cups pitted cherries from about 2 pounds whole fruit (6 heaping cups), or a mix of frozen cherries and fresh pitted cherries

2 tablespoons fresh lemon juice from 1 small lemon

1 cup granulated sugar

3/4 teaspoon kosher salt; for table salt, use half as much by volume or use the same weight

1/3 cup plus 1 teaspoon tapioca starch 

Pie dough from your favorite recipe for a double crust or 2 store-bought pie crusts

For the Egg Wash:

1 large egg

1 large egg yolk

 1 tablespoon heavy cream

1/8 teaspoon kosher salt

To Serve (optional):

Fresh or store-bough whipped cream

For the filling: Combine the pitted cherries, lemon juice, sugar, salt, and tapioca starch in a large bowl, folding the ingredients with a flexible spatula until they are well combined. Scrape the cherries into the prepared pie shell and top with the remaining dough, using a solid sheet, cutouts, or a lattice-top design. Trim away the excess dough and refrigerate the pie to ensure that the top crust is completely chilled, about 30 minutes. Meanwhile, adjust an oven rack to the lower-middle position and pre-heat to 400 degrees.


For the egg wash (if using): Whisk the egg, egg yolk, heavy cream, and salt in a small bowl. Brush the wash over the chilled top crust in a thin, even layer. This will give the crust a glossy, golden sheen, but it is not necessary in any way.


Place the chilled pie on a parchment-lined rimmed baking sheet. Bake the pie in the oven until the crust is golden, about 1 hour, then loosely cover the pie with tented foil. Alternatively, an empty baking sheet can be placed on the topmost rack of the oven to serve as a shield. Continue baking the pie until the filling is bubbling even in the very center of the pie, about 15 minutes more. If the crust completely covers filling, bake the pie until the pie reaches an internal temperature of 213 degrees on an instant-read digital thermometer inserted into the pie. The time can vary considerably depending on the thickness and type of pie plate, the amount of top crust, how long the pie was refrigerated, etc.


To serve: Cool the pie until it is no warmer than 85 degrees  on an instant-read digital thermometer inserted into the pie, about 3 hours depending on the type of pie plate you use. At higher temperatures, the filling will be runny and thin. Slice the pie into wedges with a sharp knife, pressing firmly against the bottom and sides of the pie plate to ensure the under-crust is completely cut. If you like, serve the pie with whipped cream. Wrapped in foil, the leftovers will keep up to 3 days at room temperature; warm the pie for 10 minutes in a 350 degree oven to revive the crust before serving.

This pie turned out perfectly. In the past when I have made cherry pie, even if I used cornstarch or tapioca, it always seemed to run too much. This one held together perfectly, even with using frozen cherries that I thought for sure would bleed out. The tapioca was just the right amount and chilling the pie for 30 minutes before cooking seemed to help in holding everything together and making the perfect crust. You can mix and match the cherries to suit what you like, using sweet and sour cherries if you like. A couple of things to note that Serious Eats comments on: first, the ratio of fruit to sugar in this recipe helps to boost the tapioca starch so that it gelatinizes well. Second, use a glass pie plate if you can because it helps to crisp the bottom crust well so it cuts nicely and holds up. A final note from me is that I used instant tapioca since I couldn’t find tapioca starch at any local store here. I was worried about how well it would work instead of tapioca starch but all went well for me. This pie is easily one of my favorites.

That’s all I have for today. Check back next time for another recipe. Until then, enjoy the rest of your day and enjoy your meal!


Leave a comment

Posted by on July 9, 2016 in Cooking, Dessert, Fruit, Pie, Uncategorized


Tags: , , , , ,

(Blueberry) Turnover a New Leaf

Turnovers are one of those pastries that seem to fit in just about anywhere. They can be tasty for breakfast, make for a fantastic brunch item and can be the centerpiece of your meal as a really nice dessert. While most of us are probably used to having apple turnovers, and they certainly are a classic that you can make yourself, buy frozen in the stores and heat up or get from your local bakery (if you’re lucky enough to have such a thing in today’s world). I love a good apple turnover, but getting good apples for turnovers is not an easy thing to do this time of year. Instead, now is the perfect opportunity to use some of the great summer fruit that is available. Blueberry is always a favorite of mine for pies, so why not for a turnover as well? This recipe from Bon Appetit is for blueberry-blackberry turnovers, but since I didn’t have any blackberries on hand (and while I love blackberries, Sean and Michelle are not big fans of the seeds) I decided to just go with blueberry and make the turnovers that way.

Blueberry Turnovers

For the Turnovers:

1 1/2 cups fresh (or frozen, thawed) blueberries


2 teaspoons finely grated peeled ginger

2 teaspoons fresh lime juice

¼ teaspoon kosher salt

2 tablespoons all-purpose flour, plus more for the surface

1 large egg, beaten to blend

¼ cup heavy cream

1 store-bought pie crust, or your favorite pie dough recipe

For the Glaze and Assembly:

cups powdered sugar

1 teaspoon vanilla extract

¼ teaspoon kosher salt

For the turnovers, pre-heat the oven to 350 degrees. Toss the blueberries, sugar, ginger, lime juice, salt and 2 tablespoons of flour in a medium bowl until the ingredients are combined. Beat the egg and heavy cream in a small bowl until no streaks remain.
Roll out the pie dough on a lightly floured work surface to a 15 x 10-inch rectangle. Cut a thin border around the dough to square off the edges. Cut the dough in half lengthwise and then in thirds crosswise to form six 5-inch squares. Brush the edges of the dough with the egg mixture, then mound about ¼ cup of the blueberry filling in 1 corner of each square. Working with 1 square at a time, fold the corner opposite the filling up and over to create a triangle; press the edges with a fork to seal the edges. Place the turnovers on a parchment-lined baking sheet and brush them with the remaining egg mixture. Cut about a 1-inch-long slit in the center of each turnover. Bake until the pastry is golden brown and juices run from the slits, about 35–45 minutes. Let the turnovers cool on a baking sheet until they are just slightly warm.
For the glaze and assembly, whisk the powdered sugar, vanilla, and the salt in a large, wide bowl. Whisking constantly, add warm water a tablespoonful at a time until the glaze is thick and smooth and falls off the whisk in a slowly dissolving ribbon (it should look like sweetened condensed milk).
Working one at a time, dip the top sides of the slightly warm turnovers into the glaze, letting the excess drip back into the bowl. Transfer the turnovers to a wire rack and let them sit until  the turnovers are cool and  the glaze is set, about 30 minutes.
I loved the way they turned out, but I have to admit I did make a mistake along the way while I was making them. I did not pay close enough attention to the direction when I was cutting the dough the first time and cut it incorrectly, leaving me with small squares I couldn’t do turnovers with. Instead, I turned those small squares into hand pies and went with those instead. Luckily, I was using store-bough pie dough and had another sheet that I could do them with again. I paid better attention this time and got the turnovers right. They turned out really well, with just the right amount of blueberries. The mix of the ginger and blueberries gave good flavor too that everyone seemed to like. The recipe makes 6 turnovers if you do it right and if you wanted hand pies instead, just cut the squares smaller and use one square for the top and the other for the bottom, crimp the edges and you are good to go. With the glaze on the hand pies they turn out just like the Drake’s fruit pies I love (if you live in the Northeast you know Drake’s pies).
That’s all I have for today. Check back next time for another recipe. Until then, enjoy the rest of your day, have a happy 4th of July with friends and family, and enjoy your meal!
IMG_0461


Tags: , , , , , ,

Don’t Go in the Water(Melon)! Make Your Own Watermelon Shark Fruit Salad

It’s July 4th weekend. That means lots of cookouts, parties and barbecues and lots of eating, hanging out with friends and family and fun. The last thing you want to do is cook in the hot kitchen while everyone else is out having fun in the sun. As long as your cooking everything outside you want your desserts to be just as easy for you to put together. Sure you can make or buy some pies, get some ice cream (or make your own) or have a big batch of cookies, but one of my favorite things to do when the weather is warm like this is to make a nice fruit salad. There are so many great fruits that you can use that are in season right now that you can get the chance to put something really great together. If you really want to wow everyone this year, skip the fruit cocktail in a can or jar or the prepackaged fruit tray from the grocery store with the unripe melon and do it yourself. As long as you are doing it yourself, have some summer fun and make this great watermelon shark fruit salad too from Tasting Table.

Watermelon Shark Fruit Salad

1 Baby watermelon (about 2-3 pounds)

4 cups watermelon pieces (from the baby watermelon above)

2 cups bite-size mango pieces (2 mangoes)

1 cup melon pieces (cantaloupe, honeydew, casaba, whatever you like)

1 cup sliced kiwi rounds (2 kiwis, peeled)

1/2 cup blueberries

1/2 cup red seedless grapes

1/2 cup fresh pineapple chunks

¼ cup agave nectar

2 tablespoons fresh lime juice

1½ cups bite-size avocado pieces (2 avocados), optional

½ cup toasted unsweetened coconut flakes, optional

⅓ cup toasted and roughly chopped macadamia nuts, optional

Handful of Swedish fish, optional

To make the watermelon shark, take a sharp knife and cut off the wider end of watermelon so it will stand at an angle. Turn the watermelon upright so that it is standing on its base. Draw a half-moon shaped mouth on the watermelon with a marker, beginning at the stem mark as a guideline. Use a sharp paring knife to cut along your outline and remove the watermelon wedge. Save the wedge to use for the fin for the shark. Use a large spoon to scoop out all of the watermelon flesh into a separate bowl. Using a vegetable peeler, peel off about 1-inch of the outer edge of the watermelon skin, exposing the light green flesh underneath. Cut out small triangles in the exposed light green flesh of the watermelon to make the teeth of the shark. Cut a wooden skewer in half and use it to attach the shark fin to the top of the shark. Using toothpicks, take 2 blueberries and attach them to the watermelon for eyes.

To make the fruit salad, in a large serving bowl, combine the watermelon, mango, melon, kiwi, blueberries, grapes and pineapple. Season the fruit with the agave nectar and lime juice, tossing gently to mix. Fold in the avocado pieces, if using. Garnish the salad with the coconut flakes and macadamia nuts. If you are serving the fruit salad in the shark’s head, fill the shark’s head with as much fruit as you can. Place the Swedish fish among the fruit pieces, if using, and serve.

Of course you don’t have to use the shark’s head, but hey, it’s a great centerpiece for the table, looks great and the kids love it. It’s really easy to make and Tasting Table has step by step pictures you can follow in their link. I used a baby watermelon but if you feel ambitious you could certainly use a larger one and the same thing and have much more fruit in it. Use any fruit that everyone really likes so you get a good mix of flavors, but don’t forget to use the agave nectar (or honey if you prefer) and lime juice so you get that added flavor to the fruit. The Swedish fish were just a nice touch at the end.

That’s all I have for today. Check back next time for another recipe. Until then, enjoy the rest of your day and enjoy your meal!

IMG_0466

 
Leave a comment

Posted by on July 3, 2016 in Cooking, Dessert, Fruit, Holidays


Tags: , , , , , ,

It Was a Dark and Stormy Banana Bread

I really like banana bread. It not only can make a great dessert item with a little bit of ice cream (go for Ben and Jerry’s Chunky Monkey for the complete banana experience, or make your own homemade banana ice cream), but it also is perfect for a brunch buffet or even just for breakfast on its own. I have tried a few different banana bread recipes and have never been disappointed in any that I have made, so when I saw this one from Joy the Baker I knew it had to be a hit. How could you go wrong by combining two great things – banana bread and a Dark and Stormy? If you have never had a Dark and Stormy, I was introduced to them long ago on a cruise to Bermuda and it’s a great combination of dark rum and ginger beer. this recipe incorporates the concept, though it leaves out the ginger beer and uses ginger instead.

Dark and Stormy Banana Bread

1/2 cup (1 stick) plus 2 tablespoons unsalted butter

1 cup lightly packed muscovado brown sugar (or dark brown sugar)

2 large eggs

2 teaspoons pure vanilla extract

1 tablespoon dark rum

2 ripe bananas, mashed

1/2 tablespoon fresh grated ginger

heaping 1/2 teaspoon ground cinnamon

1/2 teaspoon ground nutmeg

1/2 teaspoon ground ginger

2 cups all-purpose flour

3/4 teaspoon baking soda

1/2 teaspoon salt

Place a rack in the upper third of the oven and pre-heat the oven to 350 degrees F. Melt the butter in an 9-inch cast iron skillet over medium-low heat. Melt the butter until the crackling subsides and the butter begins to brown. Remove the skillet from the heat and stir in the sugar. Whisk until the butter and sugar are thoroughly combined. The mixture may seem broken as the butter won’t completely absorb into the sugar just yet. Allow the mixture to stand and cool for about 5 minutes.

Whisk in the eggs, one at a time. The mixture will begin to emulsify, be glossy and no longer greasy. Whisk in the vanilla and the dark rum. Add the mashed bananas, fresh ginger, cinnamon, nutmeg, and ground ginger and stir to combine.

Add the flour, baking soda, and salt. Stir the mixture carefully until all of the dry ingredients are incorporated. Use a spatula to scrape down the sides and spread the batter evenly across the skillet.

Place the skillet in the oven and bake for 18-25 minutes until mixture is dry on the top, but still slightly soft in the center. Remove the skillet from the oven and allow the banana bread to cool for 15 minutes. Sprinkle the banana bread with powdered sugar if you’d like and enjoy it warm.

There are a few great things about this recipe. Naturally, the first one is in the flavor. It is awesome banana bread, nice and moist with good banana flavor and the dark rum and ginger really shine through here. Second, this bread is the epitome of easy make and clean up since you do everything in one skillet start to finish. It’s a great use of your cast iron skillet and the bread comes out perfectly in color and has some nice texture to it and there’s no extra bowls to have to clean. Add some ice cream or homemade whipped cream to this and you have something great.
That’s all I have for today. Check back next time for another great recipe to try. Until then, enjoy the rest of your day and enjoy your meal!
IMG_0399
 

Tags: , , , ,

48 Memorial Day Dessert Ideas – Bon Appétit

What makes a great barbecue besides family, fun and food on the grill? An awesome dessert of course. There are all kinds of great dessert options you can try that go beyond the standard fruit salad or store-bought pie. Bon Appetit has 48 Memorial Day desserts for you to try, but these desserts are great for any summer get-together. Check it out and give them a try!

Source: 48 Memorial Day Dessert Ideas – Bon Appétit


Tags: , , , , ,

 
National Day Calendar

Fun, unusual and forgotten designations on our calendar.

Jennifer Probst

a little bit naughty a little bit nice

Laissez Faire

Letting Life Lead

What To Have For Dinner Tonight

Simple and delicious dinner inspiration