RSS

Category Archives: Dinner

There’ Nothing Better Than a Burger…Except a Steak Burger!

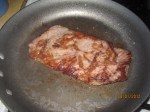
I love burgers. I’m pretty sure I could eat one every day if it wouldn’t eventually kill me. There’s just something about a nice, juicy burger with all the accompaniments you like – bacon, tomato, lettuce, avocado, really anything you want – and it’s just plain good. I didn’t think there was too much else you could do to a burger until I came across this recipe for a Steak Burger from Cook’s Country. This burger is made from ground sirloin, which is why they call it a steak burger. Now the thing about ground sirloin is that there is hardly any fat in it at all, so you need to add a little fat to this to make it perfect. it’s nothing a little melted butter can’t take care of, and while you’re at it you can add a little spice to it as well. They also use a steak sauce on the burger to really give it some intense flavor. This recipe calls for the burgers to be grilled, but of course it was raining today when I started cooking so everything got moved inside.

Grilled Steak Burgers

For the Burgers:

8 tablespoons butter

2 garlic cloves, minced

2 teaspoons onion powder

1 teaspoon pepper

1/2 teaspoon salt

2 teaspoons soy sauce

1 1/2 pounds 90 percent lean ground sirloin

4 hamburger buns

For the Steak Sauce:

2 tablespoons tomato paste

2/3 cup beef broth

1/3 cup raisins

2 tablespoons soy sauce

2 tablespoons Dijon mustard

2 tablespoons balsamic vinegar

1 tablespoon Worcestershire sauce

For the burgers, melt the butter in a large skillet over medium-low heat. Add the garlic, onion powder, pepper and salt and cook until fragrant, about 1 minute. Pour all but 1 tablespoon of the butter mixture into a bowl and let cool slightly, about 5 minutes.

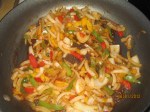
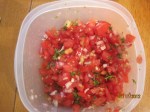
For the steak sauce, add the tomato paste to the skillet and cook over medium heat until the paste begins to darken, 1 to 2 minutes. Stir in the broth, raisins, soy sauce, mustard, vinegar, and Worcestershire sauce and simmer until the raisins plump, about 5 minutes. Process the sauce in a blender until smooth, about 30 seconds; transfer to a bowl.

Add 5 tablespoons of the cooled butter mixture and the soy sauce to the ground beef and gently knead until well combined. Shape into 4 3/4-inch-thick patties and press a shallow divot in the center of each. Brush each patty all over with 1 tablespoon of the steak sauce. Combine the remaining 2 tablespoons of the cooled butter mixture with 2 tablespoons of the steak sauce; set aside.

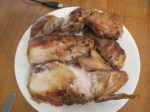
For a gas grill, turn all the burners to high, cover, and heat the grill until it is hot, about 15 minutes. Leave the burners on high. Clean and oil the cooking grate. Grill the burgers, covered, until the meat registers 120 to 125 degrees, 3 to 4 minutes per side, or 130 to 135 degrees (for medium), 4 to 5 minutes per side. Transfer the burgers to a plate, tent loosely with aluminum foil, and let rest 5 to 10 minutes. Brush the cut side of the buns with the butter-steak sauce mixture. Grill the buns, cut side down, until golden, 2 to 3 minutes. Place the burgers on the buns and serve with the remaining steak sauce.

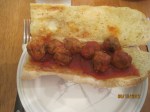
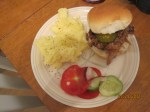
The steak sauce has just the right bite to it and tastes very good on the burgers. Of course, you can top the burgers with whatever you like to top them with. I prefer some sliced pickle, red onion and tomato myself, maybe a piece of bacon or avocado. You could just eat them with the steak sauce. I still had some of the remoulade I made a few days ago and used that. It was delicious.

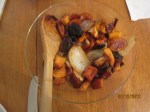
There’s no meal tomorrow since we are going to the Mets game at Citi Field tomorrow night, but I do have a dinner planned for Wednesday involving, chicken, Italian sausage and potatoes. Check back on Wednesday to see what it is. until then, enjoy your evening and enjoy your meal!

 
Leave a comment

Posted by on August 20, 2012 in Beef, Cooking, Dinner, Picnic Fare, Sauce


Tags: , , , ,

Making Good Use of Those Extra Meatballs

Yesterday I made a big try of meatballs so Michelle could use some in her Italian Wedding Soup. Since we still had a lot left to use, we decided to put some in sauce and simmer them and then make some meatball sub sandwiches. Sean opted to have just spaghetti and meatballs, but I made a sub for myself on some garlic bread.

Meatball Sub Sandwiches

For the meatballs:

2 slices of white bread (use good white bread for this)

1/3 cup buttermilk

3/4 pound ground beef

1/4 pound ground  pork

1/4 cup grated Parmesan cheese

2 tablespoons minced fresh parsley

1 large egg yolk

1 garlic clove, minced

Salt and pepper

For the sauce:

3 tablespoons olive oil

3 garlic cloves, minced

1 (28-ounce) can crushed tomatoes

1 (14.5-ounce) can diced tomatoes

3 tablespoons minced fresh basil (if you’re using dried basil, cut this in at least half)

1/4 teaspoon sugar

Salt

For the garlic bread:

1 loaf Italian bread or French bread

4 tablespoons butter, softened (use less if you like, I often do)

2 teaspoons olive oil

3 cloves garlic, crushed

1 teaspoon dried oregano

1 cup shredded mozzarella cheese (or other cheese of your liking, or no cheese at all, it’s optional)

Fresh mozzarella, sliced for the sandwiches

For the meatballs, remove and discard the crusts from the bread, then tear the bread into small pieces. Mash the bread pieces and buttermilk to a smooth paste in a large bowl, using a fork.

Add the beef, pork, Parmesan, parsley, yolk, garlic, 3/4 teaspoon of salt, and 1/8 teaspoon of pepper to the mashed bread. Stir the mixture gently until combined and uniform. Gently form the mixture into 1-inch round meatballs ( I made them smaller this time for the soup we made).

Heat the oven to 350 degrees. Place the meatballs on a wire rack in a cookie sheet or roasting pan. Cook for approximately 20 to 30 minutes or until well browned.

For the sauce, cook the oil and garlic in a saucepan over medium heat, stirring often until fragrant but not browned, about 2 minutes (don’t scorch the garlic, it tastes pretty bad when you do. As soon as you can smell it, you’re ready for the next step). Stir in the crushed tomatoes and diced tomatoes with their juice. Bring to a simmer and cook until slightly thickened, 15 to 20 minutes. Stir in the basil and sugar. Season with salt to taste. Add the meatballs to the sauce and simmer until the meatballs are heated through, about 10 minutes.

For the garlic bread, preheat the broiler. Cut the loaf of bread in half lengthwise. In a small bowl, mix the butter, oil, garlic and oregano. Spread the mixture evenly on the bread. On a baking sheet, place the bread under the broiler for 3-5 minutes, or until slightly browned. Check frequently to make sure it doesn’t burn. Remove from the broiler and serve, or, if using the cheese, sprinkle cheese over the bread and place under the broiler for another 2 minutes, or until cheese is melted and slightly brown.

To assemble the sandwich, place as many meatballs as you desire on the bread. Cover the meatballs with some extra sauce and add some slices of fresh mozzarella. Place the sandwich back under the broiler for 1 to 2 minutes until the cheese is melted.

Of course, there are always variations on this. I don’t eat cheese, so my sandwich went without. Michelle only wanted a small sandwich so she could have some pasta too, so she only had a half sandwich. You could also add some Italian sausage to the mix and have them on the sandwich as well.

It’s a great use of some leftovers. Everyone loves a good sub sandwich, and having this one on the toasted garlic bread makes it even better.

I think I am going to make some shrimp tomorrow, although I am not sure how I am going to do it just yet. Check back and see what I come up with. until then, enjoy your evening and enjoy your meal!


1 Comment

Posted by on August 13, 2012 in Beef, Breads, Cooking, Dinner, Sandwiches, Sauce


Tags: , , , , ,

My Sweetie is in the Kitchen Making Soup

When it comes to making soup in our family, I have to cede the kitchen to Michelle. She makes great soups of all kinds, all year round. I had just made some chicken stock earlier in the week, using the chicken carcasses we had used to make dinner last Sunday, so we were trying to come up with a soup to make. Michelle has been having an itch for some Italian Wedding Soup, so she decided that was what she was going to make today.

Italian Wedding Soup

For the meatballs:

2 slices of white bread (use good white bread for this)

1/3 cup buttermilk

3/4 pound ground beef

1/4 pound ground  pork

1/4 cup grated Parmesan cheese

2 tablespoons minced fresh parsley

1 large egg yolk

1 garlic clove, minced

Salt and pepper

For the soup:

2 tablespoons extra virgin olive oil

1 cup minced onion

3 carrots, peeled and diced

1 celery stalk, diced

5 cups chicken stock

1/2 cup white wine

1 cup of small pasta (Michelle actually used orzo this time around)

12 ounces spinach, washed and trimmed

For the meatballs, remove and discard the crusts from the bread, then tear the bread into small pieces. Mash the bread pieces and buttermilk to a smooth paste in a large bowl, using a fork.

Add the beef, pork, Parmesan, parsley, yolk, garlic, 3/4 teaspoon of salt, and 1/8 teaspoon of pepper to the mashed bread. Stir the mixture gently until combined and uniform. Gently form the mixture into 1-inch round meatballs ( I made them smaller this time for the soup).

Heat the oven to 350 degrees. Place the meatballs on a wire rack in a cookie sheet or roasting pan. Cook for approximately 20 to 30 minutes or until well browned.

For the soup, heat the olive oil in a large heavy-bottomed soup pot. Add the onion, carrots and celery and saute until softened, 5 to 6 minutes, stirring occasionally. Add the chicken stock and wine and bring to a boil. Add the pasta to the simmering broth and cook for 6 to 8 minutes, until the pasta is tender. Add the meatballs to the soup and simmer for one minute. Add salt and pepper to taste. Stir in the fresh spinach and cook for 1 minute, until the spinach is just wilted. Ladle into soup bowls and sprinkle with extra grated Parmesan cheese.

This recipe makes a lot of soup. The original recipe is double what I have shown here, but we halved it and it still made enough soup for dinner tonight and filled storage containers for 4 or 5 lunches, so you can get a lot mileage out of this one. it made the entire house smell great while it was  cooking. You could use any type of small pasta that you like for this soup, we just happen to have orzo on hand so we decided to use that instead. The other nice thing was I made extra meatballs so we have some to use for some sauce for a dinner this week.

Okay, it’s really hot and humid here today, so I am going to slip into the air conditioning in the bedroom and relax for the rest of the evening. I do have some recipes planned for this week using shrimp, chicken and maybe some squid. We’ll see if anything comes up along the way. Until next time, enjoy your evening and enjoy your meal!

 
1 Comment

Posted by on August 12, 2012 in Cooking, Dinner, Soups & Stews


Tags: ,

Butterfly, Butterfly, Butterflied Barbecued Chicken

It was too hot to use the stove tonight here, so I decided to go for the grill instead. As you know if you follow my blog, we live in a condo and New York State law says no charcoal or gas grills can be stored if you live in this type of dwelling, so I use an electric grill instead. You don’t always get the greatest results, but it works pretty well if you combine it with using a smoker box. I wanted to do something very simple tonight, so I found this recipe from America’s Test Kitchen for a grilled butterflied chicken. I did jazz it up a little bit by adding a dry rub and the smoker box, but you can easily just do this with just some salt and pepper.

Grilled Butterflied Chicken

2 cups of wood chips, soaked and drained

Vegetable oil

1 (3 1/2 to 4 pound) whole chicken

1 garlic clove, minced

1 teaspoon salt

1 teaspoon ground black pepper

1/2 tablespoon fresh parsley, minced

Place the wood chips in a disposable aluminum tray or a smoker box. Rest the box on top of the primary burner. Turn all the burners on to high, close the lid and heat the grill until it is very hot, about 15 minutes. Clean and oil the grill and turn all the burners to medium-low.

Mix the garlic, salt, pepper and parsley together in a small bowl. Remove and discard the gizzard packet from inside the chicken. Butterfly the chicken using poultry shears. Lay the chicken on its breast and use the poultry shears to cut out the backbone. Flip the chicken to breast side up and cover it with plastic wrap. Using a meat pounder, flatten the chicken by pounding lightly. Season both sides of the chicken with the dry rub.

Grill the chicken skin-side down, covered, until the skin is crisp and an instant-read thermometer inserted deep into the thigh registers 165 degrees, about 30 to 45 minutes. Transfer the chicken to a carving board, tent with foil and allow it to rest for 10 minutes before carving into pieces.

It is all super easy, very fast and tastes great. We just made some sliced carrots and diced potatoes to go along with the meal and it was perfect.

For tomorrow, we’ll be using a lot of the leftovers. I am planning some chicken salad sandwiches, potato salad and cole slaw, so you can check back to see how I decide to make them. Until then, enjoy your evening and enjoy your meal!


Leave a comment

Posted by on August 2, 2012 in Cooking, Dinner, Grilling, Poultry


Tags:

Sizzling Steak Fajitas

I had picked up a skirt steak this week and wanted an easy dinner for tonight, and you can’t get much easier than this fajita recipe. We love fajitas in our house and make them with all kinds of filling, like chicken (most often) shrimp, an occasionally beef. This recipe, from America’s Test Kitchen, is perfect for a weeknight meal since it only takes about 30 minutes to prepare and cook everything and you can use ingredients that a lot of people already have in the house.

Steak Fajitas

1 1 1/2 pound flank steak

Salt and pepper

2 tablespoons vegetable oil

2 tablespoons fresh lime juice

2 peppers (red, yellow or green, your choice) stemmed, seeded and sliced very thin

1 onion, sliced very thin

2 tablespoons water

1 teaspoon chili powder

1 teaspoon hot sauce

1/2 teaspoon cumin

Flour tortillas

Pat the steak dry with paper towels, then season with salt and pepper. Heat 1 tablespoon of the oil in a large skillet over medium-high heat until just smoking. Brown the steak on the first side, about 5 minutes.

Flip the steak over and continue to cook to the desired doneness, 3 to 6 minutes. Transfer the steak to a large plate and drizzle with the lime juice. Tent the steak with foil and let it rest for about 10 minutes.

Add the remaining 1 tablespoon of oil to the skillet and return it to medium-high heat until shimmering. Add the peppers, onion, water, chili powder, hot sauce, cumin, and 1/2 teaspoon of salt. Cook, scraping up any browned bits, until the onion is softened, about 5 minutes. Transfer everything to a serving bowl.

Stack the tortillas on a plate and cover with plastic wrap. Heat the tortillas in a microwave until soft and hot, about 2 minutes (You can also heat the tortillas individually in a hot skillet, flipping each one after about 20 seconds to heat the second side).

Slice the steak very thinly across the grain. Arrange the beef on a platter and serve with the warm tortillas, vegetables and any sides you like and let everyone make their own fajitas as they like.

I usually serve fajitas with some diced tomato or homemade salsa, guacamole, sour cream, shredded cheese and shredded lettuce. This way, everyone can add what they like best onto their own fajitas. Sometimes I also serve this with Mexican rice or rice and beans.

That’s dinner for tonight. I have a whole chicken to make tomorrow but I am not quite sure what recipe I want to use yet. I think it really depends on the weather and if it’s too humid to use the oven. I may opt to use the grill tomorrow night instead. We’ll have to see how it goes. Until then, enjoy your evening and enjoy your meal!

 
Leave a comment

Posted by on August 1, 2012 in Beef, Cooking, Dinner


Tags: , , , ,

Preparing Pulled Pork Indoors

I love pulled pork. There’s nothing quite like the taste of  pork slow cooked and then covered in a barbecue sauce. I have made pulled pork before and posted the recipe here, but that recipe is for outdoor cooking. The weather here has been so hit and miss this week with rain that I decided to make one completely indoors and without the slow cooker being involved. This recipe, from America’s Test Kitchen, makes a great rub for the pork so you get great barks and the sauce is perfect.

Indoor Pulled Pork with Sweet and Tangy Barbecue Sauce

Pork

1 cup plus 2 teaspoons table salt

1/2 cup plus two tablespoons sugar

3 tablespoons plus 2 teaspoons liquid smoke

1 boneless pork butt (about 5 pounds), cut in half horizontally

1/4 cup yellow mustard

2 tablespoons ground black pepper

2 tablespoons smoked paprika

1 teaspoon cayenne pepper

Barbecue Sauce

1 1/2 cups ketchup

1/4 cup light or mild molasses

2 tablespoons Worcestershire sauce

1 tablespoon hot sauce

1/2 teaspoon salt

1/2 teaspoon ground black pepper

For the pork: Dissolve 1 cup of salt, 1/2 cup of sugar, and 3 tablespoons of liquid smoke in 4 quarts of cold water in a large container. Submerge the pork in the brine, cover with plastic wrap, and refrigerate for 2 hours.

While the pork brines, combine mustard and the remaining 2 teaspoons of liquid smoke in a small bowl; set aside. Combine the black pepper, paprika, the remaining 2 tablespoons sugar, remaining two teaspoons of salt and cayenne pepper in a second small bowl; set aside. Adjust an oven rack to the lower-middle position and heat the oven to 325 degrees.

Remove the pork from the brine and dry thoroughly with paper towels. Rub the mustard mixture over the entire surface of each piece of pork. Sprinkle the entire surface of each piece with the spice mixture. Place the pork on a wire rack set inside a foil lined rimmed baking sheet. Place a piece of parchment paper over the pork, then cover with a sheet of aluminum foil, sealing the edges to prevent moisture from escaping. Roast the pork for 3 hours.

Remove the pork from the oven; remove and discard the foil and parchment paper. Carefully pour off the liquid in the bottom of the baking sheet into a fat separator and reserve it for the sauce. Return the pork to the oven and cook, uncovered, until well browned, tender and the internal temperature registers 200 degrees on an instant-read thermometer, about 1 1/2 hours. Transfer the pork to a serving dish, tent loosely with foil, and allow it to rest for 20 minutes.

While the pork rests, pour 1/2 cup of the defatted cooking liquid from the fat separator into a medium bowl. Whisk in all the sauce ingredients.

Using 2 forks, shred the pork into bite size pieces. Toss with 1 cup of the sauce and season with salt and pepper. Serve, passing the remaining sauce separately.

If you can’t find smoked paprika, sweet paprika will work just fine here. Using the parchment paper will help prevent the mustard from eating holes in the foil (it is acidic). I served the pork on plain hamburger buns with some pickle chips and sliced red onion. You could always use any store-bought barbecue sauce for the sauce if you prefer or don’t want to go through the work of making your own. The leftovers, of course are great for sandwiches the next day or even for pulled pork nachos (which are very tasty, by the way).

There are several side dishes you could do with this meal. Cole slaw, of course, is a great addition. You could also add some baked beans to the side as well. I came across a recipe this morning by Guy Fieri for mashed root vegetables that Michelle and I both liked, so I went with that one.

Creamy Mashed Root Vegetables

5 cups milk

2 1/2 cups heavy cream

2 tablespoons salt, plus more for seasoning

4 sprigs fresh thyme

2 bay leaves

2 pounds turnips

2 pounds Yukon gold potatoes

3 tablespoons butter, cut into cubes

Freshly ground black pepper

Set a large pot over high heat and add the milk, cream, salt, thyme and bay leaves. Peel and cut the turnips into 1-inch chunks. Add the turnips to the pot and cover partially with a lid. Bring to a boil and then reduce the heat to a simmer and cook the turnips for 30 minutes.

Cut the potatoes into 1-inch chunks. After the turnips have cooked for 30 minutes (turnips take a lot longer to cook than potatoes), add the potatoes and continue to simmer until all the vegetables are very tender, about 20 more minutes. Discard the bay leaves and thyme. Drain the potatoes and turnips, reserving 2 cups of cooking liquid, and then mash. Add the cooking liquid and the butter. Mix well and season with salt and pepper.

You can play with this recipe a bit and add or subtract things as you wish. You could use other root vegetables, like carrots, parsnips or sweet potatoes, instead of or with the turnips or potatoes. I like the idea of cooking with the milk and cream to add some texture to the vegetables and they mix really well when you are mashing.

Some good eating for today, and I did get a few things to make for this week, like some chicken (a whole one and some boneless breasts), a skirt steak (it was a really good sale on these this week) and some ground beef, so we’ll see what I make this week. Sean starts his cooking class this week so I think he’ll be helping in the kitchen with some things, so we’ll see what we can come up with. Check back to see what we cook. Enjoy the rest of your day and enjoy your meal!

 
11 Comments

Posted by on July 29, 2012 in Cooking, Dinner, Pork, Potatoes, Sauce, Vegetables


Tags: , , ,

Sock It To Me With Sockeye Salmon!

I have been eyeing up the salmon at Adams Farms for a couple of weeks now. It has looked great and this week, the price was finally low enough where I decided to get some to have for dinner this weekend. Now, Michelle is not a big fan of salmon, but what she doesn’t really care for is the Atlantic salmon. This salmon is typically farm raised and can have a distinct, fishy flavor. Wild Pacific salmon, like sockeye salmon, has a completely different flavor to it, It’s a deeper red, more delicate and doesn’t taste fishy at all. The catch, of course, is that wild salmon tends to be very expensive. It’s most abundant in the spring and summer, when the price might be lower. I got mine for $11.99 a pound. Off season, it typically approached $20.00 a pound. The great thing about wild salmon is that you practically have to do nothing to it. This recipe is fast and simple, with next to nothing included but the salmon.

Pan-Seared Wild Salmon

1-2 pounds of wild salmon, cut into fillets (about 6 ounces each is good)

Salt and pepper

1 tablespoon vegetable oil

Lemon or lime wedges, for serving

Pat the salmon dry with paper towels, then season with salt and pepper. Heat the oil in a large nonstick skillet over medium-high heat until just smoking. Gently lay the salmon skin side up in the skillet and cook until well browned, about 5 minutes.

Gently flip the fish skin-side down and continue to cook until all but the very center of the fish has turned from translucent to opaque, about 3 minutes. Serve with lemon or lime wedges.

A couple of notes about the fish. First, with salmon, you need to check for pin bones in the fish before you cook it. Typically, in most stores, the pin bones have already been removed for you, but it never hurts to check again to make sure they are all gone. Just run your fingers gently over the surface of the flesh. If you feel any bumps, there is a bone there that you should pull out. A pair of pliers will do the trick nicely. Second, a nonstick skillet when cooking salmon is a godsend. It will help you cook the fish all the way through without drying the fish out and leaving half the fish stuck to the pan.

I made a simple, quick sauce to put over the fish. This sauce will work for anything really –  fish, chicken, rice, pasta, vegetables – you name it. It’s really just a simple vinaigrette with some herbs added to it.

Simple Sauce

4 tablespoons extra virgin olive oil or butter

1 tablespoon minced onion

2 tablespoons lemon juice

Salt and pepper

Put the oil or butter in a small saucepan over medium heat. When the oil is warm or the butter is melted, add the onion and cook, stirring occasionally, until it softens (turn the heat down if the onion starts to color), 1 to 2 minutes.

Stir in two tablespoons of water and the lemon juice and sprinkle with some salt and pepper; maintain the heat so it bubbles gently for a minute or two. Taste, adjust the seasoning, and serve.

There are a lot of different ways you can go with this. Instead of using onion, try garlic, shallot or scallion. Add a couple of tablespoons of fresh herbs like basil, cilantro, oregano or mint. Add some jalapeno or a dried chile for some heat. You can pretty much do whatever you want with this. it also makes a great dipping sauce for some crunchy bread. I served the whole meal with some sweet potato, a tomato cucumber salad and some crunchy bread I got at the farmer’s market today.

That’s it for today. Tomorrow I plan to make some pulled pork indoors, so I’ll be posting the recipe for that one. It looks pretty good. Check back and see if you like it. Until then, enjoy your evening and enjoy your meal!

 
Leave a comment

Posted by on July 28, 2012 in Cooking, Dinner, Sauce, Seafood


Tags: , , , ,

A Wonderful Weekend Meal of Spaghetti and Mussels

I had been looking at the fresh mussels in the market the last several weeks I have gone there but I didn’t buy any because it would have been too many for just Michelle and myself. I decided to break down and bought some yesterday to have for dinner and bot am I glad I did. There were so good, and this recipe is just a perfect way to make them. Make sure you have some good, crunchy bread around to help soak up some of the delicious broth that you get from the meal.

Spaghetti and Mussels with Tomato and Basil

Salt, to taste

6 ounces spaghetti (I used fettuccine, that’s what we had on hand, but anything you like will do)

2 tablespoons olive oil

1 large shallot, minced

1/8 to 1/4 teaspoon red pepper flakes

1 pound mussels

1/3 cup dry white wine

1 teaspoon grated lemon zest

3/4 pound cherry tomatoes, halved

1/2 cup slivered fresh basil

1 tablespoon extra virgin olive oil

Freshly ground black pepper, to taste

Bring a large pot three-fourths full of salted water to a boil over high heat. Add the pasta, stir well and cook until al dente, about 11 minutes.

Meanwhile, in a large, heavy fry pan over medium-high heat, warm the olive oil. Add the shallot and red pepper flakes and saute until the shallot is almost tender, about 2 minutes. Add the mussels, wine and lemon zest. Cover the pan and cook until the mussel shells begin to open, about 4 minutes. Add the tomatoes and cook, stirring frequently, until they start to soften, about 2 minutes. Discard any mussels that do not open.

Drain the pasta and transfer it to a warmed large, shallow bowl. Pour the mussels and sauce over the pasta. Add the basil and the extra-virgin olive oil and toss to coat the pasta. Season with salt and black pepper and serve immediately.

Just a couple of quick tips regarding the mussels. If you have never purchased mussels before, you want to look shells that are tightly closed or close when they are tapped. Avoid any cracked or broken shells or any that are just sitting in a puddle of water. Make sure they smell clean. If they don’t, you don’t want them at all. You so need to scrub them before cooking, and you may even need to de-beard them. All that is is a little weedy piece sticking out between the shells. You can give them a quick tug out or use a paring knife and cut it off. Very few of those I bought had a beard. Expect a few not to open when you cook them. It’s perfectly okay, it happens in every batch, but if they don’t open, don’t eat them. You don’t need the stomach problems you’ll have later on if you do eat them. I served the meal with a small, simple salad with some balsamic vinaigrette.

I also had a small batch of ground beef so I decided to make a few meatballs to have around since Sean is coming home and loves them with his pasta. I use a very simple recipe from America’s Test Kitchen and they come out great.

Meatballs

2 slices of white bread (use good white bread for this)

1/3 cup buttermilk

3/4 pound ground beef

1/4 pound ground  pork

1/4 cup grated Parmesan cheese

2 tablespoons minced fresh parsley

1 large egg yolk

1 garlic clove, minced

Salt and pepper

Remove and discard the crusts from the bread, then tear the bread into small pieces. Mash the bread pieces and buttermilk to a smooth paste in a large bowl, using a fork.

Add the beef, pork, Parmesan, parsley, yolk, garlic, 3/4 teaspoon of salt, and 1/8 teaspoon of pepper to the mashed bread. Stir the mixture gently until combined and uniform. Gently form the mixture into 1-inch round meatballs ( I got about 20 out of the mix)

Heat the oven to 350 degrees. Place the meatballs on a wire rack in a cookie sheet or roasting pan. Cook for approximately 10 to 12 minutes or until well browned. Remove them from the oven and either place in tomato sauce or brown gravy and serve.

It’s very easy and simple and tastes quite good. The recipe calls for a mix of beef and pork, but I only used beef this time and they came out fine. Baking them on the wire rack helps keep them from sitting in any fat and they brown nicely all over.

That’s it for today. I got a number of things at the market last week, a lot of chicken, so we’ll see what I can come up with for the week. Until then, enjoy this beautiful day and enjoy your meal!


1 Comment

Posted by on July 22, 2012 in Beef, Cooking, Dinner, Pasta, Seafood


Tags: , ,

Fast Fish Tacos and Salsa

Yikes, it has been unbelievably hot and humid here in New York. Every day it’s muggy and sticky and even thunderstorms don’t seem to cool it off. It certainly doesn’t make me feel like cooking at any time – morning, afternoon or evening. I also have difficulty breathing when it’s this humid, so it really limits what I can do when it’s like this (an after effect of my illness in 2009. You can see my other blog if you’re interested in more facts). The fact is, we have to eat something. There’s only so many nights you can get away with making sandwiches and even grilling can be too much in this weather. I decided to make a meal tonight that take almost no time at all to cook. You’ll actually spend more time preparing the sides than you will the main course. I have made fish tacos before, but this is a fast version of fish tacos from Williams-Sonoma.

Fast Fish Tacos

  • 1 pound cod or other mild white-fleshed fish
      fillets
  • 1/4 teaspoon ground cumin
  • 1/4 teaspoon dried oregano
  • 1/2 teaspoon salt
  • 1 tablespoon olive oil
  • Juice from 1 lime
  • 12 corn tortillas
  • 2 cups finely shredded green cabbage
  • 1 cup fresh salsa
  • Sour cream
  • 2 tablespoons coarsely chopped fresh cilantro or fresh parsley

Directions:

Season the fish
Split the fillets lengthwise along the seam. Place the fish on a plate. In a small bowl, combine the cumin, oregano and salt. Sprinkle over both sides of the fish. Drizzle with the olive oil and lime juice.

Heat the tortillas
Preheat a cast-iron or other heavy fry pan over medium-low heat. On another burner, preheat a stovetop grill pan over medium-low heat. One at a time, warm the tortillas in the fry pan until flexible. Stack them on a plate and cover with a clean kitchen towel.

Cook the fish and assemble the tacos
Increase the heat under the grill pan to medium-high. When the pan is hot, add the fish and cook until golden, about 3 minutes. Turn and cook until golden around the edges, 1 to 2 minutes more, depending on type and thickness. Transfer the fish to a plate and cut into bite-size pieces.

Place an equal amount of the fish on each warm tortilla and top with shredded cabbage, a spoonful of salsa and a drizzle of sour cream. Sprinkle with cilantro or parsley and serve.

You could use any white fish for this recipe. I used cod because it was on sale this week, but tilapia or flounder would work just as well. I served this with sour cream, guacamole, salsa and some shredded lettuce instead of cabbage. You could also serve this with some of the black beans and rice I made last week.
I made the salsa I used myself and it is also a quick and easy recipe. The tomatoes I have purchased from Adams Farms this year have been really good so I have been using them a lot lately in many different dishes. This salsa is very easy to make and it tastes great. It will work well as a dip for chips or a topping for tacos, quesadillas or even burgers.
Tomato Salsa
1 1/2 pounds firm, ripe tomatoes, diced
1 jalapeno pepper, seeded and minced
1/2 cup minced red onion
1 small clove garlic, minced
1/4 cup chopped fresh cilantro leaves
1/2 teaspoon salt
Fresh ground black pepper
Juice of 1 lime
Granulated sugar, to taste
Set a large colander in a large bowl. Place the tomatoes in the colander and let them drain for 30 minutes. As the tomatoes drain, layer the jalapeno, onion, garlic and cilantro on top. Shake the colander to drain off the excess tomato juice. Discard the juice and wipe out the bowl.
Transfer all the contents of the colander to the now empty bowl. Add the salt, pepper and lime juice; toss to combine. Add the sugar to taste and serve.
You could make some substitutions here if you wanted. If you don’t care for cilantro (and many don’t) you could use fresh parsley instead. I have also omitted the jalapeno in the past and it still tastes great, so use it (or more of it) if that’s what you like. I have also used shallot before instead of red onion and it tastes just as good. You don’t get the bite that you often get with a red onion, but you get good flavor anyway.
That’s it for cooking for tonight. I had a bunch of bananas to use up with all this heat and got lots of ideas from people about different things to make, so I think tomorrow I will post some banana recipes that I really like. Check back and see what’s here. Until then, enjoy the rest of your evening, stay cool and enjoy your meal!
 
8 Comments

Posted by on July 17, 2012 in Cooking, Dinner, Seafood, Side Dishes


Tags: , ,

Why Are You Roasting Turkey Today? Because It Tastes Good, That’s Why!

I do seem to pick odd times to make turkey. I think a lot of people think of it as a Fall meal, but we love turkey in our house and it’s great anytime. I made a turkey breast a few weeks ago, and I have found them on sale recently, so I haven’t been able to resist buying them. This recipe is another roasting recipe, though you could probably do this one on the grill instead if you wanted to. This is a great one pot meal with the turkey, potatoes and vegetables all in one pan.

Roast Turkey Breast With Glazed Vegetables

2 tablespoons extra virgin olive oil

1 tablespoon honey

1 pound sweet potatoes, halved or quartered if large

1 pound small parsnips, peeled and halved

1 bulb fennel, thinly sliced, plus 2 tablespoons chopped fronds

1 large red onion, cut into 8 wedges

1/2 cup dried apricots

2 to 3 springs rosemary, plus 1/2 teaspoon chopped rosemary leaves

Salt and freshly ground black pepper

1 small clove garlic, minced

Grated zest and juice of 1/2 lemon

1 skin-on, bone in turkey breast half (3 to 4 pounds)

Preheat the oven to 375 degrees. Whisk 1 tablespoon of the olive oil, the honey and 2 tablespoons of water in a bowl. Put the potatoes, parsnips, fennel slices, onion, dried apricots and rosemary sprigs in a roasting pan. Add 1/2 a teaspoon each of salt and pepper, drizzle with the honey mixture and toss. Roast until the vegetables are soft, about 30 minutes, stirring once.

Meanwhile, mix the remaining 1 tablespoon of olive oil, the garlic, lemon zest and chopped rosemary in a small bowl. Rub the herb mixture under and over the turkey skin. Season with salt and pepper and bring the meat to room temperature.

Place the turkey on top of the vegetables in the pan; roast until the skin browns and a thermometer inserted into the thickest part registers 165 degrees, 1 hour to 1 hour, 15 minutes (Cover with foil if the skin gets too dark.) Transfer the turkey to a cutting board and let rest for 20 minutes.

Toss the roasted vegetables with lemon juice and the fennel fronds. Slice the turkey and serve with the vegetables.

A few quick notes on what I did when cooking this recipe. The turkey breast I had was only 1 1/2 pounds, so I cut the recipe in half. Also, I replaced the rosemary with parsley (Michelle doesn’t care for rosemary) and I didn’t use the fennel at all (too expensive in the store and we aren’t big fans of it anyway). The remainder of the recipe stayed the same.

I love the way the turkey came out and the fact that the whole meal was done in one pan made for easy clean up. Nothing is better than nice and simple, especially on a warm day.

A quick and easy meal and recipe for today. I still have some chicken to use for tomorrow, I just haven’t decided how to use it yet. We’ll have to see what I can come up with. Enjoy the rest of your day and enjoy your meal!

 
Leave a comment

Posted by on July 12, 2012 in Cooking, Dinner, Poultry, Turkey, Vegetables


Tags: , , , ,

 
National Day Calendar

Fun, unusual and forgotten designations on our calendar.

Jennifer Probst

a little bit naughty a little bit nice

Laissez Faire

Letting Life Lead

simple cooking recipes

a blog to share with you the best