RSS

Category Archives: Potatoes

Butterflied Leg of Lamb and Braised Potatoes

So last night for dinner I made something I typically do not make during the week. We had got a leg of lamb before Easter when the prices were quite reasonable and I decided to make it last night for dinner. I wanted to try something a little different with it as I have made it a couple of different ways before and we felt like trying something new. I found this recipe from Cook’s Illustrated and it sounded like something that was pretty easy to do and like it would be worth giving a try. The only part of it I was a little reluctant with was actually butterflying the leg of lamb, which I had never really done before. I think it turned out pretty well though all things considered.

Roast Butterflied Leg of Lamb with Coriander, Cumin, and Mustard Seeds

1 (6 to 8 pound) butterflied leg of lamb
Kosher salt
1/3 cup vegetable oil
3 shallots, sliced thin
4 garlic cloves, peeled and smashed
1(1 inch) piece ginger, sliced into half-inch thick rounds and smashed
1 tablespoon coriander seeds
1 tablespoon cumin seeds
1 tablespoon mustard seeds
3 bay leaves
2 (2 inch) strips lemon zest
1/3 cup chopped fresh mint
1/3 cup chopped fresh cilantro
1 shallot, minced
2 tablespoons lemon juice
Salt and pepper, to taste

For the lamb, place the lamb on a cutting board with the fat Facing down. Using a sharp knife, trim any pockets of fat and connective tissue from the underside of the lamb. Flip the lamb over, and trim the fat cap so it is between 1/8 and 1/4 inch thick. Pound the roast to an even 1 inch thickness. Cut slits, spaced a half-inch apart, in the fat In a crosshatch pattern, being careful to cut down but not into the meat. Rub 2 tablespoons of salt over the entire roast and into the slits. Let stand, uncovered, at room temperature for one hour.

Meanwhile, adjust the oven racks 4 to 5 inches from the broiler element and to the lower middle position and heat the oven to 250°. Stir together the oil, shallots, garlic, ginger, coriander seeds, cumin seeds, mustard seeds, bay leaves, and lemon zest on a rimmed baking sheet and bake on the lower middle rack until the spices are softened and fragrant and the shallots and garlic turn golden, about one hour. Remove the sheet from the oven and discard the bay leaves.

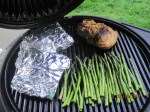
Thoroughly pat the lamb dry with paper towels and transfer, fat side up, to the sheet directly on top of the spices. Roast on the lower middle rack until the lamb registers 120°, approximately 30 to 40 minutes. Remove the sheet from the oven and heat the broiler. Broil the lamb on the upper rack until the surface is well browned and charred in spots and the lamb registers 125°, approximately 3 to 8 minutes for medium rare. Remove the sheet from the oven and, using two pairs of tongs, transfer the lamb to a carving board. Some spices will cling to the bottom of the roast. Tent loosely with aluminum foil and let rest for twenty minutes.

Meanwhile, carefully pour pan juices through a fine mesh strainer into a medium bowl, pressing on the solids to extract as much liquid as possible; discard the solids. Stir in the mint, cilantro, shallot and lemon juice. Add any other accumulated lamb juices to the sauce and season with salt and pepper to taste.

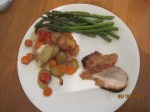
With the long side facing you, sliced lamb with the grain into three equal pieces. Turn each piece and slice across the grain into 1/4 inch thick slices. Serve with the sauce.

Admittedly, I looked at a couple of videos online to see what the best way would be to butterflied leg of lamb. It wasn’t as difficult as I thought it would be and the bones actually remove quite easily. You can then trim up the roast by eliminating any excess fat that you find. If you like to meet more well done, you could roast the lamb at a higher temperature does start with and then simply broil for the last couple of minutes to get the nice crust on the outside. I thought that the lamb itself came out quite nicely and you get a very good flavor from all the spices that have bloomed in the oven before you added the lamb.

To go along with the lamb, I wanted to make some potatoes but I didn’t want to just serve the basic roast potatoes were boiled potatoes. Luckily, my new issue of Cook’s Illustrated happened to arrive yesterday morning, and they even had a new recipe in there for braised potatoes.

Braised Red Potatoes with Lemon and Chives

1 1/2 pounds small red potatoes, unpeeled, halved
2 cups water
3 tablespoons butter
3 garlic cloves, peeled
3 sprigs fresh thyme
3/4 teaspoon salt
1 teaspoon lemon juice
1/4 teaspoon pepper
2 tablespoons minced fresh chives

Arrange the potatoes in a single layer, cut side down, in a large nonstick skillet. Add the water, butter, garlic, thyme and salt and bring to a simmer over medium high heat. Reduce the heat to medium, cover, and simmer until the potatoes are just tender, about fifteen minutes.

Remove the lid and use a slotted spoon to transfer the garlic to a cutting board; discard the thyme sprigs. Increase the heat to medium-high and vigorously simmer, swirling the pan occasionally, until the water evaporates and the butter starts to sizzle, about 15 to 20 minutes. When it is cool enough to handle, mince the garlic to a paste. Transferred the paste to a bowl and stir in the lemon juice and the pepper.

Continue to cook the potatoes, swirling the pan frequently, until the butter browns and the cut sides of the potatoes turn spotty brown, about 4 to 6 minutes longer. Off they heat add the garlic mixture and that chives and tossed to thoroughly coat.

I thought the potatoes turned out great. You do have to keep a close eye on them once the water evaporates to make sure that they do not burn or stick to the pan. Using a nonstick pan for this is really a pretty good idea. They also have a variation where you can substitute 2 teaspoons of Dijon mustard for the lemon juice and used tarragon instead of chives if you want a little bit of a different flavor. I think in banks a pretty good side – and a nice variation for potatoes, giving you that roasted feel without having to roast them.

That’s all I have for today as far as recipe ideas. Tonight I think we are having Sloppy Joe’s for dinner tonight. I have posted a recipe for this before if they want to check it out and see what it’s like. I did add something new to it this time with a new recipe for coleslaw that I tried. I may post that recipe tomorrow along with one Michelle used for brownies that she made this weekend which everyone seemed to love. Check back tomorrow and see what we have. Until then, enjoy this beautiful spring day and enjoy your meal!

 
Leave a comment

Posted by on April 9, 2013 in Cooking, Dinner, Lamb, Potatoes


Tags: , , ,

Fish Sticks and Sweet Potato Fries

I know it’s been a while since I’ve done a post on this blog, and my other blog as well. I apologize for the lapse in time but life has a way of getting in the way more often than I would like some times and had just haven’t had the time and energy to keep up with the blogs is much as I would like to. Anyway, I am going to make a concerted effort to try to do better as far as posting recipes on here and other posts on by personal blog if you follow that one as well. For now I’ll try to go back and cover some recipes that I’ve done in the past few weeks that I haven’t had a chance to write about on here. We’ll start off with a nice easy recipe that I tried not that long ago that I picked up from Cooks Country. It’s a recipe for fish sticks with tartar sauce.

Fish Sticks with Tartar Sauce

4 slices of white bread, torn into large pieces
16 Saltine crackers
1/2 cup all-purpose flour
2 large eggs
1 cup mayonnaise
2 pounds skinless cod or other thick white fish, cut into 1 inch thick strips
1/4 cup finely chopped dill pickles, plus 1 tablespoon pickle juice
1 tablespoon capers, minced
1 cup vegetable oil

Adjust an oven rack to the middle position and heat the oven to 200°. Pulse the bread and the saltines in a food processor until they are fine crumbs; transfer the mixture to a shallow dish Place the flour in a second shallow dish. Beat the eggs with 1/4 cup of the mayonnaise in a third shallow dish.

Pat the fish dry with paper towels and season well with salt and pepper. Taking one piece at a time, coat the fish strips lightly with the flour, then into the egg mixture, and then dredge in the crumbs, pressing on both sides to make sure the crumbs adhere properly. Transfer the breaded fish to a clean plate. Combine the remaining mayonnaise, pickles, pickle juice, and capers in a small bowl and set aside.

Heat 1/2 cup of the oil in a large nonstick skillet over medium heat until just smoking. Fry half of the fish strips until a deep golden brown and crisp, about two minutes per side. Drain the fish on a paper towel lined plate and transfer them to the oven to keep them warm. Discard the oil, wipe out the skillet, and repeat the process with the remaining oil and fish. Serve with that tartar sauce on the side.

I have to admit I was a little skeptical whether or not Sean and Michelle would like this particular recipe. Fish sticks are not always the most popular thing in any home. I think too many of us are used to growing up with what would come out of the box in the freezer and the taste that went along with these particular fish sticks. I can remember most of the time that they weren’t that great, but this recipe using the fresh fish and the saltines in the breadcrumbs really seem to come out nice crunchy and have great flavor. If you are not a big fan of tartar sauce, you can always eliminate that or make a simple cocktail sauce with some ketchup and with horseradish if that is something you prefer.

The next recipe is also quite a simple one. I got this one from the March issue of Bon Appétit magazine. They have a bunch of recipes in there that are great for family dinners, including the one I posted a while back for a shrimp fried rice. This one in particular is for sweet potato wedges with lime mayonnaise, although I did not make the lime mayonnaise as it didn’t seem like something the rest of the family would go for.

Sweet Potato Wedges with Lime Mayo

3 sweet potatoes, peeled, each cut lengthwise into eight wedges
2 tablespoons vegetable oil
Kosher salt and freshly ground pepper
1/3 cup mayonnaise
1/4 teaspoon finely grated lime zest
2 teaspoons fresh lime juice
Chopped fresh cilantro (for serving)

Preheat the oven to 450°. Toss the sweet potatoes and oil on a foil lined large rimmed baking sheet; season the potatoes with salt and pepper to taste. Roast the potatoes, turning once, until golden brown and crisp, approximately 25 to 30 minutes.

Meanwhile, whisk the mayonnaise, lime zest, and juice in a small bowl. Season the fries with salt, top with those cilantro, and serve with the lime Mayo for dipping.

I think the fries tasted just fine without the lime mayo, and we used ketchup as a replacement without any problem at all. All you need to round out this meal is a fresh vegetable to complete the meal, such as broccoli, asparagus, or some roasted carrots. You could even just go with a nice side salad and I think everything would be fine.

That’s the recipe for today. I am planning on making a lamb tonight. I should be able to get the recipe up for that either tonight or tomorrow. I have posted lamb recipes before, but I think I’m going to try something new as I have gotten a couple of new recipes lately for a few different things. I also have some other recipes that we have done in the last few weeks that I think would be good to post. Unfortunately I do not have pictures of a lot of the things I have made lately, but I hope to get back into that tonight with the lamb and keep going from there. Thanks for stopping by and checking out the blog and sticking with it. I hope you enjoy the recipes and get to try out some things on your own. If you ever have any recipes you would like to share, please feel free to leave a note in the comments section below with your email address and I would be happy to get back to you about posting the recipe or even doing a guest blog post on your own if you would like to do that. Thanks again, enjoy the rest of your day, and enjoy your meal!

 
Leave a comment

Posted by on April 8, 2013 in Cooking, Dinner, Potatoes, Seafood


Tags: , , , ,

Cooking a Valentine’s Day Meal at Home – NYTimes.com

Cooking a Valentine’s Day Meal at Home – NYTimes.com.

With Valentine’s Day coming next week, many people are looking to make a nice romantic meal at home. The New York Times put out this quick and easy menu as a suggestion of a nice steak, potatoes, salad and a one ingredient chocolate mousse. Check it out and see if it is something you might like to try!


Tags: , , ,

Some Thanksgiving Side Dishes

Okay, so Sunday we did the turkey and stuffing, yesterday we did the soup, today we’ll do some side dishes. I wanted to choose some classic sides but maybe try something a little different with them, and I ended up choosing both of these recipes from Cook’s Country. The first takes the traditional sweet potato casserole and makes it a little differently. I am not a fan of marshmallow and didn’t want to make something that was going to use them and this recipe seems just perfect and it is not hard to make.

Sweet Potato Casserole with Bacon-Brown Sugar Topping

3 pounds sweet potatoes, peeled and cut into 1 1/2-inch pieces

1/4 cup packed brown sugar

5 slices bacon

4 tablespoons butter, cut into 6 pieces

1/4 cup heavy cream

1/2 teaspoon grated orange zest plus 2 tablespoons juice

1 teaspoon salt

1/2 teaspoon ground cinnamon

1/4 teaspoon pepper

1/8 teaspoon cayenne pepper

Adjust an oven rack to the middle position and heat the oven to 400 degrees. Lay two 24 by 12-inch sheets of heavy-duty aluminum foil perpendicular to each other inside a rimmed baking sheet. Place the sweet potatoes in the center of the foil and sprinkle with 1 tablespoon of sugar. Fold opposite sides of the foil toward each other and crimp edges to seal tightly. Transfer the baking sheet to the oven and bake until the sweet potatoes are tender, about 60 minutes. Remove the baking sheet from the oven and heat the broiler.

Cook the bacon in a large skillet over medium heat until crispy, about 5 to 7 minutes. Transfer the bacon to a paper towel-lined plate. When the bacon is cool enough to handle, crumble it into bite-size pieces. Pulse the bacon and the remaining 3 tablespoons of sugar in a food processor until coarsely ground, about 10 pulses; set aside.

Carefully open 1 end of the foil pouch, taking care to avoid escaping steam, and pout the potatoes and accumulated liquid into the food processor. Add the butter, cream, orange zest and juice, salt cinnamon, pepper and cayenne and process until smooth, 30 to 60 seconds, scraping down the bowl as needed.

Transfer the potato puree to a 2-quart souffle dish and sprinkle evenly with the reserved bacon-sugar mixture. Broil the sweet potatoes until the topping is lightly browned and bubbling, about 2 to 4 minutes.

You can make part of this ahead of time to save you time on Thanksgiving. The processed potatoes can be refrigerated without the topping for up to 2 days. To serve it, cover the dish with aluminum foil and bake on the middle rack of a 400 degree oven until hot throughout, about 30 to 40 minutes. Remove the foil, add the bacon-sugar topping and broil as directed.

I think it is going to turn out quite nicely and I’ll be sure to take some pictures of it so you can see it on Thursday.

My second recipe frees up some stove or oven space for you by making good use of your slow cooker. it is a version of the classic green bean casserole, but made using the slow cooker to make things a little easier for you along the way.

Slow-Cooker Green Bean Casserole

1 cup canned fried onions

3 tablespoons butter

10 ounces cremini or white mushrooms, cut into 1/4-inch-thick slices

Salt and pepper

4 garlic cloves, minced

1/2 teaspoon dried thyme

1/4 cup all-purpose flour

1 1/4 cups chicken broth

1 1/4 cups heavy cream

2 pounds green beans, trimmed and cut into 1-inch pieces

2 slices white bread, torn into pieces

2 tablespoons butter, melted

2 cups canned fried onions

To make the sauce, pulse the canned onions in a food processor until finely ground; set aside. Melt the butter in a large skillet over medium heat. Add mushrooms, 3/4 teaspoon salt and 1/2 teaspoon pepper and cook until the mushrooms release their liquid, about 5 minutes. Increase the heat to medium-high and cook until the liquid is evaporated, about 5 minutes. Stir in the garlic and thyme and cook until fragrant, about 30 seconds. Add the flour and ground onions and cook until golden, about 1 minute. Stir in the broth and the cream and bring to a boil. reduce the heat to medium-low and simmer, stirring occasionally, until the sauce is thick and creamy, about 10 minutes.

Combine the sauce and the green beans in the slow cooker. Cover and cook on low until the beans are tender, 5 to 6 hours.

Meanwhile, pulse the bread and butter in a food processor until coarsely ground. Toast the bread crumbs and onions in a skillet over medium-high heat until golden brown, about 3 to 5 minutes. Top the green beans with bread-crumb mixture and serve.

You can also start making this ahead of time as well to save you some effort on Thanksgiving. The sauce and the topping can be made and refrigerated in separate airtight containers for 2 days. To finish it, microwave the sauce, covered, for 1 minute before proceeding with slow cooking. Crisp the bread-crumb mixture in a skillet before topping and serving.

I like the idea of using the slow cooker, but I also like the not using canned green beans or cream of mushroom soup to make it. Personally, I am not a big fan of canned vegetables and soups. If you like them better, stick with what you like, but I think giving the freshness is worth the little bit of extra time it takes to prep everything.

Okay, so we almost have a complete meal for Thursday. Tomorrow, I am going to talk a little bit about some appetizers and a dessert to round out the meal if you want to check back and see. Until then, enjoy the rest of your day and enjoy your meal!


Tags: , , , , , , , ,

5 Steps to Perfect French Fries | The Feed

5 Steps to Perfect French Fries | The Feed.

Okay, so they may not be the healthiest food in the world, but everyone loves french fries. At least one time in your life you need to try making homemade fries. I can promise you that it is worth the effort you put into it. It may not be something you can do all the time, but trust me, you will like them better than anything you ever bought in a store. Follow these five great tips from Cook’s Country and you will never look at Ore Ida’s the same way again. Check it out!

 
Leave a comment

Posted by on September 22, 2012 in Cooking, Cooking Websites, Potatoes, Side Dishes


Tags: , , ,

Preparing Pulled Pork Indoors

I love pulled pork. There’s nothing quite like the taste of  pork slow cooked and then covered in a barbecue sauce. I have made pulled pork before and posted the recipe here, but that recipe is for outdoor cooking. The weather here has been so hit and miss this week with rain that I decided to make one completely indoors and without the slow cooker being involved. This recipe, from America’s Test Kitchen, makes a great rub for the pork so you get great barks and the sauce is perfect.

Indoor Pulled Pork with Sweet and Tangy Barbecue Sauce

Pork

1 cup plus 2 teaspoons table salt

1/2 cup plus two tablespoons sugar

3 tablespoons plus 2 teaspoons liquid smoke

1 boneless pork butt (about 5 pounds), cut in half horizontally

1/4 cup yellow mustard

2 tablespoons ground black pepper

2 tablespoons smoked paprika

1 teaspoon cayenne pepper

Barbecue Sauce

1 1/2 cups ketchup

1/4 cup light or mild molasses

2 tablespoons Worcestershire sauce

1 tablespoon hot sauce

1/2 teaspoon salt

1/2 teaspoon ground black pepper

For the pork: Dissolve 1 cup of salt, 1/2 cup of sugar, and 3 tablespoons of liquid smoke in 4 quarts of cold water in a large container. Submerge the pork in the brine, cover with plastic wrap, and refrigerate for 2 hours.

While the pork brines, combine mustard and the remaining 2 teaspoons of liquid smoke in a small bowl; set aside. Combine the black pepper, paprika, the remaining 2 tablespoons sugar, remaining two teaspoons of salt and cayenne pepper in a second small bowl; set aside. Adjust an oven rack to the lower-middle position and heat the oven to 325 degrees.

Remove the pork from the brine and dry thoroughly with paper towels. Rub the mustard mixture over the entire surface of each piece of pork. Sprinkle the entire surface of each piece with the spice mixture. Place the pork on a wire rack set inside a foil lined rimmed baking sheet. Place a piece of parchment paper over the pork, then cover with a sheet of aluminum foil, sealing the edges to prevent moisture from escaping. Roast the pork for 3 hours.

Remove the pork from the oven; remove and discard the foil and parchment paper. Carefully pour off the liquid in the bottom of the baking sheet into a fat separator and reserve it for the sauce. Return the pork to the oven and cook, uncovered, until well browned, tender and the internal temperature registers 200 degrees on an instant-read thermometer, about 1 1/2 hours. Transfer the pork to a serving dish, tent loosely with foil, and allow it to rest for 20 minutes.

While the pork rests, pour 1/2 cup of the defatted cooking liquid from the fat separator into a medium bowl. Whisk in all the sauce ingredients.

Using 2 forks, shred the pork into bite size pieces. Toss with 1 cup of the sauce and season with salt and pepper. Serve, passing the remaining sauce separately.

If you can’t find smoked paprika, sweet paprika will work just fine here. Using the parchment paper will help prevent the mustard from eating holes in the foil (it is acidic). I served the pork on plain hamburger buns with some pickle chips and sliced red onion. You could always use any store-bought barbecue sauce for the sauce if you prefer or don’t want to go through the work of making your own. The leftovers, of course are great for sandwiches the next day or even for pulled pork nachos (which are very tasty, by the way).

There are several side dishes you could do with this meal. Cole slaw, of course, is a great addition. You could also add some baked beans to the side as well. I came across a recipe this morning by Guy Fieri for mashed root vegetables that Michelle and I both liked, so I went with that one.

Creamy Mashed Root Vegetables

5 cups milk

2 1/2 cups heavy cream

2 tablespoons salt, plus more for seasoning

4 sprigs fresh thyme

2 bay leaves

2 pounds turnips

2 pounds Yukon gold potatoes

3 tablespoons butter, cut into cubes

Freshly ground black pepper

Set a large pot over high heat and add the milk, cream, salt, thyme and bay leaves. Peel and cut the turnips into 1-inch chunks. Add the turnips to the pot and cover partially with a lid. Bring to a boil and then reduce the heat to a simmer and cook the turnips for 30 minutes.

Cut the potatoes into 1-inch chunks. After the turnips have cooked for 30 minutes (turnips take a lot longer to cook than potatoes), add the potatoes and continue to simmer until all the vegetables are very tender, about 20 more minutes. Discard the bay leaves and thyme. Drain the potatoes and turnips, reserving 2 cups of cooking liquid, and then mash. Add the cooking liquid and the butter. Mix well and season with salt and pepper.

You can play with this recipe a bit and add or subtract things as you wish. You could use other root vegetables, like carrots, parsnips or sweet potatoes, instead of or with the turnips or potatoes. I like the idea of cooking with the milk and cream to add some texture to the vegetables and they mix really well when you are mashing.

Some good eating for today, and I did get a few things to make for this week, like some chicken (a whole one and some boneless breasts), a skirt steak (it was a really good sale on these this week) and some ground beef, so we’ll see what I make this week. Sean starts his cooking class this week so I think he’ll be helping in the kitchen with some things, so we’ll see what we can come up with. Check back to see what we cook. Enjoy the rest of your day and enjoy your meal!

 
11 Comments

Posted by on July 29, 2012 in Cooking, Dinner, Pork, Potatoes, Sauce, Vegetables


Tags: , , ,

It’s a Glorious Rainbow (Trout)

It’s ungodly hot here in New York today. The temperature earlier this afternoon was 99; now it’s down to 94. Luckily, I am not cooking tonight as we are going out to visit some friends for the evening. Instead, I’ll post the recipe for the meal I made on Monday, which was oven-roasted trout with potatoes. It’s a very simple meal with Tuscan roots that only takes a few ingredients and not much effort on your part. It does turn out a very delicious piece of fish with some simple, but tasty potatoes. Use a really good extra-virgin olive oil if you have one for this one; it will make a big difference in the flavor for the fish and the potatoes.

Oven-Roasted Trout with Potatoes

2 fresh rosemary sprigs (I didn’t use these, I used thyme sprigs instead. Michelle hates rosemary, I grow my own thyme and it works out just as well here)

2 garlic cloves, minced

Salt and ground white pepper, to taste

1 1/2 pounds new potatoes, peeled and thinly sliced

4 tablespoons extra-virgin olive oil

2 tablespoons butter, cut into small pieces

4 trout fillets

Preheat the oven to 375 degrees. Set aside 1 rosemary(or thyme) sprig and finely chop the leaves of the other. In a small bowl, combine the chopped rosemary and the garlic. Season generously with salt and white pepper.

Oil a large baking dish. Arrange half of the potato slices in rows on the bottom, slightly overlapping the slices and the rows. Sprinkle evenly with one-third of the garlic mixture, drizzle with 1 1/2 tablespoons of the olive oil and dot with 1 tablespoon of the butter. Layer with the remaining potato slices, then top with one-third of the garlic mixture, 1 1/2 tablespoons of the olive oil and the remaining 1 tablespoon of butter. Cover the dish and bake for 20 minutes. Uncover and continue baking until the potatoes are almost tender, about 20 minutes more.

Remove the dish from the oven and arrange the fish in a single layer on top of the potatoes. Drizzle with the remaining 1 tablespoon of olive oil and sprinkle with the remaining garlic mixture. Lay the rosemary (or thyme) sprig on top. Return to the oven and bake until the fillets are opaque throughout, about 10 minutes. Remove from the oven and let rest for 10 minutes before serving directly from the baking dish.

This recipe, which I got from Williams-Sonoma, was a big hit with the family. I made some sugar snap peas to along as a vegetable to round out the meal. Everyone liked it and said they would gladly east it again, so I’ll have to make sure to keep the recipe around for the summer.

Okay, it’s too hot to do any more today, so I am done. Tomorrow I am planning to make a flank steak with salsa verde, so hopefully it won’t be too hot to do it. Check back tomorrow to find out. Enjoy the rest of your day, try to stay cool, and enjoy your meal!


Leave a comment

Posted by on June 21, 2012 in Cooking, Dinner, Potatoes, Seafood


Tags:

A Quick Chicken Recipe from a “Chopped” Judge

I had planned to grill today, but the weather just isn’t cooperating here in New York. It’s been cloudy and rainy for almost four days now, so there hasn’t been any cooking outside for me. So here I was, stuck with all these chicken pieces and not a thought on how to cook them. I decided to turn to Twitter and see what some famous chefs could come up with for me. America’s Test Kitchen suggested chicken and dumplings or a chicken pot pie, Geoffrey Zakarian suggested a stir fry, but Scott Conant suggested a method that stood out best to me so I decided to go with it, with some slight alteration on my part.

Simple Chicken and Potatoes

4 medium potatoes, scrubbed and cut into wedges

1/2 onion, cut into wedges

1 teaspoon paprika

2-3 pounds chicken parts (legs, breasts, thighs, wings, whatever you have to use)

 Salt and pepper

2 tablespoons olive oil

1 sprig fresh rosemary

1/2 tablespoon fresh thyme (about 2 sprigs)

1/2 teaspoon crushed red pepper flakes

Preheat the oven to 375 degrees. Toss the potatoes and onions with the paprika, salt and pepper and a teaspoon of the olive oil. Heat a large skillet over high heat until it’s very hot (Scott Conant actually said “screaming hot” so make it very hot!). Add the remaining olive oil and heat until smoking. Pat the chicken dry with paper towels and season well with salt and pepper. Add the potatoes, onions and chicken, skin side down to the skillet. Season with thyme, rosemary and red pepper flakes. Sear the chicken until the skin side is well browned, 7 to 8 minutes. Turn the chicken over, stirring the potatoes and onions also, and place the skillet in the oven. Bake the chicken until an instant read thermometer inserted into the thickest piece reads 165 degrees, about 40 minutes. Remove from the oven and serve.

Scott actually suggested leaving the whole thing on the stove, covered and cooking for 45 minutes until crispy but I thought it would turn out better in the oven so I threw it in there and it finished crisping up better and the meat was juicy, so it worked for me. I served it along with some fresh green beans, and that was it.

So a big thank you to Scoot Conant for helping me out today with dinner. I plan to do my week’s shopping tomorrow with Sean’s help, so we’ll see what kind of recipes I can come up with for next week. Check back and see what we come up with. Until then, enjoy your evening and enjoy your meal!


1 Comment

Posted by on May 24, 2012 in Cooking, Dinner, Potatoes, Poultry


Tags: , ,

Grilling some BBQ Ribs and Some Meals This Week, Wow!

I Have gotten way off schedule lately. Michelle has been working a lot of hours, Sean’s school is winding down and I started a new work project that takes a lot of my time, so I haven’t had much time for blogging on either blog lately, but I also have gotten away from our meal plan for the last few weeks. We are going to try to get back to it this week, so hopefully it all works out. In the meantime, while I am not grilling today because we are getting heavy rain here in New York, I did grill yesterday and made some Barbecued Pork Ribs. Now I have made baby back ribs on here before (check here for the recipe), but spare ribs were on sale at the supermarket last week so I got some and made them yesterday and they turned out great. It’s a simple recipe, but they take a long time to cook, which actually gave me a bit of an advantage using the electric grill over charcoal and gas, although maintaining the proper heat levels on the electric grill can get a little tricky. You really have to watch the temperature gauge closely to make sure its working out. Any type of grill will work with this, you just need to keep checking and rotating the ribs. This recipe, from America’s Test Kitchen, is written for a gas grill.

Barbecue Pork Ribs

2 full racks spareribs (2 to 3 pounds each)

1/2 cup Barbecue Spice Rub (This is the same rub I used on the pulled pork a couple of weeks ago, I always make extra to have to use for ribs, burgers, steaks, chicken, etc. You can get the recipe here or I will list it below)

2 cups wood chips, soaked and drained

2 cups barbecue sauce

Massage the ribs all over with the rub and let them stand at room temperature, covered loosely with plastic wrap, for 1 hour. Place the wood chips in a disposable aluminum tray (I actually have a small cast iron smoker box I use) and rest the tray directly on top of the primary burner. Turn all the burners to high, close the lid, and heat the grill until very hot and the chips are smoking, about 15 minutes. Clean and oil the grill. Turn the primary burner down to medium and turn off the other burners.

Position the ribs over the cooler part of the grill and cover. Barbecue until the meat starts to pull away from the bones, 3 to 4 hours, flipping, switching and rotating the ribs every 30 minutes. The temperature inside the grill should remain between 300 and 275 degrees. brush the ribs with barbecue sauce during the final 15 minutes of cooking.

Since I was using the electric grill, I had to pay particular attention the temperature. There really aren’t any cool spots to speak of when using electric since the element covers a lot of the surface area, so I would have to make sure to rotate and flip and keep the ribs to the edges of the grill. It took some work, but they were fall off the bone tasty. If you want the barbecue spice rub, here it is:

Barbecue Spice Rub

1/2 cup chili powder

1/4 cup brown sugar

1/4 cup salt

2 tablespoons black pepper

2 teaspoons cayenne pepper

Mix all the ingredients until well combined. Store in an airtight container. It will last for about 1 month.

As I said, I use it for a lot of different things, like chicken, steak and shrimp and burgers, but you can use it for whatever you would like. I served the ribs with some of the leftover beans we had frozen from the pulled pork dinner, some corn on the cob, and some potato salad. It was a great Sunday meal.

As for the rest of the week, tonight I am making Pepper Steak, which I have made before on here and you can get the recipe right here. For the rest of the week, I did buy the meat necessary, I just haven’t decided what to make yet, so it will be wait and see when you check on here to see what the meal will be. I did buy some pork chops, a whole cut up chicken, some frozen shrimp and some chicken legs (I’ll probably use some of these to make chicken stock). I’ll have to see what kind of recipes I can come up with. Any suggestions? Any input at all would be greatly appreciated any time. You can leave a comment here, on my Facebook page or on Twitter. Until the next meal, enjoy your day and enjoy your meal!

 
1 Comment

Posted by on May 21, 2012 in Cooking, Dinner, Grilling, Pork, Potatoes, Side Dishes


Tags: , , , , , , , , ,

Time to Get Your Grill On

It’s a beautiful day here in New York and it seemed like a good time to do some grilling. I have a boneless turkey breast, and I thought that would be great on the grill with some potato packets and some grilled asparagus, So let’s go for it!

Grilled Turkey London Broil

2 pounds turkey London broil (this is just one boneless turkey breast)

1/4 cup olive oil

2 tablespoons Worcestershire sauce

2 teaspoons Montreal Chicken Seasoning

1/4 cup white wine

1 teaspoon honey

Mix all the ingredients together for the marinade and whisk until well blended. In a large plastic storage bag, place the turkey and then cover with the marinade. Close the bag tightly, letting the air out, and mix so the marinade covers the turkey. Refrigerate for 3 hours or overnight.

Heat a grill until medium-warm. Remove the turkey from the bag and reserve the marinade. Place the turkey and the grill and cover the grill. Cook for approximately 30 minutes per pound brushing often with the marinade (turkey can get dry, so you need to do this) and turning often. The turkey is done when it reaches an internal temperature of 170 degrees. Allow to rest after removing it from the grill before slicing and serving.

I like to use the Montreal chicken seasoning with turkey. It’s a nice blend of spices and gives some good flavor. I use it with ground turkey all the time when making chili or turkey burgers.

The potato packets are pretty easy too. My Dad used to make these all the time, and God bless him, he tried, but he inevitably burned these a lot, but Dad also never used an oil or anything inside the packets to help with the cooking. They come out fine with some oil or butter. I only make this to serve the three of us, so you can adjust the recipe for more or less people.

Grilled Potato Packets

3 medium potatoes, scrubbed and sliced

3 medium carrots, peeled and sliced

1/2 onion, diced

Salt and pepper, to taste

3 tablespoons butter, sliced into 3 slices and then cubed

Cooking spray

Tear off three large sheets of heavy-duty aluminum foil. Spray each sheet with cooking spray. Using 1 potato, place a layer of potatoes in the middle of each sheet (try to keep it to one layer if you can). Cover the potato with one of the sliced carrots and then sprinkle with some onion. Season with salt and pepper. Place one of the cubed slices on top of the vegetables, spreading out the cubes over so they will melt into the vegetables when cooking. Wrap the potato tightly in the foil, folding it over the potato so the packet is thin (if it’s too thick it will take longer to cook). Repeat the process with the remaining potatoes. Place the packets on the hot grill, cover the grill and cook, turning about every 10 minutes, until the vegetables are tender, about 30 minutes. Serve.

I tried to keep the vegetable simple to by just using grilled asparagus. Nice and easy and only take about 5 minutes.

Grilled Asparagus

1 pound asparagus, the tough ends cut trimmed off

2 tablespoons extra virgin olive oil

Salt and pepper, to taste

Toss the asparagus with the olive oil to coat the asparagus. Season with salt and pepper. Place the asparagus on the grill in a single layer over medium-high heat. Grill, turning often, until the asparagus are bright green and tender, about 5 to 7 minutes. Remove from the heat and serve.

That’s all there is to it. A pretty simple, grilled meal on a nice evening. You can sit outside, enjoy the meal, have a nice glass of wine and enjoy. Until next time, enjoy your evening, and enjoy your meal!


1 Comment

Posted by on May 18, 2012 in Cooking, Dinner, Grilling, Potatoes, Turkey, Vegetables


Tags: , , , ,

 
National Day Calendar

Fun, unusual and forgotten designations on our calendar.

Jennifer Probst

a little bit naughty a little bit nice

Laissez Faire

Letting Life Lead

What To Have For Dinner Tonight

Simple and delicious dinner inspiration