RSS

Category Archives: Poultry

Take a Turn at These Turkey Burgers

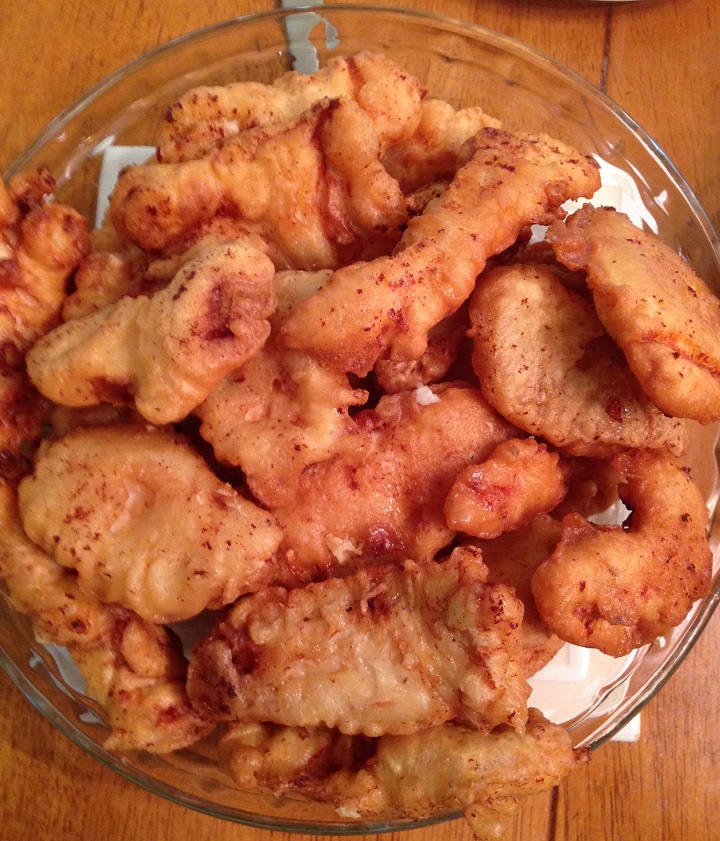
Sean had been asking me to make turkey burgers one night for dinner because he really wanted to try them out. I figured it was a great alternative to ground beef and was happy to oblige, but I really needed to figure out how to get some great flavor into the turkey burgers. To me, ground turkey has a tendency to be somewhat flavorless unless you add something to it. I love to use it in chili and meatballs, so I really wanted to find a good combination of spices and vegetables to add to the burgers to make them great. I looked at a lot of recipes and really just ended up taking what I liked best from all of them and putting them together to make my own turkey burgers.

Turkey Burgers

1 1/2 pounds ground turkey

1 shallot, diced

1 egg yolk

2 tablespoons chopped parsley

1 clove garlic, minced

1 tablespoon hot sauce

1 tablespoon McCormick’s Montreal Chicken seasoning

1/4 cup chicken broth

Salt and freshly ground black pepper

Your favorite slices of cheese, optional

Hamburger rolls, for serving

Sliced red onion, for serving

Sliced pickles, for serving

Combine the ground turkey, diced shallot, egg yolk, chopped parsley, minced garlic, hot sauce and Montreal chicken seasoning with clean hands until everything is well blended but not overmixed. Add a little bit of the chicken broth at a time and mix it into the turkey mixture (you can add a little bit more if it seems like it needs more moisture). Shape the turkey mixture into 4 or 5 equally sized patties. Season both sides of the patties with salt and freshly ground black pepper.

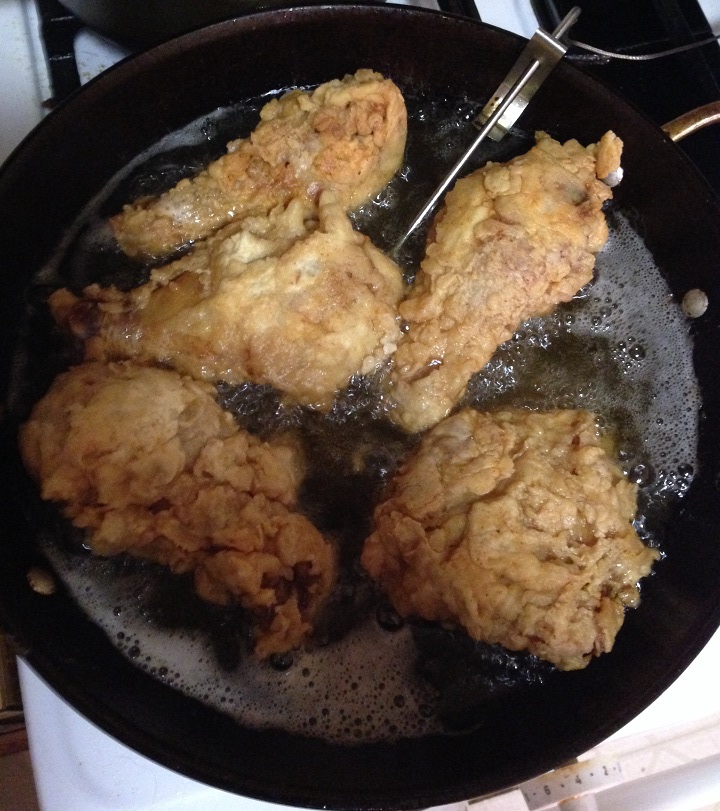
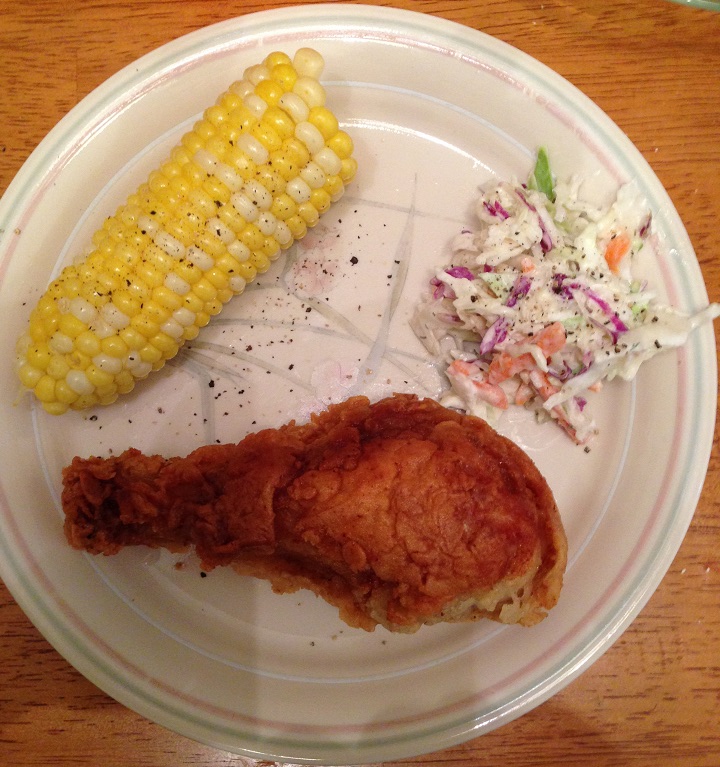
Heat 2 tablespoons of vegetable oil in a large skillet set over medium heat until the oil is shimmering. Place the patties into the skillet and cook the turkey burgers until they are golden brown and cooked all the way through, about 5 to 7 minutes per side. If you are using any cheese, place slices of cheese on the burgers and cover the skillet for 1 minute or until the cheese is completely melted. Transfer the burgers to a clean plate and serve, along with the hamburger rolls or buns, sliced red onion, pickles or any other accompaniments that you like with your burgers.

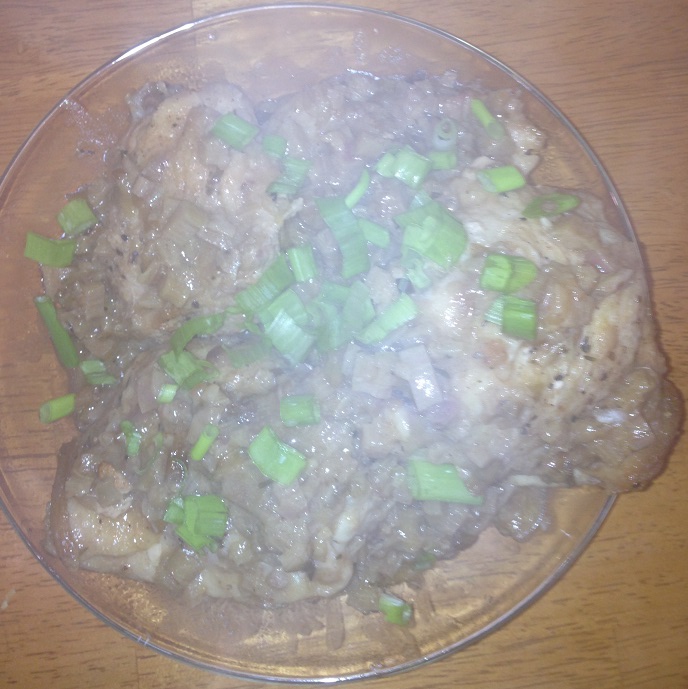
I think everyone was a little skeptical as to how flavorful these burgers would turn out, but I have to say that I thought they were great. The turkey burgers were moist and had great flavor. I think the seasonings and that little bit of chicken broth really helped to make a difference. Of course, the great thing about any type of burger is that you can always add whatever you like best to the mix and get the flavors you want. I think the little bit of heat from the hot sauce  combined well with the shallots and garlic. You could easily add other vegetables to the mix instead, like grated carrot or some spinach and it would be very good.

That’s all I have for today. Check back next time for another recipe. until then, enjoy the rest of your day and enjoy your meal!

IMG_0656

 
Leave a comment

Posted by on August 26, 2014 in Cooking, Dinner, Grilling, Lunch, Poultry, Sandwiches, Turkey


Tags: , , ,

Get Roasting – Roast Chicken with Lemon, Oregano and Vermouth

You can never have too many ways to make roast chicken. All you need to do is take a look at some the recipes on my blog and you will quickly see that not only do I make a lot of chicken, but I make a lot of roast chicken. I like the way chicken comes out in the oven with its crispy skin and tender, juicy flavor and if you can get a great sauce out of it as well that is even better. I came across this particular recipe at Food & Wine for a very simple roast chicken with lemon, oregano and vermouth to get a different and fresh flavor.

Roast Chicken with Lemon, Oregano and Vermouth

1 chicken (3 to 3 1/2 pounds) cut into 8 pieces

4 teaspoons olive oil

1 1/2 teaspoons dried oregano

2 tablespoons dry vermouth or white wine

1 teaspoon fresh lemon juice

1/4 teaspoon salt

1/8 teaspoon freshly ground black pepper

2 tablespoons water

Preheat the oven to 375 degrees. Coat the chicken with 3 teaspoons of the olive oil. Place the chicken pieces, skin side up, in a large roasting pan or cast iron pan. Sprinkle the chicken with the dried oregano, 1 tablespoon of the dry vermouth, the lemon juice, salt and pepper. Drizzle the remaining teaspoon of the olive oil over the top of the chicken.

Roast the chicken until the breasts are just done, about 25 to 30 minutes. Remove the breasts and wings to a separate plate and cover them to keep them warm. Continue to cook the thighs and drumsticks until they are done, about 5 to 7 minutes longer.

Heat the broiler of the oven. Remove the roasting pan from the oven and return the breasts and wings to the roasting pan. Broil the chicken under the broiler until the skin os golden brown, about 2 minutes. Keep an eye on it to make sure it does not burn. Remove the chicken from the pan to a platter.

Pour off the fat from the roasting pan. Set the pan over medium-high heat and add the remaining 1 tablespoon of dry vermouth and the 2 tablespoons of water. Bring the mixture to a boil, scraping the bottom of the pan to dislodge any browned bits. Boil the mixture until it is reduced approximately to 2 tablespoons. Add any accumulated juices from the platter the chicken is resting on. Spoon the sauce over the chicken and serve.

This recipe is very simple and you get the juicy chicken pieces with really nicely browned skin to go along with it. You also get a really unique pan sauce that has the nice flavor of the vermouth and lemon. It is a quick sauce but it packs some great flavor. You could use white wine instead or even chicken broth if you want to avoid the alcohol altogether, but I do have to say the vermouth adds a nice touch to the dish. You could easily do this dish just with your favorite chicken pieces, like breasts, thighs or drumsticks, instead of using the whole chicken. I served this with some herbed salt potatoes, which I will post the recipe for tomorrow, and some fresh green beans.

That’s all I have for today. Check back next time for another recipe. Until then, enjoy the rest of your day and enjoy your meal!

IMG_0651

 
1 Comment

Posted by on August 21, 2014 in Cooking, Dinner, Poultry, Sauce


Tags: , , , ,

Copy That! A Copycat Recipe of Chili’s Chicken Crispers

When it comes to family restaurant chains in our area (and there seems to be many more than we need, in my opinion), Chili’s seems to reign as the one that we frequent. Sean has always liked the food at Chili’s since he was little and is well-known throughout our family for his affinity for their cheese fries. Almost as much as he likes those, he and Michelle also both prefer the classic chicken crispers that you can find on their menu. I decided recently that I was going to try and find a copycat recipe for this particular recipe and see if I could make them at home and if they would even be close to what you get at the restaurant. I found the recipe on Chili’s at Home, a blog that features their recipes, and it seemed pretty easy to do so I gave it my best shot.

Copycat Chili’s Chicken Crispers

For the Batter:

1 egg, beaten

1/4 cup milk

3/4 cup chicken broth

1 1/2 teaspoons salt

3/4 teaspoon ground black pepper

3/4 cup self-rising flour

1/4 cup cornstarch

For the Chicken:

Vegetable oil or vegetable shortening for deep frying

10 chicken tenderloins

1/2 cup all-purpose flour

For the batter, combine the beaten egg, the milk, chicken broth, salt and pepper in a medium bowl. Whisk the ingredients until they are well combined. Add the 3/4 cup of the self-rising flour and the cornstarch, whisking into the mixture until the batter is smooth. Let the batter rest for 5 to 10 minutes.

To cook the chicken, Heat the vegetable oil or shortening in a deep fryer or large Dutch oven until the oil registers 350 degrees on a deep fry or candy thermometer inserted into the oil. Place the all-purpose flour in a medium shallow bowl. Coat the chicken pieces with the dry flour and then dip the chicken into the batter, making sure to coat it completely. Allow the excess batter to drip off and repeat the process with the remaining chicken. When the oil has reached the proper temperature, place 3 pieces of the battered chicken into the hot oil and fry the chicken for about 6 to 8 minutes or until the chicken is well browned. Drain the fried chicken pieces on a paper towel-lined plate and repeat the process with the remaining chicken. Serve with your favorite dipping sauce.

Just a couple of things about this recipe. First, if you can’t find self-rising flour near you, you can easily make your own. Take 1 cup of all-purpose flour and whisk in 1 1/4 teaspoons of baking powder and 1/4 teaspoon of salt and you will have your own self-rising flour. Second, you don’t have to use chicken tenderloins for this; I only had some boneless chicken breast on hand, so I cut them into small strips and used those, so we actually ended up with more than 10 pieces. I have to say that I think this recipe is pretty much spot on. The coating seemed exactly like what you get at the restaurant. I read elsewhere that Chili’s actually uses an MSG as an ingredient, so the chicken broth is a solid substitute to give you the flavor enhancement without the MSG. The coating is light and crunchy and the chicken is cooked through perfectly. I served this with tater tots and the obligatory corn on the cob. You could easily make your own favorite dipping sauce or use whatever you like to dip them in. I actually made Chili’s avocado-ranch dip to use, which is one of our favorites as well, but you could just use ketchup, honey mustard, barbecue sauce, hot sauce or whatever you like best.

That’s all I have for today. Check back next time for another recipe. Until then, enjoy the rest of your day and enjoy your meal!

IMG_0640


Leave a comment

Posted by on August 14, 2014 in Appetizers, Cooking, Dinner, Eating Out, Poultry


Tags: , , , , ,

Back in the Groove with Extra-Crispy Fried Chicken

As I try to get back into the swing of things and balancing work and home after vacation, along with the heat of summertime, I am trying to get back into the kitchen as well, even with the weather may make for some sticky days in the kitchen (thank God for air conditioning!). I have really felt like have fried chicken lately and I always have plenty of chicken pieces on hand but I wanted to try a recipe that would be a little bit different from those fried chicken recipes I have tried in the past. I came across this one from Saveur magazine for an extra-crispy fried chicken that makes a flavorful brine to put the chicken in ahead of time and then does some double coating with a special batter to make things super crunchy.

Extra-Crispy Fried Chicken

¼ cup kosher salt, plus more to taste
2 tablespoons coarsely ground black pepper, plus more to taste
2 tablespoons honey
2 tablespoons sugar
15 whole cloves
6 sprigs fresh parsley
6 sprigs fresh thyme
4 bay leaves
Zest and juice of 1 lemon
1 (3½–4 pound) chicken, quartered or equivalent chicken pieces (breasts, thighs, legs)
4 cups all-purpose flour
2 tablespoons granulated garlic
1½ tablespoons cayenne pepper
1½ tablespoons onion powder
1 teaspoon paprika
1 tablespoon baking powder
Canola or vegetable oil, for frying

Boil a ¼ cup of the kosher salt and 1 tablespoon of black pepper with the honey, sugar, cloves, parsley, thyme, bay leaves, lemon zest, and lemon juice, plus 6 cups of water in a 4-quart saucepan until the salt is dissolved, about 5–7 minutes. Remove the brine from the heat and let it cool completely. Add the chicken to the brine and cover; refrigerate overnight.

The next day, drain the chicken, rinse it, and pat it dry well with paper towels. Whisk 2 cups of the all-purpose flour and half each of the granulated garlic, cayenne, onion powder, and paprika with salt and pepper in a bowl until they are combined. In another bowl, whisk the remaining flour, granulated garlic, cayenne, onion powder, and paprika with the baking powder, salt, pepper, and 2 cups of water into a smooth batter.

3. Pour enough oil into a large Dutch oven or cast iron pan to reach a depth of 2 inches. Heat the oil until a deep-fry thermometer reads 300 degrees. Working in batches, dredge the chicken in flour mixture, shaking off any excess, then dip the chicken in the batter, and then dredge the chicken again in the flour. Fry the chicken, flipping the pieces once, until the chicken is golden and almost cooked through, about 7–8 minutes, or until an instant-read thermometer inserted into the thickest part of the thigh reads 150 degrees. Transfer the chicken to paper towels to drain.

4. Increase the oil temperature to 350 degrees and fry the chicken again (working in batches again if needed) until the chicken is crisp, about 2–3 minutes more; drain the chicken on paper towels and season it with salt and pepper to taste before serving.

The coating from the flour and batter is really crispy and wonderful and the chicken comes out perfectly moist underneath the crust. The brining really helps here so if you have time to do it you should. It helps the chicken and adds some great flavor as well. I served the chicken with some homemade coleslaw and corn on the cob to make it a great meal. I used only thighs and drumsticks for my meal, but you could use any combination you like and it will work well here.

That’s all I have for today. Check back next time for another recipe. Until then, enjoy the rest of your day and enjoy your meal!

IMG_0633 IMG_0634 IMG_0635

 
Leave a comment

Posted by on August 6, 2014 in Cooking, Dinner, Poultry


Tags: , , , , ,

Back to Basics – Balsamic Braised Chicken

As I get back into the groove of my work schedule, home responsibilities, cooking and the like after vacation, I have tried to keep meals relatively simple this week. One of old standby favorites has always been balsamic chicken. Balsamic chicken is one of those meals that is very simple to put together and you can get a great, tangy sauce and glaze on your chicken that is perfect over mashed potatoes or rice. Michelle always used to order balsamic chicken at one of our favorite restaurants so I do try to make it every now and then as a nice reminder. This particular recipe that I used this time is from Williams-Sonoma and only makes use of a few ingredients to make things even easier for you.

Balsamic Braised Chicken

3 pounds of chicken pieces (breasts, thighs, drumsticks) or 1 chicken cut into 8 pieces

Salt and freshly ground black pepper

2 tablespoons olive oil

2 garlic cloves, unpeeled

1 shallot, diced

1 fresh rosemary sprig

1 cup dry red wine

1/4 cup balsamic vinegar

Pat the chicken pieces dry with paper towels and season the chicken well with salt and pepper on both sides. In a large saute pan set over medium-high heat, warm the olive oil until it is shimmering. Add the chicken pieces to the pan along with the garlic and shallot and cook the chicken, turning the pieces as it is needed, until the pieces are well browned on both sides, about 20 minutes total. Adjust the heat as is necessary so that you prevent the garlic and shallots from burning.

Tip the saute pan and spoon off any excess fat that you can. Add the rosemary sprig, the red wine and the balsamic vinegar and bring the mixture to a simmer. Reduce the heat to medium, cover the pan and cook, turning the chicken pieces occasionally,until the chicken is opaque throughout when tested with a knife, about 15 to 20 minutes. Transfer the chicken pieces to a warmed platter and cover the chicken to keep it warm.

Raise the heat under the saute pan to high and bring the liquid in the pan to a boil and cook until the liquid is reduced and has thickened, creating a flavorful pan sauce, about 5 minutes. Remove and discard the garlic cloves and the rosemary sprig. Taste and adjust the seasoning of the sauce as necessary. Spoon the sauce over the chicken pieces and serve immediately.

You get great flavor of the sauce as it clings to chicken and I love the combination of the red wine with the balsamic to really give the dish great flavor. The shallots also make a nice addition to the overall meal. I served the chicken with mashed potatoes and corn to round out the meal. I think the balsamic chicken is great, but the sauce itself might be great with a piece of pork as well if you wanted to give that a try. I forgot to take a picture of this one when I made it, so unfortunately I don’t have one to show, but trust me the glaze comes out perfectly and the chicken tastes great!

That’s all I have for today. Check back next time for another recipe. Until then, enjoy the rest of your day and enjoy your meal!


Leave a comment

Posted by on July 31, 2014 in Cooking, Dinner, Poultry, Sauce


Tags: , , ,

Save Time and Effort with Pulled Chicken Sandwiches

While the temperature and humidity around here have eased a bit today, it is typical for July around these parts of New York to be very sticky and humid, making it uncomfortable all day long and making you feel like you really do not want to put much effort into dinner. Nights like that for use are usually good for really simple meals that involve little or no cooking at all, which means making things like sandwiches, salads, hot dogs and the like for dinner. Sure you can always get take out or go out if you like, but that gets expensive to do too much and you don’t have control over the ingredients you are eating. You can always compromise somewhere in the middle and buy some pre-cooked items, such as a rotisserie chicken, and make good use of that in a meal for you and your family in a bunch of ways. One thing I recently did was use a rotisserie chicken to make some pulled chicken sandwiches for a meal. You can do this just as easily with leftover chicken and simply shred it yourself and even use your favorite bottled barbecue sauce if you like, but I decided to make my own sauce to get the flavor we really like. The basis of this recipe comes from Ellie Krieger on the Food Network site.

Pulled Chicken Sandwiches

1 tablespoon vegetable oil
1 onion, chopped
3 cloves garlic, minced
1 (14-ounce) can tomato sauce
1/4 cup tomato paste
1/2 cup water
1/3 cup apple cider vinegar
5 tablespoons molasses
1/4 teaspoon ground black pepper
1/2 teaspoon liquid smoke
1 whole rotisserie chicken, skin removed, meat shredded into thin strips (about 4 to 4 1/2 cups)
6 hamburger rolls
Lettuce leaves, for garnish

Pickle slices, for garnish

Coleslaw, store-bough or homemade, for garnish

Heat the vegetable oil in a large saute pan set over medium heat. Add the onions and cook until they are soft and translucent, about 5 minutes. Add the garlic and cook for 1 minute more until the garlic is fragrant. Add the tomato sauce, tomato paste, water, cider vinegar, molasses, pepper and liquid smoke and bring the mixture to a boil. Reduce the heat to medium-low and simmer for 15 minutes. Add the chopped chicken, return the mixture to a simmer, and cook for an additional 10 minutes.

Split the hamburger rolls. Place a leaf of lettuce on each roll, then pile on 3/4 cup of the chicken mixture onto the roll and top with pickle slices, coleslaw and additional sauce, if desired.

That’s all there is to it and it tastes great. You get a nice barbecue sauce to simmer the chicken in without a lot of work and the liquid smoke adds great aroma and flavor to the sauce. I used the pickleback slaw recipe I have made before as the coleslaw for a topping and we just had the sandwiches with some chips on the side to keep things simple, though they would go well with some potato salad, macaroni salad or even just a simple side salad. You could even make these as sliders if you wanted to use them for a buffet or party and have them done in minutes.

That’s all I have for today. Check back next time for another recipe. Until then, enjoy the rest of you day and enjoy your meal!

IMG_0579

 
Leave a comment

Posted by on July 10, 2014 in Cooking, Dinner, Leftovers, Lunch, Poultry, Sandwiches


Tags: , , , , , , ,

A Chicken Dinner Thanks to Bobby Flay – Pan-Roasted Chicken with Mint Sauce

Trying to find new things to do with chicken can get tricky after a while. I am always on the lookout for new ways to try making poultry with new sauces and flavors. because we eat so much chicken, you really have to try to vary things now and then so everyone does not get bored with just he same old meal. I found this recipe from Bobby Flay listed on the New York Times Cooking site (which is a great site and resource for recipes and articles by the way) and not only did it seem really simple but looked to use some different flavors to change things up for your chicken dinner. It is a very simple recipe for pan roasted chicken with a mint sauce. Bobby Flay uses bone-in chicken breasts for the recipe, but I used a combination of breasts and thighs and it worked out just as well I think.

Bobby Flay’s Pan-Roasted Chicken with Mint Sauce

For the Chicken:

4 bone-in, skin on chicken breasts

Kosher salt

2 tablespoons paprika

2 teaspoons ground cumin

2 teaspoons ground mustard

2 teaspoons ground fennel seed

1 teaspoon freshly ground black pepper

3 tablespoons extra-virgin olive oil

For the Mint Sauce:

1 cup fresh mint leaves

1/2 cup fresh parsley leaves

4 cloves garlic, peeled and roughly chopped

1 Serrano chile, seeds removed and roughly chopped

1 tablespoon honey

1 tablespoon Dijon mustard

1/2 cup extra-virgin olive oil

Kosher salt and freshly ground black pepper

Preheat the oven to 425 degrees. Rinse the chicken well, then dry it with paper towels. Season the chicken generously with kosher salt. Combine the paprika, cumin, ground mustard, ground fennel seed and black pepper in a small bowl and rub the mixture all over the skin of the chicken.

Heat the olive oil in a large, oven-safe saute pan or skillet set over medium heat. When the oil is shimmering, put the chicken breasts into the pan skin side down and cook, unattended, until the skin is golden brown, about 6 to 8 minutes. Using tongs. turn the chicken breasts over and then place the pan in the preheated oven. Roast the chicken until it is golden brown all over and the meat is cooked entirely through, about 12 to 15 minutes. Remove the chicken to a warmed platter and allow it to rest.

Meanwhile, place the mint, parsley, garlic and Serrano chile into a food processor and pulse the mixture into a paste. Add the honey and the Dijon mustard and pulse the mixture again until it is combined. With the motor running, slowly add the olive oil until the mixture has become emulsified. Transfer the mixture to a bowl, and if necessary, whisk in a few tablespoons of water to thin the sauce. Season the sauce with salt and pepper to taste.

Spoon some of the sauce over each of the chicken breasts and serve, with the remaining sauce on the side.

The chicken turns out perfectly browned and crispy and the mint sauce is an excellent addition. It does have a little heat to it from the Serrano chile, so be aware of that if you are making it for anyone who doesn’t like a lot of heat. You could just as easily leave it out of the sauce. I served this with roasted potatoes and some roasted asparagus and it made for a perfect meal without a lot of fuss or work.

That’s all I have for today. Check back next time for another recipe. Until then, enjoy the rest of your day and enjoy your meal!

IMG_0593

 
Leave a comment

Posted by on July 8, 2014 in Cooking, Dinner, Poultry, Sauce


Tags: , , , , ,

Classic Barbecued Chicken for the Fourth

If you are looking for a good alternative to hamburgers, hot dogs and steak for this holiday weekend, a good option is always to do something with some chicken. You have lots options of available to you as far as just making a bunch of different chicken pieces or if you know that you have a crowd that really just wants to have thighs, legs, wings or breasts you can just go with those pieces on your grill. One thing about doing chicken on the grill is that you need to really watch it so that the skin doesn’t burn before the rest of the chicken is actually cooked through. This is one of the reasons I like to make barbecued chicken in the oven more than outside, which works out really well for me since I only have the electric grill to play with anyway. This particular recipe that I used comes from Better Homes and Gardens and is for their classic barbecued chicken, though I did modify the sauce recipe a bit to fit my own tastes. I have included my modifications in the recipe itself.

Classic Barbecued Chicken

2 3 1/2 pounds whole chickens, or 7 pounds of chicken pieces

Kosher salt and freshly ground black pepper

1/2 cup butter

1 cup finely chopped onion

1 tablespoon chopped fresh garlic

2 tablespoons kosher salt

1 1/2 teaspoons crushed red pepper

1 tablespoon paprika

1 tablespoon chili powder

1/2 teaspoon freshly ground black pepper

1 cup cold water

1 1/4 cups cider vinegar

1 cup packed brown sugar

2 tablespoons Worcestershire Sauce

2 tablespoons molasses

1 cup ketchup

1/2 teaspoon liquid smoke

2 tablespoons soy sauce

2 tablespoons Dijon mustard

1/2 cup tomato paste

Vegetable or canola oil

Water

If you are using whole chickens, cut up the chicken, leaving the drumsticks and thighs attached. Season the chicken pieces with salt and freshly ground black pepper. Refrigerate, covered, up to 24 hours or until you are ready to use the chicken.

For the barbecue sauce, In large non-reactive saucepan set over low heat, melt the butter. Add the onion, garlic and salt and cook until the onion softens and is tender, about 3 to 4 minutes. Add the crushed red pepper, paprika, chili powder and black pepper. Cook and stir the mixture for about 1 minute.

Add the water, cider vinegar, brown sugar and Worcestershire sauce and bring the mixture to a simmer. Stir in the molasses, ketchup, liquid smoke, soy sauce and Dijon mustard until it is all blended. Whisk in the tomato paste until the mixture is smooth. Bring the sauce to a simmer over low heat and cook, uncovered, for 10 to 15 minutes or until the sauce has thickened, stirring occasionally. Taste the sauce for seasoning and make any adjustments with salt and pepper as needed. Remove 1 1/2 cups of the sauce to prepare the chicken. Store the remaining sauce in the refrigerator and simply reheat it to serve.

For the chicken, preheat the oven to 325 degrees. Heat 1/4-inch of the vegetable oil in a large skillet set over medium heat. Working in batches, place the chicken, skin side down, in the skillet. Cook until the chicken is well browned, turning once, for about 5 minutes.

Transfer the browned chicken to a large roasting pan or baking dish. Place the chicken skin side up and add 2 tablespoons of water to the pan. Spoon the reserved 1 1/2 cups of barbecue sauce over the chicken. Cover the chicken with parchment paper and then cover the pan tightly with aluminum foil. Bake the chicken until all of the chicken is cooked through and an instant read thermometer inserted into one of the pieces registers 170 degrees. Depending on the pieces of chicken you are baking, this can take anywhere from 40 minutes for breast portions to 75 minutes for legs and thighs.

Increase the oven temperature to 450 degrees. Uncover the chicken, removing the foil and the parchment paper, and spoon on some additional barbecue sauce. Bake the chicken, uncovered, for an additional 10 to 15 minutes or until the chicken is well-glazed and the meat is very tender. Serve the chicken with the reserved barbecue sauce (not the sauce you used to put on the raw chicken!) and store any remaining barbecue sauce, covered, in the refrigerator for up to 1 week.

Unfortunately, I did not remember to take a picture of the chicken when I made this one but it came out really well. you could certainly use the same idea and make this on the grill yourself, just keep a closer eye on the chicken to control the heat, cooking it on a lower heat side of a gas or charcoal grill to keep it from burning the skin easily. You should always put the sauce on towards the end of the cooking process so that the skin can get nice and crispy before the sauce goes on and you can retain the great sauce flavor that you get. Seasoning the chicken ahead of time or even brining it the night before can make a big difference here too, so if you have the time I recommend it. The sauce was great and I actually used some of the leftover chicken and remaining sauce to make some pulled chicken sandwiches, which I will post the recipe for soon as well. This goes great with any classic barbecue sides like baked beans, coleslaw, potato salad, corn bread,corn on the cob and the like.

That’s all I have for today. Check back next time for another recipe. Until then, enjoy the rest of your day, enjoy your meal and have a safe, happy and festive July 4th!


Leave a comment

Posted by on July 4, 2014 in Cooking, Dinner, Grilling, Poultry, Sauce


Tags: , , , , , , , ,

Too Hot to Cook? Try These Easy Chicken Tostadas

It has been very hot, humid and sticky here the last few days, making it so that the last thing you feel like doing is standing in front of the stove or oven and cooking a detailed meal. It is days just like this that are perfect for a nice rotisserie chicken and doing something different and inventive with it, like this recipe from Marcella Valladolid of the Food Network for easy chicken tostadas. Tostadas are simply deep fried tortillas, so you can make these yourself if you like but I have also seen them available in some stores. You can use tostadas, a rotisserie chicken, a can of refried beans and your favorite store-bought salsa or make your own tomato salsa or try the recipe for a tomatillo avocado salsa included with this recipe.

Chicken Tostadas

8 tostadas

1 cup refried beans, warmed

4 cups cooked chicken, shredded

2 cups finely shredded lettuce

1 red onion, thinly sliced into rings

8 radishes, thinly sliced

1 cup crumbled queso fresco or other mild cheese

Sour cream or Mexican sour cream (crema) for drizzling

Tomatillo-Avocado Salsa:

8 ounces tomatillos, husked, rinsed and coarsely chopped

1 avocado, halved, pitted and peeled

1/2 cup packed fresh cilantro leaves

1 Serrano chile

1 tablespoon fresh lemon juice

Salt and freshly ground black pepper

For the tostadas, spread the tostadas with the refried beans. Top the tostadas with the shredded chicken, shredded lettuce, red onion rings, sliced radishes and the cheese. Drizzle the top of each tostada with some of the sour cream, top each with a dollop of salsa, and serve.

For the tomatillo-avocado salsa, combine the tomatillos, avocado, cilantro leaves, Serrano chile, and the lemon juice together in a blender and puree the mixture until it is smooth. Season the salsa with salt and pepper to taste. Transfer the salsa to a serving bowl, cover and refrigerate for up to 2 hours or until you are ready to use it.

This is a very easy meal that you can put together with mainly leftovers and have it ready in just a few minutes. Use leftover chicken or a rotisserie chicken and you can even just use leftover beans instead of making refried beans if you want to. you canalways include other fresh vegetables on the tostadas if you like as well and the salsa has great flavor of its own and is great for chips or as a side dish to this meal or others. We’ll be making this one again during the summer for sure.

That’s all I have for today. Check back next time for another recipe. Until then, enjoy the rest of your day and enjoy your meal!

IMG_0586


Leave a comment

Posted by on July 3, 2014 in Beans, Cooking, Dinner, Poultry


Tags: , , , , , , , ,

Simple and Sweet – Skillet Chicken with Rhubarb

When most people hear rhubarb their thoughts immediately turn to strawberry rhubarb pie (which I love by the way). You probably see a lot of rhubarb around the produce departments of markets this time of year since strawberries are in season now, but there are lots of other things you can do with rhubarb besides making great desserts like sorbet, compote or pie. I came across this recipe in the New York Times recently for a simple way to jazz up a chicken dinner with some rhubarb, scallions and honey for a bit of a different flavor. While this recipe uses a whole chicken cut into pieces, I made just chicken thighs instead but you could use any chicken pieces you like for this recipe.

Skillet Chicken with Rhubarb

1 (5 1/2-pound) whole chicken, cut into eight pieces, or various chicken parts (thighs, breasts, drumsticks)

1 tablespoon plus 1/2 teaspoon kosher salt, more as needed

1 teaspoon black pepper, more as needed

5 sprigs thyme

2 tablespoons extra-virgin olive oil

1 bunch spring onions or scallions, white and light green stalks thinly sliced (slice and reserve greens for garnish)

2 garlic cloves, minced

1/2 cup dry white wine, chicken broth or water

3/4 pound fresh rhubarb, cut into 1/2-inch dice (about 3 cups)

1 tablespoon honey, or to taste

2 tablespoons butter, cut into pieces

Pat the chicken dry with paper towels and season the chicken with 1 tablespoon of the kosher salt and 1 teaspoon of the black pepper. Place the chicken in a bowl with the thyme sprigs and cover it with plastic wrap. Refrigerate the chicken for at least 1 hour and up to overnight.

Heat the olive oil in a large skillet over medium-high heat. Remove the thyme from the bowl with the chicken and reserve the thyme sprigs. Add the chicken pieces to the skillet and sear, turning them occasionally, until the chicken is golden brown all over, about 10 minutes. Transfer the chicken pieces to a platter and set them aside.

Reduce the heat of the skillet to medium. Stir in the scallions (the white and light green parts) and cook until the scallions have softened, about 5 minutes. Add the garlic and the reserved thyme sprigs. and cook until fragrant, about 1 minute more. Stir in the wine and bring the mixture to a simmer, scraping up any browned bits in the bottom of the pan. Add the rhubarb, honey, 1/2 teaspoon of kosher salt and a few grinds of black pepper.

Return the chicken pieces to the skillet in a single layer. Cover the skillet and reduce the heat to medium-low. Simmer until the chicken is cooked through, about 15 to 20 minutes for breasts and 20 to 25 minutes for the thighs and drumsticks. Transfer the  chicken pieces to a platter as they finish cooking so they can rest.

Whisk the butter into the rhubarb sauce. Taste the sauce and adjust the seasoning if needed or desired. Spoon the rhubarb sauce over the chicken pieces and garnish the dish with the sliced scallion greens and serve.

It is a very simple dish that is perfect for a weeknight or a weekend meal. The rhubarb tastes great with the chicken and we all loved the sauce. It was ideal to spoon over the chicken and also with the rice that I had served with the meal, but it would also be great with mashed potatoes or other grains as well. I apologize for the picture as it didn’t turn out that great since there was still steam coming up off the dish when I took it, but trust me it tastes great and looks good too!

That’s all I have for today. Check back next time for another recipe. Until then, enjoy the rest of your day and enjoy your meal!

IMG_0587

 
Leave a comment

Posted by on June 30, 2014 in Cooking, Dinner, Poultry, Sauce


Tags: , , , , ,

 
National Day Calendar

Fun, unusual and forgotten designations on our calendar.

Jennifer Probst

a little bit naughty a little bit nice

Laissez Faire

Letting Life Lead

simple cooking recipes

a blog to share with you the best