RSS

Category Archives: Poultry

Easy and Tasty Skillet Fried Chicken with Black Pepper Gravy

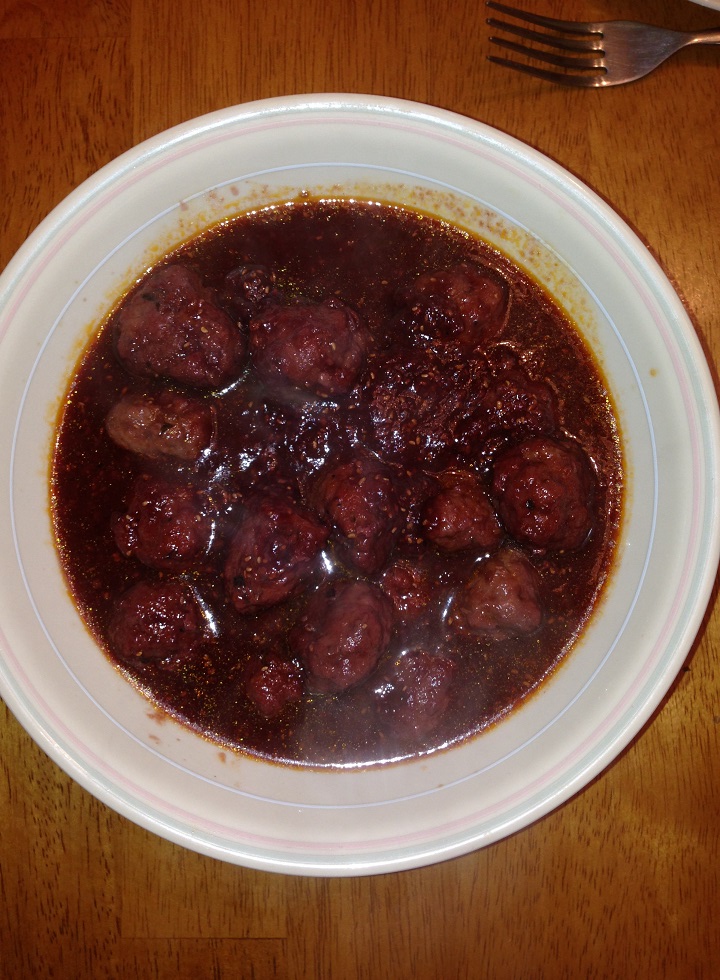
Now that the meatball kick is over, I can get back to some other recipes. I have found myself trying a few different fried chicken recipes lately, and even though it may not be the healthiest choice in the world as far as ways to make chicken, it sure does taste good. There is nothing quite like a piece of crispy fried chicken for dinner or even better, for lunch the next day. I had a craving for fried chicken with some gravy, so I was glad when I came across this recipe on the Food Network for skillet fried chicken with a black pepper gravy. It is a simple recipe that has excellent taste and flavor.

Skillet Fried Chicken with Black Pepper Gravy

One 2 to 2 1/2-pound chicken, cut into 8 pieces, or chicken parts (legs, thighs, breasts and wings)

Kosher salt and freshly ground black pepper

2 cups all-purpose flour

1/4 teaspoon cayenne pepper

Canola or vegetable oil, for frying

1 cup milk

1 cup chicken stock or water

Sprinkle the chicken with salt and pepper on both sides and set the chicken aside. Place the flour in a shallow plate and season the flour with the cayenne pepper, salt and black pepper. Toss the mixture to combine it well and set it aside.

Pour the canola or vegetable oil into a large cast-iron skillet to a depth of about 3/4-inch. Heat the oil over medium-high heat until a deep-fry thermometer inserted into the oil registers 375 degrees. Set up paper bags or layers of paper towels nearby for draining the chicken after frying.

Starting with the dark meat, one piece at a time, add the chicken to the seasoned flour and turn the chicken to coat it well on both sides. Shake the chicken to remove any excess flour. One piece at a time, add the chicken to the hot oil. The oil should not quite cover the chicken. Do not overcrowd the skillet as it can be dangerous and cause splattering and make the chicken steam instead of fry, leaving your with soggy chicken. Cook the chicken in batches if needed.

Fry the chicken pieces, turning them once or twice, until the coating on chicken is rich golden brown on all sides, about 10 to 14 minutes. Reduce the heat to medium and cover the skillet. Continue cooking until the chicken is cooked all the way through and the juices run clear when a piece of chicken is pricked with a knife, about another 10 to 15 minutes. An instant-read thermometer inserted into a thigh should register 170 degrees. Remove the chicken and drain the chicken on the brown paper bags or the paper towels.

Remove the skillet from the heat. Carefully pour off most of the grease into a metal bowl or can, leaving about 2 or 3 tablespoons in the pan with the browned crumbs. Reduce the heat to very low. Add 4 tablespoons of the remaining flour from the coating. Stir together the grease and the flour with a wooden spoon and cook, stirring often, until the mixture is golden brown, about 3 minutes. Add the milk and the chicken stock or water. Cook, stirring often, until the gravy is smooth and thick enough to coat the back of a spoon. Add a heaping pinch of black pepper. taste and adjust the seasoning with salt.

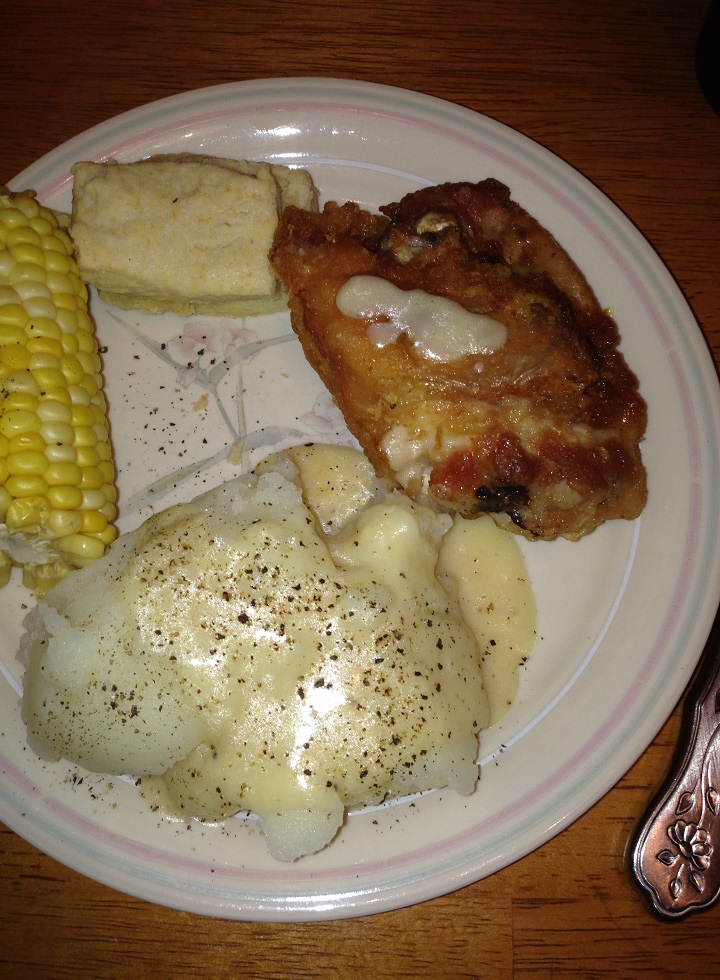
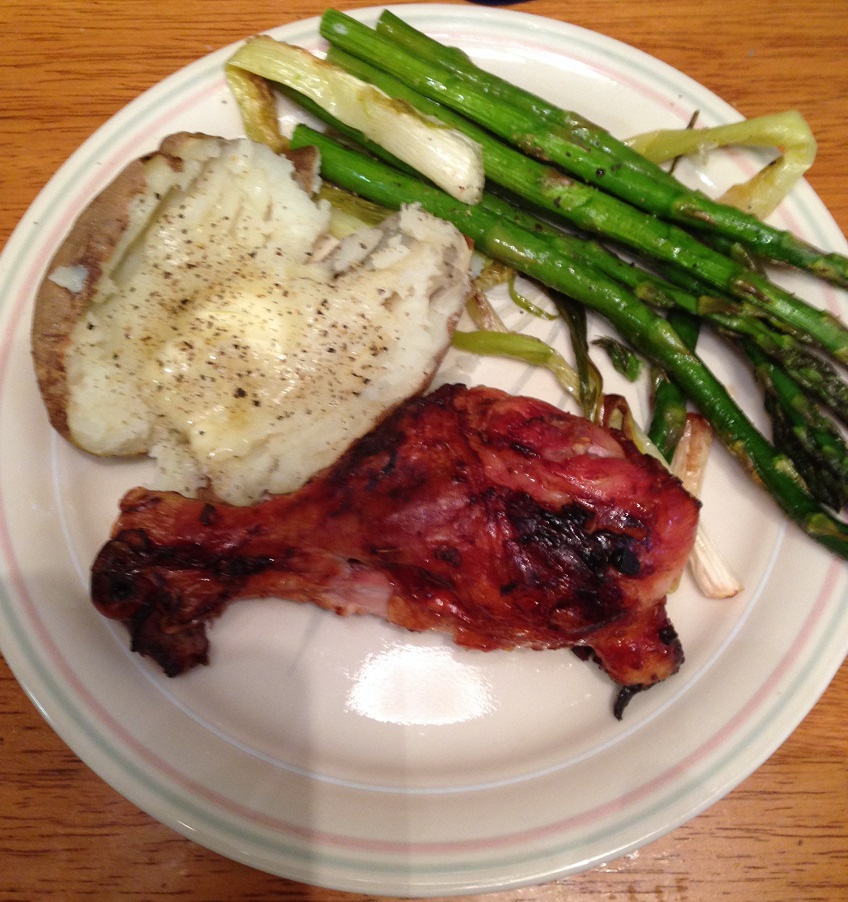
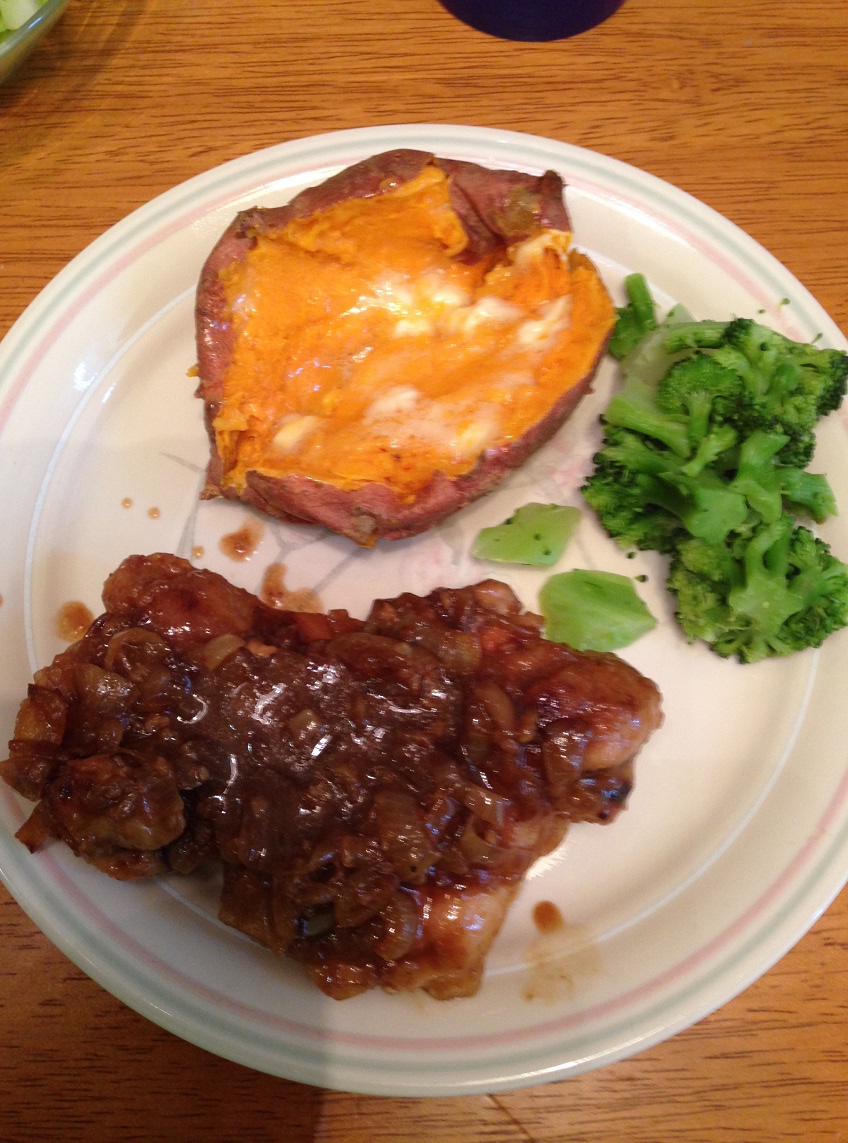
Serve the gravy with the chicken and rice or mashed potatoes.

I only made 5 pieces of chicken, all thighs, so as not to overcrowd the pan and that was more than enough for the three of us for dinner. you can always make a few batches if you need to or use 2 pans at the same time. in any case, this is a very simple recipe that yields excellent fried chicken with nice, crispy skin. The best part of the meal though is the gravy that goes with it. It has a great pepper flavor and is rich and creamy, making it perfect for mashed potatoes or rice (I used masked potatoes last night). you can round out the meal with a nice vegetable (like corn on the cob) and some homemade biscuits and you have a great meal of fried chicken during a weeknight.

That’s all I have for today. Check back next time for another recipe. Until then, enjoy the rest of your day and enjoy your meal!

IMG_0571

 
Leave a comment

Posted by on June 10, 2014 in Cooking, Dinner, Gravy, Poultry


Tags: , , , , , ,

A Meatball Finale – Turkey Meatballs with Raspberry-Balsamic Barbecue Sauce

I took a few days off from blogging to get caught up on some work, but I didn’t forget about my last meatball recipe to share along the way. The classic Italian meatballs sure went a long way and we had them for 4 dinners and a few lunches as well, so we got a lot out of the $14.00 I spent on the ground turkey and turkey sausage. Not only do the meatballs taste great, but you have a lot of things to do with them, including this recipe that Giada di Laurentiis shared on the Food Network for turkey meatballs in a raspberry-balsamic barbecue sauce. Giada’s original recipe offers these up as mini meatballs to use for appetizers, but I changed it around slightly and used bigger meatballs and we had them for dinner when I made them.

Turkey Meatballs with Raspberry-Balsamic Barbecue Sauce

2 cups frozen unsweetened raspberries, thawed
3/4 cup ketchup
2/3 cup seedless raspberry jam
3 tablespoons packed golden brown sugar
3 tablespoons balsamic vinegar
1 tablespoon Worcestershire sauce
1 teaspoon smoked paprika
1/4 teaspoon kosher salt
1/4 teaspoon freshly ground black
Zest of 1 small lemon
24 to 36 Classic Italian Turkey Meatballs
For the barbecue sauce: In a food processor or blender, blend together the raspberries, ketchup, raspberry jam, brown sugar, balsamic vinegar, Worcestershire sauce, smoked paprika, salt, pepper and lemon zest until the mixture is smooth. Pour the sauce into a heavy medium saucepan. Bring the sauce to a simmer over medium heat. Cook the sauce until it is slightly thickened, about 6 to 7 minutes. Place the meatballs in the saucepan with the sauce and cook over medium heat until the meatballs have cooked through, about 10 minutes. Remove the pan from the heat and pour the meatballs and sauce into a serving bowl and serve.

As I said, Giada makes her smaller to use as an appetizer and threads them on skewers with mango and radicchio, which would make a very nice appetizer if you want to put some out for a party or buffet. I think they worked just as well as a meal on their own over some rice. The sauce had a combination of the sweetness of the raspberries from the jam and the fruit with a bit of barbecue sauce flavor from the ketchup, balsamic vinegar, Worcestershire sauce and brown sugar. It was a very nice sauce that tasted great, though I would recommend if you are not a fan of raspberry seeds you really try to find seedless jam to use. Overall, I think it was a pretty good dish and we made this one and some of the turkey meatballs in a simple turkey gravy as well over rice or noodles to finish up the meatballs.

That’s all I have for today. Check back next time for another recipe. I have some new things to share that aren’t meatballs so I’ll be posting some new stuff next time out I think everyone will enjoy. Until then, enjoy the rest of your day and enjoy your meal!

IMG_0564

 
Leave a comment

Posted by on June 9, 2014 in Appetizers, Cooking, Dinner, Poultry, Turkey


Tags: , , , , , , ,

Meatballs Run Amok! Pizza Bianca with Kale and Turkey Meatballs

You would think we would have gotten sick of meatballs by now, wouldn’t you? Surprisingly enough we managed to keep on with our meatball theme this week, using another recipe from Giada di Laurentiis that makes use of the classic Italian turkey meatballs I made earlier in the week. For this recipe, just like the one yesterday for meatball paninis, we kept it very easy and decided to go the pizza route. This one is for pizza Bianca, which is a white pie without any red sauce, perfect for those who may not like the acidity or flavor of tomato sauce. You can use some of the meatballs from the original recipe that have not been put into sauce, or just take some of the sauced meatballs and cut them up if you want just a hint of the sauce flavor. In either case, it is a very flavorful pizza.

Pizza Bianca with Kale and Turkey Meatballs

For the Sauce:

2 tablespoons butter, at room temperature
2 tablespoons all-purpose flour
1 cup milk
1/8 teaspoon ground nutmeg
1 bay leaf
1 clove garlic, smashed and peeled
1/4 teaspoon kosher salt
1/8 teaspoon freshly ground black pepper

For the Pizza:
Extra-virgin olive oil, for oiling the baking sheet and for drizzling
One 1-pound ball pizza dough (store-bought or homemade, such as Food Processor Pizza Dough), at room temperature
3/4 cup coarsely grated mozzarella
8 Classic Italian Turkey Meatballs, halved
1/2 cup finely grated Parmesan
2 medium leaves kale, ribs removed, coarsely chopped
1/2 teaspoon kosher salt

For the sauce: In a heavy small saucepan, melt the butter over medium heat. Add the flour and stir constantly for 1 minute. Gradually add the milk, whisking constantly. Add the nutmeg, bay leaf and garlic. Whisk the mixture over medium heat until the mixture thickens to sauce consistency and is smooth, about 2 to 5 minutes. Stir in the salt and pepper.

Remove and discard the bay leaf and the garlic.

For the pizza: Preheat the oven to 450 degrees F. Oil a heavy nonstick 16- by 10-inch baking sheet with olive oil.

Using your fingers, spread the dough over the prepared baking sheet into a rectangle shape. Drizzle the dough with olive oil. Spoon the sauce on top and spread the sauce evenly across the dough, leaving a 1-inch border around the dough. Sprinkle the mozzarella on top. Arrange the meatballs, cut-side down, on top of the mozzarella and sauce. Sprinkle the pizza with the Parmesan cheese. Bake the pizza for 15 minutes. Remove the baking sheet from the oven and add the kale in an even layer on top of the meatballs. Drizzle the kale with olive oil and sprinkle the top with salt. Bake the pizza until the kale is crispy, about 10 minutes longer.

Cut the pizza into squares and serve.

One thing I did differently with this recipe, since I did not have any kale on hand, was that I used some spinach instead. Sean and Michelle both like spinach better anyway so this worked well for us, but if you really want the kale I would think it would turn out nice and crispy and taste great on the pizza. Everyone loved this pizza, not just because of the meatballs but because of the white sauce as well. The sauce had just that hint of nutmeg to give it a really unique flavor and it just seemed to go really well with the meatballs and spinach. Sean asked that I make this one again and maybe try another pizza combination with the sauce from this recipe, which sounded like a good idea to me.

That’s all I have for today. Check back next time for another recipe. Until then, enjoy the rest of your day and enjoy your meal!

IMG_0562


Tags: , , , , , , , ,

Meatball Frenzy Week Continues – Turkey Meatball Panini

So now that I had all of these meatballs I needed to find things to do with them. Luckily, Giada didn’t let me down and I supplied several other recipes in ways that you could use these great turkey meatballs. The best part about all of them is that they con convert into really easy meals that only take a few minutes to create and you have something entirely new to enjoy for the night. The first up was this really simple meatball panini recipe. I have a panini maker, but you can just as easily do this with a grill, grill pan or skillet with a little bit of effort and it will come out great too. This recipe makes use of the meatballs and a few other simple ingredients to make awesome paninis for the family to enjoy.

Turkey Meatball Panini

1 red onion, peeled, cut into eight 1/4 -to 1/2-inch-thick rounds

2 tablespoons olive oil, plus extra for drizzling

1/4 teaspoon kosher salt

1/4 teaspoon freshly ground black pepper

4 ciabatta rolls, halved horizontally (or other bread of your choice)

1 cup tomato sauce (homemade or your favorite jarred brand)

1 teaspoon red pepper flakes, optional

1 1/3 cups arugula

12 Classic Italian Turkey Meatballs, halved

8 thin slices prosciutto

8 slices provolone cheese

Preheat a grill pan or a panini maker. Brush the red onion slices on both sides with the olive oil. Sprinkle the onions with kosher salt and black pepper. Grill the onion slices until they are tender and lightly browned, about 3 to 4 minutes per side. Set the onions aside to cool

Pull out and remove some of he bread from the ciabatta rolls from each half of the rolls. This will give the meatballs a better place to sit in the sandwich. Spoon half of the tomato sauce over the bottom halves of each of the rolls. Sprinkle the sauce with red pepper flakes, if using. Add the arugula, the turkey meatballs, the prosciutto slices, grilled onions and the remaining sauce to each sandwich. Top each sandwich with two pieces of cheese. Add the tops of the rolls and drizzle the tops with olive oil. Using a pastry brush, brush the olive oil evenly over the tops of the rolls.

Place the sandwiches in the panini maker and lower the press and cook until the cheese has melted and the meatballs are heated through, about 5 minutes. Alternatively, place the sandwiches on a grill pan or in a heated skillet and place a cast-iron pan or other heavy pot (anything heavy will really do) to press the sandwiches down and cook through until the cheese is melted and the meatballs are heated through.

Cut the panini in half and serve.

The great thing about paninis, or any sandwich really, is that you can put whatever you like best on them. If you don’t like provolone, use your favorite cheese on it instead or no cheese at all (which is how I eat it). If you don’t have prosciutto, use any type of ham that you like (which I did for Sean; I used Black Forest Ham). you can use any type of other toppings that you really like or use different meatballs and still get good results (those these meatballs are really good and you should try them out). I had mine with just the grilled onions, meatballs, red pepper flakes and arugula. Michelle had hers with the meatballs, arugula, grilled onions and provolone. Sean had his with the meatballs, Black Forest Ham and prosciutto, no onions or arugula. They all looked really good and everyone really enjoyed the sandwiches. It was a great way to re-purpose some of the meatballs for a quick meal.

That’s all I have for today. Check back next time for another recipe. Until then, enjoy the rest of your day and enjoy your meal!

IMG_0561 IMG_0559 IMG_0560


1 Comment

Posted by on June 5, 2014 in Cooking, Dinner, Lunch, Poultry, Sandwiches, Turkey


Tags: , , , , ,

It’s a Meatball Frenzy Week! – Giada’s Classic Italian Turkey Meatballs

Meatballs are one of those things that everyone seems to have their own way of making. Just like it is with meatloaf, meatballs can have just about anything in them and can be all types of meat combinations depending on your preferences. I have tried a bunch of different recipes in the past, including recipes from Giada di Laurentiis, who this particular recipe is from. Not that long ago an episode of her show features several meatball recipes, including the basic one for turkey meatballs that you start out with and then other recipes you can use the same meatballs for. I decided to start out the week with the basic class turkey meatball recipe and then build out from there.

Classic Italian Turkey Meatballs

For the Meatballs:

1 cup plain breadcrumbs
1/2 cup finely grated Parmesan, plus more for serving
1/4 cup chopped fresh basil
1/4 cup chopped fresh Italian parsley
1/4 cup milk, at room temperature
1 tablespoon ketchup, optional
1 tablespoon tomato paste
3/4 teaspoon kosher salt
1/2 teaspoon freshly ground black pepper
2  eggs, at room temperature
2 cloves garlic, minced
1 small onion, finely chopped
1 pound ground turkey meat (dark meat if you can get it)
1 pound Italian turkey sausage links, casings removed
Extra-virgin olive oil, for drizzling
For the Sauce:
1/4 cup extra-virgin olive oil
3 cloves garlic, smashed and peeled
1  onion, finely chopped 1 teaspoon kosher salt, plus more to season
1/2 teaspoon freshly ground black pepper, plus more to season
3/4 cup chopped fresh basil
2 teaspoons finely ground fennel seeds
2 teaspoons dried oregano
Two 28-ounce cans crushed tomatoes
1/2 cup low-sodium chicken broth, optional

Preheat the oven to 400 degrees.

For the meatballs: In a large bowl, combine the breadcrumbs, Parmesan, basil, parsley, milk, ketchup if using, tomato paste, salt, pepper, eggs, garlic and onions. Using a wooden spoon, stir the ingredients until they are blended. Add the ground turkey and the turkey sausage meat. Using your fingers, gently mix all the ingredients until they are thoroughly combined.

Using a 1-ounce cookie scoop or a small ice cream scoop, form the meat mixture into 1 1/2-inch balls (22 to 24 meatballs). Place the meatballs on a heavy nonstick baking sheet, spacing them apart. Drizzle the meatballs with olive oil and bake until the meatballs are cooked through, about 15 minutes.

For the tomato sauce: Heat the olive oil in a large deep skillet with high sides or a Dutch oven over medium-high heat. Add the garlic, onions, salt and pepper. Cook the vegetables until they softened, about 5 to 6 minutes. Add 1/2 cup of the basil, the fennel, oregano and crushed tomatoes. Bring the sauce to a simmer. Cook the sauce over medium heat until the sauce thickens slightly, stirring occasionally, about 15 to 20 minutes. Stir in the remaining 1/4 cup of basil. Adjust the seasoning with more salt and pepper if desired.

Add the meatballs to the tomato sauce and simmer until the meatballs are heated through, about 10 minutes. Thin the sauce with chicken stock, 1/4 cup at a time, if needed.

Serve with grated Parmesan alongside.

I have to say that of all the meatball recipes I have tried recently, I think this is the best one and since it uses only turkey meat, it might be the healthiest alternative of the ones I have made. The texture of the meatball is perfect and the flavor you get from the mix of the turkey meat and sausage along with the spices is just perfect. Throw it all in a simple sauce and you have a great meal. I actually doubled the recipe and made a lot of meatballs with this recipe to use for the other meatball recipes Giada tried on that episode, so I’ll be posting meatball options all week with what we had leftover. Of course, you can always just freeze some and use them when you want them. I left about half out of the sauce to use for some of the other recipes.

That’s all I have for today. Check back next time for another recipe. Until then, enjoy the rest of your day and enjoy your meal!

classicitalianmeatballs

 
5 Comments

Posted by on June 3, 2014 in Cooking, Dinner, Poultry, Sauce, Turkey


Tags: , , , , , ,

A New Twist on Chicken Fingers – Pretzel-Crusted Chicken Fingers

I had made some classic chicken fingers not that long ago along with some homemade dipping sauces and the grocery store was having a really good sale on chicken tenderloins so I picked up another batch of them and was looking for something else to do. Sure, I could have just cut up the chicken and used it for something like a stir-fry or a warm chicken salad, but I wanted to try something else with chicken fingers again. Lo and behold along came the newest issue of Cook’s Country magazine in the mail shortly after and in it was a recipe for pretzel-crusted chicken fingers. I thought this was a good one to try to see if I could get some extra crunch and flavor out of the chicken. The recipe is very simple and only takes a few minutes to make, so you can easily make this anytime you want some chicken fingers.

Pretzel-Crusted Chicken Fingers

6 ounces thin pretzel sticks

1/2 cup all-purpose flour

2 eggs

2 tablespoons Dijon mustard

1 1/2 pounds chicken tenderloins, trimmed

Salt and pepper

6 tablespoons vegetable oil

Process the pretzel sticks in a food processor until they are finely ground, about 20 seconds. you should end up with about 1 1/2 cups of pretzel crumbs. Transfer the pretzel crumbs to a shallow dish. Spread the all-purpose flour in a second shallow dish. Beat the eggs and the Dijon mustard in a third shallow dish.

Pat the chicken dry with paper towels and season it well with salt and pepper. Dredge the chicken pieces in the flour, shaking off any excess. Then dip the chicken pieces in the egg mixture, allowing any excess to drip off. Finally, dip the chicken pieces in the pretzel crumbs, pressing on the chicken gently in the crumbs so the crumbs adhere well.

Heat 3 tablespoons of the vegetable oil in a large nonstick skillet over medium-high heat until the oil is shimmering. Cook half of the breaded chicken tenderloins until they are golden brown and cooked through, about 5 minutes per side. Adjust the heat along the way if the crust seems like it is beginning to burn. Transfer the chicken fingers to a paper towel-lined plate, discard the oil, and wipe out the skillet with paper towels. Repeat the process with the remaining 3 tablespoons of vegetable oil and the remaining chicken tenderloins. Serve the chicken fingers with your favorite dipping sauces.

You want to make sure you use the thin pretzel sticks for this recipe and not the thick pretzel rods. The thin pretzels will grind easier and are not as dense and hard as the rods, giving you better crumbs for the crust. You get a really nice flavor from the pretzel crust and just a hint of the Dijon mustard along the way to give them great flavor. This is a great recipe to offer up for the kids who love chicken fingers but want something a little different or as a quick dinner or to serve at a party. You can make large batches of them and freeze them cooked for later use at another time.

That’s all I have for today. Check back next time for another recipe. until then, enjoy the rest of your day and enjoy your meal!

pretzel crusted chicken fingers


1 Comment

Posted by on May 30, 2014 in Appetizers, Cooking, Dinner, Lunch, Picnic Fare, Poultry, Snacks


Tags: , , , , ,

Changing up Fried Chicken – Cook’s Country Latin Fried Chicken

Nearly everyone loves to eat fried chicken. It seems to be a particularly great dish as the weather gets warmer and you can incorporate it into your outdoor parties and picnics, but it is also a great dish that you can try just on a weekend or weeknight. While there are thousands of variations on fried chicken and everyone seems to have their own best method or family recipe for making it, I came across this recipe in the latest issue of Cook’s Country and thought it sounded unique enough that I wanted to give it a try. It is for Latin fried chicken and takes the basics of fried chicken and incorporates some Latin spices and flavor to give things a little bit of a different taste for you.

Latin Fried Chicken

For the Marinade:

2 tablespoons kosher salt

6 garlic cloves, chopped coarse

1 tablespoon pepper

1 tablespoon ground cumin

2 teaspoons smoked paprika

2 teaspoons dried oregano

2 teaspoons grated lime zest plus 1/4 cup lime juice(2 limes)

3 pounds bone-in chicken pieces (drumsticks, thighs, wings split breasts cut in half)

For the Coating:

1 1/4 cups all-purpose flour

3/4 cup cornstarch

1 tablespoon pepper

1 tablespoon granulated garlic

1 teaspoon baking powder

1 teaspoon white pepper

1 teaspoon kosher salt

1 teaspoon ground cumin

1/4 teaspoon cayenne pepper

3 egg whites, lightly beaten

3 quarts vegetable or canola oil

For the marinade: Combine the salt, garlic, pepper, cumin, smoked paprika, oregano, and the lime zest and lime juice together in a bowl. Add the chicken pieces and turn the chicken to coat it thoroughly with the marinade.Cover the bowl with plastic wrap and refrigerate the chicken for at least 1 hour and up to 2 hours.

For the coating: Whisk the flour, cornstarch, pepper, granulated garlic, baking powder, white pepper, salt, cumin and cayenne pepper together in a bowl. Place the beaten egg whites in a separate shallow dish.

Set a wire rack in a rimmed baking sheet. Remove the chicken from the marinade and scrape off any of the solids from the marinade from the chicken. Pat the chicken dry with paper towels. Working with one piece at a time, dip the chicken in the egg whites to thoroughly coat the chicken, letting any excess drip off back into the dish. Dredge the chicken in the flour mixture, pressing on the chicken piece to get the coating to adhere well. Transfer the chicken to the prepared wire rack and refrigerate the chicken for at least 30 minutes or up to 2 hours.

Add the vegetable or canola oil to a large Dutch oven until it measures about 2 inches deep and heat the oil over medium-high heat until it registers 325 degrees on a candy thermometer. Add half of the chicken to the hot oil and fry the chicken until the breasts register 160 degrees and the thighs.drumsticks register 175 degrees on an instant-read thermometer, about 13 to 16 minutes. Adjust the burner, if necessary, to maintain an oil temperature between 300 and 325 degrees. Transfer the chicken to a clean wire rack set in a rimmed baking sheet.Return the oil to 325 degrees and repeat the process with the remaining chicken pieces. Serve.

One thing about when you marinate the chicken – you don’t want to leave the chicken longer than 2 hours in the marinade. The lime juice in the marinade will start to toughen up the  chicken, so you should try to get it before the 2 hour mark passes. You can really taste the lime, garlic and spices in the chicken and the coating comes out perfectly crispy. Adding the cornstarch and baking powder to the flour really makes a big difference in the results. I only made 4 pieces of chicken when I tried the recipe, so I cut everything in half for a smaller batch, but you can easily make a big batch of this to serve for a party or a picnic. This chicken would go great with all kinds of side dishes and it is just as good the next day.

That’s all I have for today. Check back next time for another recipe. until then, enjoy the rest of your day and enjoy your meal!

IMG_0553

 
Leave a comment

Posted by on May 29, 2014 in Cooking, Dinner, Poultry


Tags: , , , ,

A Treat for the Whole Family – Baked Honey Barbecue Chicken Fingers

For many adults, just hearing the words “chicken fingers” is enough to make them cringe. They immediately think back to the days when the only things their young children would eat were chicken fingers, tenders, McNuggets or whatever else that happened to be called that are sold in the frozen food aisle of your grocery store, at the local fast food restaurant or any of the dozens of family style convenience restaurants around today. While you may not be thrilled with the notion of what you get in those frozen bags, there are plenty of alternatives out there that you can try making on your own that taste good so that everyone in the family will enjoy them. This particular recipe, that I picked up from Sally’s Baking Addiction, covers just that, giving you a tasty chicken fingers alternative that get away from the frying and offer you a baked alternative that tastes great.

Baked Honey Barbecue Chicken Fingers

3/4 cup barbecue sauce (whatever your favorite may be)

1/4 cup honey

1/2 cup whole wheat or all-purpose flour

1 teaspoon salt

1/2 teaspoon black pepper

1/2 teaspoon smoked paprika

2 eggs, beaten

1 1/2 cups panko breadcrumbs (or more, if needed)

1 1/2 pounds boneless, skinless chicken breasts or chicken tenders

Nonstick cooking spray

Combine the barbecue sauce and the honey in a large bowl. If you are using chicken breasts, pound the chicken breasts between two sheets of plastic wrap to 1/4-inch thickness and cut the breasts into strips. If you are using chicken tenders, cut them in half lengthwise. Add the chicken strips to the bowl with the barbecue sauce and honey and stir so all of the chicken is evenly coated. Cover the bowl tightly and marinate the chicken in the refrigerator for at least 30 minutes and up to 6 hours. The longer you marinade, the more flavorful the chicken will be.

Preheat the oven to 400 degrees. Line a baking sheet with parchment paper or a silicon baking mat or coat the sheet with nonstick cooking spray.

Combine the flour. salt, pepper and the smoked paprika in a shallow dish. Pour the beaten eggs into another shallow dish. Pour the panko breadcrumbs into a third shallow dish. Coat each chicken strip with flour, shaking off any excess. Next. dip the floured chicken in the egg and allow any excess egg to drip off. Then roll the chicken strip in the panko breadcrumbs, coating completely before shaking off any excess. Place the chicken strips on the prepared baking sheet and repeat the process until all of the chicken has been coated. Spray each chicken strip with the nonstick cooking spray to help seal the breading to the chicken, preventing the breading from staying raw and allowing it to bake into the chicken strips.

Bake the chicken fingers in the preheated oven for 10 minutes. Turn each piece over and continue baking until the outside of the chicken is crisp and the centers of the chicken pieces are cooked through, about another 10 to 12 minutes. Serve the chicken fingers with extra barbecue sauce for dipping.

The great thing about this recipe is that you can make a large batch and freeze any extras that you may have to use when you need a quick dinner for the kids or yourself or just want an easy snack. These are perfect for a meal any night with some homemade fries (I made some homemade baked sweet potato fries with ours) or you can use these for any type of buffet when you are having a party and you know kids may be around. They are also great snacks for watching the game or when you have a crowd over. You get good crunch from the breadcrumb mixture and underneath is great flavor from the barbecue sauce and the honey. This is definitely one to remember and you can experiment with this also, perhaps making the chicken fingers ranch flavored instead of barbecue with some spices, or maybe even adding some Parmesan to the breadcrumbs, eliminating the barbecue sauce and substituting tomato sauce to have an Italian-style chicken fingers. There’s lots of room to use your imagination with this one and the best part is you have control over the ingredients so you know what goes into each one, and they are baked, making them a better choice for you.

That’s all I have for today. Check back next time for another recipe. Until then, enjoy the rest of your day and enjoy your meal!

IMG_0540


Tags: , , , , , , ,

Keeping On With Chicken – Soy-Glazed Chicken with Asparagus and Scallions

In keeping up with the trend of a number of the chicken recipes that I have tried lately, this one was one of my personal favorites. I had seen this recipe in the last issue of Bon Appetit magazine and it sounded so delicious and made use of some great ingredients that I absolutely had to give it a try. While the original recipe calls for just using chicken thighs, I had a mix of thighs and drumsticks available to use so I made a little bit of both for us to have for dinner that night. This recipe for sot-glazed chicken with asparagus and scallions is easy enough to make for a weeknight meal and elegant enough for whenever you might be entertaining or want a meal that looks as great as it tastes.

Soy-Glazed Chicken with Asparagus and Scallions

2 teaspoons aniseed

4 garlic cloves, finely chopped

1/4 cup fresh lime juice, plus wedges for serving

1/4 cup soy sauce

2 tablespoons honey

8 chicken thighs (about 4 pounds)

1 bunch asparagus (about 3/4 pound), trimmed

2 bunches scallions, trimmed

2 tablespoons vegetable oil

Kosher salt and freshly ground black pepper

1/2 cup fresh cilantro leaves with tender stems

Toast the aniseed in a small dry skillet over medium heat, tossing frequently and watching to make sure it does not burn, until the aniseed is fragrant, about 2 minutes. Let the aniseed cool and then finely chop it.

Whisk the garlic, lime juice, soy sauce, honey and the chopped aniseed together in a large bowl. Add the chicken pieces and toss the mixture to coat the chicken well. Allow the chicken to sit in the marinade for at least 30 minutes.

Preheat the oven to 450 degrees. Transfer the chicken and the marinade to a foil-lined, rimmed baking sheet, making sure to place the chicken skin side down on the foil. Roast the chicken until the fat begins to render, about 15 to 20 minutes. Turn the chicken skin side up and continue to roast it, basting the chicken occasionally with the pan drippings, until the chicken is cooked through and deeply browned, about 15 to 20 minutes longer.

After turning the chicken, toss the asparagus and the scallions with the vegetable oil on another rimmed baking sheet. Season the vegetables with salt and pepper. Roast the vegetables, shaking the pan about halfway through the cooking process, until the vegetables are tender, about 10 to 15 minutes. If you have thinner stalks of asparagus or scallions, they will cook more quickly and will be done faster.

Transfer the chicken to a platter. Pour any pan juices into a glass measuring cup. Let the juices sit for a few minutes and then spoon the fat from the surface of the juices. Spoon the pan juices over the chicken and serve the chicken with the asparagus, scallions, cilantro and lime wedges.

You can always begin marinating the chicken a day ahead and simply cover the bowl and store it in the refrigerator until the next day if you want even deeper flavors. I did not have aniseed on hand but substituted fennel seed instead and got that licorice flavor that you get from either herb, so I think it worked well.The marinade is wonderful and imparts incredible flavor to the chicken thanks to the combination of the soy sauce, honey, aniseed and lime juice. I love roasted asparagus as well and with the scallions together they just seem to go really well with the chicken. It’s a great dinner that you can do in just over an hour and you get this deep brown chicken with amazing flavor and the house smells great while it is cooking.

That’s all I have for today. Check back next time for another recipe. until then, enjoy the rest of your day and enjoy your meal!

IMG_0545 IMG_0544

 
Leave a comment

Posted by on May 20, 2014 in Cooking, Dinner, Poultry, Vegetables


Tags: , , , , , , ,

A Honey of a Recipe – Honey Chili Beer Chicken

With the prices of just about everything else going up at the grocery stores, chicken is one of the few things that has remained reasonable for some of the pieces. Boneless chicken breasts remain high-priced, in my opinion, but you can get legs and thighs for a very good price, bone-in breasts are reasonable, and you can always get a whole chicken and cut it up yourself to get several meals out of it and then some stock as well. In any case, I have been stocking up on legs and thighs lately so I have also been scouring around looking for new recipes to try to get some different tastes and flavors so it doesn’t seem like we are eating the same thing several times a week. I cam across this recipe on the Internet not long ago from The Beeroness for a honey chili beer chicken that looked great, so I thought I would give it a try.

Honey Chili Beer Chicken

3 tablespoons olive oil

1/2 cup sliced onions

2 cloves garlic, minced

1 cup brown ale, divided in half

1 tablespoon balsamic vinegar

2 tablespoons honey

1/2 teaspoon red chili sauce (such as Sriracha), plus additional if desired

6 boneless, skinless chicken thighs

1/2 teaspoon salt

1 teaspoon pepper

1-2 tablespoons all-purpose flour

In a cast iron skillet over medium heat, add the olive oil and heat until the oil is shimmering. Add the onions and caramelize the onions over medium heat, mixing occasionally, until the onions are a nice golden brown, about 10 to 15 minutes.

Stir in the garlic and then add 1/2 cup of the brown ale, the balsamic vinegar, the honey and the chili sauce. Simmer the mixture until it is reduced and thickened, about 3 to 5 minutes. Remove the sauce from the pan and set the sauce aside.

Sprinkle the chicken thighs on all sides with the salt, pepper and all-purpose flour to coat the thighs well. Increase the heat of the stovetop to medium-high, place the chicken thighs in the now-empty cast iron skillet and cook the chicken thighs until they are browned on all sides, about 3 minutes per side.

Pour the sauce back into the cast iron skillet with the chicken along with the remaining 1/2 cup of the brown ale. Cover the skillet loosely with a lid, lower the heat of the stovetop to maintain a simmer in the skillet and allow the chicken to cook until the chicken thighs are cooked through, about 10 to 12 minutes, turning the chicken once during the cooking process. Remove the chicken and sauce to a platter and serve.

The sauce that you make with this chicken is really good. You get a great combination of flavors from the brown ale, the balsamic and the honey and a little bit of heat from the chili sauce to round it all out. Add in the sweetness of the caramelized onions and it seems just perfect. I am sure you could do this meal with boneless chicken breasts if you wanted to or even just make the sauce to use over something like chicken wings or drumsticks and get the same great results. The sauce might even go well with some pork chops if you wanted to give that a try as well. It was a quick, easy way to make good use of chicken and gives you some great options when you are looking for something different to try for your meal. I used a lighter ale than the recipe called for, Smithwick’s, because that is what I had on hand, but I think you could use just about any type of ale and it would work well here.

That’s all I have for today. Check back next time for another recipe. I have lots of things I have tried lately, including a bunch of chicken recipes, and I just got the latest issue of Cook’s Country (my personal favorite cooking magazine) and it has some great chicken recipes to try along with some other great options, so I will be giving a bunch of those a shot as well. until next time, enjoy the rest of your day and enjoy your meal!

IMG_0539 IMG_0538


2 Comments

Posted by on May 19, 2014 in Cooking, Dinner, Poultry, Sauce


Tags: , , , , ,

 
National Day Calendar

Fun, unusual and forgotten designations on our calendar.

Jennifer Probst

a little bit naughty a little bit nice

Laissez Faire

Letting Life Lead

simple cooking recipes

a blog to share with you the best