RSS

Category Archives: Poultry

Chicken Thigh Recipes Slideshow – Bon Appétit

Chicken Thigh Recipes Slideshow – Bon Appétit.

Chicken thighs are my favorite piece of the chicken to make. They seem to have the most flavor and there are so many different things you can do with them, whether you have bone-in, boneless, skim-on or skinless. Bon Appetit offers up 16 great ways to make chicken thighs. Give one or two or ten a try and see how they go. Check it out!

 
Leave a comment

Posted by on December 12, 2013 in Cooking, Cooking Websites, Dinner, Poultry


Tags: , , ,

I Promise, My Last Turkey Recipe for a While – Turkey Pot Pie with Stuffing Crust

You have my word that this will be the last turkey recipe I post for a while. We are working on a lot of other things right now, trying to get Christmas organized, the tree up, Sean’s birthday and it seems like and endless amount of other things but I will get to some new recipes next week, I promise. Anyway, this is a new recipe and was one I had never tried before that makes good use of cooked turkey or chicken. I got this recipe from Cook’s Country and it is for a very simple turkey pot pie with a stuffing crust.

Turkey Pot Pie with Stuffing Crust

3 tablespoons butter

1 onion, chopped

1 celery rib, chopped

2 tablespoons all-purpose flour

2 cups chicken or turkey broth

1/2 cup heavy cream

1 cup frozen vegetables, thawed, or leftover vegetables

4 cups shredded cooked turkey

3 cups prepared stuffing or leftover stuffing

1 egg, lightly beaten

Adjust an oven rack to the upper middle position and heat the oven to 475 degrees. Melt the butter in a large oven-safe skillet over medium-high heat. Cook the onion and the celery until they are soft, about 4 to 5 minutes. Stir in the flour and cook until the flour is lightly browned, about 1 minute. Slowly whisk in the chicken or turkey broth and the cream and simmer until the mixture is thickened, about 5 to 7 minutes. Add the frozen or leftover vegetables and the turkey and cook until the mixture is heated through, about 2 minutes.

Meanwhile, combine the stuffing and the egg in a large bowl. Place the stuffing mixture between pieces of parchment paper and roll it into an 11-inch circle. Remove the top layer of the parchment paper and cut the stuffing into 6 wedges. Arrange the wedges evenly over the filling and bake until the stuffing is golden and crisp, about 12 to 15 minutes. Serve.

Instead of cutting the wedges, which seemed like some unnecessary work to me, I just spread the stuffing on top of the turkey mixture and baked it this way. I really liked the way it all came out and it made great use of all of the leftovers we had from our turkey meal. If you don’t have any leftover stuffing, you can easily just use some boxed stuffing for this recipe and make it the same way. I used all kinds of leftover vegetables in this one, like peas, carrots and Brussels sprouts. Everything thickened up really nicely and it made for a great one pot meal that was done quickly.

That’s all I have for today. Check back next time for some more recipes. we’ll be trying some new things out this weekend, including some cupcakes, a cake, baked ziti and more so I will lots of recipes to post to go along with those I haven’t gotten to yet. until next time, enjoy the rest of your day and enjoy your meal!

002


Leave a comment

Posted by on December 6, 2013 in Cooking, Dinner, Leftovers, One Pot Meals, Poultry, Turkey


Tags: , , , ,

How About Some Turkey Soup?

I know, I know, we are all sick of turkey recipes at this point and everyone is busy thinking about Christmas cookies and your Christmas meal at this point. However, I still have a couple of recipes leftover of things I made with turkey so I thought I would put them out here. These recipes are for a very simple turkey stock that I made and then I used most of that stock to make a wonderful turkey soup from some of the leftovers we had of turkey. You could easily substitute some chicken for the turkey in the soup or the stock and get good results from both. First, the turkey stock.

Turkey Stock

1 leftover turkey carcass from a 10 to 15-pound turkey, including the neck, wing and leg bones

4 or 5 onions, quartered

2 large carrots, peeled and cut into chunks

4 large celery ribs, cut into chunks

2 cups white wine

2 large garlic cloves, smashed and peeled

4 sprigs fresh thyme

2 bay leaves

1 teaspoon black peppercorns

Kosher salt

Heat the oven to 450 degrees. Using a sturdy knife or your hands, cut or tear the turkey carcass into large pieces. Arrange the pieces in a single layer in a roasting pan and roast until the pieces are brown and sizzling, about 20 to 25 minutes.

Remove the pieces from the oven and transfer them to a stockpot. Add the onions, carrots and celery to the empty roasting pan and place it over medium heat. Saute them briefly, just to loosen the crusty turkey bits in the bottom of the pan. Return the pan to the oven and cook until the vegetables are browned around the edges, about 20 to 25 minutes. Remove the pan from the oven and place it back over medium heat. Add the white wine and cook, stirring, until the wine is reduced to a syrup, about 3 minutes.

Add the wine-vegetable mixture to the stockpot with the turkey pieces. Add the garlic, thyme, bay leaves, black peppercorns and stir. Add 6 quarts of water and place the pot over medium-high heat just until the mixture comes to a boil. Immediately reduce the heat to low, skim any foam floating on the top and simmer, skimming as needed, for about 3 hours. Add 1 teaspoon of salt and taste. If the stock tastes too watery, keep simmering until the stock is flavorful. Taste for salt again and add more if needed.

Strain the stock through a sieve into a large container or containers. Discard all the solids. Let the stock cool slightly and the refrigerate or freeze it.

It’s a simple method that takes some time but gets maximum turkey flavor out of the carcass and what is left over. You get a wonderful roasted flavor into the stock that gives it a great addition. I froze some and used some for this soup recipe from Michael Chiarello.

Turkey Soup

8 cups turkey stock

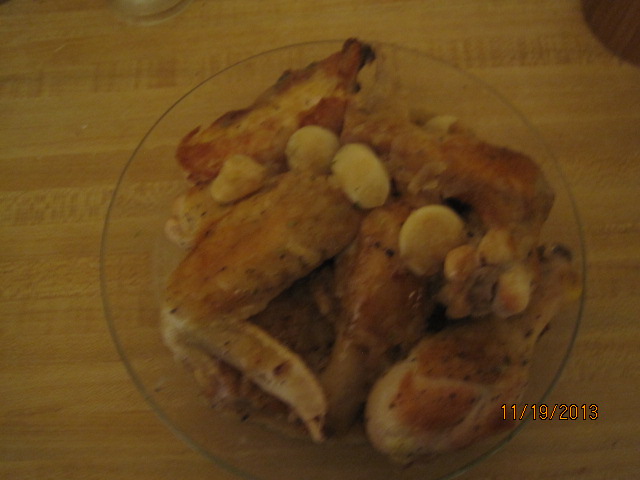
3 cups diced turkey meat, white and dark meat

1 carrot, peeled and minced

1 celery stalk, minced

1 onion, peeled and minced

2 cloves garlic, smashed

2 tablespoons olive oil

3 cups leftover cooked vegetables (Brussels sprout, sweet potatoes, green beans)

1 tablespoon chopped sage

In a large soup pot, heat the garlic in the olive oil over medium heat. Allow it to brown slightly, about 3 minutes. Add the minced carrots, celery and onions. Sweat the vegetables over medium-low heat until softened, about 7 to 8 minutes.

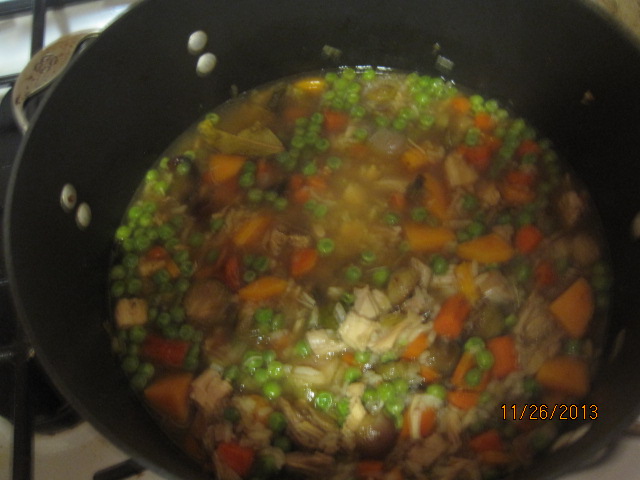
Dice the leftover vegetables. Add the sage to the soup pot along with the turkey stock and 1 bay leaf. Bring the stock to a simmer. When the pot is simmering, add the Brussels sprouts, green beans and diced turkey meat to the soup. Bring the mixture back up to a simmer. Add the sweet potatoes to the center of the soup and gently push them down. Turn the heat off and cover the pot. Allow the soup to sit and steam, about 5 to 7 minutes. let the soup simmer for 5 more minutes before serving.

It is a quick and easy way to make good use of turkey meal leftovers or any chicken meal leftovers. it’s a simple soup that you can put together for a weeknight meal that will taste great and it makes for even better lunches the next day or two. I also added some frozen peas to the mix just to round everything out.

That’s all I have for today. Check back next time for some more recipes. Until then, enjoy the rest of your day and enjoy your meal!

002 001


Tags: , , , , ,

A Return to the Kitchen After Holidays, Birthdays and More – A Leftover Recipe

I took a few days off from blogging to spend some time with the family over Thanksgiving weekend and it was my Sean’s birthday this weekend as well, so it got my away from the computer for a few days, which is not always a bad thing. I know many of you are probably beyond the leftovers from Thanksgiving, but this leftover dish I prepared for breakfast on Sean’s birthday can really work any time of the year when you have leftover turkey or really any leftover poultry at all. It is a simple turkey has that you can put together quite easily and make use of some of your leftovers.

Turkey Hash

4 tablespoons butter

3 strips bacon, chopped

1 large onion, chopped

1 red bell pepper, seeded and chopped

Salt and freshly ground black pepper

1 pound red potatoes, cut into 1 1/2 – 2 inch cubes (about 4 large potatoes)

1 tablespoon chopped thyme

3 cloves garlic, chopped

2 cups cooked turkey, shredded into 1 – 2 inch chunks

1/2 cup chicken stock

1/4 cup cream

1 teaspoon Worcestershire sauce

2-3 dashes hot sauce

1 tablespoon dry sherry

4 fried eggs (optional)

Heat a cast iron skillet over medium-high heat. Add 2 tablespoons of butter and the bacon, and cook until the bacon is brown and crisped, about 5 minutes. Add the onion and the peppers and cook until they are lightly softened, about 12 minutes. Stir in the potatoes, thyme, garlic and the turkey and season with salt and pepper. Cook, stirring occasionally, until the potatoes begin to brown, about 15 minutes. Whisk together the chicken stock, cream, Worcestershire sauce, hot sauce and the sherry in a separate bowl and then pour it evenly over the hash. Mash the mixture together lightly and press it firmly into the skillet. Cook until the hash is well browned on the bottom and the hash holds together in a loose cake, about 25 to 30 minutes. Place a large plate over the skillet and invert the hast onto the plate; set the plate aside.

Melt the remaining butter in the skillet, scraping up any browned bits, and return the hash to the skillet, uncooked-side down. Cook until the has is browned on the bottom and the potatoes are tender, about 10 minutes more. Cut the hash into quarters and top each quarter with a fried egg.

You have lots of options with this particular recipe. If you have other vegetables that are leftover that you might like to use in the hash, like squash or Brussels sprouts, by all means throw them in. They will add some nice flavor to the hash. You can always place the skillet in a 350 degree oven after the first initial frying instead of trying to flip it over if you are worried about how that might go. You just want to leave the hash in the oven long enough to crisp up the top and the potatoes get crunchy but tender. We actually didn’t serve this with the eggs since it was Sean’s birthday breakfast; he wanted pancakes instead so we all had hash and pancakes as our meal. I thought it was pretty tasty and the turkey went nicely with everything else and the hot sauce added a nice little kick to the hash. I think you could easily make this with any leftover poultry or meat and it would turn out just as well.

That’s all I have for today. Check back next time for some more recipes. I have a number of things to share that we have made recently, including a turkey pot pie, some lasagna, fettuccine alfredo and we have lots more still coming up, so check back to see what is next. Until next time, enjoy the rest of your day and enjoy your meal!

004


Leave a comment

Posted by on December 3, 2013 in Breakfast, Cooking, Holidays, Leftovers, Poultry, Turkey


Tags: , , ,

One More Thanksgiving Side Dish – Stuffing with Mushrooms and Bacon

When I made the simple roast turkey the other day, I also wanted to make a very simple stuffing to go along with it. I wanted something that didn’t use a lot of ingredients and would use what I most often have on hand in the house so I could be sure to whip it up with ease. Luckily, in the same New York Times article that I found the turkey recipe I also came across this stuffing recipe and it was perfect for what I had on hand. Not a lot of fuss, ingredients or anything else. The only change I made to it myself to make things easier is that the recipes calls for leeks, which I did not have on hand. I substituted an onion instead, and I think the results were just fine.

Stuffing with Mushrooms and Bacon

3 tablespoons melted butter, plus more as needed for greasing the pan

1 1/2 pounds sliced white bread or corn bread

1/2 pound bacon

2 large leeks or onions, trimmed and sliced (3 cups)

1 1/2 pounds mushrooms (mixed variety or use what you have), cut into bite-size pieces

1 1/2 teaspoons kosher salt

3/4 teaspoon black pepper

2 tablespoons chopped sage

1/2 cup dry white wine

1 1/4 cups chicken stock, plus more if needed

1/4 cup apple cider, if using white bread

3 tablespoons chopped parsley

Heat the oven to 250 degrees. Butter a 9 x 13-inch baking pan. Trim the crusts from the white bread and cut it into 1-inch cubes; if you are using corn bread, coarsely crumble it. Spread the bread pieces out on one or 2 large baking sheets. Toast in the oven, tossing occasionally, until the bread crumbs are very dry, about 30 minutes for white bread, about 1 hour for the corn bread. Transfer the crumbs to a large bowl to cool. Increase the oven temperature to 375 degrees.

In a large skillet over medium-high heat, cook the bacon strips until they are crisp. Transfer the bacon to a paper towel-lined plate to drain, leaving the fat in the pan. Add the leeks (or onions) to the bacon fat and cook, stirring occasionally, until they are soft, about 5 to 10 minutes. Add the mushrooms, 1 teaspoon of kosher salt and 1.2 teaspoon of black pepper. Cook, tossing frequently, until the mushrooms are tender and most of their juices have evaporated, about 10 to 15 minutes. Stir in the sage and cook for 1 minute. Add the wine and cook until it evaporates, about 2 minutes. Spoon the mushroom mixture over the dried bread. Stir in the chicken stock. If you are using white bread, stir in the cider. Add the parsley, 1/2 teaspoon of kosher salt and 1/4 teaspoon of pepper. The mixture should be moist and very soft. If you like your stuffing extremely moist, add enough stock to make it seem slightly soggy but not wet (Think that it should look like pudding). Crumble the bacon and stir it into the mixture.

Transfer the bread mixture to the prepared baking pan. Drizzle 3 tablespoons of melted butter over the stuffing. Bake until the stuffing is golden, about 35 to 45 minutes and serve.

I did make one other change to this stuffing. I did add in one diced apple to give it a little extra crunch and flavor. Michelle said it seemed like just what the dish needed and she really enjoyed it with the apple in it, but make your own call if you like that kind of stuffing. The great thing about this dish is that it was easy to do. If you make the bread crumbs ahead of time (the day before), you can throw this together and put it in the oven while your turkey is resting and it should be done in plenty of time. I think this stuffing would go well with your regular weeknight roast chicken as well if you wanted to make your weeknight meal a little fancier or just feel like having some stuffing.

That’s all I have for today. Check back next time for more recipes. I will be making a post tomorrow, most likely with links to some other websites that have Thanksgiving meal hints and recipes. I will have a post in the coming days as well as you try to make use of some of your leftovers. I think I have some easy ideas of things you can do. Until next time, enjoy the rest of your day (if you are on the East Coast, you are getting pelted with rain, like we are) and enjoy your meal!

IMG_1760

 
Leave a comment

Posted by on November 27, 2013 in Cooking, Holidays, Side Dishes, Turkey


Tags: , , , ,

One More Easy Turkey Recipe Before Thanksgiving – Simple Roast Turkey

Okay, there is still plenty of time left if you haven’t really decided want you want to do with your turkey on Thanksgiving. It’s only Monday, so you still have time to do some kind of brining if that is what you want to do. I made another turkey this past weekend to try out a dry brine method that I saw from The New York Times and Melissa Clark recently because I wanted to see if it made any difference in the bird. If it seems like I have made a lot of  turkey the last few weeks, well I have. I wanted to try some things out to give people some options and see how things work and since I wasn’t cooking Thanksgiving dinner this year myself, it seemed like a good idea. I even have 1 turkey left to cook, but my family is getting kind of tired of eating turkey at this point so I might hold on to that one until we get closer to Christmas. In the meantime, here is a very simple dry brine recipe that adds some great flavor to the turkey.

Simple Roast Turkey

1 turkey, 10 to 12 pounds

Coarse kosher salt

1 tablespoon black pepper

1 lemon, zested and quartered

1 bunch fresh thyme or rosemary

1 bunch fresh sage

12 garlic cloves, smashed and peeled

1 bottle hard cider (12 ounces)

Dry white wine or water, as needed

2 onions, peeled and quartered

3 bay leaves

Olive oil or melted butter, as needed

Remove any giblets from the cavity and reserve for stock or gravy. Pat the turkey and the turkey neck dry with paper towels; rub the turkey all over with 1/2 teaspoon of kosher salt per 1 pound of turkey, the pepper and the lemon zest, including the neck. Transfer the turkey to a 2-gallon or larger resealable plastic bag. Tuck the herbs and 6 garlic cloves inside the bag. Seal and refrigerate the turkey on a small baking sheet or wrapped in another plastic bag for at least 1 day and up to 3 days, turning the bird over every day or after 12 hours if brining for only 1 day.

Remove the turkey from the bag and pat it dry with paper towels. Place the turkey, uncovered, back on the baking sheet. Return it to the refrigerator for at least 4 hours and up to 12 hours to dry out the skin. This will help to crisp the skin while it is cooking.

When you are ready to cook the turkey, remove it from the refrigerator and allow it to come to room temperature for one hour.

Heat the oven to 450 degrees. In the bottom of a large roasting pan, add the hard cider and enough wine or water to fill the pan to 1/4-inch depth. Add half of the onions, the remaining 6 garlic cloves and the bay leaves. Stuff the remaining onions and the lemon quarters into the turkey cavity. Brush the turkey generously with olive oil or melted butter.

Place the turkey, breast side up, on a roasting rack set inside the roasting pan. Transfer the pan to the oven and roast for 30 minutes. Cover the breast with aluminum foil. Reduce the oven temperature to 350 degrees and continue roasting until an instant-read thermometer inserted into the thickest part of a thigh registers 165 degrees, about 1 1/2 to 2 hours more. Transfer the turkey to a cutting board to rest for at least 30 minutes before carving.

A couple of things about roasting turkey. Though you have probably heard it a thousand times by now from every cooking show, magazine and blog out there, brining isn’t a necessity when cooking turkey; it does seem to help as far as flavor and the skin itself, but the only real key to having moist turkey is removing the turkey from the oven when it is the right temperature. Don’t go by those little buttons that pop up on the turkey; they are often set to pop when the internal temperature is already high, sometimes 180 degrees, and the bird will continue to cook as it rests outside the oven, leaving you with dry turkey. Invest the money in a thermometer and insert it into the thigh to check the temperature. When it is at 165, pull the turkey out and LET IT REST. Don’t carve it right away; it won’t be ready, you’ll lose all the liquid that needs to re-distribute while the bird rests, and you will end up with dry meat.

If you don’t have a roasting rack to put the turkey on, you can make something of your own to get the turkey up out of the liquid so it browns all over. Form a solid ring out of aluminum foil to place under the turkey to lift it out of the liquid. That is what I did with this bird since I wanted to use one of those disposable pans this time and my rack did not fit in the pan. It worked out really well and it is easy to do.

The dry brine in this recipe really seemed to add some flavor and I did like the combination of the cider and the aromatics. It helped to create some very tasty gravy for the meal. This is one of the easiest turkey recipes I have come across and one of the most effective. If you are making a larger bird, the New York Times does have a scale so you can adjust the herbs and seasonings and cooking time of your bird accordingly. You can check it out here if you wish. I would use this recipe if you want to do things easily for yourself and have great tasting turkey.

That’s all I have for today. I still have a couple of more side dishes to share before Thanksgiving, so check back for those. Until next time, enjoy the rest of your day and enjoy your meal!

IMG_1759

 
1 Comment

Posted by on November 25, 2013 in Cooking, Dinner, Holidays, Poultry, Turkey


Tags: , , , , , ,

Breakfast? Dinner? Why Not Both? Chicken and Waffles

Sean has been asking me to make this one for a long time and I am not really sure why. I tried to tell him that chicken and waffles is just what it sounds like – fried chicken with some waffles. For some reason he really wanted to give it a god so I tried to find a recipe that specialized in both. You could simply just take your favorite fried chicken recipe and any waffle recipe and go to town if that is what you wanted to do, but I found this recipe from Emeril Lagasse that was easy, basic and made really good chicken with some spice to it and very tasty waffles to go along side of them.

Chicken and Waffles

Chicken:

1 (3 1/2 pound) fryer chicken, cut into 8 pieces, giblets removed

1 cup all-purpose flour

1 tablespoon Essence seasoning, recipe to follow

Vegetable oil, for frying

Waffles:

2 cups all-purpose flour

3 1/2 teaspoons baking powder

1 teaspoon sugar

1/4 teaspoon salt

2 eggs

4 tablespoons butter, softened

1 1/2 cups buttermilk

Butter, for topping

Maple Syrup

Essence Seasoning:

2 1/2 tablespoons paprika

2 tablespoons salt

2 tablespoons garlic powder

1 tablespoon onion powder

1 tablespoon cayenne pepper

1 tablespoon dried oregano

1 tablespoon dried thyme


To make the Essence seasoning, combine all the dried herbs thoroughly and store them in an airtight container.

For the chicken: Heat enough vegetable oil to come about 1-inch up the sides of a large, deep cast iron skillet. Heat the oil until a candy thermometer inserted into the oil registers 350 degrees.

Rinse the chicken pieces under cold water and do not dry; leave the pieces wet. In a large, sealable plastic bag, combine the flour and the Essence seasoning. Add the chicken pieces one at a time, seal the bag, and shake the coat the chicken evenly. Remove the chicken and place it on a wire rack set over a baking sheet. Repeat this process until all the chicken is coated. Allow the chicken to rest on the wire rack for 5 to 10 minutes.

Carefully add the chicken to the hot oil and fry, turning once, until the chicken is golden brown and the meat is cooked through, about 15 to 20 minutes total for the pieces being cooked. Do not overcrowd the skillet and cook the chicken in batches if necessary. Remove the chicken pieces from the pan and drain on paper towels. Place the cooked chicken pieces on a wire rack set over a baking sheet and place in a 250 degree oven to keep them warm while you finish cooking the rest of the chicken.

For the waffles: Preheat a waffle iron and lightly spray it with cooking spray. In a large bowl, sift the flour, baking powder, sugar and salt.

In a separate bowl, beat the eggs and add the butter and buttermilk and beat to combine. Add the wet ingredients into the dry ingredients and mix them well until combined.

Pour the batter into the hot waffle iron and cook until the waffle is golden brown and lightly crisp. Remove the waffle and repeat the process until all the batter is used or you have the desired amount of waffles. Top each waffle with a slice of butter, if desired, and serve with the chicken and maple syrup.

It certainly is an interesting combination if you have never had it before. The crispy chicken along with the crispy waffle and the maple syrup make for a tasty dish. I did not use a cut up fryer but only bone-in chicken thighs that I had on hand to make things a little bit easier. you could use whatever type of chicken pieces you prefer. For the Essence seasoning, the recipe makes about 2/3 cup, so you will have some leftover to use for other meals as a rub or seasoning. You could always just use whatever you like most on fried chicken instead and you can even buy your favorite waffle mix and use that if you did not want to make your own. I think it was certainly easy enough that it would warrant making again and it was different to try. Sean seemed to really enjoy it. This recipe made 4 servings, so it was just enough for the three of us with some leftover fried chicken that we can use for other meals.

That’s all I have for today. Check back next time for some more recipes. I still have a few Thanksgiving items to post, including another turkey recipe I am trying, so stay tuned. Until next time, enjoy the rest of your day and enjoy your meal!

001

 
6 Comments

Posted by on November 22, 2013 in Breakfast, Cooking, Dinner, Poultry


Tags: , , , , ,

A Simple French Dish – Chicken with Vinegar Sauce

Chicken seems to lend itself very well to easy weeknight meals no matter what pieces you happen to use. For many people, the easiest thing to do is take some boneless chicken breasts and make something from them, whether it is an easy casserole, a simple stir fry or just baking them in the oven with some potatoes or vegetables. While I like a boneless chicken breast now and then, I think you get so much more flavor out of bone-in pieces that it is worth having to wait a few extra minutes while they cook for what you get. The fact is that these pieces are often a lot cheaper than the boneless breasts anyway. Many times, I buy a whole chicken, cut it into pieces and use that for several meals. Depending on the price of the whole chicken, this can be even cheaper than buying the parts. In any case, this is one of those quick and easy weeknight recipes that can make good use of chicken parts or a cut-up chicken. I got this one from Cook’s Country for a simple yet elegant chicken with vinegar sauce.

Chicken with Vinegar Sauce

1 teaspoon cornstarch

1 cup chicken broth

1/2 cup cider vinegar

2 teaspoons honey

3 pounds bone-in chicken pieces (split breasts cut in half crosswise, drumsticks, and/or thighs), trimmed

Salt and pepper

2 teaspoons vegetable oil

1 shallot, minced

4 garlic cloves, lightly crushed and peeled

1 tablespoon butter

1 tablespoon chopped fresh tarragon

Adjust an oven rack to the upper-middle position and heat the oven to 450 degrees. Dissolve the cornstarch in 2 tablespoons of the chicken broth in a 2-cup liquid measuring cup. Whisk in the cider vinegar, honey and the remaining chicken broth; set the mixture aside.

Pat the chicken dry with paper towels and season with salt and pepper. Heat the vegetable oil in a large, oven-safe skillet over medium-high heat until it is just smoking. Cook the chicken, skin side down, until it is well browned, about 6 to 8 minutes. Transfer the chicken to a plate, skin side up.

Pour off all but 1 tablespoon of the fat accumulated in the skillet and return it to medium-high heat. Add the shallot and garlic and cook until they are fragrant, about 30 seconds. Whisk the broth mixture to re-distribute the cornstarch and add the mixture to the skillet, making sure to scrape up any browned bits on the bottom of the pan. bring the mixture to a boil and return the chicken to the skillet, skin side up, along with any accumulated juices on the plate. Move the skillet to the oven and cook until the chicken breasts register 160 degrees and the drumsticks/thighs register 175 degrees on an instant-read thermometer, about 10 to 15 minutes.

Transfer the chicken to a serving platter and tent it loosely with aluminum foil to allow the chicken to rest while preparing the sauce. Return the skillet to medium-high heat (be careful because the skillet handle will be hot from being in the oven), bring the sauce to a boil and cook until the sauce is slightly thickened, about 5 to 7 minutes. Off the heat, whisk in the butter, tarragon and any accumulated juices from the platter holding the chicken into the sauce. Season with salt and pepper to taste. Spoon the sauce over the chicken and serve.

The real key to this dish, in my opinion, is making sure you get good crispy skin on the chicken when you are browning it in the beginning of the recipe. If you can get that, you end up with a great looking and tasting meal. The sauce has some nice acidity to it from the vinegar but it also has great flavor from the broth and the chicken itself. The whole meal can be made in under 30 minutes, which is perfect for a weeknight dinner. I served it with some white rice and corn and it went very well. The sauce also added some great flavor to the rice.

That’s all I have for today. Check back next time for some more recipes. I still have a few Thanksgiving ideas to share, so keep checking for those. Until next time, enjoy the rest of your day and enjoy your meal!

001

 
Leave a comment

Posted by on November 21, 2013 in Cooking, Dinner, Poultry


Tags: , , ,

Essential Thanksgiving – Interactive Feature – NYTimes.com

Essential Thanksgiving – Interactive Feature – NYTimes.com.

The New York Times lays everything out for you perfectly in this article. They cover everything you need to know and prepare for your Thanksgiving meal to make things as easy as possible for you. Check it out!

 
1 Comment

Posted by on November 20, 2013 in Cooking, Cooking Websites, Dinner, Holidays, Turkey


Tags: , , , ,

What’s a Turkey Without Stuffing? Apple, Sage and Sausage Stuffing

One of my favorite parts of the Thanksgiving meal has always been the stuffing. Even the famous Stove Stop stuffing has its place, but if you have a little bit of time and want something that tastes a whole lot better, then take the effort to make the stuffing yourself. it is not as tough as you think it may be to make one and you can even do it a day ahead of time and just warm it up in the oven to save yourself some time. There are a lot of recipes out there for stuffing and have a few favorites of my own, but I tried a new one this weekend when I made roast turkey for Michelle’s birthday. Like the turkey, this one also came from Saveur Magazine and is for a very simple apple, sage and sausage stuffing.

Apple, Sage and Sausage Stuffing

8 tablespoons butter

3 ribs celery, chopped

1 onion, chopped

4 pork sausages, casings removed

3 apples, peeled and chopped

1 loaf white bread, crust cut off, cut into 1/2-inch cubes and toasted (about 8 cups)

2 tablespoons finely chopped fresh sage

2 cups chicken stock

Kosher salt and freshly ground black pepper, to taste

Heat the oven to 375 degrees. Melt the butter in a large skillet over medium-high heat. Add the celery and the onion, Cook until the vegetables are soft, about 15 minutes. Add the sausage and cook, using a wooden spoon to break the sausage into small pieces, until browned, about 5 minutes. Add the apples and continue cooking until the apples are soft, about 5 to 7 minutes more. Stir in the bread crumbs and the sage; add the chicken stock and season with salt and pepper to taste.

Stuff the stuffing into the turkey cavity, if you wish and roast the turkey according to plans or instructions. Take the remaining stuffing and place it in a baking dish and bake until it is golden on top, about 20 to 25 minutes.

I personally did not put any stuffing in the turkey. I have never been a big fan of stuffing that way and it makes the turkey have to cook even longer and the turkey does not always roast evenly with the stuffing inside it. If you are going to stuff the bird, you want to make sure that any stuffing you use is cooked already. If you want to make this stuffing ahead of time, instead of putting it right into the oven after mixing everything in, place the stuffing in a baking dish, cover it with foil and refrigerate it until the next day. Then, when you take the turkey out to rest, you can place it in a 375 degree oven for 30 minutes to cook and heat up. You’ll want to take the aluminum foil off the dish so the bread crumbs crisp up nicely. You may also need to add a little bit of moisture back into the stuffing because the bread will have absorbed a lot of it. I did not add any in and the stuffing tasted just fine, but it depends on how you like it. I loved the mix of the apples and sausage with the bread and the sage added just the right touch to the dish. I think it would be really good if you used a challah bread with this stuffing as well.

That’s all I have for today. Keep checking back for some more recipes that will be great for Thanksgiving. There’s lots more to come. Until next time, enjoy the rest of your day and enjoy your meal!

010

 
1 Comment

Posted by on November 12, 2013 in Cooking, Dinner, Holidays, Sausage, Side Dishes, Turkey


Tags: , , , ,

 
National Day Calendar

Fun, unusual and forgotten designations on our calendar.

Jennifer Probst

a little bit naughty a little bit nice

Laissez Faire

Letting Life Lead

simple cooking recipes

a blog to share with you the best