RSS

Category Archives: Seafood

A Quick Weeknight Meal – Garlic Shrimp and White Beans

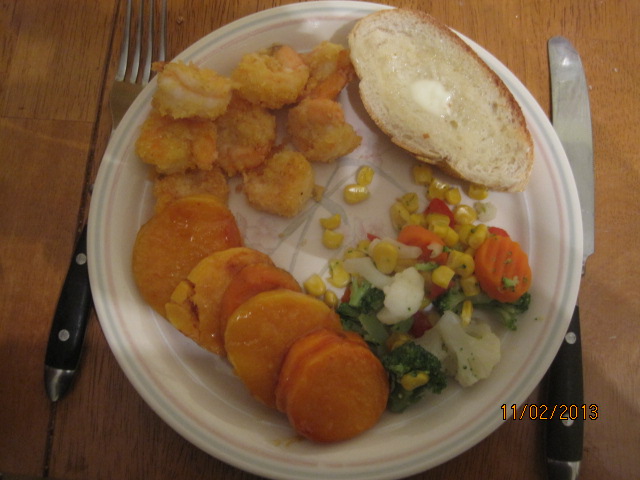
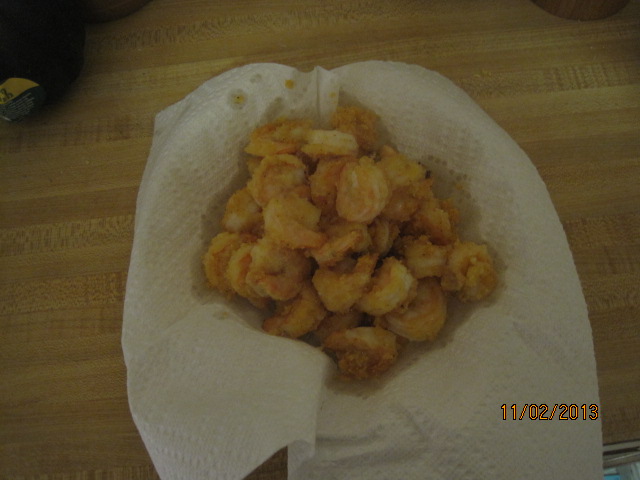
As much as I love shrimp, the prices of it lately have been pretty high so I have not been able to get it very often. Even the price of frozen shrimp has been a bit much at the supermarket, so when I saw some on sale at the fish market lately and saw it was gulf shrimp I decided to make the splurge and get some to have for dinner. Instead of just making the standard fried shrimp or shrimp scampi, I wanted to try something a little different and something that was not going to be very labor intensive to make it perfect for an easy weeknight meal that can be done in just a few minutes. I found this recipe from Bon Appetit for garlic shrimp and white beans and it sounded perfect and included everything I had on hand already, with the exception of the chiles de arbol, which I left out and substituted some chili powder instead.

Garlic Shrimp and White Beans

6 tablespoons olive oil, divided

3 garlic cloves, minced, divided

2 dried chiles de arbol

1 bay leaf

1 1/4 cups chopped tomato

Kosher salt and freshly ground black pepper

1 tablespoon tomato paste

2 15-ounce cans white beans (such as cannellini), rinsed and drained

1 cup chicken broth

1 pound shrimp, peeled and deveined

1 teaspoon smoked paprika

2 tablespoons chopped flat-leaf parsley

Grilled bread (optional)

Preheat the broiler. Heat 2 tablespoons of the olive oil in a large, heavy, ovenproof skillet over medium heat. Add 1 garlic clove, the chiles de arbol, and the bay leaf, and cook, stirring constantly, just until the mixture is fragrant, about 1 to 2 minutes. Do not allow the garlic to burn. Add the chopped tomatoes and season with salt and pepper. Cook, stirring and smashing the tomatoes with the back of a wooden spoon, until the tomatoes are completely broken down, about 5 minutes.

Add the tomato paste and cook, stirring constantly, until the tomato paste is a deep red and caramelized, about 3 to 4 minutes. Stir in the white beans and the chicken broth. Bring the mixture to a simmer and cook until the juices are slightly reduced and thickened, about 3 to 4 minutes. Season the mixture to taste with salt and pepper.

Combine the remaining 2 garlic cloves, 2 tablespoons of the olive oil, the shrimp and the smoked paprika in a medium bowl. Season with salt and pepper and toss the mixture to evenly coat all of the shrimp. Scatter the shrimp over the bean mixture in an even layer.

Broil until the shrimp are golden and cooked through, about 3 minutes. Drizzle the remaining 2 tablespoons of olive oil over he shrimp and the beans. Garnish the dish with the chopped parsley and serve with grilled bread, if desired.

While the grilled bread sounded really good, I didn’t have any on hand that day so I simply served the shrimp as it was. All of the flavors melded nicely together and the beans and the shrimp had a great taste from the garlic, chili powder and paprika. The tomatoes added a nice touch to the whole dish and having some bread to dip in to sop up the juices would have been a nice touch. The whole meal can be put together in under 30 minutes, so it is perfect for one of those busy weeknights when you need something fast to cook.

That’s all I have for today. Check back next time for another recipe. Until then, enjoy the rest of your day and enjoy your meal!

IMG_0673

 
Leave a comment

Posted by on September 16, 2014 in Beans, Cooking, Dinner, One Pot Meals, Seafood


Tags: , , ,

31 Great Labor Day Grilling Recipes | Kitchen Daily

31 Great Labor Day Grilling Recipes | Kitchen Daily.

Planning on doing some grilling on Labor Day but what to go beyond the usual hamburgers and hot dogs? Kitchen Daily has put together 31 great grilling recipes for you that cover everything from your appetizers and main courses to side dishes and dessert so you can grill every part of your meal and make the most of that last unofficial day of summer. Check out the recipes and find one to try this weekend!


Tags: , , , , ,

Wrap it Up – Salmon Baked in Paper (Salmone in Cartoccio)

I don’t buy salmon very often even though it is really good for you and I love the flavor. The fact is that, in my opinion, farm-raised salmon has some ethical issues and it just doesn’t taste that good. I hold out for the wild-caught salmon, but the problem is that most of the time it is just too expensive to buy enough for a meal for the three of us. If I can catch it on sale at the fish market and it looks good, then I will make the investment and get some. This was the case last week when I came across some wild salmon for $14 a pound, a lot cheaper than the usual $19 a pound or more, so I decided to get some and make it for dinner that night. I found this simple recipe from Williams-Sonoma for salmon baked in paper and decided to give it a try. The recipe calls for 6 portions, but I simply cut the recipe in half and made it for the three of us.

Salmon Baked in Paper (Salmone in Cartoccio)

3 tomatoes, seeded and chopped

2 shallots, finely chopped

2 tablespoons chopped fresh marjoram or oregano or 1/2 teaspoon dried

3 tablespoons fresh lemon juice

2 tablespoons olive oil, plus more for oiling paper

Salt and freshly ground pepper, to taste

6 skinless salmon fillets, each about 6 ounces and of uniform shape

Preheat the oven to 400 degrees. In a small bowl, stir together the chopped tomatoes, shallots, marjoram or oregano, lemon juice, the 2 tablespoons of the olive oil, salt and pepper.

Rinse the fish and pat it dry with paper towels. Cut 6 pieces of parchment paper into about 12 inch squares. Fold each sheet in half, open the paper like a book and brush the paper to one side of the crease you have made with olive oil. Place a salmon fillet on each oiled side of the paper. Spoon the tomato mixture over the fish, dividing it evenly among all of the packages.

Fold the parchment paper over the fish. Tightly seal each package by folding the edges over several times and creasing the paper firmly. Place the packages on 2 baking sheets.

Bake the packages in the oven until the salmon is opaque throughout, about 15 to 17 minutes. To check for the doneness of the fish, carefully open a package and pierce the fish with a knife.

Slide the packages of the fish onto individual plates and allow the diners to open their own packages individually.

It is a very simple dish that comes out with great flavor, especially this time of year when you can use fresh, local tomatoes as part of the meal. It is an easy combination and the fish is cooked to perfection, cooking in the paper just right with all of the flavors sealed in. I think you could do the dish with any type of fish that you like and just adjust the cooking time according to the thickness of the fish you are using. All in all, it is a very easy and elegant dish you can make any night of the week. I served this with some white rice and some of the black bean and mango salad I had.

That’s all I have for today. Check back next time for another recipe. Until then, enjoy the rest of your day and enjoy your meal!

IMG_0642 IMG_0643

 
2 Comments

Posted by on August 18, 2014 in Cooking, Dinner, Seafood


Tags: , , , ,

Ahoy! A Simple Catfish Dinner

As much as I love seafood, the price of it most of the time is a bit too much for many families so don’t get to eat it that much at home unless I can find something that is on sale at the fish market. I did happen to stumble across some catfish when I was there last and decided to pick some up since it was such a good deal. I have made catfish before and posted catfish recipes here, but I had come across one from Robert Irvine a while back and had been waiting for the right opportunity to give it a try. It is a very simple fried catfish with a nice little sauce to go with it and it only takes about twenty minutes to make the whole meal.

Catfish Dinner

For the Catfish:

4 catfish fillets
2 cups buttermilk
Vegetable oil, for frying
1 to 2 cups cornmeal
Salt and ground pepper
1 to 2 cups all-purpose flour
2 eggs, beaten for egg wash

For the Sauce:
1/4 pound (1 stick) butter
1/2 cup minced red onion
1/2 cup minced bell pepper
2 ribs celery, minced
1/4 cup all-purpose flour
2 teaspoons seafood seasoning, such as Old Bay
2 tablespoons minced garlic
2 cups heavy cream
1 pound Louisiana crawfish tails or small shrimp
2 cups cooked grits or polenta, for serving
Chopped green onions or chives, for garnish

To prepare the catfish: marinate the catfish by placing the fillets and buttermilk in a flat-bottomed container. Allow the catfish to marinate in the refrigerator for a minimum of 30 minutes and a maximum of 1 day.

Preheat a deep fryer, large cast iron skillet or Dutch oven to 350 degrees with vegetable oil. Before frying, remove the catfish from the marinade and allow any excess buttermilk to drip off. In separate bowls, place the cornmeal, seasoned with salt and pepper, the flour, and the beaten eggs to set up dredging stations. Coat a catfish fillet by dipping it into the flour, shaking off any excess, then dipping it in the egg wash, allowing any excess to drip off, and then dipping it in the seasoned cornmeal and repeat the process with the remaining fillets before frying. Fry the fist until the catfish reaches 145 degrees and is golden brown, about 4 to 5 minutes. Remove the fish from the frying oil and allow it to drain any excess oil on a plate with paper towels.

For the sauce: In a medium saucepan over medium heat, add the butter and melt it. Next, add the onions, peppers and celery and sweat the vegetables until they are translucent, about 3 to 4 minutes. Stir in the flour, seafood seasoning and garlic to thicken the butter. This will take 1 to 2 minutes.

Next, add the cream and reduce the heat to medium-low. Cook the mixture until the cream sets. Finally, add the crawfish or shrimp, if using, and whisk to blend, cooking for  the final 2 minutes.

To serve the fish, place 1/2 cup of grits or polenta on the plate, then a quarter of the prepared sauce and top with a crisp cooked catfish fillet. Finish the dish with green onions or chives.

Of course, finding crawfish tails in my neck of the woods is next to impossible, and I didn’t have any tiny shrimp on hand either, so I omitted them from the recipe, but I think they would really round things out nicely. The flavor from the sauce mixed with the catfish was fantastic and I served the meal with some polenta. The combination was great and it was all very simple to make. You could try the same dish with other types of fish if your prefer, such as flounder or tilapia.

That’s all I have for today. Check back next time for another recipe. Until then, enjoy the rest of your day and enjoy your meal!

IMG_0527

 
Leave a comment

Posted by on May 14, 2014 in Cooking, Dinner, Sauce, Seafood


Tags: , , , , , , ,

Step Up the Burrito a Notch with These Surf and Turf Burritos

Burritos are one of those things that are great for breakfast, lunch or dinner because you can really put anything you want inside one to make it work for you. They are easy to make and take no time at all and you can even make them ahead of time and reheat them if you need a quick meal. I decided to jazz up our burritos meal last night by making some surf and turf burritos, not using lobster meat and filet mignon of course, but opting for shrimp and some skirt steak that I had placed in some carne asada marinade. The simple marinade makes a big difference with the skirt steak as it adds great flavor to the meat and helps to break it down some to make it easier to slice and eat. If you are going to use a skirt steak or flank steak for this, you want to make sure you use a marinade along the way.

Carne Asada Marinade

1/2 cup orange juice

1/4 cup fresh lemon juice

1/4 cup fresh lime juice

2 cloves garlic, minced

1/3 cup soy sauce

1 teaspoon finely chopped canned chipotle pepper

1/2 tablespoon chili powder

1/2 tablespoon ground cumin

1/2 tablespoon paprika

1/2 teaspoon dried oregano

1/2 tablespoon black pepper

1/2 bunch cilantro, chopped

1/4 cup olive oil

2 pounds skirt or flank steak

Combine the orange juice, lemon juice and lime juice in a large bowl along with the garlic, soy sauce, chipotle pepper, chili powder, cumin, paprika, dried oregano, black pepper and the cilantro. Slowly whisk in the olive oil until all of the marinade is well combined.

Place the steak between two sheets of plastic wrap on a solid, level surface and firmly pound the steak with the smooth side of a meat mallet so that is a thickness of about 1/4-inch. After pounding the meat, poke the steak all over with a fork. Add the meat to the marinade in the large bowl, cover the bowl and allow the steak to marinade in the refrigerator for 24 hours.

Heat a grill pan or cast iron skillet over medium high heat and lightly oil the surface with vegetable oil or olive oil.

Remove the steak from the marinade and cook until your desired doneness, about 4 to 5 minutes per side for medium-rare. Discard the used marinade. When the meat is cooked to your liking, remove the steak from the grill pan or skillet and let it rest for 2 to 3 minutes before slicing thinly across the grain.

You could simply serve the meat this way with a couple of nice side dishes and you would have a great meal, but I decided to incorporate the steak into our surf and turf burritos for an extra special treat for dinner.

Surf and Turf Burritos

6 large, 10-inch flour tortillas

1 cup sour cream

1 cup guacamole or 1 avocado, peeled, pitted and sliced thinly

1 cup shredded Mexican blend cheese

2 pounds Carne Asada, sliced thinly (see above recipe)

1 pound medium shrimp, peeled, deveined and cooked, chopped

1 cup salsa or pico de gallo

On a flour tortilla, spread a layer of sour cream, then a layer of guacamole or sliced avocado and then layer liberal amounts of cheese, carne asada, shrimp and salsa or pico de gallo. With wet fingertips, fold over the sides of the tortilla and roll it up. Repeat the process until you have filled 6 tortillas.

Place the rolled burritos in a hot skillet or on a medium-hot grill. Cook the burritos until they are golden brown on both sides, about 6 minutes total.

These were really good and very filling. The great flavors of everything combined were awesome and you can make a fancy sounding and great tasting meal in just minutes with this recipe. Of course, you could probably use filet mignon and lobster if you really wanted to, but for burritos this is ideal and tastes great. I also made some Tex-Mex rice and beans to go along with the meal and I will post the recipe for them tomorrow. This recipe is definitely one we will be having again since we all loved it.

That’s all I have for today. Check back next time for another recipe. Until then, enjoy the rest of your day and enjoy your meal!

IMG_0510 IMG_0509


3 Comments

Posted by on April 18, 2014 in Beef, Cooking, Dinner, Lunch, Sandwiches, Sauce, Seafood


Tags: , , , , , , ,

A Simple Snack or Meal – Fried Shrimp with Homemade Cocktail Sauce

I love to make shrimp and now that Sean has a good appreciation for it as well since he has gotten older, we have it a little more frequently than we did in the past. Of course, Sean’s favorite way to have it is as fried shrimp. I don’t often make it this way because I try to stay away from doing too much frying these days, but every once in a while I do have to indulge him and make some nice, crispy fried shrimp. It is very easy to do only they only take a minute or two to make and will test better than any of the things you can buy in the grocer’s freezer that are already breaded and ready to be cooked. This recipe is sort of combination of recipes I got from Food Network and Williams-Sonoma, and you can certainly convert it into oven frying if you want to go that way instead. I also made an easy cocktail sauce to go along with it.

Fried Shrimp and Cocktail Sauce

For the Cocktail Sauce:

1 cup ketchup or chili sauce

2 tablespoons drained, prepared horseradish

Finely grated zest of 1 lemon

1 tablespoon fresh lemon juice

Hot sauce (optional)

For the Shrimp:

1 1/4 cups panko or other dried bread crumbs

1 teaspoon paprika

1/2 teaspoon dried oregano

1/2 teaspoon dried basil

1/2 teaspoon dried thyme

1/2 teaspoon granulated garlic

1/2 teaspoon kosher salt

1/8 teaspoon cayenne pepper

3/4 cup all-purpose flour

1/2 cup cornstarch

2 eggs

1 1/2 pounds large shrimp, peeled and deveined

Vegetable oil, for frying

To make the cocktail sauce, in a small bowl stir together the chili sauce or ketchup, the horseradish, lemon zest and lemon juice until blended. Season the sauce with hot sauce, if desired. Set the sauce aside.

For the shrimp, heat about 2 inches of the vegetable oil in a heavy-bottomed pot, Dutch oven or large cast-iron skillet over medium heat until a deep-fry thermometer registers 350 degrees. Meanwhile, in a large bowl stir together the bread crumbs, paprika, basil, oregano, thyme garlic, salt and cayenne pepper. In a separate shallow bowl whisk together the all-purpose flour and the cornstarch. Finally, in a third shallow bowl whisk the eggs.

Working in batches, dredge the shrimp in the flour mixture, shaking off any excess, then sip the shrimp in the egg mixture, again shaking off any excess, and then dip the shrimp in the bread crumb mixture, turning the shrimp to form a thick crust. Fry the shrimp in the hot oil until it is lightly golden, about 1 to 2 minutes total, adjusting the heat as necessary to maintain the oil temperature. Transfer the shrimp to a paper towel-lined plate with a slotted spoon and continue frying the shrimp until it is all fried.

Transfer the cocktail sauce to individual bowls for dipping and serve the shrimp.

These shrimp turn out with a great coating that has really good flavor and crunch when they are done. You want to be careful not to overcook the shrimp and burn the coating or make the shrimp rubbery. They only need a minute or two at the most to get really golden brown. These are great as an appetizer for a party or to serve on a buffet just as well as you can make them for dinner. The cocktail sauce is also very easy and will stay stored in the fridge so you can use it with other fish meals or instead of regular ketchup.

That’s all I have for today. Check back next time for some more great recipes. Until then, enjoy the rest of your day and enjoy your meal!

IMG_0484

 
3 Comments

Posted by on April 6, 2014 in Appetizers, Cooking, Dinner, Seafood


Tags: , , , ,

Going Ga-Ga Over Gumbo

I had meant to post this recipe a couple of weeks ago but I seemed to have caught up in other things lately and just completely forgot about it until I was making shrimp for dinner tonight and remembered I had a recipe for the shrimp, chicken and andouille gumbo I had made back on Fat Tuesday. Sean had requested some gumbo for that night so I had picked my way through a few different recipes until I came across this one from Bon Appetit. One thing to not about this particular recipe is that it makes a lot of gumbo. The servings for the original recipe are for 16 people. I cut the recipe in half when I made it and it still made a lot with many leftovers, so unless you are planning to feed a lot of people with this one, you might want to try to adjust it to fit your particular meal needs. Either way, it’s a great recipe to use.

Shrimp, Chicken and Andouille Gumbo

1 cup vegetable oil
1 cup all-purpose flour
6 large onions, chopped (about 12 cups)
6 red bell peppers, seeded, chopped (about 7 cups)
8 celery stalks, chopped (about 3 cups)
16 garlic cloves, chopped
1 teaspoon cayenne pepper
1 cup dry white wine
1/2 cup chopped fresh thyme
6 bay leaves
2 28-ounce cans diced tomatoes with juice
4 8-ounce bottles clam juice
4 cups low-salt chicken broth
4 pounds andouille sausage, cut crosswise into 1/2-inch-thick slices
3 pounds skinless boneless chicken thighs, cut into 1-inch cubes
2 16-ounce packages sliced frozen okra
4 pounds peeled deveined medium shrimp
Minced fresh Italian parsley
Steamed rice

Heat oil in a heavy 13-quart pot over medium-high heat until it is very hot and almost smoking. Add the flour and stir constantly until the mixture is a dark reddish-brown, about 5 minutes. Add the chopped onions, chopped bell peppers, and chopped celery and cook until the onions are soft and brown, stirring frequently, about 20 minutes. Add the garlic and cayenne and stir for 2 minutes. Add the wine, thyme, and bay leaves; bring the mixture to a boil, stirring occasionally. Add the tomatoes with juice, clam juice, chicken broth, andouille sausage, and the chicken thighs; simmer until the chicken is cooked through, about 15 minutes. Add the okra and simmer until it is tender, about 10 minutes.
Add the shrimp to the pot and cook the shrimp until it is just opaque in the center, stirring often, about 5 minutes. Season the gumbo to taste with the salt and pepper. Garnish the gumbo with minced parsley and serve with steamed rice alongside.

As you can see this recipe is not hard to make, but it does require an awful lot of prep work to make this easy on yourself. Do all of your chopping and dicing ahead of time and lay everything out for yourself to make it a lot easier and it will all  come together quite easily. The flavors are great and I love the spiciness of the andouille with the shrimp and chicken and all of the great vegetables. Making the roux takes some time and attention but it is definitely worth it. There are lots of gumbo recipes out there that you can try; some omit the shrimp, some include other seafood. it’s really up to you as far as what you like best but you will get a great result and this recipe is perfect to make for a party or a buffet for a lot of people.

That’s all I have for today. Check back tomorrow for another recipe to try. Until then, enjoy the rest of your day and enjoy your meal!

IMG_0457 IMG_0455


Tags: , , , , ,

Romance in the Air and On the Plate, Part 3 – Rib-Eye Steak with Pan Jus and Broiled Lobster Tails

On to the entrees! I made a pretty simple entrée for Valentine’s Day that you can make any time you want a nice steak for dinner, whether it is a special occasion or not. This simple recipe comes from Williams-Sonoma and makes a great steak with a nice pan sauce using some of the wine we had with dinner. I also added in a couple of lobster tails and I will share that recipe right after this one for the steak.

Rib-Eye Steak with Pan Jus

1 rib-eye steak, 18 to 20 ounces and about 1 1/2 inches thick

Kosher salt and freshly ground black pepper

1 fresh rosemary sprig

1 tablespoon olive oil

1/4 cup dry red wine

1/2 cup beef or chicken stock

2 small fresh thyme sprigs

Preheat the oven to 400 degrees. Season the steak generously with salt and pepper. Pick the rosemary leaves from the stem and press them into the steak. In a ovenproof skillet or saute pan set over medium-high heat, warm the olive oil. Let the oil get quite hot but before it starts to smoke, sear and brown the steak on one side for about 1 minute. Turn the steak over and sear the other side for about 1 minute. Use tongs to hold the steak upright and sear the sides, about 1 minute per side.

Transfer the pan to the oven and roast the steak for 10 to 12 minutes for medium-rare, or until it is done to your particular liking. Press the center of the steak to gauge doneness; it will have some give for medium-rare, more firmness for medium. Transfer the steak to a cutting board, cover loosely with aluminum foil and let the steak rest for 10 minutes.

Meanwhile, add the wine, stock and thyme sprigs to the drippings in the pan and place the pan over medium-high heat. Be careful not to burn yourself on the hot pan. Deglaze the pan, stirring with a wooden spatula to scrape up any browned bits, and simmer until the liquid is reduced by half. Adjust the seasoning with salt and pepper to taste. Remove and discard the thyme sprigs.

Using a sharp knife, carve the steak across the grain into thin slices. Arrange the slices on warmed plates and spoon the pan juices over the top and serve.

Admittedly, a steak this size is pretty darn big and not something you are going to buy very often, but for a special occasion it is a nice treat. Also, using a big, thick steak like this does help you cook things perfectly so it comes out just right and will not disappoint. You will likely have leftovers (we sure did, even with 3 of us eating) so you can use them for a variety of other meals afterwards. There is nothing quite like a really good steak with a simple pan juice, and this one came out just perfectly.

As an added bonus for the meal I had picked up some frozen lobster tails that were on sale and thought we would have them as well. Sean had never had lobster and wanted to try it, and I didn’t really want to buy whole lobsters, so this was a good compromise. Frozen lobsters are not always great and sometimes turn out rubbery so you need to be careful in thawing them and re-heating them for a meal, unless you are planning to use them for something like a bisque. Take them out of the freezer the day before and let them thaw in the refrigerator so they won’t be tough. I did a simple broil with a quick little marinade first for some added flavor.

Broiled Lobster Tails

3-4 frozen lobster tails, about 5 ounces each

1 medium onion, sliced

1/4 cup olive oil

1/2 cup fresh lemon juice

Pinch salt

1 teaspoon paprika

Wash the lobster tails and careful cut through the center membrane along the belly of the lobster to expose the meat.Place the sliced onion, olive oil, lemon juice, salt and paprika in a bowl and mix well. Place the lobster tails in the mixture and toss with the mix. Refrigerate the lobster tails in the mix in the refrigerator for 1 to 2 hours. Preheat the broiler for 10 minutes.

In a broiler safe dish, place the lobster tails with the hard shell facing down and pour half of the marinade over the lobsters. Broil the lobster tails for 4 minutes. Turn the lobsters so the shell is facing up and broil them for another 5 minutes. Turn the lobsters again, add the remaining marinade over the lobster tails and broil for 3 more minutes and then serve.

These were a nice treat and the marinade helped to add some nice color and flavor to the lobster meat. They were just the right size for the meal and did not come out overcooked, which I was worried about. They were quite tasty and Sean really enjoyed it for his taste of lobster, so I’ll have to look for when they are on sale again.

That’s all I have for today. Check back next time for some more recipes. I still have some dessert that we had for the night to share with you. Until then, enjoy the rest of your day and enjoy your meal!

010 008 009

 
2 Comments

Posted by on February 17, 2014 in Beef, Cooking, Dinner, Holidays, Seafood


Tags: , , , , ,

Dinner in a Flash – Quicker Than You Can Say Cornmeal Batter Shrimp

For many people, the only real association they have with seafood is shrimp. We eat a lot of different seafood in our home, but shrimp seems to be a constant favor among my family, as it is with many other families. The great thing about shrimp is that it is really easy to make and very versatile. You can do all kinds of things with it and cook it in many different ways. If you can get fresh shrimp for a good price in your local area, then go for it. For the majority of people around the country, most of the shrimp available in supermarkets or other stores is farm-raised and frozen. You can even get it often in resealable bags so you can take out just as many as you need to cook for your meal, thaw them in the refrigerator overnight or run them under cold water for an hour or less and you can start cooking. Just a few weeks ago, the New York Times Magazine ran an article about different ways to cook shrimp and gave some different recipes, which is where I picked up this recipe for cornmeal batter shrimp.

Cornmeal Batter Shrimp

Vegetable oil

1 pound shrimp, peeled and deveined

1 cup milk

1 egg

1 cup cornmeal

1/2 cup all-purpose flour

Heat about 2 inches of vegetable oil in a cast iron skillet or Dutch oven until the temperature of the oil registers 350 degrees. Slice the shrimp lengthwise while the oil is heating. Combine the milk and the egg in a separate shallow dish and beat the egg until blended with the milk. In another shallow dish, combine the cornmeal and flour and mix gently until just combined. Dip the shrimp in the liquid mixture, shaking off any excess. Dredge the shrimp in the cornmeal mixture, again shaking off any excess. Fry the shrimp in small batches in the hot oil for less than 5 minutes until golden brown. Drain the shrimp on a paper towel lined dish and cover the dish while you repeat the process with the remaining shrimp. Serve.

The whole meal can be done in about 10 or 15 minutes, including preparation. Make sure not to overcook the shrimp as it will very quickly get very rubbery and chewy. The shrimp will turn out nice and crisp and the cornmeal not only helps to give it a great crust, but really good flavor as well. You can serve this alongside some tartar sauce or cocktail sauce if you like. We had this as an entrée one night with some baked ginger sweet potatoes and some mixed vegetables, but you could also make this as a nice appetizer for any party, holiday or weekend and it would make a great snack while watching some football.

That’s all I have for today. Check back next time for some more recipes. There’s always lots more to come. Until then, enjoy the rest of your day and enjoy your meal!

003 001

 
Leave a comment

Posted by on November 7, 2013 in Appetizers, Cooking, Dinner, Seafood


Tags: , , , ,

Swift and Simple Glazed Salmon

Salmon is one of those meals I don’t make very often but I really should make more of it. It is very good for you, but Michelle really only likes the Wild salmon, which does have a different taste and look than that of farm-raised salmon and tends to cost quite a bit more. For this reason, I really only get some when I notice it on sale and looking particularly good. This was the case recently when I saw some at Adam’s Farm and picked up a pound for us to have for dinner. The great thing about fish meals is that they take almost no time at all to prepare, and this simple dish from Cook’s Illustrated is no exception and gives the salmon a great Asian flavor.

Glazed Salmon

1 teaspoon packed light brown sugar

1/2 teaspoon kosher salt

1/4 teaspoon cornstarch

1 (1 1/2 – 2-pound)skin-on salmon fillet

Pepper

1 teaspoon vegetable oil

1 recipe Asian Barbecue Glaze (to follow)

Asian Barbecue Glaze:

2 tablespoons ketchup

2 tablespoons hoisin sauce

2 tablespoons rice vinegar

2 tablespoons packed light brown sugar

1 tablespoon soy sauce

1 tablespoon toasted sesame oil

2 teaspoons Asian chili-garlic sauce

1 teaspoon grated fresh ginger

For the Asian barbecue glaze, whisk all the ingredients together in a small saucepan. Bring the mixture to a boil over medium-high heat; simmer until it is thickened, about 3 minutes. Remove from the heat and cover the saucepan to keep the glaze warm until use.

For the salmon, adjust an oven rack to the middle position and preheat the oven to 300 degrees. Combine the brown sugar, kosher salt and cornstarch together in a small bowl. Use a sharp knife to remove any whitish fat from the belly of the salmon and then cut the fillet into 4 equal portions. Pat the fillets dry with paper towels and season with pepper. Sprinkle the brown sugar mixture evenly over the top of the flesh side of the salmon fillets, rubbing it to distribute it evenly.

Heat oil in a large, oven-safe nonstick skillet over medium-high heat until it is just smoking.  Place the salmon, flesh side down, in the skillet and cook until it is well browned, about 1 minute. Using tongs, carefully flip the salmon and cook it on the skin side for about 1 minute.

Remove the skillet from the heat and spoon the Asian barbecue glaze evenly over all the salmon fillets. Transfer the skillet to the oven and cook until the fillets register 125 degrees (for medium-rare) and are still translucent when cut into with a paring knife, about 7 to 10 minutes. Transfer the fillets to a serving platter or individual plates and serve.

The brown sugar on the salmon helps it develop a nice crust when you first sear it while the cornstarch helps the glaze to adhere nicely to the fish. You end up with a beautiful pink salmon with just a nice crust and a great glaze to top it off. The whole meal can be cooked in about 20 minutes. I served this with white rice and spinach, though I also had a bit of the leftover Fall vegetable risotto with mine instead of the white rice. It was very good and simple enough to make anytime you have salmon and just want a quick and easy meal.

That’s all I have for today. Check back next time for some more recipes. Until then, enjoy the rest of your day and enjoy your meal!

001

 
Leave a comment

Posted by on October 22, 2013 in Cooking, Dinner, Sauce, Seafood


Tags: , , ,

 
National Day Calendar

Fun, unusual and forgotten designations on our calendar.

Jennifer Probst

a little bit naughty a little bit nice

Laissez Faire

Letting Life Lead

What To Have For Dinner Tonight

Simple and delicious dinner inspiration