RSS

Category Archives: Side Dishes

12 Make-Ahead Burger Toppings – Photo Gallery | SAVEUR

12 Make-Ahead Burger Toppings – Photo Gallery | SAVEUR.

There are fewer things better than having a great burger right off the grill. The flavor you get from grilling your burger is unlike any other method and I could eat them all day long myself, but having some great condiments to go on your burger makes things even better. If you want to go beyond the typical store-bought items and try some things of your own, Saveur Magazine has put together 12 great burger toppings that you can make ahead and have ready for your next barbecue, outdoor party or just to enjoy for yourself. Check it out!


Tags: , , , ,

Make This Simple Summer Side – Black Bean Salad with Mango, Cilantro and Lime

Summer meals, whether you are cooking them out on the grill, in the kitchen or not cooking at all and trying to keep things cool and light, call for some easy side dishes that taste great. Sure coleslaw and potato salad are always great standbys, but I have found myself recently trying to make more use of different beans in my main dishes and side dishes. Beans are a great source of fiber and protein and can go really well with a lot of the summer vegetables and fruit that you find available right now. I came across this really easy recipe from the Cooking Channel for a black bean salad with mango, cilantro and lime and it sounded so easy and refreshing that I just knew I had to give it a try one night.

Black Bean Salad with Mango, Cilantro and Lime

1/4 cup apple cider vinegar

2 tablespoons fresh lime juice

1 tablespoon honey

1 teaspoon ground cumin

1/3 cup canola or vegetable oil

Kosher salt and freshly ground black pepper

1/2 small ripe mango, peeled and diced into 1/4-inch pieces

1/2 yellow, orange or red bell pepper, cut into a small dice

1 (14.5-ounce) can black beans, drained and rinsed

1 small jalapeno, seeds and ribs removed, minced

1 small red onion, cut into a small dice

1/4 cup fresh cilantro leaves, chopped

In a small mixing bowl, combine the apple cider vinegar, the lime juice, the honey and the ground cumin. Slowly whisk in the canola or vegetable oil until it is well incorporated. Season with salt and pepper to taste.

Mix the diced mango, diced bell pepper, black beans, minced jalapeno pepper and the diced red onion together in a large bowl. Drizzle the vinaigrette over the ingredients and toss everything together until it is combined. Season the salad with salt and pepper to taste. Garnish the dish with the cilantro and serve.

I loved he freshness of this salad with the vinaigrette. The lime juice really made it all pop together, but to me the mixof the black beans, jalapeno, red onion and the mango are what really make this work. You get such a great medley of flavors with the freshness of the mango combined with the bite of the onion and the jalapeno that it all seems to go really well together. This salad works well as a side dish to just about any type of chicken, pork or beef dish and could even stand on its own as a vegetarian meal if you wanted it to. I served it as a side to some pulled pork tacos I made (which I ill be posting the recipe for tomorrow) and it was fantastic on the side or right on the tacos themselves. I think it would also work great with quesadillas or burritos.

That’s all I have for today. Check back next time for another recipe. Until then, enjoy the rest of your day and enjoy your meal!

IMG_0638

 
2 Comments

Posted by on August 11, 2014 in Beans, Cooking, Picnic Fare, Produce, Salad, Side Dishes, Vegetarian


Tags: , , , , ,

It’s Tomato Time! Use Those Summer Tomatoes for a Simple Tomato Tart

There are few things better than when tomatoes are in season. Getting a really fresh tomato from the local farmer’s market can be a treat all of its own and there are lots of different varieties that you get to choose from this time of year. Around here in my area, the tomatoes get very reasonable in price so you can load up and make all kinds of different things with them. They are great to use to make your own tomato sauce, perfect for a Margherita pizza, ideal for any type of BLT that you might want to make, you can dice them up for some panzanella salad, just have them in a nice salad or even just eat them alone as a sandwich all of their own. I decided to take a few tomatoes that I had and make use of this really easy recipe from Food Republic for a very simple tomato tart.

Simple Tomato Tart

4 ripe tomatoes

2 tablespoons Dijon mustard

1 package puff pastry, thawed

2 teaspoons fresh thyme leaves, chopped

1 tablespoon butter

Salt

1/4 cup balsamic vinegar

Preheat the oven to 400 degrees. Slice the tomatoes in 1/4-inch slices and salt the tomatoes heavily. This so as much excess water as possible comes out of the tomatoes and this will help keep the tart from getting soggy. Leave the salted tomatoes aside for 10 minutes. After the 10 minutes have passed. use paper towels to wipe off the extra salt on the tomatoes and pat the tomatoes dry to pick up any excess moisture that may be left.

Arrange the thawed puff pastry in a pie plate or a baking dish. Make sure to add a little bit of butter into the dish before laying the puff pastry down in the dish to prevent the pastry dough from sticking to the dish. Spread the Dijon mustard evenly over the pastry dough. Add 1 teaspoon of the chopped thyme leaves and then arrange the tomatoes on top of the Dijon mustard and the thyme leaves. Add the other teaspoon of the chopped thyme leaves over the tomatoes. Drizzle the balsamic vinegar over the top of the tomatoes. Garnish the tart with a few sprigs of thyme.

Bake the tart in the oven for 45 minutes or until the pastry has achieved a deep caramel color. Take the tart out of the oven just before the edges of the tart begin to char and not sooner. Allow the tart to coll for 15 minutes before serving or allow it to cool at room temperature and serve when you are ready.

I loved the simplicity of this dish and you really get the deep flavor of the tomatoes that have been roasted in the balsamic vinegar and the Dijon mustard adds just a hint of flavor to the dish. This is a great side dish to make to go along with any type of meal you might serve in the summer or to go along with a barbecue. you could certainly use this as a dish to bring to any summer party you might attend as well. I’ll be making this one again as the summer goes on.

That’s all I have for today. Check back next time for another recipe. Until then, enjoy the rest of your day and enjoy your meal!

IMG_0603


Leave a comment

Posted by on July 15, 2014 in Cooking, Side Dishes, Vegetables, Vegetarian


Tags: , , , , ,

Pick This Pickleback Slaw as a Side Dish for Summer

There are so many different variations of coleslaw that it seems you can try it in just about any manner with any kind of ingredient. As long as it has some form of cabbage in it, slaw seems to be fair game today. For me, I love to have a slaw that is crispy and wet and soggy and full of mayonnaise. Don’t get me wrong – I like a  coleslaw that uses mayo but I don’t want the vegetables swimming in it. It takes away from the flavors of the cabbage and other vegetables and it isn’t very practical as a summer side dish if you use a lot of mayo and can’t leave the dish out for a bit on a table. This particular recipe I picked up from the New York Times and Sam Sifton and it makes use of an item that you probably throw away most of the time – pickle juice.

Pickleback Slaw

1 small head green cabbage

1 small head red cabbage

2 carrots, peeled and grated

2 apples, such as Granny Smith, peeled and cut into matchsticks

1/2 cup mayonnaise

3 tablespoons juice from a pickle jar or pickle relish jar

1 tablespoon Dijon mustard

1 tablespoon cider vinegar

2 teaspoons hot sauce

Kosher salt

Ground black pepper

Cut the green and red cabbages in half and remove the core from each of the sides. Cut each half of cabbage in half again and slice each quarter of cabbage into very thin ribbons. Mix the red and green cabbages with the grated carrots and sliced apples in a large, non-reactive bowl.

In a separate bowl, whisk together the mayonnaise, pickle juice,Dijon mustard, cider vinegar,hot sauce, kosher salt and black pepper until well blended.

Pour the dressing over the cabbage mixture and toss the cabbage well to coat it. Season the slaw with salt and pepper to taste. The coleslaw may be covered with plastic wrap and refrigerated until you are ready to serve it. Toss the coleslaw again before serving.

Alternatively to slicing the heads of cabbage and grating the carrots yourself you could just as easily use a bag of coleslaw mix that already has all of this done for you. Choose some apples that have good flavor to them and you get even a little bit more taste into the slaw. This slaw has just the right bite to it from the pickle juice and the hot sauce and I loved the way it all mixed with the cabbages and apples. It only seemed to get better after a day or two in the fridge as well, making a great side dish for all kinds of burgers, hot dogs, ribs, sandwiches and more. of all of the coleslaw dishes I have made recently, this one seems to be one of the best choices and I have made it a couple of times since I tried the original.

That’s all I have for today. Check back again next time for another recipe. Until then, enjoy the rest of your day and enjoy your meal!

IMG_0567

 
1 Comment

Posted by on June 19, 2014 in Cooking, Dinner, Lunch, Salad, Side Dishes, Vegetables


Tags: , , , , ,

Wow the Crowd with This Zesty Potato Salad

Summer side dishes can seem limited at times and you might get tired of having the same old options of potato, coleslaw, salad, baked beans and the like. Everyone once in a while you just want to try to spice things up a little bit and try some new twists on old favorites so you can experience some new flavors and get ideas for future meals. Potato salad is one of those things that every family seems to have a basic recipe that they fall back on and pass down from person to person. I know I have made the same potato salad for years and was looking for a new way to spice things up a little bit and add some great flavor to this dish when I was making burgers the other night. I came upon this recipe in searching the Internet from a blog called Pass the Sushi and saw a posting for whiskey burgers and zesty potato salad. I decided to give both a try, and I am posting the zesty potato salad recipe first for you to take a look at.

Zesty Potato Salad

2 1/2 pounds small red potatoes, quartered

3 cloves garlic, smashed

Kosher salt

6 slices bacon, chopped

2 tablespoons extra-virgin olive oil

1 red onion, diced

3 stalks celery, diced

1/2 cup red wine vinegar

1 1/2 cups mayonnaise

1/2 cup Dijon mustard

Place the potatoes and the smashed garlic in a large stock pot. Fill the pot with water to about 2 inches above the potatoes and generously salt the water with the kosher salt. Bring the water to a boil over high heat. Reduce the heat to medium and simmer the potatoes until they are fork tender, about 10 to 12 minutes.

Meanwhile, heat the olive oil in a large skillet set over medium heat. Cook the bacon, stirring occasionally, until the bacon is browned and crispy, about 10 minutes. Remove the skillet from the heat and stir in the red onion, diced celery and the red wine vinegar. Season the mixture with salt to taste.

Drain the cooked potatoes from the stock pot and transfer them to a large bowl. Remove the garlic and throw it away. Add the bacon mixture to the hot potatoes and toss the mixture with the potatoes until the potatoes are well coated. Gently fold in the mayonnaise and the Dijon mustard until they are blended well into the potato salad. Refrigerate the potato salad until it is cold and serve.

To me, this is very close to have a colder version of German potato salad with the mix of the bacon, onions and vinegar with the potatoes, but you also get the flavors of the Dijon mustard and the mayonnaise added to it as well for some extra tang. The potato salad was very good, but it got even better the longer it sat in the refrigerator. We had some again with lunch the next day and it tasted even better than the first time. I really liked this recipe and I will definitely be using it again for barbecues or summer parties, though it does need to be refrigerated because of the mayonnaise so you need to be careful about leaving it out.

That’s all I have for today. Check back next time for another recipe. Until then, enjoy the rest of your day and enjoy your meal!

IMG_0568

 
Leave a comment

Posted by on June 13, 2014 in Cooking, Lunch, Potatoes, Salad, Side Dishes


Tags: , , ,

Another Great Summer Side Dish – Roasted Corn and Black Bean Salad

We are just about getting into summer in the area after a really long winter and that means the opportunity to get some of the really great summer vegetables that are around. For my family, that means eating a lot of corn and in all different ways. Yes,corn on the cob is great and it is certainly a family favorite for us, but one of the things that is even better is to roast some corn on the cob, strip it off the cob and use it in some wonderful side dishes. One of my favorites is a black bean and corn salad, which gives you the opportunity to combine some great flavors to get really good freshness for a side dish that is perfect for the summer. I found this particular recipe at TidyMom and decided to give it a try myself with some modifications of my own.

Roasted Corn and Black Bean Salad

3 ears corn, cut off the cob
1 orange bell pepper, diced

1/2 red onion, finely chopped

1 pint grape tomatoes, halved
1 avocado sliced
1 (15-ounce) can black beans, drained and rinsed
1/4 teaspoon salt
1 clove garlic
1/4 teaspoon pepper
Juice of 1 1/2 limes
1/4 teaspoon chili powder

1/4 cup olive oil
3 ounces blue cheese, crumbled (optional)
2 tablespoons fresh basil leaves, chopped

Cook the corn, bell pepper and the red onion in 1 tablespoon of olive oil in a large skillet set over medium-high heat until the vegetables are beginning to brown nicely all over, about 5 to 7 minutes. Toss in the black beans and cook until the beans are warmed through, about 2 minutes. Turn the heat down to low while you make the dressing.

For the dressing, smash the garlic clove and sprinkle the smashed clove with some kosher salt. With the flat side of your knife, mash and smear the garlic clove and salt until it forms a paste. Whisk the garlic paste, lime juice, salt and chili powder together in a bowl. Slowly and gradually whisk in the olive oil, starting with just a few drops and then adding the rest in a steady stream until the oil is incorporated into the dressing.

Add the dressing to the bean and corn mixture and toss the vegetables to coat them evenly. Adjust the seasoning with salt and pepper to taste. Remove the skillet from the heat and transfer the  corn and beans to a large bowl. Gently fold in the avocado, grape tomatoes, the basil and the blue cheese, if using, and serve warm or at room temperature.

That;s all there is to it and you get a really tasty side dish within minutes. You can certainly grill the corn first if you prefer instead of pan roasting it and then cut it off the cob, but since I don’t have access to a grill to do it this was my best option. I love the dressing with the nice bite of the lemon juice mixing so nicely with the corn, beans, avocado and tomatoes. This side dish can go with anything, from chicken, ribs, burgers and steak to all kinds of other meals. You could even use this as filling for tacos or quesadillas if you wanted something that is more of a vegetarian meal. It is certainly one we will use throughout the summer.

That’s all I have for today. Check back next time for another recipe. Until then, enjoy the rest of your day and enjoy your meal!

roastedcornandblackbeansalad


Tags: , , , , , , ,

A Refreshing Summer Side Dish – Apple Coleslaw

A great side dish for the warm weather when you are having a barbecue, picnic, party, buffet or just want a lighter and refreshing side is coleslaw. There are so many different things that you can do and ingredients that you can use to make a coleslaw that your options seem almost endless. Even better, with the bags of coleslaw mix that are available in most grocery stores today you do not have to go through the effort of shredding cabbage and carrots on your own (unless you want to of course). Many times during the summer these bags of coleslaw are on sale at my store for a dollar a bag or less, which makes them a great deal to buy. I have tried a bunch of coleslaw recipes in the past and am always on the lookout not just for something new, but one that uses little or no mayonnaise at all. I found this recipe on Kitchen Daily for an apple coleslaw and made a few modifications to make it my own.

Apple Coleslaw

1 package of coleslaw mix or 1 cup shredded green cabbage, 3/4 cup shredded red cabbage and 1/2 cup carrots, cut into matchsticks

1 apple, julienned

1 tablespoon mayonnaise

3 tablespoons olive oil

1/2 tablespoon apple cider vinegar

Juice of 1/2 lemon

1/2 tablespoon poppy seeds (optional)

Kosher salt and freshly ground black pepper, to taste

In a large bowl, combine the green cabbage, red cabbage, julienned carrots, or the 1 bag of coleslaw mix (whichever you happen to be using) and the julienned apple.

In a large glass measuring cup, whisk together the mayonnaise, the olive oil, the apple cider vinegar, lemon juice, the poppy seeds (if using) and the salt and pepper to taste.

Pour the dressing mixture over the cabbage mixture and stir everything together using a rubber spatula. Stir until everything is well combined. Cover the bowl and place it in the refrigerator for at least one hour so that the flavors can meld. Serve the coleslaw cold.

Personally, I left out the poppy seeds because I didn’t have any on hand and I didn’t think they would add that much to the dish. While they will look nice and add some texture, it just wasn’t for me this time. I loved the freshness that the apple added to the mix with the cabbage and carrots and since there was very little mayonnaise it didn’t get all watery as it chilled. I think you could probably eliminate that mayo all together if you wanted to go without it and just stick with the olive oil, but the mayo does help to bind everything together nicely. You could certainly try substituting yogurt or sour cream for the mayo as well. I used Gala apple for mine but I think you can use whatever apple you like the best for crispness and flavor. The original recipe called for Granny Smith, which I find to be very tart so I opted to change that out. in any case, I think it was a great coleslaw with excellent flavor that is a great side dish for burgers, hot dogs, ribs, chicken, sandwiches or just about anything else you can think of for a summer meal.

That’s all I have for today. Check back next time for another recipe. Until then, enjoy the rest of your day and enjoy your meal!

IMG_0554


1 Comment

Posted by on May 31, 2014 in Cooking, Picnic Fare, Salad, Side Dishes, Vegetarian


Tags: , , , ,

A Classic Steakhouse Meal – Steak with Maitre D’Hotel Butter and Mock Frites

I would love to have a great steakhouse meal now and then, but the steakhouses in New York City (which is about 45 miles away from us) are just too expensive and there just are not very many quality steakhouses in the area that we live that are affordable to the average family anymore. Sure, it’s a treat to go out and have a nice dinner once in a while, but it is also great if you make something similar to that experience all on your own at home and without the benefit of having a gas or charcoal grill to use. Even with a good grill, you never are really going to get the same type of steak you get at a good steakhouse unless you are spending a fortune for some quality aged beef and have a professional-grade oven that can get the heat cranked up to 800 degrees to get that great sear you need. So for the rest of us, there are still options to get a great meal for yourself. The New York Times recently had an article in their dining section regarding making a good steak at home and it can be a lot easier than you think with this recipe. It just takes some time and paying attention and you can make your own great steak and potato meal.

Steak with Maitre D’Hotel Butter and Mock Frites

For the Potatoes:

Kosher salt

8-12 new or baby potatoes

3 tablespoons canola oil

For the Maitre D’Hotel Butter:

6 tablespoons butter

2 teaspoons fresh thyme leaves, minced

1 small shallot, peeled and minced

1 teaspoon freshly squeezed lemon juice

Splash of Champagne or white wine vinegar

For the Steak:

2 pounds beef steak, such as boneless rib-eye, approximately 1-inch thick

Kosher salt and freshly ground black pepper

1 tablespoon canola oil

Preheat the oven to 450 degrees. Set a large pot filled with salted water on the stove. Add the potatoes, turn the heat to high and cook, gently boiling, until the potatoes are softened, about 12 to 15 minutes. Drain the potatoes and dry them well.

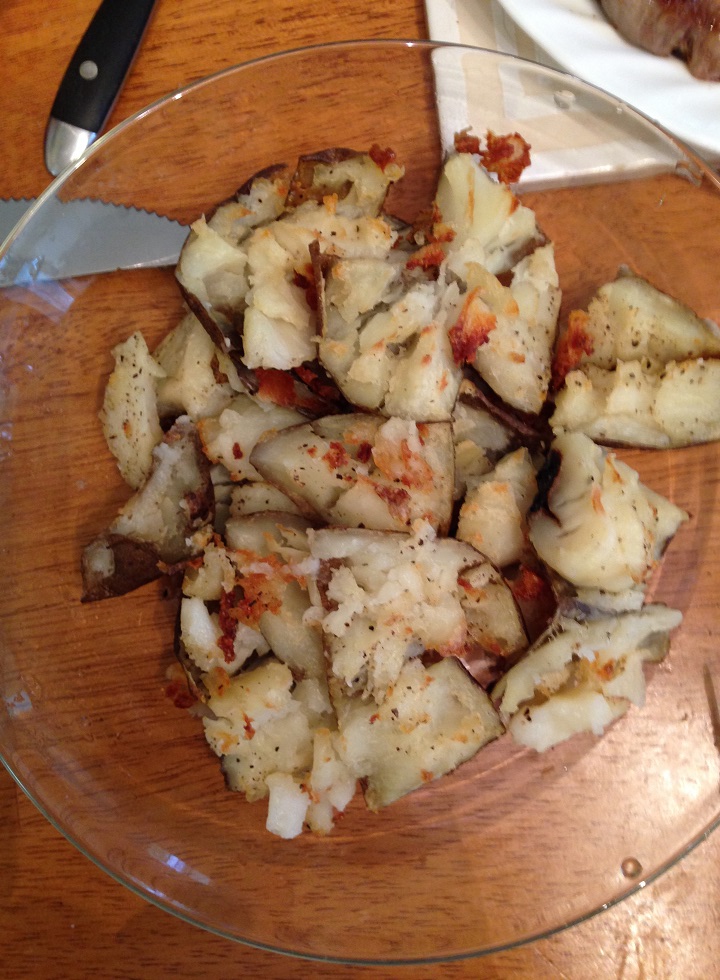
Oil a sheet pan with half of the canola oil and put the potatoes in the pan in a single layer. Using a potato masher or the bottom of a heavy glass, gently smash each potato, pressing it down to a thickness of less than 1 inch. Drizzle the rest of the canola oil over the smashed potatoes and place the sheet pan on the top rack in the oven and allow them to roast until the exteriors are golden and crunchy, about 20 to 25 minutes. Add salt to taste.

For the butter, place the butter on a cutting board and, using a fork, cut the thyme, shallot, lemon juice and vinegar into the butter until the butter is creamy and smooth. Scrape the butter together with a chef’s knife and form it into a rough log. Roll the butter tightly into a sheet of plastic wrap and refrigerate until you are ready to use it.

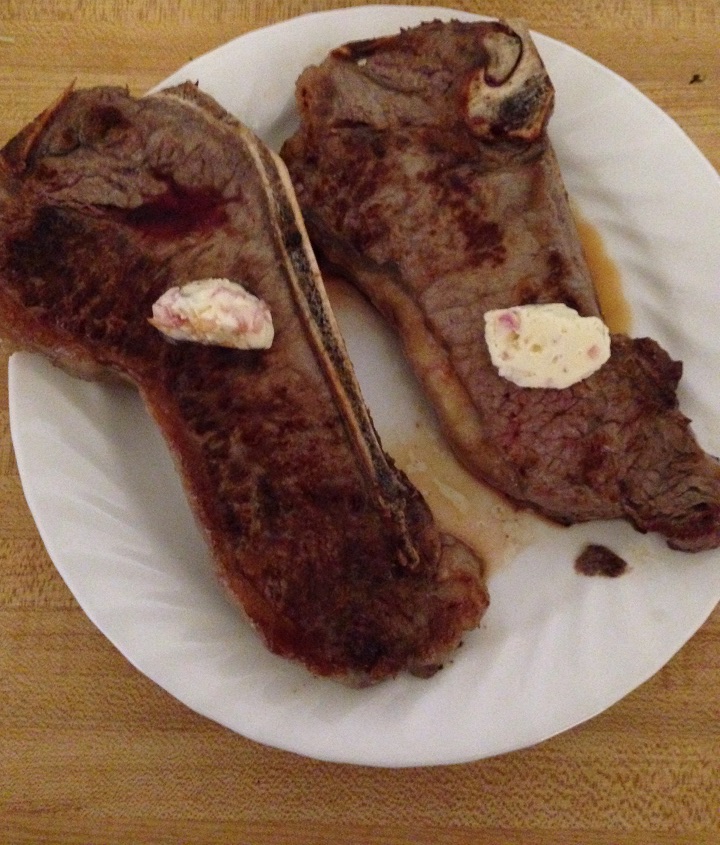
As the potatoes finish crisping, make the steaks. Set a heavy-bottomed skillet (or 2 if your steaks are very large) over high heat and let the skillet sit for a few minutes until it gets very hot.Pat the steaks dry with paper towels to absorb any exterior moisture. Shower the steaks aggressively with salt and pepper on both sides. Add the canola oil to the pan and shake the pan to distribute the oil evenly. The oil should almost immediately begin to smoke to let you know the pan is ready. Place the steaks in the skillet and allow them to sear, unattended, for 4 minutes, until they have developed a good crust on one side. Turn the steaks over and cook for an additional 3 to 6 minutes for medium-rare. Remove the steaks to a warm platter to rest. Top each steak with a tablespoon of the compound butter.

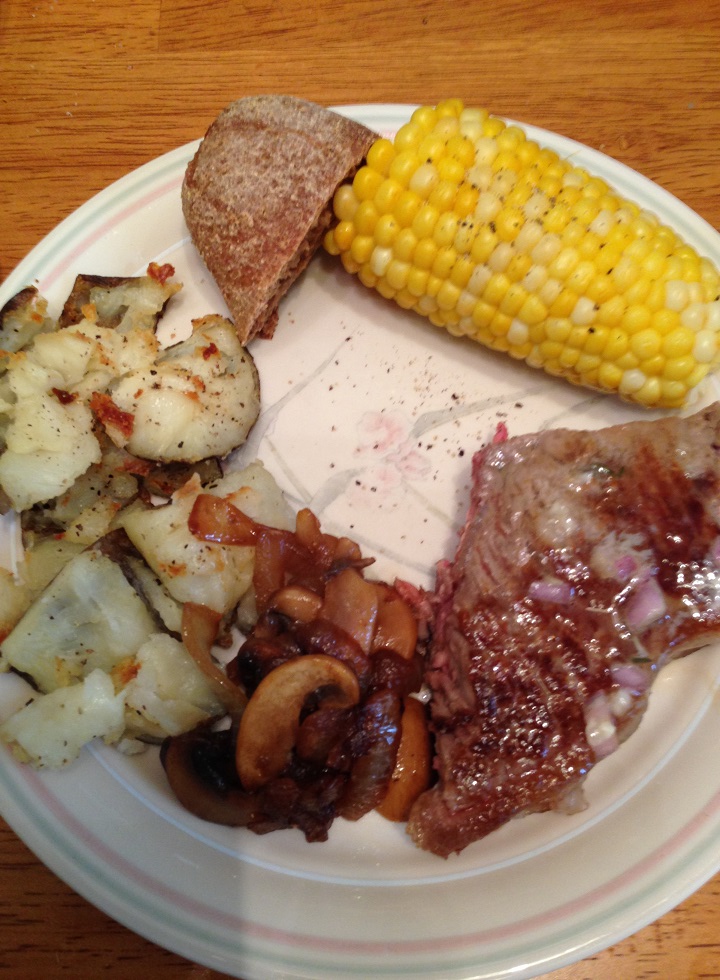
Remove the potatoes from the oven and season them with salt and pepper to taste. Place 2 or 3 potatoes on each plate alongside a steak. Top each steak with pats of the butter and serve.

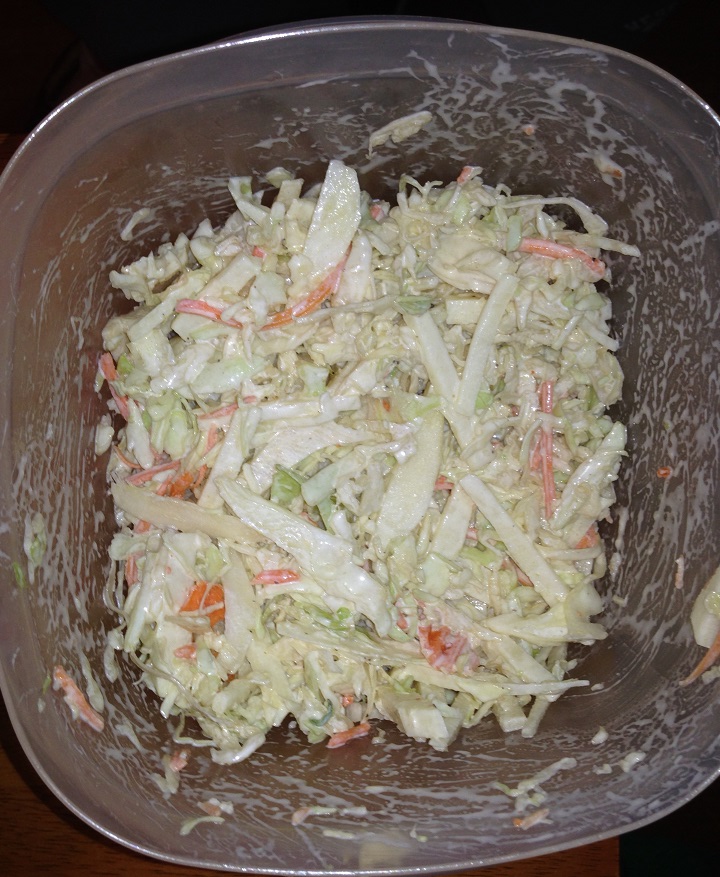
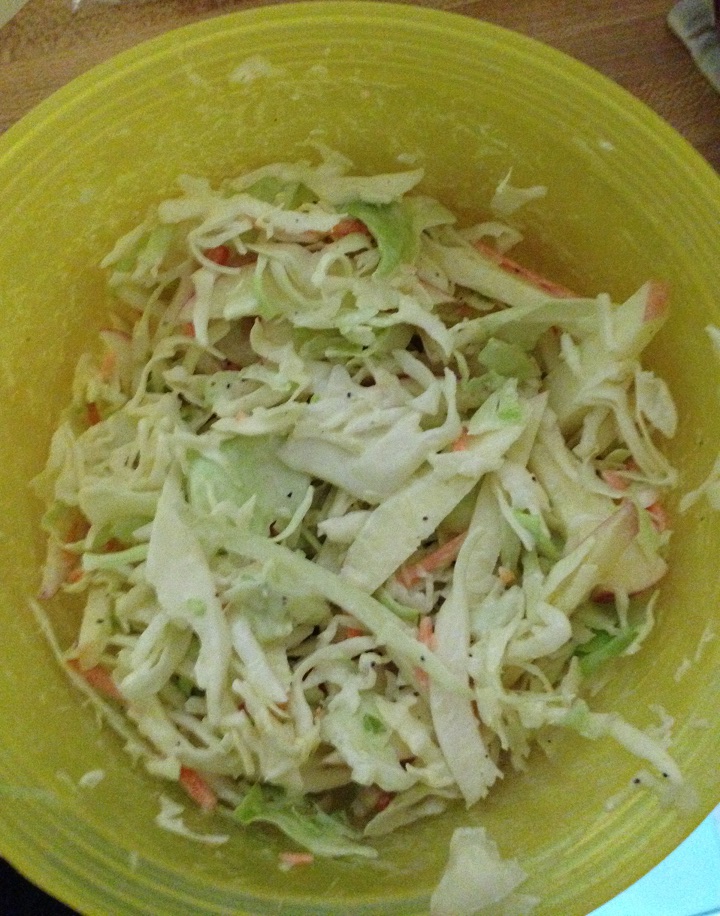
You really need to make sure your pan is very hot before you put the steaks in to make sure you can get a good crust. You also want to make sure you have gotten rid of any surface moisture from the steaks so they are not just steaming in the skillet but cooking to get a good sear. The steaks came out perfectly (of course you can always cook them longer to your particular liking, just keep a close eye on them so they don’t overcook) and the potatoes were perfect, crisp and crunchy just the way I like them. I used New York strip steaks since that is what was on sale when I got steaks and they worked out well. You can serve this with any traditional steakhouse recipe, like creamed spinach or asparagus, and having some nice bread to go along with it or some dinner rolls can really round it out for you. I made some corn on the cob and sautéed some mushrooms and onions to go along with the meal and used some of the steakhouse bread I had in the freezer. The butter is great not just on the steaks but on everything else you might serve as well.

That’s all I have for today. Check back next time for another recipe. Until then, enjoy the rest of your day and enjoy your meal!

IMG_0548 IMG_0546 IMG_0547

 
Leave a comment

Posted by on May 27, 2014 in Beef, Breads, Cooking, Dinner, Potatoes, Side Dishes


Tags: , , , , , ,

A Basic Barbecue Side Dish – America’s Test Kitchen Boston Baked Beans

There are a lot of great side dishes you can make when you are cooking for outdoor meals, barbecues, pool parties, summer graduations, buffet meals, picnics and general outdoor get-togethers. There are always options for potato salad, coleslaw, fruit salads, green salads and more, but one of my personal favorites is baked beans. Baked beans can pretty much go with any type of meal, and seem to go really well with all kinds of barbecue, whether it is ribs, chicken, burgers and hot dogs or just about anything else. I have tried a variety of baked bean recipes and posted a few of them right here on this blog, but one that I always seem to go back to is this one from America’s Test Kitchen for Boston baked beans. It’s simple and delicious and gives you that deep flavor you want.

Boston Baked Beans

4 ounces salt pork, trimmed of the rind and cut into 1/2-inch cubes
2 ounces bacon (2 slices), cut into 1/4-inch pieces
1 medium onion, chopped fine
1/2 cup molasses
1 tablespoon molasses
1 1/2 tablespoons brown mustard
1 pound dried small white beans (about 2 cups), rinsed and picked over
Table salt
1 teaspoon apple cider vinegar
Ground black pepper

Adjust an oven rack to the lower-middle position; heat the oven to 300 degrees. Add the salt pork and the bacon to an 8-quart Dutch oven; cook the pork and the bacon over medium heat, stirring occasionally, until they are lightly browned and most of the fat is rendered, about 7 minutes. Add the onion and continue to cook, stirring occasionally, until the onion is softened, about 8 minutes. Add the 1/2 cup of molasses, the brown mustard, the beans, 1 1/4 teaspoons of salt, and 9 cups of water; increase the heat to medium-high and bring the mixture to a boil. Cover the pot and set the pot in the oven. Bake until the beans are tender, about 4 hours, stirring once after about 2 hours of cooking time. Remove the lid from the pot and continue to bake the beans until the liquid has thickened to a syrupy consistency, about 1 to 1 1/2 hours longer. Remove the beans from oven; stir in the remaining tablespoon of molasses, the apple cider vinegar, and the additional salt and pepper to taste. Serve.

You really want to use dried beans for this recipe. Canned beans cooking this long will just get very mushy on you and lose all of their texture and consistency (besides, dried beans are pretty cheap, usually about 75 cents for a 1-pound bag). This recipe makes a lot of beans, as most beans recipes seem to do, so it is great if you are cooking them for a crowd at a barbecue. if you want to just make them for a smaller, home crowd or family, you can do what I did this time and cut the recipe in half. you’ll get a good portion of beans for your meal and still have leftovers to use for other days. You get great flavor from the bacon and salt pork with just a hint of the brown mustard and the molasses and vinegar both really help to build the overall flavor of the dish. This one is a family favorite for us and we make it a lot, especially in the summer or to bring over to a party.

That’s all I have for today. Check back next time for another recipe. I hope you enjoy your Memorial Day weekend and remember to take the time to thank a veteran today and remember those who have given so much to help the world through their sacrifice and commitment. Enjoy the rest of your day and enjoy your meal!

IMG_0550


4 Comments

Posted by on May 26, 2014 in Beans, Cooking, Grilling, Rice, Side Dishes


Tags: , , , , , ,

Summer’s Coming! Make This Simple Creamy Cucumber Salad

It seems like summer is never going to get here. after a particularly long, cold and snowy winter here in New York, Spring has been pretty dreary with lots of rain and clouds. This can all be pretty depressing, but summer is only a little more than a month away and I cannot wait for it to get here. Summer means warmer weather, sunshine and the chance to make some great summer dishes. While I don’t so a lot of cooking out myself since we can’t have a good grill here at the condo, I do make a lot of different types of salads all summer long. I try to make salads that don’t use a lot of lettuce since Michelle is not a big fan of most lettuce, or at least a lot of lettuce. I had bought some English cucumbers last week and they were quite large, so I needed to try to come up with something great to make with them besides just slicing some up with some lettuce. I saw Ina Garten make this recipe on the Food Network one day and knew it was one I had to try. It is simple, easy, uses only a few ingredients, and tastes very refreshing. This recipe makes a large quantity, so I actually cut it in half when I made it but I am posting the original recipe here.

Creamy Cucumber Salad

4 hothouse cucumbers, thinly sliced (about 3 to 4 pounds of cucumbers)

2 small red onions, thinly sliced

Kosher salt

4 cups (32 ounces) plain whole-milk yogurt

1 cup (8 ounces) sour cream

2 tablespoons champagne vinegar or white wine vinegar

1/2 cup minced fresh dill

1 1/2 teaspoons freshly ground black pepper

Mix the sliced cucumbers, sliced red onions and 1 1/2 tablespoons of the kosher salt in a large bowl. pour the vegetables into a colander and suspend it over a bowl. Wrap the bowl and the colander with plastic wrap and place them in the refrigerator to drain. Leave in the refrigerator for at least 4 hours and  up to overnight. Discard any of the liquid that accumulates in the bowl.

Pour the yogurt into a fine mesh sieve lined with a paper towel or with cheesecloth and suspend the sieve over another bowl. Wrap the bowl and the sieve in plastic wrap and refrigerate them for at least 4 hours and up to overnight so the yogurt can drain and thicken. Discard the liquid that accumulates in the second bowl.

When the cucumbers are ready, roll them up in paper towels or a dry kitchen towel and press the towel lightly to remove most of the liquid from the vegetables. Place the cucumbers and the drained yogurt together in a large bowl with the sour cream, the vinegar, fresh dill, 2 teaspoons of salt and the black pepper. Toss the mixture well and refrigerate the salad for a few hours to allow all of the flavors to blend together. Sprinkle the salad with 1/2 teaspoon of salt and 1/2 teaspoon of pepper and serve it chilled.

Granted, it may take up a lot of refrigerator space while everything drains (at least it did in my small refrigerator) but it is worth it. You will be surprised just how much moisture comes out of both the salted vegetables and the yogurt. The yogurt comes out nice and thick and creamy. Pressing the cucumbers in a towel removes even more liquid to help keep them from getting too soggy. The yogurt and cucumbers and red onions go so nicely together and it may even remind you a bit of tzatziki sauce from Greek food. It is a great salad that will be perfect for summer parties and barbecues to give you something different from the typical coleslaw or potato salad. This is a great side dish that goes really well with chicken, ribs, pork or beef so you can use it for all kinds of meals.

That’s all I have for today. Check back next time for another recipe. Until then, enjoy the rest of your day and enjoy your meal!

IMG_0542


Leave a comment

Posted by on May 16, 2014 in Cooking, Dinner, Lunch, Salad, Side Dishes


Tags: , , , ,

 
National Day Calendar

Fun, unusual and forgotten designations on our calendar.

Jennifer Probst

a little bit naughty a little bit nice

Laissez Faire

Letting Life Lead

simple cooking recipes

a blog to share with you the best