RSS

3 Tips for Roasting Vegetables | The Feed

3 Tips for Roasting Vegetables | The Feed.

I love roasted vegetables. I think it is my favorite way to make vegetables overall. You can get so much more flavor out of them through roasting than you can by steaming or making them in the microwave. Anyway, here are some tips from America’s Test Kitchen about the best way to approach roasting some of your favorite vegetables. Check it out!


Tags: , ,

9 Things To Do To Avoid Boredom During A Hurricane | Food Republic

9 Things To Do To Avoid Boredom During A Hurricane | Food Republic.

If you’re dealing with Hurricane Sandy (and let’s face, if you live in the United States you are, one way or another), here’s some great tips from Food Republic on ways to help you pass the time during the storm itself. Stay safe, stay dry and enjoy each other’s company! Check it out!

 
Leave a comment

Posted by on October 29, 2012 in Cooking, Cooking Tips, Cooking Websites


Tags: ,

Five Autumn Soups for the (Coming) Cold Weather « Chef Marcus Samuelsson

Five Autumn Soups for the (Coming) Cold Weather « Chef Marcus Samuelsson.

As Hurricane Sandy heads our way here in New York, it certainly makes you feel like you might need a nice bowl of soup to keep you warm. Here’s a selection of 5 soups designed for fall weather from chef Marcus Samuelsson. I am a little skeptical of spicy coconut lentil, but hey, if you like it give it a try. The others all sound like they would be great to sit down next to a a roaring fire and enjoy. Check it out!

 
Leave a comment

Posted by on October 29, 2012 in Cooking Websites, Soups & Stews


Tags: , ,

Let’s Have a Snack: Homemade Egg Rolls

I had seen some egg roll wrappers on sale in the supermarket this week and thought I would give this a try. I did need to pick up a few things along the way for this, but none of it was hard to find; it was all basic stuff that I would normally buy or had in the house. I actually found a use for that oyster sauce I bought to make the Thai dinner the other night!

Egg Rolls

1 package of egg roll wraps

1 pound ground pork

1 teaspoon minced fresh ginger

2 cups cabbage, finely chopped

1/4 pound bean sprouts

1/2 cup carrots, shredded

3 green onions, chopped

2 tablespoons oyster sauce

Heat a non-stick skillet over medium high heat. Add 1 tablespoon vegetable and heat until shimmering. Add the pork and the ginger and heat until lightly browned, about 2 to 3 minutes. Add the cabbage, bean sprouts, carrots and green onions and cook for 2 minutes. Stir in the oyster sauce. Remove the skillet from the heat and allow the mixture to cool completely.

Use 2 tablespoons of filling per egg roll. Place the filling diagonally on the wrap. Fold the bottom corner over the filling and roll snugly half-way to cover the filling. Fold in both side corners snugly against the filling; moisten the edges of the last flap with water. Roll the wrap up tightly and seal the top corner. Lay the egg roll flat side down until they are ready to cook.

If you want to fry them, In a large skillet heat vegetable oil to 350 degrees. Place the egg rolls flap side down, a few at a time, making sure not to crowd them in the pan (you’ll have to do this in batches if you are making a lot). Turn the rolls occasionally and cook until golden, about 2 to 3 minutes. Drain on paper towels and serve.

If you want to bake them (which I did), heat the oven to 400 degrees. Place the rolls on a baking sheet coated with non-stick cooking spray. Lightly brush the tops of the egg rolls with olive oil and bake until golden brown, 12 to 15 minutes.

I wanted to try baking them to avoid all the extra oil and I think they turned out great. Sean and I loved the way they came out. The great thing about egg rolls is that you can fill them with whatever you want. You can choose to just use vegetables, use chicken, beef, shrimp, really anything you want. The options are endless.

Just a couple of things about this recipe. I bought a bag of cole slaw mix and used that instead of shredding the cabbage and carrots myself. It was much easier and still turned out well. I did end up adding more cabbage then the recipe called for because it was cooking away so rapidly, so you may want to watch that. I also think it could use some flavoring, so you may want to make a little sauce to use instead of just using the oyster sauce. Also, this recipe is designed to use all the egg roll wrappers. The package I bought has 20 wrappers, which is a lot of egg rolls. I only made 8 and we still have 6 leftover. Once you open the package of wrappers, you either should use it in 7 days or freeze it and it should be good for about 2 months, which gives you time to make more later on. It’s a great recipe to do some experimenting with.

That’s it for tonight. We have another wedding to go to tomorrow, so there’s no dinner tomorrow, but we are planning to make beef stew or beef barley soup Sunday, so check back for that recipe. Until then, enjoy your evening and enjoy your meal!

 
Leave a comment

Posted by on October 26, 2012 in Appetizers, Cooking, Pork


Tags:

Good Eats Meatloaf and Roasted Green Beans

I love meatloaf. I know I have said that on here many times, but it’s always worth repeating. When we got out somewhere, if it’s on the menu I want to try it. Of course, some times I am disappointed by the results, but hey, you still have to try, right? So tonight when I decided to make meatloaf, I turned to a recipe from Alton Brown and his “Good Eats” program. I like a lot of the things he makes (and he’s great to follow on Twitter if you are on there) so I figured this recipe was a no-brainer. It got a lot of good reviews from people on Food Network’s website also, so I had to give it a try.

Good Eats Meatloaf

6 ounces garlic-flavored croutons
1/2 teaspoon ground black pepper
1/2 teaspoon cayenne pepper
1 teaspoon chili powder
1 teaspoon dried thyme
1/2 onion, roughly chopped
1 carrot, peeled and broken
3 whole cloves garlic
1/2 red bell pepper
18 ounces ground chuck
18 ounces ground sirloin
1 1/2 teaspoon kosher salt
1 egg

For the glaze:
1/2 cup ketchup
1 teaspoon ground cumin
Dash Worcestershire sauce
Dash hot pepper sauce
1 tablespoon honey

Heat the oven to 325 degrees.


In a food processor bowl, combine croutons, black pepper, cayenne pepper, chili powder, and thyme. Pulse until the mixture is of a fine texture. Place this mixture into a large bowl. Combine the onion, carrot, garlic, and red pepper in the food processor bowl. Pulse until the mixture is finely chopped, but not pureed. Combine the vegetable mixture, ground sirloin, and ground chuck with the bread crumb mixture. Season the meat mixture with the kosher salt. Add the egg and combine thoroughly, but avoid squeezing the meat.


Pack this mixture into a 10-inch loaf pan to mold the shape of the meatloaf. Onto a parchment paper-lined baking sheet, turn the meatloaf out of the pan onto the center of the tray. Insert a temperature probe at a 45 degree angle into the top of the meatloaf. Avoid touching the bottom of the tray with the probe. Set the probe for 155 degrees.


Combine the ketchup, cumin, Worcestershire sauce, hot pepper sauce and honey. Brush the glaze onto the meatloaf after it has been cooking for about 10 minutes. Bake for 45 to 50 minutes. Allow it to rest for 10 minutes, covered, after removing from the oven. Slice and serve.

This recipe is great. The meatloaf and the glaze have a nice combination of bite from the hot sauce, cayenne and chili pepper and a sweetness from the honey. We all loved it and I’ll definitely be making this one again.

I decided to serve this with some boiled potatoes and green beans. I love green beans too, and I am always looking for a new way to make them. I came across this recipe from Williams-Sonoma that is simple and tastes great from the roasting.

Roasted Green Beans and Carrots with Red Onion

3/4 pound green beans, trimmed
1/2 pound carrots, peeled and cut diagonally about 1/4 inch thick
1 red onion, sliced
2 large garlic cloves, very thinly sliced
1 1/2 tablespoons olive oil
1 teaspoon ground cumin
Salt and freshly ground pepper, to taste

Preheat an oven to 350°F. Place an 8-by-11-inch heavy roasting pan or a very large, ovenproof fry pan on the rack.

Bring a large saucepan three-fourths full of water to a boil over high heat. Add a pinch of salt and the green beans. Cook the beans until they turn bright green and are just tender, 1 to 2 minutes. Drain the beans and plunge them into a bowl of ice-cold water to stop the cooking and drain again.

In a large bowl, toss together the beans, carrots, onion, garlic and olive oil. Sprinkle with the cumin, season with salt and pepper, and toss again to thoroughly combine. Transfer the vegetables to the preheated pan and spread them evenly. Roast, stirring occasionally, until the vegetables are tender and lightly browned, 45 to 55 minutes. Taste and adjust the seasonings with salt and pepper.

It was a something different to do and I like roasting vegetables. The flavor seems a little more intense when you roast them. You could easily add other vegetables to this if you wanted to, choosing some other fall root vegetables like parsnips, turnips, or sweet potatoes.
We also made some of the all-purpose gravy I have made before, because you must have gravy with meatloaf. Overall, it was quite a good meal.
Well, I have a doctor’s appointment tomorrow night, so I am not sure I’ll get a meal in, but we’ll see what happens. Until next time, enjoy your evening and enjoy your meal!


2 Comments

Posted by on October 24, 2012 in Beef, Cooking, Dinner, Gravy, Vegetables


Tags: , , , , , ,

7 Slow-Cooked Crockpot Lunches | Food Republic

7 Slow-Cooked Crockpot Lunches | Food Republic.

It’s that time of year again when the weather turns cool and thoughts turn back to the slow cooker to make soups, stews and chili. Here are some great recipe ideas from Food Republic about things that you can do in your slow cooker and make great lunches for these cool fall days for you at home, to being to the office or for the kids to bring to school in a thermos. Check it out!


Tags: , ,

Let’s Have Some Lemon Roasted Chicken

I haven’t had much of a chance to do any cooking the last few days. We have been running here, there and everywhere and either haven’t been home to make dinner or have just gone for quick solutions because I haven’t had time or energy to cook. Tonight, however, I was determined to cook. We had nice whole chicken and I wanted a quick and easy recipe. I came across this one from Williams-Sonoma that is a simple one dish meal. I had to modify the recipe very slightly since the original recipe is designed to be made in a special pan sold by Williams-Sonoma that acts as a roaster, holding the bird over the pan itself so you can roast the vegetables in the bottom. I don’t have that pan (and it seems kind of pricey to me anyway) so I just roasted everything in one pan and that was it.

Lemon Roasted Chicken with Rainbow Carrots and Fingerling Potatoes

1 chicken, about 4 pounds

Salt and freshly ground pepper, to taste

6 large, fresh thyme or rosemary sprigs

2 bay leaves

2 garlic cloves, smashed

1/2 lemon

2 tablespoons butter, at room temperature

1 1/2 pounds baby rainbow carrots, peeled and tops trimmed

1 pound fingerling potatoes, halved lengthwise

2 tablespoons olive oil

Remove and discard the fat from the chicken cavity. Rinse the chicken inside and out and pat dry with paper towels. Lightly season the cavity with salt and pepper. Place 4 of the herb sprigs, 1 of the bay leaves, all of the garlic and the lemon inside the cavity.

Tuck the wings behind the back. Using kitchen twine, lift the neck end of the breast, then pull the twine around the wings and under the chicken. Bring the ends of the twine up over the breast and cross over at the leg end of the breast, pulling tight. Bring the ends of the twine around the drumsticks and tie in a knot. Let the chicken stand at room temperature for 30 minutes.

Preheat the oven to 475 degrees.

Rub the outside of the chicken with the butter and generously season with salt and pepper. In a large bowl, stir together the carrots, potatoes, olive oil, the remaining 2 sprigs of herbs and the remaining bay leaf, and season with salt and pepper. Transfer the vegetables to the base of the roasting pan and spread evenly. Place the chicken on top of the vegetables and roast, stirring the vegetables halfway through, until an instant-read thermometer inserted into the thickest part of the thigh registers 170 degrees, about 45 to 50 minutes.

Transfer the chicken to a cutting board, cover loosely with aluminum foil and let rest for 10 minutes. Carve the chicken and arrange on a warmed platter with the vegetables and serve.

Of course, I couldn’t find any rainbow carrots around here in any of the markets. I just used regular carrots instead, but the rainbow carrots would look great and add some great color to the dish. The chicken itself roasts up nicely and the skin was crisp. You get the faint hint of the lemon and rosemary throughout the chicken and the potatoes and carrots are roasted nicely and have great flavor. Overall it was quite a nice dish.

Tomorrow night is meatloaf night here, and I’ll be using the Alton Brown recipe from Good Eats, so check back for that one. Later on in the week I do plan to make either some beef stew or soup, I haven’t decided which yet. I also have some  chicken thighs and I have a recipe I plan to use for them perhaps Thursday or Friday. I also bought some egg roll wrappers and thought I would have a stab at making them, so check back for that recipe as well. Until next time, enjoy your evening and enjoy your meal!

 
Leave a comment

Posted by on October 23, 2012 in Cooking, Dinner, One Pot Meals, Poultry


Tags: , , , , , ,

Time to Strip (Steak) in the Kitchen (and Some Mushroom Gravy too)

Michelle had picked up a couple of nice looking New York strip steaks the other day and today seemed like a good day to make them.There’s nothing really fancy about them or cooking them either. You can easily pan fry them or just put them under the broiler, which is what I usually do. The other thing about steak is you want to make sure you let it rest before you slice it so all the juices stay in the steak and not run out all over the plate, leaving you with dry meat. I had bought the mushrooms a few days ago and I have been looking for an excuse to make some mushroom gravy, and this was it. Mushroom gravy is great with meat loaf or Salisbury steak, but I think it can work well with other steak or just to have with some mashed potatoes.

New York Strip Steaks with Mushroom Gravy

2 New York strip steaks, about 10 ounces each

Salt and freshly ground pepper

1 tablespoon butter

10 ounces white mushrooms, trimmed and sliced

1 shallot, minced

3/4 teaspoon minced fresh thyme

1/4 cup all-purpose flour

1/2 teaspoon Worcestershire sauce

2 1/2 cups beef broth

Take the steaks out of the refrigerator and sit, covered, on the counter for 30 minutes to 1 hour to allow them to come to room temperature. Preheat the broiler and position a rack about 4-5 inches from the element. Season the steaks liberally with salt and pepper. Place the steaks on an aluminum foil-covered broiler pan and place the steaks under the broiler. Heat for four minutes and then flip and heat for another four minutes. Remove the steaks from the oven to a serving dish and loosely tent with aluminum foil and allow to rest for about 10 minutes.

Meanwhile, heat the butter in a medium skillet and add the mushrooms and shallot. Saute until the mushrooms and shallot are soft and the mushrooms are a deep brown, about 6 minutes. Stir in the thyme and cook until fragrant, about 30 seconds. Add the flour and cook, stirring frequently, until golden, about 2 minutes. Slowly whisk in the broth and the Worcestershire sauce and bring to a boil. Reduce the heat to medium and simmer, whisking until thickened, about 10 minutes. Season with salt and pepper to taste. Serve on the side with the steaks.

If you want a creamier sauce, you could add a 1/2 cup of heavy cream in the last-minute of the cooking of the gravy to give you the creaminess you want. Of course I served it with mashed potatoes and some broccoli, but creamed spinach would be great with this as well to make it a classic steak dinner.

That’s it for tonight. We won’t be home for dinners the next few nights but I’ll be back on Monday with a new recipe and I have some plans for a few things next week, so check back and see what I come up with. Until then, enjoy the rest of your evening and enjoy your meal!


Leave a comment

Posted by on October 18, 2012 in Beef, Cooking, Dinner, Gravy


Tags: , , , ,

Let’s (Bacon) Wrap It Up

I wanted to make something easy today and just use what we already had in the house since I have a bit of a cold and didn’t feel like going out. I checked in the freezer and we had some tilapia, so that’s what I am going with today. I found a great recipe idea from Mark Bittman in this weeks New York Times Sunday Magazine that makes some great use of fish and everybody’s favorite, bacon. It’s quick, easy and destined to taste great. I mean, it has bacon in it, it has to be great, right?

Bacon Wrapped Tilapia

6 slices bacon

1 pound firm whitefish, like tilapia or cod, cut into 4 filets

1 tablespoon olive oil

1/2 red onion, thinly sliced

Salt and pepper, to taste

Parsley, to garnish

In a large non-stick skillet over medium-high heat, add the olive oil and warm until shimmering. Add in the red onion and saute until they are just starting to soften, about 3 minutes. Meanwhile, wrap the bacon slices tightly around the fish fillets and lightly season with salt and pepper. Add this fish to the pan and saute until the fish and bacon are done and the bacon is starting to crisp, turning halfway through cooking, about 8 minutes. Garnish with parsley ans serve.

That’s all there is to this one. You get the smoky flavor of the bacon added to the fish along with the bite of the red onion and you have a nice meal. I served this with plain white rice, but I also had some acorn squash on hand, so I decided to bake that and have it as our vegetable. I love the way acorn squash tastes when it has been baked or roasted, and it tastes even better when you add in a little brown sugar and maple syrup.

Baked Acorn Squash

1 acorn squash, cut in 1/2
2 tablespoons brown sugar
2 tablespoons butter, softened
2 tablespoons maple syrup
Salt
Freshly ground black pepper

Scoop the seeds and stringy pulp out of the squash cavities and discard. In a small mixing bowl, combine the brown sugar, butter, syrup and salt and pepper, to taste. Rub the squash cavities and cut sides of the squash with the butter mixture and place them on a baking sheet, cut side up. Bake in the preheated oven for about 1 hour until the squash is tender when pierced with a fork. Serve 1 half per person.

There you have it, a quick meal for a Sunday, or any day, for that matter. There’s not a lot of clean up involved for this one either, and I plan to use the leftover rice with some turkey chili that I also made today to have for dinner tomorrow and lunches this week.

That’s all I have for tonight. I do have a few recipes that I plan to try this week, including a shrimp dish that I picked up this week that looks pretty tasty. We’re also heading into the soups and stews time of year, so I plan to be making more things like that in the coming weeks, so we’ll have to check for some recipes for them as well. Until next time, enjoy the rest of your day and enjoy your meal!


Leave a comment

Posted by on October 14, 2012 in Cooking, Dinner, Seafood, Vegetables


Tags: , , , , ,

A Great Weeknight Meal: Go Ahead and Thai One On

Now that the trip to Ireland is over and done, it’s time to get back to some everyday cooking again. I made a few different meals this week, but the one that stands out as something different was this one. I recently started a subscription to Cook’s Illustrated and when my first issue came, I had picked out this recipe as the first one I wanted to try. It is a Thai dish called pad see ew. It is a traditional street dish of charred rice noodles with some kind of meat, Chinese broccoli and eggs in a sauce. It looked good and the recipe seemed pretty straightforward to me and it seemed like something the whole family would eat. I am the first to admit, I do not normally like pasta or noodles, but the rice noodles had a little bit of different texture and taste to them and since they were crisping up in the cooking, I didn’t mind them at all. The hardest part I had was finding all the ingredients locally. Serrano chiles are apparently hard to come by around here, and it took a little work to find some broccolini and oyster sauce as well, but I did track them down at a local market that has mostly Asian food.

Stir-Fried Noodles with Chicken (Pad See Ew)

Chile Vinegar

1/2 cup white vinegar

1 serrano chile, stemmed and sliced into thin rings

Stir-Fry

2 boneless, skinless chicken breasts, trimmed and cut against the grain into 14-inch thick slices

1 teaspoon baking soda

8 ounces rice noodles

1/4 cup vegetable oil

1/4 cup oyster sauce

1 tablespoon plus 2 teaspoons soy sauce

2 tablespoons packed dark brown sugar

1 tablespoon white vinegar

1 teaspoon molasses

1 teaspoon fish sauce

3 garlic cloves, sliced thin

3 large eggs

10 ounces broccolini, florets cut into 1-inch pieces, stalks cut on the bias into 1/2-inch pieces

For the Chile Vinegar: Combine the vinegar and the serrano chile in a bowl. Let stand at room temperature for at least 15 minutes.

For the Stir-Fry:  Combine the chicken with 2 tablespoons of water and the baking soda in a bowl. Let sit at room temperature for 15 minutes. Rinse the chicken in cold water and drain well.

Bring 6 cups of water to a boil. Place the noodles in a large bowl. Pour the boiling water over the noodles. Stir, then soak the noodles until they are almost tender, about 8 minutes, stirring once halfway through the soak. Drain and rinse the noodles with cold water.  Drain well and toss with 2 teaspoons of the oil.

Whisk the oyster sauce, soy sauce, sugar, vinegar, molasses, and fish sauce together in a bowl.

Heat 2 teaspoons of the oil and the garlic in a large nonstick skillet over high heat, stirring occasionally, until the garlic is a deep golden brown, 1 to 2 minutes. Add the chicken and 2 tablespoons of the sauce mixture, toss to coat, and spread the chicken in an even layer. Cook without stirring until the chicken begins to brown, 1 to 1 1/2 minutes. Push the chicken to one side of the skillet. Add 2 teaspoons of the oil to the cleared side of the skillet. Add the eggs to the clear space. Using a rubber spatula, stir the eggs gently and cook until they set but are still wet. Stir the eggs into the chicken and continue to cook, breaking up the large pieces of egg, until the eggs are fully cooked, about 30 to 60 seconds. Transfer the chicken mixture to a bowl.

Heat two teaspoons of the oil in a now-empty skillet until smoking. Add the broccolini and 2 tablespoons of sauce and toss to coat. Cover the skillet and cook for 2 minutes, stirring once halfway through cooking. Remove the lid and continue to cook until the broccolini is crisp and very brown in spots, 2 to 3 minutes, stirring once halfway through cooking. Transfer the broccolini to the bowl with the chicken mixture.

Heat two teaspoons of oil in the now-empty skillet until smoking. Add half of the noodles and 2 tablespoons of the sauce to coat. Cook until the noodles are starting to brown in spots, about two minutes, stirring halfway through cooking. Transfer the noodles to the bowl with the chicken mixture. Repeat the process with the remaining 2 teaspoons of oil, the noodles and the sauce. When the second batch of noodles is cooked, add the entire contents of the bowl back to the skillet and toss to combine. Cook without stirring until everything is warmed through, 1 to 1 1/2 minutes. Transfer everything to a platter and serve immediately, passing the chile vinegar separately.

It’s a pretty simple meal that I think turned out quite well. Michelle and Sean both loved it, and I liked it too. And it’s nice because it fits easily into a one-pot meal for easy cleanup as well.The whole meal itself does not take long to cook and prepare, so it fit well into a school night meal.

As I said, finding some of the ingredients can prove to be a challenge depending on the type of markets you have locally to you. If you can’t get broccolini, you could substitute regular broccoli with no problem. I think you need to get the rice noodles to make it authentic and it does add to the taste, though I found the rice noodles to be quite expensive ($6.99 for a 1 pound box of noodles).

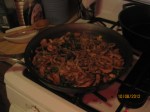
I had my budding photographer Sean take the picture of the meal for me as it cooked. He wants to be my blog photographer, so the job is his right now. I think he did a pretty good job on this one.

That’s it for today. i do have some more recipes to post that we have done recently, including some tacos and a bacon-wrapped tilapia, so look for those over the next few days. Until then, enjoy the rest of your fall day and enjoy your meal!

 
1 Comment

Posted by on October 13, 2012 in Cookbooks, Cooking, Dinner, One Pot Meals, Poultry


Tags: , , , ,

 
National Day Calendar

Fun, unusual and forgotten designations on our calendar.

Jennifer Probst

a little bit naughty a little bit nice

Laissez Faire

Letting Life Lead

simple cooking recipes

a blog to share with you the best