RSS

Tag Archives: williams-sonoma

For a Fun Side, Try This Caramelized Onion Focaccia

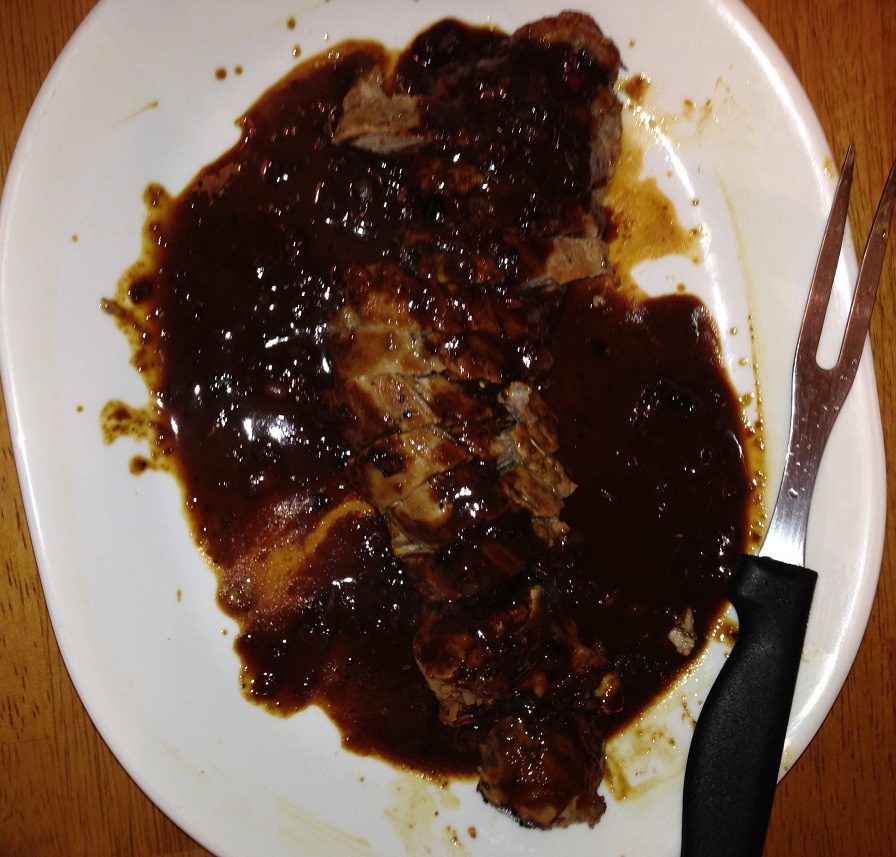
Focaccia bread is one of the great additions to all kinds of meals or it can be perfect for you to use for sandwiches of all kinds. There are lots of different ways you can make it, from having a plain and simple bread to one loaded with all kinds of toppings. There are lots of different things I would like to try on focaccia but I was looking for something pretty simple to start with for my first time out giving this type of bread a try. I found this recipe on Williams-Sonoma’s website and the original recipe calls for a bacon, Gruyère and caramelized onion focaccia, so I decided just to go with the caramelized onions as a topping as I thought it would be a nice side for the pork dinner I was making that night anyway. It gave me a good starting recipe that if I liked I could use again as the basis for one with other toppings.

Caramelized Onion Focaccia

1 package (2 1/4 teaspoons ) active dry yeast

2 teaspoons firmly packed light brown sugar

1 cup warm water (110°F/43°C)

3 cups all-purpose flour

6 tablespoons olive oil, plus more for brushing

1 teaspoon kosher salt

2 yellow onions, halved and thinly sliced

In the bowl of a stand mixer, dissolve the yeast and 1 teaspoon of the brown sugar in the warm water. Let the mixture stand until it is foamy, about 10 minutes. Add the flour, 4 tablespoons of the olive oil and the salt. Attach the dough hook to the stand mixer and knead on medium-low speed until the dough is smooth and elastic, about 10 minutes. Form the dough into a ball, put it back into the bowl, and cover the bowl with plastic wrap. Let the dough rise in a warm, draft-free spot until it doubles in size, about 1 hour.

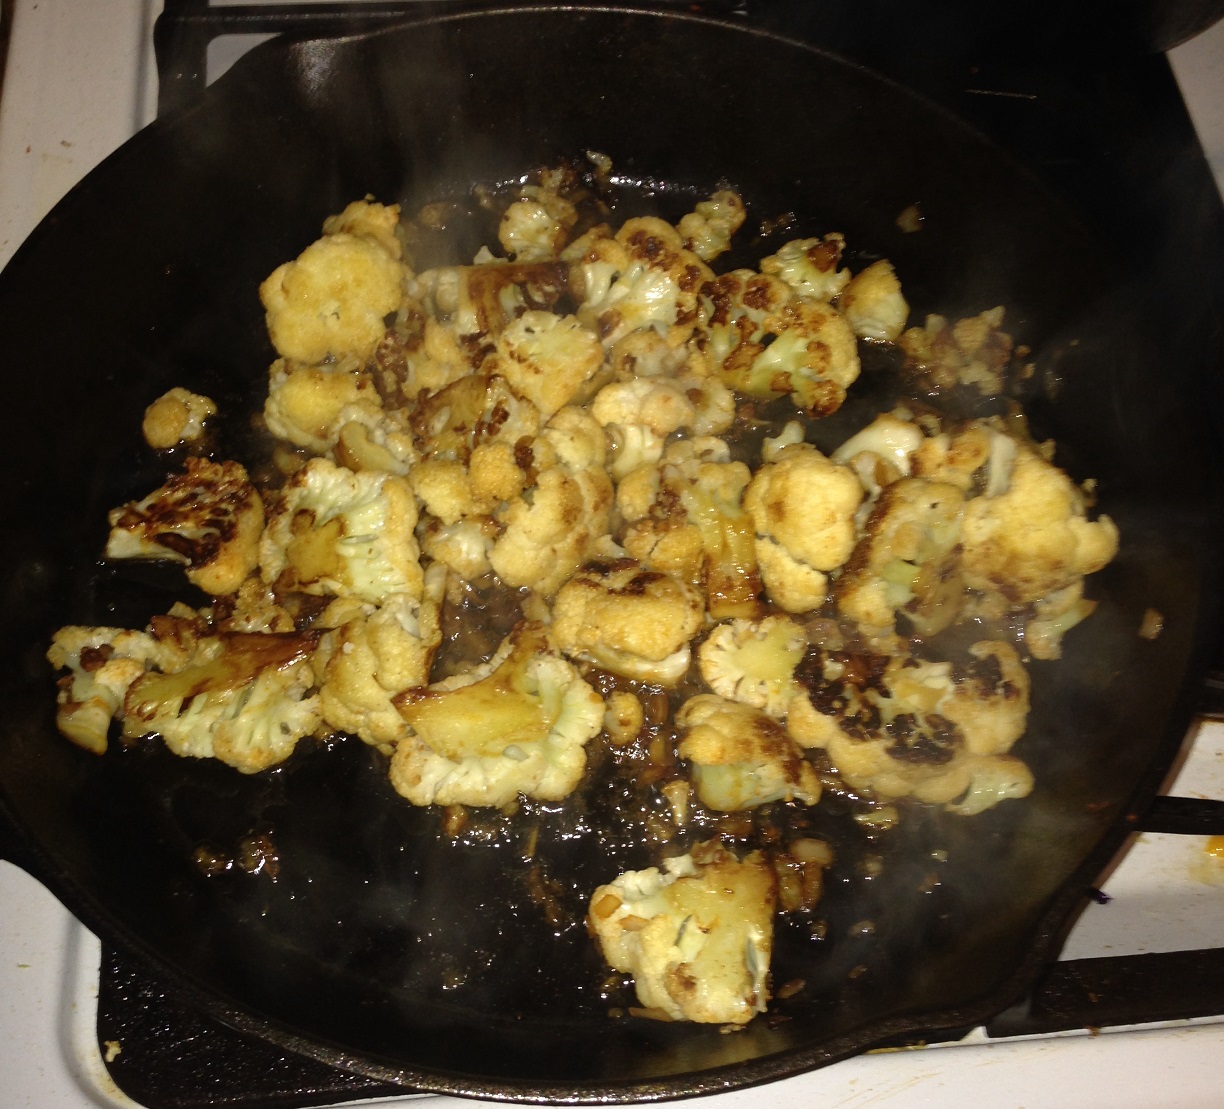
 Meanwhile, in a large cast-iron frying pan add 1 tablespoon of butter and melt it over medium heat. Add the onions and saute over medium-low heat until they start to wilt, about 3 minutes. Stir in the remaining 1 teaspoon of the brown sugar and a pinch of salt and continue to cook until the onions are golden brown and caramelized, about 20 minutes. Remove the onions from the heat and allow them to cool.

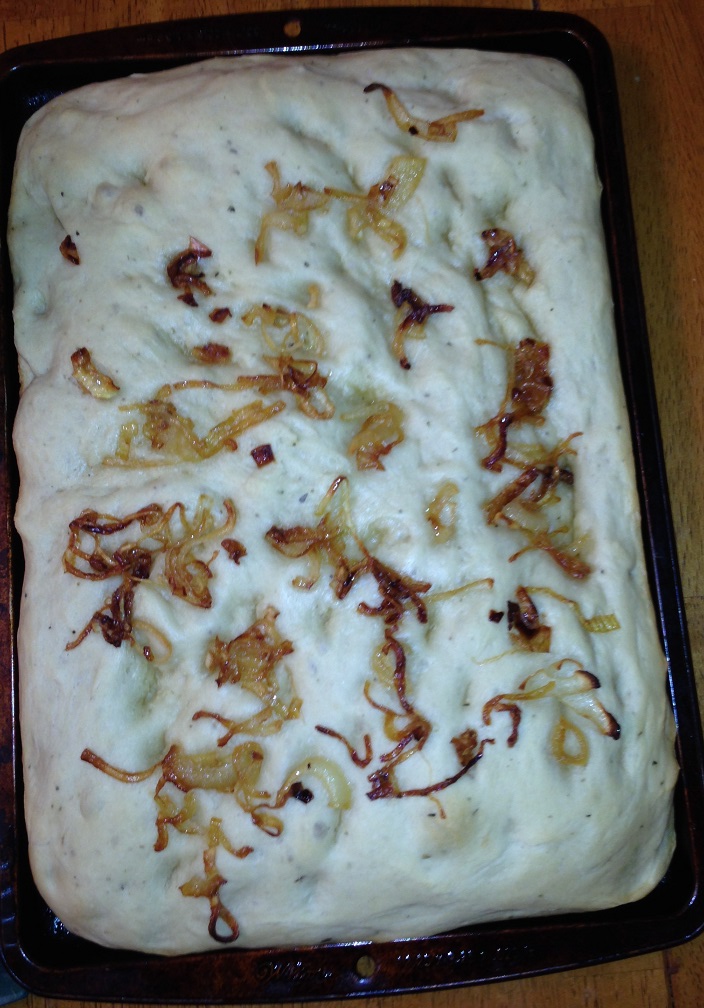
 Oil a rimmed baking sheet with the remaining 2 tablespoons of olive oil. Dump the dough onto the prepared pan and press it into a rough rectangle. Using your fingers, stretch the dough into a rectangle about 10 by 14 inches Cover the dough loosely with a kitchen towel and let it rise in a warm, draft-free place until it is puffy, about 1 hour.

 Position a rack in the middle of the oven and preheat the oven to 425 degrees. Dimple the surface of the dough with your fingertips. Gently brush the dough with olive oil, then sprinkle the dough evenly with the onion mixture. Bake until the bread is golden, about 15 to 18 minutes. Cut the focaccia into squares and serve them while warm.

This bread is perfect as a side dish for any meal, or as an appetizer before the meal. If you want to add the cheese and bacon, add the Gruyère into mixture when you add the olive oil and salt when you are making the dough. The bacon can be added when you are sauteing the onions and added as a topping. You could certainly add some extra cheese as a topping as well if you wanted. I thought it was perfect with just the onions this time and it was great to use the squares for sandwiches later on for lunches.

That’s all I have for today. Check back next time for another recipe. until then, enjoy the rest of your day and enjoy your meal!

IMG_0518

 
1 Comment

Posted by on May 3, 2014 in Breads, Cooking


Tags: , , , ,

Quick, Easy and Tasty – Molasses-Glazed Roast Pork

Roast pork is always a favorite meal and when you make pork tenderloins it means you can get an elegant meal on the table pretty quickly. The tenderloins do not take long to cook and take very well to all kinds of sauces and glazes so you get a lot of room to experiment with different things that you like. I had a pork tenderloin in the freezer last week so when we were looking for something a little different for dinner one night I decided to take it out and find a new recipe that we can make fast during the week. I came across this recipe from Williams-Sonoma for a molasses-glazed roast pork tenderloin and it looked really easy to make so I thought I would give it a shot. The original recipe calls for it to be made with sweet potatoes, but I actually didn’t have any on hand that day so I just went with the pork instead.

Molasses-Glazed Roast Pork and Sweet Potatoes

2 pork tenderloins, each 10 to 12 ounces
Coarse kosher salt and freshly ground black pepper, to taste
1/4 cup light molasses
1/4 cup Dijon mustard
1 tablespoon minced fresh rosemary
1 teaspoon red pepper flakes
1 1/2 pounds orange-fleshed sweet potatoes, unpeeled, cut into 1/2-inch slices
2 1/2 tablespoons olive oil, plus more for brushing
1 shallot, minced
1/2 cup chicken broth

Preheat an oven to 400 degrees. Season the pork tenderloins lightly with salt and black pepper. Set the tenderloins aside.

In a small bowl, stir together the molasses, mustard, rosemary and 1/2 teaspoon of the red pepper flakes. Set aside.

In a large bowl, combine the sweet potatoes, the remaining 1/2 teaspoon of red pepper flakes and 1 1/2 tablespoons of the olive oil. Season the potatoes with salt and black pepper and toss to coat the sweet potatoes evenly. Brush a large rimmed baking sheet with olive oil. Arrange the sweet potatoes on the baking sheet in a single layer, leaving a space in the center of the pan. Transfer the potatoes to the oven and roast them for 15 minutes.

Meanwhile, in a large fry pan over medium-high heat, warm the remaining 1 tablespoon of olive oil. Add the pork tenderloins and brown them on all sides, about 6 minutes total.

Remove the baking sheet from the oven and place the pork in the center; set the fry pan aside. Brush the pork and potatoes with some of the molasses mixture. Return the baking sheet to the oven and roast until the potatoes are tender and an instant-read thermometer inserted into the thickest part of the pork registers 145°F, about 15 minutes. Transfer the pork and potatoes to a warmed platter.

Pour off all but 1 tablespoon of the fat from the fry pan and set the pan over medium-high heat. Add the shallot and cook, stirring frequently to scrape up the browned bits, until the shallot begins to soften, about 3 minutes. Add the remaining molasses mixture and the chicken broth and bring the mixture to a boil, stirring frequently. Simmer until the sauce thickens slightly, about 3 minutes.

Slice the pork and drizzle with the sauce. Serve the pork and potatoes immediately, passing any remaining sauce at the table.

It is a very simple meal that you can prepare and make in under an hour and gives you something different for a weeknight. The molasses glaze tastes great with the pork and I imagine it will taste great with sweet potatoes as well. I served the pork with some of the leftover Tex-Mex rice and beans that I had made as well as a new cauliflower recipe that I will be posting and some homemade focaccia bread that I made (I’ll be posting that recipe as well). It was a nice change of pace for a weeknight dinner that you can put together pretty easily.

That’s all I have for today. Check back next time for another recipe. until then, enjoy the rest of your day and enjoy your meal!

IMG_0519 IMG_0516

 
1 Comment

Posted by on May 1, 2014 in Cooking, Dinner, Pork


Tags: , , ,

Holla for Some Challah!

Sean has been asking me to try to make challah bread for a long time and I have avoided doing it because I couldn’t find a recipe where everything seemed easy enough to follow that I would not have a problem with it. The recipe itself is not that difficult; I was always a little intimidated by the whole braiding aspect of the bread. Finally, Michelle said to me “It’s just like braiding a girl’s hair,” something I haven’t even tried since I was younger and my younger sisters needed someone to help them with hair when no one else was around. Anyway, I decided to give it a try and got this recipe from Williams-Sonoma to try it out. There are only a few ingredients involved in the bread and it is the perfect time of year to give this one a try with Easter and Passover right around the corner.

Challah Bread

2 packages (5 teaspoons) active dry yeast
1 cup warm water (105° to 115°F)
1/2 cup sugar
3 eggs, plus 1 egg, beaten, for glaze
5 cups all-purpose flour
2 teaspoons salt
8 tablespoons (1 stick) butter, at room temperature

1 tablespoon poppy seeds or sesame seeds (optional)

Directions:

To make the dough by hand, in a large bowl, dissolve the yeast in the warm water and let it stand until it is foamy, about 5 minutes. Using a wooden spoon, stir in the sugar, 3 eggs, 4 1/2 cups of the flour, the salt and the butter until the dough comes together in a sticky mass. Turn the dough out onto a lightly floured surface and knead, working in the remaining flour as necessary to keep the dough from being too sticky, until the dough is smooth and elastic, 5 to 7 minutes. Do not be tempted to add too much flour. The dough should stay soft and will become less sticky with kneading.

To make the dough with a stand mixer, in the 5-quart bowl of a mixer, dissolve the yeast in the warm water and let it stand until it is foamy, about 5 minutes. Add the sugar, 3 eggs, 4 1/2 cups of the flour, the salt and butter. Place the bowl on the mixer, attach the dough hook and knead on low-speed, working in the remaining flour as necessary to keep the dough from being too sticky, until the dough is smooth and elastic, 5 to 7 minutes. Do not be tempted to add too much flour. The dough should stay soft and will become less sticky with kneading. Remove the dough from the bowl.

Form the dough into a ball and transfer it to a lightly oiled bowl. Cover the bowl with a damp kitchen towel and let the dough rise in a warm, draft-free spot until it doubles in bulk, about 2 hours.

Line a sheet pan or rimless baking sheet with parchment paper. Punch down the dough. Using a pastry scraper, scrape the dough out onto a clean work surface. To make a 4-strand braid, cut the dough into 4 equal pieces with a sharp knife or a bench scraper. Using your palms, and starting in the center and working outward, elongate 1 piece by rolling it gently against the work surface with even pressure until you have formed a rope as long as the prepared pan. Repeat with the remaining 3 pieces.

Line up the 4 strands in front of you horizontally. Cross the strand farthest from you across the other 3 strands so that it is nearest you. Cross the strand that is now next to it across the other 2 strands away from you. Position the outside strands so that they are away from the center ones, and position the center 2 strands perfectly horizontal. Bring the strand nearest you down between the 2 horizontal strands. Bring the strand farthest from you up and across to the opposite side. Again, bring the strand farthest from you down between the 2 straight strands. Bring the strand nearest you up and across to the opposite side. Starting from the strand nearest you, repeat the braiding until you reach the ends of the ropes. Pinch them together at the top and at the bottom, and tuck the strands under at the ends.

Alternatively, to make one large 3-strand braid, cut the dough into 3 equal pieces with a sharp knife or a bench scraper. Follow the directions for rolling out the ropes for the 4-strand braid. Line the 3 strands up straight so that they are in front of you vertically. Cross the right strand over the middle strand, then cross the left strand over the middle strand. Keep going back and forth, crossing left over right, then right over left, until you reach the ends of the ropes. Pinch them together at the top and at the bottom, and tuck the strands under at the ends.

Place the braided loaf on the prepared pan, cover it with a dry kitchen towel, and let it rise again in a warm, draft-free spot until the loaf doubles in size and is spongy to the touch, about 45 to 60 minutes.

Position a rack in the lower third of an oven and preheat the oven to 350°F.

Brush the braid gently with the beaten egg and sprinkle it with the seeds, if using. Bake the braid until it is nicely browned and sounds hollow when tapped on the bottom, about 30 to 35 minutes. Transfer the bread to a wire rack and let cool completely.

It really is very easy to make, I think I just got a little confused by the braiding instructions and ended up doing it as Michelle suggested. I went with the 3-braid variation of this recipe and I can say that it makes a giant loaf of bread, which made Sean very happy because he loves it for sandwiches and we are already planning to use it to make French toast this weekend as well. It has the wonderful sweetness and cake-like quality you expect in challah bread. I’ll be making this one again for sure now that I know I can handle it.
That’s all I have for today. Check back next time for another recipe. Until then, enjoy the rest of your day and enjoy your meal!
IMG_0502
 
2 Comments

Posted by on April 10, 2014 in Breads, Cooking


Tags: , ,

Keep it Simple with Salt and Pepper Chicken

Instead of going through the effort to roast a whole chicken sometimes, you can get just as much mileage out of roasting up some bone-in chicken breasts. you can get all the white meat that you want and much better flavor thanks to the skin and bones than just making some boneless chicken breasts. I like to buy the big value packs of bone-in breasts when they are on sale, cut the breasts in half and roast them simply, using this east recipe I got from Williams-Sonoma. This way you can get a great meal out of it for dinner that night and then have plenty leftover for other meals. This one is really simple that you can do any night of the week or on a Sunday night and end up with a week’s worth of meals.

Salt and Pepper Chicken

6 bone-in, skin-on chicken breast halves, about 4 pounds total, cut in half
Salt and freshly ground pepper, to taste
1 cup chicken broth
1 teaspoon chopped fresh thyme, sage or tarragon
2 tablespoons cold butter, cut into cubes

Preheat an oven to 400°F.

Season the chicken generously with salt and pepper on top of and under the skin. Place the chicken, skin side up, in a large roasting pan. Roast until the chicken is golden brown and an instant-read thermometer inserted into the center of each breast registers 170°F, about 45 minutes.

Transfer 4 chicken breast halves to a serving platter and reserve the remaining 2 for another use.

Place the roasting pan on a stovetop over high heat. When the roasting pan sizzles, add the broth and thyme (or other herbs) and stir to scrape up the browned bits from the pan bottom. Boil the mixture until the broth is reduced by half, about 3 minutes. Remove from the heat.

Whisk the butter, a couple of pieces at a time, into the reduced liquid. Season the sauce with salt and pepper. Serve the chicken, passing the sauce at the table.

It’s a very simple dish that you can make with just about side dishes that you want and it can come out elegant. These are great with mashed potatoes, roasted potatoes, sweet potatoes, any kind of rice, polenta and any vegetable that you feel like making. The best part is that the leftover chicken is perfect for you to use for other meals. You can make chicken salad sandwiches, shred some  chicken for pulled chicken sliders or chicken tacos or use some of the chicken to make some chicken noodle soup or other chicken soups. There are lots of great things that you can do to get several meals out of the leftovers to really stretch your budget.

That’s all I have for today. Check back next time for another recipe. I still have lots of different things to share that I have been trying out lately. Until then, enjoy the rest of your day and enjoy your meal!

IMG_0494

 
4 Comments

Posted by on April 3, 2014 in Cooking, Dinner, Leftovers, Poultry


Tags: , , , , , , ,

No Sauce Pizza Time – Pancetta, Asparagus and Goat Cheese Pizza

I just came across a bunch of recipes for pizza that do not make use of any tomato sauce so I have wanted to give some of them a try. Sean loves pizza but he does not like a lot of sauce, so making no sauce pizzas is a great option for them. honestly, I find the sauce on a lot pizza overpowering and too acidic for my tastes anyway, so making some pizza without sauce seems like a good idea to me. This recipe from Williams-Sonoma is for a pancetta, asparagus and goat cheese pizza that I adapted for our own purposes since I did not have any pancetta or goat cheese on hand. Bacon substitutes for the pancetta here and I used mozzarella and Parmesan instead of goat cheese for the  cheese.

Pancetta, Asparagus & Goat Cheese Pizza

2 tablespoons olive oil

2 ounces pancetta or bacon, minced

Pinch red pepper flakes

1 bunch slender asparagus, ends trimmed

1 pound Food processor pizza dough or store-bought pizza dough

Cornmeal, for dusting

6 ounces shredded mozzarella cheese

4 scallions, white and pale green parts only, thinly sliced

1/4 pound soft, fresh goat cheese, crumbled

Parmesan cheese

Kosher salt and freshly ground black pepper

Preheat the oven to 450 degrees. In a medium skillet over medium heat, warm 1 tablespoon of the olive oil. Add the pancetta or bacon and the red pepper flakes. Saute until the pancetta is browned, about 2 minutes. Remove the skillet from the heat. Cut each asparagus spear into 3 pieces and then cut the thick ends of the asparagus in half lengthwise. Place the asparagus in a small bowl. Add the remaining 1 tablespoon of olive oil and toss the asparagus to coat.

Roll out the pizza dough on a lightly floured work surface to an 11 or 12-inch oval or round. Sprinkle a rimless baking sheet with the  cornmeal. Transfer the pizza dough to the baking sheet. Brush the dough with some of the pancetta cooking oil and the sprinkle the pancetta mixture onto the pizza. Spread the mozzarella cheese over the dough, leaving a 1/2-inch plain edge. Sprinkle the scallions and then the goat cheese over the mozzarella cheese. Arrange the asparagus over the pizza. Grate some Parmesan cheese over the asparagus then season the pizza with salt and pepper to taste.

Place the pizza in the oven and bake the pizza until the asparagus is tender and the edges of the crust are brown, about 20 minutes. Transfer the pizza to a cutting board and let the pizza stand for 5 minutes before cutting it into small wedges or pieces and serve.

The pizza had some great flavor from the bacon and asparagus. I loved the asparagus; it had the same roasted flavor I get when I roast it in the oven and the mix with the bacon and just a hint of red pepper flakes and scallions was perfect. This makes a great appetizer dish, a snack for watching the game or just for something different on Fridays for pizza night. You could easily leave off the pancetta or bacon altogether and make it a vegetarian pie.

That’s all I have for today. Check back tomorrow for another recipe. There’s still lots of good stuff to come. I am trying a beef stroganoff recipe tonight that I’ll be sharing soon too. until next time, enjoy the rest of your day and enjoy your meal!

IMG_0464


2 Comments

Posted by on March 10, 2014 in Cooking, Dinner, Pizza


Tags: , , , ,

Jazzing Up the Vegetables – Caramelized Cauliflower with Honey and Smoked Paprika

Cauliflower is in season this time of year so it is often on sale around here now, making it a good time to get some if you like it. I have to admit, I like cauliflower, but I often find it quite bland as far as taste. it is one of Michelle’s favorite vegetables, so I thought I would get some fresh cauliflower while it was a good price but I wanted to do something with it that would really bring out some flavor in the dish. I came across this recipe from Williams-Sonoma for a caramelized cauliflower with honey and smoked paprika to really punch up the flavor some.

Caramelized Cauliflower with Honey and Smoked Paprika

3 tablespoons extra-virgin olive oil

2 tablespoons butter

1 large cauliflower, about 3 pounds, cut into 1-inch florets

Salt, to taste

1 shallot, minced

1/4 teaspoon red pepper flakes

1/2 teaspoon smoked sweet paprika

2 tablespoons honey

2 tablespoons water

1/2 lemon

Freshly ground black pepper, to taste

In a large fry pan or skillet set over medium heat, warm 2 tablespoons of the olive oil and melt the butter. Add the cauliflower florets, sprinkle them with a generous pinch of salt and toss the florets to gently coat them with the oil and butter mixture. Spread the florets into a single layer and cook, without stirring the cauliflower, until the undersides are lightly browned, about 3 to 4 minutes. Flip each cauliflower piece over and continue cooking, undisturbed, until each piece is evenly browned, about another 3 to 4 minutes. Repeat the process until all sides of the cauliflower florets are evenly browned, about another 3 to 5 minutes more.

Add the remaining 1 tablespoon of olive oil, the shallot, the red pepper flakes and the smoked paprika to the pan. Cook, stirring occasionally, until the shallot is softened, about 2 to 3 minutes. Add the honey and the water and saute until the liquid reduces to a glaze, about 2 to 3 minutes. Squeeze the juice of the half a lemon over the cauliflower, stir the vegetables to combine them well and cook them for 30 seconds. Remove the pan from the heat. Taste the vegetables and adjust the seasonings with salt and pepper as appropriate.

Transfer the cauliflower to a warmed bowl and serve immediately.

It is a very easy side dish to make and tastes great with the paprika, pepper flakes and the honey glaze on the cauliflower. In my opinion it gives the cauliflower a lot more flavor than it ever had before without having to smother it in cheese and it just uses a few simple ingredients. I will surely remember this one again as it gives a nice option for a vegetable we do not have that often.

That’s all I have for today. Check back tomorrow for another recipe. I have a few new ones I have tried recently, including a new ribs recipe and some things we made for Mardi Gras, including gumbo, red rice, sweet potato cornbread and banana’s Foster parfaits. It was all pretty delicious and I think you will like them. until next time, enjoy the rest of your day and enjoy your meal!

IMG_0450

 
Leave a comment

Posted by on March 6, 2014 in Cooking, Vegetables


Tags: , , , , ,

Easy Glazed Pork Tenderloin with Pear and Thyme… Sort Of

When I had bought pork tenderloin a couple of weeks I froze one of the tenderloins, as I usually do, so we can make one for another meal on another night. I decided to use it the other night after I had seen this recipe from Williams-Sonoma, but I wanted to make a little change to it. The original recipe is a glazed pork tenderloin with pear and thyme, but since I am the only one who really likes to eat pears in out house (the other two just kind of tolerate them when I cook with them), I decided to change it up just slightly by using some apple instead. Apples go so well with pork anyone that it just seemed like an easy and smooth transition for this recipe. This one is very simple with just a few ingredients and can be done in about 30 minutes total, making it even better.

Glazed Pork Tenderloin with Pear and Thyme

1 pork tenderloin, about 1 pound, trimmed of excess fat

Salt and freshly ground black pepper, to taste

1 tablespoon extra-virgin olive oil

1 red onion, cut into 1/8-inch wedges

4 pears, cored and each cut into 8 wedges

2 tablespoons honey

1 tablespoon balsamic vinegar

Leaves from 12 fresh thyme sprigs

Preheat the oven to 400 degrees.

Season the pork tenderloin well with salt and the freshly ground black pepper to taste. In a ovenproof saute pan or cast iron pan set over medium-high heat, warm the olive oil until it is shimmering. Sear the pork tenderloin, turning it occasionally, until it is well browned, about 6 to 8 minutes total. Transfer the pork tenderloin to a plate.

Add the red onion and the pears to the pan and saute them for 1 minute. Return the pork to the pan and drizzle it with the honey and balsamic vinegar. Scatter the thyme leaves in the pan. Transfer the pork to the oven and roast it until the juices run clear when the pork is pierced with a knife, about 15 to 20 minutes.

Transfer the pork to a cutting board, cover it loosely with aluminum foil and allow it to rest for 5 minutes. Cut the  pork into slices about 1/2 an inch thick. Divide the pork, pears and onion wedges among the individual plates, drizzle with the glaze from the pan and serve immediately.

As I noted early, I substituted 2 golden delicious apples that were cored for the pears and cut the apples into wedges and cooked the pork with them. While I think the dish would be great with pears, I think it turned out just fine with the apples instead. The mix of the honey and the balsamic vinegar made a great glaze for the pork and for the apples and the flavor was fantastic. The best part – it was done in 30 minutes and all I needed to do was add a couple of side dishes and we were good to go. Easy to make and a fast clean up.

That’s all I have for today. Check back tomorrow when I will go over one of the side dishes I made that was fantastic – a peas and carrots risotto. It’s a good one so you will want to check for that one. Until then, enjoy the rest of your day and enjoy your meal!

003

 
Leave a comment

Posted by on February 24, 2014 in Cooking, Dinner, Pork


Tags: , , , ,

An Easy, Awesome Side Dish – Roasted Asparagus with Lemon

One way to know for sure that spring is around the corner besides the facts that the weather might be getting warmer (hopefully) and the daylight hours are longer (for sure) is that you will find asparagus more plentiful and on sale this time of year.It really reaches its peak between March and May, but it has been on sale in my area for that last week or so and it always one of our favorite vegetables to eat with just about any meal. There are several good ways to make asparagus, but one of my favorites and one of my favorites to do any vegetable is by roasting it. This recipe from Williams-Sonoma is a very easy one to make with just a few ingredients that you can enjoy during the weeknight or with a more elegant dinner.

Roasted Asparagus with Lemon

2 pounds asparagus, tough ends trimmed and stems peeled

1/4 cup extra-virgin olive oil

2 garlic cloves, minced

Zest of 1 lemon

Salt and freshly ground pepper, to taste

1 lemon, cut into 8 wedges

Position an oven rack in the upper third of the oven and preheat the oven to 450 degrees.

Arrange the asparagus in a single layer on a rimmed baking sheet.

In a small bowl, whisk together the olive oil, minced garlic and the lemon zest. Brush the asparagus evenly with the oil mixture, turning the spears to make sure each one gets coated well, and then season the asparagus generously with salt and freshly ground black pepper. Arrange the lemon wedges around the asparagus on the baking sheet.

Roast the asparagus until it is tender and just starting to turn a golden color, about 6 to 8 minutes. Transfer the asparagus to a warmed serving platter and drizzle it with any pan juices before serving.

Just a couple of things about asparagus in general. When you buy it from the store, you want to be sure that you choose spears that have bright green stalks and just a hint of purple color in the tips. If the tips are already starting to brown or the asparagus feels limp, choose another batch. If you are not planning to cook the asparagus that same day you need to make sure you store it properly so it doesn’t go bad on you. You can simply stand the spears upright in a pan filled with about 1 inch of water and refrigerate them until you are ready to cook them. They need the water to stay fresh and you should see them in water at the grocery store or on ice to keep them fresh. When you trim them, just make sure you cut off far enough to get rid of the woody stem at the bottom. Thicker asparagus does tend to need to be peeled so they cook more evenly, but if you buy thin asparagus you can get away without peeling them. This simple dish gives you great lemon flavor with the hint of garlic that goes so well with asparagus and it takes less than 10 minutes to make so you can do this one any night of the week.

That’s all I have for today. Check back next time for another recipe. Until then, enjoy the rest of your day and enjoy your meal!

01115b0c4962fc39a6ff19d3c86c04d12f35233605

 
3 Comments

Posted by on February 22, 2014 in Cooking, Cooking Tips, Vegetables


Tags: , , , ,

Romance in the Air and On the Plate, Part 3 – Rib-Eye Steak with Pan Jus and Broiled Lobster Tails

On to the entrees! I made a pretty simple entrée for Valentine’s Day that you can make any time you want a nice steak for dinner, whether it is a special occasion or not. This simple recipe comes from Williams-Sonoma and makes a great steak with a nice pan sauce using some of the wine we had with dinner. I also added in a couple of lobster tails and I will share that recipe right after this one for the steak.

Rib-Eye Steak with Pan Jus

1 rib-eye steak, 18 to 20 ounces and about 1 1/2 inches thick

Kosher salt and freshly ground black pepper

1 fresh rosemary sprig

1 tablespoon olive oil

1/4 cup dry red wine

1/2 cup beef or chicken stock

2 small fresh thyme sprigs

Preheat the oven to 400 degrees. Season the steak generously with salt and pepper. Pick the rosemary leaves from the stem and press them into the steak. In a ovenproof skillet or saute pan set over medium-high heat, warm the olive oil. Let the oil get quite hot but before it starts to smoke, sear and brown the steak on one side for about 1 minute. Turn the steak over and sear the other side for about 1 minute. Use tongs to hold the steak upright and sear the sides, about 1 minute per side.

Transfer the pan to the oven and roast the steak for 10 to 12 minutes for medium-rare, or until it is done to your particular liking. Press the center of the steak to gauge doneness; it will have some give for medium-rare, more firmness for medium. Transfer the steak to a cutting board, cover loosely with aluminum foil and let the steak rest for 10 minutes.

Meanwhile, add the wine, stock and thyme sprigs to the drippings in the pan and place the pan over medium-high heat. Be careful not to burn yourself on the hot pan. Deglaze the pan, stirring with a wooden spatula to scrape up any browned bits, and simmer until the liquid is reduced by half. Adjust the seasoning with salt and pepper to taste. Remove and discard the thyme sprigs.

Using a sharp knife, carve the steak across the grain into thin slices. Arrange the slices on warmed plates and spoon the pan juices over the top and serve.

Admittedly, a steak this size is pretty darn big and not something you are going to buy very often, but for a special occasion it is a nice treat. Also, using a big, thick steak like this does help you cook things perfectly so it comes out just right and will not disappoint. You will likely have leftovers (we sure did, even with 3 of us eating) so you can use them for a variety of other meals afterwards. There is nothing quite like a really good steak with a simple pan juice, and this one came out just perfectly.

As an added bonus for the meal I had picked up some frozen lobster tails that were on sale and thought we would have them as well. Sean had never had lobster and wanted to try it, and I didn’t really want to buy whole lobsters, so this was a good compromise. Frozen lobsters are not always great and sometimes turn out rubbery so you need to be careful in thawing them and re-heating them for a meal, unless you are planning to use them for something like a bisque. Take them out of the freezer the day before and let them thaw in the refrigerator so they won’t be tough. I did a simple broil with a quick little marinade first for some added flavor.

Broiled Lobster Tails

3-4 frozen lobster tails, about 5 ounces each

1 medium onion, sliced

1/4 cup olive oil

1/2 cup fresh lemon juice

Pinch salt

1 teaspoon paprika

Wash the lobster tails and careful cut through the center membrane along the belly of the lobster to expose the meat.Place the sliced onion, olive oil, lemon juice, salt and paprika in a bowl and mix well. Place the lobster tails in the mixture and toss with the mix. Refrigerate the lobster tails in the mix in the refrigerator for 1 to 2 hours. Preheat the broiler for 10 minutes.

In a broiler safe dish, place the lobster tails with the hard shell facing down and pour half of the marinade over the lobsters. Broil the lobster tails for 4 minutes. Turn the lobsters so the shell is facing up and broil them for another 5 minutes. Turn the lobsters again, add the remaining marinade over the lobster tails and broil for 3 more minutes and then serve.

These were a nice treat and the marinade helped to add some nice color and flavor to the lobster meat. They were just the right size for the meal and did not come out overcooked, which I was worried about. They were quite tasty and Sean really enjoyed it for his taste of lobster, so I’ll have to look for when they are on sale again.

That’s all I have for today. Check back next time for some more recipes. I still have some dessert that we had for the night to share with you. Until then, enjoy the rest of your day and enjoy your meal!

010 008 009

 
2 Comments

Posted by on February 17, 2014 in Beef, Cooking, Dinner, Holidays, Seafood


Tags: , , , , ,

Romance in the Air and On the Plate, Part 1 – Roasted Beet Salad

Even though the weather around here has been absolutely atrocious this week, I had planned Valentine’s Day dinner late last week, of the ingredients I needed last week or early in the week and I was completely prepared to make everything. I even put extra hours of work in so I could be sure I had enough time to cook everything and spent the better part of the afternoon preparing everything. We had a nice, elegant meal for the three of us, something we do not do too often and it tasted great and was fun. I’ll be sharing the recipes I made over the next several days, so we may as well start off with the salad. The original thought for the recipe comes from Williams-Sonoma, but I actually ended up changing quite a bit of it because Michelle is not a big fan of a couple of the ingredients, so I did switch some things around for this roasted beet salad. I’ll give you the original recipe and then let you know what I did to change it around.

Roasted Beet Salad

3 golden beets, trimmed and washed

6 red beets, trimmed and washed

1/2 cup olive oil

Kosher salt and freshly ground black pepper

2 tablespoons fresh lemon juice

5 tablespoons creme fraiche

1 tablespoon chopped fresh dill

2 teaspoons minced shallots

4 cups baby watercress

4 ounces goat cheese, crumbled

1/3 cup toasted chopped walnuts

Preheat the oven to 350 degrees. Place the golden and red beets on a baking sheet. Coat the beets with 3 tablespoons of the olive oil and season them well with the kosher salt and black pepper. Cover the baking sheet with aluminum foil and roast until the beets are fork tender, about 1 hour. When the beets are cool enough to handle, peel the beets and cut them into 1-inch wedges.

Meanwhile, combine the lemon juice, creme fraiche, the remaining 5 tablespoons of olive oil, the dill and the shallots in the blended or food processor. Blend or emulsify the ingredients until they are well mixed and season the vinaigrette with kosher salt and pepper to taste.

Arrange the beet wedges in a layer on a platter and top them with the watercress. Garnish with the goat cheese and toasted walnuts. Drizzle the vinaigrette over the salad and serve.

Okay, looking back at this I made quite a few changes to the recipe. First, I could only find red beets in my area so that is what I used. I would have loved to have the golden ones too, but it just wasn’t happening this time. Next, I omitted the goat cheese and the toasted walnuts. Michelle doesn’t like either one of them so they both went out. I also couldn’t locate any creme fraiche in the area so I had to make my own using equal parts of sour cream and heavy cream and mixing them together. It turned out just fine and was perfect to use. Finally, I hated to waste the beet greens so I decided to use them in the salad with the watercress. One thing to not about beet greens – they are very dirty and need extensive washing and spinning in the salad spinner if you have one. Also, they can be quite bitter when they are raw so if you don’t like the bitter flavor you can try blanching them or even wilting them a little in a saute pan for a few minutes. They are too tasty to waste though and make a nice addition to the meal if you can use them. We all loved the beets and always forget how great roasted beets can taste. I really need to buy them more often to make them. I really enjoyed the dressing as well with the shallots and dill adding some great flavor and I can see how the goat cheese and walnuts would add a lot to this salad. It was good as we had it, but the additions would make it even better. The picture I took does not have the dressing on it yet and you can really only see the beets and beet greens so it doesn’t do it justice.

That’s all I have for today. Check back next time for the next part of the dinner menu. I’ll be going over the two sides we had with the meal – sautéed spinach with garlic and garlic-thyme smashed potatoes. Until next time, enjoy the rest of your day and enjoy your meal!

006


2 Comments

Posted by on February 15, 2014 in Cooking, Dinner, Dressings, Holidays, Salad


Tags: , , , , , , ,

 
National Day Calendar

Fun, unusual and forgotten designations on our calendar.

Jennifer Probst

a little bit naughty a little bit nice

Laissez Faire

Letting Life Lead

What To Have For Dinner Tonight

Simple and delicious dinner inspiration