RSS

Monthly Archives: November 2013

You Gotta have Bread for Thanksgiving – Easy New Orleans French Bread and Focaccia Rolls

I have been branching out more and more into the world of bread and making my own at home when I can. It just plain tastes better and works out to be a lot cheaper than what you pay for it in the stores. While I do try to keep things simple with what a make, I just recently tried a couple of recipes that are easy to do, with few ingredients, and will go well not just with your holiday meal plans but are great for any time. The first I tried is New Orleans French bread from Saveur magazine.

New Orleans French Bread

2 tablespoons sugar

2 1/4-ounce packages active dry yeast

2 tablespoons vegetable shortening

6 cups bread flour

1 tablespoon kosher salt

Place 1 tablespoon of the sugar, the yeast and 2 cups of water heated to 115 degrees in the bowl of a stand mixer fitted with a dough hook; let the mixture sit until it is foamy, about 10 minutes. Add the remaining sugar and the shortening and then add the flour and salt. Mix on low-speed until the dough forms; increase the speed to medium-high and knead the dough until it is smooth, about 8 to 10 minutes. Remove the bowl from the mixer and cover it with plastic wrap. Let the dough sit until it has doubled in size, about 1 1/2 to 2 hours.

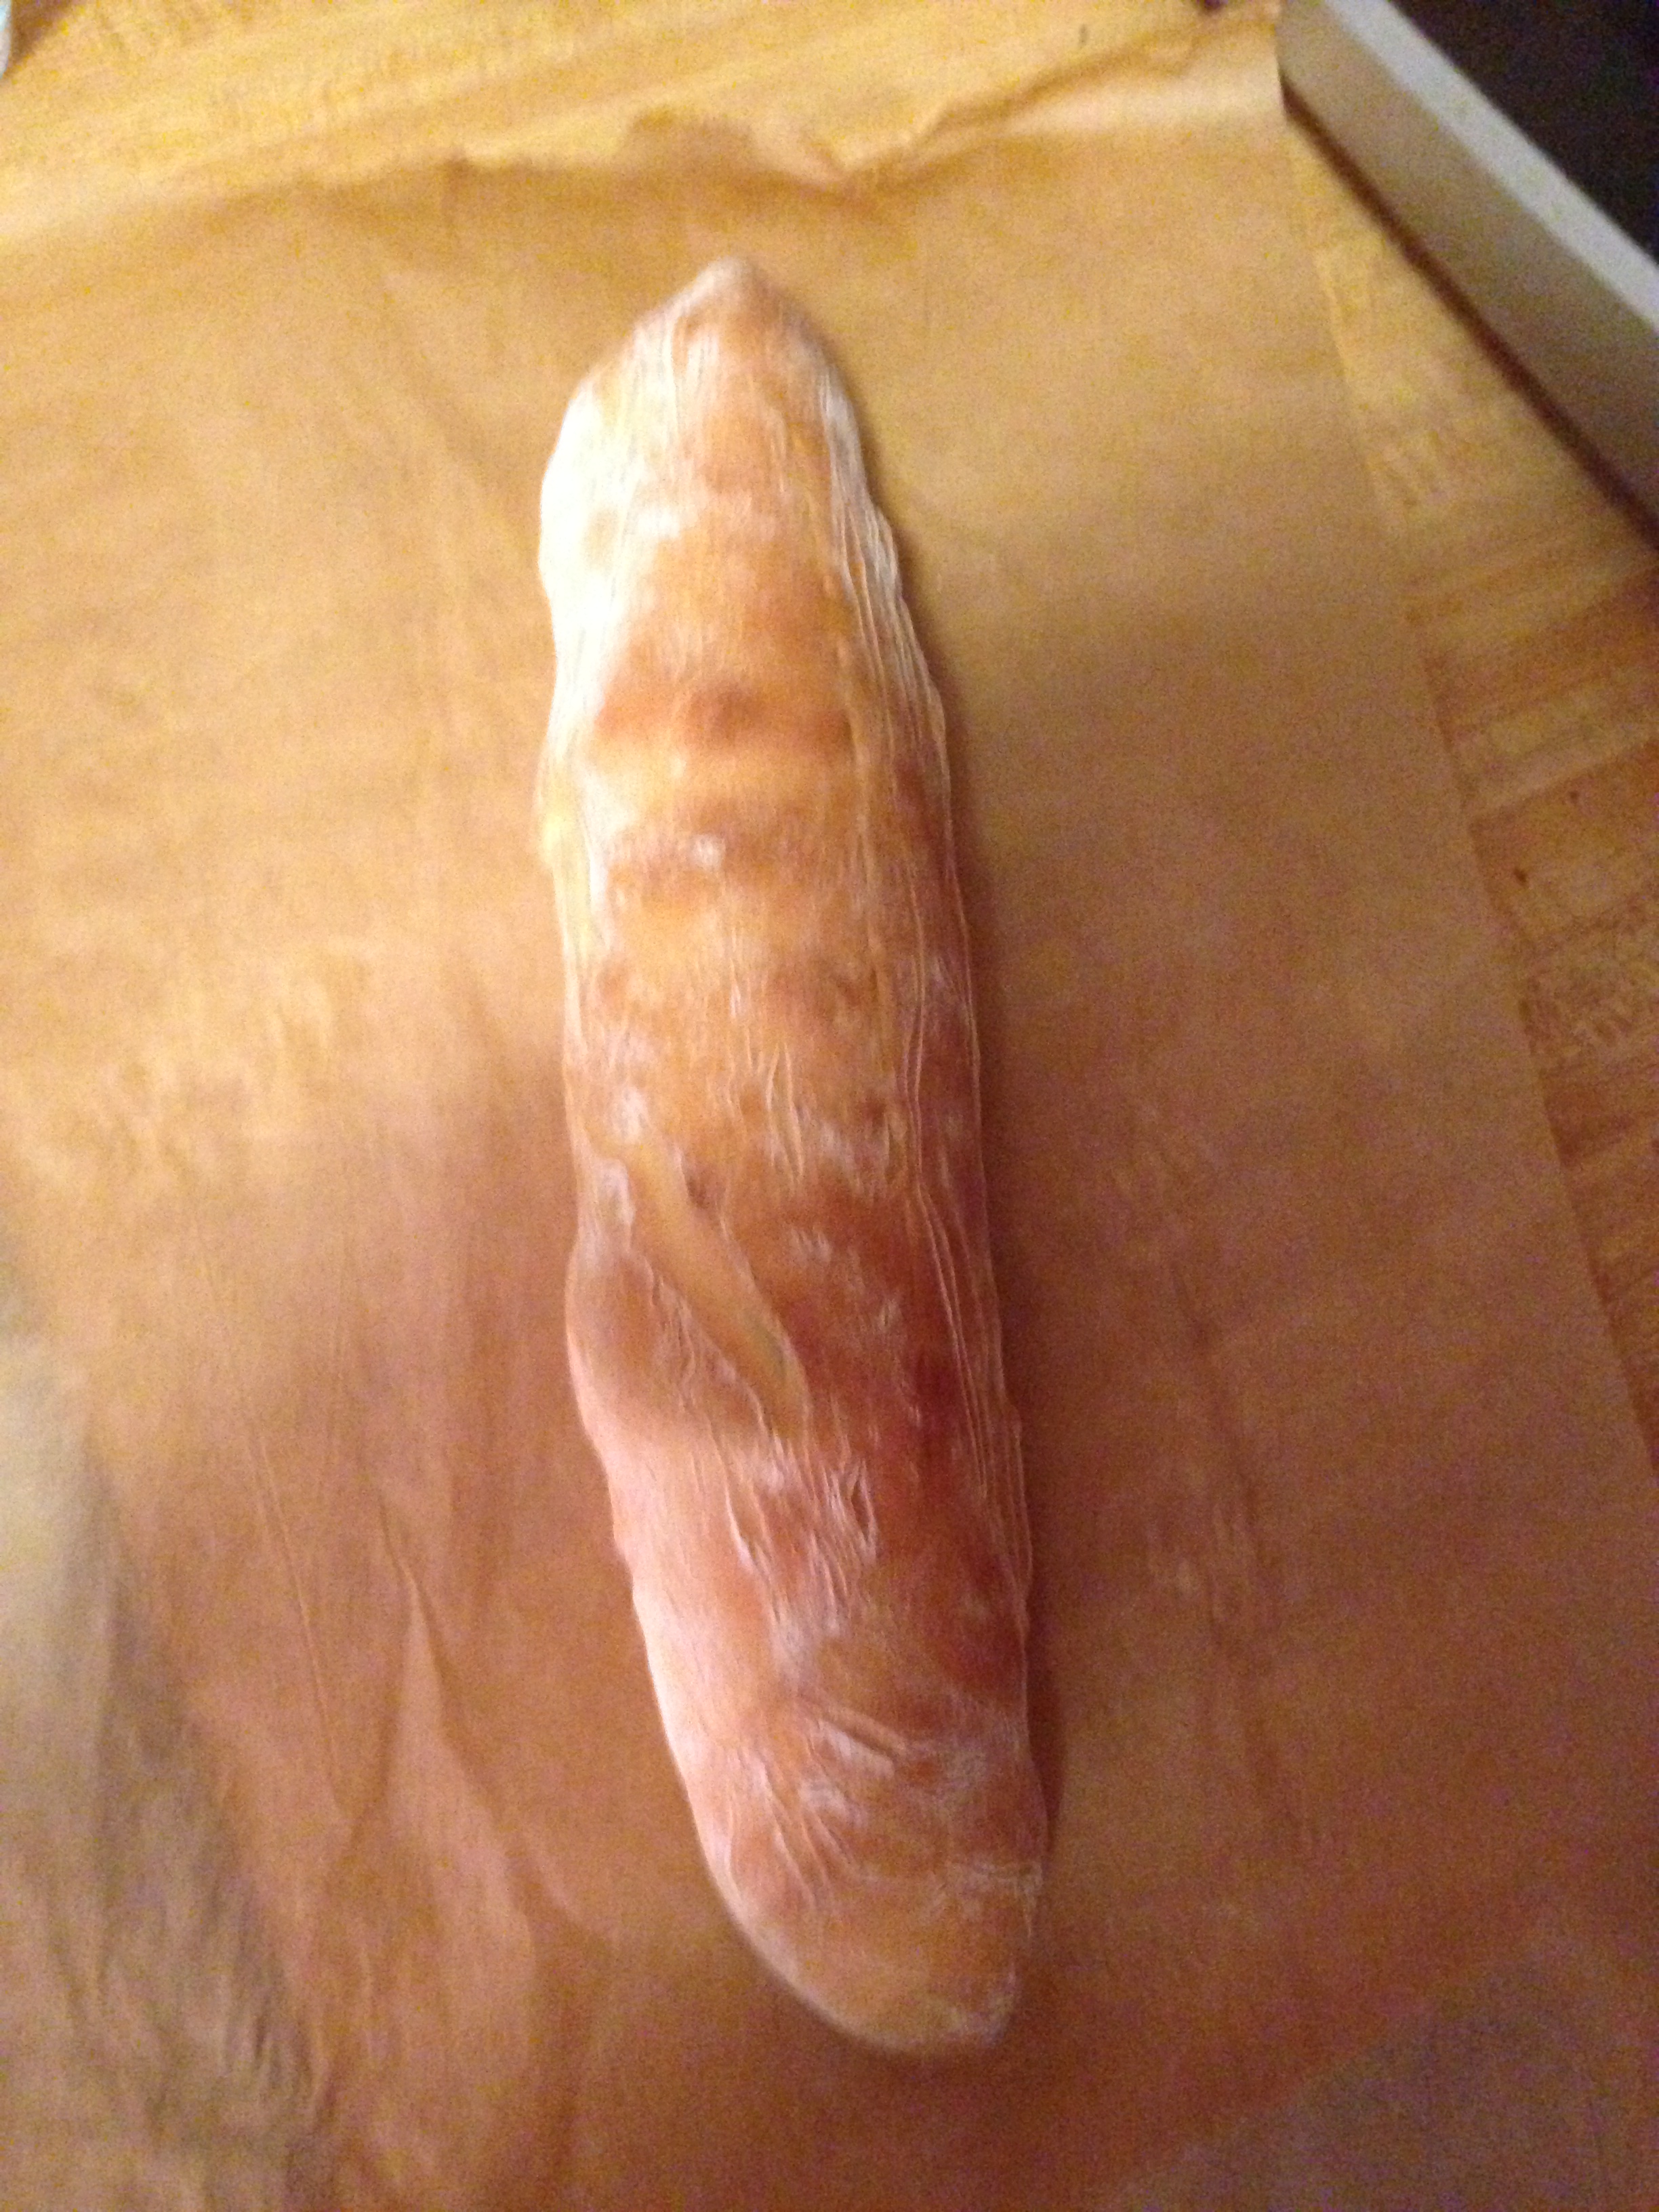
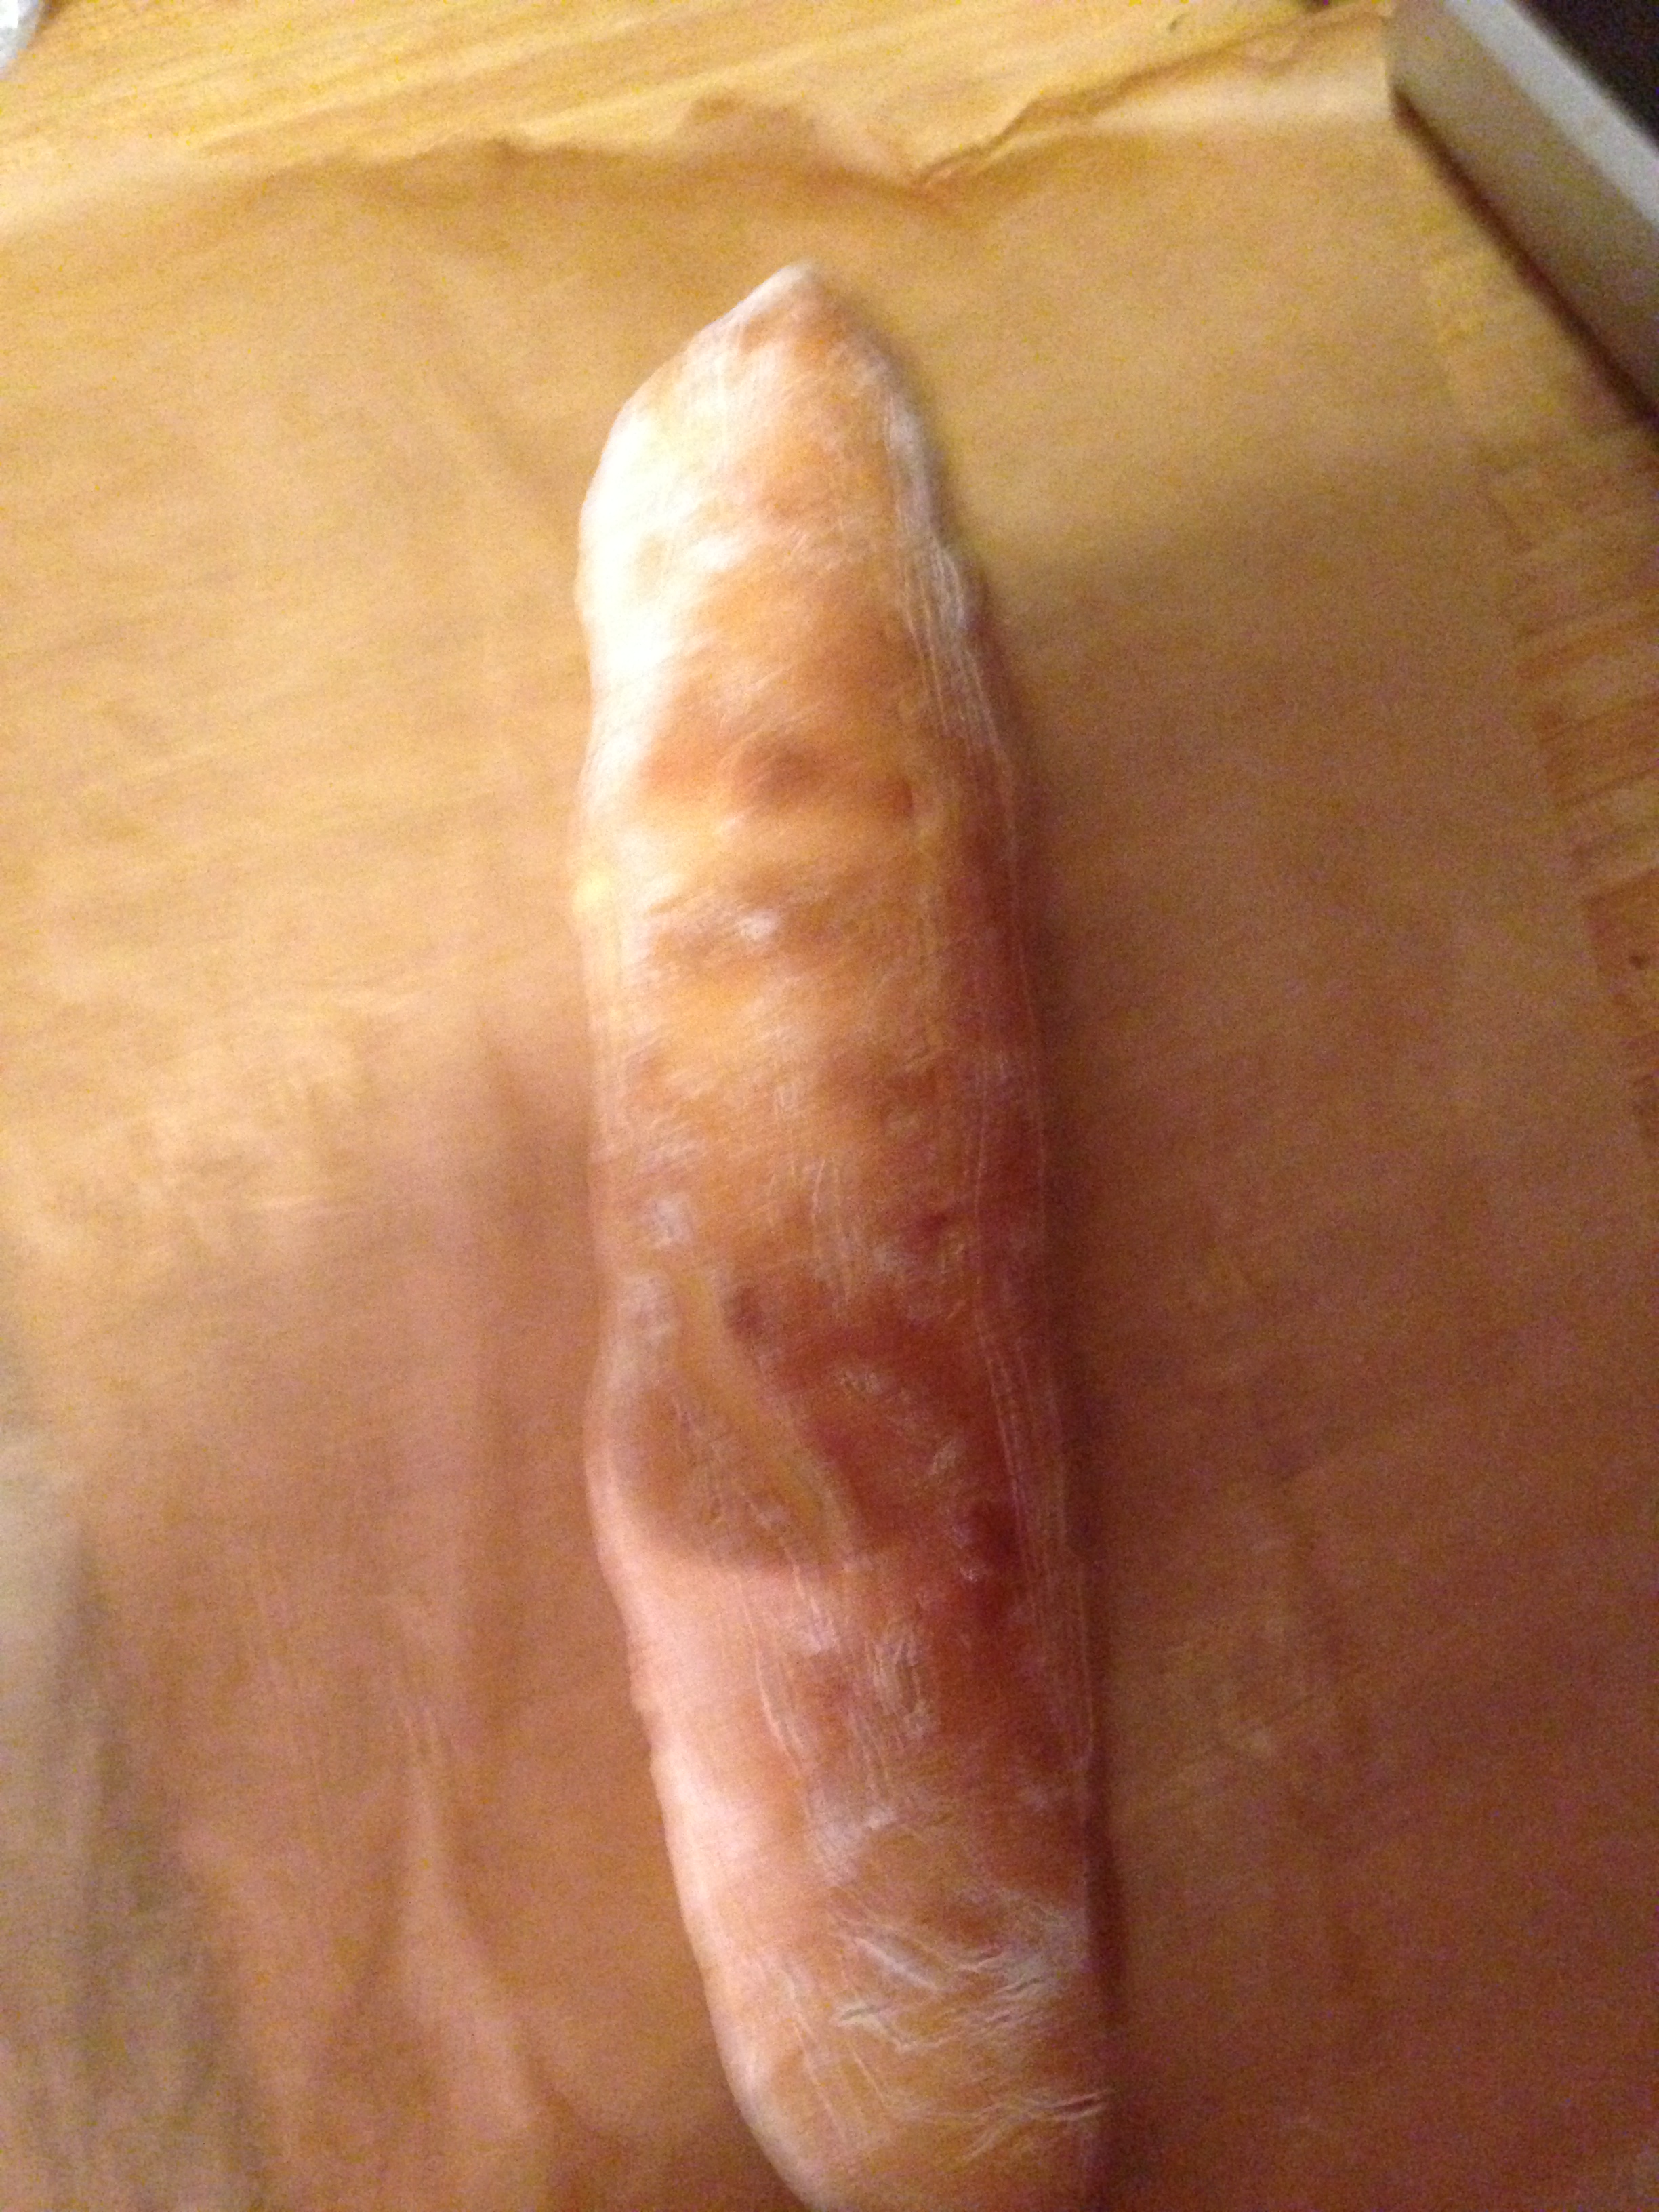
Uncover the dough and transfer it to a floured work surface. Knead the dough briefly to form a ball. Divide the dough into quarters and shape each quarter into a 16-inch long thick rope. Place two ropes each on a parchment paper-lined baking sheet and cover with plastic wrap. Allow the loaves to sit until they have doubled in size, about 1 to 1 1/2 hours.

Heat the oven to 375 degrees. Using a sharp knife or cutting blade, slash a long line down the center of each loaf. Bake the loaves until they are light brown and an instant read thermometer inserted into the center of each loaf reads between 208 to 212 degrees, about 30 minutes. Let the loaves cool for 15 minutes before serving.

Of course, we couldn’t resist and cut into one of the loaves right out of the oven and it was great. These French bread loaves are crunchy and delicious and perfect for many uses. Not only are they great to go with your entrée, but they would be great for appetizers like crostini, or just dipped in some olive oil. They are also ideal for sandwiches of all kinds. I’ll definitely make these again.

The other bread I tried this week is a simple recipe I came across for focaccia rolls. I wanted to make something that could be used for dinner rolls or also used for sandwiches and the like and this recipe was easy enough and seemed to fit my needs the best.

Focaccia Rolls

1 1/4 cups warm water (105 to 115 degrees)

1 teaspoon honey

1 tablespoon active dry yeast

1/4 cup olive oil, divided

2 teaspoons salt

1 1/2 teaspoons Italian seasoning, divided

3 1/2 cups bread flour

In the bowl of a stand mixer, stir together the warm water, honey and the yeast. Allow the mixture to proof until it id frothy, about 10 minutes. Add 2 tablespoons of the olive oil, the salt, 1 teaspoon of Italian seasoning and mix together.

In a small bowl, mix together the remaining olive oil and herbs and set aside.

Attach the dough hook to the mixer and add the flour to the mixture in the bowl. Knead the mixture on medium speed for 10 to 12 minutes until the dough is smooth and elastic and does not stick to your hands.

Oil a large bowl and add the dough. Cover the bowl with a damp towel or plastic wrap and place it in a draft-free area to rise for 1 1/2 to 2 hours or until the dough has doubled in size.

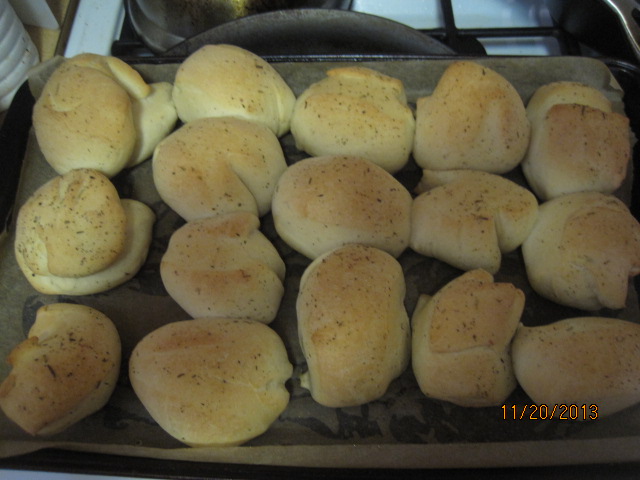
Once the dough is risen, punch it down and divide it into 12 equal size balls. Place the balls on a greased baking sheet, cover it with a damp towel and allow it to rise for 30 to 40 minutes.

Heat the oven to 400 degrees. Using the remaining olive oil and her mix, brush the top of each roll. Place the baking sheet in the oven and bake for 20 to 25 minutes, until the tops of the rolls are golden brown and the rolls sound hollow.

I actually got more than 12 rolls out of this batch as I made some smaller and some larger so we could use some for dinner rolls and some for hamburgers. They have great flavor to them and I really liked them with the burgers. The small ones are perfect as dinner rolls for your holiday meals. I’ll be making these again as well.

That’s all I have for today. Check back again next time for more recipes. I still have a few Thanksgiving ideas if you are looking for something, so stayed tuned. Until next time, enjoy the rest of your day and enjoy your meal!

IMG_0389 002 003 IMG_0388

 
Leave a comment

Posted by on November 23, 2013 in Breads, Cooking, Holidays


Tags: , , , , ,

Breads, Rolls, and Biscuits – Photo Gallery | SAVEUR

Breads, Rolls, and Biscuits – Photo Gallery | SAVEUR.

While many of us may rely on one of the guests to bring some bread to our Thanksgiving or holiday meal, if you have some time ahead of the day and want to make something on your own, Saveur Magazine has put together a great collection of different recipes for breads, rolls and biscuits that you can make for your holiday meal. There’s lots of good choices here, so check it out!

 
4 Comments

Posted by on November 23, 2013 in Biscuits, Breads, Cooking, Cooking Websites, Holidays


Tags: , , , , , , , ,

Breakfast? Dinner? Why Not Both? Chicken and Waffles

Sean has been asking me to make this one for a long time and I am not really sure why. I tried to tell him that chicken and waffles is just what it sounds like – fried chicken with some waffles. For some reason he really wanted to give it a god so I tried to find a recipe that specialized in both. You could simply just take your favorite fried chicken recipe and any waffle recipe and go to town if that is what you wanted to do, but I found this recipe from Emeril Lagasse that was easy, basic and made really good chicken with some spice to it and very tasty waffles to go along side of them.

Chicken and Waffles

Chicken:

1 (3 1/2 pound) fryer chicken, cut into 8 pieces, giblets removed

1 cup all-purpose flour

1 tablespoon Essence seasoning, recipe to follow

Vegetable oil, for frying

Waffles:

2 cups all-purpose flour

3 1/2 teaspoons baking powder

1 teaspoon sugar

1/4 teaspoon salt

2 eggs

4 tablespoons butter, softened

1 1/2 cups buttermilk

Butter, for topping

Maple Syrup

Essence Seasoning:

2 1/2 tablespoons paprika

2 tablespoons salt

2 tablespoons garlic powder

1 tablespoon onion powder

1 tablespoon cayenne pepper

1 tablespoon dried oregano

1 tablespoon dried thyme


To make the Essence seasoning, combine all the dried herbs thoroughly and store them in an airtight container.

For the chicken: Heat enough vegetable oil to come about 1-inch up the sides of a large, deep cast iron skillet. Heat the oil until a candy thermometer inserted into the oil registers 350 degrees.

Rinse the chicken pieces under cold water and do not dry; leave the pieces wet. In a large, sealable plastic bag, combine the flour and the Essence seasoning. Add the chicken pieces one at a time, seal the bag, and shake the coat the chicken evenly. Remove the chicken and place it on a wire rack set over a baking sheet. Repeat this process until all the chicken is coated. Allow the chicken to rest on the wire rack for 5 to 10 minutes.

Carefully add the chicken to the hot oil and fry, turning once, until the chicken is golden brown and the meat is cooked through, about 15 to 20 minutes total for the pieces being cooked. Do not overcrowd the skillet and cook the chicken in batches if necessary. Remove the chicken pieces from the pan and drain on paper towels. Place the cooked chicken pieces on a wire rack set over a baking sheet and place in a 250 degree oven to keep them warm while you finish cooking the rest of the chicken.

For the waffles: Preheat a waffle iron and lightly spray it with cooking spray. In a large bowl, sift the flour, baking powder, sugar and salt.

In a separate bowl, beat the eggs and add the butter and buttermilk and beat to combine. Add the wet ingredients into the dry ingredients and mix them well until combined.

Pour the batter into the hot waffle iron and cook until the waffle is golden brown and lightly crisp. Remove the waffle and repeat the process until all the batter is used or you have the desired amount of waffles. Top each waffle with a slice of butter, if desired, and serve with the chicken and maple syrup.

It certainly is an interesting combination if you have never had it before. The crispy chicken along with the crispy waffle and the maple syrup make for a tasty dish. I did not use a cut up fryer but only bone-in chicken thighs that I had on hand to make things a little bit easier. you could use whatever type of chicken pieces you prefer. For the Essence seasoning, the recipe makes about 2/3 cup, so you will have some leftover to use for other meals as a rub or seasoning. You could always just use whatever you like most on fried chicken instead and you can even buy your favorite waffle mix and use that if you did not want to make your own. I think it was certainly easy enough that it would warrant making again and it was different to try. Sean seemed to really enjoy it. This recipe made 4 servings, so it was just enough for the three of us with some leftover fried chicken that we can use for other meals.

That’s all I have for today. Check back next time for some more recipes. I still have a few Thanksgiving items to post, including another turkey recipe I am trying, so stay tuned. Until next time, enjoy the rest of your day and enjoy your meal!

001

 
6 Comments

Posted by on November 22, 2013 in Breakfast, Cooking, Dinner, Poultry


Tags: , , , , ,

Thanksgiving Dressings and Stuffings – Photo Gallery | SAVEUR

Thanksgiving Dressings and Stuffings – Photo Gallery | SAVEUR.

You’ve got your turkey, your side dishes, your mashed potatoes, and your dessert, but don’t foget about the stuffing. Whether you call it stuffing or dressing, for me it is one of the best tasting parts of the meal that you just can’t do without. Saveur gives you 15 great stuffing/dressing ideas and recipes right here so you can go however you like. Check it out!

 
Leave a comment

Posted by on November 21, 2013 in Cooking, Cooking Websites, Holidays, Side Dishes


Tags: , , , , , ,

A Simple French Dish – Chicken with Vinegar Sauce

Chicken seems to lend itself very well to easy weeknight meals no matter what pieces you happen to use. For many people, the easiest thing to do is take some boneless chicken breasts and make something from them, whether it is an easy casserole, a simple stir fry or just baking them in the oven with some potatoes or vegetables. While I like a boneless chicken breast now and then, I think you get so much more flavor out of bone-in pieces that it is worth having to wait a few extra minutes while they cook for what you get. The fact is that these pieces are often a lot cheaper than the boneless breasts anyway. Many times, I buy a whole chicken, cut it into pieces and use that for several meals. Depending on the price of the whole chicken, this can be even cheaper than buying the parts. In any case, this is one of those quick and easy weeknight recipes that can make good use of chicken parts or a cut-up chicken. I got this one from Cook’s Country for a simple yet elegant chicken with vinegar sauce.

Chicken with Vinegar Sauce

1 teaspoon cornstarch

1 cup chicken broth

1/2 cup cider vinegar

2 teaspoons honey

3 pounds bone-in chicken pieces (split breasts cut in half crosswise, drumsticks, and/or thighs), trimmed

Salt and pepper

2 teaspoons vegetable oil

1 shallot, minced

4 garlic cloves, lightly crushed and peeled

1 tablespoon butter

1 tablespoon chopped fresh tarragon

Adjust an oven rack to the upper-middle position and heat the oven to 450 degrees. Dissolve the cornstarch in 2 tablespoons of the chicken broth in a 2-cup liquid measuring cup. Whisk in the cider vinegar, honey and the remaining chicken broth; set the mixture aside.

Pat the chicken dry with paper towels and season with salt and pepper. Heat the vegetable oil in a large, oven-safe skillet over medium-high heat until it is just smoking. Cook the chicken, skin side down, until it is well browned, about 6 to 8 minutes. Transfer the chicken to a plate, skin side up.

Pour off all but 1 tablespoon of the fat accumulated in the skillet and return it to medium-high heat. Add the shallot and garlic and cook until they are fragrant, about 30 seconds. Whisk the broth mixture to re-distribute the cornstarch and add the mixture to the skillet, making sure to scrape up any browned bits on the bottom of the pan. bring the mixture to a boil and return the chicken to the skillet, skin side up, along with any accumulated juices on the plate. Move the skillet to the oven and cook until the chicken breasts register 160 degrees and the drumsticks/thighs register 175 degrees on an instant-read thermometer, about 10 to 15 minutes.

Transfer the chicken to a serving platter and tent it loosely with aluminum foil to allow the chicken to rest while preparing the sauce. Return the skillet to medium-high heat (be careful because the skillet handle will be hot from being in the oven), bring the sauce to a boil and cook until the sauce is slightly thickened, about 5 to 7 minutes. Off the heat, whisk in the butter, tarragon and any accumulated juices from the platter holding the chicken into the sauce. Season with salt and pepper to taste. Spoon the sauce over the chicken and serve.

The real key to this dish, in my opinion, is making sure you get good crispy skin on the chicken when you are browning it in the beginning of the recipe. If you can get that, you end up with a great looking and tasting meal. The sauce has some nice acidity to it from the vinegar but it also has great flavor from the broth and the chicken itself. The whole meal can be made in under 30 minutes, which is perfect for a weeknight dinner. I served it with some white rice and corn and it went very well. The sauce also added some great flavor to the rice.

That’s all I have for today. Check back next time for some more recipes. I still have a few Thanksgiving ideas to share, so keep checking for those. Until next time, enjoy the rest of your day and enjoy your meal!

001

 
Leave a comment

Posted by on November 21, 2013 in Cooking, Dinner, Poultry


Tags: , , ,

A Little Break From Thanksgiving For a Pork Chop Casserole

I am taking a little break today from all the holiday recipe ideas I have been making and posting to write about the entrée I made this past weekend for dinner. I had just received the latest issue of Cook’s Country magazine a few days ago and they always have such great recipe ideas in there that I end up using many of them in our daily cooking. This is true of the pork chop casserole I made on Sunday. Pork chops are not something I would normally consider as a great idea for a casserole dish, but this recipe made them perfectly and it tasted amazing.

Pork Chop Casserole

4 slices white sandwich bread, torn into 1-inch pieces

1/2 cup Parmesan cheese, grated

4 tablespoons butter

2 tablespoons chopped fresh sage

Salt and pepper

4 (8 to 10-ounce) bone-in blade-cut pork chops, about 1-inch thick, bones removed, trimmed

1 head green cabbage, cored and sliced 1/2 inch thick

4 carrots, peeled and cut into 1/2-inch pieces

1 onion, halved and sliced thin

4 garlic cloves, minced

1 tablespoon minced fresh thyme

2 tablespoons all-purpose flour

1/2 cup dry white wine

1/2 cup heavy cream

Adjust an oven rack to the middle position and heat the oven to 300 degrees. Process the white bread, Parmesan cheese, 2 tablespoons of butter, 1 tablespoon of sage, 1/2 teaspoon of salt and 1/2 teaspoon of pepper in a food processor until coarsely ground, about 8 pulses. Set the mixture aside. Pat the pork chops dry with paper towels and season with salt and pepper. Melt the remaining 2 tablespoons of butter in a Dutch oven over medium-high heat. Add the pork chops and cook until they are well browned, about 4 minutes per side. Transfer the chops to a cutting board, halve them crosswise, and place them in a 13 by 9-inch baking dish.

Add the cabbage, carrots, onion, 1/2 teaspoon of salt and 1/2 teaspoon of pepper to the now-empty Dutch oven and cook, covered, until the cabbage is wilted, about 7 to 10 minutes. Remove the lid and continue to cook the vegetables until the onion is browned and the moisture from the pan has evaporated, about 5 minutes.

Add the garlic, thyme and the remaining 1 tablespoon of sage and cook until it is fragrant, about 30 seconds. Add the flour and cook for 1 minute. Add the wine and the cream, bring the mixture to a boil, and cook until it is thickened, about 1 minute. Pour the cabbage mixture over the pork chops and cover the baking dish with aluminum foil. Bake until the pork chops are tender, about 1 hour.

Remove the foil, increase the oven temperature to 425 degrees, and continue to cook the casserole until the top is browned, about 15 minutes. Top the casserole with the bread crumb mixture and continue to bake the casserole until it is golden brown, about 15 minutes. Let the casserole cool for 15 minutes before serving.

I know it may seem silly to use blade pork chops with the bone and then remove the bone, but there is a reason for it. The blade chops generally have more fat than the other chops you see in the stores, and these most often have the bone in them. More fat not only means more flavorful meat in this case but it is also less likely to dry out while cooking in this method. I loved the flavor the casserole had with the mix of the pork and the cabbage and the bread crumb topping added just the right amount of crunch without there being too much of it. Everyone seemed to really enjoy it and I’ll be making this one again. I served this with the winter squash bowls and some roasted balsamic potatoes to round out the meal.

That’s all I have for today. Check back next time for some more recipes. I have a couple of breads I have tried recently that might be good for Thanksgiving coming up – some french bread and some focaccia rolls. Until next time, enjoy the rest of your day and enjoy your meal!

004

 
Leave a comment

Posted by on November 20, 2013 in Cooking, Dinner, One Pot Meals, Pork


Tags: , , , , , ,

Essential Thanksgiving – Interactive Feature – NYTimes.com

Essential Thanksgiving – Interactive Feature – NYTimes.com.

The New York Times lays everything out for you perfectly in this article. They cover everything you need to know and prepare for your Thanksgiving meal to make things as easy as possible for you. Check it out!

 
1 Comment

Posted by on November 20, 2013 in Cooking, Cooking Websites, Dinner, Holidays, Turkey


Tags: , , , ,

50 Mashed Potato Recipes : Recipes and Cooking : Food Network

50 Mashed Potato Recipes : Recipes and Cooking : Food Network.

For most of us, having mashed potatoes is a crucial part of the Thanksgiving meal. There of course is the simple and classic way of making this dish, but Food Network has come up with 50 different ways that you can jazz up this traditional dish to make it a little different for your meal. Check it out!

 
Leave a comment

Posted by on November 19, 2013 in Cooking, Cooking Websites, Holidays, Potatoes


Tags: , , , ,

How About An Elegant Thanksgiving Side? Winter Squash Bowls

While I did not make this side dish with the turkey I made recently, it is one that would go well with your Thanksgiving meal and look really nice on the table. Any type of winter squash would work well for Thanksgiving or any Fall or winter meal, and doing one like this can make a Sunday dinner look nice or your holiday table. I got this recipe from Bon Appetit and you really have your choice of what type of winter squash you want to use, so use what you like best and what is most available in your area.

Winter Squash Bowl

1 medium butternut squash ( about 1 1/2 pounds)

5 small winter squash (about 1 pound each; such as acorn squash, carnival, delicata or sugar pumpkins), divided

4 1/2 teaspoons olive oil, divided

3 teaspoons pure maple syrup, divided

Kosher salt and freshly ground black pepper

1 tablespoon butter, room temperature

1 teaspoon fresh thyme leaves

Preheat the oven to 400 degrees. Line 2 rimmed baking sheets with parchment paper. Cut the butternut squash in half crosswise. Set the top half of the butternut squash aside. Remove the seeds and strings from the bottom half of the butternut squash and discard them. Place the bottom half of the butternut squash on 1 baking sheet. Remove the caps from 3 of the small squash by cutting a circle 1 inch around the stems with a small serrated knife (just like you were carving a pumpkin). Slice off and discard the strings from the bottom sides of the caps. Scoop out the seeds and strings from the centers of the squash and discard.

Cut a thin slice off the bottom of the 3 hollowed-out small squash so the squash will sit evenly on a flat surface; place (with the caps on) the squash on a baking sheet along with the bottom of the butternut squash. Drizzle the insides of the squash with 1/4 teaspoon of olive oil and 1/4 teaspoon of maple syrup. Season the cavities with salt and pepper. Bake the squash until a paring knife inserted into the squash meets no resistance, about 1 hour.

Meanwhile, remove the stems from the remaining 2 small squash and cut the squash in half lengthwise. Remove the seeds and strings from the small squash and the top half of the butternut squash and discard. Peel and chop the squash into 1/4-inch pieces and place them in a large bowl. Add the remaining 4 1/4 teaspoons of olive oil and toss to coat them well. Season the squash pieces with salt and pepper. Spread the squash pieces in a single layer on the remaining baking sheet and bake, stirring once, until the squash is tender, about 30 minutes. Transfer the baked squash to a large bowl and toss it with the remaining 2 3/4 teaspoons of maple syrup, the butter and the thyme leaves. Divide the baked squash among the hollowed-out butternut and small squash and serve warm or at room temperature.

I did change this recipe up just slightly. Since I was making this for less people, I did not need to use all this squash. What I actually did since I had a very large butternut squash is cut it into 3 sections, hollow out part of it, and used 2 sections of the butternut squash and one acorn squash to fill with the remaining squash. I have to say the squash I had was pretty solid and did have a lot of seeds, so I had to do some hollowing out on my own, which took a little work, but it was worth it. The squash was wonderfully roasted and tender and had great flavor from the maple syrup. It also looked very nice in the squash bowls itself. I think you could easily do this with just one squash of any size if you wanted something smaller and elegant for a weeknight meal.

That’s all I have for today. Check back next time for some more recipes. I have a pork chop casserole recipe I just tried, some homemade french bread, a great turkey pot pie for your turkey leftovers, another turkey recipe, chicken and waffles and much more to come so stay tuned. Until next time, enjoy the rest of your day and enjoy your meal!

003

 
1 Comment

Posted by on November 19, 2013 in Cooking, Dinner, Holidays, Vegetables, Vegetarian


Tags: , , , , , ,

What’s a Birthday Without a Cake? Lemon Layer Cake for Michelle

Let me start off by saying that I feel I have never been much of a baker. It is only until recently that I have begun to try my hand at baking bread, and I like doing it, it comes out better (most of the time) than what you can buy in the store and it is a heck of a lot cheaper than buying bread at the store. That being said, I have never been much of one to make things like pastries, cookies or cakes. However, I did decide that this year I was going to give one a try to see if I could make a cake for Michelle’s birthday. She likes lemon cakes, so I thought I would try this one that I saw in Saveur magazine for a lemon layer cake. It seemed easy enough to try for my first foray into the land of cakes.

Lemon Layer Cake

For the Cake and Syrup:

16 tablespoons unsalted butter, softened, plus more for pans

2 1/2 cups cake flour, plus more for pans, sifted

2 1/2 teaspoons baking powder

1 teaspoon kosher salt

1/2 cup milk

1 teaspoon vanilla extract

1 3/4 cup sugar

1 tablespoon lemon zest

4 eggs

1/3 cup fresh lemon juice

For the Frosting:

1 1/2 cups sugar

1/4 cup cornstarch

1/4 cup lemon zest

1 teaspoon kosher salt

10 egg yolks

1 cup fresh lemon juice

1 1/2 cups unsalted butter, softened

1 teaspoon vanilla extract

For the cake: heat the oven to 350 degrees. Butter and flour two 9-inch cake pans and set them aside. Whisk together the cake flour, baking powder, and salt in a large bowl; set the bowl aside. Whisk together the milk and vanilla in a bowl and set it aside. in the bowl of a stand mixer fitted with a paddle, cream the butter, 1 1/2 cups of sugar and the lemon zest on medium-high speed until it is pale and fluffy, about 3 minutes. Add the eggs, one at a time, beating well after each addition. On low speed, alternately add the dry ingredients in 3 batches and the wet ingredients in 2 batches. Increase the speed to high and beat the mixture until the batter is smooth, about 5 seconds. Divide the batter between the prepared pans and smooth the tops with a rubber spatula; drop the pans lightly on a counter to expel any large air bubbles. Bake the cakes until a toothpick inserted into the middle comes out clean, about 30 minutes. Let the cakes cool for 20 minutes in the pans; invert the pans onto wire racks and let the cakes cool. Using a serrated knife, halve each cake horizontally to produce four layers; set the cakes aside. Bring the remaining sugar and lemon juice to a boil in a small saucepan over high heat. Remove the syrup from the heat and set it aside.

For the frosting: Whisk together the sugar, cornstarch, lemon zest and salt in a large saucepan. Add the yolks and whisk the mixture until it is smooth; stir in the lemon juice. Stirring often, bring the mixture to a boil over medium heat; cook, stirring constantly, until it is very thick, about 3 minutes. Remove it from the heat, allow it to cool and transfer it to a bowl; chill the lemon curd. In the bowl of a stand mixer fitted with a paddle, beat the butter and 1/4 of the lemon curd on medium-high speed until it is fluffy and smooth, about 1 minute. Add half of the remaining lemon curd, beating the mixture until it is smooth, and then add the remaining lemon curd and vanilla. Increase the speed of the mixer to high; beat the frosting until it is pale and fluffy, about 3 minutes.

To assemble the cake, place one cake layer on a cake stand and drizzle it with 2 tablespoons of the syrup and spread it with 3/4 cup of frosting; top this with another layer of cake, drizzle it with 2 tablespoons of the syrup and spread it with another 3/4 cup of frosting. Place another cake over the frosting, drizzle it with 2 tablespoons of the syrup and spread it with another 3/4 cup of the frosting; top this with the remaining layer of cake and drizzle this with the remaining syrup. Cover the top and the sides with the remaining frosting. Chill the cake to firm the frosting then serve the cake at room temperature.

I do have to say for my first time out of making a cake that it turned out pretty well. Granted, there are people who are much better at making and decorating cakes than I am, but for a novice dad trying to make a cake I think it turned out pretty well. The frosting was fluffy and smooth and there was great lemon flavor throughout the cake thanks to the zest in the batter, the syrup drizzled over the cakes and the lemon curd frosting, which I really liked. Could it have been better? Probably, but I’ll cut myself some slack and say it will look and taste even better next time around. All in all, I think this was a pretty easy one to start with and those who ate cake seemed to enjoy it.

That’s all I have for today. Check back next time for some more recipes. I still have lots to share, including some Thanksgiving ideas as well as some every day dinners to try. I just got the latest issue of Cook’s Country, and that always inspires some to try some of their ideas, so look out for those. Until next time, enjoy the rest of your day and enjoy your meal!

IMG_0379 IMG_0378

 
Leave a comment

Posted by on November 18, 2013 in Cakes, Cooking, Dessert


Tags: , ,

 
National Day Calendar

Fun, unusual and forgotten designations on our calendar.

Jennifer Probst

a little bit naughty a little bit nice

Laissez Faire

Letting Life Lead

What To Have For Dinner Tonight

Simple and delicious dinner inspiration