there are always going to be times where you wish you had some dessert around and you just don’t have anything available. Maybe it is some last-minute visitors stopping by for coffee and you just wish you had something you could put out. Or maybe you are like me and you have a teenager complaining that there are no desserts in the house and they would like something to have as a snack or dessert. At times like this you need to have an arsenal of desserts that you can put together easily, typically in under an hour and without creating a lot of fuss or mess. Sure, cookies are always an option, but for me it means dragging out a lot of ingredients, the mixer, cookie sheets and more and it means a lot of clean-up. Brownies are always a good option too, but maybe you don’t have the chocolate on hand to do them fast. it is at times like this that I often find myself turning to a trusty pound cake recipe I got from America’s Test Kitchen. it is a classic recipe, easy to put together, requires only a few ingredients and minimal clean up and produces a great and versatile dessert.
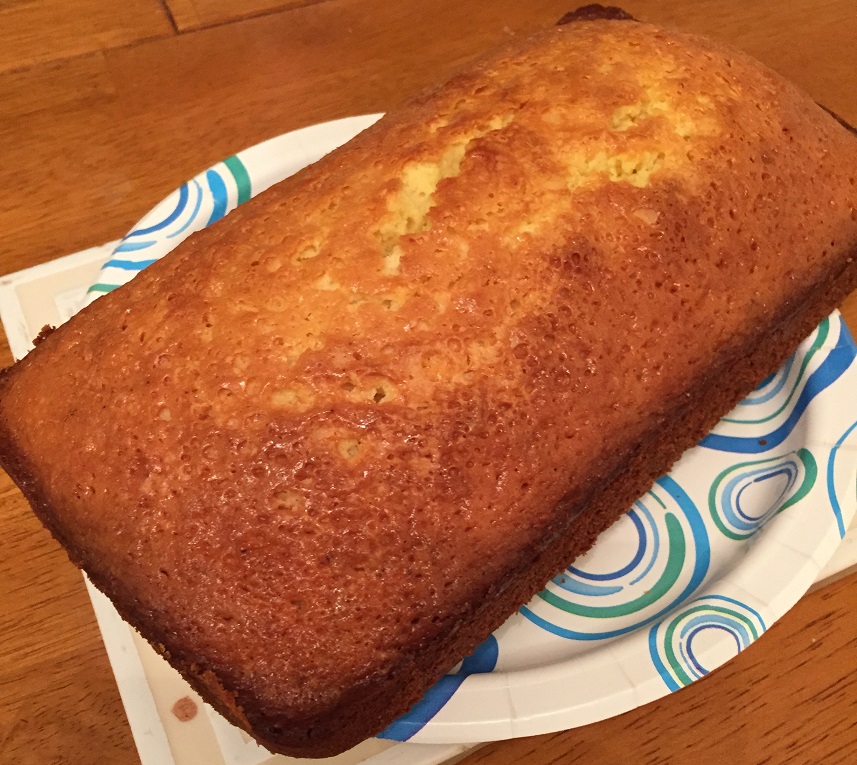
Easy Lemon Pound Cake
1 1/2 cups cake flour
1 teaspoon baking powder
1/2 teaspoon salt
1 1/4 cups sugar
4 eggs, room temperature
1 1/2 teaspoons vanilla extract
2 tablespoons grated lemon zest
2 teaspoons lemon juice
16 tablespoons (2 sticks) butter, melted and hot
Adjust an oven rack to the middle position and heat the oven to 350 degrees. Grease and flour and 8 1/2 by 4 1/2-inch loaf pan. Whisk the flour, baking powder and salt together in a bowl.
Process the sugar, eggs, vanilla, lemon zest and lemon juice together in a food processor until the ingredients are combined, about 10 seconds. With the food processor running, add in the hot melted butter in a steady stream until it is incorporated. Pour the mixture from the food processor into a large bowl.
Sift the flour mixture over the egg mixture in 3 additions, whisking to combine the ingredients after each addition until only a few streaks of flour remain. Continue to whisk the batter gently until almost no lumps remain. Try not to overmix the batter. Scrape the batter into the prepared loaf pan and smooth out the top. Wipe any drops of batter off the sides of the pan and gently tap the pan on the counter to release any air bubbles from the batter. Bake the cake in the oven until a toothpick in the center comes out with a few moist crumbs attached, about 50 to 60 minutes, rotating the pan halfway through the baking process.
Let the cake cool in the loaf pan on a wire rack for 10 minutes. Run a small knife around the edge of the cake to loosen it from the pan, then flip the cake out onto a wire rack.Turn the cake right side up and allow it to cool completely, up to 2 hours, before serving.
What you end up with in just about an hour is a moist pound cake that is not thick and dense like many can be. The process of adding the hot butter in the food processor allows the ingredients to emulsify quickly before there is a chance of anything curdling that can make the cake dense. if you prefer not to have the lemon you can simply leave the zest and juice out and get a nice, plain pound cake or you can substitute something like orange juice and zest for an orange flavor or use some almond extract and slivered almonds for an almond pound cake. you can then serve this nicely by itself or with some ice cream, serve with berries or other fruit, or even serve it in chunks with some chocolate fondue.
That’s all I have for today. Check back next time for another recipe. Until then, enjoy the rest of your day, have a Happy Valentine’s Day and enjoy your meal!