RSS

Category Archives: Dessert

Light Summer Desserts Recipes : Cooking Channel

Light Summer Desserts Recipes : Cooking Channel.

While I am not a big dessert eater myself, I do like to have something every now and then and few of us actually want to do any baking during the warm summer months. The Cooking Channel has provided 30 great light summer dessert recipes using fruit, which is always a favorite of mine any time of year. They all seem easy to make and are a great alternative to sugary snacks and heavy desserts. Check it out!

 
Leave a comment

Posted by on June 25, 2013 in Cooking Websites, Dessert, Fruit


Tags: , , ,

Fine Food for Father’s Day Part 2 – Banana Cream Pie

One of my top 5 all-time favorite desserts is banana cream pie. We don’t have it too often, mainly because it’s not the healthiest of desserts but it tastes really good and since it was Father’s Day, Michelle decided that it was a nice treat for me to have for the day. I had looked at recipes for banana cream pie, namely because I was a little disappointed in the traditional flavor you get out of making the pie with your standard, boxed banana pudding and some with cream. I wanted something that had a little more of an intense banana flavor, and I came across this recipe in Cook’s Country and thought it would be really good to try.

Banana Cream Pie

5 ripe bananas
4 tablespoons butter
2 1/2 cups half-and-half
1/2 cup plus 2 tablespoons granulated sugar
6 large egg yolks
1/4 teaspoon salt
2 tablespoons cornstarch
1 1/2 teaspoons vanilla extract
1 store-bought or homemade pie crust
2 tablespoons orange juice
1 cup heavy cream
2 tablespoons confectioners’ sugar

Peel 2 of the bananas and slice them into 1/2-inch-thick pieces. Melt 1 tablespoon of butter in a medium saucepan over medium-high heat. Add the sliced bananas and cook until they begin to soften, about 2 minutes. Add the half-and-half, bring to a boil, and boil for 30 seconds. Remove from the heat, cover, and allow to sit for 40 minutes.

Whisk the granulated sugar, egg yolks, and salt together in a large bowl until smooth. Whisk in the cornstarch. Strain the cooled half-and-half mixture through a fine mesh strainer into the yolk mixture – do not press on the bananas – and whisk until incorporated; discard the cooked bananas.

Transfer the mixture to a clean medium saucepan. Cook over medium heat, whisking constantly, until it is thickened to the consistency of warm pudding (180°), about 4 to 6 minutes. Remove the pan from the heat; whisk in the remaining 3 tablespoons of butter and 1 teaspoon of vanilla. Transfer the pastry cream to a bowl, press greased parchment paper directly against the surface, and allow it to cool for about one hour.

Meanwhile, roll the pie dough into a 12-inch round on a lightly floured counter. Transfer the dough to a 9-inch pie plate, fold the edge of the dough under itself so the edge of the fold is flush with the outer rim of the plate, and flute the edges. Refrigerate for 40 minutes, then freeze for 20 minutes. Adjust an oven rack to the lower-middle position and heat the oven to 375°.

Line the chilled pie shell with a 12-inch square of aluminum foil, folding the foil over the edges of the dough. Fill with pie weights and bake for 20 minutes. Carefully remove the foil and the weights, rotate the plate, and continue baking until the crust is golden brown, about 7 to 11 minutes. Allow it to cool to room temperature.

Peel and slice the remaining 3 bananas to about 1/4-inch-thick and toss them with the orange juice. Whisk the pastry cream briefly, then spread half over the bottom of the pie shell. Arrange the sliced bananas on the pastry cream. Top with the remaining pastry cream.

Using a stand mixer fitted with a whisk, whip the cream, confectioner’s sugar, and the remaining 1/2 teaspoon of vanilla on medium-low speed until foamy, about 1 minute. Increase the speed to high and whip until stiff peaks form, about 1 to 3 minutes. Spread the whipped cream evenly over the top of the pie. Refrigerate the pie until it is set, at least 5 hours and up to 24 hours.

I have to say that the pastry cream that you make for this recipe gave the pie a much better flavor than any other pie that I had had before. You want to make sure that you use bananas that are not green or overripe. If they have just the right amount of yellow with a few brown spots, you will get the best banana flavor out of them. Cooking them in the half-and-half mixture really leeches all of the flavor out of the bananas themselves and pulls the taste right in. If you didn’t want to go through everything with the pie crust, you could certainly use a simple, store-bought, pre-made crust that you could just pour the mixture into, but it does add more to the flavor if you follow the recipe exactly. I would certainly make pie this way again instead of using the banana pudding that you buy in the store.

That’s all there is for today. Check back again later on in the week to see what of the recipes I post. As I said, I do have a few other recipes that I have made recently that I do want to get on here, so check back and see what comes up next. Until then, enjoy the rest of your day and enjoy your meal!

005 003 004


Leave a comment

Posted by on June 18, 2013 in Cooking, Dessert, Pie


Tags: , , , ,

Weekend Entertaining: Father’s Day Barbecue | Williams-Sonoma Taste

Weekend Entertaining: Father’s Day Barbecue | Williams-Sonoma Taste.

Looking for a great barbecue meal for the weekend for Father’s Day? Williams-Sonoma has this post to help you with all the planning and the menu from appetizers and drinks to the entree, sides and desserts. Check it out and give it a try!


Tags: , , , ,

Michelle’s Not-So-Secret Oatmeal Cookies

Everyone, and I mean everyone, always loves the cookies Michelle makes. This is particularly true of the chocolate chip cookies she makes and the oatmeal raisin cookies. I love the both myself, but I have to admit the oatmeal raisins are my favorite. They come out perfectly and I am pretty sure I could eat an entire batch of them myself if I put my mind to it. What’s her secret recipe? Well, it’s hardly a secret really. She uses the same recipe as is listed on Quaker Oats’ website for their cookies, but she does tweak it a little.

Michelle’s Famous Oatmeal Raisin Cookies

1 cup (2 sticks) butter, softened

1 cup firmly packed brown sugar

1/2 cup granulated sugar

2 eggs

1 teaspoon vanilla extract

1 1/2 cups all-purpose flour

1 teaspoon baking soda

1 teaspoon cinnamon

1/2 teaspoon salt

3 cups quick cooking Irish oatmeal

2 cups raisins

Preheat the oven to 350 degrees. Beat together the butter and both of the sugars until creamy. Add the eggs and vanilla extract; beat well. Combine the flour, baking soda, cinnamon and salt in a separate bowl and mix well. Add the combined flour mixture to the butter mixture and mix well. Slowly stir in the oats until just combined.Fold in the raisins until just combined. Drop rounded teaspoons of cookie dough onto cookie sheets lined with parchment paper. Bake the cookies for 10 to 12 minutes or until golden brown. Cool for 1 minute on the cookie sheet and then remove to a wire rack for further cooling.

That’s all there is to them. The only changes she really makes are in the oats and raisins. She uses the Irish oatmeal a lot of  the time. It seems to have a more natural and better flavor than from the standard Quaker Oats we have bought in the past and I really like them this way. She also adds in twice the amount of raisins as is in the standard recipe. This seems to make the cookies softer and more chewy, which is great in an oatmeal raisin cookie. As I said, everyone really seems to enjoy them, and she just made them this weekend and we devoured them at every chance, almost as quick as they were coming out of the oven. I had to stop and make a plate just to be sure I could get a picture of them before they all disappeared.

That’s the recipe for today. Check back later in the week and I’ll have a few more recipes, including a little different take on baby back ribs that I made last night, a new chicken recipe and even some burger recipes I want to try. I have a few others in store for the coming weeks as well that should be great that I have picked up from various sources, including The New York Times, Food Republic, Alton Brown, Marc Murphy, Bon Appetit and many more. Keep checking back to see how they work out. Enjoy the rest of your spring day today and enjoy your meal!

001

 
2 Comments

Posted by on May 29, 2013 in Cookies, Cooking, Dessert


Tags: , , , ,

Positively Perfect Pound Cake

We’ve done a lot of cooking and baking over the last few days, and it has given me quite a few recipes to work with. One of the things we made this past weekend was a classic pound cake recipe that I got from America’s Test Kitchen. I love just a plain piece of pound cake with a cup of coffee or maybe even a simple dollop of whipped cream or a little bit of fruit on the side. It’s a great thing to make it and doesn’t take a lot of work on your part so you could easily make one and bring it to a party or a friend’s home.

Pound Cake

1 1/2 cups cake flour
1 teaspoon baking powder
1/2 teaspoon salt
1 1/4 cups sugar
4 large eggs, at room temperature
1 1/2 teaspoons vanilla extract
16 tablespoons (2 sticks) butter, melted and hot

Adjust an oven rack to the middle position and heat the oven to 350°. Lightly coat a 9 x 5-inch loaf pan with vegetable oil spray, then line the bottom with parchment paper. Whisk the flour, baking powder, and salt together in a large bowl and set aside.

Process the sugar, eggs, and vanilla in a food processor until combined, about 10 seconds. With the machine running, pour the melted butter through the feed tube in a steady stream, about 30 seconds. Pour the mixture into a large bowl.

Sift one-third of the flour mixture over the egg mixture and whisk in. A few streaks of flour should remain. Repeat twice more with the remaining flour mixture and continue to whisk the batter gently until most of the lumps are gone. Do not over mix.

Pour the batter into the prepared pan and smooth the top. Wipe any drops of batter off the sides of the pan. Bake until a wooden skewer inserted into the center of the cake comes out with just a few crumbs attached, about 50 to 60 minutes, rotating the pan halfway through baking. Let the cake cool in the pan for 10 minutes, then flip it out onto a wire rack. Turn the cake right side up, remove the parchment paper, and allow it to cool to room temperature, about 3 hours.

There are few notes about this recipe. You could easily vary the recipe up a little bit and add some flavor to it. Adding 2 tablespoons of grated lemon zest and 2 teaspoons of fresh lemon juice to the sugar just before you process everything in the 2nd step will give you a nice lemon pound cake. You can do the same with a tablespoon of grated orange zest and a tablespoon of orange juice and get an orange flavor instead. If you don’t have any cake flour on hand, you can make your own replacement. For every 1 cup of cake flour, you need 7/8 of a cup of all-purpose flour and 2 tablespoons of cornstarch in order to get the same results You can serve this cake with a variety of different fruits on the side or some homemade whipped cream. Remember that blueberry sauce I made about a week ago? I used that on the cake and it tasted great.

That’s all there is for today. Next time out I held be sharing the recipe Michelle uses for her oatmeal raisin cookies. I also have some other recipes to try to share this week so keep checking back to see if there’s anything you like. Until then, enjoy the rest of your day and enjoy your meal!

003 001 002

 
Leave a comment

Posted by on May 28, 2013 in Cakes, Cooking, Dessert, Sauce


Tags: , , , , , ,

Dessert Special – Mango Pineapple Fruit Salad and Tapioca Pudding

Very often, I do not make desserts. We don’t usually have dessert during the week, and when I’m cooking dinner I usually don’t have a lot of energy left over to make something. On the weekends, very often Michelle will make something for dessert. Yesterday we split the duty, she made one dessert while I made another. Both were very easy to make, although the tapioca pudding did seem to take a little while as far as the procedure. The recipe I made, however, for a mango pineapple fruit salad was very easy and only took a few minutes.

Mango Pineapple Fruit Salad

1 fresh pineapple
1 pint strawberries, sliced
2 bananas, sliced
1 kiwi, peeled and sliced
1 mango, sliced
1/2 cup red seedless grapes, halved
1/3 cup honey
2 limes, juiced
1/2 teaspoon cinnamon
1/4 cup coconut flakes (optional)
1 bunch fresh mint

Cut the pineapple in half lengthwise. Carve out the insides from the pineapple halves. Save the halves to serve the fruit salad in. Dice the pineapple, discarding the core from the center. Mix the pineapple, strawberries, bananas, kiwi, mango and grapes together. In a small bowl, combine the honey, lime juice and cinnamon. Pour the mixture over the fruit and toss well. Place the fruit in the pineapple shell, sprinkle with coconut flakes (if using) and garnish with the fresh mint leaves.

Michelle it also made some homemade whipped cream which we served on the side to put on the fruit if you want to date me. I did not have a kiwi on hand so I did not use them. I also omitted the coconut flakes as none of us are really crazy about coconut here. The great thing about fruit salad is they you can really add whatever you want to and it will always taste great, so if you have any fruit on hand that you wanted to use this is the perfect opportunity for you.

We had bought the small pearl instant tapioca a few weeks ago since I use it when I am making fruit pies. We had also picked up a bag of the large pearl tapioca by accident and needed something to do with it, so naturally we simply decided to make some tapioca pudding.

Tapioca Pudding

1/2 cup large pearl tapioca
2 1/2 cups milk
1/4 teaspoon salt
1/2 cup sugar
2 eggs, separated
1 teaspoon vanilla

In a bowl, soak the tapioca in 2 cups of room temperature water overnight. Drain the water. In a double boiler, heat the milk just until no longer cold. Add the salt and the tapioca. Continue heating until small bubbles appear at the sides of the pan. Cover, turn the heat to very low and cook for one hour. Make sure that the milk mixture does not simmer or boil.

Separate the egg whites from the egg yolks. Beat the egg yolks and sugar together until light yellow in color. Add a little of the hot mixture to the egg yolks and blend thoroughly. Add the egg yolk mixture to the hot milk mixture, stirring constantly. Place the double boiler over medium heat and cook until the tapioca mixture is very thick, about 15 minutes.

Beat the egg whites until they are stiff and. Slowly fold the egg whites into the hot tapioca mixture. Stir in the vanilla. Serve the pudding warm or chilled.

Personally, I am not a big fan of putting of any flavor really. There’s a long story behind it, and it has to do with when I was in the hospital doing my recovery and was forced to eat pudding two and three times a day. Ever since then I’ve kind of gotten away from it, but Michelle and Sean both enjoy it and they really liked the large pearl tapioca.

There was the only recipes I have for today. I do have several other recipes of items I made last week and things I have planned for this week, so you can expect to see some new postings later on this week. I think the recipes are things everyone will enjoy. Until the next time, enjoy the rest of your day and enjoy your meal!

001 006

 
Leave a comment

Posted by on May 6, 2013 in Cooking, Dessert, Fruit


Tags: , , , ,

20 Cookie Recipes That Will Take You Back to Childhood: BA Daily: Bon Appétit

20 Cookie Recipes That Will Take You Back to Childhood: BA Daily: Bon Appétit.

Who doesn’t love a good cookie? Personally, I love when Michelle makes a homemade chocolate  chip or oatmeal raisin cookie. There is nothing in the world just like it. Bon Appetit has put together 20 cookie recipes that will bring you back to those when days when Mom or Grandma would pull a tray of cookies out of the oven for you. Check it out and see if you want to try one of your own.

 
Leave a comment

Posted by on April 25, 2013 in Cookies, Cooking, Cooking Websites, Dessert


Tags: , ,

Sunday Chicken and Strawberry Rhubarb Pie


I decided to get back to making a regular Sunday dinner and this week as I hadn’t done it a couple of weeks. I had picked up some chicken earlier in the week and a whole chicken makes great Sunday meal. I wanted to find a recipe that would make things a little different and I had seen this one on the Food Network about a week or so ago and thought I would give it a try. It is Garlic Chicken with Israeli Couscous. I had never made it before and it looked good on the TV so we figured what the head lets give it a try.

Garlic Chicken with Israeli Couscous

For the Chicken:
2 whole garlic bulbs
1 lemon, zest stayed and juice
1 large bunch fresh thyme, leaves only
1 tablespoon cumin seeds, toasted and ground
Pinch crushed red pepper flakes
Kosher salt
Extra virgin olive oil
1 4 to 5 pound chicken, cut into eight parts

Couscous:
Kosher salt
2 cups medium size Israeli couscous
Extra virgin olive oil
3 ribs celery, sliced thin
1 large onion, sliced
Pinch crushed red pepper flakes
1 1/2 cups dry white wine
3 tablespoons tomato paste
Large pinch saffron
2 zucchini, cut into 1/2-inch dice
2 to 3 cups chicken stock
1/2 cup pine nuts, toasted (optional)
3 scallions, white and green, sliced thin

For the garlic chicken: preheat the oven to 350°. Put the garlic bulbs straight on the oven rack and roast them until they are soft when squeezed, about thirty minutes. Remove them from the oven and allow them to cool. Turn the oven up to 375°.

While the garlic is roasting, prepare the chicken. In a food processor or bowl, add the lemon zest and juice and set aside. When the garlic bulbs are cool, slice the tops off and squeeze out the roasted garlic into the bowl or food processor along with the thyme, cumin, crushed red pepper and salt to taste. Add a little olive oil and purée or mash into a loose paste. Massage the mixture all over the chicken pieces and allow it to sit for at least one hour.

For the couscous: bring a pot of well salted water to a boil over medium heat. Add the couscous and cook until it is about two-thirds of the way cooked through, approximately 5 to 6 minutes. Drain and set aside.

Coat a large sauté pan with olive oil and heat over medium high heat. Add the chicken to the pan and brown it on all sides. Remove it to a plate, drain the fat and add the celery and onions. Season with salt and crushed red pepper. Deglaze the pan with the white wine, scraping up all the bits on the bottom of the pan, and cook for 7 to 8 minutes. Stir in the tomato paste and cook for another two minutes. Add in the saffron, zucchini, cooked couscous and chicken stock. Stir well to combine, and then taste and adjust the seasonings if needed.

Transfer the mix to a ovenproof dish. Nestle the chicken, skin side up, in the couscous and add some more chicken stock, if needed, to keep things moist and cover the pan with foil. Add some more chicken stock to keep everything moist. Sprinkle with pine nuts, if using, and cover the pan with foil. Place the baking dish on a sheet pan. Roast the chicken for approximately 20 minutes, and then remove the foil and roast for another 10 to 15 minutes. Remove the chicken from the oven and top with this scallions before serving.

The chicken came out very moist and had a nice flavor to it because of the garlic paste that was used. I had never made couscous before, so it was little different for me, but I think it came out okay. I don’t think I put enough salt in the water when I was preparing it initially because it tasted like it could use a little more seasoning. Use your best judgment and see what works well for you. I also did not use the pine nuts as they are quite expensive and not something I normally use at all so I just left them out of the recipe. Overall I think it turned out pretty well and if you didn’t want to use couscous I think you could easily substitute white rice or brown rice and this recipe and it would turn out just fine.

Earlier in the week, Sean had asked me to get some strawberries and make something for dessert with them. Of course, this time of year the first thing I thought of was strawberry rhubarb pie. I love the taste of the fresh strawberries with the rhubarb and I hadn’t made this pie before so I had to scour around for a recipe to use. I found one at Williams – Sonoma and I also found one through America’s Test Kitchen. I liked aspects of each one, although the one from America’s Test Kitchen did not include any rhubarb so I sort of combine the two recipes and used the best of both to see how it would come out.

Strawberry – Rhubarb Pie

Two rolled out rounds of basic pie dough, or store-bought pie dough
4 pints (about 3 pounds) fresh strawberries, gently rinsed and dried, hulled and quartered lengthwise
3/4 cup sugar
2 tablespoons cornstarch
1 1/2 teaspoons low sugar or no sugar pectin
Generous pinch table salt
1 tablespoon juice from one lemon
3 cups rhubarb, trimmed and sliced half-inch thick (four or five stalks)
1 tablespoon cold butter, cut into small pieces

Preheat the oven to 350°.

For the filling: Select 6 ounces misshapen, underripe or otherwise unattractive strawberries, halving those that are large; you should have about 1 1/2 cups. In a food processor, process the berries until they are a smooth purée, about 20 to 30 seconds, scraping down the sides of the bowl as needed. You should have about 3/4 cup of purée when you are done.

Whisk the sugar, cornstarch, pectin, and salt in a medium saucepan. Stir in the berry purée, making sure to scrape the corners of the pan. Cook over medium-high heat, stirring constantly with a heatproof rubber spatula, and bring to a full boil. Boil, scraping the bottom and sides of the pan to prevent scorching, for two minutes to ensure that the cornstarch is fully cooked (the mixture will appear frothy when it first reaches a boil, then will darken and thicken with further cooking). Transfer to a large bowl and stir in the lemon juice. Allow to cool to room temperature.

Meanwhile, pick over the remaining strawberries and halve any that are still large. Mix the berries and the rhubarb into the bowl with the glaze and fold gently with a rubber spatula until everything is coated evenly. Place one dough round in the bottom of the pie plate and pat it firmly into the bottom and up the sides of the dish. Transfer the berry mixture to the dough-lined pan. Dot the fruit mixture with the butter. Place the second dough round carefully over the top of the filled pie. Trim the edges neatly, leaving a slight overhang and crimp the edges to seal the pie. Brush the top crust with one lightly beaten egg. Using a small knife, cut five or six slits into the top crust to allow steam to escape during baking.

Place the pie in the oven and bake until the crust is golden and the filling is thick and bubbling, approximately 50 to 60 minutes. Transfer to a wire rack and allow the pie to cool completely to set. Serve at room temperature or re-warm in a 350° oven for 10 to 15 minutes just before serving.

I think the pie turned out great myself. It was still just a little bit runny but not much. I think using the pectin instead of tapioca did seem to really help, and it gave the strawberry pie a nice strawberry jam-like flavor to it. I think once it has been sitting in the refrigerator overnight it will have set up even more and taste even better. Of course, you want to serve this with fresh whipped cream or ice cream on the side.

That’s all there is for today. I do have a few recipes planned out for the week, so we’ll see what we can get to as far as what we want to put up here. I do know I am making fish tacos this week at some point and I have posted a couple of different recipes for them on the air, so it is likely I’ll be using one of those if you want to check out and see what the recipe is like. I do also have a recipe I want to try this week for chicken sandwiches and will have to see what else comes along during the week. Until then, enjoy the rest of your day and enjoy your meal!

002


I forgot to take a picture of the chicken to go along with this. Sorry about that 🙂


6 Comments

Posted by on April 22, 2013 in Cooking, Dessert, Dinner, Pasta, Pie, Poultry


Tags: , , , , , , , ,

A Star’s Brownies with a Side of Cole Slaw

I thought I would just post a few simple recipes that I’ve made in the past week for today. The first is one that I came across in The New York Times and it is a recipe that I’ve seen in other places on the Internet. I am sure many people are familiar with Katherine Hepburn’s brownie recipe and may have seen it in other places. I thought it would be a nice simple dessert to make for one evening so we gave it a try.

Katherine Hepburn’s Brownies

1/2 cup cocoa
1 stick butter
2 eggs
1 cup sugar
1/4 cup flour
1 cup chopped walnuts or pecans (optional)
1 teaspoon vanilla
pinch of salt

Preheat the oven to 325°. Melt the butter in a saucepan with the cocoa and stir until smooth. Remove the saucepan from the heat and allow it to cool for a few minutes. Mix in the eggs one at a time. Add the sugar, flour, nuts (if using), vanilla and salt. Pour the mixture into a greased 8 x 8 square pan. Bake for forty minutes. Do not overbake as the brownies should be gooey on the inside. Let the brownies cool completely and cut into bars.

It was a very simple recipe that took no time at all to prepare. This makes it great as an option to make for a quick dessert as you may have the items around the house had any time. I am not a big brownie fan myself, but I have to admit that they came out quite nice. They were nice and crisp on the top and soft and chewy on the inside. You could serve them with a bit of vanilla ice cream on the side or just some simple homemade whipped cream and you have a complete dessert in no time at all.

The second recipe I have for today is one I am made when I had made Sloppy Joes was earlier in the week. I wanted to make a side dish to go along with them and I felt like having some coleslaw, but I wanted to try a little bit of a different recipe. I found this one through Williams – Sonoma on their website and it sounded pretty good to me. I try not to make a lot of coleslaw recipes that use mayonnaise, only because it seems to me that they tend to use a lot of it and it waters down the side dish. This one doesn’t used to much, and I actually cut down the amount in the recipe itself anyway.

Williams – Sonoma Coleslaw

1 head green cabbage, cored, quartered and thinly sliced
1 1/2 tablespoons kosher salt, plus more, to taste
half cup mayonnaise
1 1/2 tablespoons granulated sugar
1 tablespoon fresh lemon juice
1 teaspoon celery seed
2 tablespoons cider vinegar
Freshly ground black pepper, to taste
2 carrots, peeled and julienned

Place the cabbage in a large bowl, sprinkle with the 1 1/2 tablespoons of kosher salt and toss well. Transfer the cabbage to a colander and let drain for thirty minutes. In a large bowl, whisk together the mayonnaise, granulated sugar, lemon juice, celery seed and vinegar, and season with the salt and black pepper. Add the drained cabbage and carrots and toss to coat them evenly with the dressing. Cover and refrigerate for 2 to 3 hours before serving.

As I said, I have made a few adjustments to this recipe. First, I used a bag of coleslaw mix that included the green cabbage, red cabbage and julienned carrots already done so I did not have to deal with the slicing. However, I did salt the cabbage ahead of time to help draw out some of the moisture. Instead of using the half cup of mayonnaise, I only used a quarter cup and I think the recipe turned out just fine. I liked it a lot better without all the mayonnaise and it does cut down on some of the fat involved in the recipe itself. It makes great side dish for nearly anything, such as hamburgers, hot dogs, barbecued spare ribs, chicken, pulled pork or any type of sandwich that you may be making.

That’s all there is to the recipes I have for today. I do plan to go shopping this weekend to get some things in for some new recipes I would like to try this week. I have picked up some recipes from The New York Times, Williams – Sonoma, Cook’s Illustrated, America’s Test Kitchen, The Food Network and some others sources, so I have a lot to draw from right now of meals that we can choose. I do hope to get some new things up but more blog within the coming days. Check back and see what’s going on and see if there’s anything that you like. As always, if there is anything you would like to see, or have any requests of recipes, just drop me a note in the comments section or you can send me an email and I’ll be happy to get back to you. Until then, enjoy the rest of your spring weekend and enjoy your meal!

001

 
3 Comments

Posted by on April 13, 2013 in Cooking, Dessert, Salad, Side Dishes


Tags: , , , , , , , , ,

Irish Onion Soup and a Couple of Desserts

Yesterday we decided to make our St. Patrick’s Day dinner instead of doing it today. With that in mind I have posted recipes before for corned beef, colcannon, Irish coffee, Shamrock shakes and other recipes that I picked up while we were in Dublin last year. I did make corned beef and cabbage and boiled potatoes yesterday for them to dinner but I also added a few other items to the meal. One that stands out the most was an Irish onion soup that we made. It was pretty simple to make, didn’t take much longer than an hour to assemble and cook and it tasted great. The recipe itself is pretty simple and you could really make this any time of year not just for St. Patrick’s Day.

Irish Onion Soup

2 tablespoons butter
2 medium yellow onions, have lengthwise and sliced into pieces
3 tablespoons Irish whiskey
1 tablespoon granulated it sugar
1 1/2 teaspoons kosher salt, plus a pinch
1 1/2 tablespoons all-purpose flour
1 clove garlic, finely chopped
1/2 cup dark Irish beer, such as Guinness
6 1/2 cups beef stock or broth
1/2 teaspoon freshly ground pepper
Day-old baguette, sliced into 3/4- inch slices
Irish cheddar cheese, sliced into 1/4- inch thick slices

in a large skillet set over medium heat melt the butter. Once the butter is melted and the white foam subsides add the sliced onions. Cook using a wooden spoon to stir occasionally, until the onions are soft and gold in about 20 minutes. Add the Irish whiskey. If you have a gas burner, carefully till the pan toward the flame to flambé the onion of whiskey mixture. If you have that electric cooktop, use a long match to flambé the whiskey or you can skip the flambé altogether. Stir in the granulated sugar. Cook, stirring occasionally until the onions turn darker shade of brown, approximately 4 to 6 minutes. Stir in the pinch of kosher salt, the all-purpose flour, and the finely chopped garlic. Cook until the garlic is fragrant, about two minutes. While stirring pour in the Irish beer. Simmer, stirring occasionally until the beer is reduced by 1/3, about five minutes. Add the beef stock, 1 1/2 teaspoons kosher salt and freshly ground pepper. Bring the soup to a simmer. Reduce the heat to medium low and cook for 20 minutes.

Adjust an oven rack to the upper middle position and heat the broiler to high. Divide the soup among oven-safe bowls and set them on a rimmed baking sheet. To each bowl add two bread slices. Cover each slice of bread with two pieces of the Irish cheddar. Set the rimmed baking sheet on the upper middle oven rack and broil until the cheese is melted, golden and bubbling, 3 to 5 minutes. Remove from the oven and serve immediately.

You could certainly use a different type of cheese if you prefer not to go with the Irish cheddar. Personally, I didn’t put any cheese on mine and just had the onion soup itself. The recipe itself makes enough for four servings, but I had a little bit more so we can make it for six people. There were no leftovers it off from what I made.

Michelle made two different cakes for dessert. We actually got the recipes from two different sources. We had seen the recipe for the Fallen Chocolate Cake in the recent Bon Appétit magazine. It sounded really good and it’s basically a flourless cake, so we thought we would give it a try.

Fallen Chocolate Cake

1/2 cup (one stick) butter, cut into 1-inch pieces, plus more, room temperature, for the pan
3/4 cup +2 tablespoons sugar, divided, plus more for the pan
10 ounces semisweet or bittersweet chocolate, coarsely chopped
2 tablespoons vegetable oil
6 large eggs
2 tablespoons unsweetened cocoa powder
1 teaspoon vanilla extract
3/4 teaspoon kosher salt

1 cup chilled heavy cream
1/2 cup marscarpone
3 tablespoons powdered sugar

Preheat the oven to 350°. Lightly butter a springform pan and dust with sugar, tapping out any excess. Combine the chocolate, oil, and half cup of butter in a large heatproof bowl. Set the bowl over a saucepan of slow simmering water and heat, stirring often, until melted. Remove the bowl from the sauce pan.

Separate 4 eggs, placing the whites and the yolks in separate medium bowls. Add the cocoa powder, the vanilla, salt, 1/4 cup of sugar, and the remaining two eggs to the bowl with the yolks and whisk until the mixture is smooth. Gradually whisk the yolk mixture into the chocolate mixture, blending well. Using an electric mixer on high-speed, beat the egg whites until frothy. With the mixer running, gradually beat in 1/2 cup of sugar; beat until firm peaks form. Gently fold the egg whites into the chocolate mixture in 2 additions, folding just until they are incorporated between additions. Scrape the batter into the prepared pan. Smooth the top and sprinkle with the remaining 2 tablespoons of sugar.

Bake until the top is puffed and starting to crack and the cake is pulling away from the edge of the pan, about 35 to 45 minutes. Transfer to a wire rack and let the cake cool completely in the pan. The cake will collapse in the center and crack further as it cools.

For the topping, use an electric mixer on medium high-speed to beat the heavy cream, marscarpone, and powdered sugar in a medium bowl until soft peaks form. Remove the sides of the springform pan from the cake and mound the whipped cream mixture into the center of the cake.

We found that the cake itself seems to taste awful lot like a really good, thick brownie. The cream used on the top was really great it combined with the cake itself. We were little worried as to how this one would turn out, which is why we decided to make a second cake along with it. For the second cake, we opted to make a Dark Chocolate Guinness Cake with Bailey’s Buttercream Frosting. I saw a bunch of recipes on the Internet, but opted to go with this one that I saw at The Procrastobaker.  This one is a more traditional cake, besides the addition of the alcohol.

Dark Chocolate Guinness Cake with Bailey’s Buttercream Frosting

1 1/2 sticks butter
1 cup Guinness Extra Stout
1 tablespoon vanilla extract
3/4 cup unsweetened cocoa
1 1/2 cups sugar
1 1/4 cups all-purpose flour
1 teaspoon baking soda
2 large eggs

3 sticks butter, softened
3 cups powdered sugar, sifted
2 to 4 tablespoons Bailey’s Irish Cream liqueur

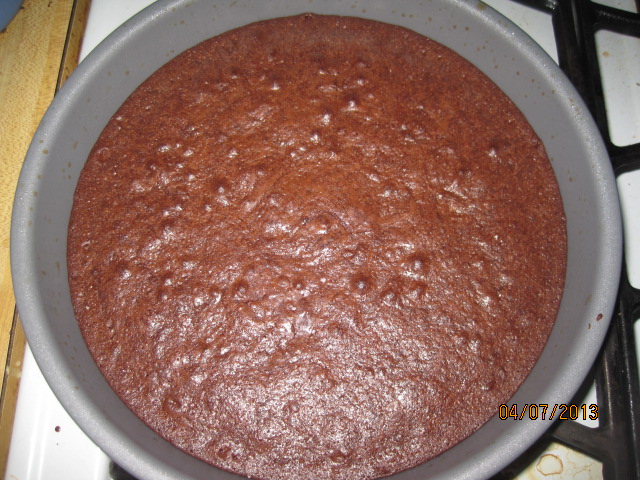
Preheat the oven to 350°. Melt the butter in a small sauce pan and remove from the heat and whisk in the Guinness, the vanilla and cocoa powder. While the mixture cools slightly, grease and line 2 8-inch cake pans with parchment paper. Whisk together the sugar, flour and baking soda in a large bowl. Pour the Guinness mixture into the flour mixture and then whisk in the two eggs. When the batter is completely smooth, divide the batter between the two cake pans. Place the cake pans in the oven and bake for about 30 to 35 minutes, or until a toothpick inserted in the center of the cake comes out clean. Leave the cakes in the pans to cool.

To make the buttercream frosting, whip together the butter and sugar until very pale, adding in enough Bailey’s for it to be loose and fluffy. To assemble the cake, level off the cake layers if needed using a serrated knife. Spread roughly 1/3 of the buttercream frosting on the bottom layer of the cake. Top with the second cake layer and wiggle it until the line up correctly. If you wish, you can do a crumb coat by using another 1/3 of the buttercream and spreading a thin layer all over the top and sides of the cake. Refrigerate to set the frosting, for a few hours or overnight if you wish. Once the crumb coat is firm to the touch, spoon the final one 1/3 of  the frosting on top of the cake and spread evenly all over.

Everyone loves the taste of this cake, although we seem split on which cake everyone seemed to enjoy better. For me personally, I preferred the Guinness cake. I like the taste of the buttercream frosting and the cake itself had an awesome flavor to it. Just my personal preference, as I’m not always a big fan of the brownie and the fallen cake seemed to taste more like that to me. However, if you are looking for a gluten-free alternative, the fallen cake is a pretty good choice.

That’s all I have for today. I hope everyone enjoys their St. Patrick’s Day if you are celebrating and have a good time while staying safe. I’ll be posting some of the recipes this week, including one of fish sticks and sweet potato fries that I made. Check back that this week for other recipes. Until then, enjoy the rest of your day and enjoy your meal!

007 008 009


Tags: , , , , , , ,

 
National Day Calendar

Fun, unusual and forgotten designations on our calendar.

Jennifer Probst

a little bit naughty a little bit nice

Laissez Faire

Letting Life Lead

simple cooking recipes

a blog to share with you the best