RSS

Category Archives: Dessert

An Easy Dessert From the Past – Icebox Cake

Easy desserts can be really helpful when you cannot think of anything to make and are having a dinner or just want a special treat for you and your family one night without having to put a lot of effort into it. One of the classic desserts that many people may remember from their youth is just like this – the classic icebox cake. It only has a few ingredients to it and most of the time you need to put into making the cake is the cake chilling in the refrigerator. What you come out with is a great tasting classic without much effort. I got this recipe from the Cooking Channel, though you can also find the recipe on the back of the chocolate wafer cooking package you use in the recipe (unless of course you are making your own chocolate wafer cookies).

Classic Icebox Cake

40 chocolate wafer cookies (store-bought or homemade)

3/4 cup sugar

1/4 cup water

1 teaspoon corn syrup

3 cups heavy whipping cream

To make the caramel whipped cream, in a medium saucepan put the sugar in a mound in the center of the pan. Try to be sure that the sugar does not hit the sides of the pan. Gently add the water and the corn syrup, making sure that the sugar does not splash up on the sides of the pan. If any of the sugar is not dissolved, very gently stir, but make sure none of the sugar hits the sides of the pan. All of this care to keep the sugar off the sides of the pan will prevent the sugar from crystallizing while it cooks.

Cook the sugar mixture over high heat, without stirring. When the sugar starts to color on the edges, gently stir the sugar until it is quite dark. The sugar will smoke a bit until it has turned dark.

Once the caramel is dark in color, reduce the heat and add half of the heavy whipping cream. The caramel will sputter and seize up, which is normal. Gently whisk the caramel until the sugar dissolves. Add the remaining heavy cream and stir. Strain the caramel cream into a shallow container and cover and refrigerate it until it is well chilled, about 2 to 4 hours minimum.

Using a whisk or a stand mixer, whip 2/3 of the chilled caramel cream until soft peaks have formed. Reserve the remaining 1/3 of the cream for topping the cake.

To make the icebox cake, Line a 8-inch by 4-inch loaf pan with plastic wrap.

Coat the bottom of the prepared loaf pan with about 1/4-inch thick layer of the caramel cream. Line the outer edge of the loaf pan with chocolate wafer cookies. Spread a layer of cream on each cookie and layer them together in the pan. You should end up with about 3 rows of cookies and cream. Cover the top with more of the cream so that the cookies are completely covered. Refrigerate the cake for at least 3 hours or overnight.

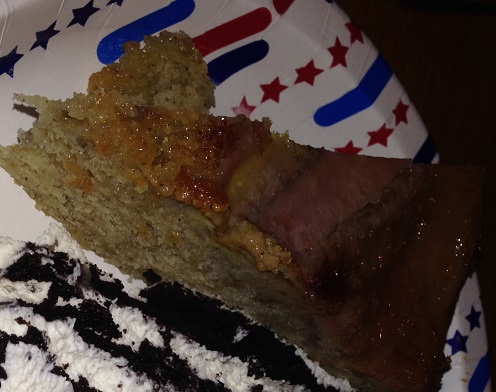
Invert the cake onto a serving platter. Whip the remaining 1/3 of the caramel cream and decorate the cake with it as you wish.

Of course, if you didn’t want to go through the effort of making the caramel cream, you could simply make some regular whipped cream and use that as the base and topping for your cake and it would come out just as nicely I believe, but the caramel adds a nice touch and flavor to the cake. The cake is light and airy and the chocolate wafers just go so nicely with the cream that you can find yourself eating a lot of this cake without much effort at all. It’s pretty tasty and one that we use often, either with regular whipped cream or caramel cream.

That’s all I have for today. Check back next time for another recipe. Until then, enjoy the rest of your day and enjoy your meal!

IMG_0577 IMG_0576


Leave a comment

Posted by on September 8, 2014 in Cakes, Cooking, Dessert


Tags: , , ,

A Morning Treat or Fine Dessert – Peach and Blueberry Cobbler

While going to farmer’s markets is a great way to support your own local economy, buy directly from the farms around you and get great produce and other items for great prices, one thing I have found is that some people do tend to go a little overboard with the amount they buy in relation to what they will eat before it will all spoil. I have to admit I am guilty of this at times as things can look great and I get all of these ideas in my head as to what I can do and make with what I buy, but the reality is that sometimes I just do not have the time to do it. When I was checking over what we had just he other day, I discovered some peaches and blueberries I had forgotten about and I wanted to do something to make a quick dish with them before they went pas the point of no return. The easiest thing to do with fruit like this I have found is to make some sort of cobbler or crumble. Thus this recipe from Kitchen Daily for a peach and blueberry cobbler came at the perfect time and was put to use right away.

Peach and Blueberry Cobbler

3 tablespoons butter

3 tablespoons canola or vegetable oil

1 cup whole-wheat flour

1 1/2 teaspoons baking powder

1/2 teaspoon salt

1 cup milk

1/2 cup sugar

1 teaspoon vanilla extract

3 ripe but firm peaches (about 1 pound), pitted and sliced into eighths, or 3 1/2 cups frozen peaches

2 cups (1 pint) fresh or frozen blueberries

Preheat the oven to 350 degrees. Place the butter and vegetable or canola oil in a large cast-iron skillet or a 9-inch by 13-inch baking pan. Heat the skillet or pan in the oven until the butter is melted and fragrant, about 5 to 7 minutes.

Meanwhile, combine the whole-wheat flour, baking powder and salt in a large bowl. Add the milk, sugar and vanilla extract and stir the mixture until it is combined.

Add the melted butter mixture to the batter in the bowl and stir to combine them. Pour the batter into the hot skillet or pan. Spoon the peaches and blueberries evenly over the batter.

Return the skillet or pan to the oven and bake the mixture until the top of the cobbler is browned and the batter around the fruit is completely set, about 50 minutes to 1 hour. Remove the skillet to a wire rack to coll the cobbler for at least 15 minutes. Serve the cobbler warm.

Of course, you can also make this ahead, cool it and remove it from the skillet and keep it for after dinner. I warmed up the pieces in the microwave before we served them, but you could also put the whole skillet back in a warm 350 degree oven for a few minutes just to warm it through. This is perfect to serve with some ice cream or whipped cream (or both) as a dessert, but having a slice with your coffee in the morning also makes for a very tasty breakfast. You get the great mix of the fruit together with a simple recipe. The whole-wheat flour adds some flavor and texture to the dish, but I think you could just as easily use all-purpose flour instead if you prefer it. In either case, it was a perfect solution on how to use the fruit (and you could really use any fruit here that you happen to have around, fresh or frozen) and get a nice dish from it.

That’s all I have for today. Check back next time for another recipe. Until then, enjoy the rest of your day and enjoy your meal!

IMG_0665

 
3 Comments

Posted by on September 2, 2014 in Breakfast, Cakes, Cooking, Dessert, Fruit


Tags: , , , ,

31 Great Labor Day Grilling Recipes | Kitchen Daily

31 Great Labor Day Grilling Recipes | Kitchen Daily.

Planning on doing some grilling on Labor Day but what to go beyond the usual hamburgers and hot dogs? Kitchen Daily has put together 31 great grilling recipes for you that cover everything from your appetizers and main courses to side dishes and dessert so you can grill every part of your meal and make the most of that last unofficial day of summer. Check out the recipes and find one to try this weekend!


Tags: , , , , ,

The Perfect Summer Dessert – Strawberry Chiffon Pie

It’s no secret that I really like Cook’s Country magazine. There are usually a half a dozen recipes or so with each issue that I end up trying out and loving, so it was no big surprise when I got the August/September issue that I found a bunch of stuff that I wanted to try out. At the top of list though was the strawberry chiffon pie that I saw. With strawberries still in season I had plenty of them on hand and the recipe seemed so easy that there was just no way I was going to pass up the chance to give it a shot and I am glad I did. It was easily one of the best desserts I had made in a while.

Strawberry Chiffon Pie

For the Crust:

1 (5.3-ounce) box shortbread cookies, broken into 1-inch pieces

2 tablespoons sugar

1/4 teaspoon salt

1/2 cup slivered almonds, toasted

2 tablespoons butter, melted


For the Filling:

2 teaspoons unflavored gelatin

2 tablespoons water

12 ounces strawberries, hulled (2 1/2 cups), plus 8 ounces strawberries, hulled, halved, and sliced thin (1 1/3 cups)

3/4 cup (5 1/4 ounces) plus 2 tablespoons sugar

2 tablespoons cornstarch

1/4 teaspoon salt

2 tablespoons lemon juice

2 egg whites

1/8 teaspoon cream of tartar

1/2 cup heavy cream, chilled

For the crust, adjust an oven rack to the middle position and heat the oven to 325 degrees. Grease a 9-inch pie plate. Process the cookies, sugar, and salt in a food processor until they are finely ground, about 1 minute. Add the almonds and pulse until they are coarsely chopped, about 8 pulses. Add the melted butter and pulse until everything is well combined, about 10 pulses. Transfer the crumb mixture to the pie plate. Using the bottom of a dry measuring cup, press the crumbs evenly into the bottom and up the sides of the plate. Bake until the crust is golden brown, about 18 to 20 minutes, rotating the crust halfway through baking. Let the crust cool completely on a wire rack, about 30 minutes. The crust can be wrapped in plastic and stored at room temperature for up to 24 hours.

For the filling, sprinkle the gelatin over the water in a small bowl and let it sit until the gelatin softens, about 5 minutes. Process the hulled whole strawberries in a food processor until they are completely smooth, about 1 minute. Transfer the strawberry puree  to a fine-mesh strainer set over a medium bowl and press on the solids to extract about 1 cup of juice; discard the solids. Whisk 3/4 cup of sugar, cornstarch, salt, and the strawberry juice together in a small saucepan.

 Bring the juice mixture to a simmer over medium heat, stirring constantly. Cook the mixture until it is slightly thickened, about 1 minute. Off the heat, whisk in the gelatin mixture until it is dissolved. Transfer the mixture to a large bowl, stir in the lemon juice, and let the mixture cool completely, about 30 minutes, stirring occasionally.

 Using a stand mixer fitted with the whisk attachment, whip the egg whites and the cream of tartar on medium-low speed until they are foamy, about 1 minute. Increase the speed to medium-high and whip the whites to soft, billowy mounds, about 1 minute. Gradually add the remaining 2 tablespoons of sugar and whip until  glossy, stiff peaks form, about 2 to 3 minutes. Whisk one-third of the meringue into the cooled strawberry mixture until it is smooth. Fold the remaining meringue into the strawberry mixture until only a few white streaks remain.

In the now-empty mixer bowl, whip the heavy cream on medium-low speed until it is foamy, about 1 minute. Increase the speed to high and whip until stiff peaks form, about 1 to 3 minutes. Gently fold the whipped cream into the strawberry mixture until no white streaks remain. Fold in the sliced strawberries. Spoon the filling into the crust and spread the filling into an even layer using the back of a spoon. Refrigerate the pie for at least 3 hours or up to 24 hours before serving.

The taste of this pie is phenomenal. You get a nice, fluffy filling that is very light and teeming with strawberry flavor. It does remind you a lot of strawberry ice cream in flavor but the texture is much lighter and then you get the pieces of strawberry inside it as well to top things off. If you wanted to skip making the crust yourself and save some time, you could easily use your favorite store-bought crust instead (shortbread, graham cracker or a Nilla wafer crust would all work well) and you can make this elegant dessert that tastes phenomenal in no time at all. I would be curious to see how well it works with frozen strawberries instead of fresh so you could make it any time of year. I may have to give it a try sometime.

That’s all I have for today. Check back next time for another recipe. Until then, enjoy the rest of your day and enjoy your meal!

IMG_0641

 
2 Comments

Posted by on August 15, 2014 in Cooking, Dessert, Fruit, Pie


Tags: , , ,

The Master Ice Cream Recipe – NYTimes.com

The Master Ice Cream Recipe – NYTimes.com.

Making your own ice cream not only lets you make a really tasty treat but gives you greater control over all of the ingredients that go into your ice cream, letting you make a fresher-tasting, healthier alternative to some of the products available in the store. The New York Times posted this master ice cream recipe that you can then add on to or change to fit your particular wants in your favorite frozen treat. Check it out!


Tags: , , , ,

You’d Be Crazy Not to Try This Strawberry-Rhubarb Greek Yogurt Fool

There’s still plenty of time to get some great strawberries to use in all kinds of wonderful recipes for the summer. You can use strawberries in any meal you have during the day. Make a smoothie or just chop some up for your oatmeal for breakfast, put some in a tasty salad for lunch and you can even work them into your chicken dinner if you like. Of course, my favorite way to use them is in some kind of dessert. I was looking for an easy dessert that would just take a few minutes to make, taste great and be a bit healthier than perhaps a standard pie or tart. I came across this recipe from Bobby Flay for a strawberry-rhubarb fool that makes use of Greek Yogurt to give it some extra flavor and make it a bit of a healthier option than whipped cream or ice cream.

Strawberry-Rhubarb Greek Yogurt Fool

2 stalks rhubarb, cut into 1-inch pieces

1 cup sliced strawberries

1/2 cup sugar

One 3-inch strip orange peel, plus 1 teaspoon grated orange zest

2 cups nonfat Greek yogurt

1 teaspoon vanilla extract

2 tablespoons honey

1/2 cup chopped pistachios

Combine the rhubarb, strawberries, sugar and orange peel in a medium saucepan over medium heat. Bring the mixture to a simmer and cook until the rhubarb and strawberries are soft, stirring frequently, about 10 to 12 minutes. Transfer the fruit mixture to a bowl and let it cool completely. Remove the orange peel before making any servings. The strawberry-rhubarb mixture can be made 2 days ahead of time and stored well covered in the refrigerator.

Whisk together the Greek yogurt, orange zest and the vanilla extract in a bowl until combined. Swirl the rhubarb mixture through the Greek yogurt mixture. Do not fold the rhubarb mixture completely into the yogurt. Divide the mixture among dessert bowls or glasses. Drizzle the tops of each serving with some honey and top with the chopped pistachios.

This really easy dessert looks great and tastes even better. You get the awesome mix of the strawberries and rhubarb swirled into the tangy flavor of the Greek yogurt. When you mix in the honey with it makes it even better, but perhaps may favorite part is the crunch and saltiness you get from the pistachios. It just seems to all go really well together and you can have them made in about 15 minutes, giving you a really easy dessert that you can whip up at the last-minute and have it look elegant.

That’s all I have for today. Check back next time for another recipe. Until then, enjoy the rest of your day and enjoy your meal!

photo (9)

 
Leave a comment

Posted by on August 7, 2014 in Cooking, Dessert, Fruit


Tags: , , , ,

Plum Good Eatin’! Plum Tarts with Honey and Black Pepper

As far as fruit goes summer is my favorite time of year. All of my favorite fruits are in season right now and I can stock up on cherries, peaches and plums and have plenty of snacks and try out all sorts of great recipes for desserts. Sure pies and cobblers are great, but I saw this particular recipe in Bon Appetit for a plum tart that was so easy and looked so delicious that I just had to give it a try myself. You can easily use peaches or apricots in this recipe instead of plums if you prefer (really any stone fruit will do well with this one) and if you keep some puff pastry around in the freezer for those last-minute desserts when you need them you put this together in under an hour, including your prep and thaw time for the pastry.

Plum Tarts with Honey and Black Pepper

1 sheet frozen puff pastry (one 14-ounce package or half of a 17.3-ounce package), thawed per package instructions

1 pound red plums, pitted and cut into 1/2-inch wedges

1/4 cup sugar

Freshly ground black pepper

1 tablespoon honey

Sea salt

Preheat the oven to 425 degrees. Cut the puff pastry into six 4-inch squares and place them on a parchment paper-lined baking sheet, making sure to prick the pastry all over with a fork so it does not puff up while it is cooking. Top the pastry with the plum wedges, leaving a 1/2-inch border around the edge if possible. Sprinkle the plums with the sugar and then season them with a few grinds of freshly ground black pepper.

Bake the tarts, rotating the pan halfway through the baking process, until the edges of pastry are puffed and golden brown, about 25 to 30 minutes. Drizzle the tarts with honey and sprinkle each tart with some sea salt just before they are served.

You can make these tarts a few hours ahead of time and just keep them at room temperature and they will be perfect for dessert. Don’t be afraid to maybe add a little bit of homemade whipped cream on the side when you serve them either. You get great flavor from the plums and the honey and black pepper really bring out some great additional flavor to the whole dish. This one was so easy to do and tasted and looked great so I am sure I’ll be making it again before the summer is over, either with plums again or maybe I’ll give it a whirl with some fresh peaches.

That’s all I have for today. Check back next time for another recipe. Until then, enjoy the rest of your day and enjoy your meal!

IMG_0629

 
Leave a comment

Posted by on August 1, 2014 in Cooking, Dessert, Fruit


Tags: , , , , ,

Everyone Screams for These Homemade Ice Cream Sandwiches

Summertime and ice cream just go hand in hand, though some people will tell you that ice cream is pretty much perfect any time of the year. I am not a huge ice cream eater myself but I do appreciate it every now and then and Michelle and Sean both love it, so I decided to make a simple and easy treat of some homemade ice cream sandwiches. The recipe is from Bon Appetit and when I first saw the picture of their finished product and how easy it was to make these I knew I would have to give it a try. They take a little time, but if you start them in the morning you can have your own ice cream sandwiches for dessert that same night.

Homemade Ice Cream Sandwiches

3/4 cup plus 2 tablespoons all-purpose flour

1/4 cup unsweetened cocoa powder

1/2 teaspoon baking soda

1/2 teaspoon kosher salt

6 tablespoons (3/4 stick) butter, room temperature

1/2 cup sugar

1 tablespoon light corn syrup

1 egg yolk

1 teaspoon vanilla extract

1 tablespoon sour cream

1 pint ice cream (any flavor)

Whisk the flour, cocoa powder, baking soda and kosher salt together in a medium bowl. Using an electric mixer, beat the butter, sugar and corn syrup together in another medium bowl until the mixture is light and fluffy, about 3 minutes. Add the egg yolk and vanilla and beat until they are well combined.

Reduce the mixer speed to low and add the dry ingredients; mix the ingredients until they are just combined. Mix in the sour cream. Form the dough into a 3/4-inch square and wrap it tightly with plastic wrap. Chill the dough in the refrigerator until it is firm, about 2 to 3 hours.

Preheat the oven to 350 degrees. Roll out the dough between 2 sheets of parchment paper to about 1/8-inch thickness. Transfer the dough (still between the sheets of parchment paper) to a large baking sheet and chill the dough again in the refrigerator until it is firm, at least for about 30 minutes. Remove the top sheet of the parchment paper. If the dough is well chilled the top sheet will remove very easily. Trim the dough into a 14-inch by 10-inch rectangle. Bake the dough until it is dry and just set at the edges, about 8 to 10 minutes. Transfer the baking sheet to a wire rack and let the dough cool completely.

Trim the cookie to a 12-inch by 9-inch rectangle, then cut the cookie into twelve 3-inch squares. Scoop some ice cream into a medium bowl and mix it until it is just softened, about 2 to 3 minutes. Turn 6 cookies bottom side up. Dividing the ice cream evenly, scoop the ice cream on top of the cookie and press down on it lightly. top the ice cream with the remaining cookies, pressing down gently. Place the ice cream sandwiches on a parchment paper-lined baking sheet and freeze them until they are firm, at least 4 hours. Cut the sandwiches in half diagonally to make triangles, if you wish. Wrap the sandwiches in parchment, if desired, and freeze them until you are ready to serve them.

They are very easy to make and I can tell you that the dough smells and tastes just like what you get if you bought an ice cream sandwich from a store or the ice cream man. The best part is that you can make them with any type of ice cream that you like, so you can really vary them to suit your particular liking or your family’s and make them in different flavors if you wish. I cut them small to make smaller sandwiches, just he right bite-size snack that we could all enjoy. Of course you could always make them completely homemade and make your own ice cream to put inside them, but any of your favorite flavors work just as well.They are very easy to make and worth the wait, so I would certainly make these again.

That’s all I have for today. Check back next time for another recipe. Until then, enjoy the rest of your day and enjoy your meal!

IMG_0600


Leave a comment

Posted by on July 11, 2014 in Cooking, Dessert, Snacks


Tags: , , , ,

It’s Strawberry Season! Make This Strawberry-Blueberry-Rhubarb Cobbler

I love the selection of fresh summer fruits and vegetables. It is a great time to go to the farmer’s market or local grocery store to pick up some things like peaches, plums, corn watermelon, and of course, berries. Strawberries, blueberries, raspberries and blackberries, among others, all thrive this time of year and you can make great use of all of them in fruit salads, smoothies, parfaits and all kinds of other snacks and desserts. I had some strawberries and blueberries on hand this past weekend, along with some rhubarb, and decided to try out this recipe from America’s Test Kitchen for a strawberry-rhubarb cobbler, though I added in the blueberries for a little added flavor. This one is super easy to make and can be done in less than hour to give you a great dessert.

Strawberry-Blueberry-Rhubarb Cobbler

For the Filling:

1 quart fresh strawberries, rinsed and hulled

1 pint fresh blueberries, rinsed

10 ounces rhubarb, cut into 1/2-inch chunks

1/3 cup sugar

1 teaspoon vanilla extract

1 tablespoon cornstarch

For the Topping:

1 cup all-purpose flour

3 tablespoons yellow cornmeal

1/4 cup sugar plus 2 tablespoons

1 teaspoon baking powder

1/4 teaspoon baking soda

1/4 teaspoon table salt

1/3 cup buttermilk

3 tablespoons butter, melted

1/2 teaspoon vanilla extract

1/8 teaspoon ground cinnamon

Adjust an oven rack to the middle position and heat the oven to 400 degrees. Toss the strawberries, blueberries and rhubarb together with the sugar, vanilla extract and cornstarch until blended and place the filling in a deep-dish pie plate. Place the pie plate on a rimmed baking sheet and bake the filling until the fruit releases its liquid and is hot and bubbling around the edges, about 20 to 30 minutes.

Meanwhile, whisk the flour, cornmeal, 1/4 cup of the sugar, the baking powder, baking soda, and salt together in a large bowl. Set this bowl aside. In a separate bowl, whisk the buttermilk, melted butter and vanilla together and set it aside. In a third small bowl, mix the remaining 2 teaspoons of sugar with the ground cinnamon and set it aside.

When the filling is ready, stir in the buttermilk mixture into the flour mixture with a rubber spatula until the two are just combined and no pockets of flour remain. Remove the cobbler filling from the oven and give it a stir. Pinch off pieces of the dough and sprinkle them on top of the hot filling to cover the filling to your liking. Sprinkle the tops of the filling with the cinnamon sugar.

Place the cobbler with the topping back in the oven and continue to cook the cobbler until the topping is golden brown and cooked through and the filling is once again hot and bubbling, about another 15 to 20 minutes. Cool the cobbler on a wire rack for 15 minutes before serving.

You can top this off with some homemade whipped cream to really make it special. America’s test Kitchen actually clumps the topping together to form a biscuit-like topping, but I thought it would be better with just spreading the topping around like I did. To me it is just an aesthetic thing unless you like the whole biscuits on top. In either case, do how you like it. The cobbler tastes great as the fruit releases all its juices and you get the flavors of the strawberries, blueberries and rhubarb. i think this would work well with just about any type of fruit, such as peaches, plums, apples, pears and the like as well, so you can experiment with it and try different things.

That’s all I have for today. Check back next time for another recipe. Until then, enjoy the rest of your day and enjoy your meal!.

IMG_0598


Leave a comment

Posted by on July 7, 2014 in Cooking, Dessert, Fruit, Pie


Tags: , , , , , ,

Going Bananas for Banana Upside Down Cake

Michelle had asked me what I wanted for a Father’s Day dinner last week and I knew what I wanted for dessert right away. I love desserts that make use of bananas (see the Bananas Foster cake Michelle made for my past birthday) and I had just recently seen this recipe on the Food Republic website for an awesome looking banana upside down cake. I have tried pineapple upside down cake and peach upside down cake so this one seemed like it would be just as good and was not going to be hard to make. I was really looking forward to it and was not disappointed with the results.

Banana Upside Down Cake

For the Banana Caramel:

1 1/2 cups sugar

4-5 bananas, ripened

1/4 teaspoon cinnamon

For the Cake:

2/3 cup butter, plus extra for greasing

1 1/4 cups all-purpose flour

11/2 teaspoons baking powder

1 teaspoon ground cinnamon

4 eggs, separated

3/4 cup sugar

2 large ripe bananas, peeled and mashed

Preheat the oven to 325 degrees. Generously butter the bottom and sides of a 9-inch diameter springform cake pan then line the pan with parchment paper.

To make the banana caramel, put the sugar and 2/3 cup of water in a heavy saucepan and cook the mixture over high heat until the sugar has dissolved. Let the mixture boil until it has thickened to a golden-brown caramel, taking care not to burn it. Remove the caramel immediately from the stove and pour it into the prepared cake pan, tipping the pan slightly from side to side until the pan is evenly coated. Peel the bananas and halve them lengthwise. Arrange the bananas over the caramel in a neat pattern, trimming the bananas as necessary, then dust the bananas with the ground cinnamon.

For the cake batter, sift together the flour, baking powder and cinnamon in a large bowl. Put the egg whites in a separate clean bowl and whisk the egg whites using an electric hand mixer until stiff peaks have formed. Put the butter and the sugar in another large bowl and whisk them together until the mixture is light and fluffy. Slowly whisk in the egg yolks into the butter-sugar mixture one at a time until combined. Fold in the mashed bananas, followed by the dry ingredients in the flour mixture. Fold in the egg whites into the entire mixture and gently mix to form the batter.

Pour the batter into the cake pan and spread the batter evenly with a spatula. Bake the cake in the oven for 50 to 60 minutes, or until a skewer inserted into the center of the cake comes out clean. Remove the cake from the oven and allow it to cool for 5 minutes in the pan before unmolding it. The cake is easier to unmold while it is still warm before the caramel has had a chance to cool and harden. Run a thin knife around the inside of the pan. Put a large flat plate over the top of the cake pan and, holding the pan and the plate, invert it and gently lift off the pan and peel off the parchment paper. Serve the cake warm.

Wow, this cake tasted really good! It was kind of a mix of really moist banana bread with the caramel you have on a typical upside down cake except it is chock full of banana flavor. Put some homemade whipped cream on top of the cake and you have yourself a masterpiece. I loved every bite of it and the cake stayed moist for a couple of days afterward to provide a wonderful snack each night. We will definitely be making this one again and I think it would be great to make to bring to a party, housewarming or summer barbecue.

That’s all I have for today. Check back next time for another recipe. Until then, enjoy the rest of your day and enjoy your meal!

bananaupsidedowncake


Leave a comment

Posted by on June 24, 2014 in Cakes, Cooking, Dessert


Tags: , , , , , ,

 
National Day Calendar

Fun, unusual and forgotten designations on our calendar.

Jennifer Probst

a little bit naughty a little bit nice

Laissez Faire

Letting Life Lead

simple cooking recipes

a blog to share with you the best