RSS

Savor the Summer for Lunch with This Tomato Sandwich

Summertime brings about some of my favorite vegetables and fresh fruit to make all kinds of great things with. I love to go to the farmers’ markets and see what I can get from some of the local farms and I always come back with something great and delicious. Know that Monroe finally has its own farmers’ market every Sunday I can just drive to town and get some great stuff, which I did this past weekend. I got a great haul of strawberries and peaches, but I also picked up some local beets,  cauliflower, honey, heirloom tomatoes and even a chuck roast from one of the local farms that raises organic beef. Tomatoes are just starting to hit their stride now and instead of turning to what you can get at your local supermarket and pay lots more for sub par fresh tomatoes, go to your nearest farmstand or farmers’ market and get some great heirlooms. I got a basket of heirloom tomatoes which had 6 good-sized tomatoes in it for only $6.00 where they easily sell for at least four dollars a pound in my local store. Now that I have some great tomatoes to use, I needed to find something to make. The first thing I thought of was to have a great lunch with a classic and simple tomato sandwich. You probably don’t even really need a recipe for a tomato sandwich, but I took this idea from Melissa Clark at New York Times Cooking, followed her idea and added a bit to it to really make it my own.

Tomato Sandwich

4 slices crusty bread

1 fat garlic clove, halved crosswise

1 ripe, soft tomato, halved

Extra-virgin olive oil, for drizzling

Salt and freshly ground black pepper

Mayonnaise, as needed

1 ripe heirloom tomato, sliced

Thinly sliced red or white onion

1 ripe avocado, pitted and sliced thinly (optional)

4 slices cooked bacon (optional)

Toast the bread slices until they are golden. Take each slice and rub one side all over with the cut side of the garlic clove. (The clove should start to disintegrate into the bread.) Rub each slice with the cut sides of the soft halved tomato, pressing so the tomato flesh sticks to the bread. Drizzle the bread with the olive oil, then sprinkle each slice with a bit of salt.

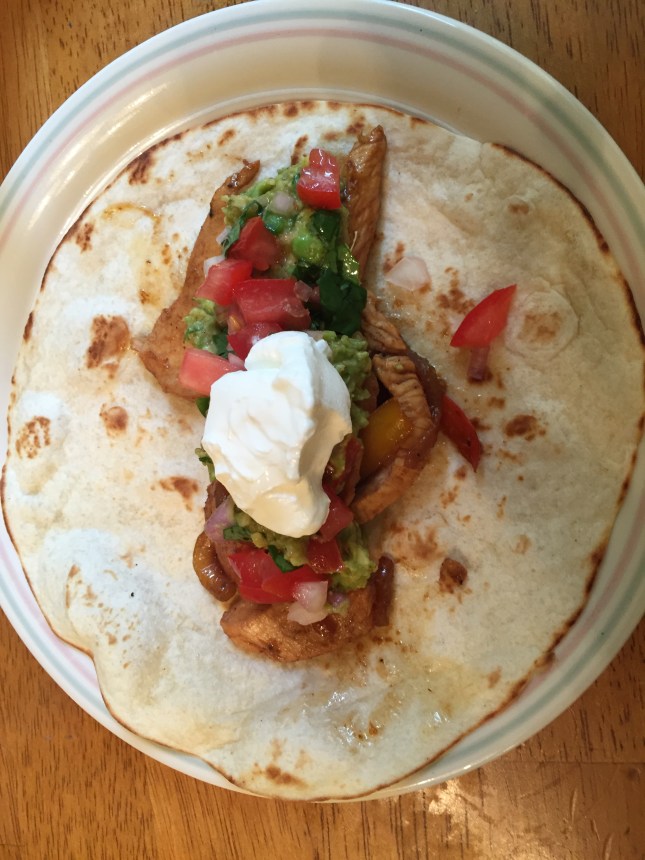
Spread the mayonnaise over the tomato pulp on the slices of bread. Place the sliced heirloom tomatoes on top of 2 pieces of the bread. Cover the tomato slices with the onions and sprinkle them with salt. Top with the avocado slices or the bacon if using, sprinkle on some freshly ground pepper to taste and then use the other 2 slices of tomato-rubbed bread to make sandwiches.

You have lots of options of course, as you do with any sandwich. I omitted the bacon she suggested as I just wanted the taste of the tomato and avocado with the onion. I prefer the bite a red onion provides, but if you like something mellower a white onion is also good. The combination on the sandwich of the great-tasting tomatoes with the onion, avocado and the little hint of garlic on the bread makes it all a perfect lunch. I put a little bit of parsley on mine for some extra flavor and you could do the same with some lettuce, arugula, spinach, fresh basil or anything else you might like. I made the sandwich on my favorite homemade bread and it was divine. It is the perfect sandwich to have during the summer and it makes me wish I could get heirloom tomatoes like this locally all year-long.

That’s all I have for today. Check back next time for another recipe. Until then, enjoy the rest of your day and enjoy your meal!

IMG_0534


Tags: , , , , , , , ,

A Simple Side Dish for Any Time – Homemade Fried Rice

Most people love getting takeout Chinese food for dinner once in a while. I know we do it about once a month and there are always standard favorites that we like to get with the meal. Egg rolls are always a given and Michelle and Sean love to get wonton soup, but one thing the whole family loves is the fried rice you can get. While I like all of the fried rice I am always partial to pork fried rice myself. There is something about the taste of the rice with the bits of pork that is just perfect for a Chinese food meal. I have made fried rice before at home and while it never quite comes out just like takeout, it gets pretty close. Of course I don’t have a commercial kitchen, stove and overhead vents to do everything they can do, so I have to make do with what I have. When we had some leftover pork from dinner the other night I decided to use a piece and try this fried rice recipe from Sam Sifton at New York Times Cooking. Of course, this recipe doesn’t have any pork in it originally, but it also doesn’t have some of the other vegetables I added to it to make it a well-rounded dish of vegetables and rice.

Homemade Fried Rice

3 tablespoons neutral oil, like canola or grapeseed

1 medium onion, peeled and roughly chopped

1 red bell pepper, stemmed, cored and roughly chopped

2 carrots, peeled and finely minced

1 tablespoon minced garlic, or to taste

1 cup peas (defrost if frozen)

1 tablespoon minced ginger, or to taste

3 to 4 cups cooked white rice, cooled

2 eggs, lightly beaten

¼ cup Shaoxing wine, or water

2 tablespoons soy sauce

1 tablespoon sesame oil

Salt and freshly ground black pepper to taste

½ cup minced cilantro or scallions

Put 1 tablespoon of the oil in a wok or a large skillet, and turn the heat to high. When the oil begins to shimmer, add the onion, pepper and carrots and cook, stirring occasionally, until the vegetables are softened and beginning to brown, about 5 to 10 minutes. With a slotted spoon, remove the vegetables to a bowl.

Drain the peas if necessary and add them to skillet; cook, shaking the pan, for about a minute, or until the peas are hot. Remove them to the bowl with the other vegetables.

Put the remaining oil in the skillet, followed by  the garlic and ginger. When the mixture is fragrant, about 15 seconds later, add the rice, breaking up any clumps with a spoon as you go along and tossing it with oil. When the rice is well coated, make a well in the center and break the eggs into it. Scramble the eggs, then stir them into the rice.

Return the vegetables to the skillet and stir everything together to integrate it all well. Add the wine or water and cook, stirring, for approximately 1 minute. Add the soy sauce and sesame oil, then taste and add salt and pepper if necessary. Turn off the heat, stir in the cilantro or scallions and serve.

I added some pork into the dish after the vegetables were done and before the rice, cooked to heat it through for 2 or 3 minutes since it was already cooked, and then removed it from the pan and continued the steps. You could just as easily do the same with chicken, beef, shrimp or anything else that you like. I added in some leftover veggies as well like corn and broccoli because it helped to make the side dish one that was then filled with vegetables and rice, meaning I just needed a protein to make the meal. I loved all of the great flavors from the dish with the eggs mixed in and the sesame oil seems to add the perfect touch right at the end to the rice. This is a great way to make use of all of those leftovers you may have in the fridge and just aren’t sure what to do with them. I served this with some steak for a complete meal but really, if you add enough chicken, pork, shrimp or other protein to the rice it can be a one dish dinner all on its own.

That’s all I have for today. Check back next time for another recipe. until then, enjoy the rest of your day and enjoy your meal!

IMG_0520


Tags: , , , , , ,

Put Some Zing in Your Shrimp – Bloody Mary Shrimp

I just got back from a great vacation in the Outer Banks with my brothers and sisters, nieces and nephews. We had a lot of fun, spent times by the pool, had some great local beer and craft beers and even got to try out a couple of new recipes along the way. One thing that we enjoyed during the trip was having Bloody Marys by the pool in the morning. If you like a Bloody Mary then you love the taste of tomato juice, spices and vodka over ice. We used a Bloody Mary mix called Zing Zang, which has some great flavor and a spicy kick to it that made the drinks fantastic. My brother and I got to thinking since the Zing Zang was so good, I bet it would taste great on some of the fresh local shrimp from one of the nearby fish stores. We headed down to Whalebone Seafood where we got a few pounds of fresh shrimp (and some great fresh clams as well) and then set about finding a recipe for the shrimp. We came upon this one from AllRecipes.com for Bloody Mary Shrimp and gave it a try.

Bloody Mary Shrimp

2 pounds cooked medium shrimp, shelled and deveined

1 (32 ounce) bottle bottled Bloody Mary mix (such as Zing Zang), or as needed

1 jalapeno pepper, seeded and finely chopped

1 large sweet onion, finely chopped

1 cup finely chopped jicama

4 limes, juiced

2 tablespoons Worcestershire sauce

1 avocado, peeled and chopped, or more to taste

In a large bowl, gently combine the shrimp, Bloody Mary mix, jalapeno pepper, onion, jicama, lime juice, and Worcestershire sauce until all of the ingredients are thoroughly mixed. Cover and chill the mixture for at least 3 hours to allow flavors to blend (overnight is even better if you can). Gently stir in the avocado, then chill the mixture for 1 more hour before serving.

Man this is so simple and you get such great flavor from the dish. I have to admit, having super fresh shrimp really made this recipe standout for me, but I think it could be just as good with any cooked shrimp that you can get for yourself. The dish had great combinations of the sweetness of the shrimp with the spice of the Zing Zang and jalapeno and the addition of the lime juice was just perfect. We couldn’t find any jicama down where we were so we left it out, but I can see where it would add some really nice crunch to round out the dish. We served this as a side dish to go along with the steaks we were having that night but it would be great for any type of appetizer before a meal or as the main dish for your dinner when you want a cold meal. I could see serving this with just a side salad and some crusty bread and you are good to go. You could really spice things up and add a little vodka to the dish as well to get the full Bloody Mary experience, though we left it out since the kids were having some too. Overall it was a great dish to make.

That’s all I have for today. Check back next time for another recipe. Until then, enjoy the rest of your day and enjoy your meal!

IMG_0510


Tags: , , , , ,

50 Easy Weeknight Summer Dinners, So You Can Relax – Bon Appétit

It’s summer and it’s hot out so avoiding the elaborate dinner becomes almost a necessity for most of us. Bon Appetit is here to help you out with 50 easy weeknight summer dinners so you don’t have to slave in the kitchen to have a good meal. Check it out!

Source: 50 Easy Weeknight Summer Dinners, So You Can Relax – Bon Appétit


Tags: , , , , ,

Our 20 Most Popular Shrimp Recipes Right Now – Recipes from NYT Cooking

Summertime and seafood go together really well and there’s nothing better than making use of shrimp for one of your weeknight meals. Shrimp is easy to make, very versatile and just takes a few minutes to cook so you can have a great meal on the table in no time at all. NYT Cooking has 20 great shrimp recipes you can try for all kinds of occasions to make something fun, different and delicious with your shrimp. Check it out!

Source: Our 20 Most Popular Shrimp Recipes Right Now – Recipes from NYT Cooking


Tags: , , , , , ,

29 Grilled Steak Recipes – Bon Appétit

If you have plans to break out the grill any time soon and want to go beyond just making hamburgers and hot dogs, you can’t go wrong with making a steak. With so many choices to go with, you could make something different all summer long with these 29 steak recipes for the grill from Bon Appetit. Check it out!

Source: 29 Grilled Steak Recipes – Bon Appétit

 
Leave a comment

Posted by on July 19, 2016 in Beef, Cooking, Cooking Websites, Dinner, Grilling


Tags: , , , , ,

Tips for Hosting a Budget-Friendly Barbecue | MyRecipes.com

Everyone loves to cook out and host a party in the summer, but sometimes it can seem pretty overwhelming to your budget when you happen to invite a big crowd. This is especially true if you want to be able to do this several times over the summer. Luckily, they are plenty of great options available to you so that you can have a fantastic summer barbecue where everyone will enjoy the food and you don’t have to spend a fortune each time. MyRecipes.com has put together some really helpful hints and tips so you know just what to do and how to plan for your next summer party. Check it out!

Source: Tips for Hosting a Budget-Friendly Barbecue | MyRecipes.com


Tags: , , , ,

A Honey of a Wing Recipe – Honey Mustard Chicken Wings

I have a real affinity for chicken wings. Whether you have them as an appetizer or as your entrée for a meal they can be perfect. I like to try all different types of wings and sample them in different places when we go out to eat. While I may not like them fiery hot like some people do, I do like them with some heat sometimes. Sean, on the other hand, is not a big fan of spicy hot wings or even wings that are medium hot so when I make them for just the two of us when Michelle is away, I usually have to find another way to cook them. I have tried barbecued wings and teriyaki wings in the past, but this time I thought some nice honey mustard wings would be a good compromise for the both of us. We get a little bit of heat for me, the sweetness for him, and we are both happy. I came across this recipe from Food52 for honey mustard chicken wings and it seemed simple to make, so I thought I would give it a try.

Honey Mustard Chicken Wings

pounds chicken wings, separated into drumettes and flats

Salt and pepper

Cooking spray

tablespoons butter

2/3 cup honey

1/2 cup Dijon mustard

tablespoons bourbon

tablespoons soy sauce

teaspoon Sriracha (add more for extra spice)

scallions, thinly sliced

Preheat the oven to 400 degrees. Line the bottom of a rimmed cookie sheet with aluminum foil for easy cleanup. Put a cooling rack (usually used for cakes and cookies) onto the cookie sheet. This allows the heat to circulate better and helps the wings to develop a crispy skin. Lay the chicken wings out on the rack and season them with a bit of salt and pepper and a quick spray of cooking oil.

Put the wings into the oven, cook for about 20 minutes, flip them over, and cook the wings for another 20 minutes. Turn on the broiler and cook the wings another 5 minutes on each side. This will give them a nice, rich brown color and crispy skin. Keep an eye on them so that they don’t burn.

Return the oven to 400 degrees. In a medium-sized saucepan, combine the butter, honey, mustard, bourbon, soy sauce and Sriracha. Simmer the mixture for just 2 to 3 minutes so that all the flavors come together. Brush the chicken wings with the sauce and put them back in the oven for about 5 to 8 minutes. Flip the wings over, brush them with more sauce, and cook them for another 5 to 8 minutes. The chicken should be pulling away from the bones and the sauce should have a great glaze going. Serve the wings garnished with scallions and additional sauce on the side.

The honey really shines through in this recipe. It seemed like a lot to me when I was making the recipe, but the sauce was not as sweet as I had worried about. The combination of the Dijon mustard, bourbon and soy sauce really help to set it off and the hot sauce gave the wings just that hint of heat that I liked and Sean did not even notice. He remarked to me several times that I needed to remember this recipe and make them again as he really liked them. He even had the leftovers for lunch the next day to polish them off. It is a great alternative for wings for those that may not like hot or Buffalo-style wings.

That’s all I have for today. Check back next time for another recipe. I will be vacationing in the Outer Banks starting tomorrow through next Sunday the 24th so I’ll be posting some links to other sites for recipes you might like. Until the next time, enjoy the rest of your day and enjoy your meal!

IMG_0482

 
1 Comment

Posted by on July 16, 2016 in Appetizers, Cooking, Dinner, Poultry, Sauce, Snacks


Tags: , , , , , ,

Make it Yourself – Not-Quite Chili’s Chicken Fajitas

No matter where you happen to live today the odds are pretty good that there is a Chili’s restaurant somewhere near you. They seem to get more popular all the time and there are always plenty of commercials on TV telling you about what you can get there. We have one that is about 2 miles from our home and ever since Sean was little he has been a Chili’s fan. In fact, whenever Michelle goes away on business, Sean and I have a ritual that we have done for years where we go to Chili’s one night to have dinner while she is away. The menu has changed quite a bit over the years but one thing that has remained constant are the fajitas. Chili’s became quite popular thanks to this signature dish, serving it in a sizzling cast iron dish or skillet with all of the fixings to go along with it. While I do like the fajitas there and some other things on the menu, the fajitas themselves are not that hard to make on your own. However, I wanted to duplicate the flavor that they have with the fajitas so I had to do some searching on the Internet. I found several different copycat recipes to try, and I combined a few of them to make the recipe I tried out, taking he bulk of the idea from Todd Wilbur.

Not-Quite Chili’s Chicken Fajitas

For the Pico de Gallo:

2 medium tomatoes, diced

1/2 cup diced onion

2 teaspoons chopped fresh jalapeno pepper, seeds and ribs removed

2 teaspoons finely minced fresh cilantro

For the Chicken Marinade:

1/4 cup fresh lime juice

1/3 cup water

2 tablespoons vegetable oil

1 clove garlic, minced

2 teaspoons distilled white vinegar

2 teaspoons soy sauce

1/2 teaspoon liquid smoke

1 teaspoon salt

1/2 teaspoon chili powder

1/2 teaspoon cayenne pepper

1/4 teaspoon ground black pepper

Dash onion powder

2 boneless, skinless chicken halves

1 onion, sliced

1 tablespoon vegetable oil

1 teaspoon soy sauce

2 tablespoons water

1/2 teaspoon fresh lime juice

Dash ground black pepper

Dash salt

1/2 cup pico de gallo, for serving

1/2 cup shredded cheddar or Mexican blend cheese, for serving

1/2 cup guacamole, for serving

1/2 cup sour cream, for serving

1 cup shredded lettuce, for serving

6 to 8 6-inch flour tortillas, for serving

Salsa, for serving

For the pico de gallo, combine the diced tomatoes, onion, jalapeno, cilantro and salt together in a small bowl until they are blended. Cover and chill the bowl.

For the marinade, combine the lime juice, water, vegetable oil, garlic, vinegar, soy sauce, liquid smoke, salt, chili powder, cayenne pepper, black pepper and onion powder together in a large bowl. Place the chicken halves in the marinade and toss the chicken to coat it with the marinade. Cover the bowl and chill, allowing the chicken to marinade for 2 hours.

Pre-heat a grill pan to high heat. Pre-heat a separate large skillet over medium-high heat. Add the vegetable oil and heat until the oil is shimmering. Add the onion slices and saute the onion for about 5 minutes until it is softened. Combine the soy sauce, water and lime juice together in a small bowl and pour the mixture over the onions. Add the black pepper and continue to saute the onions until they are translucent and dark on the edges, about 4 to 5 minutes longer. Salt the onions to taste.

While the onions are sauteing, grill the chicken in the grill pan until the chicken is cooked through, about 4 to 5 minutes per side. When the chicken is done, remove it from the grill pan and slice it into thin strips. Add the chicken strips into the pan with the onions and toss the two together. Serve the chicken with the pico de gallo, shredded cheese, guacamole and sour cream arranged on a separate plate on top of a bed of the shredded lettuce. Serve the salsa on the side, if desired. Steam the tortillas in a moist towel in the microwave for about 30 seconds to heat them through and serve them on the side as well.

I also added some yellow, orange and red peppers to the onions and sautéed them together as Chili’s often does, but if you are not a fan of the peppers feel free to leave them out. Also, you could easily substitute beef or shrimp for the chicken if you prefer. The beef can hold up to marinating overnight if you wanted to make it while the shrimp could follow the standard recipe. Also, if you want to get really fancy and serve it all in a sizzling pan like Chili’s does, you could always heat up a separate cast iron skillet or pan in the oven while you are cooking and dump the chicken and onions into it when you are done so you get he nice sizzle to go along with the meal. Overall, I think the flavors of the fajitas were pretty close to what you get in the restaurant. The soy sauce and liquid smoke seem to make a difference in the flavor of the chicken over other fajitas I have made in the past. Other than those two ingredients I didn’t see anything that was different from what I have done before so I think they must be the key to the taste. Sean really enjoyed them and said they tasted great, so you can save yourself a trip to the restaurant and some money and make them cheaper on your own. I would try this one again as a good alternative to the standard way I make fajitas.

That’s all I have for today. Check back next time for another recipe. Until then, enjoy the rest of your day and enjoy your meal!

IMG_0495

 
Leave a comment

Posted by on July 15, 2016 in Cooking, Dinner, Eating Out, Poultry


Tags: , , , , , , ,

It Pays to Plan Ahead – Pan-Roasted Pork Chops with Apple Fritters

Not every meal you make has to be a spur of the moment decision for you. In fact, I like to try to plan out the whole week’s menu in advance so I can make sure I have all of the ingredients I am going to need for the week ready and available when I want them. This also let’s me make some dinners that may need a little bit of extra preparation, like marinating or brining, and I know what days are better for recipes where I may need a little bit more time to make them. Planning a meal that involves brining chicken or pork usually gives you 12 hours or a day to get everything together that you need in case you don’t have everything around, along with imparting some great flavor onto whatever protein you happen to be cooking that day. Pork chops are particularly great for brining because it helps to keep the meat moist, plumps up the pork and can give it a much-needed flavor boost when you want it. This particular recipe, from New York Times Cooking and Sam Sifton, does take some planning ahead, but it leaves you with a great combination of juicy pork chops and tasty apple fritters that would make Peter Brady forget all about his pork chops and applesauce meal.

Pan-Roasted Pork Chops with Apple Fritters

For the Pork Chops and Brine:

1 cup apple cider

6 tablespoons sugar

4 tablespoons kosher salt, plus more for seasoning

3 bay leaves

2 dried chiles de árbol

5 juniper berries

1 teaspoon caraway seeds

1 teaspoon mustard seeds

1 teaspoon coriander seeds

4 pork chops on the bone, approximately 1 ½ inches thick

Freshly ground black pepper

2 tablespoons canola oil or other neutral oil

For the Sauce:

1 tablespoon butter

2 shallots peeled and finely diced

1 teaspoon thyme leaves, chopped

2 tablespoons brandy

1 cup heavy cream

½ cup chicken stock

2 teaspoons whole grain mustard

1 teaspoon horseradish, ideally freshly grated

For the Apple Fritters:

2 cups apple cider

1 cinnamon stick

4 Granny Smith apples, peeled, cored and cut into ½-inch rounds

1 whole egg

½ cup very cold seltzer water

½ cup rice flour

½ cup all-purpose flour

1 cup canola oil or other neutral oil

In a large bowl, mix the apple cider with 4 cups of water, the sugar and the salt. Toast the bay leaves, chilies, juniper berries, caraway seeds, mustard seeds and coriander seeds in a small pan set over medium heat until you can smell them, then add them to the brine, and stir the mixture to combine it. Add the pork chops, cover the bowl and place it in the refrigerator to brine overnight or for up to 48 hours.

To pan-roast the pork chops, pre-heat the oven to 375 degrees. Remove the pork chops from the brine, and pat them dry with a paper towel. Season the meat aggressively with freshly ground black pepper and a little salt. Set a large sauté pan that will fit in the oven over medium-high heat. Add the oil, and when it is shimmering, place the chops in the pan. Cook the chops until they are well seared on one side, about 4 minutes, then turn the chops over, and place the pan in the oven to finish the chops, about 6 to 8 minutes. (The internal temperature of the pork, measured at the center of the chop, should be between 140 and 145 degrees for medium rare.) Remove the meat from the pan and allow the chops to rest for 5 minutes or so while you make the sauce.

Return the same pan to the stovetop and set it over medium heat, and add the butter, stirring and scraping to incorporate the meat drippings, then add the shallots and the thyme. Cook for about 3 minutes, then add the brandy. Allow the mixture to reduce by half, then add the cream and the stock and reduce the mixture again, until the sauce coats the back of a spoon. Remove the sauce from the heat, and whisk in the mustard and the horseradish.

For the apple fritters, heat the apple cider and the cinnamon stick with a couple of inches of water in a large pot set over high heat. Add the apple rounds, and blanch for 1 minute, then remove them to a towel to dry. Whisk together the egg and the seltzer until the mixture is frothy, then gently mix in the rice flour and all-purpose flour. Put the oil in a large pan set over medium-high heat. When the oil is shimmering, dip the apple rings into the batter and fry them in the oil until they are golden brown about 2 to 3 minutes.

Serve the pork chops with a few apple fritters and a heavy drizzle of sauce across the top.

This meal does take some preparation and you likely will have to get some ingredients you may not always have around the house ahead of time, but it is well worth the effort. The chops have fantastic flavor to them and the sauce for them is perfect, with a great blend of the mustard and horseradish in a cream sauce to really complement the chops. The apple fritters are always a favorite as well and work very nicely with the pork. I served this with some roasted carrots and parsnips and some store-bought pierogies to go along with the meal and it was a family favorite. If you know you have some extra time to make something, this recipe can be a great choice. It is also perfect to serve on a weekend when you might have a little more time to prepare something for dinner or are having people over. It may seem like a lot of work to make the brine, but it is really worth it so you can get the added flavor and extra juiciness with the pork. You’ll be glad you took the time to do it. I was able to find all of the ingredients I needed locally, which isn’t always easy for me, so you should be able to get everything you need to make this dish.

That’s all I have for today. Check back next time for another recipe. Until then, enjoy the rest of your day and enjoy your meal!

IMG_0263


Leave a comment

Posted by on July 14, 2016 in Cooking, Dinner, Fruit, Pork, Sauce


Tags: , , , , , ,

 
National Day Calendar

Fun, unusual and forgotten designations on our calendar.

Jennifer Probst

a little bit naughty a little bit nice

Laissez Faire

Letting Life Lead

simple cooking recipes

a blog to share with you the best