RSS

Make This Simple Summer Side – Black Bean Salad with Mango, Cilantro and Lime

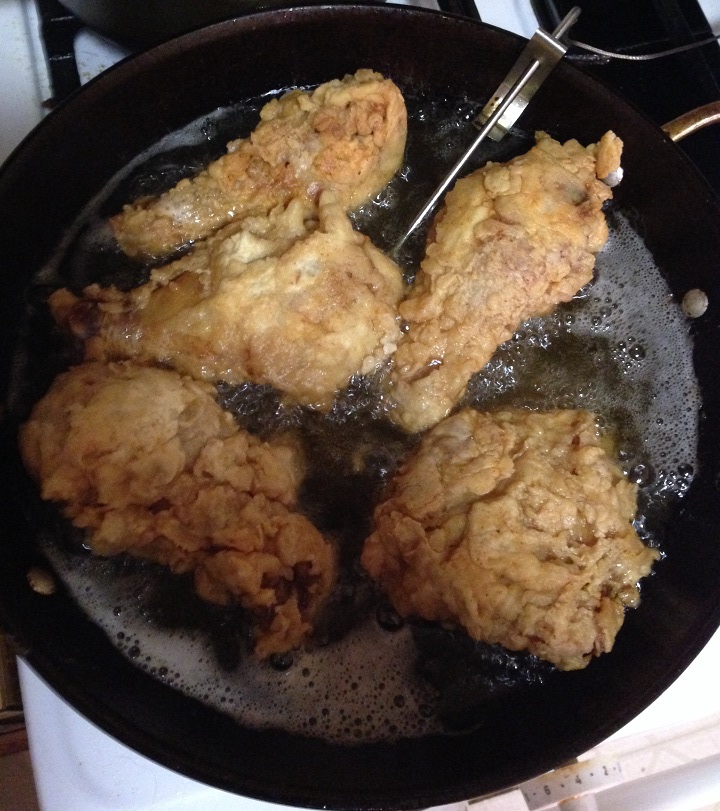
Summer meals, whether you are cooking them out on the grill, in the kitchen or not cooking at all and trying to keep things cool and light, call for some easy side dishes that taste great. Sure coleslaw and potato salad are always great standbys, but I have found myself recently trying to make more use of different beans in my main dishes and side dishes. Beans are a great source of fiber and protein and can go really well with a lot of the summer vegetables and fruit that you find available right now. I came across this really easy recipe from the Cooking Channel for a black bean salad with mango, cilantro and lime and it sounded so easy and refreshing that I just knew I had to give it a try one night.

Black Bean Salad with Mango, Cilantro and Lime

1/4 cup apple cider vinegar

2 tablespoons fresh lime juice

1 tablespoon honey

1 teaspoon ground cumin

1/3 cup canola or vegetable oil

Kosher salt and freshly ground black pepper

1/2 small ripe mango, peeled and diced into 1/4-inch pieces

1/2 yellow, orange or red bell pepper, cut into a small dice

1 (14.5-ounce) can black beans, drained and rinsed

1 small jalapeno, seeds and ribs removed, minced

1 small red onion, cut into a small dice

1/4 cup fresh cilantro leaves, chopped

In a small mixing bowl, combine the apple cider vinegar, the lime juice, the honey and the ground cumin. Slowly whisk in the canola or vegetable oil until it is well incorporated. Season with salt and pepper to taste.

Mix the diced mango, diced bell pepper, black beans, minced jalapeno pepper and the diced red onion together in a large bowl. Drizzle the vinaigrette over the ingredients and toss everything together until it is combined. Season the salad with salt and pepper to taste. Garnish the dish with the cilantro and serve.

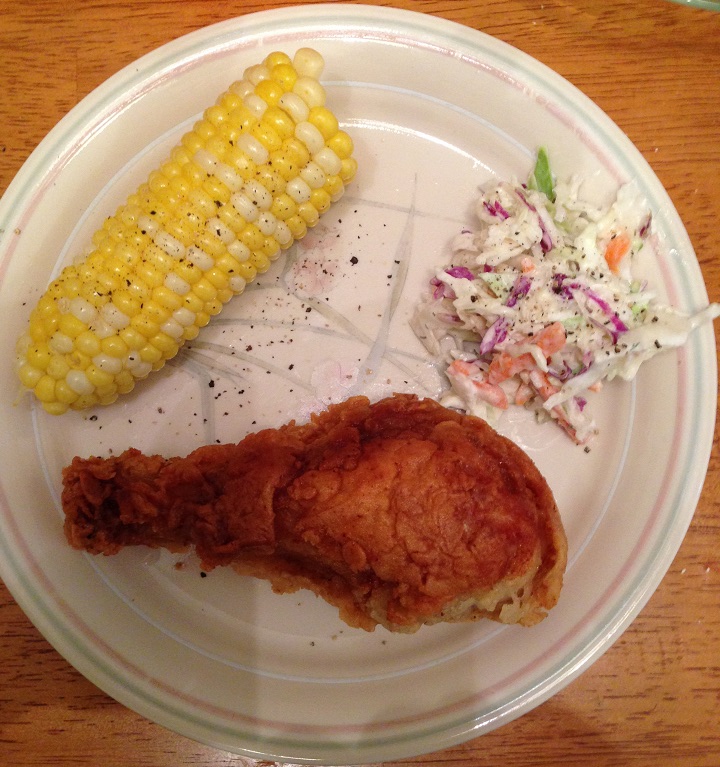
I loved he freshness of this salad with the vinaigrette. The lime juice really made it all pop together, but to me the mixof the black beans, jalapeno, red onion and the mango are what really make this work. You get such a great medley of flavors with the freshness of the mango combined with the bite of the onion and the jalapeno that it all seems to go really well together. This salad works well as a side dish to just about any type of chicken, pork or beef dish and could even stand on its own as a vegetarian meal if you wanted it to. I served it as a side to some pulled pork tacos I made (which I ill be posting the recipe for tomorrow) and it was fantastic on the side or right on the tacos themselves. I think it would also work great with quesadillas or burritos.

That’s all I have for today. Check back next time for another recipe. Until then, enjoy the rest of your day and enjoy your meal!

IMG_0638

 
2 Comments

Posted by on August 11, 2014 in Beans, Cooking, Picnic Fare, Produce, Salad, Side Dishes, Vegetarian


Tags: , , , , ,

The Master Ice Cream Recipe – NYTimes.com

The Master Ice Cream Recipe – NYTimes.com.

Making your own ice cream not only lets you make a really tasty treat but gives you greater control over all of the ingredients that go into your ice cream, letting you make a fresher-tasting, healthier alternative to some of the products available in the store. The New York Times posted this master ice cream recipe that you can then add on to or change to fit your particular wants in your favorite frozen treat. Check it out!


Tags: , , , ,

You’d Be Crazy Not to Try This Strawberry-Rhubarb Greek Yogurt Fool

There’s still plenty of time to get some great strawberries to use in all kinds of wonderful recipes for the summer. You can use strawberries in any meal you have during the day. Make a smoothie or just chop some up for your oatmeal for breakfast, put some in a tasty salad for lunch and you can even work them into your chicken dinner if you like. Of course, my favorite way to use them is in some kind of dessert. I was looking for an easy dessert that would just take a few minutes to make, taste great and be a bit healthier than perhaps a standard pie or tart. I came across this recipe from Bobby Flay for a strawberry-rhubarb fool that makes use of Greek Yogurt to give it some extra flavor and make it a bit of a healthier option than whipped cream or ice cream.

Strawberry-Rhubarb Greek Yogurt Fool

2 stalks rhubarb, cut into 1-inch pieces

1 cup sliced strawberries

1/2 cup sugar

One 3-inch strip orange peel, plus 1 teaspoon grated orange zest

2 cups nonfat Greek yogurt

1 teaspoon vanilla extract

2 tablespoons honey

1/2 cup chopped pistachios

Combine the rhubarb, strawberries, sugar and orange peel in a medium saucepan over medium heat. Bring the mixture to a simmer and cook until the rhubarb and strawberries are soft, stirring frequently, about 10 to 12 minutes. Transfer the fruit mixture to a bowl and let it cool completely. Remove the orange peel before making any servings. The strawberry-rhubarb mixture can be made 2 days ahead of time and stored well covered in the refrigerator.

Whisk together the Greek yogurt, orange zest and the vanilla extract in a bowl until combined. Swirl the rhubarb mixture through the Greek yogurt mixture. Do not fold the rhubarb mixture completely into the yogurt. Divide the mixture among dessert bowls or glasses. Drizzle the tops of each serving with some honey and top with the chopped pistachios.

This really easy dessert looks great and tastes even better. You get the awesome mix of the strawberries and rhubarb swirled into the tangy flavor of the Greek yogurt. When you mix in the honey with it makes it even better, but perhaps may favorite part is the crunch and saltiness you get from the pistachios. It just seems to all go really well together and you can have them made in about 15 minutes, giving you a really easy dessert that you can whip up at the last-minute and have it look elegant.

That’s all I have for today. Check back next time for another recipe. Until then, enjoy the rest of your day and enjoy your meal!

photo (9)

 
Leave a comment

Posted by on August 7, 2014 in Cooking, Dessert, Fruit


Tags: , , , ,

Back in the Groove with Extra-Crispy Fried Chicken

As I try to get back into the swing of things and balancing work and home after vacation, along with the heat of summertime, I am trying to get back into the kitchen as well, even with the weather may make for some sticky days in the kitchen (thank God for air conditioning!). I have really felt like have fried chicken lately and I always have plenty of chicken pieces on hand but I wanted to try a recipe that would be a little bit different from those fried chicken recipes I have tried in the past. I came across this one from Saveur magazine for an extra-crispy fried chicken that makes a flavorful brine to put the chicken in ahead of time and then does some double coating with a special batter to make things super crunchy.

Extra-Crispy Fried Chicken

¼ cup kosher salt, plus more to taste
2 tablespoons coarsely ground black pepper, plus more to taste
2 tablespoons honey
2 tablespoons sugar
15 whole cloves
6 sprigs fresh parsley
6 sprigs fresh thyme
4 bay leaves
Zest and juice of 1 lemon
1 (3½–4 pound) chicken, quartered or equivalent chicken pieces (breasts, thighs, legs)
4 cups all-purpose flour
2 tablespoons granulated garlic
1½ tablespoons cayenne pepper
1½ tablespoons onion powder
1 teaspoon paprika
1 tablespoon baking powder
Canola or vegetable oil, for frying

Boil a ¼ cup of the kosher salt and 1 tablespoon of black pepper with the honey, sugar, cloves, parsley, thyme, bay leaves, lemon zest, and lemon juice, plus 6 cups of water in a 4-quart saucepan until the salt is dissolved, about 5–7 minutes. Remove the brine from the heat and let it cool completely. Add the chicken to the brine and cover; refrigerate overnight.

The next day, drain the chicken, rinse it, and pat it dry well with paper towels. Whisk 2 cups of the all-purpose flour and half each of the granulated garlic, cayenne, onion powder, and paprika with salt and pepper in a bowl until they are combined. In another bowl, whisk the remaining flour, granulated garlic, cayenne, onion powder, and paprika with the baking powder, salt, pepper, and 2 cups of water into a smooth batter.

3. Pour enough oil into a large Dutch oven or cast iron pan to reach a depth of 2 inches. Heat the oil until a deep-fry thermometer reads 300 degrees. Working in batches, dredge the chicken in flour mixture, shaking off any excess, then dip the chicken in the batter, and then dredge the chicken again in the flour. Fry the chicken, flipping the pieces once, until the chicken is golden and almost cooked through, about 7–8 minutes, or until an instant-read thermometer inserted into the thickest part of the thigh reads 150 degrees. Transfer the chicken to paper towels to drain.

4. Increase the oil temperature to 350 degrees and fry the chicken again (working in batches again if needed) until the chicken is crisp, about 2–3 minutes more; drain the chicken on paper towels and season it with salt and pepper to taste before serving.

The coating from the flour and batter is really crispy and wonderful and the chicken comes out perfectly moist underneath the crust. The brining really helps here so if you have time to do it you should. It helps the chicken and adds some great flavor as well. I served the chicken with some homemade coleslaw and corn on the cob to make it a great meal. I used only thighs and drumsticks for my meal, but you could use any combination you like and it will work well here.

That’s all I have for today. Check back next time for another recipe. Until then, enjoy the rest of your day and enjoy your meal!

IMG_0633 IMG_0634 IMG_0635

 
Leave a comment

Posted by on August 6, 2014 in Cooking, Dinner, Poultry


Tags: , , , , ,

15 Takeout Recipes You Should Know How to Make at Home – Bon Appétit

15 Takeout Recipes You Should Know How to Make at Home – Bon Appétit.

Ever since I got back from vacation I haven’t had much time to try out any new recipes I have been busy with work and other commitments, but I hope to get back to it in the next day or two so I have something new to share with everyone. In the meantime, here is a posting from Bon Appetit that you may enjoy. Everyone loves takeout, but here are a few recipes from Bon Appetit that you can try to make some of your takeout favorites, like shrimp fried rice and spring rolls, right in your own kitchen to save you some money and give you great tasting dishes all of your own. Check it out!

 
Leave a comment

Posted by on August 5, 2014 in Cooking, Cooking Websites, Dinner, Eating Out


Tags: , , ,

22 Steak Recipes, from Rib Eye to Skirt Steak, Fajitas to Skewers – Bon Appétit

22 Steak Recipes, from Rib Eye to Skirt Steak, Fajitas to Skewers – Bon Appétit.

There are fewer things better than having a great steak meal for dinner, and summertime lends itself really well to making steak indoors or out. Bon Appetit has put together 22 great steak recipes of all different kinds so you can make different cuts of beef in different ways and try some new recipes out. Check it out!

 
Leave a comment

Posted by on August 3, 2014 in Beef, Cooking, Cooking Websites, Dinner, Grilling


Tags: , , , ,

Plum Good Eatin’! Plum Tarts with Honey and Black Pepper

As far as fruit goes summer is my favorite time of year. All of my favorite fruits are in season right now and I can stock up on cherries, peaches and plums and have plenty of snacks and try out all sorts of great recipes for desserts. Sure pies and cobblers are great, but I saw this particular recipe in Bon Appetit for a plum tart that was so easy and looked so delicious that I just had to give it a try myself. You can easily use peaches or apricots in this recipe instead of plums if you prefer (really any stone fruit will do well with this one) and if you keep some puff pastry around in the freezer for those last-minute desserts when you need them you put this together in under an hour, including your prep and thaw time for the pastry.

Plum Tarts with Honey and Black Pepper

1 sheet frozen puff pastry (one 14-ounce package or half of a 17.3-ounce package), thawed per package instructions

1 pound red plums, pitted and cut into 1/2-inch wedges

1/4 cup sugar

Freshly ground black pepper

1 tablespoon honey

Sea salt

Preheat the oven to 425 degrees. Cut the puff pastry into six 4-inch squares and place them on a parchment paper-lined baking sheet, making sure to prick the pastry all over with a fork so it does not puff up while it is cooking. Top the pastry with the plum wedges, leaving a 1/2-inch border around the edge if possible. Sprinkle the plums with the sugar and then season them with a few grinds of freshly ground black pepper.

Bake the tarts, rotating the pan halfway through the baking process, until the edges of pastry are puffed and golden brown, about 25 to 30 minutes. Drizzle the tarts with honey and sprinkle each tart with some sea salt just before they are served.

You can make these tarts a few hours ahead of time and just keep them at room temperature and they will be perfect for dessert. Don’t be afraid to maybe add a little bit of homemade whipped cream on the side when you serve them either. You get great flavor from the plums and the honey and black pepper really bring out some great additional flavor to the whole dish. This one was so easy to do and tasted and looked great so I am sure I’ll be making it again before the summer is over, either with plums again or maybe I’ll give it a whirl with some fresh peaches.

That’s all I have for today. Check back next time for another recipe. Until then, enjoy the rest of your day and enjoy your meal!

IMG_0629

 
Leave a comment

Posted by on August 1, 2014 in Cooking, Dessert, Fruit


Tags: , , , , ,

Back to Basics – Balsamic Braised Chicken

As I get back into the groove of my work schedule, home responsibilities, cooking and the like after vacation, I have tried to keep meals relatively simple this week. One of old standby favorites has always been balsamic chicken. Balsamic chicken is one of those meals that is very simple to put together and you can get a great, tangy sauce and glaze on your chicken that is perfect over mashed potatoes or rice. Michelle always used to order balsamic chicken at one of our favorite restaurants so I do try to make it every now and then as a nice reminder. This particular recipe that I used this time is from Williams-Sonoma and only makes use of a few ingredients to make things even easier for you.

Balsamic Braised Chicken

3 pounds of chicken pieces (breasts, thighs, drumsticks) or 1 chicken cut into 8 pieces

Salt and freshly ground black pepper

2 tablespoons olive oil

2 garlic cloves, unpeeled

1 shallot, diced

1 fresh rosemary sprig

1 cup dry red wine

1/4 cup balsamic vinegar

Pat the chicken pieces dry with paper towels and season the chicken well with salt and pepper on both sides. In a large saute pan set over medium-high heat, warm the olive oil until it is shimmering. Add the chicken pieces to the pan along with the garlic and shallot and cook the chicken, turning the pieces as it is needed, until the pieces are well browned on both sides, about 20 minutes total. Adjust the heat as is necessary so that you prevent the garlic and shallots from burning.

Tip the saute pan and spoon off any excess fat that you can. Add the rosemary sprig, the red wine and the balsamic vinegar and bring the mixture to a simmer. Reduce the heat to medium, cover the pan and cook, turning the chicken pieces occasionally,until the chicken is opaque throughout when tested with a knife, about 15 to 20 minutes. Transfer the chicken pieces to a warmed platter and cover the chicken to keep it warm.

Raise the heat under the saute pan to high and bring the liquid in the pan to a boil and cook until the liquid is reduced and has thickened, creating a flavorful pan sauce, about 5 minutes. Remove and discard the garlic cloves and the rosemary sprig. Taste and adjust the seasoning of the sauce as necessary. Spoon the sauce over the chicken pieces and serve immediately.

You get great flavor of the sauce as it clings to chicken and I love the combination of the red wine with the balsamic to really give the dish great flavor. The shallots also make a nice addition to the overall meal. I served the chicken with mashed potatoes and corn to round out the meal. I think the balsamic chicken is great, but the sauce itself might be great with a piece of pork as well if you wanted to give that a try. I forgot to take a picture of this one when I made it, so unfortunately I don’t have one to show, but trust me the glaze comes out perfectly and the chicken tastes great!

That’s all I have for today. Check back next time for another recipe. Until then, enjoy the rest of your day and enjoy your meal!


Leave a comment

Posted by on July 31, 2014 in Cooking, Dinner, Poultry, Sauce


Tags: , , ,

Back From Vacation with These Spare Ribs With Smoky Blackberry Barbecue Sauce

I spent the last week down in the Outer Banks in North Carolina with my family just relaxing and enjoying the sun and not doing much cooking along the way. my brother manned the grills for the week and did a great job with all of the different things that he cooked. I did make a few side dishes along the way but nothing extravagant and we all had a great time seeing each other and having fun. Now that I am back home, it’s time to get down to some more cooking. I had these spare ribs in the freezer and knew I wanted to make them, so I decided to give this recipe a try from Kitchen Daily that makes use of a smoky blackberry barbecue sauce. Their original recipe is designed to be used with short ribs, but I think it makes a pretty nice transition over to spare ribs. I used St. Louis ribs, but you could just easily use baby backs and get good results.

Spare Ribs with Smoky Blackberry Barbecue Sauce

For the Sauce:

1 pound blackberries

2 teaspoons smoked paprika

3 tablespoons vegetable oil

1 tablespoon minced garlic

1 medium onion, finely chopped, plus 1/4 cup minced

1/4 cup tomato paste

1 cup apple cider vinegar

1 cup packed light brown sugar

1/4 cup soy sauce

3 tablespoons seeded and minced chipotles in adobo sauce

2 tablespoons Dijon mustard

1 teaspoon ground cumin

Kosher salt and freshly ground black pepper

2 tablespoons extra-virgin olive oil

1 teaspoon dried oregano

For the Ribs:

4 pounds St. Louis spare ribs or baby back ribs

Kosher salt and freshly ground black pepper

Preheat the oven to 350 degrees. Line a large rimmed baking sheet with aluminum foil and place the ribs on the baking sheet. Season the ribs well with salt and pepper on both sides. Cover the ribs with another sheet of aluminum foil and bake them, covered, in the oven for 25 minutes. Remove the top cover of aluminum foil and bake the ribs uncovered for another 25 minutes.

Meanwhile, make the sauce. In a large bowl toss the blackberries together with the smoked paprika. Heat a medium saute pan over high heat and place the blackberries in the pan. Heat the berries, tossing them occasionally, until the berries begin to burst, about 3 to 5 minutes.

In a large saucepan, heat the 3 tablespoons of vegetable over medium heat until the oil is shimmering. Add the garlic and cook, stirring constantly, until the garlic is golden and fragrant, about 1 minute. Add the chopped onion and cook over medium heat, stirring occasionally, until the onions have softened and started to brown, about 7 minutes. Stir in the tomato paste and cook until the paste is glossy, about 2 minutes. Add the blackberries, cider vinegar, brown sugar, soy sauce, chipotles, Dijon mustard and the ground cumin and bring the mixture to a boil. Simmer the mixture over medium-low heat, stirring occasionally, until the sauce has slightly thickened and the berries are very tender, about 20 minutes.

Transfer the sauce to a blender and allow it to cool slightly. Puree the sauce until it is smooth. Strain the sauce through a fine sieve into a bowl and discard any leftover solids in the sieve. Season the sauce with salt and pepper to taste and allow the sauce to cool completely. Stir in the minced onion, the olive oil and the dried oregano.

Brush the ribs in the oven with the blackberry barbecue sauce until they are well coated and continue baking the ribs for another 25 minutes. Turn up the heat in the oven to 400 degrees and give the ribs a final coating of barbecue sauce, allowing them to cook for 5 to 10 minutes until the sauce is caramelized and the ribs are cooked through.Remove the ribs from the oven to a cutting board and cut the ribs into portions and serve with the remaining sauce.

The blackberry sauce has a very distinct flavor to it and the chipotles add just the right amount of heat to the sauce. The sauce has the consistency of any other barbecue sauce but if you like blackberries you will really enjoy the flavor you get. This sauce is great for ribs but I think it would do just as well on chicken or other pieces of pork if you wanted to give that a try. I tried to strain out as many of the blackberry seeds as I could but some still got through so it’s something you have to be aware of if your diners aren’t fans of the seeds. Other than that, I think the sauce was a real winner.

That’s all I have for today. Check back next time for another recipe. Until then, enjoy the rest of your day and enjoy your meal!

IMG_0628


Leave a comment

Posted by on July 29, 2014 in Cooking, Dinner, Grilling, Pork, Sauce


Tags: , , , , , ,

15 Carnival Recipes You Can Make at Home – Bon Appétit

15 Carnival Recipes You Can Make at Home – Bon Appétit.

Half the fun of going to a carnival or street fair is all of the different foods they have available. It seems like the food that you can get there is found in no other place and has a certain taste to it thanks to the event all on its own. Bon Appetit has put together 15 recipes here of famous carnival foods that you can enjoy right in your kitchen to being back the tastes, smells and memories. All you need are some rides and carnival games and you are all set. Check it out!

 
1 Comment

Posted by on July 27, 2014 in Cooking, Cooking Websites, Eating Out, Snacks


Tags: , , ,

 
National Day Calendar

Fun, unusual and forgotten designations on our calendar.

Jennifer Probst

a little bit naughty a little bit nice

Laissez Faire

Letting Life Lead

simple cooking recipes

a blog to share with you the best