RSS

A Couple of Not Quites – Not Quite Shake N’ Bake Pork Chops and Banana-Blueberry “Ice Cream”

I always like to look for ways to make things that you can either find at some of these chain restaurants when you go out and try to duplicate it and make it taste a little better. I do the same thing with some of the classic ideas that have been used for years with dinners and try to make them taste better without all of the preservatives or other additives that might be in the products you buy. This is was the case with two recipes I tried recently. First up is a very simple version of the classic Shake N’ Bake pork chops. More than likely, you have all tried the coating at one point in your lives. You probably had it when you were younger and maybe even made it yourself when you have been cooking. This recipe brings back that nostalgic feel by updating it a bit and making it taste even better, along with a simple peaches spiked with mustard to replace the applesauce.

Not Quite Shake N’ Bake Pork Chops with Peaches and Mustard

1/2 cup all-purpose flour

1 tablespoon salt

1 tablespoon pepper

4 eggs

2 cups panko bread crumbs

4 boneless thin-cut loin pork chops, pounded to 1/4-inch thickness

2 cups vegetable oil

2 ripe peaches or any stone fruit, such as nectarines, plums or apricots, cut into 1-inch cubes

1 1/2 tablespoons Dijon mustard

1/2 teaspoon salt

2 tablespoons chopped fresh flat-leaf parsley

Pre-heat the oven to 175 degrees. In a shallow dish, stir together the flour, salt and pepper. in a separate dish, beat the eggs. in a third dish, spread the panko bread crumbs.

Working with 1 pork chop at a time, dredge the chop in the seasoned flour, then dip it in the egg (shaking off any excess egg), then dip the chop in the panko bread crumbs, pressing firmly so the crumbs adhere well. Repeat the process until all of pork chops have been breaded.

In a large saute pan, heat the oil over high heat until it registers 375 degrees. Carefully lower to chops into the oil and fry for 2 minutes, until just golden brown. Flip and fry the chops for 2 minutes more until the other side is golden. Remove the pork from the oil and transfer the chops to a clean dish and place on a rack in the oven to keep warm until the remaining chops have been cooked. Repeat the process with the remaining pork chops.

For the compote, toss together the peaches, mustard, salt and parsley until blended. Serve with the pork chops.

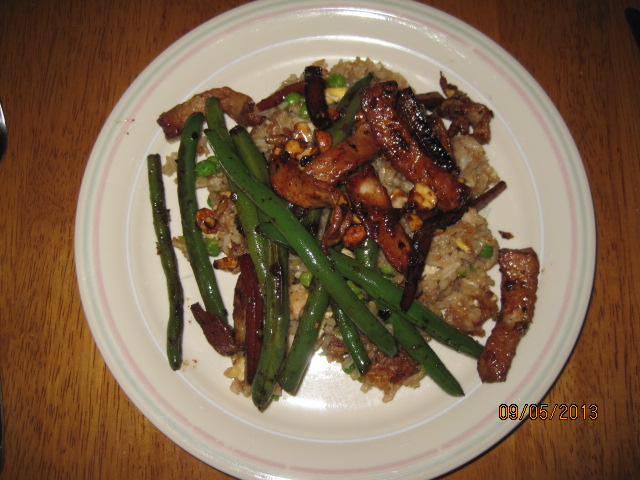
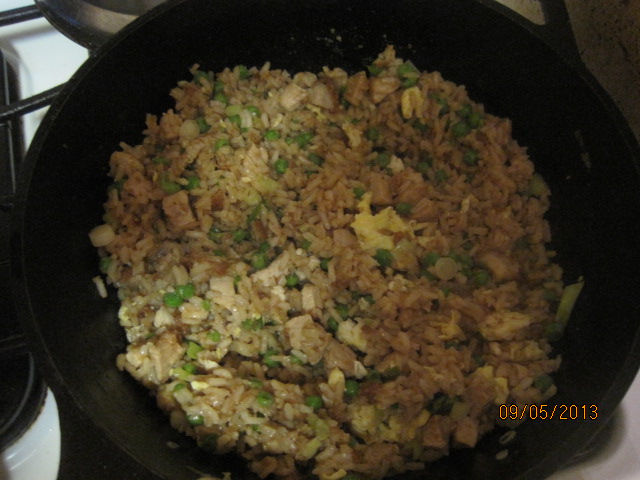
Using the panko really does give the crisp coating that you would get with Shake N’ Bake. Pounding the chops thin make them cook even faster, so this meal can be made very quickly for you in a matter of minutes, making it perfect for a weeknight meal. Serve it with some rice and the peach compote (or homemade applesauce if you prefer)and you have a great meal. I actually served this with the polenta and roasted vegetables recipe I posted last week.

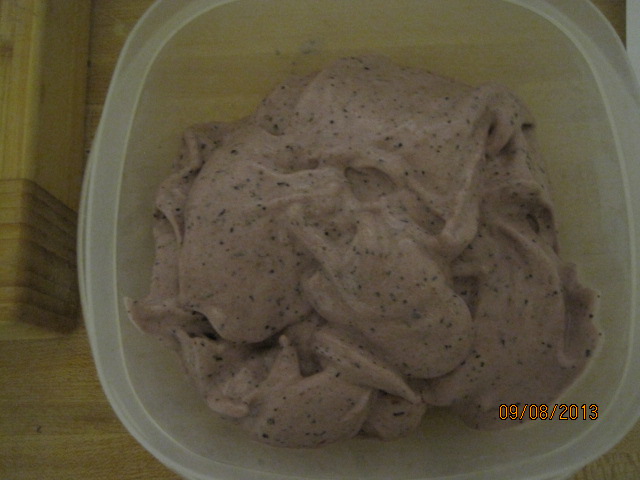
With a little planning, you can have the next recipe for a very healthy dessert. I came across this recipe on Bon Appetit’s website. It is so simple it was impossible to pass up and try just to see how it would come out. It is for banana-blueberry “ice cream.” It’s not quite ice cream since there is no dairy at all in it, but you do get the creamy texture and great flavor in just 3 ingredients.

Banana-Blueberry “Ice Cream”

4 firm, ripe bananas, cut into chunks and frozen overnight

1 cup blueberries

Pinch of kosher salt

Puree the bananas, blueberries and salt in a food processor, scraping down the sides as needed, until smooth and creamy.

The ice cream can be 5 days ahead. Simply cover and freeze it. Let it sit at room temperature for 10 minutes before serving. It is very creamy, has great fruit flavor without fat or cholesterol and is only 120 calories a serving. It’s a fantastic fruit snack. Michelle and I both really liked it and Sean liked it too, though he thought it needed some sugar, which we were trying to avoid by making this in the first place.

That’s all I have for today. Check back again to see what recipes come up this week. I do have some plans for a new version of spaghetti and meatballs, some honey roasted ribs and we still have the lemon icebox pie to come, so keep checking back to see what shows up. Until next time, enjoy the rest of your day and enjoy your meal!

005 001


Leave a comment

Posted by on September 10, 2013 in Cooking, Dessert, Dinner, Pork, Sauce


Tags: , , , ,

Keep it Simple – Pork Stir-Fry with Green Beans and Peanuts

Stir fry is a great weeknight meal. You can plan everything out, make use of any vegetables you may have around, any protein that you want to use or any sauce you want to create. You can really do anything you want with them. I had some pork chops that I wasn’t sure how I wanted to cook so I did some searching and found this recipe from Bon Appetit for a very simple pork stir fry that tasted great.

Pork Stir-Fry with Green Beans and Peanuts

12 ounces pork tenderloin, trimmed, cut into 1-inch strips

4 tablespoons soy sauce

1 1/2 tablespoons honey

2 garlic cloves, minced

1/4 teaspoon dried crushed red pepper

1 pound green beans, trimmed, cut into 1 1/2-inch lengths

1 cup matchstick-size strips peeled carrots (about 2 medium carrots)

2 tablespoons vegetable oil

1 large red bell pepper, cut into 1 1/2-inch strips

1 tablespoon minced peeled fresh ginger

3 green onions, thinly sliced

1/4 cup finely chopped lightly salted dry-roasted peanuts

Mix the pork, 1 tablespoon of the soy sauce, 1 tablespoon of the honey, half of the garlic, and the crushed red pepper in a medium bowl. Mix the remaining 3 tablespoons of soy sauce and the remaining 1/2 tablespoon of honey in a small bowl and set aside.

Cook the green beans in a large saucepan of boiling salted water until they are crisp-tender, about 3 minutes. Add the carrots to the green beans in the water; cook for 1 minute. Drain the carrots and the green beans. Heat 1 tablespoon of the vegetable oil in a large non-stick skillet over high heat.

Add the pork mixture and stir-fry for 1 minute. Transfer the pork to a separate dish. Add the remaining 1 tablespoon of vegetable oil to the skillet; add the red bell pepper and stir-fry for 1 minute. Add the green beans, the carrots, the ginger, and the remaining garlic; stir-fry for 1 minute. Return the pork to the skillet along with the reserved soy sauce-honey mixture. Stir everything well until it is heated through, about 1 minute. Season to taste with salt and pepper. Transfer the stir fry to a bowl. Sprinkle the stir fry with the sliced green onions and the chopped peanuts and serve.

This is very simple to make and you will likely spend more time preparing everything than you actually will cooking. The green beans are nice and crisp and pick up a little bit of the soy sauce and honey flavor from the pork. If you don’t want to add the peanuts or have nut allergies, you can certainly leave them out of the dish altogether.

I made this dish with some homemade fried rice since we had some leftover rice to work with. I used a recipe from America’s Test Kitchen that I have used before and was able to use a lot of leftovers we had like the rice, a leftover pork chop from the other night and some frozen peas. All in all it was a very simple meal that you can make anytime and easily substitute out other ingredients if you wish.

That’s all I have for today. Check back next time to see what other recipes come along. I still have the homemade Shake N’ Bake pork chops and I am planning to make the lemon icebox pie this weekend, so check back for those. Until then, enjoy the rest of your day and enjoy your meal!

003 001 002

 
Leave a comment

Posted by on September 6, 2013 in Cooking, Dinner, Pork, Rice


Tags: , , ,

Side Dish or Main Dish – Polenta with Roasted Vegetables

I saw this recipe from Williams-Sonoma about 2 weeks ago and knew I wanted to give it a try. I have been trying to introduce more things polenta into our meals to cut back on starches like potatoes, bread and white rice. Sean isn’t exactly thrilled with it so far, so I try to do things with it to make it a little more palatable to him. This recipe could easily be a main course on its own if you wanted a vegetarian meal or you can use it as a side dish for a meal, which is what I did.

Polenta with Roasted Vegetables

3 tablespoons olive oil, plus more for the pans

1 small eggplant, cunt into 3/4-inch pieces

2 small zucchini, cut into 3/4-inch pieces

2 small yellow squash, cut into 3/4-inch pieces

1/2 red onion, cut into 3/4-inch pieces

1 orange bell pepper, seeded and cut into 3/4-inch pieces

Salt and freshly ground black pepper

1 cup stone ground cornmeal (polenta)

2 tablespoons butter

1 cup grated Parmesan cheese

Pre-heat the oven to 450 degrees. Oil a rimmed baking sheet and an 8-inch baking dish with olive oil

In a large bowl, combine the eggplant, zucchini, summer squash, red onion and bell pepper. Drizzle with the 3 tablespoons of olive oil, season with salt and pepper, and toss to combine. Arrange the vegetables in a single layer on the prepared baking sheet. Roast, tossing once, until the vegetables are caramelized, about 20 to 25 minutes. Set the vegetables aside and reduce the oven temperature to 350 degrees.

Meanwhile, in a heavy saucepan, bring 4 cups of salted water to a boil over medium heat. Stirring constantly, very slowly add the polenta. Cook, stirring constantly, until the polenta begins to thicken, about 5 minutes. Reduce the heat to low and continue cooking the polenta, stirring frequently, until the polenta is soft, about 25 minutes. Add the butter and Parmesan  cheese and stir until the cheese has melted. Pour the polenta into the prepared baking dish and smooth the top.

Bake the polenta just until it begins to set, about 15 minutes. Remove the dish from the oven and top the polenta evenly with the roasted vegetables. Place the polenta back in the oven and continue to bake it until the vegetables are heated through, about 15 minutes. Serve the polenta directly from the dish.

I did change a few things about the original recipe. The original recipe also calls for 2 cups of Fontina cheese to be added at the same time as the Parmesan. I did not have any on hand, so I just used the Parmesan instead and I think it turned out fine. Since I am not a cheese eater, this was more than enough for me but you may like it even better with the Fontina. Also, I did not use the eggplant or the pepper. Michelle and Sean are not big eggplant fans, so I omitted it from the recipe and used extra zucchini and squash instead. I also did not have an orange pepper so I added a diced carrot instead for similar color. You could easily make this as a main course for a meal and it would be quite filling. We have leftovers to use as side dishes for other meals this week. I loved the creaminess of the polenta and the vegetables added just the right texture and flavor to the dish.

That’s all I have for today. Check back next time for some more recipes I have been working on. Until then, enjoy the rest of your day and enjoy your meal!

004


1 Comment

Posted by on September 5, 2013 in Cooking, Dinner, Side Dishes, Vegetables, Vegetarian


Tags: , , ,

Ciabatta, Ciabatta, You Bet!

I have always kind of shied away from making bread. I don’t really have any counter space to roll and knead dough out properly. Our kitchen is about the size of a closet with one small counter to do work on, so I have always been limited in what I can do. That being said, I have tried to get a little more adventurous and try some dough that can be done in the food processor or in a stand mixer. I love ciabatta bread, so that was immediately one of the first that I tracked down a recipe for. After finding a good one, I set about making it. You need to know you are doing this one a day in advance, so make sure you give yourself time to do it. It takes a lot of waiting but it’s worth it.

Homemade Ciabatta Bread

1/8 teaspoon active dry yeast

2 tablespoons warm water

1/3 cup warm water

1 cup bread flour

1/2 teaspoon active dry yeast

2 tablespoons warm milk

2/3 cup warm water

1 tablespoon olive oil

2 cups bread flour

1 1/2 teaspoons salt

To make the sponge: In a small bowl, stir together the 1/8 teaspoon of yeast and the 2 tablespoons of warm water and allow it to stand for 5 minutes, or until creamy. In a medium bowl, stir together the yeast mixture, the 1/3 cup of warm water and 1 cup of bread flour. Stir together for 4 minutes, then cover the bowl with plastic wrap. Allow the sponge to stand at a cool room temperature for at least 12 hours and up to 1 full day.

To make the bread: In a small bowl, stir together the 1/2 teaspoon of the dry yeast and the milk and allow it to stand for 5 minutes, or until it is creamy. In the bowl of a standing electric mixer fitted with a dough hook, blend together the milk mixture, the sponge, water, olive oil and flour at low-speed until the flour is just moistened; add the salt and mix the dough until it is smooth and elastic, about 8 minutes. Scrape the dough into an oiled bowl and cover it with plastic wrap.

Let the dough rise at room temperature until it has doubled in bulk, about 1 1/2 hours. The dough will be sticky and full of air bubbles. Turn the dough out onto a well-floured work surface and cut it in half. Transfer each half to a parchment sheet and form it into an irregular oval about 9 inches long. Dimple the loaves with floured fingers and dust the tops of the loaves with flour. Cover the loaves with a dampened kitchen towel. Let the loaves rise at room temperature until almost doubled in bulk, about 1 1/2 to 2 hours.

At least 45 minutes before baking the ciabatta, place a baking stone on the oven rack with the lowest position in the oven and pre-heat the oven to 425 degrees.

Transfer 1 loaf on its parchment paper to a rimless baking sheet with a long side of the loaf parallel to the far edge of the baking sheet. Line up the far edge of the baking sheet with the far edge of the baking stone in the oven and tilt the baking sheet to slide the loaf with the parchment onto the back half of the baking stone. Transfer the remaining loaf to the front half of the stone in a similar manner. Bake the ciabatta loaves for 20 minutes, or until a pale golden brown. Cool the loaves on a wire rack.

I was a little skeptical before I even tried the recipe how this would come out, but it was really good. The crust is perfectly crunchy with a great texture to the bread itself. Sean and I each had a slice while it was still warm and it was awesome. I then made a sandwich with the bread later on for dinner and it was fantastic. Michelle took a sandwich for lunch herself today. The only thing I might change is the shaping of the loaves. I did not shape them in the oval as recommended and went for a little bit of a longer loaf. I think the oval would work out much better and give you larger slices to work with. I will definitely be making this again. I know around here they get about $4.00 a loaf for ciabatta and I figure the cost of making two loaves at home is about a dollar, so it is certainly worth the time you put in. Most of the time is actually waiting for the dough to rise, so you don’t have a lot of effort to put in for great results and savings.

That’s all I have for today. Check back next time for another new recipe that I have tried this week. We have tried several already, so I have a bunch of new ones to choose from. Until next time, enjoy the rest of your day and enjoy your meal!

007


3 Comments

Posted by on September 4, 2013 in Breads, Cooking


Tags: ,

A Sweet Treat – Heath Bar Brickle Drop Cookies

My wife makes great cookies. I don’t know what it is about them when she makes them, but they just come out better than anyone else’s cookies, most of all mine. That is why I leave the cooking baking to her. She is the expert. Michelle knows how much I like Heath Bars. Heath bars are really the only candy bar that I can say I really like and would eat regularly. I just love the English toffee in them. When we saw the Heath bar brickle bits in the supermarket not that long ago, Michelle knew right away I was going to want to try them out and have some cookies. This is the recipe that is right on the back of the package and is also available through Hershey’s website (the maker of Heath bars).

Heath Bar Brickle Drop Cookies

1 cup (2 sticks) butter, softened

1 cup granulated sugar

1 cup packed light brown sugar

1 teaspoon vanilla extract

1/2 teaspoon salt

3 eggs

3 1/2 cups all-purpose flour

2 teaspoons baking soda

2 teaspoons cream of tartar

1 1/3 cups (1- 8 ounce package) Heath Bits ‘O Brickle Toffee Bits

Preheat the oven to 350 degrees. Lightly grease a cookie sheet or line it with parchment paper.

Beat the butter, granulated sugar, brown sugar, vanilla and salt in a large bowl until blended. Add the eggs; beat well. Stir together the flour, baking soda and cream of tartar; gradually add the flour mixture to the butter mixture, beating until well blended. Stir in the toffee bits. Drop by heaping teaspoons onto the prepared cookie sheet.

Bake the cookies for 8 to 10 minutes or until lightly browned. Cool slightly and remove them to a wire rack to cool completely. Repeat the process with the remaining cookie dough.

The recipe says it makes about 6 dozen cookies, which seems to be about right. These cookies come out most and chewy and have the great toffee flavor to them. They go great with a nice cup of coffee or just as a midnight snack when you have to get up and walk the dog at night. For me, they rank right up there with Michelle’s chocolate chip cookies and her oatmeal raisin cookies, both family favorites around here.

That’s all I have for today. check back again to see what recipes come up next. I do have recipes for some polenta with roasted vegetables, a homemade Shake N’ Bake pork chops recipe, and I have the dough for the ciabatta bread proofing right now, so we’ll have that one this week as well and anything else that may come along that strikes my fancy. Until next time, enjoy the rest of your day and enjoy your meal (or your cookies)!

IMG_1661

 
2 Comments

Posted by on September 3, 2013 in Cookies, Cooking, Dessert


Tags: , , , ,

Rainy Labor Day? Make Some Indoor Beer Can Chicken

It looks like it is going to be a rainy, cloudy and muggy day here for Labor Day today, which may put a damper on some people’s plans for picnics or cookouts. While you may not be able to have the barbecue you were hoping for on the last unofficial day of summer, you can still have food that tastes just as great. I came across this recipe in the New York Times awhile back and have been waiting for the right time to use it and with the rain we had yesterday and the fact that I found a whole chicken on sale for $4.00 the time was right to give it a try. I have done beer can chicken outdoors before, but I had never ventured to try it in the oven.

Indoor Beer Can Chicken

1 whole chicken, about 4 to 5 pounds

4 tablespoons sweet paprika

2 tablespoons chili powder

2 tablespoons ground cumin

1 tablespoon ground coriander

1 tablespoon brown sugar

1 tablespoon granulated white sugar

1 tablespoon freshly ground black pepper

1 tablespoon kosher salt

1 tablespoon red pepper flakes, or to taste

1 can beer, ideally yellow in color, with the top half consumed or poured off

Remove the top rack from the oven and preheat the oven to 425 degrees. Remove the neck and giblets from the chicken. Rinse the chicken well in cold water and pat dry thoroughly with paper towels.

Combine all the spices together in a large bowl and blend. Apply the dry rub to the chicken both inside and outside. Place the beer can on a solid surface such as a counter top or tabletop. Pick up the chicken and, taking a leg in each hand, put the cavity of the chicken over the beer can and slide the bird down the can. Carefully transfer the bird and the can to a roasting pan and place the pan carefully in the oven.

Roast the chicken for about 1 1/4 to 1 1/2 hours until the breast meat registers 165 degrees on an instant read thermometer or until the legs of the chicken feel very loose in their sockets. You can tent the chicken with foil after 45 minutes of cooking if you want to try to keep the skin from getting too dark. Carefully remove the chicken from the oven, remove the can from the chicken and allow the chicken to rest, tented loosely with foil, for about 10 minutes before carving.

The one I cooked was literally falling off the bone. It was very moist on the inside and the spices not only added great flavor but made for a super crispy skin that everyone just loved. You could easily just use this spice rub if you want to just roast some chicken pieces or do some chicken on the grill. You could also baste the chicken with barbecue sauce along the way as it roasts if you want that flavor, but I chose to just go with the dry rub this time. We had the chicken with some mashed potatoes, corn on the cob and biscuits and it was delicious. I’ll definitely be making this one again.

That’s all I have for today. Check back again during the week to see what else comes up. I have a few things on hand to make this week and I am going to get to the lemon icebox pie, ciabatta bread, some homemade pizza rolls, a new pork chop recipe and a nice polenta with roasted vegetables recipe I got from Williams-Sonoma. Until next time, enjoy the rest of your day and enjoy your meal!

003 001


2 Comments

Posted by on September 2, 2013 in Cooking, Dinner, Grilling, Poultry


Tags: , , ,

Best Summer & Picnic Side Dish Recipes : Cooking Channel

Best Summer & Picnic Side Dish Recipes : Cooking Channel.

It’s never too late to make some of these great side and picnic dishes. While they are perfect for your summer time events, who says you can’t use some of them all year round? Cooking Channel gives you some great options of things to make for yourself or bring to a party. Check it out!


Tags: , , ,

Having an Easy London Broil Meal

London broil is one of those  cuts of meat that cries out for seasoning and marinade. When you cook it and season it right it can be a great meal at a very reasonable price. Leave it plain and overcook it and you might as well just eat a sneaker. I had picked up a London broil on sale recently and decided to make it for dinner last night using this recipe I picked up from Food Network. All that’s really required is the time to let the meat sit in the marinade; the cooking time itself is only about 15 minutes.

London Broil with Herb Butter

3/4 cup beef broth

3 tablespoons extra-virgin olive oil

1 tablespoon soy sauce

1 tablespoon Worcestershire sauce

2 tablespoons fresh lemon juice

Kosher salt and freshly ground black pepper

1 top round London broil steak (about 2 pounds)

4 tablespoons butter, softened

1 1/2 tablespoons chopped fresh chives

1 tablespoon chopped fresh parsley

1 tablespoon chopped fresh tarragon

Kosher salt and freshly ground pepper

1 tablespoon fresh lemon juice

Prepare the steak: Pour the beef broth into a medium bowl and whisk in 2 tablespoons of the olive oil, the soy sauce, Worcestershire sauce, lemon juice, 1 teaspoon of salt and 1/2 teaspoon of pepper. Place the steak in a large resealable plastic bag, pour in the marinade and seal, squeezing out the air. Refrigerate the steak for at least 4 hours and up to 1 day.

Prepare the herb butter: Mix the butter with the chives, parsley, tarragon, a pinch of salt, 1/2 teaspoon of pepper and the lemon juice in a bowl.

About 30 minutes before cooking, remove the meat from the bag and discard the marinade. Dry the steak well with paper towels and bring it to room temperature. Heat a large skillet over high heat, about 2 minutes. Rub the steak with the remaining 1 tablespoon of olive oil. Sprinkle 1 tablespoon of salt over the surface of the pan; add the meat and set a heavy skillet on top to weigh it down. Sear the steak for about 7 minutes; turn the steak, replace the weight over the steak and cook until a thermometer inserted into the side of the steak registers 110 degrees for medium-rare, about 5 minutes.

Transfer the steak to a cutting board, brush with some of the herb butter, tent with aluminum foil and allow the steak to rest for about 10 minutes. Thinly slice the steak against the grain and top with more of the herb butter.

The herb butter adds a really nice flavor to the steak and the marinade is tasty but not overpowering at all. You want to make sure that you don’t overcook this cut of meat. It gets very chewy pretty quickly, even if you marinade to help break the meat down some before cooking. I actually added 1 tablespoon of Montreal steak seasoning and rubbed it into both sides of the steak before cooking just to get some extra flavor and it was great. I served this steak with mashed potatoes, some mixed vegetables and I whipped up some caramelized onions right in the pan I had cooked the steak in.

Caramelized Onions

1 onion, sliced

1/4 cup beef broth

1 tablespoon balsamic vinegar

1 tablespoon butter

Add the sliced the onions to the pan you cooked the steak in along with the beef broth. Turn the heat to high and scrape up any browned bits on the bottom of the pan. Cook until the onion is softened, about 3 minutes. Add the balsamic vinegar and stir, allowing to cook down, about 1 minute. Add the butter to the pan and swirl to melt and coat the onions.

It’s a quick little side dish that makes up some great onions. You can try it anytime you cook any type of beef or change things up and use chicken broth when you make some chicken.

That’s all I have for today. Check back next time to see what recipe comes along. I am starting to plan some things out for next week so check and see what I decide to make. Until next time, enjoy the rest of your day and enjoy your meal!

003 001

 
Leave a comment

Posted by on August 31, 2013 in Beef, Cooking, Dinner, Sauce, Vegetables


Tags: , , , ,

A Quick Dinner of Beef Tacos

I am always on the lookout for quick weeknight meals that taste great. Sean had requested we have tacos for dinner a few nights ago. I like to make taco dinners because they are simple to make and clean up from and always taste great. The nice things about tacos are that, like fajitas, you can use any protein you like best for your main component. I have made and posted fish taco recipes before, but this time I thought I would keep it simple and use the ground beef we had on hand to make some beef tacos using this recipe from America’s Test Kitchen.

Beef Tacos

1 tablespoon vegetable oil

1 onion, minced

3 garlic cloves, minced

2 tablespoons chili powder

1 teaspoon cumin

1 teaspoon coriander

1/2 teaspoon oregano

1/4 teaspoon cayenne pepper

1 pound ground beef

1/2 cup tomato sauce

1/2 cup chicken broth

2 teaspoons cider vinegar

1 teaspoon light brown sugar

Taco shells

Heat the vegetable oil in a medium skillet over medium heat until shimmering. Add the onion and cook until it is softened, about 5 minutes. Stir in the garlic, spices, and 1 teaspoon of salt and cook until fragrant, about 30 seconds.

Stir in the ground beef and cook, breaking it up with a wooden spoon, until it is no longer pink,about 5 minutes. Stir in the tomato sauce, broth, vinegar and brown sugar and simmer until the mixture is thickened, about 10 minutes. Season with salt to taste.

Divide the filling evenly among the taco shells and serve, putting out any toppings or accompaniments that you wish.

If you have ever bought any of those packaged taco kits, you know that they come with a seasoning packet. Perhaps you have even bought a packet separately to use to make tacos. Do yourself a favor and just use the spice mix listed here in this recipe. It tastes a lot better than anything you will buy. Also, instead of adding the water like the packet asks you to do, you can add the tomato sauce and broth used here and get much better results and flavor.

I always serve tacos with some homemade salsa, sour cream, shredded cheese and lettuce for toppings. Very often I also have guacamole to serve as well, which I did not have this time. I made some Mexican rice to go along with it, which makes an excellent side dish for tacos.

That’s all I have for today. it’s just a simple and quick recipe today. Check back next time as I will have a recipe for london broil with herb butter that sounds pretty tasty. I also hope to have some other recipes this weekend that I have been promising to make but just haven’t had the time to get to yet. You’ll want to check back for those as the lemon icebox pie looks great and I am anxious to try making the ciabatta bread. Until then, enjoy the rest of your day and enjoy your meal!

010


1 Comment

Posted by on August 29, 2013 in Beef, Cooking, Dinner, Rice


Bring Your Lunch to Work – NYTimes.com

Bring Your Lunch to Work – NYTimes.com.

There’s a great article in the New York Times Dining section today about bringing your lunch to work. So many people opt for buying lunch, spending a lot of extra money that you can save simply by making a couple of things early in the week or on Sunday while watching TV that can give you great tasting lunches for the rest of the week. Check out this article and see some of the ideas it has for you.


Tags: , , , , , ,

 
National Day Calendar

Fun, unusual and forgotten designations on our calendar.

Jennifer Probst

a little bit naughty a little bit nice

Laissez Faire

Letting Life Lead

simple cooking recipes

a blog to share with you the best