RSS

Tag Archives: bon appetit

A Fresh and Fulfilling Side Dish – Roasted Cauliflower with Lemon-Parsley Dressing

I like cauliflower, but I often have a couple of problems with it. Number one, when it is not in season it can be quite expensive to get a fresh head of cauliflower around here. I usually have to wait until it goes on sale someplace before I pick some up. The second problem I have is that by itself it can be quite bland. If you have ever steamed cauliflower or boiled it you know that it doesn’t always have a lot of flavor to it by itself and a lot of people get put off just by the smell of cauliflower as it is cooking. One of the reasons I do not often buy frozen cauliflower is that it can be pretty tasteless in my opinion unless you do something with it. So when I bought some fresh cauliflower last week, I set out to try to find a good way of cooking it. I love roasting vegetables myself; it brings out much more flavor and you get the chance to add some herbs, dressings or sauces to it to make it even more flavorful. This works particularly well with cauliflower, so I was glad when I found this recipe from Bon Appetit for roasted cauliflower with lemon-parsley dressing and decided to give it a try.

Roasted Cauliflower with Lemon-Parsley Dressing

1 head cauliflower (about 2 pounds), cut into florets
6 tablespoons olive oil, divided
Kosher salt and freshly ground pepper
1 cup fresh flat-leaf parsley leaves
1/2 teaspoon finely grated lemon zest
2 tablespoons fresh lemon juice

Preheat the oven to 425 degrees. Toss the cauliflower florets and 4 tablespoons of the olive oil on a rimmed baking sheet; season the cauliflower with salt and pepper. Roast the cauliflower, tossing it occasionally, until it is tender and golden brown, about 25–30 minutes.

Meanwhile, pulse the parsley, the lemon juice, and the remaining 2 tablespoons of the olive oil in a food processor until it is very finely chopped; season the dressing with salt and pepper to taste. Toss the roasted cauliflower with the lemon-parsley mixture and top the cauliflower with the lemon zest.

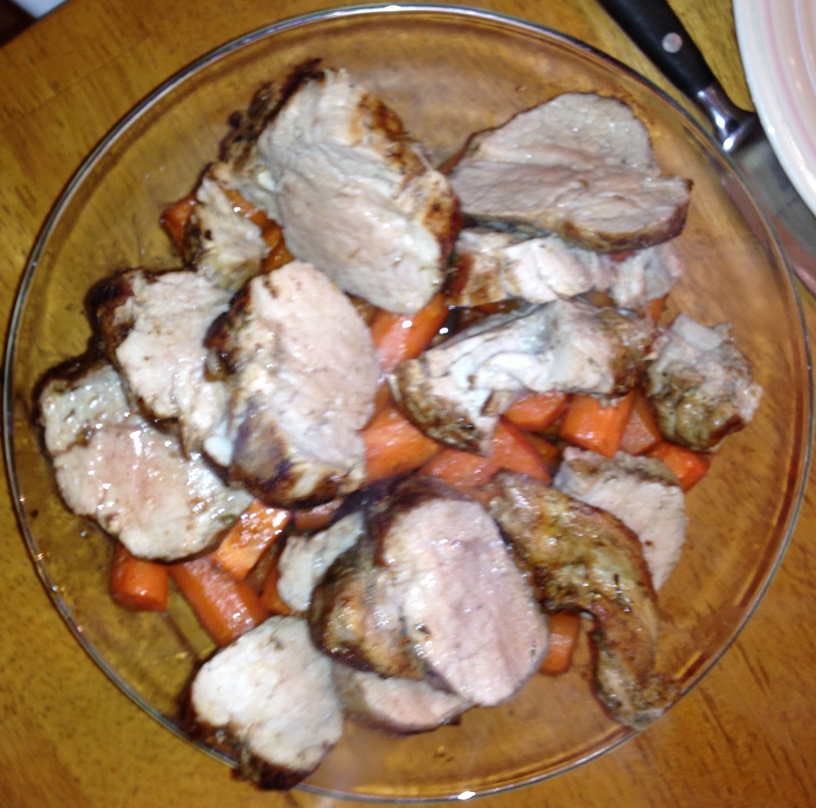
It is a very simple side dish that really gets the flavors of the cauliflower brought out by the roasting. The lemon dressing really helps to bring it all together as well. You can use this as a side dish for really any type of entrée you are making, such as steak, lamb, chicken or pork. I used it as a side when I made the molasses-glazed pork tenderloin I had made and it went perfectly with the meal. You can also make the dressing ahead of time since it is easy to put together and keep it chilled in the refrigerator until after you have roasted the cauliflower. it makes for a great option for you if you are tired of steaming or boiling.

That’s all I have for today. Check back next time for another recipe. I just want to take a quick moment to thank everyone who has been following along or reading the blog as it continues to grow. it has been a lot of fun for me and I hope you can find some great recipes that you want to try for you and your family. If there is ever anything that you want to see, a question you may have or a recipe of your own you would like to share, please feel free to leave a  comment below, send me an e-mail at IguanaFlats@msn.com or catch up to me on my Facebook or Twitter page. Until next time, enjoy the rest of your day and enjoy your meal!

IMG_0517

 
Leave a comment

Posted by on May 2, 2014 in Cooking, Dinner, Side Dishes, Vegetables


Tags: , , , , ,

Spice Up your Weeknight – Spice-Rubbed Pork Tenderloin with Roasted Carrots

Pork tenderloin is a great choice for a weeknight meal when you want something that seems a little more elegant and fancy and can still be done in under 45 minutes or even thirty minutes. I usually but tenderloin when it is on sale and since they come in a package of two tenderloins I freeze one and make one for dinner so I can always pull one out to have for a meal. There are lots of great things you can do with the tenderloin – roasting, grilling, pan roasting, cutting it into medallions, cutting it up for a stir fry – but I really liked this option of adding some nice spices to the tenderloin and roasting it with some carrots for a nice meal. This recipe comes from Bon Appetit and is for a spice-rubbed pork tenderloin with roasted carrots.

Spice-Rubbed Pork Tenderloin with Roasted Carrots

For the Carrots:

2 pounds carrots, peeled, trimmed and cut into 1/2-inch pieces
2 tablespoons water
1 tablespoon extra-virgin olive oil
1 tablespoon butter, diced
2 garlic cloves, thinly sliced
1 small jalapeño (preferably red), seeded, coarsely chopped
1 teaspoon honey
1/2 teaspoon ancho chile powder
1/2 teaspoon ground cumin
1/4 teaspoon coarse kosher salt

For the Pork Tenderloin

2 1- to 1-1/4-pound pork tenderloins
2 teaspoons dried oregano
2 teaspoons ground cumin
1 teaspoon ancho chile powder
1 teaspoon smoked paprika
1 teaspoon coarse kosher salt
1 tablespoon extra-virgin olive oil

For the carrots: Arrange the carrots on a large rimmed baking sheet. Whisk 2 tablespoons of water and all of the remaining ingredients in a small bowl; pour the mixture over the carrots and toss to coat. Cover the carrots tightly with heavy-duty foil.

For the pork tenderloin: Preheat the oven to 400°F. Roast the carrot mixture covered until the carrots are just tender, about 30 minutes.

Meanwhile, arrange the pork tenderloins on another rimmed baking sheet. Stir the oregano, cumin, chile powder, smoked paprika, and 1 teaspoon of coarse salt in a small bowl; rub the mixture all over the tenderloins. Heat the olive oil in a heavy, large nonstick skillet over medium-high heat. Add the pork to the skillet and cook until the pork is browned on all sides, about 5 minutes. Return the pork to the rimmed baking sheet.

Remove the foil from the carrots. Nestle the pork among the carrots on the baking sheet, arranging the carrots in a single layer around the pork. Roast uncovered until an instant-read thermometer inserted into the center of the pork registers 145°F, stirring the carrots occasionally if they are beginning to caramelize, about 18 minutes. Let the pork rest for 5 to 10 minutes.
Transfer the pork to a work surface. Cut the pork crosswise into 1/2-inch-thick slices. Arrange the carrots on the platter. Top the carrots with pork slices, drizzling any pan juices over the pork.
It is a very simple dish that gets great flavor from all of the spices used on the pork. You get a little bit of heat from the chile powder used on the carrots and pork and little bit of sweet from the sweetness of the carrots and the honey in the glaze. The original recipe calls for the use of whole baby carrots, which would work really well here, but I didn’t have any on hand and just went with carrots instead. Also, I only made one pork tenderloin instead of two so I did cut back on the recipe a bit for just one so it was not overloaded with spice. In either case, it is a great meal that can be ready and on the table in under and hour.
That’s all I have for today. Check back next time for another recipe. Until then, enjoy the rest of your day and enjoy your meal!
IMG_0503


Leave a comment

Posted by on April 15, 2014 in Cooking, Dinner, Pork, Vegetables


Tags: , , , ,

22 Classic Cocktails You Need to Know How to Make – Bon Appétit

22 Classic Cocktails You Need to Know How to Make – Bon Appétit.

To go along with your Sunday meal this week or just for your own knowledge to drink or make for friends, here are 22 classic cocktail recipes from Bon Appetit so that you can have access to making that Moscow Mule the next time someone wants one. Check it out!

 
Leave a comment

Posted by on April 14, 2014 in Beverages, Cooking Websites


Tags: , , ,

24 Recipes for Lamb, from Chops to Roasts to Kebabs – Bon Appétit

24 Recipes for Lamb, from Chops to Roasts to Kebabs – Bon Appétit.

With Easter this coming Sunday and springtime upon us, now is great time to make some lamb, a classic Spring and Easter meal (and it happens to be on sale this week too around here). Bon Appetit has put together 24 lamb recipes to cover everything you might be interested in when it comes to making lamb to give you some great ideas. Check it out!

 
Leave a comment

Posted by on April 14, 2014 in Cookbooks, Cooking Websites, Holidays, Lamb


Tags: , , , ,

Two Great Flavors in One – Bananas Foster Coffee Parfaits

This is another part of the Fat Tuesday meal I made a few weeks ago as a special dessert. I love Bananas Foster. It is probably my favorite dessert option, or at least right up there with Black Forest cake. Instead of just making simple Bananas Foster though, we wanted to try something that would be a little bit different for us. I searched around and found a bunch of different recipes but this one, from Bon Appetit, struck me as the one that looked like it would be very different and have great flavor. It is for Bananas Foster coffee parfaits. It tastes great, but be warned, it is labor intensive so you have to be willing to work a bit for it.

Bananas Foster Coffee Parfaits

4 large egg yolks
1 1/2 cups chilled whipping cream
2/3 cup packed light brown sugar
2 tablespoons molasses
2 tablespoons dark rum
2 tablespoons coffee liqueur
2 tablespoons instant coffee crystals
1/2 teaspoon vanilla extract
3 large bananas, cut into 3/4-inch chunks
3/4 cup (about) crushed gingersnaps
6 whole gingersnaps 
6 bananas slices 
6 fresh mint sprigs, optional

Combine the egg yolks, 1/2 cup of the whipping cream, 1/3 cup of the light brown sugar, molasses, rum, coffee liqueur and instant coffee in a medium stainless steel bowl. Set the bowl over a saucepan of simmering water (do not let the bottom of the bowl touch the water.) Using a handheld electric mixer, beat the yolk mixture until it is thick and a thermometer registers 160°F, about 18 minutes. Remove the bowl from over the water; continue beating the mixture until it is cool, about 4 minutes.

Using the same beaters, beat 1 cup of the whipping cream and the vanilla in a medium bowl until medium-firm peaks form. Fold the cream into the cooled yolk mixture in 2 additions. Cover and chill the mixture until it is thickened, about 4 hours. This portions can be made 1 day ahead. Just keep it chilled until you are ready to continue.

Preheat the broiler. Place the banana chunks on a baking sheet. Push 1/3 cup of the brown sugar through a fine mesh sieve onto the bananas, coating them evenly. Place the bananas close to the heat; broil the bananas until the sugar melts and crisps on the bananas.

Spoon 1/4 cup of the coffee custard into each of six 1 1/4- to 1 1/2-cup goblets.

Spoon the bananas over the custard, dividing them equally. Sprinkle each parfait with 1 rounded tablespoon of the crushed gingersnaps. Top each parfait with another 1/4 cup of the custard. Garnish each with a gingersnap, banana slice and mint, if desired.

I have to say that these were a lot of work getting the mixture just right, so I can understand while people might not want to make them, standing over a double boiler with your electric mixer, mixing for 18 minutes, but the end result is worth it. These parfaits had great flavor from the bananas, the rum, the coffee liqueur and the coffee. Throw in the ginger snaps for some extra crunch and to me it was great. It might not be something I make very often, but as a once a year treat I think it is a pretty good thing.

That’s all I have for today. Check back next time for another recipe. As always, there’s lots of good stuff to share. Until then, enjoy the rest of your day and enjoy your meal!

IMG_0458


Leave a comment

Posted by on March 25, 2014 in Cooking, Dessert, Fruit


Tags: , , ,

Going Ga-Ga Over Gumbo

I had meant to post this recipe a couple of weeks ago but I seemed to have caught up in other things lately and just completely forgot about it until I was making shrimp for dinner tonight and remembered I had a recipe for the shrimp, chicken and andouille gumbo I had made back on Fat Tuesday. Sean had requested some gumbo for that night so I had picked my way through a few different recipes until I came across this one from Bon Appetit. One thing to not about this particular recipe is that it makes a lot of gumbo. The servings for the original recipe are for 16 people. I cut the recipe in half when I made it and it still made a lot with many leftovers, so unless you are planning to feed a lot of people with this one, you might want to try to adjust it to fit your particular meal needs. Either way, it’s a great recipe to use.

Shrimp, Chicken and Andouille Gumbo

1 cup vegetable oil
1 cup all-purpose flour
6 large onions, chopped (about 12 cups)
6 red bell peppers, seeded, chopped (about 7 cups)
8 celery stalks, chopped (about 3 cups)
16 garlic cloves, chopped
1 teaspoon cayenne pepper
1 cup dry white wine
1/2 cup chopped fresh thyme
6 bay leaves
2 28-ounce cans diced tomatoes with juice
4 8-ounce bottles clam juice
4 cups low-salt chicken broth
4 pounds andouille sausage, cut crosswise into 1/2-inch-thick slices
3 pounds skinless boneless chicken thighs, cut into 1-inch cubes
2 16-ounce packages sliced frozen okra
4 pounds peeled deveined medium shrimp
Minced fresh Italian parsley
Steamed rice

Heat oil in a heavy 13-quart pot over medium-high heat until it is very hot and almost smoking. Add the flour and stir constantly until the mixture is a dark reddish-brown, about 5 minutes. Add the chopped onions, chopped bell peppers, and chopped celery and cook until the onions are soft and brown, stirring frequently, about 20 minutes. Add the garlic and cayenne and stir for 2 minutes. Add the wine, thyme, and bay leaves; bring the mixture to a boil, stirring occasionally. Add the tomatoes with juice, clam juice, chicken broth, andouille sausage, and the chicken thighs; simmer until the chicken is cooked through, about 15 minutes. Add the okra and simmer until it is tender, about 10 minutes.
Add the shrimp to the pot and cook the shrimp until it is just opaque in the center, stirring often, about 5 minutes. Season the gumbo to taste with the salt and pepper. Garnish the gumbo with minced parsley and serve with steamed rice alongside.

As you can see this recipe is not hard to make, but it does require an awful lot of prep work to make this easy on yourself. Do all of your chopping and dicing ahead of time and lay everything out for yourself to make it a lot easier and it will all  come together quite easily. The flavors are great and I love the spiciness of the andouille with the shrimp and chicken and all of the great vegetables. Making the roux takes some time and attention but it is definitely worth it. There are lots of gumbo recipes out there that you can try; some omit the shrimp, some include other seafood. it’s really up to you as far as what you like best but you will get a great result and this recipe is perfect to make for a party or a buffet for a lot of people.

That’s all I have for today. Check back tomorrow for another recipe to try. Until then, enjoy the rest of your day and enjoy your meal!

IMG_0457 IMG_0455


Tags: , , , , ,

Some Comfort Food Midst All This Snow – Hoisin Glazed Meatloaf

Okay, I don’t know about you, but I am pretty sick of all of the snow around here. I am not much of a fan of winter in the first place – it’s too cold and ever since I was sick it’s harder to breather in the cold and walk in the snow, and my feet hurt in the cold weather too. perhaps it’s time to think about relocating to a warmer climate! In the meantime, weather like this makes us all yearn for  comfort food, and in my mind there is not much more comforting than a meatloaf. If you follow the blog, you know I love it and I have tried various recipes all of the time, so when I came across this idea from Bon Appetit awhile back I was just waiting for the right moment to spring it out. I modified the original recipe a bit since they were really making it with the intent of sandwiches and I had a dinner, and I also added a couple of things on the inside of the meatloaf as well to round out the flavor and texture.

Hoisin Glazed Meatloaf

For the Glaze:

3/4 cup hoisin sauce

1/2 cup rice vinegar

1 1-inch piece ginger, peeled and minced

1 garlic clove, minced

For the Meatloaf:

Nonstick vegetable oil spray

2 cups 1/2-inch cubes day-old crustless white bread (from 2 slices)

1/2 cup chicken broth

1 carrot, peeled and diced

1 celery stalk, peeled and diced

4 slices bacon, minced

1 1/3 cups thinly sliced scallions (dark green parts separated)

1 4-inch piece ginger, peeled, minced

4 garlic cloves, minced

1 pound ground beef

1 pound ground pork

2 eggs, beaten to blend

1 teaspoon Chinese five-spice powder

For the glaze, add the hoisin sauce, rice vinegar, ginger and garlic to a medium saucepan and bring the mixture to a boil. Reduce the heat to low and cook, stirring often, until the sauce thickens to a glaze, about 8 to 10 minutes. Set aside.

For the meatloaf, preheat the oven to 375 degrees. Using the vegetable spray, spray a cooling rack with spray and insert it into the bottom of a rimmed baking sheet and set it aside. In a large bowl, soak the bread cubes in the chicken broth, stirring frequently, until all of the liquid has been absorbed and the bread is beginning to fall apart, about 4 to 5 minutes. in a large skillet over medium heat, add the carrots, celery and bacon until the vegetables are tender and starting to brown and the bacon has rendered its fat and begin to crisp, about 5 to 6 minutes. Add the scallions (the white and light green parts only), ginger and garlic and cook, stirring often until the vegetables begin to soften, about 3 to 4 minutes. Allow the mixture to cool in the pan for 5 minutes.

Combine the scallion mixture with the bread mixture in a large bowl. Add 2 tablespoons of the warmed and thickened hoisin glaze, the remaining scallion parts, the beef, the pork, the eggs and the Chinese five spice. Using your hands, work all the ingredients together until everything is very well incorporated and the mixture is beginning to get sticky. Form the mixture into a loaf shape and place it on the cooling rack inside the rimmed baking sheet. Cover the meat loaf with foil.

Bake the meatloaf in the foil for 30 minutes. Uncover the meatloaf and 2 to 3 tablespoons of the hoisin glaze over the top of the meatloaf. Place the meatloaf back in the oven, uncovered, and continue baking until an instant-read thermometer registers 165 degrees when inserted into the center of the meatloaf, about 1 hour longer.

Remove the meatloaf from the oven and allow it to rest for ten minutes before slicing and serving.

The flavors that you get from the unique mix of spices and the glaze for this meatloaf are very good. Everyone loved it and commented on liking the filling in the meatloaf with the carrots, celery scallions and bacon (Sean especially loved the bacon, of course) The original recipe does not call for the carrots and celery like this but I think they added a nice touch to the meat. We have had the leftovers for a couple of lunches as sandwiches and I have to admit it all tastes pretty darn good as a sandwich too. I’ll definitely keep this one in mind for a meatloaf recipe.

That’s all I have for today. Check back next time for another recipe. I have a lot to choose from to post, so I am not sure which one I will go with yet next, so you’ll have to wait and see. Until then, enjoy the rest of your day, stay dry, warm and safe and enjoy your meal!

001


3 Comments

Posted by on February 5, 2014 in Beef, Cooking, Dinner


Tags: , , , ,

Sidle Up for Side Dishes – Dominican-Style Yellow Rice and Creamy Buttermilk Coleslaw

With all of the different main dishes that I have made lately, I have been making some news sides to go along with some of them. Two in particular really stood out for me anyway. The first was one that I made to go along with the pork tacos we had for dinner. It is a recipe from Bon Appetit for Dominican-style yellow rice. it is a very simple rice dish with some vegetables and spices that are great unique flavor to it.

Dominican-Style Yellow Rice

1/4 cup vegetable oil

1/2 cup red onion, chopped

1/2 red or yellow pepper, seeded and chopped

1 celery stalk, chopped

2 scallions, white and light green parts only, sliced 1/2-inch thick

2 garlic cloves, finely chopped

1 bay leaf

1 teaspoon cumin seeds

1 teaspoon ground turmeric

1/4 teaspoon cayenne pepper

1 cup long-grain rice

2 cups chicken broth

1/2 teaspoon kosher salt

2 tablespoons chopped fresh cilantro

2 tablespoons chopped fresh parsley

Heat the oil in a medium saucepan over medium-high heat. Add the onion, bell pepper, celery and scallions and cook, stirring often, until the vegetables are softened, about 5 minutes. Add the garlic, bay leaf, cumin seeds, turmeric and cayenne pepper and cook, stirring, until the mixture is fragrant, about 2 minutes. Add the rice and stir to coat the rice, then add the chicken broth and the salt. Bring the mixture to a boil, stir it once, and the cover the pan. Reduce the heat to low and cook until the rice is tender and all of the liquid has been absorbed, about 15 to eighteen minutes. Allow the ride to stand in the pot for 10 minutes, covered. Uncover the pot and fluff the rice with a fork. Stir in the cilantro and parsley and serve.

The rice had great color from the turmeric and other spices and the flavor was very good. The combination of the peppers and onion with the rice was just perfect for me. I can see using this side dish with any chicken meal that you make or with pork and I think it would be great.

On the night where I made the fried chicken biscuits, I also tried a new recipe for some coleslaw. I have a bunch of different coleslaw recipes and I am always trying something a little different. This time, since I had some buttermilk on hand I thought I would try out this buttermilk coleslaw recipe from Cook’s Country. it uses a couple of ingredients to make it really creamy without being too watery.

Creamy Buttermilk Coleslaw

1 medium head green cabbage, cored and chopped fine

2 carrots, peeled and shredded with a box grater

Salt

2/3 cup buttermilk

1/2 cup mayonnaise

1/4 cup sour cream

8 scallions, chopped fine

2 tablespoons sugar

1 teaspoon Dijon mustard

1/4 teaspoon ground black pepper

Toss the shredded cabbage and the carrots with 1 teaspoon of salt in a colander set over a medium bowl. Allow the vegetables to stand until they are wilted, about 1 hour. Rinse the cabbage and carrots under cold water, drain, dry well with paper towels and transfer the vegetables to a large bowl.

Stir in the buttermilk, mayonnaise, sour cream, scallions, sugar, mustard and pepper plus some salt to taste. Refrigerate the coleslaw until it is chilled, about 15 minutes. Adjust the seasonings and serve.

I liked this coleslaw because salting the cabbage helps to draw a lot of the moisture out of it so there is not too much water or moisture. Then the buttermilk adds some great tangy flavor to the mix and the sour cream, mayonnaise and mustard each help to add flavor and body to the mix so you get a nice, thick, creamy sauce. If I am going to make a recipe using mayonnaise, I think this is the best one I have tried so far. Of course it is great with any sandwich or along side of burgers, ribs, hot dogs or really just about anything else.

That’s all I have for today. Check back next time for some more recipes. Until then, enjoy the rest of your day and enjoy your meal!

013 002

 
Leave a comment

Posted by on February 4, 2014 in Cooking, Rice, Salad, Side Dishes


Tags: , , , , , ,

It’s a Chicken Invasion, Part 4 – Fried Chicken Biscuits

So yesterday was for a basic fried chicken sandwich from Cook’s Country, which was very tasty. Today is something that is just as easy, might taste even better and is a little more homemade. The recipe id for fried chicken biscuits and is from Bon Appetit, who got the recipe from the Pies-N-Thighs restaurant in Brooklyn, New York. The recipe sounded too good to pass up – delicate and spicy fried chicken on a nice fluffy homemade biscuit with honey butter. How could you not at least give it a try?

Fried Chicken Biscuits

For the Fried Chicken:
1 cup buttermilk
1 tablespoon hot sauce
½ teaspoon kosher salt
¼ teaspoon freshly ground black pepper
¼ teaspoon cayenne pepper
4 skinless, boneless chicken cutlets (about 1½ lb. total), pounded to ¼” thickness

For the Biscuits:

3 teaspoons baking powder
2½ teaspoons kosher salt
1 teaspoon sugar
¼ teaspoon baking soda
5½ cups all-purpose flour, plus more
1½ cups (3 sticks) chilled unsalted butter, cut into pieces
1½ cups chilled buttermilk
1 large egg, beaten to blend
For the Honey Butter and Assembly:

½ cup (1 stick) butter, room temperature
¼ cup honey
½ teaspoon kosher salt, plus more
Vegetable oil, for frying; about 2½ cups
2 cups panko Japanese breadcrumbs
Freshly ground black pepper
4 Pies-N-Thighs Biscuits (recipe above)
Hot sauce, for serving

For the chicken cutlets, combine the buttermilk, hot sauce, salt, black pepper, and cayenne in a resealable plastic bag; add the chicken. Seal the bag, turn the bag several times to coat, and chill the chicken in the refrigerator for at least 3 hours.

For the biscuits, preheat the oven to 375°. Pulse the baking powder, salt, sugar, baking soda, and 5½ cups of flour in a food processor. Add the butter and pulse until the texture is of coarse meal with a few pea-size pieces of butter remaining.
Transfer the mixture to a large bowl. Mix in the buttermilk with a fork, then gently knead the dough just until a shaggy dough comes together.
Pat out the dough on a lightly floured surface until it is about 1¼ inches thick. Cut out the biscuits with a 3” biscuit cutter, re-rolling the scraps once.
Place the biscuits on a parchment-lined baking sheet and brush the tops with egg. Bake the biscuits until they are golden brown, about 30–35 minutes.
To make the honey butter, mix the butter, honey, and ½ a teaspoon of the salt in a small bowl until smooth; set the honey butter aside.
To prepare the chicken, pour the vegetable oil into a large skillet, preferably cast iron, to a depth of ½ an inch and heat the pan over medium-high heat until the oil bubbles immediately when a little panko is added.
Meanwhile, place the panko bread crumbs in a shallow bowl. Remove the chicken from the marinade; season it with salt and pepper. Dredge the chicken in the panko, shaking off any excess. Working in 2 batches and maintaining the oil temperature, fry the chicken until it is golden brown, crisp, and cooked through, about 3 minutes per side. Transfer the chicken to a paper towel–lined baking sheet to drain.
Split the biscuits and spread each side of the biscuits with 1 tablespoon of the. reserved honey butter. Build the sandwiches with biscuits, chicken, and hot sauce, if desired and serve.
Just a couple of things about these recipes. I used chicken tenders that I had bought on sale this past week instead of the chicken breasts and they seem to work out just fine for me. I think you could probably just as easily use boneless thighs as well if you like them better. i did have a little trouble with the panko bread crumbs not sticking very well to all of the chicken pieces. I think I might flour them a little next time after they come out of the marinade to make them stick better, but overall the flavor was really good. To me, the real winner here is the biscuits. They tasted really good and were nice and fluffy. The recipe calls for you to use a 3 inch biscuit cutter, which seemed too big to me so I made them smaller, using a 2 inch cutter and got more biscuits out of the batch so we were able to use them for other meals. Everyone loved the biscuits so I know I’ll be making this one again. I made a little cole slaw to go along with the biscuits. I tried a different recipe this time, which I will post soon, but you can use any cole slaw recipe you like best.
That’s all I have for today. Check back next time for another recipe. until then, enjoy the rest of your day and enjoy your meal!
012 011
 
2 Comments

Posted by on February 1, 2014 in Biscuits, Breads, Cooking, Dinner, Poultry, Sandwiches


Tags: , , , , , , ,

It’s a Chicken Invasion! Part One – Bourbon Glazed Chicken

It seems like every time I go to the grocery store lately for the last few weeks there is chicken on sale and I come home with a lot of it. We have been making a lot of chicken lately and cutting back on red meat where we can to try to be a little healthier and let’s face it – no matter where I seem to shop lately beef is very expensive so we may as well have some poultry. I have a lot of chicken recipes to use, so there is always plenty for me to try, so we’ll be doing chicken recipes all week this week. First up was a simple dish that I saw from Bon Appetit that they actually use for their wings but I simply adapted it to use with chicken thighs and drumsticks instead. It is for bourbon glazed chicken and the glaze tastes delicious.

Bourbon Glazed Chicken

2 tablespoons butter

1 cup chopped onion

3 garlic cloves, peeled, thinly sliced

1 cup bourbon, divided

1 cup ketchup

1/2 cup hot sauce

1/4 cup tomato paste

3 tablespoons packed light brown sugar

4 pounds bone-in chicken parts (thighs, drumsticks and wings)

Melt the butter in a large heavy saucepan over medium-high heat. Add the chopped onion and garlic and saute until golden brown, about 5 to 6 minutes. Add 3/4 of a cup of the bourbon and boil the mixture until most of the liquid is absorbed, about 6 to 8 minutes. Whisk in the remaining 1/4 cup of the bourbon, the ketchup, hot sauce, tomato paste, and the brown sugar until it is well blended. Reduce the heat and simmer until the sauce thickens slightly, stirring occasionally, about 10 minutes. Season the marinade with salt and pepper to taste. Remove the marinade from the heat and allow it to cool to room temperature.

Place the chicken parts in a large glass baking dish or roasting pan. Pour the marinade over the chicken parts and turn the chicken to well coat it. Cover the chicken and refrigerate it overnight.

Preheat the oven to 375 degrees. Line a baking sheet with foil or with parchment paper. Place a cooling rack on top of the prepared baking sheet. Arrange the chicken pieces on the cooling rack, spacing each piece slightly apart. Spread any of the remaining marinade from the dish over the chicken parts. Sprinkle the chicken with salt and pepper. Bake the chicken on the cooling rack in the baking sheet until the parts are cooked through and an instant read thermometer inserted into the thickest part of a thigh registers 165 degrees and the skin is browned, about 45 to 50 minutes. Transfer the chicken to a serving platter and serve.

I can see that this recipe would work really well with chicken wings and I think it tasted great with the chicken parts. The bourbon gave a nice sweetness and with the brown sugar, the ketchup and the hot sauce it was like a nice barbecue sauce with a little heat and sweetness. I would certainly use this recipe again for any chicken parts. It might even be better if you can use it on the grill. Marinading it really makes a big difference with this one as it really enhances the flavor, so let it sit overnight if you can. I served the chicken with some wild rice and fresh green beans.

That’s all I have for today. Check back next time to see the next chicken recipe. until then, enjoy the rest of your day and enjoy your meal!

007 006


4 Comments

Posted by on January 27, 2014 in Cooking, Dinner, Poultry, Sauce


Tags: , , , , ,

 
National Day Calendar

Fun, unusual and forgotten designations on our calendar.

Jennifer Probst

a little bit naughty a little bit nice

Laissez Faire

Letting Life Lead

What To Have For Dinner Tonight

Simple and delicious dinner inspiration