RSS

Tag Archives: Cook’s Country

Island Flavor with Jerk Pork tenderloin with Spinach and Pineapple Salad

Even though the weather has taken a decidedly chillier turn in the last few days here even though it is spring, I had been in the mood for something a little more tropical, at least as far as dinner. I have actually picked up a bunch of different pieces of pork over the last few days as they were having a sale so I was able to get pork tenderloin, a pork loin roast and some center cut pork chops at a really good price so I wanted to make something that would be a little spicy a different from what we usually have when it comes to pork tenderloin. I had recently seen a recipe in Cook’s Country for a jerk pork tenderloin with arugula and pineapple salad. The recipe sounded quite delicious and the ingredients for pretty basic, though I did not have any arugula in the house but I did happen to have some spinach on hand that I could use as a replacement. So I set about making this recipe for dinner so that we could have a little bit of a Caribbean flair even though it was only 45° outside.

Jerk Pork Tenderloin with Spinach and Pineapple Salad

2 (12-ounce) pork tenderloins, trimmed

3 tablespoons jerk seasoning

2 tablespoons vegetable oil

2 cups 1/2-inch pineapple pieces

1/2 cup finely chopped red onion

1/4 cup orange juice

Pinch cayenne pepper

2 ounces (2 cups) baby spinach

Salt and pepper

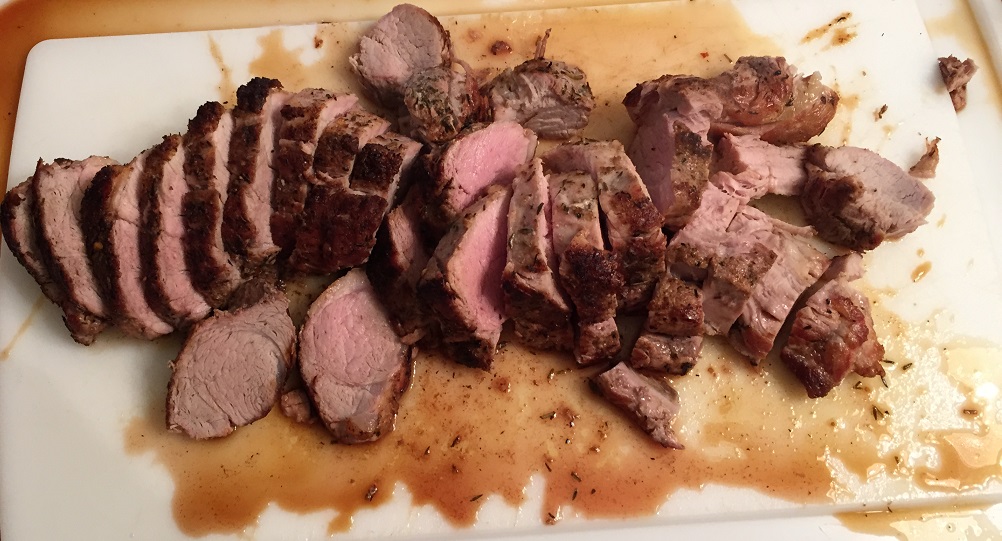
Adjust and oven rack to the middle position and heat the oven to 450°. Set a wire rack inside a rimmed baking sheet. Pat the pork tenderloins dry with paper towels and season them with 2 tablespoons of the jerk seasoning. Heat 1 tablespoon of the vegetable oil in a large skillet set over medium-high heat until the oil is just smoking. Cook the pork tenderloins until they are browned on all sides, about 5 to 7 minutes. Transfer the pork tenderloins to the prepared wire rack. Roast the pork until the meat registers 140° on an instant-read thermometer inserted into the thickest part of the tenderloins, about 15 to 17 minutes. Transfer the pork tenderloins to a carving board, tent them loosely with aluminum foil, and allow them to rest for 5 minutes.

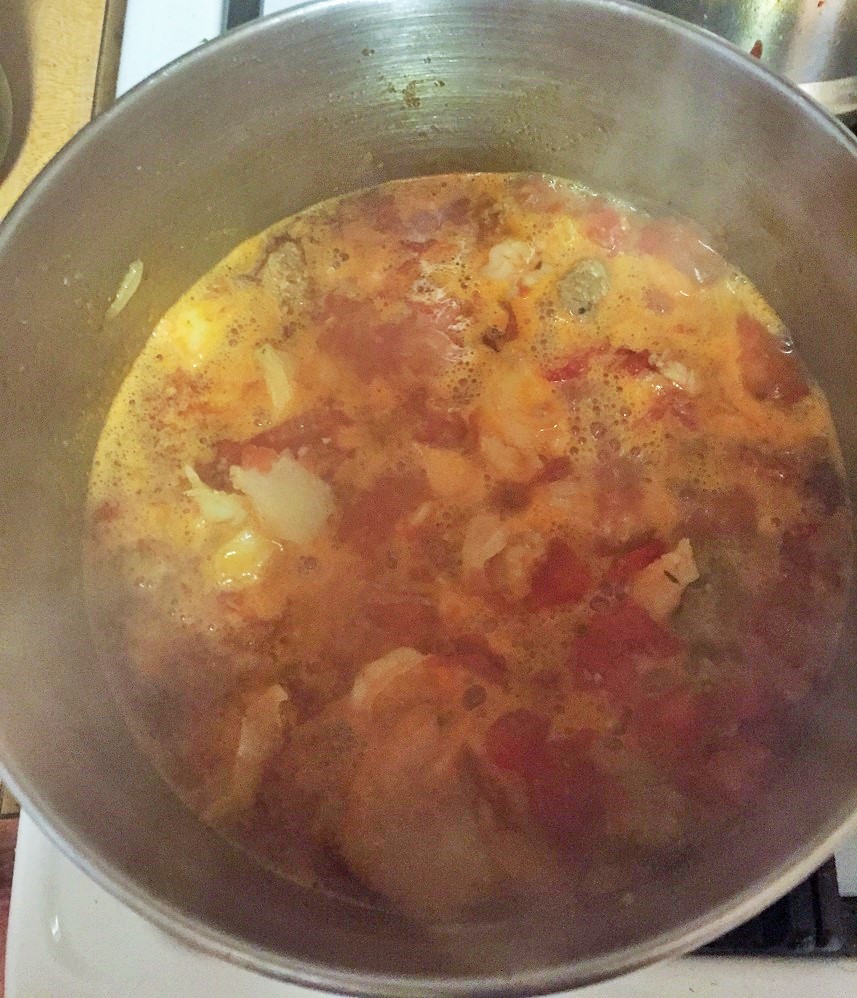
Heat the remaining 1 tablespoon vegetable oil in the now-empty skillet set over medium-high heat until the oil is shimmering. Add the pineapple pieces, red onion, orange juice, cayenne pepper, and the remaining 1 tablespoon of the jerk seasoning and cook, scraping up any browned bits, until the onion is just softened, about 3 to 4 minutes. Off the heat, stir in the baby spinach. Season the mixture with salt and pepper to taste. Slice the pork tenderloins, transfer the slices to a platter, and top the pork with the pineapple mixture.

This is another great simple recipe from Cook’s Country that you can have completed in under 30 minutes and with just a few ingredients. The pork had great spice flavor from the jerk seasoning and you can use any seasoning you like to flavor the pork. Personally, I used the Island Jerk Rub that is from Pepper Mary and it had just the right amounts of spice to it and some great heat and it also helped to make a really good crust on the outside of the pork. I really enjoyed the mix of the pineapple with the arugula and it made a nice touch on top of the pork. The sauce that was created from the pineapple and the orange juice was not overly sweet and thickened to a nice consistency. In my opinion, pineapple goes really well with pork so it made a perfect addition to the dish. I think the spinach worked out just as well as the arugula might have and Sean actually enjoyed having the spinach they are instead of the peppery flavor that arugula often has. It is certainly a recipe worth remembering if you want a nice, spicy dish that you can make quickly during the week.

That’s all I have for today. Check back next time for another recipe. Until then, enjoy the rest of your day, and enjoy your meal!spinschandpineapplesalad jerkporktenderloin

 
Leave a comment

Posted by on April 23, 2015 in Cooking, Dinner, Pork, Salad, Spices


Tags: , , , , , , , ,

Spice it Up with Chicken Tostadas with Spicy Mashed Black Beans

If you have been following along on my blog with me, you know that I like to use a lot of recipes from Cook’s Country. It is perhaps my favorite cooking magazine and I like to use the recipes because most of them are pretty easy, use basic ingredients, and taste great. the magazine only comes out every other month, and since their website is a pay website if you want to access the recipes, I don’t mind sharing the ones that I try out so you can see just how good they are. Such is the case with this chicken tostada recipe I made this week, which was in the latest issue of Cook’s Country. I have made tostadas before, and they are pretty easy to put together, and this one incorporated some nice spicy black beans into the recipe and since I love black beans personally, I knew I wanted to give this recipe a try.

Chicken Tostadas with Spicy Mashed Black Beans

2 (6 to 8-ounce) boneless, skinless chicken breasts, trimmed, halved lengthwise and sliced crosswise 1/2 inch thick

1 tablespoon ground cumin

Salt and pepper

2 tablespoons vegetable oil

1 (15-ounce) can black beans, rinsed

1 (10-ounce) can diced tomatoes

1/4 cup coarsely chopped fresh cilantro

8 (5-inch) corn tostadas, warmed

2 ounces feta cheese, crumbled (1/2 cup)

2 radishes, trimmed, halved, and sliced thin

Pat the chicken dry with paper towels and toss it with the ground cumin, 1/2 teaspoon of salt and 1/2 teaspoon of black pepper. Heat the vegetable oil in a large nonstick skillet set over medium-high heat until it is just smoking. Cook the chicken until it is browned and cooked through, about 5 to 7 minutes. Transfer the chicken to a plate and tent it loosely with foil to keep it warm.

Return the now-empty skillet to medium-high heat and add the black beans, tomatoes and 2 tablespoons of the cilantro. Cook, mashing the beans with a potato masher, until the mixture is thickened and the liquid has evaporated, about 5 minutes. Season the mixture with salt and pepper to taste.

Arrange the tostadas on a serving platter. Spoon 1/2 cup of the bean mixture onto each tostada. Evenly distribute the chicken, feta cheese, radishes and the remaining 2 tablespoons of cilantro over the bean mixture. Serve with sour cream and lime wedges on the side.

A couple of quick notes about the recipe. The original recipe calls for a can of diced tomatoes and green chiles, which I did not have, so I just used diced tomatoes and diced up half of a jalapeno pepper and included it in the mix. It tasted nice and fresh to me this way. I did not use corn tostadas, again because I did not have any on hand, but instead used small flour tortillas I had on hand and fried them in oil for a minute to crisp them up nicely. These worked fine for me as well and everyone seemed to like them. I also did not use feta since we aren’t much for feta in this house and instead I offered up some Mexican cheese blend for Michelle and Sean since they are the cheese eaters in the house. The tostadas were delicious and the bean mixture on the tostadas was perfect, giving just a little bit of spice and a nice refried beans texture to the dish. We gobbled up every last bit of them and I did make some easy Mexican rice to go alongside the dish, which I will post the recipe for tomorrow. The lime wedges and sour cream topped it all off, and even some fresh avocado would be nice along with these also. It’s a very easy meal for any night of the week.

That’s all I have for today. Check back next time for another recipe. Until then, enjoy the rest of your day and enjoy your meal!

chickentostadawithspicyblackbeans


2 Comments

Posted by on April 17, 2015 in Beans, Cooking, Dinner, Poultry


Tags: , , , , , ,

How About Stew Day Two? Seafood and Chorizo Stew

I know it seems silly that I have been clamoring for warmer weather for months and now that it is finally here what recipes do I offer up but stew recipes? Well, there are a couple of reasons for the stew recipes. First, I have been so busy with work lately that making a stew gives me a chance to put together a dinner rather easily and have it all in one pot, making things even better for all of us. Second, both of the stews I have made, this one today and the chicken stew yesterday, I kind of spring-like in their ingredients so they fit pretty well into the weather that we have been having lately anyway. lastly, this recipe today came in the last issue of Cook’s Country magazine and I just love to make their recipes, so I couldn’t resist it. This one is for a simple seafood and chorizo stew, making use of shrimp, cod and chorizo so you get the great flavors of the seafood combined with the heat and spiciness of the chorizo.

Seafood and Chorizo Stew

1 tablespoon extra-virgin olive oil, plus extra for drizzling

6 ounces chorizo sausage, quartered lengthwise and sliced 1/2-inch thick

1 onion, chopped fine

4 garlic cloves, minced

1 tablespoon chopped fresh oregano

2 (14.5-ounce) cans diced tomatoes

1 (8-ounce) bottle clam juice

1 pound extra-large shrimp (21 to 25 per pound), peeled, deveined and tails removed

2 (6-ounce) skinless cod fillets, 1 to 1 1/2 inches thick, cut into 1-inch chunks

Salt and pepper

Heat the olive oil in a large saucepan set over medium-high heat until the oil is shimmering. Add the chorizo and the onion and cook until both are lightly browned, about 7 to 9 minutes. Stir in the garlic and 1 teaspoon of the oregano and cook until both are fragrant, about 30 seconds. Add the diced tomatoes and their juice and the clam juice, scraping up any browned bits from the bottom of the pan and bring the mixture to a simmer. Cook until the mixture is slightly thickened, about 10 minutes.

Pat the shrimp and the cod dry with paper towels and season each with salt and pepper. Gently stir the seafood into the stew and cook until the seafood is opaque and cooked through, about 5 to 6 minutes. Stir in the remaining 2 teaspoons of oregano and season the stew with salt and pepper to taste. Portion the stew into individual bowls and drizzle with a little bit of extra olive oil and serve.

This was a nice thick stew with lots of great flavor to it. love the combination of the shrimp and chorizo and I think if you wanted to leave the cod out altogether and just go with those two this would be a fine dish as well, though the cod adds a nice bit of contrast and some extra meatiness to the dish. I had bought some fresh made chorizo from the butcher and it was perfect, with just the right amount of heat to it. This stew goes great with some nice crusty bread to sop up the juices and I really enjoyed the leftovers for lunch the next day when the stew was even a little bit hotter because the chorizo had really melded into the dish by then. This is another great one pot meal you can have done in under 30 minutes so it is great for any weeknight when you need something easy to put together.

That’s all I have for today. Check back next time for another recipe. Until then, enjoy the rest of your day and enjoy your meal!

seafoodchorizostew

 
Leave a comment

Posted by on April 15, 2015 in Cooking, Dinner, One Pot Meals, Sausage, Seafood


Tags: , , , , , ,

Steak in a Snap – Cook’s Country Strip Steaks with Sauteed Onion and Mushrooms

Now that the Easter holiday is over and a couple of really big work projects are out of the way for me, hopefully I can get back to doing some more regular posts here on my cooking blog. I have made a few different things recently, with a number of them coming out of the last issue of Cook’s Country magazine. They was have some good choices and therefore meals that have recipes that are easy to follow and make use of some basic ingredients. I particularly like their recipe card dinners that can be done in under 30 minutes or so. That is the case with this particular recipe for a strip steaks with sautéed onion and mushrooms. I had just happened to get some New York strip steaks on sale last week and saw it was a great opportunity to give this easy recipe a try. It makes use of just a few ingredients and makes a really nice and flavorful sauce to go along with the steak, mushrooms and onions.

Strip Steaks with Sautéed Onion and Mushrooms

2 (one-pound) boneless strip or rib-eye steaks, 12 1 1/2 inches thick

Salt and pepper

2 tablespoons vegetable oil

8 ounces mushrooms, trimmed and sliced thin

one onion, halved and sliced thin

2 garlic cloves, minced

1/4 cup balsamic vinegar

3 tablespoons chopped fresh chives

2 Tablespoons Butter

Pat the steaks dry with paper towels and season each steak well with salt and pepper. Heat 1 tablespoon of the vegetable oil in a large cast-iron or stainless steel skillet set over medium-high heat until the oil is just smoking. Cook the steaks until they are well browned and the meat registers 125° on an instant read thermometer inserted into the center of the steak (for medium rare), about 5 minutes per side. Transfer the steaks to a carving board and tent it loosely with aluminum foil and allow the steaks to rest for about 5 minutes.

Heat the remaining 1 tablespoon of vegetable oil in the now empty skillet over medium-high heat until the oil is just smoking. Add the mushrooms, onion 1/2 teaspoon of salt and 1/2 teaspoon of pepper and cook until the vegetables are well browned, about 5 minutes. Add the minced garlic and cook until the garlic is fragrant, about 30 seconds.

Stir the balsamic vinegar and any accumulated beef juices into the skillet and simmer, scraping up any browned bits in the pan, until the sauce has thickened, about 1 to 2 minutes. Take the skillet off the heat and stir in 2 tablespoons of the chives and the 2 tablespoons of butter. Season the sauce with salt and pepper to taste. Slice the steaks and transfer them to a platter. Top the steaks with the sauce and sprinkle the steaks with the remaining 1 tablespoon of chives and serve.

It might be hard for you to get a recipe that is much easier than that and supplies you with such great flavor. The mix of the balsamic vinegar with the mushrooms, onions and garlic really provide great flavor for the steaks. I made some mashed potatoes to go along with it and the sauce was just as great on the potatoes as it was on the steak. The steak was cooked perfectly to medium rare (that is the way we prefer it anyway) but if you like it cooked a little more well you could always cook it for an extra minute or 2 to get the doneness that you prefer. You get a great sear on the steaks and a nice sauce to go with them and mushrooms and onions go with steak so well that it seemed perfect together.

That’s all I have for today. Check back next time for another recipe. Until then, enjoy the rest of your day and enjoy your meal!

stripssteakswithonionandmushrooms


Leave a comment

Posted by on April 6, 2015 in Beef, Cooking, Dinner, Sauce


Tags: , , , ,

A Perfect Play on a One Pot Meal – Cook’s Country One-Pan Pork Chop Dinner

One pot meals are the dream of any busy home cook. You love to have a meal that tastes great, gets everything together in one dish and has easy clean up and cooking time. it may not always be as easy as it sounds and I am always on the lookout for different variations on the one pot meal. It is not often you see one involving pork that doesn’t involve a stir fry, so when I saw this recipe listed in the latest issue of Cook’s Country I was intrigued. It roasts the vegetables and the pork chops together, not something you often see because pork chops, even really think ones, do not take the same amount of time to roast as most of your vegetables do. I was wondering just how the chops would get nicely browned without doing them on the stovetop and still have everything roasted together in one pan.

One-Pan Pork Chop Dinner

4 (10-ounce) bone-in center-cut pork chops, 1 to 1 1/4 inches thick, trimmed

1/3 cup extra-virgin olive oil

Kosher salt and black pepper

1 teaspoon paprika

1 teaspoon ground coriander

1 pound Yukon Gold potatoes, unpeeled, halved lengthwise and cut crosswise into 1/2-inch thick slices

1 pound carrots, peeled and cut into 3-inch lengths, thick ends quartered lengthwise

1 fennel bulb, stalks discarded, bulb halved, cored and cut into 1/2-inch thick wedges

10 garlic cloves, peeled

2 teaspoons minced fresh rosemary

2 tablespoons minced fresh parsley

1 small shallot, minced

4 teaspoons red wine vinegar

1/8 teaspoon sugar

Adjust an oven rack to the upper-middle position and heat the oven to 450 degrees.Pat the pork chops dry with paper towels and rub each chop with 1 teaspoon of the olive oil. Combine 2 teaspoons of the kosher salt, 1 teaspoon of black pepper, the paprika and the coriander together in a small bowl. Season the pork chops all over with the spice mixture and set the pork chops aside.

Toss the potatoes, carrots, fennel, garlic cloves, rosemary, 1 tablespoon of the olive oil, 1 1/2 teaspoons of kosher salt and 1/4 teaspoon of the black pepper together in a large bowl until the vegetables are well coated. Spread the vegetables in a single layer on a rimmed baking sheet. Roast the vegetables until they are just tender, about 25 minutes.

Carefully place the pork chop on top of the vegetables and return the baking sheet to the oven. Roast the pork chops until they register 140 degrees on an instant read thermometer inserted into the thickest part of the pork chops and the vegetables are fully tender, about 10 to 15 minutes longer, rotating the baking sheet halfway through the roasting process.

Meanwhile, combine the parsley, shallot, red wine vinegar, sugar, 1/2 teaspoon of kosher salt, 1/4 teaspoon of black pepper and the remaining 1/4 cup of olive oil together in a bowl.Transfer the vegetables and the pork chops to a platter and drizzle with the vinaigrette before serving.

The chops and the vegetables both were nicely browned and had great flavor. the spice run on the chops really helped them to brown nicely and provide just the flavor they needed for the dish and roasting the pork chops on top of the vegetables added some extra flavor to the veggies as well. Since the vegetables were nice and hot when I added the pork they helped to cook the pork nicely as well. The vinaigrette was a nice finish to the dish but I think it tasted great without it as well and we just passed the vinaigrette on the side for those that might want it on their meal. I love roasted carrots and throw in the potatoes, garlic and fennel (I added an onion too to the dish; who doesn’t love roasted onion?)and the flavors were phenomenal. Best of all, of course is that there was only one pan to clean up when dinner was done. It makes for a great weeknight meal in one dish that you can do in under 45 minutes.

That’s all I have for today. Check back next time for another recipe. Until then, enjoy the rest of your day and enjoy your meal!

onepanporkchopdinner


Tags: , , , , ,

Kicking Cook’s Country Cracker-Crusted Fried Chicken

Fried chicken is an awesome thing when it is done right. Sure it can be messy and take some time to get done with brining and making the coating and deep-frying, but in the end, if it is all done right, you end up with a great crunchy coating and juicy chicken pieces to make the meal perfect. I have tried a bunch of different fried  chicken recipes in the past and I am always up for a new one to try out to get the perfect coating. I have had some where the coating is disappointing and without crunch but when I saw this recipe in the latest issue of Cook’s Country for a cracker-crusted fried chicken the picture along made it worth giving a shot to. I had four pieces of bone-in chicken thighs and nothing to do with them and then Sean saw this picture in the magazine and said “let’s have this tonight.” The ingredient list is pretty basic and we had everything on hand, so we gave it a try.

Cracker-Crusted Fried Chicken

Salt and pepper

2 tablespoons Worcestershire sauce

2 tablespoons soy sauce

2 teaspoons cayenne pepper

2 teaspoons granulated garlic

3 pounds bone-in chicken pieces (split breasts cut in half crosswise, drumsticks, thighs and/or wings)

36 square saltines (1 sleeve)

1/2 cup all-purpose flour

1/2 cup cornstarch

1 teaspoon baking powder

3 quarts peanut or vegetable oil

Whisk 1 1/2 quarts of cold water, 2 tablespoons of salt, Worcestershire sauce, soy sauce, cayenne pepper and granulated garlic together in a large container until the salt dissolves. Add the chicken pieces, cover the container and refrigerate the chicken for at least 1 hour or up to 4 hours.

Place the saltines in a gallon zipper-lock bag, seal the bag and crush the crackers to medium-fine crumbs with a rolling pin or mallet. you should have about 1 cup of cracker crumbs. Transfer the crumbs to a large bowl and whisk in the flour, cornstarch, baking powder, 2 teaspoons of pepper and 1/2 teaspoon of salt until the ingredients are well combined.

Set a wire rack in a rimmed baking sheet. Set a second wire rack in a second rimmed baking sheet and line half of the rack with a triple layer of paper towels. Working with 1 piece at a time, remove the chicken from the brine mixture and transfer it to the saltines mixture, pressing the chicken firmly so the coating adheres well to the chicken. Transfer the coated chicken to the prepared rack without the paper towels and repeat the process with the remaining chicken. Refrigerate the coated chicken pieces for at least 30 minutes or up to 2 hours.

Add the peanut or vegetable oil to a large Dutch oven until it measures about 2 inches deep and heat the oil over medium-high heat to 350 degrees. Add half of the chicken to the hot oil and fry the chicken until the breasts register 160 degrees and the drumsticks, thighs or wings register 175 degrees on an instant-read thermometer, about 13 to 16 minutes total. Adjust the burner, if necessary, to maintain the oil temperature between 300 and 325 degrees. transfer the cooked chicken to the paper towel-lined side of the second wire rack to drain on each side for 30 seconds, then move the pieces to the unlined side of the rack. Return the oil to 350 degrees and repeat the process with the remaining chicken pieces.

I did adjust the recipe down a bit since I was only making 4 pieces of chicken, so I cut the recipe by about 1/3 and it seemed to work out pretty well for me with the size chicken thighs I had. The coating was great with a nice crunch to it and it was perfect in color and texture. the chicken remained moist as well and it was well seasoned thank to brining the pieces ahead of time. Refrigerating the pieces with the coating did help to settle the coating on the pieces as well. I really liked the additions to the brine of the soy sauce, Worcestershire and cayenne as it imparted some great flavor on the chicken. Everything came out nicely with the chicken and of course this would be great for leftovers for lunch the next day, but Sean liked it enough so we had none leftover to save.

That’s all I have for today. Check back next time for another recipe. Until then,enjoy the rest of your day and enjoy your meal!

crackercrustedfriedchicken


Leave a comment

Posted by on March 30, 2015 in Cooking, Dinner, Poultry


Tags: , , , , , ,

When Michelle’s Away the Bacon Will Play – Bacon-Wrapped Meatloaf

Okay, this recipe is definitely not for the health-conscious, but it is for the bacon lover in all of us. Sean had seen this recipe in my recent issue of Cook’s Country and knowing his love for all things bacon asked when I was going to make it. The problem is that Michelle and bacon don’t always play nicely together, so I really needed to wait for her to be away on business before I could break out the recipe and give it a try. When she went away recently, the first night she was gone Sean asked me if I was going to make this. I broke out the recipe for bacon-wrapped meatloaf and gave it a try. This recipe seems a lot like a standard meatloaf recipe, with the addition of bacon in, on and around the meatloaf itself.

Bacon-Wrapped Meatloaf

1/4 cup your favorite bottled barbecue sauce, plus extra for serving

1 tablespoon cider vinegar

1 tablespoon Worcestershire sauce

1 tablespoon spicy brown mustard

17 square or 19 round saltine crackers, crushed (about 2/3 cup)

4 slices coarsely chopped bacon, plus 8 whole slices

1 onion, chopped coarse

3 garlic cloves, minced

1/2 cup milk

2 eggs plus 1 egg yolk

1/3 cup minced fresh parsley

3/4 teaspoon salt

1/2 teaspoon pepper

1 1/2 pounds 90 percent lean ground beef

Adjust an oven rack to the upper-middle position and heat the oven to 375 degrees. Line a rimmed baking sheet with aluminum foil and set a wire rack in the baking sheet. Whisk the barbecue sauce, Worcestershire sauce, cider vinegar and mustard together in a bowl. Set aside the glaze.

Process the saltines in a food processor until they are finely ground, about 30 seconds,; transfer the ground crackers to a large bowl. Pulse the chopped bacon and the chopped onion in the now-empty food processor until both are coarsely ground, about 10 pulses. Transfer the bacon mixture to a large non-stick skillet and cook over medium heat until the onion is soft and translucent, about 5 minutes. Add the minced garlic and cook until the garlic is fragrant, about 30 seconds. Set the mixture aside off the heat.

Add the milk, eggs and egg yolk, parsley, salt, pepper and 2 tablespoons of the glaze to the saltines and mash the ingredients together with a fork until a chunky paste forms. Stir in the bacon mixture until everything is well combined. Add the ground beef and knead with your hands until the ingredients are blended.

Lightly spray an 8 1/2 by 4 1/2-inch loaf pan with vegetable oil spray, Line the pan with a large sheet of plastic wrap with some extra plastic wrap hanging over the edges of the pan. Push the plastic wrap into the corners and up the sides of the pan. Line the pan crosswise with the remaining 8 bacon slices, overlapping them slightly and letting the excess hang over the edges of the pan. You should have at least 1/2-inch of overhanging bacon. Brush the bacon with 3 tablespoons of the glaze. Transfer the meatloaf mixture to the bacon-lined pan and press the mixture firmly into the pan. Fold the bacon slices over the mixture.

Using a metal skewer or the tip of a paring knife, poke 15 holes in one 14 by 3-inch piece of foil. Center the foil rectangle on top of the meatloaf. Carefully flip the meatloaf onto the wire rack set in the baking sheet so the foil is on the bottom and the bacon is on the top. Gripping the plastic, gently lift and remove the pan from the meatloaf. Discard the plastic. Gently press the meatloaf into a 9 by 5-inch rectangle.

Bake the meatloaf in the oven until the bacon is browned and the meatloaf registers 150 degrees on an instant-read thermometer inserted into the center of the meatloaf, about one hour. Remove the meatloaf from the oven and heat the broiler. Brush the top and sides of the meatloaf with the remaining 2 tablespoons of the glaze. Broil the meatloaf until the glaze begins to char and the meatloaf registers 160 degrees, about 3 to 5 minutes. Using the foil as a sling, transfer the meatloaf to a cutting board and let it rest for 15 minutes before slicing. Serve with the extra barbecue sauce.

While it may seem like a bit of work to create the loaf itself, it really doesn’t take that long and it makes a difference in getting the right shape and having a way for some of the fat to drain off the meatloaf while it cooks. The meatloaf gets great flavor from the bacon both inside and outside, but to me the real winner of the meatloaf recipe is in the glaze. You get this really great smoky flavor to the meatloaf that makes it extra-special. You can use whatever barbecue sauce you like for this one and I actually added 1/2 teaspoon of liquid smoke to the glaze to enhance it a little more. I also put the meatloaf in the pan and then refrigerated it for about 15 minutes to let the shape set more before I flipped it out onto the wire rack prior to baking. It seemed to help in having the meatloaf hold its shape better. The other thing to remember is that you will get better slices of meatloaf if you allow it to sit and rest after taking it out of the oven. I often wait up to 30 minutes before slicing it to get the best slices. I can see using this glaze on other meatloaf recipes even without all of the bacon in and out to get the flavor. Sean and I both liked the meatloaf and he loved it with all of the bacon and the bacon in the meatloaf does add extra smokiness but I can see where this can be bacon overload for some people.

That’s all I have for today. Check back next time for another recipe. Until then, enjoy the rest of your day and enjoy your meal!

baconwrappedmeatloaf

 
2 Comments

Posted by on February 15, 2015 in Beef, Cooking, Dinner, Sauce


Tags: , , , ,

Better Believe This Bourbon-Butter Steak Tips with Maple Mashed Sweet Potatoes is the Bomb!

Leave it took Cook’s Country Magazine to keep supplying me with easy to make, quick weeknight meals. Finding something that uses just a few ingredients but comes together really nicely to taste great and can all be done in less than 30 minutes is my idea of the perfect weeknight meal. We have been so busy around out house lately with work and all of the other family things going on and it is only going to get crazier as we get further into November and December with birthdays, holidays, parties, travel and more. This means finding fast and easy meals that we can do without a lot of effort. This one for bourbon butter steak tips with maple mashed sweet potatoes is great because you can get the sweet potatoes softened in the microwave, get your steak tips going and have everything ready in about 20 minutes. Add a green vegetable and you are good to go.

Bourbon-Butter Steak Tips with Maple Mashed Sweet Potatoes

2 pounds sweet potatoes, peeled and cut into 1/2-inch pieces

3 tablespoons vegetable oil

Salt and freshly ground black pepper

1/4 cup heavy cream

1/4 cup maple syrup

1 1/2 pounds sirloin steak tips, trimmed and cut into 2-inch chunks

1/2 cup bourbon

2 teaspoons apple cider vinegar

2 tablespoons butter

1 tablespoon chopped fresh chives

Combine the sweet potatoes, 2 tablespoons of the vegetable oil, 1 teaspoon of salt and 1/2 teaspoon of black pepper in a large bowl. Cover and microwave until the sweet potatoes are tender, about 10 minutes, stirring the potatoes halfway through the cooking process. Add the heavy cream and 3 tablespoons of the maple syrup and mash the potatoes until they are smooth; cover the potatoes and set them aside.

Meanwhile, pat the steak tips dry with paper towels and season the steak with salt and pepper. Heat the remaining 1 tablespoon of vegetable oil in a large skillet set over medium-high heat until the oil is just smoking. Add the steak tips and cook them until they are well browned all over and the meat registers 125 degrees (for medium-rare), about 6 to 8 minutes. Transfer the steak tips to a platter and tent them loosely with foil to keep them warm.

Off the heat, add the bourbon, apple cider vinegar and the remaining 1 tablespoon of maple syrup to the skillet. Return the skillet to medium-high heat and cook until the sauce is slightly thickened, about 3 minutes, scraping up any browned bits from the bottom of the skillet. Off the heat, whisk in the butter and season the sauce with salt and pepper to taste. Return the steak and any accumulated juices to the pan and toss the steak to coat it well with the sauce. Sprinkle the steak with chives and serve it with the mashed sweet potatoes.

This was a very delicious meal with a nice hint of the maple syrup permeating the potatoes and the steak. Throw in the taste that the bourbon adds to the sauce and it really makes the steak out of this world. I really think you could make this with any cut of beef if you did not have steak tips to use; you could use a London broil, sirloin or any other cut of beef that you really prefer or even use a whole steak like a rib eye or strip steak and it would be great. It’s so easy to make and you get wonderful layers of flavor.

That’s all I have for today. Check back next time for another recipe. Until then, enjoy the rest of your day and enjoy your meal!

IMG_0721


2 Comments

Posted by on November 3, 2014 in Beef, Cooking, Dinner, Potatoes, Sauce


Tags: , , , , , ,

Back to Cooking with a Great Fall Side Dish – Cider-Glazed Root Vegetables

Now that my oven is up and running again I was able to do some actual cooking over the past weekend and a few different things that I can share on the blog. One of my favorite things about fall cooking is all of the great root vegetables that seem to go so well with fall meals come out. You can do great things with carrots, parsnips, sweet potatoes, turnips, beets and more and while I personally love to roast all kinds of vegetables, I also thought it would be great to bring all of these flavors together and use another great piece of fall produce – apples. Apples are pretty plentiful in this area of New York this time of year so it’s a great time to take advantage of them as well. This particular recipe for cider-glazed root vegetables was in the latest issue of Cook’s Country magazine and uses the cider to give the vegetables some added flavor and punch. The original recipe uses hard apple cider in it, which I did not have on hand. Instead I used some local apple cider as a substitute.

Cider-Glazed Root Vegetables

4 tablespoons butter

1 pound carrots, peeled and cut into 1/2-inch pieces

12 ounces parsnips, peeled and cut into 3/4-inch pieces

12 ounces turnips, peeled and cut into 3/4-inch pieces

3 shallots, peeled and halved

2 1/2 cups hard cider or regular cider

3 tablespoons sugar

Salt and freshly ground black pepper

1 apple, cored and cut into 1/2-inch pieces

2 tablespoons chopped fresh tarragon

2 teaspoons cider vinegar

Melt 1 tablespoon of the butter in a large skillet set over medium-high heat. Add the carrots, parsnips, turnips and shallots and cook until lightly browned, about 5 to 6 minutes. Add the apple cider, sugar, 1 1/2 teaspoons of salt and the remaining 3 tablespoons of the butter and bring the entire mixture to a boil. Reduce the heat to medium-low and cover the skillet. Cook the vegetables until they are just tender, about 7 to 10 minutes, stirring the vegetables occasionally.

Uncover the skillet and increase the heat to medium. Cook the vegetables until they are fully tender, about 13 to 15 minutes, stirring them occasionally. Stir in the apple and continue to cook the vegetables until the cider starts to become syrupy and the apple is just tender, about another 2 to 3 minutes. Take the skillet off the heat and stir in the chopped tarragon and the apple cider vinegar. Season the vegetables with salt and pepper to taste. Transfer the vegetables to a serving dish and pour any of the remaining glaze over the vegetables before serving.

Other than substituting regular apple cider for the hard apple cider, I also used golden beets instead of turnips since I already had the beets on hand. You can use pretty much root vegetables that you really like and I think they would work pretty well here. The original recipe as it is posted here is also designed to serve 8 people, so I cut the recipe in half when I actually made it for just the 3 of us and we still had plenty of leftovers. You get some really great flavor with all of the vegetables mixed together with the cider and the apple, though I have to admit that using the regular cider probably creates a bit of a weaker tasting glaze than if you use the hard cider, but it was still really good. I made this as a side dish to go with meat loaf, but I think it would go really well with any pork or poultry dish as well.

That’s all I have for today. Check back next time for another recipe. Until then, enjoy the rest of your day and enjoy your meal!

IMG_0715

 
Leave a comment

Posted by on October 13, 2014 in Cooking, Dinner, Side Dishes, Vegetables, Vegetarian


Tags: , , , , , ,

Take on Thursday with Turkey in a Pot with Gravy

Sean has been asking me to make turkey for weeks, but until recently unless you bought a whole turkey around here you couldn’t really get anything at the price of turkey when the holidays are not coming around can be really high so I have been putting it off for a few weeks. Last week when I was shopping I noticed our Stop and Shop and a few turkey breast halves at a really reasonable price. They were about 3 pounds each and one of them easily provided enough for a meal for just the three of us, so I picked up two (one went right into the freezer for later use) and knew I would be able to satisfy Sean’s urge for turkey. As luck would have, the latest issue of Cook’s Country has an interesting recipe for turkey breast that I wanted to try that is called turkey in a pot with gravy.This recipe promises a moist bird with some really good gravy, so it was certainly worth a shot. The original recipe uses a whole turkey breast and I adjusted it down since I was only making a half, but I have posted the original recipe here if you want to try a whole one.

Turkey in a Pot with Gravy

1 (7-pound) bone-in whole turkey breast, wings discarded, trimmed

Salt and pepper

2 tablespoons olive oil

1 onion, chopped

1 carrot, chopped

1 celery rib, chopped

6 garlic cloves, crushed and peeled

1 teaspoon minced fresh thyme

1 bay leaf

1 tablespoon butter, melted

1/4 cup all-purpose flour

4 cups chicken broth

Adjust an oven rack to the middle position and heat the oven to 250 degrees. Using kitchen shears, trim any rib bones that extend beyond the underside of the turkey breast. If any backbone pieces are still attached to the underside of the turkey, remove them as well. Pat the turkey dry with paper towels and season it all over with salt and pepper.

Heat the olive oil in a large Dutch oven set over medium-high heat until the oil is just smoking. Add the turkey, skin side down, and cook until the breast is well browned, about 12 to 16 minutes, rolling it from side to side as needed to make for even browning. Transfer the turkey to a plate and set it aside. Pour off all but 2 tablespoons of fat from the pot. Add the onion, carrot, celery, garlic, thyme and bay leaf to the pot and cook until the vegetables are well browned, about 7 to 10 minutes.

Return the turkey and any accumulated juices to the pot, skin side up. Off the heat, place a large sheet of aluminum foil over the pot and press the edges to seal the foil, then cover the pot tightly with the lid. Transfer the pot to the oven and cook until the thickest part of the turkey breast registers 155 degrees on an instant-read thermometer inserted into the turkey, about 1 1/2 to 1 3/4 hours.

Remove the pot from the oven and heat the broiler. Uncover the pot (be careful, the handles will be very hot as well as the lid) and brush the turkey with the melted butter. When the broiler is heated, return the pot to the oven and broil the turkey until the skin is golden brown, about 8 to 15 minutes, rotating the pot as needed for even browning. Remove the pot from the oven. Transfer the turkey to a carving board, tent the turkey loosely with foil, and allow it to rest while making the gravy.

Place the pot over medium-high heat, bring the contents to a boil and cook until almost all of the liquid has evaporated, about 8 to 15 minutes. Stir in the flour and cook until it is lightly browned, about 2 minutes. Slowly whisk in the chicken broth and bring the mixture to a boil. Reduce the heat to medium and cook at a strong simmer, stirring often, until the gravy is thickened and measures about 2 cups, about 15 to 18 minutes. Strain the gravy through a fine-mesh strainer set over a medium saucepan; discard the solids. Season the gravy with salt and pepper to taste. Carve the turkey and re-warm the gravy, if needed, and serve it with the turkey.

Cooking the turkey at the low temperature in the oven after browning helps to ensure that you get a moister turkey in the end and then putting it under the broiler for a bit for some additional browning gives you great, crispy skin as well. The gravy had great flavor as well thanks to the concentration you get from letting all the liquid evaporate before you make your roux. Everything about it was perfect and of course we had some stuffing, mashed potatoes and vegetables for our little mini pre-Thanksgiving meal. There were even some leftovers after just making the half breast so we could have turkey sandwiches for lunch the next day (always a favorite of mine). I may do this again with the other half breast I have in the freezer.

That’s all I have for today, check back next time for another recipe. Until then, enjoy the rest of your day and enjoy your meal!

IMG_0703 IMG_0702

 
2 Comments

Posted by on October 2, 2014 in Cooking, Dinner, Gravy, Poultry, Turkey


Tags: , , , ,

 
National Day Calendar

Fun, unusual and forgotten designations on our calendar.

Jennifer Probst

a little bit naughty a little bit nice

Laissez Faire

Letting Life Lead

What To Have For Dinner Tonight

Simple and delicious dinner inspiration