RSS

Tag Archives: food network

A Great Fall Soup in the Slow Cooker – Slow Cooker Bean and Barley Soup

With the cooler weather coming upon us now, that means more of an opportunity to make soups and make some good use of the slow cooker. We made a couple of different soups this week, and the first one allowed me to use some of the dried beans I had picked up that were on sale this past week. I had picked up bags of black beans, Great Northern beans, navy beans and lentils, so I had plenty to work with as I looked for a recipe where I could use different types in one soup. I came upon this recipe from the Food Network for a bean and barley soup in the slow cooker and it sounded perfect.

Slow-Cooker Bean and Barley Soup

1 cup dried multi-bean mix or Great Northern Beans, picked over and rinsed

1/2 cup pearl barley

3 cloves garlic, smashed

2 medium carrots, roughly chopped

2 ribs celery, roughly chopped

1/2 medium onion, roughly chopped

1 bay leaf

Kosher salt

2 teaspoons dried Italian seasoning herb blend

Freshly ground black pepper

1/2 ounce dried porcini mushrooms, crumbled if large (optional)

One 14-ounce can whole tomatoes, with juice

3 cups cleaned baby spinach leaves

1/4 cup freshly grated Parmesan cheese

Balsamic vinegar, for drizzling

Extra-virgin olive oil, for drizzling

Put 6 cups of water, all of the beans, the barley, garlic, carrots, celery, onions, bay leaf, 1 1/2 teaspoons kosher salt, Italian seasoning, pepper and porcini mushrooms, if using, in a slow cooker. Squeeze the tomatoes through your hands over the slow cooker to break them down, and add them with their juices. Cover the slow cooker and cook on high until the beans are tender and the soup is thick, about 8 hours.

Add the spinach and Parmesan cheese, and stir until the spinach wilts, about 5 minutes. Remove the bay leaf and season with salt and pepper to taste.

Ladle the soup into warmed bowls and drizzle each serving with balsamic vinegar and olive oil.

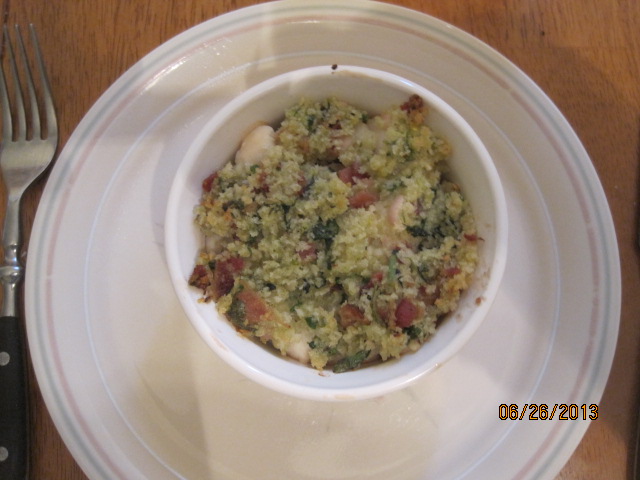
I love a hearty bean soup and this one, with the different beans in, has awesome flavor. It was nice and thick with very flavorful broth from all the vegetables. Adding the spinach and cheese towards the end is a great way to add flavor and make it even more flavorful, but if you wanted to leave them out and just have the bean and barley soup I think it would be just as good. Serve it with some nice crunchy bread and you have a great vegetarian or meatless meal. The soup itself tasted even better the next day after it has had a chance to set and the flavors have melded together even more than the first day, so it has made for some great lunches as well.

That’s all I have for today. Check back next time for another soup recipe as I will go over the nice corn chowder that we made this week. Until next time, enjoy the rest of your day and enjoy your meal!

003


Tags: , , , , ,

Thanksgiving Lite – Roasted Turkey Breast with Creamy Gravy

Even though it is only just October, before you know it we will all be thinking about Thanksgiving dinner and the different dishes we are going to prepare. The great thing about this time of year is that turkey becomes not only more available, but more affordable. For the rest of the year, the price can seem quite high for a turkey. Right about now you will start to see the price creep down little by little and you may also see the availability of different turkey parts for sale as well. I came across this half a turkey breast in the store on Monday and couldn’t pass it up. It was 2 1/2 pounds, but it only cost $4.00 and we will get a dinner and lunches out of it, so it’s a great deal. I then went looking for a recipe and found this one from Rachel Ray. I did modify it somewhat, as in the recipe she makes a cranberry pomegranate sauce and had neither cranberries nor pomegranates, so I eliminated that end of it. She also makes the recipe with two split turkey breasts and since I only had one, I had to scale things down a bit. I am posting the entire recipe she uses here for you to try.

Roasted Turkey Breast with Creamy Gravy and Cranberry Pomegranate Sauce

For the Turkey Breast:

1 full or 2 split boneless, skin-on turkey breasts

2 cloves garlic, grated or pasted

1 stick butter, softened

1/4 cup fresh herbs, such as parsley, chives, thyme, tarragon or rosemary

1 tablespoon lemon juice

Salt and black pepper

For the Cranberry Pomegranate Sauce:

One 12-ounce bag fresh cranberries

1 cup sugar

Pinch salt

1 cinnamon stick

1 strip orange rind

1 pomegranate

For the Creamy Gravy:

2 tablespoons all-purpose flour

1 1/2 cups chicken stock

1 tablespoon Worcestershire sauce

Salt and black pepper

1/3 cup heavy cream

1/4 cup freshly grated Parmigiano-Reggiano (optional)

For the roasted turkey breast: Preheat the oven to 350 degrees. Place the turkey breast on a baking rack over a baking sheet. Combine the garlic and softened butter with the herbs and lemon juice. Slather about 5 tablespoons of the garlic-herb butter over the turkey breast and sprinkle liberally with salt and pepper., reserving the remaining garlic-herb butter for the gravy. Roast the turkey in the oven for 45 minutes.

For the cranberry pomegranate sauce: Place the cranberries in a medium saucepan with the sugar, salt, cinnamon stick, orange rind and 1 cup of water. Bring the mixture to a boil and cook until all the berries pop and the sauce thickens, about 15 minutes. Cool and remove the rind and the cinnamon stick. Peel the pomegranate in a bowl of water, separating the seeds, and drain. Add the pomegranate seeds into the sauce.

For the creamy gravy: Right before serving the turkey, melt the remaining garlic-herb butter over medium heat in a saucepan. Whisk in the flour until blended, followed by the chicken stock, to thicken. Whisk in the Worcestershire sauce and season with salt and pepper to taste. Stir in the heavy cream and the cheese (if using) and keep the gravy warm until you are ready to serve.

Slice the roasted turkey breast and serve with room temperature cranberry pomegranate sauce and the warm gravy.

A couple of things about this recipe. I left the cheese out of the gravy since I don’t really care for cheese that much and I just didn’t think it went well with the dish. I think the gravy turned out fine without it, but if you want the added creaminess from the cheese, go for it. This recipe makes a lot of turkey, which is one of the reasons I cut it in half. The one split turkey breast was more than enough for the three of us and we had plenty of leftovers as well. I liked the flavor you get from the garlic-herb butter on the turkey and in the gravy and it did help to crisp up what little skin there was on the turkey. I served this with smashed potatoes (they weren’t mashed too much; I just used a potato masher for a bit on them) and some pan roasted asparagus. It was a nice meal that you can do in under an hour and satisfy that early season turkey craving.

That’s all I have for today. Check back next time for another recipe. I still have my Oktoberfest sausage to make tonight, a roast beef recipe for this weekend, and some other things to try like a new soup recipe and a new one for banana bread. Keep checking back to see what comes up next. Until next time, enjoy the rest of your day and enjoy your meal!

001

 
2 Comments

Posted by on October 4, 2013 in Cooking, Dinner, Gravy, Poultry, Sauce, Turkey


Tags: , , , , , ,

Start of the Week With Some Quick Chicken Chimichangas

I had actually intended to make enchiladas this weekend, but Michelle thought she might like to have chimichangas instead. In reality, I was going to take as many shortcuts as possible whatever I was cooking because I had bought a rotisserie chicken to use for something, even if it was just rotisserie chicken for dinner. I got this recipe from Food Network, though I did alter it slightly to fit our family wants from the meal. Since I don’t eat cheese, I eliminated the cheese from the ones I made for myself. Also, Michelle and Sean would not go for the green chile sauce in the recipe, so though I included it in this recipe, I didn’t actually make it myself.

Chicken Chimichangas

2 tablespoons butter

4 tablespoons vegetable oil

1 onion, chopped

3 cloves garlic, chopped

1 jalapeno pepper, diced (you can take the seeds out if you want less heat)

1 1/2 teaspoons chili powder

1/2 teaspoon ground cumin

1/4 teaspoon ground cinnamon

Kosher salt

1 tomato, chopped, plus more for topping

2 tablespoons chopped fresh cilantro

2 1/2 cups shredded rotisserie chicken

1/4 cup sour cream

1 15-ounce can refried beans

4 10-inch flour tortillas

1 cup shredded Monterey Jack cheese, plus more for topping

Shredded lettuce, for topping

Mexican rice, for serving

Green chile sauce, for topping (see recipe)

Green Chile Sauce:

1/2 cup chopped onion

2 garlic cloves, chopped

1 tablespoon vegetable oil

Pinch chili powder

Pinch cumin

Pinch granulated sugar

Pinch Kosher salt

2 4-ounce cans chopped green chiles, drained and rinsed

1 cup chicken broth

1/4 cup chopped fresh cilantro

Preheat the oven to 450 degrees. Melt the butter with 2 tablespoons of the vegetable oil in a skillet; transfer the butter mixture to a bowl. Heat the remaining 2 tablespoons of vegetable oil in the skillet. Add the onion, garlic and jalapeno and cook until soft, about 3 minutes. Add the chili powder, cumin, cinnamon and 1 teaspoon of kosher salt.; toast the spices for about 30 seconds. Add the tomato and cilantro and cook until slightly dry, about 2 minutes. Stir in the rotisserie chicken and sour cream and warm through. Remove the skillet from the heat.

Brush a rimmed baking sheet with some of the reserved butter-oil mixture. Spread 2 tablespoons of refried beans down the center of each flour tortilla, leaving a 2-inch border on both ends. Top the beans with 1 cup of the chicken mixture and 1/4 cup of cheese. Fold in the ends and roll up the tortilla.

Put the chimichangas seam-side down on the baking sheet; brush the chimichangas with the butter-oil mixture. Bake for 8 to 10 minutes per side, brushing the chimichangas again after you flip them. Top with the green sauce, more cheese, lettuce and tomato. Serve with the Mexican rice and any leftover refried beans.

For the Green Chile Sauce: Saute the onions and chopped garlic cloves in a skillet with the vegetable oil. Add a pinch of chili powder, cumin, sugar and kosher salt; cook for 30 seconds. Stir in the two cans of drained, rinsed and chopped green chiles; cook for 2 minutes. Add the chicken broth and simmer until the sauce thickens, then puree the sauce in a blender or with a stick blender. Stir in the chopped cilantro and serve over the chimichangas.

Not only was this recipe very easy to make at the very last minute (made easier by the rotisserie chicken), it tasted great. The blend of spices with the chicken really was very nice. Personally, I think it would have been even better with the green chile sauce and plan to make it next time around. Of course, you could easily make your own chicken by simply sauteing a couple of boneless chicken breasts or baking them in the oven and use the chicken meat that way.

That’s all I have for today. Check back next time for some more recipes. I made a couple of homemade snacks yesterday that I will post recipes for and am planning on a nice vegetable chowder for dinner tonight that I will post this week as well. Until next time, enjoy the rest of your day and enjoy your meal!

002

 
Leave a comment

Posted by on September 16, 2013 in Cooking, Dinner, Poultry, Rice, Sauce


Tags: , , , , ,

Twisting a Classic: Spaghetti (Squash) and Meatballs

As sacrilegious as it may sound, I don’t like pasta. I have never eaten it, even when I was a little kid. I don’t know if it’s the taste, flavor, texture or what, but I just don’t like it. Don’t get me wrong; if I am at someone’s home and that’s what they serve, I am eating it without a fuss. Do I go out of my way to make it at home? No, not for me. I do make it for Michelle and Sean, who both love pasta, but I make something else for myself. So when I decided I was making meatballs this week, I wanted to try something different. It was lucky that I had come across this recipe from Food Network recently to give me the inspiration.

Spaghetti Squash and Meatballs

1 medium spaghetti squash (about 2 pounds)

Kosher salt

3 tablespoons extra-virgin olive oil, plus more for brushing

2 stalks celery, chopped

1 medium carrot, roughly chopped

1 medium onion, roughly chopped

6 cloves garlic

1 cup fresh parsley leaves

1 pound ground beef

1 pound ground pork

2 large eggs

1 cup Italian-style breadcrumbs

1 cup plus 3 tablespoons grated Parmesan cheese

2 28-ounce cans tomato puree

2 large sprigs basil

1 teaspoon dried oregano

Preheat the oven to 425 degrees. Halve the squash lengthwise and scoop out the seeds. Sprinkle the cut sides with 1/2 teaspoon of kosher salt and then brush both sides with olive oil. Put the squash, cut side up, in a baking dish and cover it tightly with aluminum foil. Roast for 20 minutes, then uncover the squash and continue roasting until the squash is tender, about 35 more minutes.

Meanwhile, make the meatballs: Brush a baking sheet with olive oil. Pulse the celery, carrot, onion, garlic and parsley in a food processor to make a paste. Transfer half of the vegetable paste to a bowl; add the ground beef, ground pork, eggs, breadcrumbs, 1 cup of the Parmesan cheese and 1 teaspoon of salt and mix with your hands until it is just combined. Form the mixture into about 24 two-inch meatballs; transfer the meatballs to the prepared baking sheet. Bake the meatballs until they are firm but not cooked all the way through, about 10 minutes.

To make the sauce, heat 3 tablespoons of the olive in a large pot over medium-high heat. Add the remaining vegetable paste and cook, stirring occasionally, until it looks dry, about 5 minutes. Stir in the tomato puree; rinse each can with 1 cup of water and add it to the pot. Stir in the basil, oregano and 1 1/2 teaspoons of salt. Bring the sauce to a simmer, then add the meatballs and simmer until the sauce thickens and the meatballs are cooked through, about 15 to 20 minutes. Remove the basil.

Use a fork to scrape the spaghetti squash flesh into strands; transfer the squash to a large bowl and toss with 2 tablespoons of grated Parmesan cheese. Season with salt to taste.  Divide the squash among plates or bowls and top each with some meatballs, sauce and the remaining 1 tablespoon of Parmesan cheese.

A couple of notes about this recipe. This particularly recipe makes a lot of sauce and meatballs, so you will have leftovers to store or freeze if you like. You can store the sauce and meatballs for up to a month in the freezer. You can always skip making the sauce and just use your favorite jarred sauce if you choose to go that route. I have tried multiple meatball recipes and posted several of them on here. This one is one of the more flavorful I have tried, so it’s worth a shot. Everyone really liked the spaghetti squash as an alternative. I thought Sean would resist, but he really liked it too. There is a great flavor from the squash and it goes well with the meatballs.

That’s all I have for today. Check back tomorrow for another recipe. I did make the lemon icebox pie, so you’ll want to check back for that one. Until next time, enjoy the rest of your day and enjoy your meal!

001


1 Comment

Posted by on September 12, 2013 in Beef, Cooking, Dinner, Sauce, Vegetables


Tags: , , ,

Get Your Hot Dogs Here! (And Some Good Toppings Too!)

I think the hot dog gets a pretty bad rap. Granted, it may not be the healthiest alternative when it comes to something to eat, but there are some hot dogs that just taste downright delicious. I can be pretty fussy about the brand of hot dog I have, but there is something about eating a hot dog at a cookout or barbecue that makes it so it doesn’t seem to matter that much what brand it may be. When I am at home, I personally prefer a Sabrett hot dog or a Nathan’s. The other requirement I have is that they need to be hot dogs with the skin on. There is something about biting into a hot dog and getting that snap that makes it just right. Anyway, I didn’t think there would be much in the way of recipes for hot dogs, and there may not be a lot of variations in the way you cook them, but there are countless toppings you can try. This recipe, from Bobby Flay, tries to make these hot dogs just like one you could get on the streets of New York with some great toppings.

New York Street Cart Dogs with Onion Sauce and Red Pepper Relish

Onion Sauce:

2 tablespoons vegetable oil

2 large onions, halved and thinly sliced

2 teaspoons ancho chile powder

1/2 teaspoon ground cinnamon

1/2 cup ketchup

1/4 teaspoon hot sauce

1/2 teaspoon kosher salt

1/4 teaspoon freshly ground black pepper

Grilled Pepper Relish:

6 cloves roasted garlic, coarsely chopped

3 grilled red peppers, peeled, seeded and diced

3 tablespoons extra-virgin olive oil

2 tablespoons red wine vinegar

3 tablespoons finely chopped fresh flat-leaf parsley, plus leaves for garnish

Kosher salt and freshly ground black pepper

Grilled Hot Dogs:

8 all-beef kosher hot dogs

Vegetable oil

Freshly ground black pepper

Hot dog buns

Mustard

For the onion sauce: heat the oil in a medium saucepan over medium heat. Add the onions and cook until soft, about 5 minutes. Stir in the chile powder and  cinnamon and cook for 1 minute. Add 1 cup of water, the ketchup, the hot sauce, salt and black pepper and bring the mixture to a simmer. Cook until it is thickened and the onions are very soft, adding more water if needed, about 25 minutes. Transfer to a bowl and allow the mixture to cool to room temperature before serving.

For the grilled pepper relish: Combine the garlic, peppers, oil, red wine vinegar and parsley in a bowl and season with salt and pepper. Cover and allow the mixture to sit at room temperature for at least 30 minutes before serving.

For the hot dogs: heat a grill to high heat for direct grilling. Brush the hot dogs with oil and sprinkle them with pepper. Grill the hot dogs until slightly charred and golden brown on all sides, about 6 minutes. put the hot dogs in the buns and top with mustard, onion sauce and the grilled pepper relish.

I did make a few alterations to this recipe. First, we were having pretty heavy rain and thunderstorms yesterday, so there was no grilling involved at all for me. I roasted the peppers and garlic in the oven and made the relish indoors. It also meant cooking the hot dogs inside, but instead of frying them or boiling them, I like them steamed. You get a much better snap from the hot dogs when you steam them. Just put about an inch of water in a large saucepan and bring it to a boil. Then insert a steamer basket into the pan, put the hot dogs in the basket and allow them to steam for about 3 minutes. They come out much more like a hot dog cart hot dog than grilling, in my opinion. I also added some yellow and orange pepper into the pepper relish for more color and flavor.

The onion sauce really does take like the onion sauce you can buy in the stores or get from a vendor. It was sweet with a little heat and tasted great with the mustard. The same goes for the pepper relish. You can really taste the garlic in this one, so you may even want to cut back a bit on the garlic to get more pepper flavor.

That’s all I have for today. Check back next time for another recipe. I just made the Tar Hell Pie in the latest issue of Cook’s Country magazine, so you can check back for that recipe tomorrow and see how it came out. Until next time, enjoy the rest of your day and enjoy your meal!

IMG_1638 IMG_1637

 
Leave a comment

Posted by on August 10, 2013 in Beef, Cooking, Dinner, Grilling, Sauce, Side Dishes


Tags: , , , , , , , ,

Belly Up to Some Backyard Burgers

You can never have too many ways to make a good burger on the grill. Since this is the time of year that you can experiment a little, I went out and found this recipe from chef Chris Santos (frequently a judge on Food Network’s “Chopped”) for his Ultimate Backyard Burger along with some smoked chili ketchup to help spice up the barbecue results a little.

Smoked Chili Ketchup

1 cup minced shallots

2 cloves garlic, minced

2 tablespoons extra-virgin olive oil

2 teaspoons honey

1 cup canned chopped tomatoes

1/2 cup corn syrup

1/2 cup sherry vinegar

2 tablespoons brown sugar

2 teaspoons chipotle puree

Vegetable stock, if needed

Salt and freshly ground black pepper

Burger:

12 slices bacon

4 ounces very soft butter

3 pounds ground beef

3 tablespoons paprika

1 tablespoon cumin

1 tablespoon Worcestershire sauce

Kosher salt and freshly ground black pepper

Olive oil, for brushing

6 hamburger buns

6 slices American cheese

For the ketchup: Saute the shallots and garlic in the olive oil in a large skillet over low heat until translucent, about 4 to 6 minutes. Add the honey and cook for 2 to 3 minutes more. Add the tomatoes, corn syrup, vinegar, sugar and chipotle puree and simmer for 30 minutes. Puree the mixture in a blender or food processor, adding some vegetable stock if the ketchup seems too thick. Season with salt and pepper and set aside.

For the burgers: Preheat the oven to 375 degrees. Heat a grill to high heat. Brush both sides of the bacon slices with some of the smoked chili ketchup. Place the bacon on a baking sheet and bake for 15 to 20 minutes, turning halfway through.

Gently fold the butter into the ground beef along with the paprika, cumin and Worcestershire sauce. Form the beef mixture into 6 patties and sprinkle both sides liberally with salt and pepper.

Brush the hamburger buns on each side with olive oil and grill the insides of the buns until golden brown, about 1 to 2 minutes. Grill the burgers until medium rare, 3 to 4 minutes per side, or to your own particular liking of doneness. Once you flip the burger, add a slice of the cheese to each burger and keep the cover of the grill closed to allow the cheese to melt.

Spread the smoked ketchup on one side of the bun and place the burger on the bun cheese side up and top with 2 strips of bacon.

I loved the smoked ketchup. It had some nice bite to it from the chipotle puree and had great flavor from the shallots, vinegar and brown sugar. I personally did not put any cheese on my burger but I think it tasted great all the same. Putting some of the butter into the meat along with spices really added to the burger itself. This is definitely a recipe I will try again. Unfortunately, I forgot to take pictures of this one when it was done, but I will try to get to it the next time I make them.

That’s all I have for today. Check back next time to see what recipes I will be trying out, including a grilled sausage recipe, some beer battered fish and pulled pork sliders. They all sound pretty yummy so you will want to check them out. As always, if you ever have any questions or a recipe you would be interested in seeing, just drop me a note in the comment sections on the blog or you can catch up with me on Facebook or Twitter. Until next time, enjoy the rest of your day and enjoy your meal!


Leave a comment

Posted by on July 11, 2013 in Beef, Cooking, Grilling, Sauce


Tags: , , , ,

It’s Not an Illusion – It’s Magic Bars

We’re always on the lookout for recipes that are great desserts to bring to a party or barbecue. As soon as I saw this one on the Food Network with Giada De Laurentiis, I knew we were going to have to give it a try. It combines a couple of things that everyone really loves – brownies, caramel and chocolate chip cookies. I have seen this dish called a few different things, but Giada called it Magic Bars. The real magic part about them is how fast they disappear.

Magic Bars

Brownie Layer:

1 box brownie mix

1/2 cup vegetable oil

2 tablespoons instant espresso powder

3 large eggs, at room temperature

Cookie Layer:

1 1/3 cups all-purpose flour

1/2 teaspoon baking powder

1/2 teaspoon baking soda

1/4 teaspoon salt

1 stick (1/2 cup) butter, cut into 1/2-inch pieces, at room temperature

3/4 cup light brown sugar

1/2 cup granulated sugar

1 large egg, at room temperature

1 teaspoon vanilla extract

1/2 cup semisweet chocolate chips

Caramel:

3 bags soft caramel candies, unwrapped

1 tablespoon vanilla extract

Position a rack in the lower third of the oven and preheat the oven to 350 degrees. Spray two 13 x 9-inch baking dishes with cooking spray. Line each dish with a 15-inch square of parchment paper, allowing the excess to hang over the sides. Spray the parchment paper with cooking spray.

For the brownie layer: In a large bowl, blend together the brownie mix, vegetable oil, 1/4 cup of water, espresso powder and the eggs. Using a hand mixer, beat for 1 minute on medium speed. Pour the batter into one of the prepared pans. Bake until a toothpick inserted about 1 inch from the edge of the baking dish comes out clean, about 25 to 27 minutes. Transfer the pan to a wire rack to cool for 1 hour.

Using the excess parchment paper as handles, lift the brownie layer from the pan. Run a thin spatula underneath to loosen it from the parchment paper. Keep the oven turned on.

For the cookie layer: In a medium bowl, whisk together the flour, baking powder, baking soda and salt. In a stand mixer fitted with the paddle attachment, beat the butter and sugars in a large bowl until fluffy. Beat in the vanilla and egg. Add the flour mixture and beat until a dough forms. Stir in the chocolate chips. Using your fingers, press the dough evenly into the bottom of the other prepared baking dish, leaving a 1/2-inch border. Bake until it is light golden, about 14 to 16 minutes. Transfer the pan to a wire rack to cool for 30 minutes.

For the caramel: In a medium, heavy saucepan, combine the caramel candies, 2 tablespoons of water and vanilla over medium-low heat. Cook, stirring occasionally, until the candies have melted and the mixture is smooth, about 10 minutes. Pour the caramel evenly over the cookie layer. Working quickly, place the brownie layer on top of the caramel. Gently press the brownie layer into the caramel. Refrigerate for 1 hour until the caramel has set. Allow the layers to come to room temperature, about 30 minutes. Cut into 24 bars and store it in an airtight plastic container.

The original recipe calls for some shredded coconut over the brownie layer and a cup of chopped walnuts in the cookie layer, but we omitted both since we were bringing it to a party and we weren’t sure if there were any dislikes or allergies involved, so we kept it simple. Everyone seemed to love the dessert and you got the best of both worlds with brownie and chocolate chip all in one. Michelle thought the caramel could be a little smoother and suggested added some heavy cream next time to the caramel to smooth it out some more. No matter how you decide to make it, it is very easy to do and tastes great. It’s definitely a good one to remember for a party.

That’s all I have for today. Check back again to see what other recipes I’ll be using in the coming days. Sean has been picking out some recipes he wants us to try, and this week I think we are going to make things like pulled pork sliders, Cobb chicken salad sandwiches, barbecued chicken and we are even going to try our hand at making some bagels. Check back and see how it goes. until then, enjoy the rest of your day, try to stay cool and enjoy your meal!

003

 
Leave a comment

Posted by on July 7, 2013 in Cakes, Cooking, Dessert


Tags: , , , ,

Down by the Bay Scallops

I don’t often buy bay scallops for myself. While they are the cheaper alternative to good sea scallops, most of the time bay scallops are soaked in solution and chemicals and they just don’t taste very good. The exception is if you can find “dry” or chemical-free bay scallops to use. These can be a lot better and can actually make for a great tasting and inexpensive seafood meal if you can catch them at just the right price. The trick can often be finding them dry and on sale, and I happened to stumble across them when I was shopping this past week so I picked up a pound. Bay scallops are great just sautéed over with some garlic, butter, white wine and parsley over rice or pasta, but I was looking to do something a little different this type out. I found a recipe from Ina Garten, the Barefoot Contessa of the Food Network and this recipe sounded like it would taste great and took no time at all to make.

Bay Scallop Gratin

6 tablespoons butter, at room temperature

6 garlic cloves, minced

2 medium shallots, minced

2 ounces thinly sliced prosciutto, minced

4 tablespoons minced fresh parsley, plus extra for garnish

2 tablespoons freshly squeezed lemon juice

2 tablespoons Pernod

2 teaspoons kosher salt

1 teaspoon freshly ground black pepper

6 tablespoons olive oil

1/2 cup panko bread crumbs

6 tablespoons dry white wine

2 pounds bay scallops

Lemon, for garnish

Preheat the oven to 425 degrees. Place 6 (6-inch round) gratin dishes on a sheet pan.

To make the topping, place the butter in the bowl of an electric mixer fitted with the paddle attachment (you can also use a hand mixer). With the mixer on low-speed, add the garlic, shallot,prosciutto, parsley, lemon juice, Pernod, salt and pepper and mix until combined. With the mixer still on low, add the olive oil very slowly as though making a mayonnaise, until combined. Fold the panko bread crumbs in with a rubber spatula and set aside.

Place 1 tablespoon of the white wine in the bottom of each gratin dish. With a small, sharp knife, remove the white muscle and membrane from the side of each scallop and discard (many times this is already done with bay scallops, but if it’s not, you should do it). Pat the scallops dry with paper towels and distribute them evenly among the dishes. Spoon the garlic butter mixture over the top of the scallops. Bake for 10 to 12 minutes, until the topping is golden and sizzling and the scallops are barely done. If you want the top crustier, place the dishes under the broiler for 2 minutes, until they are browned to your liking. Finish the dish with a squeeze of fresh lemon juice and a sprinkling of chopped parsley over each dish and serve with crusty French bread.

Just a couple of things about this recipe. Since I was only making this for 3 of us, I cut the recipe in half and found that a pound of bay scallops was more than enough for 3 dishes. The recipe does call for a couple of items most people may not have on hand for cooking, but there are substitutions available. I do not have prosciutto on hand most times, so I simply fried a couple of pieces of bacon beforehand and crumbled them up to use in the dish. If you don’t have any white wine on hand or don’t like to cook with alcohol, don’t fret. I didn’t have any white wine either and just dotted the bottom of each dish with some extra-virgin olive oil. You could easily leave it out of the dish altogether. The same can be said of the Pernod, which is a particular brand of anise flavored liqueur. If you have anisette, ouzo or Sambuca, you can use them in the recipe instead if you really want the licorice-like flavor you get from them. I didn’t have any of them on hand, so I simply left it out and I don’t think it hurt the dish at all. One final thing about scallops in general – don’t overcook them. Scallops, whether sea scallops or bay scallops, need to be barely cooked cooked, just until they are opaque, otherwise it will feel like you are eating pencil erasers.

That’s all I have for today. Check back next time for some new recipes I have been trying, including a polenta pizza, a new chicken dish and a few other things I have planned. Until next time, enjoy the rest of your day and enjoy your meal!002

 
1 Comment

Posted by on June 29, 2013 in Cooking, Dinner, One Pot Meals, Seafood


Tags: , , ,

Fine Food for Father’s Day, Part 1 – Strip Steak with Brandied Mushrooms and Sweet Potatoes

Father’s Day dinner is always treat. Michelle and Sean get to do all the cooking and I get to pick out what I would like to have for dinner. I picked something simple this year since it was just the 3 of us. Michelle had picked up some New York strip steaks and we had some other things around the house that could make for a simple yet elegant meal. We thought about using the grill, but the weather was kind of iffy at the time we were eating dinner so we thought on the safe side we would just do it inside. The recipe for the steaks comes from Tyler Florence.

New York Strip Steak with Brandied Mushrooms and Fresh Thyme

4 New York strip steaks, each about 1 1/2 inches thick
Extra-virgin olive oil
Kosher salt and freshly ground black pepper
2 pounds mushrooms, trimmed, brushed clean with the towel and stemmed
Leaves from 2 sprigs fresh thyme
2 cloves garlic, chopped
1/4 cup brandy
1/2 cup heavy cream

Remove the steaks from the refrigerator and allow them to come to room temperature. Heat 2 tablespoons of oil in a large sauté pan over medium-high heat until smoking. Sprinkle the steaks all over with salt and pepper. Put the steaks in the pan and cook, turning to brown all sides completely, until medium-rare, about 8 to 10 minutes depending on how thick the steaks are. Remove the steaks to a platter with tongs and cover loosely with a tent of aluminum foil to keep the meat warm while you make the sauce.

Put the sauté pan back over medium-high heat and add 1/4 cup olive oil. When the oil is smoking, add the mushrooms and cook, stirring, about 10 minutes, until golden brown. Add the thyme and the garlic, and season well with salt and pepper. Toss a few more times to cook the garlic, then dump the mushrooms out onto a platter. Take the pan off the heat, add the brandy, return the pan to the heat, and cook until almost evaporated. Add the cream and cook that down to 2 to 3 minutes until reduced by about one half and thickened. Return the mushrooms to the pan with whatever juices have collected on the platter and simmer the entire thing another 2 minutes until thickened again. Season with salt and pepper. Slice the steaks thin against the grain. Taste the sauce for salt and pepper and serve.

I loved the mushrooms sauce that came with the steaks. The steaks were cooked perfectly and the sauce added just the right amount of flavor with the mushrooms and the brandy. We did not have to pounds of mushrooms on hand, so we actually ended up about halving the recipe and cut down the amount of olive oil used to about 2 tablespoons and cut the brandy down to about 1/8 of a cup and the heavy cream to about one-fourth.

Besides making some corn on the cob to go with the steaks, we also used a recipe from Bobby Flay of the Food Network for grilled sweet potatoes with lime and cilantro. Even though we didn’t actually grill the potatoes, I think they still came out pretty nicely for indoor cooking. It’s very easy to make this recipe and takes next in no time at all.

Grilled Sweet Potatoes with Lime and Cilantro

3 sweet potatoes, unpeeled
Kosher salt
2 teaspoons finely grated lime zest
Pinch of cayenne pepper
1/4 cup canola oil
Freshly ground pepper
1/4 cup finely chopped fresh cilantro

To par-cook the potatoes, place the potatoes in a large pot of water and boil until fork tender, about 8 minutes. Allow the potatoes to cool completely. Slice each potato lengthwise into eighths.

Preheat the grill to medium or place a cast-iron grill pan over medium heat. Mix 1 tablespoon of salt, the lime zest and the cayenne pepper in a small bowl and set aside.

Brush the potato wedges with the oil and season well with salt and pepper. Grill the potatoes until they are golden brown on all sides (including the skin) and just cooked through, about 1 1/2 to 2 minutes per side. Transfer the potatoes to a platter and immediately season with the salt mixture and sprinkle with cilantro.

We simply made the potatoes in the cast-iron pan instead of dragging the grill pan out and I think they turned out just as well. Par-cooking them is really necessary here because you want to make sure the potatoes are going to be cooked all the way through when you make them this way. If you just put them in raw, they are not going to be done in one to 2 minutes and will burn. I really liked the mixture of the lime and the salt with the cayenne pepper; it really help to bring out the flavor of the potatoes and I actually used some of the salt on my piece of corn on the cob as well.

That’s all there is for today. Next time I will post the recipe Michelle used to make banana cream pie for dessert for Father’s Day. I can tell you it was pretty darn good and I really enjoyed it. Check back for that one as well as some of the recipes that I have done recently and plan to post on the blog. Until next time, enjoy the rest of your day and enjoy your meal!002


Tags: , , , , , , ,

6 Food-Filled Ways to Celebrate Dad on Father’s Day | FN Dish – Food Network Blog

6 Food-Filled Ways to Celebrate Dad on Father’s Day | FN Dish – Food Network Blog.

There’s still time to get some great ideas of things to cook or do for Dad today for Father’s Day. Here’s some great ideas from Food Network about different things to do or recipes to try with Dad today. Check it out and I hope all the dads out there have a wonderful Father’s Day!

 
Leave a comment

Posted by on June 16, 2013 in Cooking, Cooking Tips, Cooking Websites


Tags: , , ,

 
National Day Calendar

Fun, unusual and forgotten designations on our calendar.

Jennifer Probst

a little bit naughty a little bit nice

Laissez Faire

Letting Life Lead

simple cooking recipes

a blog to share with you the best