RSS

Category Archives: Side Dishes

Pair Up the Pork – Glazed Pork Tenderloin with Pineapple-Scallion Chutney

When it comes to cooking pork, it seems to me the pork tenderloin is the forgotten son. Most people pay more attention to cooking pork chops or ribs and tend to overlook the greatness that the tenderloin can offer you. I find very often that pork tenderloin is on sale at one supermarket or another and since you get to in a package you can very often get a few meals at of just one purchase for about eight or nine dollars. Tenderloin is also very quick to cook so it makes an ideal choice for a weeknight meal when you may not have a lot of time to put into dinner. One thing I have noticed about pork tenderloin is that it does need some spice or seasoning to really jazz up the flavor. I had purchased pork tenderloin not that long ago and was looking for something different to do with it when I came across this recipe at Fine Cooking. The original recipe makes use of a pork loin, which is typically a little bit of a bigger and thicker roast and takes more time to cook but I did adapt it to the tenderloins that I had available and made it into a pretty tasty meal.

Glazed Pork Tenderloin with Pineapple-Scallion Chutney

2 large cloves garlic

Kosher salt

1 tablespoon extra-virgin olive oil

2 teaspoons finely grated lemon zest

1-1/2 teaspoons toasted coriander seeds, ground (or just ground coriander)

2 pork tenderloins, trimmed

1 medium fresh pineapple (about 3-1/2 lb.)

1/4 cup maple syrup, preferably grade B

2 tablespoons sherry vinegar

1 large shallot, minced

Pinch ground cayenne

1 large scallion, thinly sliced, white and green parts separated

3 tablespoons chopped fresh cilantro

Peel and coarsely chop the garlic. Sprinkle it with a generous pinch of salt and mash it to a paste with the side of a chef’s knife. Transfer the garlic to a small bowl and stir in the oil, lemon zest, coriander, and 1 tablespoon of salt.

Put the pork on a large rimmed baking sheet, pat it dry with paper towels, and rub the tenderloins all over with the salt mixture. Let the tenderloins sit at room temperature for at least 1 hour and up to 2 hours.

Position a rack in the center of the oven and heat the oven to 350°. Roast the pork until an instant-read thermometer inserted in the thickest part reads 130°F. Factor in about 20 minutes per pound of cooking time for the tenderloins to reach this temperature.

Meanwhile, peel and core the pineapple. Cut half of the pineapple into a small dice and roughly chop the other half. Purée the roughly chopped pineapple in a blender, then strain it through a fine strainer, pressing on the solids with a spoon, to yield about 3/4 cup of pineapple juice. In a small saucepan, combine the strained pineapple juice and maple syrup and cook over medium-high heat until the mixture is reduced to 1/3 cup, about 12 to 15 minutes. The liquid will become very bubbly as it reduces; lower the heat as necessary.

Set aside all but 2 tablespoons of the reduced liquid (this will be your glaze). Add the vinegar, shallot, cayenne, and a pinch of salt to the 2 tablespoons of liquid remaining in the saucepan and cook the mixture over medium heat just until the shallot begins to soften, about 2 to 3 minutes. Add the diced pineapple and scallion whites and continue to cook, stirring frequently, until the pineapple softens and releases some of its juice, about 3 to 5 minutes. Remove the chutney from the heat and let it cool slightly.

When the pork reaches 130°F, brush it with some of the glaze and continue to roast, brushing with more glaze every 5 minutes, until an instant-read thermometer inserted in the center of the roast reads 145°F, about 20 minutes more. Let the tenderloins rest for at least 10 minutes before serving.

When you are ready to serve, stir the scallion greens and cilantro into the chutney. Slice the pork into 1/2-inch-thick rounds and serve it with the chutney.

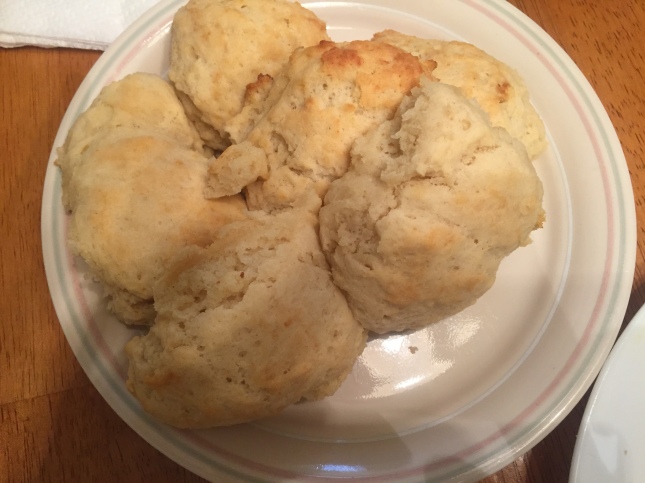
The recipe itself is pretty straightforward and you do want to keep a close eye on the tenderloins and the temperature to make sure that it is cooked all the way through. You may even want to sear the tenderloins on the stove top to get a little bit of color on them before you place them in the oven. I actually follow the recipe and glazed them every few minutes and then in the last two or three minutes of cooking placed them under the broiler to give them some extra color. The glaze has fantastic flavor with the combination of the maple syrup and pineapple and the chutney has a nice combination of heat and sweetness thanks to the cayenne pepper and the pineapple. The chutney makes quite a bit so you likely will have some left over (which I did) and then you can use it again as a side dish or other meals or even as a topping for chicken or hamburger. Overall it is a pretty quick meal that you can cook during the week that provide you with something different to do with pork. I served it with some plain white rice, steamed broccoli and homemade biscuits to complete the meal.

That’s all I have for today. Check back next time for another recipe. Until then, enjoy the rest of your day and enjoy your meal!


Leave a comment

Posted by on November 17, 2016 in Cooking, Dinner, Fruit, Pork, Side Dishes


Tags: , , , , , , ,

Bring on the Brussels Sprouts – Maple Roasted Brussels Sprouts

Brussels sprouts are one of those vegetables, like cauliflower and beets, that you either love or you hate. Some people just do not like the look or texture of them or the way that they smell when they are cooked. I, on the other hand, am a big fan of Brussels sprouts and love to make them just about any time of the year, though they seem particularly well suited for fall and winter meals. To me they are a great side dish for any dinner entrée and can be something different and special for your Thanksgiving meal this year. There are a number of different ways to cook them, but I find roasting them gives them the best flavor. It also gives you a chance to add something to them to have their flavor come out even better and get a fabulous green color when they are cooked. I found this recipe from Food & Wine not long ago for maple-roasted Brussels sprouts that sounded like a really tasty way to bring sprouts to the table.

Maple- Roasted Brussels Sprouts

1/4 cup canola oil

2 1/4 pounds baby Brussels sprouts or regular Brussels sprouts that are halved lengthwise

Salt and freshly ground pepper

1 stick (4 ounces) butter, cut into tablespoons and softened

2 tablespoons light brown sugar

1/4 cup Grade A pure maple syrup

1 1/2 tablespoons cider vinegar

1 cup vacuum-packed roasted chestnuts, coarsely chopped (6 ounces), optional

1 tablespoon walnut oil, optional

Heat the canola oil in a very large skillet until it is shimmering. Add the Brussels sprouts and season them with salt and pepper, then cook the sprouts over high heat without stirring until they are browned, about 2 to 3 minutes. Add the butter and brown sugar and cook the ingredients over moderately high heat, stirring occasionally, until the brown sugar is melted, about 1 to 2 minutes. Add the maple syrup and cook, stirring occasionally, until the Brussels sprouts are just crisp-tender, about 7 to 9 minutes. Stir in the apple cider vinegar. Add the chestnuts and walnut oil, if using, and cook until they are hot.

Using a slotted spoon, transfer the Brussels sprouts and chestnuts to a bowl. Boil the cooking liquid over high heat until it is thickened slightly, about 2 to 3 minutes. Pour the sauce over the Brussels sprouts and serve.

A couple of things about the original recipe. This recipe serves 10, so it is well-suited to use for Thanksgiving if you are having a lot of people over. For my purposes, I cut down the recipe significantly since they are only 3 of us for dinner. I cut everything in half and still had some leftovers. Also, the original recipe from Food & Wine doesn’t have the chestnuts and walnut oil as optional. While they might provide great crunch and flavor, I didn’t have either on hand and find both to be quite expensive for something that I would rarely use so I eliminated them and made them optional. If you love chestnuts and have walnut oil, I am sure they add to the dish but I think it was good without them. I loved the mix of the maple syrup and sprouts and the glaze created for the sprouts was fantastic. Make sure to use real maple syrup and not the pancake syrup (which isn’t really maple) to get the great taste. The Brussels sprouts were nicely browned and crisp and done just perfectly. It was the perfect side dish for the engagement chicken recipe I made the other day it was one I would make with turkey, poultry or pork.

That’s all I have for today. Check back next time for another recipe. Until then, enjoy the rest of your day and enjoy your meal!

sprouts

 
Leave a comment

Posted by on November 14, 2016 in Cooking, Dinner, Side Dishes, Vegetables


Tags: , , , ,

Our 20 Most Popular Thanksgiving Side Dishes – Recipes from NYT Cooking

It’s that time of year again – when people begin to think about Thanksgiving and what the meal will contain. It’s never too early to start planning out your menu and the more organized you can be the smoother the days leading up to and Turkey Day will be for you. A good place to start is to consider some of the side dishes that you will want to make for the day. New York Times Cooking has put together 20 of their most popular Thanksgiving side dishes so you can see some classic recipes or give something new a try this year. Check it out!

Source: Our 20 Most Popular Thanksgiving Side Dishes – Recipes from NYT Cooking


Tags: , , , , , ,

A New Take on a Takeout Classic – Chinese Fried Rice

Everyone always has their favorite dish when it comes to getting Chinese food. While some people will always defer to things like egg rolls, beef and broccoli, wonton soup, General Tso’s chicken or Mushu pork, there always seems to be one thing that is consistent with all Chinese food takeout orders – fried rice. The great thing about fried rice is that it goes so well with any of the entrées you might choose for takeout but it can also be an entrée all of its own. There are different varieties available from whatever place you normally get your Chinese food from but fried rice is easy enough where you can make something like this right at home to go with your favorite Asian meal or just to have as the centerpiece of your dinner. I have tried a few different fried rice recipes over the years and recently came across this one at Food.com that promise to have the taste and flavor just like you get from your favorite takeout place.

Chinese Fried Rice

3cup finely chopped onion

2 1tablespoons oil

1 egg, lightly beaten (or more eggs if you like)

3 drops soy sauce

3 drops sesame oil

8 ounces cooked lean boneless pork or 8 ounces chicken, chopped

1cup finely chopped carrot (very small)

1cup frozen peas, thawed

4 cups cold cooked rice, grains separated (preferably medium grain)

4 green onions, chopped

2 cups bean sprouts (optional)

2 tablespoons soy sauce(add more if you like)

Heat 1 tablespoon of the oil in a wok or large skillet over medium-high heat; add the chopped onions and stir-fry until the onions turn a nice brown color, about 8-10 minutes; remove the onions from the skillet.

Allow the skillet to cool slightly.

In a small bowl, mix the egg with 3 drops of soy sauce and 3 drops of sesame oil; set the bowl aside.

Add 1/2 tablespoon of the oil to the skillet, swirling to coat the surface; add the egg mixture. Working quickly, swirl the egg until the egg sets against the skillet. When the egg puffs, flip the egg and cook the other side briefly. Remove the egg from the skillet and chop the egg into small pieces. Set the egg aside.

Heat 1 tablespoon of the oil in the skillet. Add the selected meat to the skillet, along with the carrots, peas, and cooked onion. Stir-fry the ingredients for about 2 to 3 minutes.

Add the cooked rice, green onions, and bean sprouts (if using), tossing the ingredients to mix everything well and stir-fry for about 3 minutes.

Add 2 tablespoons of the soy sauce and the chopped egg to the rice mixture and fold them into the rice. Stir-fry everything together for 1 minute more and serve.

As is always the case with fried rice, you can use any type of protein you like with the dish – beef, pork, chicken, shrimp, tofu – or no meat at all and keep everything vegetarian. I did find that this recipe does seem to taste a lot like takeout rice. I am not sure if it is the amount of soy used or just the method, but the taste was really close for me. I served this with the chicken teriyaki I made and it complemented the meal perfectly, but as I said this fried dish could stand on its own as a meal if you want something easy one night and have some leftover protein and vegetables to deal with. I even threw in some leftover asparagus tips into the mix to top ours off.

That’s all I have for today. Check back next time for another recipe. Until then, enjoy the rest of your day and enjoy your meal!

img_0592


Tags: , , , , ,

How to Use Squash, from Frying to Dips | Bon Appetit

Fall weather is upon us and winter is not far behind and among the bounty of great vegetables available this time of year or all the different types of squash that you can get. The choices seem almost endless and if you are looking for some ideas of what you can do with the different types of squash out there Bon Appetit has 23 squash recipe ideas you can try out that are ideal for all different types of cooking and baking. Check it out!

Source: How to Use Squash, from Frying to Dips | Bon Appetit


Tags: , , , , ,

Quick, Easy and Delicious – You Can Make This Simple Crusty Bread

If you follow the blog regularly then you know that I write a lot about baking bread. For me, bread baking is a relaxing endeavor and I love the taste and smell of homemade bread more than anything you can buy from the supermarket. Of course, not everyone has time to put into making fresh loaves of bread all of the time. It can be a process and take several hours and a lot of people just feel like it is not worth the effort.But what if you could make fresh loaves of bread that were as easy as possible? Wouldn’t it be great if you could have fresh bread for the sandwich for work tomorrow or to go with your dinner tonight? It can happen if you make use of this recipe from Nick Fox from New York Times Cooking. The idea of the recipe comes from Jeff Hertzberg, a doctor from Minneapolis, who worked to streamline the bread-making process. Now you can have no fuss bread with just a little bit of effort on your part.

Simple Crusty Bread

1 ½ tablespoons yeast

1 ½ tablespoons kosher salt

6 ½ cups unbleached, all-purpose flour, more for dusting dough

Cornmeal

In a large bowl or plastic container, mix the yeast and the salt into 3 cups of lukewarm water (about 100 degrees). Stir in the flour, mixing the flour into the water mixture until there are no dry patches. The dough will be quite loose. Cover the bowl or container, but not with an airtight lid. Let the dough rise at room temperature for 2 hours (or up to 5 hours).

Bake the bread at this point or refrigerate the dough, covered, for as long as two weeks. When you are ready to bake, sprinkle a little flour on the dough and cut off a grapefruit-size piece with serrated knife. Turn the dough in your hands to lightly stretch the surface, creating a rounded top and a lumpy bottom. Put the dough on a pizza peel sprinkled with cornmeal; allow the dough to rest for about 40 minutes. Repeat the process with the remaining dough or refrigerate it.

Place broiler pan on the bottom of the oven. Place a baking stone on the middle rack and turn the oven to 450 degrees; heat the stone at that temperature for 20 minutes.

Dust the dough with flour, slash the top of the dough with a serrated or very sharp knife three times. Slide the dough onto the stone. Pour one cup of hot water into the broiler pan and shut the oven quickly to trap the steam. Bake the bread until it is well browned, about 30 minutes. Cool completely.

Okay, so you can’t make a fresh, homemade loaf bread in 30 minutes but once you have let the dough rise at room temperature and refrigerated it, the hard part is over. It then just becomes taking a portion, letting it rest for 40 minutes and cooking it. This recipe makes enough for 4 loaves of bread so you can get plenty of use out of it. The dough itself is rather sticky when you make it but it is still pretty easy to work with. You don’t have to go through all of the kneading and everything else to prepare it. Once you put it in the oven you can brown it to your liking and it is great for any meal, to use for toast, sandwiches or just to have fresh bread around when you want it. You can even bake all 4 loaves at once and freeze the excess until you want to use it so you always have fresh bread around. I have used this recipe several times to make quicker bread when I know we are having people over for dinner and I want some fresh bread for the meal. It is flavorful, crusty and has a great chew. The picture I took is of loaves that aren’t quite as browned as I normally like but they are still quite good.

That’s all I have for today. Check back next time for another recipe. Until then, enjoy the rest of your day and enjoy your meal!

img_0589

 
3 Comments

Posted by on October 26, 2016 in Breads, Dinner, Lunch, Side Dishes


Tags: , , , , ,

The 101 Recipes You Need to Know How to Cook | Bon Appetit

Every home cook has some basic recipes that they turn to all of the time for weeknight meals, special Sunday suppers or dinner parties. There are some classics and basic recipes that you learn along the way that you can always rely on when you want to turn out a great meal. Bon Appetit has put together 101 of the basic classic recipes, with everything from appetizers to desserts and everything in between so that you can have recipes to fall back on, learn and use when you want them. Check it out!

Source: The 101 Recipes You Need to Know How to Cook | Bon Appetit


Tags: , , , ,

Impressive Biscuits in a Hurry – Cook’s Country Buttermilk Drop Biscuits

We had something of an impromptu breakfast yesterday with Michelle’s parents and our nephew stopping over for a nice breakfast so we had to throw some things together in a hurry. There is always plenty of bacon, eggs and coffee in the house and ingredients to make pancakes, but I really like to have nice, warm biscuits to serve with breakfast as well. They are great just with butter, but also go well with jelly, or to put some egg or bacon on and make yourself a little sandwich. The usual recipe I have turned to for biscuits takes a bit of time and preparation, something I did not really have yesterday, but this recipe from Cook’s Country for buttermilk drop biscuits gives you the same great taste and flavor in much less time so you can put it together pretty quickly.

Buttermilk Drop Biscuits

2 cups all-purpose flour

2 teaspoons baking powder

1/2 teaspoon baking soda

1 teaspoon sugar

3/4 teaspoon salt

1 cup buttermilk, chilled

8 tablespoons butter, melted, plus 2 tablespoons butter

Adjust an oven rack to the middle position and pre-heat the oven to 475 degrees. Line an unrimmed baking sheet with parchment paper. Whisk together the flour, baking powder, baking soda, sugar and salt in a large bowl until the ingredients are well blended. Stir the buttermilk and melted butter together in a 2-cup liquid measuring cup until the butter begins to form clumps.

Add the buttermilk mixture to the flour mixture and stir with a rubber spatula until just incorporated. Using a greased 1/4-cup dry measuring cup, drop level scoops of the batter about 1 1/2 inches apart onto the prepared baking sheet. Bake the biscuits in the oven until the tops are golden brown, rotating the baking sheet halfway through the baking process, about 12 to 14 minutes.

Melt the remaining 2 tablespoons of butter and brush it on the biscuit tops. Transfer the biscuits to a wire rack to let cool for 5 minutes before serving.

This recipe makes about 12 biscuits. The difference in this recipe is that it uses hot fat (the melted butter) instead of the traditional cold fat you use with butter. With cold butter, as the butter melts it creates steam and helps to give you a flaky biscuit. When you stir the hot butter together with the cold buttermilk in this recipe, the butter will clump up in the milk, giving you the same type of texture you would get in a traditional recipe but with less work. The biscuits came out perfectly and were light and fluffy and had great flavor, making them ideal to go with breakfast. They will also be good to go along with any meal you like and you do not have to go through a lot of effort to make them. Even if you don’t have buttermilk on hand, you can always create your own by combining 1 cup of regular milk with a tablespoon of white vinegar or lemon juice and allowing it to stand for 5 minutes. You could also get dry buttermilk, which I use often as a stand-in for recipes, where you just need to add water to the powder to get buttermilk. In either case you can end up with great biscuits for breakfasts or to have with stews, soups, chicken, meat or just about any meal you like in just a few minutes.

That’s all I have for today. Check back next time for another recipe. Until then, enjoy the rest of your day and enjoy your meal!

img_0098

 
3 Comments

Posted by on October 10, 2016 in Breads, Breakfast, Dinner, Side Dishes


Tags: , , , , , ,

Kitchen Pantry Cooking Essentials – Key Ingredients and Recipes – Food.com

The key to good cooking and easy cooking is having some basics in your pantry all of the time. When you have the right ingredients around you can put together a meal in no time at all. Food.com has a list for you of the 50 most common cooking essentials you want in your pantry so you can do anything at any time. Check it out!

Source: Kitchen Pantry Cooking Essentials – Key Ingredients and Recipes – Food.com


Tags: , , , , , ,

The Best Biscuits! Believe It! Southern Style Biscuits

If you have spent any time on my blog you’ll see that there are a number of different biscuit recipes on here. I like to make biscuits because they can be good for so many things. They are great for breakfast to use as breakfast sandwiches with sausage, bacon, egg and cheese, They can fill in in a pinch for lunch if you want a small sandwich to tide you over and they are great with dinners to soak up gravy, dip in soup or just have to go along with a hearty meal. Needless to say we are biscuit lovers in this house, which means I am always interested when a recipe comes along. A while back I saw this recipe from Tasting Table for southern-style biscuits and they sounded very good. It is, by far, the best biscuit recipe I have tried to date and is certainly one you want to look into.

Southern-Style Biscuits

10 tablespoons butter, frozen

2 cups all-purpose flour

1 tablespoon baking powder

1 teaspoon sugar

¼ teaspoon baking soda

1 teaspoon kosher salt

¾ cup chilled buttermilk

¼ cup chilled heavy cream

Flaky salt, for sprinkling

Place a rack in the center of the oven and preheat the oven to 450 degrees.

Grate the frozen butter using the large side of a box grater. Transfer the butter to a bowl and place the bowl in the freezer to keep it chilled.

Sift the flour, baking powder, sugar and baking soda into a large bowl. Whisk in the salt. Using a fork, stir in the grated, chilled butter and then make a well in the center of the mixture. Add the buttermilk and cream and stir until the dough begins to clump and become shaggy.

Turn the dough onto a lightly floured work surface. Working quickly, gently press and fold the dough 4 to 5 times (try not to knead or squeeze the dough), then form it into a rectangle. Pat the dough down to a uniform thickness of about ¾ inch.

Using a 2½-inch biscuit cutter, press straight down through the dough, without twisting. Gather and pat down the scraps if needed to make more cuts. Place the biscuits on a parchment-lined baking sheet so that they are just touching and chill the biscuits in the fridge for about 20 minutes.

Sprinkle each biscuit with flaky salt and bake the biscuits until they are golden on top, about 12 to 15 minutes. Let the biscuits cool slightly before serving.

These biscuits never seem to last very long. I get about 10 to 12 biscuits out of the dough and I would say at least half are gone if we make them with dinner and by the next day they have all been used. You can make this dough ahead of time and cut the biscuits out and then freeze the dough to use the biscuits when you want them. You want to make sure all of the dairy you use in this recipe – the butter, buttermilk and cream – is all very cold as it is a key to making the biscuits come out as great as they do. Getting those solid pieces of butter in the dough to be there while the biscuits cook give great flavor to the final results. The biscuits are fluffy, moist and have just a that hint of crisp exterior that you will love. My family loves this recipe over any others I have made before and it is pretty much the only one I use now. The picture below shows the biscuits with some sausage gravy and eggs that we had one night as a breakfast for dinner, but I also regularly make them with anything that we are having gravy with – chicken, turkey, meatloaf, pot roast – or any time I make stew or soup. They are just plain delicious.

That’s all I have for today. Check back next time for another recipe. Until then, enjoy the rest of your day and enjoy your meal!

IMG_0480

 
6 Comments

Posted by on September 1, 2016 in Biscuits, Breakfast, Cooking, Dinner, Lunch, Side Dishes


Tags: , , , ,

 
National Day Calendar

Fun, unusual and forgotten designations on our calendar.

Jennifer Probst

a little bit naughty a little bit nice

Laissez Faire

Letting Life Lead

What To Have For Dinner Tonight

Simple and delicious dinner inspiration