RSS

Category Archives: Cooking

A Bounty of Bread to Enjoy with My Breadmaker – Homemade Rye Bread

Yesterday I wrote about the breadmaker that I received for Christmas and have been using pretty regularly since then. I have tried a few different recipes, including the basic white bread recipe that Sean and Michelle both use for their lunches and sandwiches. I prefer something a little different from just white bread, so I decided I was going to give the rye bread recipe a try. The one they list in the book for the breadmaker is pretty basic and simple so I decided to go along with that, but I also wanted to combine it with a recipe that I found at King Arthur Flour for a sandwich rye bread. The resulting recipe listed below is really just combination of the two recipes.


Basic Sandwich Rye Bread

1 1/2 cups water

4 1/4 cups bread flour

2/3 cup rye flour

2 tablespoons sugar

1 1/2 teaspoons salt

1 tablespoon Dijon mustard

2 tablespoons butter

2 teaspoons active dry yeast

1 tablespoon caraway seeds (optional)


To use with the Zojirushi breadmaker, measure and combine the ingredients into the baking pan in this order: water, bread flour, rye flour, sugar, salt, Dijon mustard and butter. Make a depression in the middle of the flour and place the yeast in the depression. Make sure the yeast does not touch any of the liquid. If the dry yeast contacts water the results from the breadmaker may not be ideal. Insert the baking pan into the unit and close the lid. To select the desired course, press the SELECT COURSE button to set the arrow to the BASIC WHEAT. Press the start button and allow the breadmaker to proceed through the cycles of preheating, kneading, rising and then baking. If you are using the caraway seeds, when it is time to add the ingredients such is the seeds, the breadmaker will beep for 30 seconds and ADD will flash in the display. Open the lid to the breadmaker and add the appropriate ingredients. Allow the machine to proceed through the baking cycle and carefully remove the baking pan when the machine has indicated that the baking process is complete. Remove the bread from the baking pan and allow it to cool.


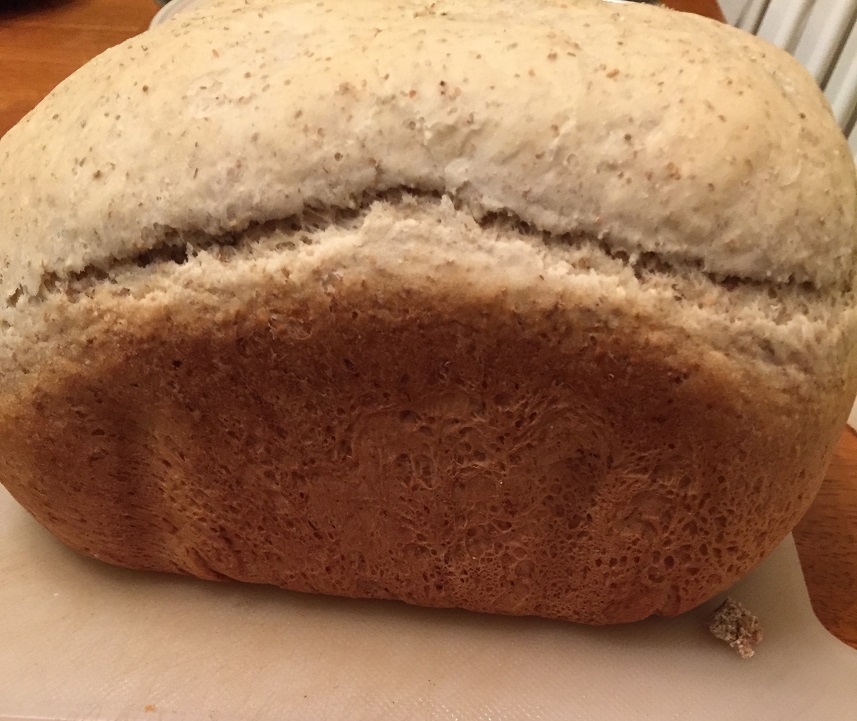
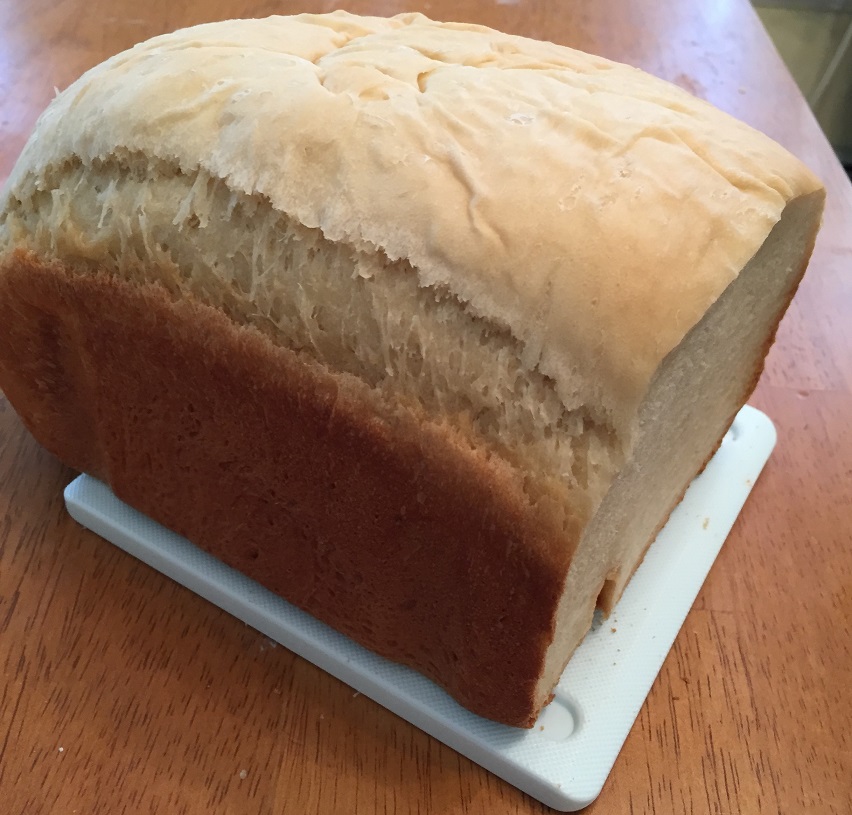
Granted, this particular recipe is designed for the specific Zojirushi breadmaker that I am using, but I think it could be adapted to fit with other breadmakers. The breadmaker takes 3 hours and 40 minutes to complete everything for this particular recipe. In the end, the result of the recipe was very tasty. The bread had a nice crust and crunch to it on the outside while the inner layer of the bread was done perfectly. I used this for my sandwiches pretty much all week long and have made it again since that initial recipe because I like the result so much. It certainly does provide a savings considering what the cost of a typical rye bread is here at the local stores. One loaf seem to last for me about 7 to 10 days so I think we certainly got a lot out of it. I did not add the caraway seeds to mine though I do like to have rye bread that way on occasion and I am sure it would taste just fine. I enjoyed the bread with chicken salad and tuna salad but anything you want to use the bread for would be perfect. You could also adapt this recipe to make it without a breadmaker. If you are interested in that particular method, here is the link to the original recipe at King Arthur Flour.

That’s all I have for today. Check back next time for another recipe. Until then, enjoy the rest of your day and enjoy your meal!

ryebread


8 Comments

Posted by on February 5, 2015 in Breads, Cooking, Lunch, Sandwiches


Tags: , , , , , , ,

Zounds Fantazztic! My Review of the Zojirushi Home Bakery Supreme Breadmaker

I am finally getting around to finding some time to blog about some of the things that I got as gifts this past holiday season. I know it might seem a little late for something like that, but one of the things I received is a breadmaker. The breadmaker is something that I have talked about getting for a long time since we do seem to go through quite a bit of bread in this house and I do not know about where you live, but here the price of bread can get quite expensive. Even just for a regular loaf of rye bread it can cost over $3. I came to the conclusion that I could make a good quality bread right at home on my own for less money, but if I had to spend all of the time doing all the work it would really cut into my day and maybe it would not be worth it. That is why the breadmaker seemed like a good investment. I looked around at various models before I finally decided to add to my Amazon wish list the Zojirushi breadmaker. I really like the model that had the ability to make a larger loaf of bread and a more traditional horizontal loaf, unlike other makers that make a vertical loaf with a big hole in where the kneading takes place. That is why I chose the model that I got and here is my quick review of what it has to offer.

The Zojirushi BB-CEC20 model has everything I could hope for in a bread machine. To start off with, it was packed better than most any other small appliance that I have ever come across. There were all kinds of protection for the machine on top, around and on the bottom of the box. The machine is quite heavy itself so I needed to be careful with it when I took it out of the box and decided to place it on the butcher block kitchen cart that we have as its best location. The breadmaker comes with an instructional DVD that takes you through the basics of how to use the machine, all of its parts, how to set it up properly and a couple of the basic recipes. The DVD is pretty short and does not really provide you with that much more information than what you would get out of just reading the operating instructions book that comes with it. The operation instructions cover everything that you would need to know and give you several different recipes that you can use for all kinds of basic breads. It covers everything from white bread, rye bread, whole wheat bread, cinnamon raisin bread and more. It also gives recipes for some basic dough so that you can make pizza dough, pretzels, rolls, croissants or other types of bread that you want to form into different shapes such as baguettes, ciabatta and the like. You could also do some basic pound cake recipes or quick breads like banana bread or zucchini bread. There are even recipes for sourdough starters and a homemade course cycle which allows you to program each of the cycles to adapt better to your particular bread recipes.


Now on to the basics of the machine itself. I really liked how simple it is to put everything together and the baking pan that is inside the machine has a nice nonstick coating on the inside to help you easily remove breads that you have baked or even doughs that have just been kneaded. The machine also comes with a 1 cup measure and a tablespoon/teaspoon for you to use for your measurements. The actual use of the machine could not be much easier than it is. I started off with the first recipe that I tried using the basic white bread recipe that comes in the manual. The basic white bread recipe is also posted right on the side of the machine so you do not always have to have access to the manual if you just wanted to make a simple sandwich bread. All you needed to do was put the ingredients right in, although they do need to be placed in a specific order in order to guarantee proper mixing and rising (water, flour, sugar, salt, dry milk, butter and then yeast in the center of the flour). I then plugged the machine in, and you get your choice of choosing not just what type of course you would like to make, whether it is a basic bread or a quick bread (you can use rapid rise yeast for the quick cycle) but you can also choose what type of crusty want for your bread, choosing light, medium or dark. Once you have selected that it is just a matter of pressing the start button and letting machine do its thing. The basic white bread recipe takes 3 hours and 45 minutes to do all the mixing, kneading, rising and baking. Once the bread is complete the machine beeps to let you know that it is finished. You can just pop open the lid and take the baking pan out, though you want to remember to use oven mitts while you are removing the baking pan as it will be quite hot. Because the baking pan is nonstick you do not have to struggle to try to get the loaf out of the pan. I also like the fact that the kneading paddles are small so it does not leave a giant hole in the bottom of your loaf of bread from where the dough was resting. The kneading paddles are also very sturdy and do a great job throughout the process. The final product was excellent and even though I am not a big fan of plain white bread, I have to admit that the bread came out quite nice and had a really good crunch to it. We have made several loaves of white bread since the Christmas holiday and Sean takes some for a sandwich for lunch just about every day to school. I would definitely recommend this particular breadmaker over the others that you find on the market today. Though the price can be a lot more, with this model costing nearly $250, it is certainly worth the investment and will pay for itself over the long-term if you use it regularly. Zojirushi also has a number of recipes posted right on their website that are not in the manual that you can try out. I have included a couple of pictures of the machine along with a picture of some of the white bread that we made recently. Tomorrow I will post the rye bread recipe that I used to make some tasty rye bread.


That’s all I have for today. Check back next time for another recipe. Until then, enjoy the rest of your day and enjoy your meal!

breadmaker3 basicwhitebread breadmaker1 breadmaker2


3 Comments

Posted by on February 4, 2015 in Breads, Cooking, Cooking Websites, Equipment


Tags: , , ,

It’s No Pretzel From a Shopping Cart, But they are Close – Homemade Pretzel Bites

One of my favorite snacks since I was a kid has always been the hot pretzels we used to get of the streets of New York City or when we went to the ballpark. I can remember going to Shea Stadium and getting a hot pretzel that was made over hot coals in the shopping cart from one of the vendors outside of the stadium. Sure they were a little bit burnt but the smell and the flavor is something that stayed with me and I really enjoyed it. I have made pretzels at home before and while they have not been able to replicate that shopping cart experience, they have been pretty good. With the Super Bowl this past weekend, I was looking for a snack that we could make that would go well with the game and I came across this recipe at King Arthur Flour for a very simple pretzel bite that takes no time at all to put together. I actually did most of the work in my new bread machine, which I will write more about tomorrow and in the coming days with recipes that I have tried in there.


Homemade Pretzel Bites

2 1/2 cups all-purpose flour

1 teaspoon salt

1 teaspoon sugar

2 1/4 teaspoons instant yeast

7/8 to 1 cup warm water

1 cup boiling water

2 tablespoons baking soda

Coarse, kosher or pretzel salt

6 tablespoons butter, melted

To make the dough by hand, or with a mixer: Place the all-purpose flour, salt, sugar, yeast and warm water into a bowl, and beat until the ingredients are well combined. Knead the dough, by hand or machine, for about 5 minutes, until it is soft, smooth, and quite slack. Flour the dough in place it in a bag and allow the dough to rest for 30 minutes.

To make the dough with a bread machine, place the all-purpose flour, salt, sugar, yeast, and warm water into the pan of your bread machine. Program the machine for a basic dough and press Start. Allow the dough to proceed through its kneading cycle (there is no need to allow the dough to rise), then cancel the machine, flour the dough, and give it a rest in a plastic bag, as instructed above, for 30 minutes.

While the dough is resting, prepare the topping. Combine the boiling water and baking soda, stirring until the baking soda is totally or almost totally dissolved. Set the mixture aside to cool until it is lukewarm. Preheat the oven to 400°. Prepare a baking sheet by spraying it with vegetable oil or nonstick cooking spray, or by lining the pan with parchment paper.

Transfer the pretzel dough to a lightly greased work surface, and divide it into 6 equal pieces. Roll the 6 pieces of dough into 12 inch to 15 inch long ropes. Cut each rope crosswise into about 12 pieces. Pour the cooled baking soda solution into a pan large enough to hold the pretzel bite dough pieces. Place the bites into the solution, gently swish them around, and leave them there for about 2 to 3 minutes. Transfer the bites to the greased or parchment lined baking sheet, and topped them with pretzel salt, coarse salt or kosher salt. Bake the bites in the oven for 12 to 15 minutes, until they are golden brown. Remove the bites from the oven, and roll them in melted butter. Place the pretzel bites on a rack to cool slightly. If you are not going to eat them immediately store them in an airtight container until you are ready to serve them.


The process was really easy using the bread machine, but it does not seem like it would be much harder if you did this by hand or with a mixer. The pretzels turned out perfectly with a really nice chew to them and they had that golden crunchy outside that you like to have in a pretzel. You could easily leave off the salt if you did not want them salted or substitute something like cinnamon-sugar or just plain sugar if you prefer to have a sweeter pretzel. The total time did not take that long, only a little bit more than an hour or so, so you can put these together for just about any type of occasion, party, buffet or snack that you might feel like having. I know I will be making them again pretty soon.


That’s all I have for today. Check back next time for another recipe. Until then, enjoy the rest of your day, and enjoy your meal!

pretzelbites

 
2 Comments

Posted by on February 2, 2015 in Breads, Cooking, Picnic Fare, Snacks


Tags: , , , , , ,

Our 7 Best Chicken Wing Recipes Slideshow – Bon Appétit

Our 7 Best Chicken Wing Recipes Slideshow – Bon Appétit.

Okay, there’s still time for you to get in recipes for the big game tonight. everyone wants some type of chicken wings for game day, and Bon Appetit has 7 great chicken wing recipes to suit all of your tastes with the favorite snack for watching sports. Check it out!

I’ll be back tomorrow and starting up with some more of my own recipes I have tried, I promise!


Tags: , , , , , , ,

21 Sandwiches for Your Game Day Spread | Serious Eats

21 Sandwiches for Your Game Day Spread | Serious Eats.

I have been really busy work and stuff around the house this week with Michelle leaving on a business trip so I haven’t had much time for blogging the last few days. I should be able to get back into a rhythm next week, but for now here are some more great Super bowl party ideas. If you are looking to try some great sandwiches for the big game, Serious Eats has put together 21 sandwich recipes to wow your crowd. Try them on game day or any time, because a good sandwich is always a great option. Check it out!


Tags: , , , , ,

A Week of Side Dishes, Part Two – Creamed Spinach

Okay, I know not everyone likes spinach and maybe you have tried to avoid it like the plague since you were a kid, but in my opinion I would much rather have spinach as a vegetable than a side of kale. I know it seems sacrilegious to say that about kale today since it is a “super food” and all, but there is just something about kale that I makes me rather have something else – like spinach. Surprisingly, we never had a problem getting Sean to eat spinach either and it ranks among the family favorites in vegetables. Besides, you can do a lot of things with it besides just steaming it. It is great raw in a salad or on sandwiches instead of lettuce and of course, one of the favorites around the holidays is always creamed spinach, which is the recipe I am posting today. I actually made this right around the holidays and forgot to post about it, but here it is today and it is easy enough where you can really make this any time of the year. This particular recipe comes from the Food Network’s Sunny Anderson and comes together pretty quickly in the oven and makes use of frozen spinach.

Creamed Spinach

4 tablespoons butter, plus more for the pan

1/2 red onion, chopped

Kosher salt and freshly ground black pepper

2 cloves garlic, minced

2 teaspoons red chili flakes

1 3/4 cups heavy cream

1 cup shredded Parmesan cheese

1 teaspoon ground nutmeg

1/2 cup sour cream

2 (10-ounce) packages frozen chopped spinach, thawed and squeezed dry

1/2 cup packaged fried onions

Preheat the oven to 375 degrees. Butter and 8 by 8-inch baking dish. Melt the butter in a large skillet set over medium-high heat. Add the chopped red onion and a pinch of salt. Saute the onion for about 3 minutes, then add the minced garlic and the red chili flakes and saute the mixture for 2 minutes more. Add the heavy cream, Parmesan cheese and the nutmeg. heat the mixture until the cream is just beginning to bubble, stirring often, about 3 to 4 minutes. Turn the burner off and stir in the sour cream and the spinach. Adjust the seasoning with salt and pepper as needed to taste. Pour the mixture into the prepared baking dish and sprinkle the top evenly with the fried onions. Bake the spinach until the top is golden and bubbly, about 15 to 20 minutes.

Granted this may not be the healthiest version of eating spinach out there but it does taste pretty good. It does seem a lot like the typical green bean casserole that you might also find around the holidays and the flavors will remind you of that. One thing you want to remember is to make sure to thaw and dry the frozen spinach as much as you can to get as much liquid out as possible otherwise you will end up with a very runny dish. I did leave out the red chili flakes in my recipe but if you like a little added heat to your dish you should put it in. You end up with a very creamy, tasty side dish that goes really well with just about any type of beef, poultry and pork meal. this also works well if you need to bring a side dish to a party or buffet dinner. Unfortunately, this is also one of those dishes that I neglected to take a picture of so I don’t have one to share with you as to how it came out. Sorry about that. I am trying better, I promise.

That’s all I have for today. Check back next time for another recipe. Until then, enjoy the rest of your day and enjoy your meal!

 
Leave a comment

Posted by on January 27, 2015 in Cooking, Dinner, Holidays, Side Dishes, Vegetables


Tags: , , , , , ,

A week of Side Dishes, Part One – Roasted Asparagus with Balsamic Glaze and Lemon Zest

As the snow starts to fall here as we get pummeled with the 1st blizzard of 2015 in my area of New York, I have been going through some of the recipes of things I have made lately and I realize I have a lot of side dishes that I have done recipes for that I have not posted on here yet. So I decided for this week I will post a different side recipe each day to give you some ideas of different things that you can try with your main dishes. The first one, from Williams-Sonoma, is for a roasted asparagus with balsamic glaze and lemon zest. Asparagus is one of our favorite vegetables around here so we do try to make use of it quite often and I have found that roasting it is one of my favorite ways to make it. The great thing about asparagus is that you can use it in a bunch of different ways and for several different kinds of meals. This one in particular can go pretty well with just about anything and is really simple to make any night of the week.


Roasted Asparagus with Balsamic Glaze and Lemon Zest

20 to 25 asparagus spears, tough ends removed

1/3 cup balsamic vinegar

1 tablespoon olive oil

1/2 teaspoon salt

1/2 teaspoon freshly ground black pepper

2 teaspoons grated lemon zest

Preheat the oven to 450°. Spread the asparagus in a baking dish large enough to hold them in a single layer. Drizzle the asparagus with the balsamic vinegar and the olive oil, and sprinkle them with salt and pepper. Turn the asparagus spears several times to make sure they are all coated evenly. Roast the asparagus for 10 minutes, turning them from time to time. Remove the asparagus from the oven, sprinkle the asparagus with the lemon zest and turn the spears several times. Return the asparagus to the oven and continue to roasted until the spears are crisp-tender and the color has darkened slightly, about 5 to 7 minutes more. Transfer the asparagus to a platter and serve immediately. Or, let the asparagus cool, then cover with aluminum foil and allow it to stand at room temperature for up to one hour before serving.


I find that when you roast asparagus it really brings out the great flavor of the vegetable and with this recipe the balsamic vinegar in the lemon zest really add some extra punch to the dish. I think this side dish goes really well with just about any type of beef that you might serve, but it also would work great with poultry, pork or fish. Many people often serve asparagus as part of an appetizer before the meal if you are serving a more elegant dinner or even serve asparagus as part of a brunch, and this recipe could work well for either situation. 25 asparagus spears might sound like a lot, but it really does not go very far and this recipe is perfect for 3 or 4 people. We did not even have any leftovers when I served this one myself. You can serve the asparagus warm right out of the oven or let it cool to room temperature, which is the way a lot of people like it. Personally I prefer it hot but it tastes great either way.


That’s all I have for today. Check back next time for another recipe. Until then, enjoy the rest of your day, stay warm and out of the snow, and enjoy your meal!

roastedasparagus


Tags: , , , , ,

Super Bowl Food Ideas and Party Recipes – Bon Appetit

Super Bowl Food Ideas and Party Recipes – Bon Appetit.

As we deal with a snowstorm here in my area of New York and then a family party later today,  you can have a chance to look over some more great Super Bowl snack, appetizers and recipes for your party, to bring to a party or just to have for your own while you watch the game. Bon Appetit has all kinds of great ideas for your Super Bowl party guide for all of your favorite game-time snacks. Check it out!


Tags: , , , , , , ,

Great Sandwiches for Dinner, Game Time or Any Time – Pork Meatball Banh Mi

Regular followers of the blog already know how much I love sandwiches. I think could be happy having a sandwich for dinner just about every day of the week, as long as it was something different all of the time. I have looked at making Banh Mi sandwiches for a while but I have always kind of shied away from mom because I was worried that Sean and Michelle would not really care for them because of the spice that is in most of the recipes. However, when I saw this particular recipe for a pork meatball bánh mì from Bon Appétit, I decided to bite the bullet and give the recipe a try. This particular recipe does use a lot of ingredients that I do not normally have on hand so I did have to get a few things, such as daikon, a Japanese white radish. You may have to go out and get a couple of different ingredients if you want to make this particular version, but it is certainly worth the results.


Pork Meatball Banh Mi

For the Hot Chili Mayo:

2/3 cup mayonnaise

2 green onions, finely chopped

1 tablespoon hot chili sauce (such as sriracha)

For the Meatballs:

1 pound ground pork

1/4 cup finely chopped fresh basil

4 garlic cloves, minced

3 green onions, finely chopped

1 tablespoon fish sauce

1 tablespoon hot chili sauce

1 tablespoon sugar

2 teaspoons cornstarch

1 teaspoon freshly ground black pepper

1 teaspoon coarse kosher salt

To Assemble the Sandwiches:

2 cups coarsely grated carrots

2 cups coarsely grated peeled daikon (Japanese white radish)

1/4 cup unseasoned rice vinegar

1/4 cup sugar

1 teaspoon coarse kosher salt

1 tablespoon sesame oil

4 10-inch-long individual baguettes or for 10-inch-long pieces French bread baguette (cut from 2 baguettes)

Thinly sliced jalapeno peppers

Fresh cilantro sprigs

To make the hot chili mayo, stir the mayonnaise, chopped green onions, and hot chili sauce together in a small bowl. Season the mix with salt to taste. The hot chili mayo can be made 1 day ahead and kept covered and chill in the refrigerator.

To make the meatballs, line a rimmed baking sheet with plastic wrap. Gently mix the ground pork, basil, garlic, green onions, fish sauce, hot chili sauce, sugar, cornstarch, black pepper and kosher salt in a large bowl. Using moistened hands and a scant tablespoonful for each, roll the meat mixture into 1-inch meatballs. Arrange the meatballs on a baking sheet. Cover and chill the meatballs until you are ready to bake.

To create the ingredients for the sandwiches, toss the grated carrots, daikon, rice vinegar, sugar and salt in a medium bowl. Allow the mixture to stand at room temperature for one hour, tossing occasionally. Preheat the oven to 300°. Heat the sesame oil in a large skillet set over medium-high heat. Add half of the meatballs. Sauté the meatballs until they are browned and cooked through, turning the meatballs often and lowering the heat if they are browning too quickly, about 15 minutes. Transfer the meatballs to another rimmed baking sheet and place them in the oven. Repeat the process with the remaining meatballs.

Cut each baguette or baguette piece horizontally in half. Pull out enough bread from each bread half to leave a 1/2-inch-thick shell. Spread some of the hot chili mayo over each bread shell. Arrange the jalapenos, then cilantro, in the bottom halves of the bread shells. Fill each sandwich with 1/4 of the meatballs. Drain the pickled vegetables and place them atop the meatballs. Press on the baguette tops and serve.


The combination of the spicy mayonnaise, the pickled vegetables and the pork meatballs really make this an outstanding sandwich. Sean had the meatballs without the spicy mayo and he really like the flavor of them, comparing it to a nice piece of sausage on a baguette. I really love the way the mayo combined with the meatballs to give a nice spicy flavor and the pickled vegetables just topped it all off for me. The pickled vegetables are a lot like a coleslaw recipe, so you could use coleslaw instead if you prefer that, but using the daikon gives a little bit of heat to the vegetables. I even used the leftover mayonnaise on other sandwiches throughout the week because I like the way it turned out. I think it would be great on a hamburger, which I did not get to try but I think I will next time. Anyway, this was a fairly simple bánh mì to make that had some nice spice to it and some really great flavor.


That’s all I have for today. Check back next time for another recipe. Until then, enjoy the rest of your day and enjoy your meal!

porkmeatballs porkmeatballbanhmi


Leave a comment

Posted by on January 23, 2015 in Cooking, Dinner, Lunch, Pork, Sandwiches, Sauce, Vegetables


Tags: , , , , , , , ,

Super Bowl Appetizers and Snacks : Football Recipes : Cooking Channel

Super Bowl Appetizers and Snacks : Football Recipes : Cooking Channel.

the big game is coming up soon and you want to get ready for your party or game day with lots of great snacks, finger foods and appetizers for the game. Cooking Channel has put together 34 great appetizer recipes that you can use for anyone and everyone at your game day party. Check it out!

 
Leave a comment

Posted by on January 22, 2015 in Appetizers, Cooking, Cooking Websites, Snacks


Tags: , , , , ,

 
National Day Calendar

Fun, unusual and forgotten designations on our calendar.

Jennifer Probst

a little bit naughty a little bit nice

Laissez Faire

Letting Life Lead

simple cooking recipes

a blog to share with you the best