RSS

Category Archives: Dinner

Another Soup (Sans Picture) – French Onion Soup

It really bothers me now when I make something and forget to take a picture of it. It doesn’t happen nearly as often as it did when I first started the  blog, but it still happens on occasion. It’s easy when you caught up in cooking and trying to get the meal on the table and you’re talking about homework, what happened at school, work or anything else going on and sometimes by the time I remember there is nothing left to take a picture of. Such is the case when I made French onion soup not that long ago. French onion soup is a personal favorite of Michelle’s and there are lots of recipes out there for it, but this one from America’s Test Kitchen is our personal favorite. It takes longer to cook, but it is so worth it to get the deep, rich onion flavor that you get from cooking the onions this way.

French Onion Soup

3 tablespoons butter, cut into 3 pieces
6 large yellow onions (about 4 pounds), halved and cut pole to pole into 1/4-inch-thick slices 
Table salt
2 cups water, plus extra for deglazing
1/2 cup dry sherry
4 cups chicken broth 
2 cups beef broth
6 sprigs fresh thyme, tied with kitchen twine
1 bay leaf
Ground black pepper
1 small baguette, cut into 1/2-inch slices
8 ounces shredded Gruyère cheese (about 2 1/2 cups)
Adjust an oven rack to the lower-middle position and heat the oven to 400 degrees. Generously spray the inside of a heavy-bottomed large (at least 7-quart) Dutch oven with nonstick cooking spray. Place the butter in the pot and add the onions and 1 teaspoon of salt. Cook, covered, for 1 hour (the onions will be moist and slightly reduced in volume). Remove the pot from the oven and stir the onions, scraping the bottom and sides of the pot. Return the pot to the oven with the lid slightly ajar and continue to cook until the onions are very soft and golden brown, about 1 1/2 to 1 3/4 hours longer, stirring the onions and scraping the bottom and sides of the pot after 1 hour.
 Carefully remove the pot from the oven and place it over medium-high heat. Using oven mitts to handle the pot, cook the onions, stirring frequently and scraping the bottom and the sides of pot, until the liquid evaporates and the onions brown, about 15 to 20 minutes, reducing the heat to medium if the onions are browning too quickly. Continue to cook, stirring frequently, until the pot bottom is coated with dark crust, about 6 to 8 minutes, adjusting the heat as necessary. Scrape any fond that collects on the spoon back into the onions. Stir in 1/4 cup water, scraping the pot bottom to loosen the crust, and cook until the water evaporates and the pot bottom has formed another dark crust, about 6 to 8 minutes. Repeat the process of deglazing 2 or 3 more times, until the onions are very dark brown. Stir in the sherry and cook, stirring frequently, until the sherry evaporates, about 5 minutes.
Stir in  the chicken and beef broths, 2 cups of water, thyme, bay leaf, and 1/2 teaspoon of salt, scraping up any final bits of browned crust on the bottom and sides of the pot. Increase the heat to high and bring the mixture to simmer. Reduce the heat to low, cover, and simmer for 30 minutes. Remove and discard the herbs, then season with salt and pepper.
 While the soup simmers, arrange the baguette slices in a single layer on a baking sheet and bake in a 400-degree oven until the bread is dry, crisp, and golden at the edges, about 10 minutes. Set the bread aside.
To serve, adjust an oven rack 6 inches from the broiler element and heat the broiler. Set individual broiler-safe crocks on a baking sheet and fill each with about 1 3/4 cups of soup. Top each bowl with 1 or 2 baguette slices (do not overlap slices) and sprinkle evenly with the Gruyère cheese. Broil the soup until the cheese is melted and bubbly around the edges, about 3 to 5 minutes. Let the soup cool  for 5 minutes before serving.
Admittedly, making the onions this way is a much longer process than some other recipes but I think the flavor you get out of them is worth it. I have had French onion soup before where you can tell the onions were not cooked long enough and taste bitter. That won’t happen with this recipe. You want to make sure that the crocks you use are safe for the broiler to avoid any broken glass in the oven. You could also do all of this in advance if you want to use the soup for a dinner party. The soup will actually have better flavor if it sits for a day or two. You then just need to put it in the crocks under the broiler with the bread and cheese to finish it off. I used homemade broth in mine because I had some around, but if you want to use store-bought it will work just as well here. The flavor for this one is coming mostly from the onions.
That’s all I have for today. Check back next time for another recipe, and I promise to have a picture of it for sure. Until then, enjoy the rest of your day and enjoy your meal!


Tags: , , , ,

Leftover to Warm Your Heart (and Stomach) – Turkey Rice Soup

The weather keeps fluctuating around here from unseasonably warm to bitter cold and then back again. It’s amazing that we haven’t all come down with lots of colds yet this winter and the weather really does seem to affect the way I want to cook. On a nice day you feel like having something like ribs or burgers or some chicken and then on the cold days we want soups and stews. Luckily, I try to cook larger meals with the intent that we will get many meals out of the leftovers. Such is the case when I made some turkey recently and then made stock with the leftover carcass and we used the leftover meat to make some nice turkey rice soup. The rice adds a nice heartiness to the dish and you can use all your leftovers or frozen vegetables to help flavor the soup and make the cooking even easier than ever.

Turkey Rice Soup

2 tablespoons olive oil
1 onion, chopped
1 leek, white and light green parts halved lengthwise, sliced thin crosswise
2 celery ribs, chopped
1 pound cooked turkey meat, white and dark meat, chopped
6 cups turkey or chicken broth
2 sprigs fresh thyme
2 bay leaves
2 carrots, peeled, quartered lengthwise, and sliced ¼ inch thick
1/2 cup white rice
Salt and pepper
1 cup frozen peas
2 tablespoons minced fresh parsley

 Heat 1 tablespoon of the olive oil in a Dutch oven over medium-high heat until shimmering. Add the onion leeks carrots and celery and cook until just beginning to brown, about 5 minutes. Add the turkey meat and heat the meat through until it is beginning to brown, about 1 to 2 minutes. Remove the contents from the Dutch oven to a separate bowl and set it aside.
Wipe out the now-empty Dutch oven with paper towels and heat the remaining 1 tablespoon of olive oil over medium-high heat until shimmering. Add the white rice and cook, stirring frequently, until the edges of the rice become translucent, about 2 minutes.Add the turkey mixture back to the Dutch oven and heat through for about 1 minute. Add the turkey or chicken broth and 1 teaspoon of salt and bring the mixture to a boil. Reduce the heat to medium-low add the thyme and bay leaves and simmer, covered, stirring occasionally, until the rice is tender, about 12 to 14 minutes. Stir in the frozen peas and cook until they are heated through, about 5 minutes. Stir in parsley and season with salt and pepper to taste. Serve.
You can just as easily do this with leftover chicken instead of turkey or even with a rotisserie chicken that you can pick up at the store to save you some effort. The great thing about using a rotisserie chicken is that you can then use that carcass to make your own stock and get the great flavor from that. It doesn’t even have to cook all day; you really only need to add some onion, celery and carrot with the carcass and a bay leaf and let it cook for about 30 minutes and you can have flavorful stock. Other leftover veggies will work in this soup as well if you want and I added some leftover green beans we had. Sauteing the rice briefly does make a difference here as it helps to keep the rice firm by firming the starches before you add the liquid so the rice will not bloat. it makes for a great quick dinner you can do any night of the week and get good flavor from your leftovers.
That’s all I have for today. Check back next time for another new recipe. There’s still lots of good stuff to come, including a lamb recipe, a quick turkey breast recipe, baked ziti, a couple of different wings to try, skillet pizza and more. until next time, enjoy the rest of your day and enjoy your meal!
001


Tags: , , , ,

Just Because It’s Winter Doesn’t Mean You Can’t Have Great Spare Ribs

I love spare ribs no matter what time of year it may happen to be and for me living in a condo, I can’t really do any grilling of ribs anyway so I turn to making them in the oven to get the best results. i have a standard recipe that I have used often but I was looking for something a little different this time to maybe get a  different flavor. I came across this recipe from theKitchn, a blog that I check out often. They offered up a very simple recipe for cooking great ribs indoors any time of year with a nice smoky flavor and a little zip to them.

Oven Baked Spare Ribs

4 to 5 pounds pork spare ribs or baby back ribs

1/4 cup Dijon mustard

2 teaspoons liquid smoke

1 cup dry spice rub

1 cup barbecue sauce, store-bought or homemade

Line a baking sheet with aluminum foil and set a rack on top of the foil on the baking sheet. Lay the ribs on top of the rack in a single layer. This will allow for the heat to better circulate on all sides of the ribs so they cook evenly.

Mix the Dijon mustard and the liquid smoke in a small bowl and brush the mixture on both sides of the ribs. Sprinkle the ribs with the dry rub and pat the ribs gently to make sure the rub adheres well to the rib meat. For an even deeper flavor, try doing this step a day ahead of time and wrapping the ribs in plastic wrap and refrigerate them until the next day.

Heat the broiler and place an oven rack a few inches right below the broiler heating element. Make the meaty side of the ribs is facing up. Broil the ribs for about 5 minutes, until the sugar in the dry rub is bubbling and the ribs are evenly browned.

Heat he oven to 300 degrees. Move the ribs to an oven rack set in the middle position of the oven. Roast the ribs for 2 1/2 to 3 hours for spare ribs or 1 1/2 to 2 hours for baby back ribs. Halfway through the cooking process, cover the ribs with aluminum foil to protect them from drying out.

Remove the foil from the ribs and brush the ribs with barbecue sauce. Place the ribs back in the oven and continue to cook them for another thirty minutes. The ribs are done when a knife slides easily into the thickest part of the rib meat. Allow the ribs to rest, covered with foil, for about ten minutes, and then cut between the bones to separate the individual ribs. Serve with extra barbecue sauce for dipping.

There are all kinds of spice rub recipes you can use for your ribs, and I have given the link to the one I use most often, but you can also buy some from the store if you have a personal favorite. I actually used a rub that was sent to me by Pepper Mary, who sells spices on her website. I used the Mesquite Blend, which was perfect for the ribs and added a nice mesquite wood flavor to the meat. This is a perfect spice blend for ribs or pulled pork if you are looking for something easy to use. Adding the liquid smoke makes a big difference in the smell and flavor as well. This recipe is very easy to do if you want ribs any time of year and don’t have a gas or charcoal grill to use. Any of the typical rib sides are perfect for this meal, such as baked beans, corn bread or cole slaw or even homemade fries.

That’s all I have for today. Check back next time for another recipe. Until then, enjoy the rest of your day and enjoy your meal!

005 004


1 Comment

Posted by on January 17, 2014 in Cooking, Dinner, Pork, Sauce, Spices


Tags: , , , , , , ,

How to Reheat Leftovers, from Pizza to Pasta to Eggs – Bon Appétit

How to Reheat Leftovers, from Pizza to Pasta to Eggs – Bon Appétit.

We all end up with lots of leftovers in our refrigerator day after day and never seem to know how to re-heat them so people will want to eat them again. I am actually making leftovers tonight, so some of these tips from Bon Appetit about the best way to re-heat leftovers will really come in handy. Check it out!

 
Leave a comment

Posted by on January 16, 2014 in Cooking Tips, Cooking Websites, Dinner, Leftovers


Tags: , , , ,

Bend Over Backwards for Some Brussels Sprout Pizza

Admittedly, this seems like an out of the ordinary pizza, and I guess it is, but once you try it you will see just how delicious it can be. Making your own pizza at home is a pretty easy thing to do and costs a lot less than going to your local pizza place or getting delivery pizza, and you get to control the ingredients that go into it. You can make your own pizza dough, as I do often, or you can buy pre-made dough at most grocery stores and it is pretty inexpensive. This recipe is from Bon Appetit and is perfect for those who want a vegetarian pizza or those who like a pizza without any tomato sauce.

Brussels Sprouts Pizza

2 tablespoons olive oil plus more for brushing and drizzling

1 large onion, thinly sliced

Kosher salt and freshly ground black pepper

1/2 pound Brussels sprouts, trimmed, leaves removed

2 garlic cloves, finely chopped

1 teaspoon crushed red pepper flakes

All-purpose flour, for dusting

1 store-bought pizza dough or Food Processor Pizza Dough

1/2 cup grated Parmesan cheese

Preheat the oven to 450 degrees. Heat 2 tablespoons of the olive oil in a large skillet over medium-high heat. Add the onion, season with salt and pepper and cook, stirring occasionally, until the onion has softened and turned golden, about 8 to 10 minutes. Add the Brussels sprouts, chopped garlic, and crushed red pepper flakes and cook until the Brussels sprouts are wilted, about 5 minutes. Season the mixture with salt and pepper, remove the skillet from the heat and set it aside.

Lightly flour a rimmed baking sheet and stretch the pizza dough to the edges of the baking sheet. Lightly brush the dough with some olive oil and season the dough with kosher salt and freshly ground black pepper. Top the dough with 1/4 cup of the Parmesan cheese, then the Brussels sprouts mixture followed by the remaining 1/4 cup of Parmesan cheese.

Bake the pizza until the dough is crisp and the cheese is melted, about 8 to 12 minutes. Allow the pizza to cool for 5 minutes before cutting. Serve the pizza drizzled with some more olive oil.

I think this pizza had great flavor to it. The Brussels sprouts and onions went together perfectly and the red pepper flakes just gave the whole pizza a hint of heat. You could always leave the crushed red pepper flakes out of the dish completely if you did not want any heat to it. I personally enjoyed it, but Michelle and Sean both said they would just as soon leave it out. I also made a plain cheese pizza to go along with this one and I am glad I did since there was none left of this particular pie. I was surprised Sean liked it so much since Brussels sprouts aren’t always high on everyone’s list, let alone a 13-year old, but he really liked it. I’ll definitely have to keep this one on hand because it is great to make if you need a vegetarian meal or just a pizza with no sauce.

That’s all I have for today. Check back next time for another recipe. Until then, enjoy the rest of your day and enjoy your meal!

010

 
4 Comments

Posted by on January 16, 2014 in Cooking, Dinner, One Pot Meals, Pizza, Vegetarian


Tags: , , , , , ,

Stick to Your Ribs Beef and Barley Soup

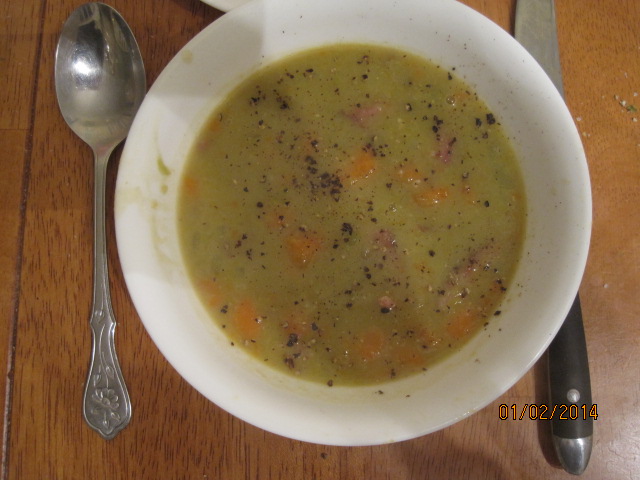
This may be my absolute favorite soup. Beef and barley soup offers up everything I like about a soup. Rich, hearty stock, flavor meat and vegetables and the barley just seems to pull it all together to make a fantastic meal overall. We made a batch of this soup a week or so ago and froze leftovers just so we could have it again another time. I actually made my own beef stock to make this one using the prime rib bones I had from the holidays so the stock had even better flavor and I didn’t need to follow the stock recipe that is included in this recipe from America’s Test Kitchen. If you don’t have your own beef stock, try making this one because it will help add a good depth of flavor to the stock beyond what you get from any store-bought stock.

Beef and Barley Soup

For the Stock:

1 teaspoon vegetable oil

1 pound white mushrooms, trimmed and quartered

1 large onion, chopped

1 pound 85 percent lean ground beef

2 tablespoons tomato paste

1/2 cup dry red wine

8 cups water

1 large carrot, peeled and chopped

1 large celery rib, chopped

2 tablespoons soy sauce

2 teaspoons salt

2 bay leaves

For the Soup:

1 pound sirloin steak tips, trimmed and cut into 1/2-inch pieces

Salt and pepper

2 tablespoons vegetable oil

1/2 pound cremini mushrooms, trimmed and sliced 1/2-inch thick

1 onion, chopped

1 garlic clove, minced

1 1/2 teaspoons minced fresh thyme or 1/2 teaspoon dried

2 tablespoons all-purpose flour

1/4 cup dry red wine

1 (14.5-ounce) can diced tomatoes, drained

1/2 cup pearl barley

3 carrots, peeled and cut into 1/2-inch pieces

2 celery ribs, cut into 1/2-inch pieces

2 bay leaves

2 tablespoons minced fresh parsley

To prepare the stock, heat 1 teaspoon of vegetable oil in a large Dutch oven over medium-high heat until just smoking. Add the mushrooms and the chopped onion. Cook, stirring often, until the onion is browned and a golden brown fond has formed on the bottom of the pot, about 8 to 12 minutes. Stir in the ground beef and cook, breaking up the meat with a wooden spoon until the meat is no longer pink, about 3 minutes. Stir in the tomato paste and cook until it is fragrant, about 30 seconds. Stir in the red wine, scraping up any browned bits, and cook until it is nearly evaporated, about 1 to 2 minutes. Stir in the 8 cups of water, the chopped carrot, celery, soy sauce, salt and bay leaves and bring the mixture to a boil. Cover and reduce the heat to a gentle simmer and cook, skimming as needed, until the stock tastes rich and flavorful, about 1 1/2 hours. Strain the stock through a fine mesh strainer and discard the solids. Allow the stock to settle for 5 to 10 minutes. Remove the fat from the stock by skimming with a wide, shallow spoon or using a fat separator. Set the stock aside.

To prepare the soup, pat the sirloin steak tips dry with paper towels and season with salt and pepper. Heat 2 teaspoons of vegetable oil in a Dutch oven over medium-high heat until just smoking. Add half of the meat and cook, stirring occasionally, until the meat is well browned, about 5 to 7 minutes, reducing the heat if the pot is beginning to scorch. transfer the browned meat to a medium bowl and repeat the process with 2 teaspoons of vegetable oil and the remaining beef. transfer the second batch of browned meat to the bowl. Add 2 teaspoons of vegetable oil to the now-empty Dutch oven and heat over medium heat until it is shimmering. Add the cremini mushrooms and the chopped onion and cook until they are softened, about 7 to 10 minutes. Stir in the garlic clove and the thyme and cook until fragrant, about 30 seconds. Stir in the all-purpose flour and cook for 1 minute. Whisk in the red wine, scraping up any browned bits and cook until the wine is nearly evaporated, about 1 minute.

Stir in the reserved beef stock, the drained diced tomatoes, carrots, celery, pearl barley, bay leaves and the meat along with any accumulated meat juices in the bowl. Bring the mixture to a boil then cover, reduce the heat to a gentle simmer and cook until the meat, barley and vegetables are tender, about 30 to 40 minutes.

Off the heat, remove the bay leaves. Stir in the fresh minced parsley and season with salt and pepper to taste before serving.

A couple of quick notes about the recipe. If you don’t want to cook with the red wine, leave it out or substitute water or extra beef stock. You might lose a bit of flavor but not that much. I used plain white mushrooms instead of cremini because I can’t always get cremini around here. even if you don’t really like mushrooms, they really do add some great flavor to this soup so you should try to keep them in. Michelle doesn’t like to eat mushrooms, but we still use them for the flavor and she eats around them. You also want to make sure you cut everything to uniform sizes so it all cooks evenly. One thing to know about any leftovers or if you are cooking this ahead of time – barley will keep absorbing liquid as it sits, so be prepared for that. It’s best to eat this the same day you make it or know you will have to add stock when you re-heat and the barley will be a bit bloated. Other than that, this is a great filling soup that everyone seems to enjoy and it is one of my favorites every time.

That’s all I have for today. Check back next time for another recipe. Until then,enjoy the rest of your day and enjoy your meal!

002

 
Leave a comment

Posted by on January 15, 2014 in Cooking, Dinner, One Pot Meals, Soups & Stews


Tags: , , , ,

Beat the Weeknight Grind – Pork Cutlets with Sweet Potatoes and Maple Pan Sauce

After taking the weekend off to do some other work I am back with a great weeknight meal that I got from Cook’s Country. Weeknight meals can be the worst for busy families. You just feel like you never have enough time to be a home cooked meal on the table with work, school, homework, afterschool activities, chores and more, which can lead us to settling for takeout meals that aren’t good for us and are expensive. I always try to come up with meal ideas that can be made during the typical weeknight fast so it is something you can put together after you get home and have a meal on the table in under an hour. This one fits the bill for speed, taste and it is inexpensive to make. While the recipe calls for boneless pork cutlets, I had 3 bone-in chops on hand and decided to use those instead. It took a few minutes longer to cook because of that, but the taste results were the same to me.

Pork Cutlets with Sweet Potatoes and Maple Pan Sauce

2 pounds sweet potatoes, peeled and cut into 1/2-inch pieces

1/4 cup vegetable oil

Salt and pepper

2 teaspoons garam masala

2 teaspoons ground cumin

8 (3-ounce) boneless pork cutlets, 1/4-inch thick, trimmed

4 garlic cloves, sliced thin

1/2 cup maple syrup

2 tablespoons Dijon mustard

2 tablespoons cider vinegar

Combine the sweet potatoes, 2 tablespoons of the vegetable oil, 1/2 teaspoon of salt and 1/2 teaspoon of pepper in a large bowl. Cover the potatoes and microwave them until the potatoes are nearly tender, about 7 minutes. Set the bowl of potatoes aside.

Meanwhile, combine the garam masala, cumin, 1 teaspoon of salt, and 1/2 teaspoon of pepper in a bowl. Pat the pork cutlets dry with paper towels and season them with the spice mixture. Heat 1 tablespoon of the vegetable oil in a large, nonstick skillet over medium-high heat until it is shimmering. Add 4 of the cutlets to the skillet and cook until they are well browned and cooked through, about 2 minutes per side. Transfer the cutlets to a plate and tent the plate with aluminum foil. Repeat the process with the remaining 1 tablespoon of vegetable oil and the remaining 4 pork cutlets.

Add the potatoes and garlic to the now-empty skillet and cook over medium heat until the potatoes are browned and tender, about 5 minutes. Transfer the potatoes to a platter. Add the maple syrup, Dijon mustard, cider vinegar and any accumulated pork juices to the now-empty skillet and simmer over medium heat until the mixture has thickened, about 2 minutes. Transfer the pork cutlets to the platter with the sweet potatoes and pour the sauce from the skillet over the top. Serve.

I really liked the flavor of the sauce and what it added to both the potatoes and the pork. Maple syrup and sweet potatoes just seem to go really well together and it was even better with the spice mixture on the pork. If you do not have garam masala on hand or can’t find it in your local grocery store, you can use a mix of ground  coriander, cumin, ground cardamom, pepper and ground cinnamon and get the same flavor. It is a fast recipe that gives you great taste and all you need to do is add a vegetable or a salad and you are good to go with your meal in about 30 minutes.

That’s all I have for today. Check back next time for another recipe. I have a big work project I am working on right now, so I am going to try to get on here every day if I can to share some more ideas, recipes and more. Until next time, enjoy the rest of your day and enjoy your meal!

003

 
2 Comments

Posted by on January 13, 2014 in Cooking, Dinner, Pork, Potatoes, Sauce


Tags: , , , , , ,

Fun with Chicken – Citrus-Marinated Chicken Thighs

I think chicken thighs have so much more flavor than your standard boneless chicken breast. Of course there is more fat in the thigh, but that does help to get some flavor and you can always take the skin off or buy skinless. Chicken thighs are generally a lot cheaper to buy also and I very often buy a large pack of bone-in chicken thighs so we always have some in the freezer to use for a quick meal. Such was the case last night when I wanted something simple to make for dinner and had taken some thighs out the day before. I decided I wanted to try this simple recipe from Bon Appetit for a citrus marinated chicken thighs. it has just a few ingredients and the prep work and cooking can all be done in under and hour so you can have dinner on the table quickly.

Citrus-Marinated Chicken Thighs

1 bunch scallions, thinly sliced

1/2 bunch cilantro, leaves and tender stems only

2 garlic cloves, chopped

1 teaspoon finely grated lime zest

1 teaspoon finely grated orange zest

1/4 cup fresh lime juice

1/4 cup fresh orange juice

1/4 cup soy sauce

2 tablespoons vegetable oil

1 tablespoon kosher salt

2 pounds skin-on, bone-in chicken thighs

Set aside 1/4 cup of the sliced scallions for later in the recipe. Pulse the cilantro, garlic, lime zest, orange zest, lime juice, orange juice, soy sauce, vegetable oil, kosher salt and the remaining sliced scallions in a food processor or blender until a coarse puree has formed. Set aside 1/4 cup of the marinade for later use. Place the remaining marinade in a large resealable plastic bag. Add the chicken thighs, seal the bag, and turn the bag to coat the chicken well. Chill the chicken in the refrigerator for at least 20 minutes.

Preheat the broiler. Remove the chicken from the marinade and place the chicken, skin side down, on a foil lined broiler-safe baking sheet. Discard the marinade. Broil the chicken pieces until they are lightly browned, about 5 minutes. Turn the chicken over and continue to broil it skin side up until it is cooked completely through and an instant-read thermometer inserted into the thickest part of a thigh registers 165 degrees, about 12 to 15 minutes longer. Serve the chicken with the reserved marinade and the reserved sliced scallions.

You can start to marinade the chicken about 2 hours before if you want to get a bigger head start, but try not to marinade it any longer than that or the chicken will start to break down from the acids. With this recipe you get the really nice crispy skin that is perfect on a piece of chicken. You also get great flavor from the marinade with the scallions, citrus zest, citrus juices and cilantro. The marinade has a pesto look to it and has great flavor. I used some the leftover marinade on my plate to mix with the white rice I had also made to go along with the meal. I also made some corn to round out the meal. I think you could easily use this marinade on other chicken pieces if you preferred drumsticks, wings or even breasts instead of the thighs. You may have to adjust your cooking time accordingly if you use a different piece of chicken, but I think you get great flavor no matter what.

That’s all I have for today. Check back next time for another recipe. Until then, enjoy the rest of your day and enjoy your meal!

007 005

 
Leave a comment

Posted by on January 10, 2014 in Cooking, Dinner, Poultry, Sauce


Tags: , , , ,

Another Game Day (or Anytime) Snack – Marcus Samuelsson’s Swedish Meatballs

Just before Christmas I was walking through Home Goods through the aisle where they have spices, sauces and jellies of all kinds and I saw a jar of lingonberry preserves. It’s not something you see at all around this area at any time and I did pick it up and put it in my cart but then upon second thought I put it back .I kept thinking I was never going to use this very often and didn’t really want to spend the extra money on it. Upon hindsight I should have made the purchase when we decided we wanted to make Swedish meatballs on Christmas Eve as an appetizer and I wanted to make them as authentic as possible. I found this recipe from Marcus Samuelsson of Food Network and Red Rooster fame and since he was from Sweden I figured he knew what he was talking about. I ended up having to make a substitution for the lingonberry preserves (more on that later), but the recipe still turned out really well.

Marcus Samuelsson’s Swedish Meatballs

For the meatballs:

1/2 cup fine dry bread crumbs

1/4 cup heavy cream

2 tablespoons olive oil

1 medium red onion, finely chopped

1/3 pound ground chuck or sirloin

1/2 pound ground veal

1/2 pound ground pork

2 tablespoons honey

1 egg

3 tablespoons butter

For the sauce:

1 cup chicken stock

1/2 cup heavy cream

1/4 cup lingonberry preserves

2 tablespoons pickle juice

To garnish:

Lingonberry preserves

Quick pickled cucumbers

Combine the bread crumbs and the heavy cream in a small bowl, stirring with a fork until all the crumbs are moistened. Set the bowl aside.

Heat the olive oil in a small skillet over medium heat. Add the red onion and saute for about 5 minutes, until the onion is softened. Remove the skillet from the heat.

In a large bowl, combine the ground beef, ground veal, ground pork, the sautéed red onion, the honey and the egg and mix everything well with your hands. Season with salt and pepper to taste.

Add the bread crumb and cream mixture to the beef mixture and mix together well. Using wet hands to keep the mixture from sticking to your fingers and hands, shape the mixture into meatballs the size of a golf ball, placing them on a plate lightly moistened with water. When you are done rolling you should have about 24 meatballs in total.

Melt the butter in a large skillet over medium-high heat. Add the meatballs, in batches if necessary, and cook, turning frequently, for about 7 minutes until they are browned on all sides and cooked through. transfer the meatballs to a plate and drain off all but 1 tablespoon of fat from the skillet.

Return the skillet to the heat, whisk in the chicken stock, heavy cream, lingonberry preserves and the pickle juice and bring it to a simmer. Season to taste with salt and pepper. Add the meatballs to the sauce, reduce the heat to medium and simmer for about five minutes until the sauce thickens slightly and the meatballs are heated through.

Okay, a few things about this recipe. I was kicking myself over the lingonberry preserves and did some research online as to what I could use for a substitute. The best recommendation I saw was to try using cranberry preserves, which I was able to get, and I think they added a really nice flavor to the dish. I purchased a package of meatloaf mix that had the ground beef, pork and veal in it already to make the meatballs and everything else I had on hand so we were good to go. Marcus Samuelsson explains in his description of the recipe that comes from his grandmother that the meatballs that she always made were not the perfectly round and shaped meatballs you find in most places but were kind of lumpy and misshapen. This made me feel better because that is just how mine looked. I think because the mixture is moist and sticky it is hard to shape them perfectly but the taste is sure there. I will definitely be making these again. Unfortunately, I was so busy trying to put it together on Christmas Eve that I never got a picture of them, but I will try to get them next time. Trust me, they are good. I think these would be great as a meal with mashed potatoes or rice.

That’s all I have for today. Check back next time for some more recipes. It has been so cold here lately we have been making a lot of soups, so I have some other soup recipes to share with everyone. Until next time, enjoy the rest of your day and enjoy your meal!


2 Comments

Posted by on January 8, 2014 in Appetizers, Beef, Cooking, Dinner, Sauce, Snacks


Tags: , , ,

Split From the Cold with Split Pea Soup

Split pea soup has always been one of my favorites and one that does not get made too often, at least in my house anyway. traditionally it  was always made with a ham bone to get the flavor from, which we never really have around this house very much. Secondly, Michelle has never been a big fan of pea soup, so I had stayed away from trying to make it. Recently she said I should give it a try since she knows how much I like it and she might feel differently about it now. Since I still did not have a ham bone to make it with, I went hunting for alternatives. I saw a lot of recipe that simply used bacon or ham steak as a replacement, but I wanted a bit more flavor than that. I immediately thought of ham hocks, but my local store did not have any. However, they did have some smoked pork necks and this seemed like it would work well enough so I gave it a try.

Split Pea Soup

2 smoked ham hocks or pork necks, each about 3/4 pound
1 1/2 cups green split peas, rinsed and picked over
2 tablespoons butter
1 onion, coarsely chopped
1 carrot, peeled and coarsely chopped
8 cups water or chicken stock

Salt and pepper, to taste

Bring a large saucepan three-fourths full of water to a boil over high heat. Add the ham hocks or pork necks and simmer for 1 minute. Drain and set aside. Pick over the split peas and discard any misshapen peas and stones. Rinse the peas and drain.

In a soup pot or Dutch oven over medium heat, melt the butter. Add the onion and carrot and sauté, stirring occasionally, until the vegetables are soft, about 10 minutes. Add the ham hocks, split peas and the 8 cups of water or stock. Bring to a boil, reduce the heat to low and simmer gently until the peas are soft, about 50 to 60 minutes.
Remove the soup from the heat. Remove the ham hocks and let them stand until they are cool enough to handle. Let the soup cool slightly.

Using a blender and working in batches, puree the soup on high-speed until smooth, about 2 minutes for each batch. Return the puree to a clean soup pot. Alternatively, process the soup with an immersible blender in the pot. Thin the soup with more stock, if needed. Place the soup over medium heat and reheat to serving temperature. Season with salt and pepper.

While the soup is heating, remove the meat from the ham hocks and discard the skin and bones. Cut the meat into small pieces and add to the soup. Stir to heat through.

To serve, ladle the soup into warmed bowls and serve.

I think the pork necks worked out really well and gave the soup a nice, smoky flavor that I really enjoyed. The soup thickened up nicely and tasted wonderful and there was just enough left over for me to have some for lunch today. It went really well with the Filipino sweet rolls that I made to go with them, but you could just as easily make some croutons to top the soup with also. As you can tell from the picture, I like to put a lot of pepper in my soup :).
That’s all I have for today. Check back next time for another recipe. I still have a backlog of items from the holidays to share so I’ll be sharing more of those over the next few days. Until next time, enjoy the rest of your day and enjoy your meal!
003
 
3 Comments

Posted by on January 4, 2014 in Cooking, Dinner, One Pot Meals, Soups & Stews


Tags: , ,

 
National Day Calendar

Fun, unusual and forgotten designations on our calendar.

Jennifer Probst

a little bit naughty a little bit nice

Laissez Faire

Letting Life Lead

simple cooking recipes

a blog to share with you the best