RSS

Category Archives: Fruit

It Pays to Plan Ahead – Pan-Roasted Pork Chops with Apple Fritters

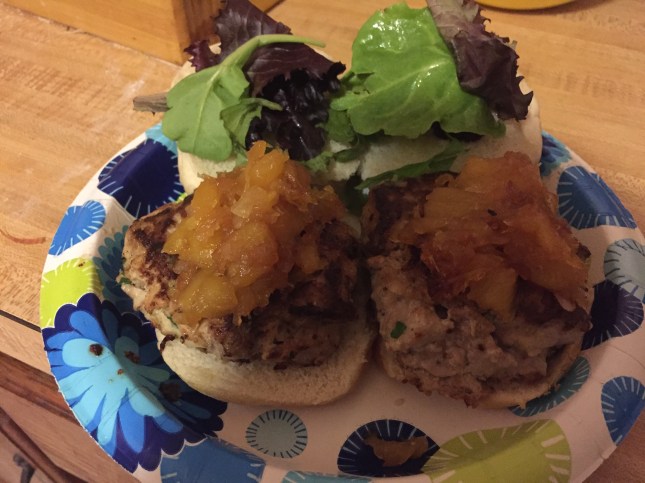
Not every meal you make has to be a spur of the moment decision for you. In fact, I like to try to plan out the whole week’s menu in advance so I can make sure I have all of the ingredients I am going to need for the week ready and available when I want them. This also let’s me make some dinners that may need a little bit of extra preparation, like marinating or brining, and I know what days are better for recipes where I may need a little bit more time to make them. Planning a meal that involves brining chicken or pork usually gives you 12 hours or a day to get everything together that you need in case you don’t have everything around, along with imparting some great flavor onto whatever protein you happen to be cooking that day. Pork chops are particularly great for brining because it helps to keep the meat moist, plumps up the pork and can give it a much-needed flavor boost when you want it. This particular recipe, from New York Times Cooking and Sam Sifton, does take some planning ahead, but it leaves you with a great combination of juicy pork chops and tasty apple fritters that would make Peter Brady forget all about his pork chops and applesauce meal.

Pan-Roasted Pork Chops with Apple Fritters

For the Pork Chops and Brine:

1 cup apple cider

6 tablespoons sugar

4 tablespoons kosher salt, plus more for seasoning

3 bay leaves

2 dried chiles de árbol

5 juniper berries

1 teaspoon caraway seeds

1 teaspoon mustard seeds

1 teaspoon coriander seeds

4 pork chops on the bone, approximately 1 ½ inches thick

Freshly ground black pepper

2 tablespoons canola oil or other neutral oil

For the Sauce:

1 tablespoon butter

2 shallots peeled and finely diced

1 teaspoon thyme leaves, chopped

2 tablespoons brandy

1 cup heavy cream

½ cup chicken stock

2 teaspoons whole grain mustard

1 teaspoon horseradish, ideally freshly grated

For the Apple Fritters:

2 cups apple cider

1 cinnamon stick

4 Granny Smith apples, peeled, cored and cut into ½-inch rounds

1 whole egg

½ cup very cold seltzer water

½ cup rice flour

½ cup all-purpose flour

1 cup canola oil or other neutral oil

In a large bowl, mix the apple cider with 4 cups of water, the sugar and the salt. Toast the bay leaves, chilies, juniper berries, caraway seeds, mustard seeds and coriander seeds in a small pan set over medium heat until you can smell them, then add them to the brine, and stir the mixture to combine it. Add the pork chops, cover the bowl and place it in the refrigerator to brine overnight or for up to 48 hours.

To pan-roast the pork chops, pre-heat the oven to 375 degrees. Remove the pork chops from the brine, and pat them dry with a paper towel. Season the meat aggressively with freshly ground black pepper and a little salt. Set a large sauté pan that will fit in the oven over medium-high heat. Add the oil, and when it is shimmering, place the chops in the pan. Cook the chops until they are well seared on one side, about 4 minutes, then turn the chops over, and place the pan in the oven to finish the chops, about 6 to 8 minutes. (The internal temperature of the pork, measured at the center of the chop, should be between 140 and 145 degrees for medium rare.) Remove the meat from the pan and allow the chops to rest for 5 minutes or so while you make the sauce.

Return the same pan to the stovetop and set it over medium heat, and add the butter, stirring and scraping to incorporate the meat drippings, then add the shallots and the thyme. Cook for about 3 minutes, then add the brandy. Allow the mixture to reduce by half, then add the cream and the stock and reduce the mixture again, until the sauce coats the back of a spoon. Remove the sauce from the heat, and whisk in the mustard and the horseradish.

For the apple fritters, heat the apple cider and the cinnamon stick with a couple of inches of water in a large pot set over high heat. Add the apple rounds, and blanch for 1 minute, then remove them to a towel to dry. Whisk together the egg and the seltzer until the mixture is frothy, then gently mix in the rice flour and all-purpose flour. Put the oil in a large pan set over medium-high heat. When the oil is shimmering, dip the apple rings into the batter and fry them in the oil until they are golden brown about 2 to 3 minutes.

Serve the pork chops with a few apple fritters and a heavy drizzle of sauce across the top.

This meal does take some preparation and you likely will have to get some ingredients you may not always have around the house ahead of time, but it is well worth the effort. The chops have fantastic flavor to them and the sauce for them is perfect, with a great blend of the mustard and horseradish in a cream sauce to really complement the chops. The apple fritters are always a favorite as well and work very nicely with the pork. I served this with some roasted carrots and parsnips and some store-bought pierogies to go along with the meal and it was a family favorite. If you know you have some extra time to make something, this recipe can be a great choice. It is also perfect to serve on a weekend when you might have a little more time to prepare something for dinner or are having people over. It may seem like a lot of work to make the brine, but it is really worth it so you can get the added flavor and extra juiciness with the pork. You’ll be glad you took the time to do it. I was able to find all of the ingredients I needed locally, which isn’t always easy for me, so you should be able to get everything you need to make this dish.

That’s all I have for today. Check back next time for another recipe. Until then, enjoy the rest of your day and enjoy your meal!

IMG_0263


Advertisement
 
Leave a comment

Posted by on July 14, 2016 in Cooking, Dinner, Fruit, Pork, Sauce


Tags: , , , , , ,

Feeling Fancy on a Weeknight – Pork Tenderloin with Balsamic Raspberries

I know most people want something that does not take much effort on a weeknight. You’re tired after a long day at work and the last thing you want to, especially in the summertime, is spend a long time in the kitchen in front of the stove making dinner. I feel the same way; there are just some nights where you don’t want to do it. The great thing is that there are so many good recipes out there that you can do in under 30 minutes and have a really nice meal on the table without working up a big sweat in the kitchen. All it takes is a little bit of planning on your part each day or at the start of each week so you can be sure you have all of the ingredients on hand. Then you can crank out your dinner and have it on the table fast. A great example of a dinner that looks fancy but takes no time at all is this one from Food Republic for pork tenderloin with balsamic raspberries. It is an elegant looking dish that you can have on the table in about 30 minutes.

Pork Tenderloin with Balsamic Raspberries

2 pork tenderloins (about 3/4 pound each)

1 tablespoon extra virgin olive oil

salt and freshly ground pepper

3 tablespoons butter

1 shallot, finely chopped

1 cup balsamic vinegar

1/4 cup granulated sugar

2 cups fresh raspberries

Preheat the oven to 375 degrees, with a rack in the middle position. Rub the pork tenderloins with the olive oil and sprinkle each tenderloin with salt and pepper.

Melt 2 tablespoons of the butter in a large skillet and brown the pork on all sides, about 4 to 5 minutes. Place the pork on a rack in a roasting pan and roast it for about 10 to 12 minutes; an instant-read thermometer inserted into the center should read 140 degrees. Remove the tenderloins from the oven and let the meat rest on a cutting board for 5 minutes.

Meanwhile, melt the remaining 1 tablespoon of butter in a small saucepan set over medium heat and cook the shallots, stirring, until they are soft, about 2 to 3 minutes.Stir in the balsamic vinegar, the sugar and 1/2 teaspoon of salt and simmer until the sauce starts to thicken, about 10 minutes.

Season the sauce with pepper, add the raspberries, and heat the sauce until the raspberries are just warm.

Cut the meat into slices and serve with the warm balsamic raspberries.

It is a very simple dinner to make but it looks pretty fancy when you get it all on the plate. You get a really nice sauce with the vinegar and raspberries and we all loved the flavor the sauce provided to the pork. You could use the sauce pretty successfully with other cuts of pork if you prefer, like boneless cutlets or chops or even bone-in chops. I served the pork with some Brussels sprouts and roasted potatoes, but you can make it really easy on yourself and just put it together with some rice and a salad or a baked potato and salad and have everything ready to go. Anytime you can get a main dish done in about 25 minutes and have it look fancy and taste awesome is a pretty good deal to me.

That’s all I have for today. Check back next time for another recipe. Until then, enjoy the rest of your day and enjoy your meal!

IMG_0363

 
Leave a comment

Posted by on July 12, 2016 in Cooking, Dinner, Fruit, Pork, Sauce


Tags: , , , , , ,

Decadent, Delightful and Delicious – White Chocolate Raspberry Cupcakes with Raspberry Buttercream

I am not much of a baker myself but I do like to try to make things every now and then beyond the pies that I make. That being said, there are people I know that are much better at baking and do things a lot more extravagant than I can do. It has to be a recipe that really interests me for me to want to venture over to the baking side and make things, but it does happen now and then. That is what happened when I saw this recipe from Williams-Sonoma for white chocolate raspberry cupcakes with a raspberry butter cream. They just looked too good not to try to when I looked over the recipe it looked like something that I could actually make a pretty good go of without trouble. I actually combined this recipe with a recipe I saw for raspberry buttercream because I wanted to have a more predominant color to the frosting.

White Chocolate Raspberry Cupcakes with Raspberry Buttercream

For the cupcakes:

2 cups (10 oz./315 g) all-purpose flour

2 teaspoons baking powder

1/4 teaspoon salt

1/2 cup (4 oz./125 g) unsalted butter, at room temperature

1 cup (8 oz./250 g) granulated sugar

3 large egg whites, at room temperature

1/2 cup (4 fl. oz./125 ml) milk, at room temperature

2 oz. (60 g) white chocolate, chopped and melted

1 container (6 oz./185 g) fresh raspberries

For the raspberry buttercream:

1 cup fresh raspberries

½ cup butter, softened

2 cups powdered sugar

Chunk of white chocolate, for shaving (optional)

Preheat an oven to 350 degrees. Line 12 standard muffin cups with paper liners.

To make the cupcakes, in a large bowl, whisk together the flour, baking powder and salt.Using an electric mixer, beat together the butter and sugar on medium speed until the mixture is light and fluffy, about 3 to 5 minutes. Add the egg whites and beat until they are blended, scraping down the bowl as needed. Add the flour mixture in 3 additions alternately with the milk in 2 additions, starting and ending with the flour mixture. Beat the mixture just until it is combined. Stir in the white chocolate just until it is blended, then gently fold in the raspberries. Spoon the batter into the prepared muffin cups, dividing the batter evenly among the cups.

Bake the cupcakes until they are puffed and light golden and the center springs back slightly when touched, about 25 minutes. Let the cupcakes cool completely on a wire rack, about 30 minutes.

To make the raspberry buttercream, add  the raspberries to a food processor. Pulse the raspberries  until they become a thick sauce. Push the raspberry puree through a sieve to extract the juice and get rid of the seeds. Set the raspberry sauce aside.

In a stand mixer with the paddle attachment, cream the butter on high for about 2-3 minutes to get a creamy fluffy texture. Add in the powdered sugar and raspberry sauce on low-speed until they are combined. If the frosting is too runny add more powdered sugar. If it is too thick add some milk.

Spoon the buttercream into a pastry bag fitted with a star tip and pipe the buttercream onto the cooled cupcakes. Shave curls from the chunk of white chocolate and sprinkle over the cupcakes if desired or top with a fresh raspberry, if desired.

The cupcakes can be stored on the counter at room temperature for a day or two and in the refrigerator for up to 5 days.

I admit it was a bit of work to get the raspberry sauce through a sieve to get all of the seeds out but the hard work is well worth it to give you a smooth raspberry sauce for the frosting. These cupcakes are very tasty, with the raspberry and white chocolate shining through. If you prefer to have cupcakes without a whole raspberry inside, you could certainly take the whole raspberries and make a sauce from them and then pipe it into the center of the cupcakes so you get the raspberry flavor without the whole raspberry in there, but I liked it with the raspberry inside. I think they came out well and tasted better being in the refrigerator where the buttercream firmed up and had a great texture. This makes a great summer dessert as an alternative to making a cake or pie.

That’s all I have for today. Check back next time for another recipe. Until then, enjoy the rest of your day and enjoy your meal!

IMG_0356


Tags: , , , , , , ,

You Can Bake a Cherry Pie Very Long John, Just Bake This One

The season for fresh cherries is pretty short so if you like cherries you want to make the most of the time you have them, which is right now. For me cherries are great to just snack on, but there are lots of great things you can do with them as well. They make a great addition to dishes using duck or pork, but naturally everyone thinks of dessert right away when they think of cherries. I am a big pie fan myself, so making cherry pie seems like the natural thing to do. Now the idea of pitting several pounds of cherries does not really appeal to me, as I am sure it doesn’t for a lot of people. However, if you really like cherry pie and want to make some of your own, you can make a good compromise and use some frozen cherries mixed with fresh cherries. The frozen cherries, like most frozen fruit, are packaged and frozen when the cherries are ripe so they have good flavor and the pitting has already been done for you. If you mix this together with some fresh cherries you pit yourself, it makes things a lot easier. If you really want to streamline things, and I did, it is worth investing in a good cherry pitter. I have one from OXO that does a fantastic job instead of doing it myself with a paring knife and ending up with cherry stained hands and cramps in my fingers. Once you have a plan for your cherries, you want to try this cherry pie recipe from Serious Eats. It’s the best cherry pie recipe I have ever tried.

Homemade Cherry Pie

For the Filling:

5 heaping cups pitted cherries from about 2 pounds whole fruit (6 heaping cups), or a mix of frozen cherries and fresh pitted cherries

2 tablespoons fresh lemon juice from 1 small lemon

1 cup granulated sugar

3/4 teaspoon kosher salt; for table salt, use half as much by volume or use the same weight

1/3 cup plus 1 teaspoon tapioca starch 

Pie dough from your favorite recipe for a double crust or 2 store-bought pie crusts

For the Egg Wash:

1 large egg

1 large egg yolk

 1 tablespoon heavy cream

1/8 teaspoon kosher salt

To Serve (optional):

Fresh or store-bough whipped cream

For the filling: Combine the pitted cherries, lemon juice, sugar, salt, and tapioca starch in a large bowl, folding the ingredients with a flexible spatula until they are well combined. Scrape the cherries into the prepared pie shell and top with the remaining dough, using a solid sheet, cutouts, or a lattice-top design. Trim away the excess dough and refrigerate the pie to ensure that the top crust is completely chilled, about 30 minutes. Meanwhile, adjust an oven rack to the lower-middle position and pre-heat to 400 degrees.


For the egg wash (if using): Whisk the egg, egg yolk, heavy cream, and salt in a small bowl. Brush the wash over the chilled top crust in a thin, even layer. This will give the crust a glossy, golden sheen, but it is not necessary in any way.


Place the chilled pie on a parchment-lined rimmed baking sheet. Bake the pie in the oven until the crust is golden, about 1 hour, then loosely cover the pie with tented foil. Alternatively, an empty baking sheet can be placed on the topmost rack of the oven to serve as a shield. Continue baking the pie until the filling is bubbling even in the very center of the pie, about 15 minutes more. If the crust completely covers filling, bake the pie until the pie reaches an internal temperature of 213 degrees on an instant-read digital thermometer inserted into the pie. The time can vary considerably depending on the thickness and type of pie plate, the amount of top crust, how long the pie was refrigerated, etc.


To serve: Cool the pie until it is no warmer than 85 degrees  on an instant-read digital thermometer inserted into the pie, about 3 hours depending on the type of pie plate you use. At higher temperatures, the filling will be runny and thin. Slice the pie into wedges with a sharp knife, pressing firmly against the bottom and sides of the pie plate to ensure the under-crust is completely cut. If you like, serve the pie with whipped cream. Wrapped in foil, the leftovers will keep up to 3 days at room temperature; warm the pie for 10 minutes in a 350 degree oven to revive the crust before serving.

This pie turned out perfectly. In the past when I have made cherry pie, even if I used cornstarch or tapioca, it always seemed to run too much. This one held together perfectly, even with using frozen cherries that I thought for sure would bleed out. The tapioca was just the right amount and chilling the pie for 30 minutes before cooking seemed to help in holding everything together and making the perfect crust. You can mix and match the cherries to suit what you like, using sweet and sour cherries if you like. A couple of things to note that Serious Eats comments on: first, the ratio of fruit to sugar in this recipe helps to boost the tapioca starch so that it gelatinizes well. Second, use a glass pie plate if you can because it helps to crisp the bottom crust well so it cuts nicely and holds up. A final note from me is that I used instant tapioca since I couldn’t find tapioca starch at any local store here. I was worried about how well it would work instead of tapioca starch but all went well for me. This pie is easily one of my favorites.

That’s all I have for today. Check back next time for another recipe. Until then, enjoy the rest of your day and enjoy your meal!


Leave a comment

Posted by on July 9, 2016 in Cooking, Dessert, Fruit, Pie, Uncategorized


Tags: , , , , ,

(Blueberry) Turnover a New Leaf

Turnovers are one of those pastries that seem to fit in just about anywhere. They can be tasty for breakfast, make for a fantastic brunch item and can be the centerpiece of your meal as a really nice dessert. While most of us are probably used to having apple turnovers, and they certainly are a classic that you can make yourself, buy frozen in the stores and heat up or get from your local bakery (if you’re lucky enough to have such a thing in today’s world). I love a good apple turnover, but getting good apples for turnovers is not an easy thing to do this time of year. Instead, now is the perfect opportunity to use some of the great summer fruit that is available. Blueberry is always a favorite of mine for pies, so why not for a turnover as well? This recipe from Bon Appetit is for blueberry-blackberry turnovers, but since I didn’t have any blackberries on hand (and while I love blackberries, Sean and Michelle are not big fans of the seeds) I decided to just go with blueberry and make the turnovers that way.

Blueberry Turnovers

For the Turnovers:

1 1/2 cups fresh (or frozen, thawed) blueberries


2 teaspoons finely grated peeled ginger

2 teaspoons fresh lime juice

¼ teaspoon kosher salt

2 tablespoons all-purpose flour, plus more for the surface

1 large egg, beaten to blend

¼ cup heavy cream

1 store-bought pie crust, or your favorite pie dough recipe

For the Glaze and Assembly:

cups powdered sugar

1 teaspoon vanilla extract

¼ teaspoon kosher salt

For the turnovers, pre-heat the oven to 350 degrees. Toss the blueberries, sugar, ginger, lime juice, salt and 2 tablespoons of flour in a medium bowl until the ingredients are combined. Beat the egg and heavy cream in a small bowl until no streaks remain.
Roll out the pie dough on a lightly floured work surface to a 15 x 10-inch rectangle. Cut a thin border around the dough to square off the edges. Cut the dough in half lengthwise and then in thirds crosswise to form six 5-inch squares. Brush the edges of the dough with the egg mixture, then mound about ¼ cup of the blueberry filling in 1 corner of each square. Working with 1 square at a time, fold the corner opposite the filling up and over to create a triangle; press the edges with a fork to seal the edges. Place the turnovers on a parchment-lined baking sheet and brush them with the remaining egg mixture. Cut about a 1-inch-long slit in the center of each turnover. Bake until the pastry is golden brown and juices run from the slits, about 35–45 minutes. Let the turnovers cool on a baking sheet until they are just slightly warm.
For the glaze and assembly, whisk the powdered sugar, vanilla, and the salt in a large, wide bowl. Whisking constantly, add warm water a tablespoonful at a time until the glaze is thick and smooth and falls off the whisk in a slowly dissolving ribbon (it should look like sweetened condensed milk).
Working one at a time, dip the top sides of the slightly warm turnovers into the glaze, letting the excess drip back into the bowl. Transfer the turnovers to a wire rack and let them sit until  the turnovers are cool and  the glaze is set, about 30 minutes.
I loved the way they turned out, but I have to admit I did make a mistake along the way while I was making them. I did not pay close enough attention to the direction when I was cutting the dough the first time and cut it incorrectly, leaving me with small squares I couldn’t do turnovers with. Instead, I turned those small squares into hand pies and went with those instead. Luckily, I was using store-bough pie dough and had another sheet that I could do them with again. I paid better attention this time and got the turnovers right. They turned out really well, with just the right amount of blueberries. The mix of the ginger and blueberries gave good flavor too that everyone seemed to like. The recipe makes 6 turnovers if you do it right and if you wanted hand pies instead, just cut the squares smaller and use one square for the top and the other for the bottom, crimp the edges and you are good to go. With the glaze on the hand pies they turn out just like the Drake’s fruit pies I love (if you live in the Northeast you know Drake’s pies).
That’s all I have for today. Check back next time for another recipe. Until then, enjoy the rest of your day, have a happy 4th of July with friends and family, and enjoy your meal!
IMG_0461


Tags: , , , , , ,

Don’t Go in the Water(Melon)! Make Your Own Watermelon Shark Fruit Salad

It’s July 4th weekend. That means lots of cookouts, parties and barbecues and lots of eating, hanging out with friends and family and fun. The last thing you want to do is cook in the hot kitchen while everyone else is out having fun in the sun. As long as your cooking everything outside you want your desserts to be just as easy for you to put together. Sure you can make or buy some pies, get some ice cream (or make your own) or have a big batch of cookies, but one of my favorite things to do when the weather is warm like this is to make a nice fruit salad. There are so many great fruits that you can use that are in season right now that you can get the chance to put something really great together. If you really want to wow everyone this year, skip the fruit cocktail in a can or jar or the prepackaged fruit tray from the grocery store with the unripe melon and do it yourself. As long as you are doing it yourself, have some summer fun and make this great watermelon shark fruit salad too from Tasting Table.

Watermelon Shark Fruit Salad

1 Baby watermelon (about 2-3 pounds)

4 cups watermelon pieces (from the baby watermelon above)

2 cups bite-size mango pieces (2 mangoes)

1 cup melon pieces (cantaloupe, honeydew, casaba, whatever you like)

1 cup sliced kiwi rounds (2 kiwis, peeled)

1/2 cup blueberries

1/2 cup red seedless grapes

1/2 cup fresh pineapple chunks

¼ cup agave nectar

2 tablespoons fresh lime juice

1½ cups bite-size avocado pieces (2 avocados), optional

½ cup toasted unsweetened coconut flakes, optional

⅓ cup toasted and roughly chopped macadamia nuts, optional

Handful of Swedish fish, optional

To make the watermelon shark, take a sharp knife and cut off the wider end of watermelon so it will stand at an angle. Turn the watermelon upright so that it is standing on its base. Draw a half-moon shaped mouth on the watermelon with a marker, beginning at the stem mark as a guideline. Use a sharp paring knife to cut along your outline and remove the watermelon wedge. Save the wedge to use for the fin for the shark. Use a large spoon to scoop out all of the watermelon flesh into a separate bowl. Using a vegetable peeler, peel off about 1-inch of the outer edge of the watermelon skin, exposing the light green flesh underneath. Cut out small triangles in the exposed light green flesh of the watermelon to make the teeth of the shark. Cut a wooden skewer in half and use it to attach the shark fin to the top of the shark. Using toothpicks, take 2 blueberries and attach them to the watermelon for eyes.

To make the fruit salad, in a large serving bowl, combine the watermelon, mango, melon, kiwi, blueberries, grapes and pineapple. Season the fruit with the agave nectar and lime juice, tossing gently to mix. Fold in the avocado pieces, if using. Garnish the salad with the coconut flakes and macadamia nuts. If you are serving the fruit salad in the shark’s head, fill the shark’s head with as much fruit as you can. Place the Swedish fish among the fruit pieces, if using, and serve.

Of course you don’t have to use the shark’s head, but hey, it’s a great centerpiece for the table, looks great and the kids love it. It’s really easy to make and Tasting Table has step by step pictures you can follow in their link. I used a baby watermelon but if you feel ambitious you could certainly use a larger one and the same thing and have much more fruit in it. Use any fruit that everyone really likes so you get a good mix of flavors, but don’t forget to use the agave nectar (or honey if you prefer) and lime juice so you get that added flavor to the fruit. The Swedish fish were just a nice touch at the end.

That’s all I have for today. Check back next time for another recipe. Until then, enjoy the rest of your day and enjoy your meal!

IMG_0466

 
Leave a comment

Posted by on July 3, 2016 in Cooking, Dessert, Fruit, Holidays


Tags: , , , , , ,

Anytime is Burger Time! Turkey Burgers with Caramelized Pineapple

I love a good hamburger (and probably even a bad one). Burgers make a quick and easy meal, taste great and we always seem to think about them more in the summertime because it is the perfect time to grill. I like to cook burgers all year-long and since I don’t have an outdoor grill to use I make use of my trusty cast iron skillet, nonstick skillet or cast iron grill pan to get the job done for me. Having the same old traditional hamburger can get a little boring at times so I do like to vary things up now and then. That is why when I saw this recipe from the Tasting Table I knew I wanted to give it a try. The original recipe calls for using ground chicken, but I find ground chicken to be pretty bland. Ground turkey may not sound that much better to some people, but I use it a lot more because it seems to hold up better and takes on other flavors really well so I decided to substitute that into this recipe. Besides, I had just gotten some ground turkey on sale at the grocery store so this was the perfect way to use it.

Turkey Burgers with Caramelized Pineapple

For the Turkey Patties:

1¼ pounds ground turkey

¼ cup crème fraîche or sour cream

1 tablespoon chopped parsley

2 teaspoons chopped chervil

2 teaspoons kosher salt

2 eggs

1 shallot, minced

Freshly ground pepper, to taste

For the Caramelized Pineapple:

2 cups (12 ounces) finely chopped pineapple

1 cup white wine vinegar

2½ tablespoons honey

½ yellow onion, minced

1 cup water

Kosher salt and freshly ground pepper, to taste

For Assembly:

2 tablespoons olive oil

4 hamburger rolls, toasted

Arugula, for garnish

To make the turkey patties: In a medium bowl, add all the turkey patty ingredients and mix them together until they are incorporated completely. With your hands, form 4 equal-sized patties from the mixture and place the patties on a plate; cover the plate with plastic wrap then chill the patties in the refrigerator for 1 hour. This will help them to firm up and hold together nicely during cooking.

Meanwhile, make the caramelized pineapple: In a large skillet set over medium heat, combine the pineapple, white wine vinegar, honey and onion. Bring the mixture to a simmer and cook until the vinegar has completely evaporated, about 20 to 25 minutes.

Once the pineapple begins to caramelize, stir in the water. Simmer the mixture until the pineapple thickens to form a compote, another 6 to 8 minutes. Season the pineapple with salt and pepper to taste.

Cook the burgers: In another large skillet, heat the olive oil over medium-high heat. Add the turkey patties and cook, flipping once, until the patties are golden brown and their internal temperature reads 165 degrees on an instant-read thermometer inserted into the center of a patty, about 4 to 5 minutes per side.

5. Assemble the burgers: On each toasted bun bottom, place a  turkey patty, then top each with a spoonful of the caramelized pineapple, a handful of arugula and the other bun half and serve.

This is probably one of the best turkey burger recipes I have tried. The turkey was cooked just right and it was moist and flavorful, something I always worry about with turkey burgers. I think the sour cream really helps to add moisture and flavor to the burger. The pineapple is great as well, though I did find that it took me more than 25 minutes to completely get all of the vinegar evaporated in the initial step. I took me more like 30 to 35 minutes, but it was okay with me. The pineapple came out nicely caramelized and was great on the burger. I could see using that type of pineapple for other dishes, like a pulled pork sandwich or even as a side dish for a pork dinner. Sean added a piece of cheddar cheese to his burger to round things off and really enjoyed it. I even I had enough turkey to make a couple of extra burgers that we could have for lunch the next day since I did not make them too large.

That’s all I have for today. Check back next time for another recipe. until then, enjoy the rest of your day and enjoy your meal!

IMG_0442


Tags: , , , , , , , ,

It Was a Dark and Stormy Banana Bread

I really like banana bread. It not only can make a great dessert item with a little bit of ice cream (go for Ben and Jerry’s Chunky Monkey for the complete banana experience, or make your own homemade banana ice cream), but it also is perfect for a brunch buffet or even just for breakfast on its own. I have tried a few different banana bread recipes and have never been disappointed in any that I have made, so when I saw this one from Joy the Baker I knew it had to be a hit. How could you go wrong by combining two great things – banana bread and a Dark and Stormy? If you have never had a Dark and Stormy, I was introduced to them long ago on a cruise to Bermuda and it’s a great combination of dark rum and ginger beer. this recipe incorporates the concept, though it leaves out the ginger beer and uses ginger instead.

Dark and Stormy Banana Bread

1/2 cup (1 stick) plus 2 tablespoons unsalted butter

1 cup lightly packed muscovado brown sugar (or dark brown sugar)

2 large eggs

2 teaspoons pure vanilla extract

1 tablespoon dark rum

2 ripe bananas, mashed

1/2 tablespoon fresh grated ginger

heaping 1/2 teaspoon ground cinnamon

1/2 teaspoon ground nutmeg

1/2 teaspoon ground ginger

2 cups all-purpose flour

3/4 teaspoon baking soda

1/2 teaspoon salt

Place a rack in the upper third of the oven and pre-heat the oven to 350 degrees F. Melt the butter in an 9-inch cast iron skillet over medium-low heat. Melt the butter until the crackling subsides and the butter begins to brown. Remove the skillet from the heat and stir in the sugar. Whisk until the butter and sugar are thoroughly combined. The mixture may seem broken as the butter won’t completely absorb into the sugar just yet. Allow the mixture to stand and cool for about 5 minutes.

Whisk in the eggs, one at a time. The mixture will begin to emulsify, be glossy and no longer greasy. Whisk in the vanilla and the dark rum. Add the mashed bananas, fresh ginger, cinnamon, nutmeg, and ground ginger and stir to combine.

Add the flour, baking soda, and salt. Stir the mixture carefully until all of the dry ingredients are incorporated. Use a spatula to scrape down the sides and spread the batter evenly across the skillet.

Place the skillet in the oven and bake for 18-25 minutes until mixture is dry on the top, but still slightly soft in the center. Remove the skillet from the oven and allow the banana bread to cool for 15 minutes. Sprinkle the banana bread with powdered sugar if you’d like and enjoy it warm.

There are a few great things about this recipe. Naturally, the first one is in the flavor. It is awesome banana bread, nice and moist with good banana flavor and the dark rum and ginger really shine through here. Second, this bread is the epitome of easy make and clean up since you do everything in one skillet start to finish. It’s a great use of your cast iron skillet and the bread comes out perfectly in color and has some nice texture to it and there’s no extra bowls to have to clean. Add some ice cream or homemade whipped cream to this and you have something great.
That’s all I have for today. Check back next time for another great recipe to try. Until then, enjoy the rest of your day and enjoy your meal!
IMG_0399
 

Tags: , , , ,

48 Memorial Day Dessert Ideas – Bon Appétit

What makes a great barbecue besides family, fun and food on the grill? An awesome dessert of course. There are all kinds of great dessert options you can try that go beyond the standard fruit salad or store-bought pie. Bon Appetit has 48 Memorial Day desserts for you to try, but these desserts are great for any summer get-together. Check it out and give them a try!

Source: 48 Memorial Day Dessert Ideas – Bon Appétit


Tags: , , , , ,

easter recipes Recipes – NYT Cooking

Easter is less than a week away and if you are planning on hosting Easter dinner this year, you want to have some good recipe ideas on what to make. NYT Cooking has put together everything you might be interested in making this year, from ham to lam to side dishes, brunch recipes, desserts,what to do with those hard-boiled eggs and much more. Check it out!

Source: easter recipes Recipes – NYT Cooking


Tags: , , , , , , , , ,

 
National Day Calendar

Fun, unusual and forgotten designations on our calendar.

Authentic Autograph Source, LLC

Licensed autographs and collectibles dealer in the Pacific NW! We have a wide range of sports, celebrities, and more!

Jennifer Probst

a little bit naughty a little bit nice

Laissez Faire

Letting Life Lead

%d bloggers like this: