RSS

Category Archives: Gravy

Thanksgiving Recipes Across the United States – NYTimes.com

Thanksgiving Recipes Across the United States – NYTimes.com.

The New York Times used their Food section of the newspaper and online today to post a particular recipe related to Thanksgiving for each of the 50 states and Washington D.C. and Puerto Rico. This gives you a chance to try a lot of new things for your Thanksgiving this year or try something from your home state that you may never have thought of before. Check it out!


Tags: , , , , ,

Marcus Knows Best: Helga’s Meatballs and Gravy with Carrot Apple Mashed Potatoes

I am a big fan of Swedish meatballs. I have been making them for several years with different variations, most commonly one recipe that my grandmother had passed on to me years ago and one from chef Marcus Samuelsson that he uses at his restaurant, Red Rooster, in Harlem here in New York. I like both recipes but the one from chef Samuelsson seems much more authentic to me so that is the one I have used, still use, and is basically the same as the one in this recipe, but this recipe also has the addition of carrot-apple mashed potatoes to go with the meatballs to make it more of a meal and less of an appetizer. This is the way you will find it on the menu at Red Rooster and the flavor is fantastic. I did tweak the recipe just a bit from the original. I decided to bake my meatballs instead of grilling them, as is called for in the original recipe to get more of a char on the meatballs. It just seemed easier to bake them, though doing them in a skillet would work pretty well too. Other than that, I followed the recipe, right down to the lingonberry preserves. This particular version is from the Serious Eats website.

Helga’s Meatballs and Gravy with Carrot-Apple Mashed Potatoes

For the Meatballs:

2 tablespoons olive oil

1 red onion, finely chopped

1/2 cup dry bread crumbs

1/4 cup heavy cream

1/2 pound ground chuck or sirloin

1/2 pound ground veal

1/2 pound ground pork

2 tablespoons honey

1 large egg

Kosher salt and freshly ground black pepper


For the Gravy:

1 cup chicken broth

1/2 cup heavy cream

1/4 cup lingonberry preserves

2 tablespoons pickle juice

Kosher salt and freshly ground black pepper


For the Carrot-Apple Mashed Potatoes:

3 Yukon Gold potatoes, peeled and quartered

2 carrots, peeled and chopped

1 Granny Smith apple, peeled, cored, and sliced

2 tablespoons olive oil

1 red onion, thinly sliced

2 garlic cloves, thinly sliced

2 medium shallots, thinly sliced

1 tablespoon balsamic vinegar

1 tablespoon honey

1/2 cup buttermilk

1/2 teaspoon horseradish, preferably freshly grated

Kosher salt and freshly ground black pepper

To make the meatballs, heat the olive oil in a small skillet over medium heat. When the oil is shimmering, add the red onion and cook until the onion is softened, about 5 minutes. Remove the onions from the heat and allow them to cool.

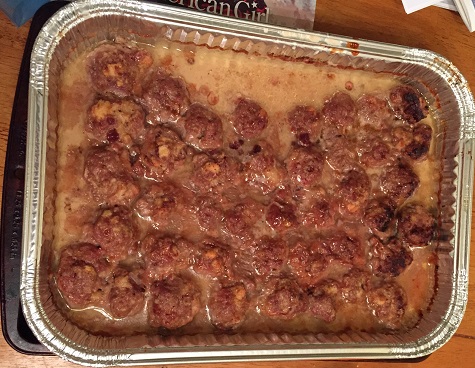
Combine the bread crumbs and the heavy cream in a large bowl, stirring the mixture with a fork until all of the bread crumbs are moistened. Add the sautéed onions, ground beef, ground veal, ground pork, honey, egg, and salt and pepper to the bread crumbs and mix the ingredients well. Wet your hands to keep the meatballs from sticking and shape the mixture into meatballs the size of golf balls, placing them on a plate lightly moistened with some water. You should end up with about 24 to 30 meatballs.

Heat the oven to 400 degrees. On a rimmed baking sheet with a rack inserted, place the meatballs on the rack and bake them in the oven until they are golden brown all over and cooked through, about 12 to 15 minutes.

To make the gravy, bring the chicken broth, heavy cream, lingonberry preserves and pickle juice to a simmer in a large saucepan set over medium-high heat. Add the meatballs to the gravy, reduce the heat to medium and simmer until the gravy thickens slightly and the meatballs are heated through, about 5 minutes. Season with salt and pepper to taste and keep the meatballs and gravy warm.

To make the carrot-apple mashed potatoes, place the potatoes in a large saucepan, cover the potatoes with salted cold water by at least one inch and cook the potatoes until they are tender, about 20 minutes. Put the carrots and apples in a separate saucepan covered with salted cold water by at least one inch and cook until the carrots and apples are tender, about 15 minutes.

While the potatoes, apples and carrots cook, heat the olive oil in a medium skillet over medium-high heat. When the oil is shimmering, add the onion, garlic, shallots, balsamic vinegar and honey. Reduce the heat to medium-low and cook, stirring often, until the onions and shallots are tender, about 10 minutes.

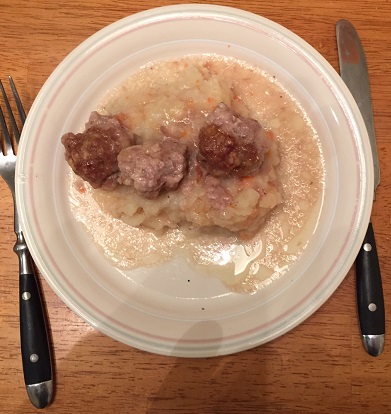
Drain the potatoes and the apples and carrots and return all of them to one of the cooking pots. Mash the mixture coarsely with a fork or a potato masher. Stir in the buttermilk, horseradish and onion mixture. Season the potatoes with salt and pepper to taste. Spoon the carrot-apple mashed potatoes onto dinner plates and top them with the meatballs and gravy.

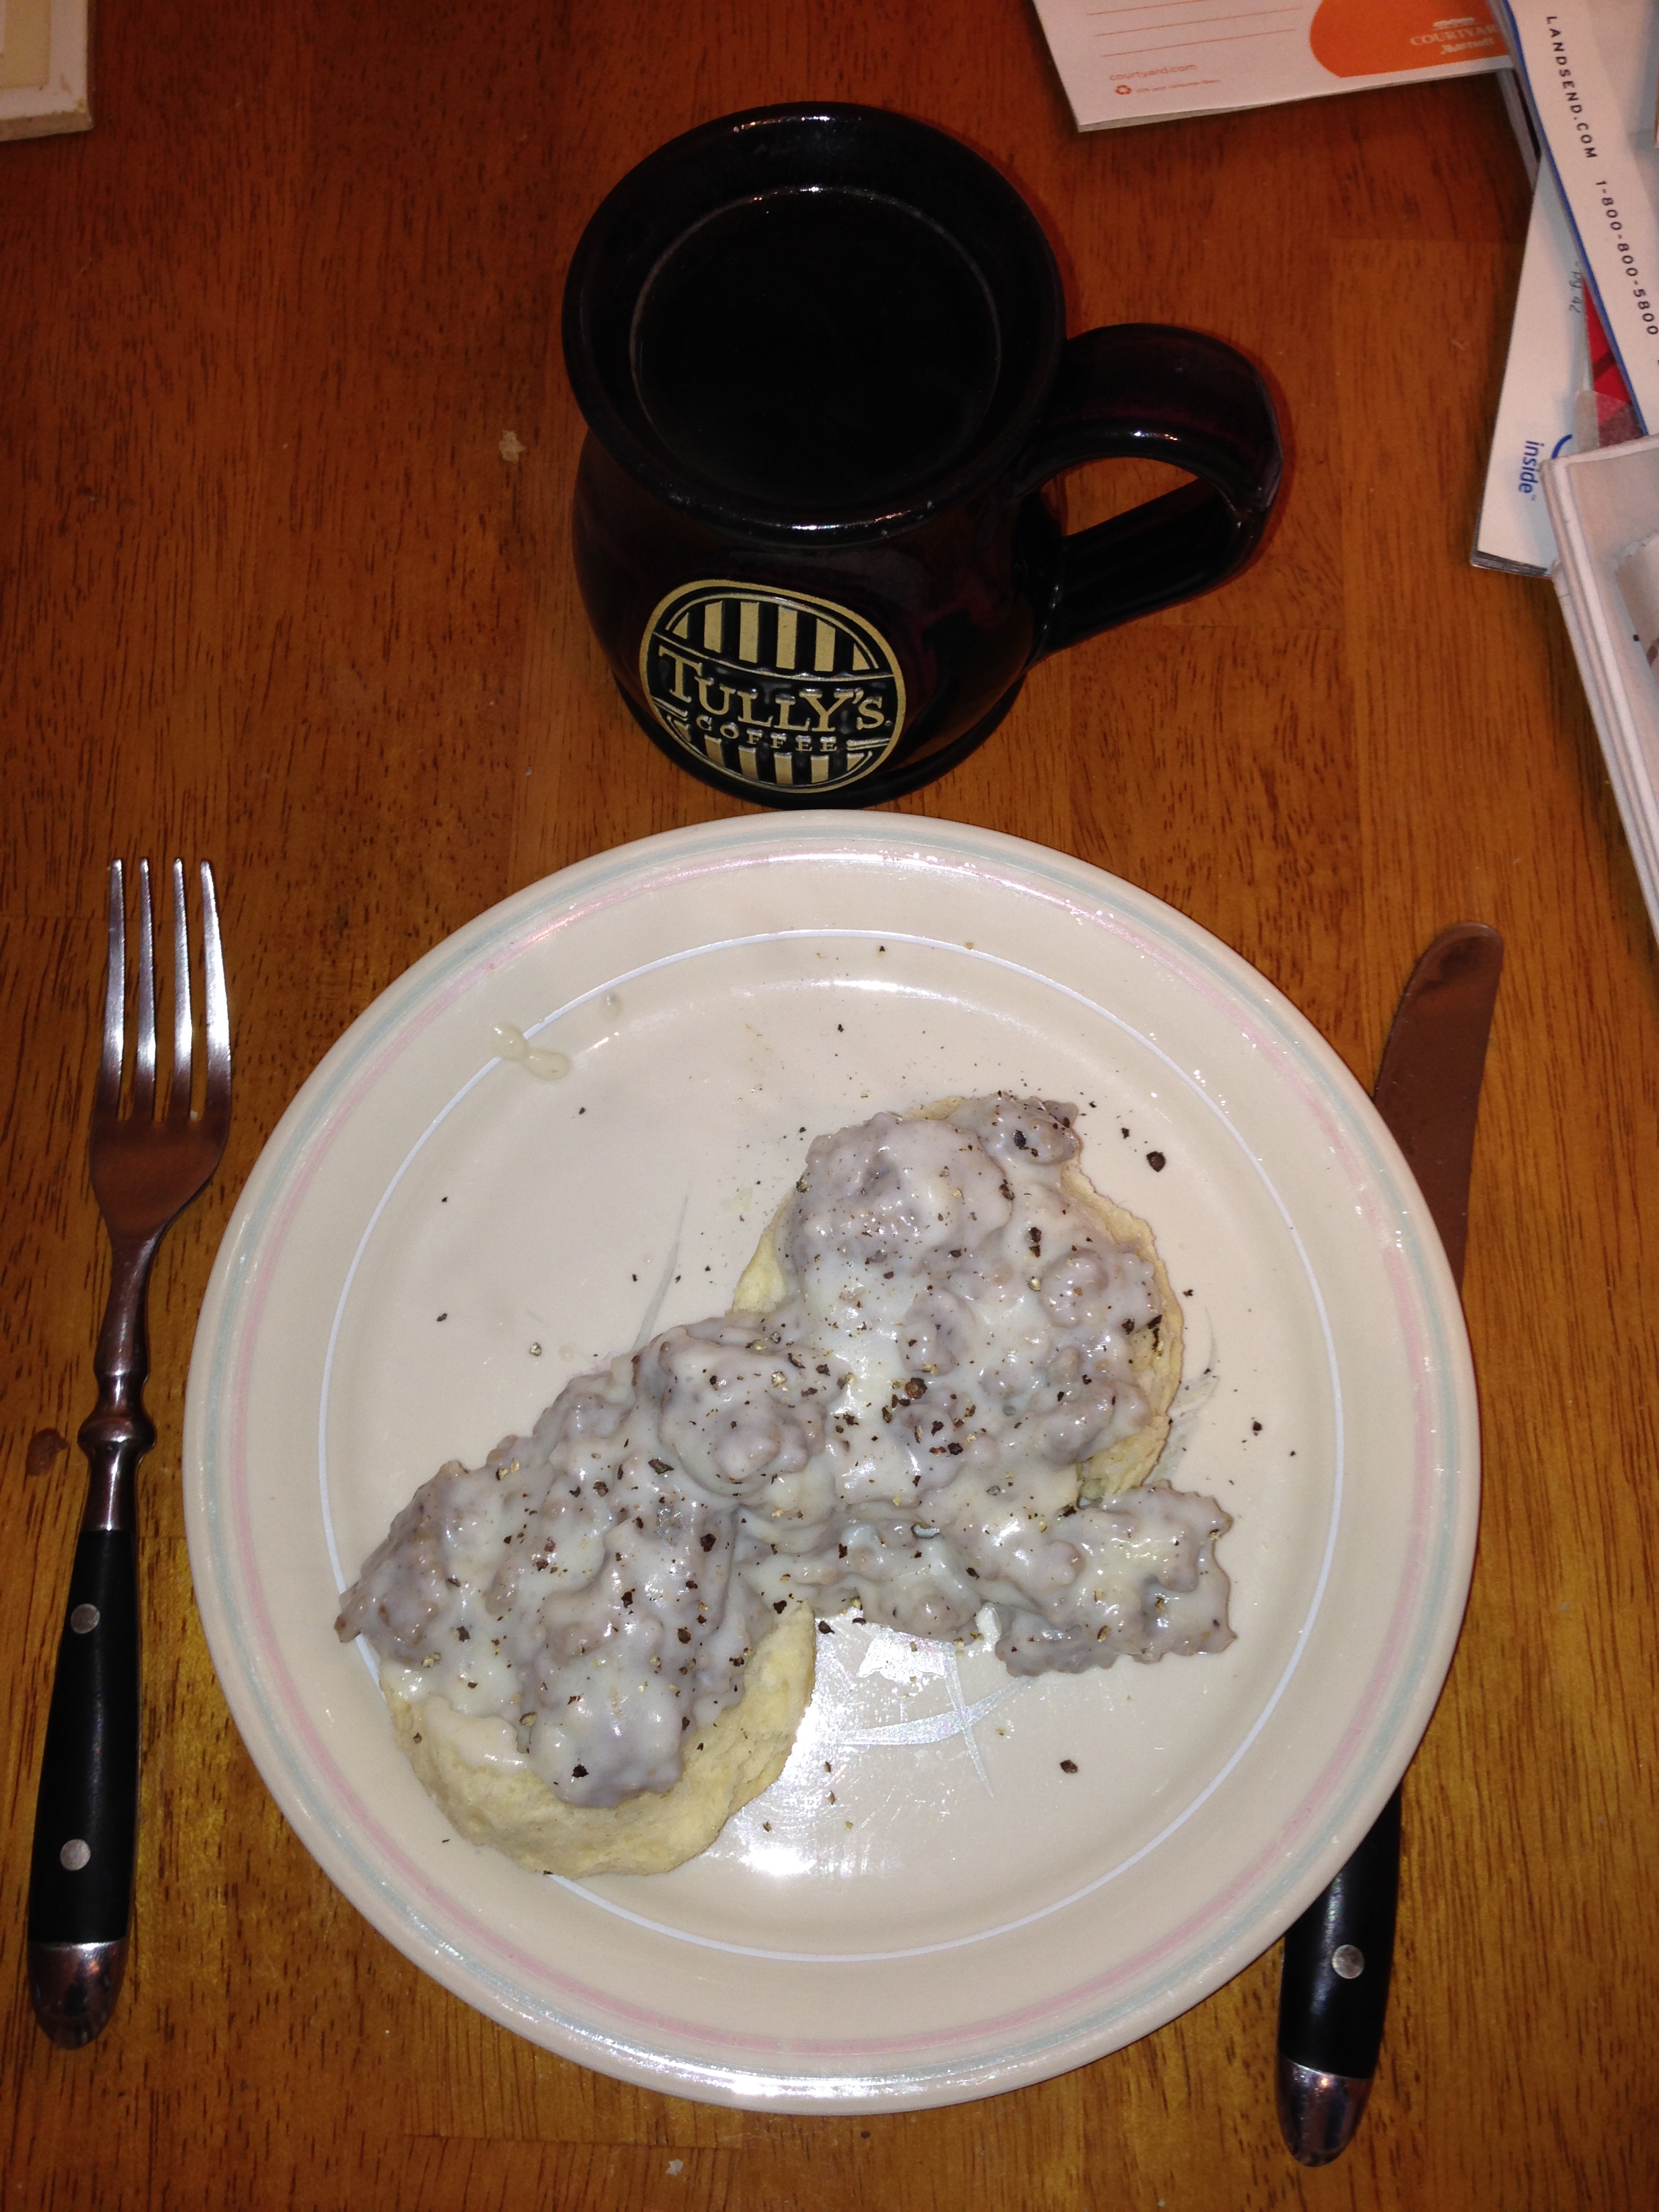
The meatballs have fantastic flavor and the gravy makes them even better. If you can get the lingonberry preserves it makes a big difference in the overall taste, adding that hint of flavor that makes them distinctly Swedish meatballs. I really liked the apple-carrot mashed potatoes as well as it was a great mix of flavors with the apple and carrot along with the onions, horseradish and garlic. I actually made the meatballs a little bit smaller so we had a bunch leftover that I could freeze and use for appetizers for the holidays coming up. It is definitely a recipe worth giving a try.

That’s all I have for today. Check back next time for another recipe. Until then, enjoy the rest of your day and enjoy your meal!

0146af31e8ec4786e27839d999aae30417fe4c9f76 011e41250b90c3b157aa65cc417bac35575f970a66 018be89fc28a00feb694b5fb1f07a9e2638e3ea4d5


Leave a comment

Posted by on November 18, 2014 in Appetizers, Beef, Cooking, Dinner, Gravy, Pork, Potatoes


Tags: , , , , , , , , ,

Thanksgiving: Recipes, Tips, Menus and Techniques | SAVEUR

Thanksgiving: Recipes, Tips, Menus and Techniques | SAVEUR.

With Michelle’s birthday this weekend, I have a lot of planning, prep work and regular work to do so I’ll be posting some great links for Thanksgiving ideas from some popular websites, such as this one:

It’s never too early to start planning out your Thanksgiving menu and Saveur magazine has you covered with lots of great recipes, tips, menus you can make, techniques to help you and videos to watch to help you with everything from gravy to carving the turkey to leftovers. Check it out!


Tags: , , , , , , , , ,

Take on Thursday with Turkey in a Pot with Gravy

Sean has been asking me to make turkey for weeks, but until recently unless you bought a whole turkey around here you couldn’t really get anything at the price of turkey when the holidays are not coming around can be really high so I have been putting it off for a few weeks. Last week when I was shopping I noticed our Stop and Shop and a few turkey breast halves at a really reasonable price. They were about 3 pounds each and one of them easily provided enough for a meal for just the three of us, so I picked up two (one went right into the freezer for later use) and knew I would be able to satisfy Sean’s urge for turkey. As luck would have, the latest issue of Cook’s Country has an interesting recipe for turkey breast that I wanted to try that is called turkey in a pot with gravy.This recipe promises a moist bird with some really good gravy, so it was certainly worth a shot. The original recipe uses a whole turkey breast and I adjusted it down since I was only making a half, but I have posted the original recipe here if you want to try a whole one.

Turkey in a Pot with Gravy

1 (7-pound) bone-in whole turkey breast, wings discarded, trimmed

Salt and pepper

2 tablespoons olive oil

1 onion, chopped

1 carrot, chopped

1 celery rib, chopped

6 garlic cloves, crushed and peeled

1 teaspoon minced fresh thyme

1 bay leaf

1 tablespoon butter, melted

1/4 cup all-purpose flour

4 cups chicken broth

Adjust an oven rack to the middle position and heat the oven to 250 degrees. Using kitchen shears, trim any rib bones that extend beyond the underside of the turkey breast. If any backbone pieces are still attached to the underside of the turkey, remove them as well. Pat the turkey dry with paper towels and season it all over with salt and pepper.

Heat the olive oil in a large Dutch oven set over medium-high heat until the oil is just smoking. Add the turkey, skin side down, and cook until the breast is well browned, about 12 to 16 minutes, rolling it from side to side as needed to make for even browning. Transfer the turkey to a plate and set it aside. Pour off all but 2 tablespoons of fat from the pot. Add the onion, carrot, celery, garlic, thyme and bay leaf to the pot and cook until the vegetables are well browned, about 7 to 10 minutes.

Return the turkey and any accumulated juices to the pot, skin side up. Off the heat, place a large sheet of aluminum foil over the pot and press the edges to seal the foil, then cover the pot tightly with the lid. Transfer the pot to the oven and cook until the thickest part of the turkey breast registers 155 degrees on an instant-read thermometer inserted into the turkey, about 1 1/2 to 1 3/4 hours.

Remove the pot from the oven and heat the broiler. Uncover the pot (be careful, the handles will be very hot as well as the lid) and brush the turkey with the melted butter. When the broiler is heated, return the pot to the oven and broil the turkey until the skin is golden brown, about 8 to 15 minutes, rotating the pot as needed for even browning. Remove the pot from the oven. Transfer the turkey to a carving board, tent the turkey loosely with foil, and allow it to rest while making the gravy.

Place the pot over medium-high heat, bring the contents to a boil and cook until almost all of the liquid has evaporated, about 8 to 15 minutes. Stir in the flour and cook until it is lightly browned, about 2 minutes. Slowly whisk in the chicken broth and bring the mixture to a boil. Reduce the heat to medium and cook at a strong simmer, stirring often, until the gravy is thickened and measures about 2 cups, about 15 to 18 minutes. Strain the gravy through a fine-mesh strainer set over a medium saucepan; discard the solids. Season the gravy with salt and pepper to taste. Carve the turkey and re-warm the gravy, if needed, and serve it with the turkey.

Cooking the turkey at the low temperature in the oven after browning helps to ensure that you get a moister turkey in the end and then putting it under the broiler for a bit for some additional browning gives you great, crispy skin as well. The gravy had great flavor as well thanks to the concentration you get from letting all the liquid evaporate before you make your roux. Everything about it was perfect and of course we had some stuffing, mashed potatoes and vegetables for our little mini pre-Thanksgiving meal. There were even some leftovers after just making the half breast so we could have turkey sandwiches for lunch the next day (always a favorite of mine). I may do this again with the other half breast I have in the freezer.

That’s all I have for today, check back next time for another recipe. Until then, enjoy the rest of your day and enjoy your meal!

IMG_0703 IMG_0702

 
2 Comments

Posted by on October 2, 2014 in Cooking, Dinner, Gravy, Poultry, Turkey


Tags: , , , ,

Easy and Tasty Skillet Fried Chicken with Black Pepper Gravy

Now that the meatball kick is over, I can get back to some other recipes. I have found myself trying a few different fried chicken recipes lately, and even though it may not be the healthiest choice in the world as far as ways to make chicken, it sure does taste good. There is nothing quite like a piece of crispy fried chicken for dinner or even better, for lunch the next day. I had a craving for fried chicken with some gravy, so I was glad when I came across this recipe on the Food Network for skillet fried chicken with a black pepper gravy. It is a simple recipe that has excellent taste and flavor.

Skillet Fried Chicken with Black Pepper Gravy

One 2 to 2 1/2-pound chicken, cut into 8 pieces, or chicken parts (legs, thighs, breasts and wings)

Kosher salt and freshly ground black pepper

2 cups all-purpose flour

1/4 teaspoon cayenne pepper

Canola or vegetable oil, for frying

1 cup milk

1 cup chicken stock or water

Sprinkle the chicken with salt and pepper on both sides and set the chicken aside. Place the flour in a shallow plate and season the flour with the cayenne pepper, salt and black pepper. Toss the mixture to combine it well and set it aside.

Pour the canola or vegetable oil into a large cast-iron skillet to a depth of about 3/4-inch. Heat the oil over medium-high heat until a deep-fry thermometer inserted into the oil registers 375 degrees. Set up paper bags or layers of paper towels nearby for draining the chicken after frying.

Starting with the dark meat, one piece at a time, add the chicken to the seasoned flour and turn the chicken to coat it well on both sides. Shake the chicken to remove any excess flour. One piece at a time, add the chicken to the hot oil. The oil should not quite cover the chicken. Do not overcrowd the skillet as it can be dangerous and cause splattering and make the chicken steam instead of fry, leaving your with soggy chicken. Cook the chicken in batches if needed.

Fry the chicken pieces, turning them once or twice, until the coating on chicken is rich golden brown on all sides, about 10 to 14 minutes. Reduce the heat to medium and cover the skillet. Continue cooking until the chicken is cooked all the way through and the juices run clear when a piece of chicken is pricked with a knife, about another 10 to 15 minutes. An instant-read thermometer inserted into a thigh should register 170 degrees. Remove the chicken and drain the chicken on the brown paper bags or the paper towels.

Remove the skillet from the heat. Carefully pour off most of the grease into a metal bowl or can, leaving about 2 or 3 tablespoons in the pan with the browned crumbs. Reduce the heat to very low. Add 4 tablespoons of the remaining flour from the coating. Stir together the grease and the flour with a wooden spoon and cook, stirring often, until the mixture is golden brown, about 3 minutes. Add the milk and the chicken stock or water. Cook, stirring often, until the gravy is smooth and thick enough to coat the back of a spoon. Add a heaping pinch of black pepper. taste and adjust the seasoning with salt.

Serve the gravy with the chicken and rice or mashed potatoes.

I only made 5 pieces of chicken, all thighs, so as not to overcrowd the pan and that was more than enough for the three of us for dinner. you can always make a few batches if you need to or use 2 pans at the same time. in any case, this is a very simple recipe that yields excellent fried chicken with nice, crispy skin. The best part of the meal though is the gravy that goes with it. It has a great pepper flavor and is rich and creamy, making it perfect for mashed potatoes or rice (I used masked potatoes last night). you can round out the meal with a nice vegetable (like corn on the cob) and some homemade biscuits and you have a great meal of fried chicken during a weeknight.

That’s all I have for today. Check back next time for another recipe. Until then, enjoy the rest of your day and enjoy your meal!

IMG_0571

 
Leave a comment

Posted by on June 10, 2014 in Cooking, Dinner, Gravy, Poultry


Tags: , , , , , ,

Keeping Up with the Classics – America’s Test Kitchen Classic Pot Roast

Making a pot roast dinner is always a family favorite for us. I can remember the days of having a pot roast when I was a child and just the smell of it cooking was enough to make you feel good and you could not wait for dinnertime. Pot roast takes a long time, but with this recipe most of the work is done before the cooking and then you have four hours or so to do other things, relax and wait for the wonderful meal to come. This recipe from America’s Test Kitchen is a really simple one and is a little bit different from the pot roast recipe I have posted in the past. With this recipe you let the meat cook for several hours without having to turn it every 30 minutes like I have in the past.

Classic Pot Roast

1 (3 1/2- to 4-pound) boneless beef chuck-eye roast, pulled into two pieces at natural seam and trimmed of large knobs of fat
Kosher salt
2 tablespoons butter
2 medium onions, halved and sliced thin (about 2 cups)
1 large carrot, chopped medium (about 1 cup)
1 celery rib, chopped medium (about 3/4 cup)
2 medium garlic cloves, minced or pressed through garlic press (about 2 teaspoons)
1 cup beef broth, plus 1 to 2 cups for sauce
1/2 cup dry red wine, plus 1/4 cup for sauce
1 tablespoon tomato paste
1 bay leaf
1 sprig plus 1/4 teaspoon chopped fresh thyme leaves
Ground black pepper
1 tablespoon balsamic vinegar

Sprinkle the pieces of meat with 1 tablespoon of kosher salt (1½ teaspoons if using table salt), place the meat on a wire rack set in a rimmed baking sheet, and let the meat stand at room temperature for 1 hour.

Adjust an oven rack to the lower-middle position and heat the oven to 300 degrees. Heat the butter in a heavy-bottomed Dutch oven over medium heat. When the foaming subsides, add the onions and cook, stirring occasionally, until the onions are softened and beginning to brown, about 8 to 10 minutes. Add the carrot and celery; continue to cook, stirring occasionally, for 5 minutes longer. Add the garlic and cook until it is fragrant, about 30 seconds. Stir in 1 cup of beef broth, ½ cup of red wine, tomato paste, bay leaf, and thyme sprig; bring the mixture to simmer.
 Pat the beef dry with paper towels and season it generously with pepper. Using 3 pieces of kitchen twine, tie each piece of meat into a loaf shape for even cooking.
 Nestle the meat on top of the vegetables. Cover the pot tightly with a large piece of aluminum foil and cover the pot with a lid; transfer the pot to the oven. Cook the beef until it is fully tender and a sharp knife easily slips in and out of the meat, about 3½ to 4 hours, turning the meat halfway through the cooking process.
Transfer the roasts to a cutting board and tent the meat loosely with foil. Strain the liquid through a mesh strainer into a 4-cup liquid measuring cup. Discard the bay leaf and the thyme sprig. Transfer the vegetables to a blender jar. Allow the liquid to settle for 5 minutes, then skim any fat off the surface. Add more beef broth as necessary to bring the liquid amount to 3 cups. Place the liquid in the blender with the vegetables and blend everything until it is smooth, about 2 minutes. Transfer the sauce to a medium saucepan and bring it to a simmer over medium heat.
 While the sauce heats, remove the twine from the roast and slice it against the grain into ½-inch-thick slices. Transfer the meat to a large serving platter. Stir the chopped thyme, the remaining ¼ cup of red wine, and the balsamic vinegar into the sauce and season it to taste with salt and pepper. Spoon half of the sauce over the meat; pass the remaining sauce separately.
This meal is wonderful and the sauce just tops everything off. Splitting the roast into 2 smaller roasts makes a big difference in the cooking time and really helps to soften and break down the meat, making it just melt and fall apart when you go to slice it. This recipe also only puts half of the broth in up front so instead of the meat braising in all of the liquid through the cooking time, it sits above a lot of the liquid, letting the roasts brown while cooking so you can skip searing the meat beforehand. The sauce tastes wonderful as well and makes great gravy for the meat, the vegetables and of course the mashed potatoes that you need to serve with any pot roast. I’ll certainly be using this recipe again when I make pot roast.
That’s all I have for today. Check back next time for another recipe. I just wanted to say a quick thank you to all that have been following along and visited the blog last week to help make it the busiest week I have ever had on the blog. Thanks for all of your interest in the recipes and I plan to keep on sharing all kinds of good things. Until next time, enjoy the rest of your day and enjoy your meal!
IMG_0500 IMG_0498 IMG_0499
 
Leave a comment

Posted by on April 21, 2014 in Beef, Cooking, Dinner, Gravy, Sauce


Tags: , , , ,

Sunday Breakfast with Alton & Bobby – Southern Biscuits and Sausage Gravy

I’ve had a craving for biscuits and gravy lately and yesterday stopped over at Adam’s Farms and got some of their homemade bulk breakfast sausage so I could make some this morning for our Sunday breakfast. Sunday breakfast is usually the only day during the week where Sean, Michelle and I get to eat breakfast together, so we try to make it something different and special each week. I was looking for something quick and easy to use for the sausage gravy and for the biscuits, but I wanted homemade biscuits, not the stuff you get out of the refrigerated can. I turned to Food Network and found a good biscuit recipe from Alton Brown for southern biscuits to go alongside of the sausage gravy recipe I got from Bobby Flay. Both are really easy to make so you can get a different taste for breakfast in no time at all.

Alton Brown’s Southern Biscuits

2 cups flour
4 teaspoons baking powder
1/4 teaspoon baking soda
3/4 teaspoon salt
2 tablespoons butter
2 tablespoons shortening
1 cup buttermilk, chilled

Preheat the oven to 450 degrees.

In a large mixing bowl, combine the flour, baking powder, baking soda and salt. Using your fingertips, rub the butter and shortening into the dry ingredients until the mixture looks like crumbs.Try to do this quickly so that the fat does not completely melt. Make a well in the center of the mixture and pour in the chilled buttermilk. Stir just until the dough comes together. The dough will be very sticky.

Turn the dough onto a floured surface, dust the top of the dough with flour and gently fold the dough over on itself 5 or 6 times. Press into a 1-inch thick round. Cut out the biscuits with a 2-inch cutter, being sure to push straight down through the dough. Place the biscuits on baking sheet so that they just touch. Reform the scrap dough, working it as little as possible and continue cutting. 

Bake until the biscuits are tall and light gold on top, about 15 to 20 minutes.

Bobby Flay’s Sausage Gravy and Biscuits

1 1/2 pounds bulk breakfast sausage or mixture of hot and mild bulk sausage
4 tablespoons flour
1/2 gallon milk
Salt
Pepper
Biscuits, store-bought or homemade (see Alton Brown’s Southern Biscuit recipe above)

In a large pot, add the sausage and cook until it is browned and cooked through. Drain the grease and add the flour to the sausage. Cook the sausage in the flour over medium-high heat until the sausage is well-coated with the flour. Add the milk and stir until the gravy has the  desired thickness and add salt and pepper, to taste. Serve with the biscuits.


I did change up the sausage gravy recipe a little and did not use the 1/2 gallon of milk. I only use about 3/4 of a cup along with a 1/4 cup of heavy cream because we like a gravy that is much thicker for the sausage, and it turned out perfect. The real star here though is the biscuits. These are really easy to make, smell great and taste awesome. You could use these for all kinds of breakfast sandwiches that you like if you didn’t want the sausage gravy, like bacon, eggs, ham or anything else. They are also a great dinner biscuit and I plan to use the rest to go along with dinner tonight. You could even just have one warm with some butter to go with your tea or coffee in the morning and you would be all set.

That’s all I have for today. Check back next time for another recipe. Until then, enjoy the rest of your day and enjoy your meal!

IMG_0506 IMG_0505

 
4 Comments

Posted by on April 13, 2014 in Biscuits, Breads, Breakfast, Cooking, Gravy, Pork


Tags: , , , , , , , , , , ,

A Prime Way to Start the New Year – Prime Rib Sandwiches

Happy New Year! I hope everyone had a wonderful day and evening yesterday and you are ready to start off 2014 in grand style. Granted, this recipe is not one that you can make very often, but since I had some leftover prime rib, this seemed like a great way to make good use of it. Of course you can always make a little prime rib if you want just to make these sandwiches. While I did get the recipe from Saveur, I altered it quite a bit to the point where I think it is mostly mine so I could make use of some items we all like in the sandwiches.

Prime Rib Sandwich

1 medium onion, peeled and thinly sliced

1 tablespoon vegetable oil

4 ounces mushrooms, cleaned, stems removed, thinly sliced

3 tablespoons all-purpose flour

2 1/2 cups beef broth

1/2 Roasted Prime Rib recipe or leftover prime rib, thinly sliced

1 tablespoon butter

Kosher salt and freshly ground black pepper, to taste

4 sandwich rolls

Slices of cheese – Provolone, Colby Jack, Cheddar (whatever you really like), for topping

Heat the vegetable oil in a large skillet over medium heat until it is shimmering. Add the onion and cook until the onion softens and is just starting to brown, about 5 minutes. Add the mushrooms and cook just until the mushrooms begin to release some liquid, about 3 to 4 minutes.Whisk in the flour and cook until it is well blended into the vegetables, about 2 minutes. Slowly begin to whisk in the beef broth, a little at a time until so that it absorbs a bit into the vegetables and then just add it slowly, whisking constantly, to avoid lumps from forming in the gravy, about 4 to 5 minutes. Bring the gravy to a boil and reduce the heat to medium-low and cook until the gravy is slightly thickened, about 4 to 5 minutes.Stir in the butter and add salt and pepper to taste.

Stir in the prime rib and cover the pan until the meat is heated through, about 5 minutes. Place one roll on each serving plate and place slices of prime rib in gravy, onions and mushrooms in the roll. if you desire top with any cheese that you like and serve as a cheese steak sandwich or simply serve as an open-faced sandwich without the cheese.

For the cheese steak style sandwich, you may want to place the sandwich under the broiler for a minute to get the cheese melted the way you would like it. I preferred mine without the cheese and just as an open-faced sandwich. You can add all kinds of toppings to this if you wish, like peppers, or hot peppers or even other vegetables that you might like to have. You can even serve it with some mashed potatoes or some oven baked french fries and let them get some of the delicious gravy as well. To me, there was no better way to make use of the leftover prime rib. It was super tender and tasted great with the gravy. It made me wish I had leftover prime rib around the house a little more than once a year!

That’s all I have for today. Check back next time for some more recipes. Until then, enjoy the rest of your day, Happy New Year and enjoy your meal!

002 001


2 Comments

Posted by on January 1, 2014 in Beef, Cooking, Dinner, Gravy, Leftovers, Sandwiches


Tags: , , , , ,

The Perfect Roast Turkey? It Seems Pretty Darn Close

It seems like there are dozens of different ways to make your Thanksgiving turkey and hundreds of different recipes out there to suit whatever need, ingredients or things you may want to try when it comes to the turkey. For me, roasting a turkey doesn’t get much better. Since I am not hosting Thanksgiving this year, Michelle decided she would like to have a turkey dinner to help celebrate her birthday this past weekend. Now I didn’t really need a recipe to make the turkey, but I came across this method from Saveur Magazine that professed to make the perfect roast turkey, so I figured I would give it a try to see how it worked out.

Perfect Roast Turkey and Gravy

1 13-14 pound fresh turkey

2 tablespoons kosher salt

1 teaspoon freshly ground black pepper

1 1/2 cups homemade chicken or turkey broth

3/4 cup dry white wine or dry vermouth

2 tablespoons brandy

4 tablespoons fat from the roasting liquid or butter

1/3 cup all-purpose flour

4 cups warm turkey or chicken broth

Remove the giblets from the turkey and refrigerate them for a later use. Pat the turkey dry with paper towels. Sprinkle the kosher salt and black pepper liberally all over the turkey, spreading a little in the turkey cavity and being sure to season the back, breasts and thighs. Arrange the turkey on a wire rack over a rimmed baking sheet and refrigerate, uncovered (this will help to dry out the skin, giving you a crisper skin during the roasting) for one to two days.

Remove the turkey from the refrigerator about two hours before roasting to take the chill off the bird. This will help it to cook more evenly. Heat the oven to 450 degrees. Tuck the turkey wings behind the neck and tie the tips of the drumsticks together with kitchen twine. Arrange the turkey breast side up on a rack set in a sturdy roasting pan. Pour 1 1/2 cups of the turkey or chicken broth into the bottom of the pan and slide the turkey into the oven, immediately lowering the heat to 350 degrees. Let the turkey roast for 2 1/2 to 3 hours total, rotating the pan after about 1 1/4 hours. Meanwhile, combine the remaining broth with the giblets in a saucepan over medium heat. Simmer gently, partially covered, until the giblets are tender, about 45 minutes. Remove the giblets, saving them to add to the gravy later, and keep the broth warm.

Baste the turkey by spooning pan drippings over the breasts every 45 minutes. If you notice the breasts or drumsticks getting too dark, cover them loosely with aluminum foil during the last 30 to 45 minutes of roasting. The turkey should cook at a rate of about 13 minutes per pound. To check the doneness, pierce the meaty part of thigh with a sharp knife and check that the juices run mostly clear with only a trace of pink. Don’t wait for them to become perfectly clear; this may br a sign that the turkey is already overdone. To double-check yourself, insert an instant-read thermometer into the thigh, being careful not to hit the bone; it should read 170 degrees.

When the turkey is done, grab both sides of the roasting rack with oven mitts to lift and tilt the turkey and let the juices pour from the cavity into the pan. Set the turkey aside, tenting it very loosely with foil, to rest for at least 30 minutes while you make the gravy. Pour all the liquid from the roasting pan into a heatproof bowl or 1-quart measuring cup and set it aside. Set the roasting pan over 2 burners at medium-high heat and add the white wine or vermouth and the brandy. Bring to a boil, scraping with a wooden spoon to dissolve any cooked-on bits and return the reserved liquid to the roasting pan. Boil, stirring often, until the liquid is reduced to nearly half, about 8 minutes. Turn off the heat and set aside.

Once the liquid from the roasting pan has settled, spoon off and transfer the surface fat to a medium saucepan to make a roux for your gravy. If you can get 4 tablespoons of fat from the surface, use that; if not, you can make up the difference by using some butter. Heat the fat over medium-low heat and whisk in 1/3 cup of flour until it is smooth. Cook for about 4 minutes, until the roux is a light amber color, and then gradually whisk in the reserved pan drippings. Bring the mixture to a simmer and slowly whisk in 4 cups of the warmed broth. Let the gravy simmer and thicken, whisking occasionally, for about 15 minutes (or longer if you want a thicker gravy). For a hearty giblet gravy, finely chop the neck meat along with the gizzard and the heart and stir it into the finished gravy. Season the gravy with salt and pepper to taste and keep the gravy warm while you carve the turkey.

I don’t know if this is the perfect roast turkey, but I have to say if it isn’t it’s pretty darn close. I had never salted the turkey like this before, but it did seem to help the bird when it came to retaining moisture and juice and it wasn’t too salty, though we did find that you don’t really need to add much salt, if any at all, to the gravy because the pan drippings had plenty. The bird was perfectly browned and moist and the gravy was wonderful. Saveur does provide a method for making your own turkey broth ahead of time using turkey parts that you can buy, but I didn’t do this and just used chicken stock that I had instead and I think it turned out fine. I think you could certainly substitute store-bought chicken or turkey broth to save you some time if you don’t want to make your own turkey broth.

That’s all I have for today. I have lots of other recipes that are perfect for Thanksgiving as I made a lot of side dishes to go along with this turkey, so check back all week for some great ideas on ways to make turnip casserole, Brussels sprouts, maple glazed carrots, sausage, apple and sage stuffing, creamed pearl onions, some great appetizers like broccoli dip in a bowl and meatball sliders and a lemon layer cake I made for dessert. Check back and see what comes up next. Until then, enjoy the rest of your day and enjoy your meal!

011


5 Comments

Posted by on November 11, 2013 in Cooking, Dinner, Gravy, Holidays, Poultry, Turkey


Tags: , , , , , , , , , ,

A Breakfast Special: Homemade Biscuits and Sausage Gravy

Michelle likes to make a homemade breakfast on Sundays and this past weekend was no exception. She had asked me what I felt like having and I had suggested biscuits and sausage gravy. I know it is far from the healthiest breakfast out there, but it tastes really good and it is something we almost never have. I found this recipe from Cook’s Country that was simple and quick to make and didn’t use any ingredients that we didn’t already have in the house, which made it even better to try.

Homemade Biscuits and Sausage Gravy

Biscuits:

3 cups all-purpose flour
1 tablespoon sugar
1 tablespoon baking powder
1/2 teaspoon baking soda
1 teaspoon salt
8 tablespoons (1 stick) butter, cut into 1/2-inch pieces and chilled
4 tablespoons vegetable shortening, cut into 1/2-inch pieces and chilled
1 1/4 cups buttermilk 

Sausage Gravy:

1/4 cup all-purpose flour
1 teaspoon ground fennel seed
1 teaspoon ground sage
1 1/2 teaspoons pepper
1 1/2 pounds bulk pork sausage
3 cups milk
Salt

 For the biscuits: Adjust an oven rack to the middle position and heat the oven to 450 degrees. Line a baking sheet with parchment paper. Pulse the flour, sugar, baking powder, baking soda, salt, butter, and shortening in the food processor until the mixture resembles a coarse meal. Transfer the mixture to a large bowl. Stir in the buttermilk until combined.

On a lightly floured surface, knead the dough until it is smooth, about 8 to 10 kneads. Pat the dough into a 9-inch circle, about 3/4-inch thick. Using a 3-inch biscuit cutter dipped in flour, cut out rounds of dough and arrange them on a prepared baking sheet. Gather the remaining dough, pat it into a 3/4-inch-thick circle, and cut out the remaining biscuits. You should have 8 biscuits in total.

Bake until the biscuits begin to rise, about 5 minutes, then rotate the pan and reduce the oven temperature to 400 degrees. Bake until the biscuits are golden brown, about 12 to 15 minutes, then transfer the biscuits to a wire rack and let them cool.

For the sausage gravy: Combine the flour, fennel, sage, and pepper in a small bowl. Cook the sausage in a large nonstick skillet over medium heat, breaking up the meat with a wooden spoon, until the sausage is no longer pink, about 8 minutes. Sprinkle the flour mixture over the sausage and cook, stirring constantly, until the flour has been absorbed, about 1 minute. Slowly stir in the milk and simmer until the sauce has thickened, about 5 minutes. Season with salt and serve over split biscuits. The biscuits can be stored in a zipper-lock bag for 2 days to be used again later on.

It’s a very simple meal that makes a great breakfast. You could just have this alone with your coffee, tea or juice or serve it with an egg over easy or scrambled eggs and you have a really nice breakfast for a weekend. We actually made extra so there was some left over for me to have another day. I just heated some of the sausage gravy up and added a little milk to it to loosen it up and had some with a biscuit. It was pretty darn yummy.

That’s all I have for today. Check back next time for another recipe. As always, there’s still lots to come, including more Thanksgiving ideas and recipes to use. Until next time, enjoy the rest of your day and enjoy your meal!

IMG_0369

 
1 Comment

Posted by on November 6, 2013 in Biscuits, Breads, Breakfast, Gravy, Pork


Tags: , , , , , ,

 
National Day Calendar

Fun, unusual and forgotten designations on our calendar.

Jennifer Probst

a little bit naughty a little bit nice

Laissez Faire

Letting Life Lead

What To Have For Dinner Tonight

Simple and delicious dinner inspiration