RSS

Category Archives: Sauce

Fine Food for Father’s Day, Part 1 – Strip Steak with Brandied Mushrooms and Sweet Potatoes

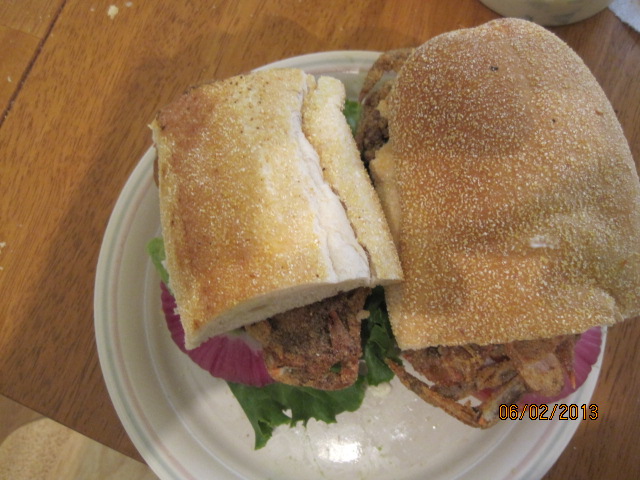
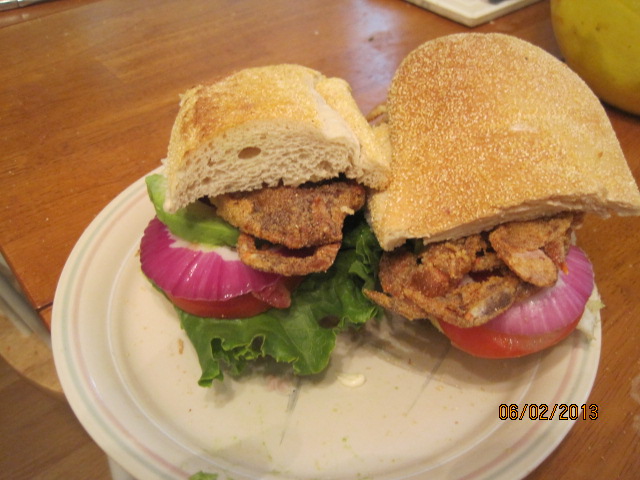
Father’s Day dinner is always treat. Michelle and Sean get to do all the cooking and I get to pick out what I would like to have for dinner. I picked something simple this year since it was just the 3 of us. Michelle had picked up some New York strip steaks and we had some other things around the house that could make for a simple yet elegant meal. We thought about using the grill, but the weather was kind of iffy at the time we were eating dinner so we thought on the safe side we would just do it inside. The recipe for the steaks comes from Tyler Florence.

New York Strip Steak with Brandied Mushrooms and Fresh Thyme

4 New York strip steaks, each about 1 1/2 inches thick
Extra-virgin olive oil
Kosher salt and freshly ground black pepper
2 pounds mushrooms, trimmed, brushed clean with the towel and stemmed
Leaves from 2 sprigs fresh thyme
2 cloves garlic, chopped
1/4 cup brandy
1/2 cup heavy cream

Remove the steaks from the refrigerator and allow them to come to room temperature. Heat 2 tablespoons of oil in a large sauté pan over medium-high heat until smoking. Sprinkle the steaks all over with salt and pepper. Put the steaks in the pan and cook, turning to brown all sides completely, until medium-rare, about 8 to 10 minutes depending on how thick the steaks are. Remove the steaks to a platter with tongs and cover loosely with a tent of aluminum foil to keep the meat warm while you make the sauce.

Put the sauté pan back over medium-high heat and add 1/4 cup olive oil. When the oil is smoking, add the mushrooms and cook, stirring, about 10 minutes, until golden brown. Add the thyme and the garlic, and season well with salt and pepper. Toss a few more times to cook the garlic, then dump the mushrooms out onto a platter. Take the pan off the heat, add the brandy, return the pan to the heat, and cook until almost evaporated. Add the cream and cook that down to 2 to 3 minutes until reduced by about one half and thickened. Return the mushrooms to the pan with whatever juices have collected on the platter and simmer the entire thing another 2 minutes until thickened again. Season with salt and pepper. Slice the steaks thin against the grain. Taste the sauce for salt and pepper and serve.

I loved the mushrooms sauce that came with the steaks. The steaks were cooked perfectly and the sauce added just the right amount of flavor with the mushrooms and the brandy. We did not have to pounds of mushrooms on hand, so we actually ended up about halving the recipe and cut down the amount of olive oil used to about 2 tablespoons and cut the brandy down to about 1/8 of a cup and the heavy cream to about one-fourth.

Besides making some corn on the cob to go with the steaks, we also used a recipe from Bobby Flay of the Food Network for grilled sweet potatoes with lime and cilantro. Even though we didn’t actually grill the potatoes, I think they still came out pretty nicely for indoor cooking. It’s very easy to make this recipe and takes next in no time at all.

Grilled Sweet Potatoes with Lime and Cilantro

3 sweet potatoes, unpeeled
Kosher salt
2 teaspoons finely grated lime zest
Pinch of cayenne pepper
1/4 cup canola oil
Freshly ground pepper
1/4 cup finely chopped fresh cilantro

To par-cook the potatoes, place the potatoes in a large pot of water and boil until fork tender, about 8 minutes. Allow the potatoes to cool completely. Slice each potato lengthwise into eighths.

Preheat the grill to medium or place a cast-iron grill pan over medium heat. Mix 1 tablespoon of salt, the lime zest and the cayenne pepper in a small bowl and set aside.

Brush the potato wedges with the oil and season well with salt and pepper. Grill the potatoes until they are golden brown on all sides (including the skin) and just cooked through, about 1 1/2 to 2 minutes per side. Transfer the potatoes to a platter and immediately season with the salt mixture and sprinkle with cilantro.

We simply made the potatoes in the cast-iron pan instead of dragging the grill pan out and I think they turned out just as well. Par-cooking them is really necessary here because you want to make sure the potatoes are going to be cooked all the way through when you make them this way. If you just put them in raw, they are not going to be done in one to 2 minutes and will burn. I really liked the mixture of the lime and the salt with the cayenne pepper; it really help to bring out the flavor of the potatoes and I actually used some of the salt on my piece of corn on the cob as well.

That’s all there is for today. Next time I will post the recipe Michelle used to make banana cream pie for dessert for Father’s Day. I can tell you it was pretty darn good and I really enjoyed it. Check back for that one as well as some of the recipes that I have done recently and plan to post on the blog. Until next time, enjoy the rest of your day and enjoy your meal!002


Tags: , , , , , , ,

‘Tis the Season for Soft Shell Crab

While you can get soft-shell crab until about the month of September, the best time of year is to get it between June and July. The local fish market that I go to just recently started having it in and since I was there yesterday I decided to get some. Ideally, if you can get the crabs live that is the best way for you to get them. Most fish places will then clean it for you, which usually involves them trimming off the eyes and mouth and cleaning out the gills. Soft-shell crab should be eaten within 24 hours of purchasing that way you can be sure that it is good and fresh. Most recipes you will come across involved sautéing or frying the crab in some way. I decided to use this recipe that I’ve found from Tyler Florence that makes a soft-shell crab BLT with a special lemon-pepper mayonnaise.

Soft-Shell Crab BLT with Lemon-Pepper Mayonnaise

Lemon-Pepper Mayonnaise

2 large egg yolks
1 teaspoon salt
1 teaspoon dry mustard
1 lemon, juiced
1 cup vegetable oil
2 teaspoons cracked black pepper
1 handful fresh flat-leaf parsley, finely chopped

Crabs

2 cups buttermilk
1 tablespoon crab boil seasoning
Sea salt and freshly ground black pepper
4 medium soft-shell crabs, cleaned and rinsed
Vegetable oil, for frying
2 cups all-purpose flour

Sandwich

4 soft bread rolls, such as brioche or croissants, split and lightly toasted
4 red leaf lettuce leaves
1 fine-ripe tomato, sliced
8 slices hickory-smoked bacon, cooked
1 avocado, halved, pitted, peeled, and sliced

To make the mayonnaise, in a food processor, combine the egg yolks, salt, dry mustard, and lemon juice; process together to form a stable base. With the motor running on the food processor, add a few drops of the oil through the feed tube, until the mixture begins to thicken. Begin adding the remaining oil in a thin, steady stream. Scrape down the sides of the food processor and pour the mayonnaise into a small bowl. Mix in the black pepper and the parsley, cover, and refrigerate. The mayonnaise may be kept for up to 3 days.

To prepare the soft-shell crabs, pour the buttermilk in a shallow bowl large enough to hold all the crabs. Season the buttermilk with crab boil seasoning, salt, and pepper. Lay the crabs in the buttermilk mixture and marinate, covered, in the refrigerator for 1 hour. Soaking the crabs in the buttermilk will help them plump up when cooked. Remove the crabs from the milk bath and let the excess drip off.

Pour 2 inches of vegetable oil in a heavy frying pan or large pot and heat to 350°. Put the flour in a pie dish or plate and season with a fair amount of salt and pepper. Dredge the crabs in seasoned flour to coat, shaking off the excess. Lay the crabs in the hot oil in a single layer without crowding; you may have to fry them in batches. Be careful since the crabs have a tendency to pop and spatter (if you have a splatter screen, now is a good time to break it out and use it). Cook the crabs for about 3 minutes on each side, turning once, until golden brown. Drain on paper towels.

To build the sandwich, spread the lemon-pepper mayonnaise on both halves of the toasted bread. Add the lettuce, tomato, bacon, and avocado. Lay a fried soft-shell crab on top and close up the sandwich.

I love the way this sandwich came out. The crab tasted great with the bacon and avocado and the lemon-pepper mayonnaise added just the right flavor to the sandwich. I did season the flour a little bit with some Old Bay seasoning to add some extra flavor. One word of warning when making the mayonnaise – when you’re going to use raw egg yolks, I would recommend that you use eggs that have already been pasteurized to avoid any risk of salmonella. You could also make the lemon-pepper mayonnaise by using store-bought mayonnaise and simply mixing and the lemon juice, dry mustard, pepper and parsley yourself and avoid the problem altogether. Mayonnaise itself isn’t that hard to make if you have food processor or a really strong wrist for whisking, so you should give it a try sometime if not this time. I also added a little bit of sliced red onion to the sandwich. I served the sandwiches with some homemade coleslaw and it was a perfect meal for a hot night.

That’s all there is for today. Check back again during the week to see what other recipes we decide to use. I did go shopping yesterday and I do have some plans this week to make some chicken, some pork chops and I did get some ground beef and some sausage, though I have not yet decided what to do with them. So check back and see what comes along. Until the next time, enjoy the rest of your day and enjoy your meal!

002 001

 
Leave a comment

Posted by on June 3, 2013 in Cooking, Dinner, Sauce, Seafood, Side Dishes


Tags: , , , , ,

Taking on the Big Marc Burger

Everyone loves to have a hamburger of some sort. There are thousands of different recipes all over the place using all kinds of different meats, cheeses, sauces, condiments and rolls. I have posted links just within the last week of many different burger recipes you can use for this summer on your grill. One in particular that struck me and made me want to give it a try was one that was posted by the Food Network. The recipe specifically is from Marc Murphy, a well-known chef and restaurant owner many may be familiar with the as one of the judges on the show “Chopped.” He offered up a recipe for what he calls “The Big Marc.”

The Big Marc Burger

Homemade Cheddar and Black Pepper Buns

1 cup warm water
1 1/2 ounces fresh yeast
1/2 cup sugar
4 ounces butter, melted, plus more for greasing
4 eggs
1 1/2 teaspoons salt
4 to 5 cups all-purpose flour
8 ounces shredded cheddar cheese
1 and freshly cracked black pepper

Spiked Ketchup

1 head garlic
Olive oil
Salt and freshly ground black pepper
1 cup mayonnaise
2 tablespoons Dijon mustard
1 1/2 cups ketchup
5 ounces vodka (about 2/3 cup)

Burgers

2 1/2 pounds 80/20 ground beef, formed into six 6-ounce patties
Salt and freshly ground black pepper
2 tablespoons canola oil
3 ounces melted butter
Bread and butter pickles

For the buns, stir the water, yeast and sugar together to activate the yeast. You can tell when the yeast is activated-little bubbles will have formed, which will take several minutes. Add the melted butter and 3 of the eggs and mix until incorporated.

Add 4 cups of flour and the salt to the bowl of a stand mixer fitted with the dough hook attachment. Mix together on low speed, then stop and add the wet ingredients. Continue to mix until the dough is very smooth, about 5 minutes. You may want to add a little bit more flour as you mix; the dough should be sticky but workable. Transfer the dough to a bowl. Cover the bowl with a kitchen towel, place in a warm area and let rise until the dough has doubled in size, about 30 minutes.

After the dough has proofed (risen), turn it out onto a lightly-floured countertop and knead in the cheddar and black pepper. Try not to overwork the dough; once the cheese is mixed in you can stop. Cut the dough into 6 equal portions and shape them into round balls. Place on a buttered baking sheet and flatten them with your hand. Cover and let rise again in a warm area until they have doubled in size, about 30 minutes more. When they are almost doubled in size, preheat the oven to 350°. Beat the remaining egg in a small bowl and brush the tops of the rolls with the egg. Bake until golden brown, rotating halfway through, about 10 to 15 minutes.Cool the rolls on a wire rack.

For the ketchup, turn the oven down to 250°. Cut the garlic in half crosswise and sprinkle with olive oil, salt and pepper. Wrap the garlic in aluminum foil and roast until soft, about 35 to 40 minutes. Remove the garlic from the skins and mix into a paste. Reserve 1 tablespoon for the ketchup, and keep the remaining garlic for another use. Whisk together the mayonnaise, mustard and roasted garlic in a bowl. Add the ketchup and vodka and mix until incorporated. This will keep for up to 6 days in the refrigerator.

For cooking the burgers, heat a skillet over high heat or heat an outdoor grill to high. Sprinkle the patties with salt and pepper. Coat with oil and sear or grill until medium rare, about 3 to 5 minutes per side.

Slice the buns in half horizontally and brush with the melted butter. Toast in the skillet or on the grill. Arrange pickles slices on each bottom bun and place a hamburger on top. Slather 1 to 2 tablespoons of spiked ketchup over the burger and set the top bun in place. Serve with the remaining ketchup on the side.

Just a few things about this recipe. Number one, I’ve never made any type of buns like this before so it was a new experiment for me. I have to say it was pretty easily done and they came out quite nice. I did eliminate putting the cheddarr and black pepper into the rolls because I wasn’t sure how they would come out and wanted to try them just plain the first time around. We all liked the hamburger buns better than anything you would buy at the supermarket. As is noted in the recipe, however, the recipes for the buns and the ketchup are quite large. The buns themselves come out big when they are finished and are probably more than what you need for a hamburger unless you really like a large roll. I actually ended up cutting the recipes for the buns and the ketchup in half of what is shown here and still ended up with a lot of ketchup and big buns. Next time, I think I will portion the buns out to make them even smaller and see how they come out and maybe even just do 1/3 of the ketchup recipe. You could go for completely homemade in this recipe and grind your own beef with a mixture of chuck and sirloin and form your own patties that way. Of course, you can serve any condiments or sauces that you like on the side. We actually made ours with some crispy bacon and some onion rings.

That’s the recipe for today. Check back next time and you can see the meatloaf recipe I tried out recently that comes from Tyler Florence. I also have a few other recipes for the coming days and weeks so you want to keep checking back and see what comes up. Until then, try to stay: this heat wave were experiencing in New York and enjoy the rest of your day and enjoy your meal!

006 003 004 005

 
Leave a comment

Posted by on May 31, 2013 in Beef, Breads, Cooking, Dinner, Grilling, Sauce


Tags: , , , , , , , ,

Positively Perfect Pound Cake

We’ve done a lot of cooking and baking over the last few days, and it has given me quite a few recipes to work with. One of the things we made this past weekend was a classic pound cake recipe that I got from America’s Test Kitchen. I love just a plain piece of pound cake with a cup of coffee or maybe even a simple dollop of whipped cream or a little bit of fruit on the side. It’s a great thing to make it and doesn’t take a lot of work on your part so you could easily make one and bring it to a party or a friend’s home.

Pound Cake

1 1/2 cups cake flour
1 teaspoon baking powder
1/2 teaspoon salt
1 1/4 cups sugar
4 large eggs, at room temperature
1 1/2 teaspoons vanilla extract
16 tablespoons (2 sticks) butter, melted and hot

Adjust an oven rack to the middle position and heat the oven to 350°. Lightly coat a 9 x 5-inch loaf pan with vegetable oil spray, then line the bottom with parchment paper. Whisk the flour, baking powder, and salt together in a large bowl and set aside.

Process the sugar, eggs, and vanilla in a food processor until combined, about 10 seconds. With the machine running, pour the melted butter through the feed tube in a steady stream, about 30 seconds. Pour the mixture into a large bowl.

Sift one-third of the flour mixture over the egg mixture and whisk in. A few streaks of flour should remain. Repeat twice more with the remaining flour mixture and continue to whisk the batter gently until most of the lumps are gone. Do not over mix.

Pour the batter into the prepared pan and smooth the top. Wipe any drops of batter off the sides of the pan. Bake until a wooden skewer inserted into the center of the cake comes out with just a few crumbs attached, about 50 to 60 minutes, rotating the pan halfway through baking. Let the cake cool in the pan for 10 minutes, then flip it out onto a wire rack. Turn the cake right side up, remove the parchment paper, and allow it to cool to room temperature, about 3 hours.

There are few notes about this recipe. You could easily vary the recipe up a little bit and add some flavor to it. Adding 2 tablespoons of grated lemon zest and 2 teaspoons of fresh lemon juice to the sugar just before you process everything in the 2nd step will give you a nice lemon pound cake. You can do the same with a tablespoon of grated orange zest and a tablespoon of orange juice and get an orange flavor instead. If you don’t have any cake flour on hand, you can make your own replacement. For every 1 cup of cake flour, you need 7/8 of a cup of all-purpose flour and 2 tablespoons of cornstarch in order to get the same results You can serve this cake with a variety of different fruits on the side or some homemade whipped cream. Remember that blueberry sauce I made about a week ago? I used that on the cake and it tasted great.

That’s all there is for today. Next time out I held be sharing the recipe Michelle uses for her oatmeal raisin cookies. I also have some other recipes to try to share this week so keep checking back to see if there’s anything you like. Until then, enjoy the rest of your day and enjoy your meal!

003 001 002

 
Leave a comment

Posted by on May 28, 2013 in Cakes, Cooking, Dessert, Sauce


Tags: , , , , , ,

A Chilly Day Calls for Spaghetti and Meatballs for a Crowd

I know it’s not the ideal start to a long weekend when two days ago it was 85° out and I was looking to turn the air conditioner on and then we wake up this morning and it’s 42° outside and windy and rainy. Since the weekend doesn’t look like it’s going to get any better until Monday, today is a good day to do a recipe for a classic spaghetti and meatballs. This recipe, from Cook’s Illustrated, is designed if you’re cooking for a large crowd so you want to keep that in mind if you are going to use this recipe. When I do it for just the three of us I generally have to adjust it down a little bit and we still end up with enough sauce and meatballs left over where we can freeze some for another several meals.

Classic Spaghetti and Meatballs for a Crowd

Meatballs

2 1/4 cups panko bread crumbs
1 1/2 cups buttermilk
1 1/2 teaspoons unflavored gelatin
3 tablespoons water
2 pounds 85% lean ground beef
1 pound ground pork
3 large eggs
3 ounces Parmesan cheese, grated
6 tablespoons minced fresh parsley
3 garlic cloves, minced
1 1/2 teaspoons salt
1/2 teaspoon pepper

Sauce

3 tablespoons extra-virgin olive oil
1 large onion, grated
6 garlic cloves, minced
1 teaspoon dried oregano
1/2 teaspoon red pepper flakes
3 (28-ounce) cans crushed tomatoes
6 cups tomato juice
6 tablespoons dry white wine
Salt and pepper
1/2 cup minced fresh basil
3 tablespoons minced fresh parsley
Sugar

3 pound spaghetti
2 tablespoons salt
Grated Parmesan cheese

For the meatballs: adjust oven racks to the lower-middle and upper-middle positions and heat the oven to 450°. Set wire racks into aluminum foil-lined rimmed baking sheets and spray the racks with vegetable oil spray.

Combine the bread crumbs and the buttermilk in a large bowl and let sit, mashing occasionally with a fork, until a smooth paste forms, about 10 minutes. Meanwhile, sprinkle the gelatin over the water in a small bowl and allow it to soften for 5 minutes.

Mix the ground beef, ground pork, eggs, Parmesan, parsley, garlic, salt, pepper, and gelatin mixture into the bread crumb mixture using your hands. Pinch off and roll the mixture into 2-inch meatballs (about 40 meatballs total) and arrange on the prepared baking sheets. Bake until the meatballs are well browned, about 30 minutes, switching and rotating the baking sheets halfway through the baking process.

For the sauce: while the meatballs bake, heat the oil in a Dutch oven over medium heat until shimmering. Add the onion and cook until softened and lightly browned, about 5 to 7 minutes. Stir in the garlic, oregano and pepper flakes and cook until fragrant, about 30 seconds. Stir in the crushed tomatoes, tomato juice, wine, 1 1/2 teaspoons of salt, and 1/4 teaspoon of pepper, bring to a simmer, and cook until the sauce thickens slightly, about 15 minutes.

Remove the meatballs from the oven and reduce the oven temperature to 300°. Gently nestled the meatballs into the sauce. Cover, transfer to the oven, and cook until the meatballs are firm and the sauce has thickened, about one hour. The sauce in the meatballs can be cooled and refrigerated for up to 2 days. To re-heat, drizzle 1/2 cup of water over the sauce, without stirring, and re-heat on the lower-middle rack of a 325° oven for 1 hour.

Meanwhile, bring 10 quarts of water to a boil in a large 12-quart pot. Add the pasta and salt and cook, stirring often, until al dente. Reserve 1/2 cup of the cooking water, then drain the pasta and return it to the pot.

Gently stir the basil and parsley into the sauce and season with sugar, salt, and pepper to taste. Add 2 cups of sauce (without meatballs) to the pasta and toss to combine. Add the reserved cooking water as needed to adjust the consistency. Serve, topping the individual portions with more tomato sauce and several meatballs and passing the Parmesan cheese

As I said, this recipe makes a lot of food. They outline it as having enough to serve 12 people, but if you make the full recipe I think it could even serve more than that. I have always gotten more than 40 meatballs out of the recipe so we always have plenty left over for uses down the road. Their recipe also calls for some prosciutto to be used in the meatball mixture, which I leave out. I do like the way that the meatballs come out when they are baked in the oven and then the entire concoction with the sauce is placed in the oven again. The thickness of the sauce and the taste of the meatballs seems to be a lot better to me. You could easily served this with any type of pasta that you wish and I love to make some garlic bread to go along with it.

That’s the recipe for today. We did some shopping this morning so I did get a few things and to make over the next few days or so. Tonight I’ll be making a pork tenderloin dinner so you can check back for the recipe on that one. I also picked up some baby back ribs and the makings for some meatloaf so will be having those this week as well. I do plan to head up to Adams and see if they have anything else interesting that we might use for dinner this week. Check back and see what we come up with. Until then, enjoy the rest of your rainy day and enjoy your meal!

003

 
1 Comment

Posted by on May 25, 2013 in Beef, Cooking, Dinner, Pasta, Sauce


Tags: , , , , , ,

An Anniversary Dinner: Pan Seared Rib Eye Steak, Port Wine Sauce and Bacon Wrapped Shrimp

Okay, so I probably want a little overboard with dinner for our anniversary last night, but it was certainly worth it. It was a lot of work to get everything prepared and it was an awful lot of food for just the three of us (of course Sean joined us for dinner), but everything tasted great so I had nothing to complain about. I went to the store yesterday morning and picked out some nice-looking rib-eye steaks to make and with a little help from Denise Landis of The New York Times I was able to put together a quick port wine pan sauce to go with the steaks. Both were pretty easy to do.

Pan Seared Rib-eye Steaks

1 tablespoon vegetable oil
4 (8-to 10-ounce) rib-eye steaks, 1 to 1 1/4 inches thick
Salt and pepper
1 recipe Port Wine Pan Sauce (to follow)

Heat the oil in a large skillet over medium-high heat until just smoking. Meanwhile, pat the steaks dry with paper towels and season both sides generously with salt and pepper. Lay the steaks in the pan, leaving 1/4 inch between the steaks. Cook, without moving the steaks, until well browned, about 4 minutes. Using tongs, flip the steaks and continue to cook until the meat registers 115 to 120° (for rare) or 120 to 125° (for medium-rare), 3 to 7 minutes. Transfer the steaks to a serving platter and tent loosely with aluminum foil to rest or while preparing the pan sauce, then serve.

Port Wine Pan Sauce

1 small shallot, minced
1 small onion, minced
8 ounces mushrooms, sliced
Salt and pepper
1/2 cup ruby port
2 tablespoons butter
1/4 teaspoon chopped fresh thyme

In the same skillet that the steaks were seared in, add the shallot, onion and mushrooms. Cook, stirring occasionally, until the onions begin to soften, about 3 to 4 minutes. Remove the vegetables from the pan. Deglaze the pan with the ruby port, stirring to loosen any browned bits. Add the butter, 1 tablespoon at a time, and gently swirl into the sauce until well blended, about 1 to 2 minutes. Add the vegetables back into the pan, season with salt and pepper to taste, and stir in till slightly thickened about 1 to 2 minutes more. Off the heat, add in the fresh thyme and gently mix. Serve the sauce on the side with the steaks.

The steaks were cooked perfectly and have great flavor to them even though the only spices I added were salt-and-pepper. I actually cooked them for about 2 minutes longer so they were closer to medium, but you want to make them to your own personal preference. The pan sauce was just right for the steaks. I love the taste that the port wine adds to the sauce on it blended well with the shallots, onion and mushrooms. It also tasted great on the mashed potatoes that I made to go along on the side.

And the other dish that I made to go along with the meal was a very simple bacon wrapped shrimp. This doesn’t have to be a messy project or a big production; there are really only three ingredients to the entire recipe and most of the work goes into the preparation and not the cooking itself.

Bacon Wrapped Shrimp

24 large uncooked shrimp, shelled and deveined
6 slices bacon, cut into quarters
1 tablespoon Montreal Steak seasoning

Preheat the oven to 450°. Cover the bottom of a rimmed baking sheet with aluminum foil. Insert a wire rack into the baking sheet. Spray the baking sheet with nonstick vegetable spray. Wrap each shrimp in a 1/4 slice of bacon, being sure to wrap the bacon tightly. Secure the bacon with toothpicks if necessary. Place the shrimp on the wire rack in the baking sheet. Sprinkle the shrimp with the steak seasoning on both sides.

When the oven has come up to temperature, place the baking sheet inside the oven and bake the shrimp until opaque and the bacon has begun to crisp, approximately 10 to 15 minutes.

It doesn’t get much easier than this one. There are a couple of notes to take into mind when making this for yourself. First, make sure that you using large shrimp for this particular recipe. The size of the shrimp will take just about as long to roast in the oven as the bacon will to crisp so you won’t end up with any rubbery shrimp. If you are using smaller shrimp such as a medium-sized shrimp, you may want to think about cooking the bacon slightly before you wrap the shrimp to make sure that the bacon will be crisp at the same time the shrimp is done. You don’t have to use the steak seasoning if you don’t want to, although I think it added a nice flavor to the shrimp and the bacon. You could also use a barbecue sauce instead of the seasoning if you wanted to try something a little different. Having the shrimp up on the wire rack in the pan allows the air to get underneath and the heat to get underneath so that the bacon and the shrimp both cook on both sides. You could also put the shrimp on a skewer if you didn’t want to use toothpicks, or if you wrap the bacon tight enough, as I tried to do, you don’t really need any toothpicks at all.

I also served a side dish of roasted asparagus for the vegetable. Overall, I think it was a pretty good meal and we all seem to enjoy it. There were some leftovers of course but will be able to re-purpose them for another meal.

That’s all there is for today. Check back next time this see the recipes I use for dinner tonight. I’m hoping to get to the Ethiopian stir-fry tonight; I’m curious as to how well that one will turn out. Check back and see how it goes. Until then, enjoy the rest of your day and enjoy your meal!

001

 
Leave a comment

Posted by on May 23, 2013 in Beef, Cooking, Dinner, Sauce, Seafood


Tags: , , , , , ,

Getting Fancy with Scallops with Carrot Cream, Pickled Carrots and Herb Oil

I came across this recipe thanks to Food Republic, who had posted it on their site about a week ago. The pictures of it looked great and it sounded simple enough to try out myself so I thought I would give it a shot. It doesn’t take long to make at all, so you can even do it for a weeknight meal without any trouble.

Scallops with Carrot Cream, Pickled Carrots and Herb Oil

Carrot Cream

1/2 pound carrots, cut into a large dice (about 2 cups)

1 teaspoon salt

1/2 cup heavy cream

Freshly ground black pepper

Pickled Carrots

1 large carrot, sliced into short ribbons using a vegetable peeler (about 1 cup)

1/4 cup seasoned rice wine vinegar

Scallops

1 pound sea scallops

Salt and freshly ground black pepper

1 tablespoon vegetable oil

Herb Oil

3/4 cup packed fresh Italian parsley leaves

1 tablespoon fresh marjoram leaves

1/4 cup extra-virgin olive oil

1/4 cup vegetable oil

For the carrot cream : Add the carrots and salt to medium saucepan and cover with water. Bring to a boil and cook for 7 to 8 minutes, or until the carrots are tender. Drain the carrots and add them to a blender along with the cream and a pinch of pepper to taste. Blend until the mixture is a very smooth puree and set aside.

For the pickled carrots: In a medium bowl, toss the carrots with the rice wine vinegar. Marinate the carrots for at least 20 minutes. Drain, reserving the vinegar for another use, and set aside.

For the herb oil: In a blender, combine the parsley, marjoram, olive oil, vegetable oil and the salt. Blend until the oil turns a vibrant green color, about 3 minutes. You can strain the oil through a fine mesh strainer or leave it alone if you like it with some texture to it. Transfer the oil to a bowl or a squeeze bottle.

For the scallops: Dry the scallops thoroughly with paper towels. Place them on a plate and season them generously with salt and pepper. Heat a heavy skillet over high heat. Add the vegetable oil and, when the skillet is very hot, carefully add the scallops to the pan, being careful not to splatter oil on yourself or crowd the pan with too many scallops. Cook the scallops for 2 minutes on one side without disturbing them, or until they are caramelized, then flip them over, cooking the other side for a minute or so more.

To assemble the dish: Gently re-heat the carrot cream, then spoon some on each plate for serving. Top each plate with several scallops. Drizzle some herb oil around the scallops and garnish with a sprinkling of pickled carrots and marjoram leaves.

This dish looked very nice and tasted fantastic. The scallops were cooked perfectly and I loved the combination of the carrot cream and the pickled carrots with the scallops themselves. The herb oil added a nice contrast to the dish with the parsley and marjoram. It seemed like a perfect combination. I also had plenty of oil left over to use for other dishes down the road. I served this with some white rice and broccoli to round out the meal.

That’s it for today. Tonight is our 20th anniversary and I have a nice dinner planned, so check back for the menu for that one later this week. Until next time, enjoy the rest of your day and enjoy your meal!

001


Tags: , , , ,

Easy French Toast with Blueberry Sauce

Every once in a while we decided to bake something a little fancier for breakfast. Yesterday, Michelle woke up and decided she would like to have some French toast. French toast is not something I make at all really, mainly because it’s not one of my particular favorites. In my opinion, a lot of French toast that you get is pretty soggy and has too much egg for my particular taste. Anyway, I was more than happy to make some for Michelle and Sean and chose to use this recipe from the Cook’s Illustrated Cookbook.

French Toast

8 large slices hearty white sandwich bread or challah bread
1 1/2 cups milk, warmed
3 large egg yolks
3 tablespoons packed light brown sugar
2 tablespoons butter +2 tablespoons melted
1 tablespoon vanilla extract
1/2 teaspoon ground cinnamon
1/4 teaspoon salt

Adjust an oven rack to the middle position and heat the oven to 300°. Place the bread on a wire rack set inside a rimmed baking sheet. Bake the bread until it is almost dry throughout (the center should remain slightly moist), about 16 minutes, flipping the slices half way through the baking. Remove the bread from the rack and allow it to cool for five minutes. Return the baking sheet with the wire rack to the oven and reduce the temperature to 200°.

Whisk the milk, egg yolks, sugar, 2 tablespoons of melted butter, vanilla, cinnamon, and salt in a large bowl until well blended. Soak the bread in the milk mixture until it is saturated but not falling apart, about 20 seconds per side. Using a slotted spatula, pick up one bread slice and allow the excess milk mixture to drip off; repeat the process with the remaining slices. Place the soaked bread on another baking sheet or platter.

Melt half a tablespoon of butter in a large skillet over medium-low heat. Using a slotted spatula, transfer two slices of the soaked bread to the skillet and cook until golden brown, about 3 to 4 minutes. Flip the bread and continue to cook on the second side until it is golden brown about 3 to 4 minutes longer. If the toast is cooking too quickly, reduce the temperature slightly. Transfer the toast to a baking sheet in the oven. Wipe out the skillet with paper towels. Repeat the cooking process with the remaining bread, two pieces at a time, adding a half tablespoon of butter for each batch that you cook. Serve warm.

I think it came out pretty well myself considering I’m no French toast expert and Michelle and Sean both seem to really enjoy it. It was a little more work toasting the bread before you actually make the French toast, but I think it came out better because the bread isn’t nearly as soggy as I’ve seen in the past. I think between using only the yolks of the egg and adding some melted butter to liquid it gives the toast a chance to be not nearly as soggy and a little more rich.

I also decided that I wanted to make a little bit of blueberry sauce to go along with the French toast. I had just bought some blueberries at the store the other day and they looked pretty good. This recipe makes quite a bit of sauce, a lot more than what was needed for the French toast, but we have it on hand now and I think it’ll be great to use with things like ice cream, cake or even in your oatmeal in the morning.

Blueberry Sauce

2 cups fresh blueberries

1/3 cup sugar

1 tablespoon fresh lemon juice

1/8 teaspoon salt

1/2 teaspoon vanilla extract

Wash and crush the blueberries in a medium bowl. Add the sugar, lemon juice and salt and mix well. Place the mixture in a small saucepan and bring to a boil over medium heat, stirring occasionally. Boil for 1 minute and then add the vanilla. Remove from the heat and chill until serving.

It’s a pretty useful sauce that I think you find you’ll be able to work it into a lot of other areas if you want to use it. It’ll go just as well on pancakes as it would for French toast that’s for sure.

That’s all there is for today. I’ll have some more recipes for you tomorrow. I will likely be posting the fried chicken recipe I used that I got from the New York Times recently. I also have several other recipes to try out for this week, so check back in see what I use. Until then, enjoy the rest of your day and enjoy your meal!

002 001

 
1 Comment

Posted by on May 20, 2013 in Breakfast, Cooking, Sauce


Tags: , , , , ,

Mother’s Day Dinner, Part 1 – Eggplant Parmesan

Cooking on Mother’s Day is always a special event. I wanted to make sure I made things that Michelle really wanted to have for dinner and that would be good for the guests that we were having for the day. After some back and forth we decided on a few different things to make, but it was mostly going to have an Italian theme to it. I made a few things, so for the first day of the recipes I am going to post the recipe I used for Eggplant Parmesan that I got from the Cook’s Illustrated Cookbook. Actually, a lot of recipes that I used for the Mother’s Day meal came from this cookbook. This one, I think, was my favorite of the day.

Eggplant Parmesan

1/4 cup extra-virgin olive oil
2 garlic cloves, minced
1 (28-ounce) can crushed tomatoes
1/2 teaspoon dried basil
1/4 teaspoon dried oregano
1/4 teaspoon sugar
Salt and pepper
2 pounds eggplant, sliced into one fourth-inch-thick rounds
Kosher salt and pepper
8 slices white sandwich bread, torn into quarters
2 ounces Parmesan cheese, grated (1 cup)
1 cup flour
4 large eggs
6 tablespoons vegetable oil
8 ounces mozzarella cheese, shredded (2 cups)
1 ounce Parmesan cheese, grated (1/2 cup)
10 fresh basil leaves, roughly torn

For the tomato sauce, heat the oil and garlic in a large saucepan over medium heat. Cook, stirring often, until the garlic turns golden but not browned, about three minutes. Stir in the tomatoes, basil, oregano, sugar, 1/4 teaspoon pepper, and a pinch of salt, bring to a simmer, and cook until the sauce thickens and the flavors meld, about 10 to 12 minutes. Take the sauce off the heat, season with salt to taste and cover to keep warm.

For the eggplant, line a baking sheet with a triple layer of paper towels and set it aside. Toss the eggplant and 1 1/2 teaspoons of salt together in a bowl, then transfer it to a colander. Let it sit until the eggplant releases about 2 tablespoons of liquid, about 30 to 45 minutes. Wipe the excess salt from the eggplant, then arrange it on a prepared baking sheet. Cover the eggplant with another triple layer of paper towels and firmly press each slice to remove as much liquid as possible.

While the eggplant is draining, adjust oven racks to the upper-middle and lower-middle positions, place a rimmed baking sheet on each rack, and heat the oven to 425°. Pulse the bread in a food processor to fine, even crumbs, about 15 pulses. You should have about 4 cups of breadcrumbs when you are done. Transfer the crumbs to a pie plate or shallow dish and stir in the Parmesan cheese and a half teaspoon of pepper; set aside.

Combine the flour and 1 teaspoon of pepper in a large zipper-lock bag and shake to combine. Beat the eggs in a second pie plate or shallow ditch. Place 8 to 10 eggplant slices in the bag with the flour, sealed the bad, and shake to coat the eggplant. Remove the eggplant slices, shaking off any excess flour, then dip in the eggs, letting any excess egg run off. Then coat the eggplant evenly with the bread-from mixture. Set the breaded slices on a wire rack set in a rimmed baking sheet. Repeat the process with the remaining eggplant.

Remove the preheated baking sheets from the oven. Add 3 tablespoons of oil to each sheet, tilting the sheet to coat it evenly with the oil. Place half of the breaded eggplant on each baking sheet and a single layer; bake until the eggplant is well browned and crisp, about 30 minutes, switching and rotating the baking sheets after 10 minutes, and flipping the eggplant slices with a wide spatula after 20 minutes. (Do not turn off the oven.)

To assemble the dish, spread 1 cup of the tomato sauce over the bottom of a 13 x 9-inch baking dish. Layer in half of the eggplant slices, overlapping slices to make sure everything fits. Distribute 1 cup of sauce over the eggplant, then sprinkle with 1 cup of the mozzarella cheese. Layer in the remaining eggplant, then.with 1 cup of sauce, leaving the majority of the eggplant exposed so it will remain crisp. Sprinkle with the Parmesan cheese and the remaining 1 cup of mozzarella. Bake until bubbling and the cheese is browned, 13 to 15 minutes. Cool for 10 minutes, and scattered the basil over the top, and serve, passing the remaining tomato sauce separately.

I had never made eggplant Parmesan before, and the few times that I have had it be eggplant to me comes out to be quite soggy and full of oil. I think a lot of this is because most people just simply fry the eggplant before they put it in the oven. This technique seems to work better to me as salting the eggplant first helps draw out a lot of the moisture out of it, and then the baking process helps to keep it crisp. I actually used Panko breadcrumbs instead of making the breadcrumbs in the food processor as suggested and I think it actually came out better. Only putting a little bit of sauce on the eggplant cook in the dish also seem to help keep it nice and crisp as well. I used the same technique with the chicken Parmesan that we also made for dinner and that seemed to work really well too; you’ll see that recipe posted tomorrow. Everyone seemed to love the eggplant and it disappeared quite quickly, so fast in fact that I never even got a picture of it to take to post on here, so for that I apologize. But I will certainly make this dish again as the recipe proved to be popular even with those who are not big fans of eggplant.

That’s it for today. Time to get back to work. Tomorrow I will post the recipe for the chicken Parmesan that I need it. It is slightly different than the recipe I have posted here in the past and that everyone seemed to really like the way that came out as well so I think you’ll enjoy it. Check back tomorrow and see if you like it. Until then, enjoy the rest of your day and enjoy your meal!

 
1 Comment

Posted by on May 13, 2013 in Cookbooks, Cooking, Dinner, Holidays, Sauce, Vegetables


Tags: , , , , ,

Pan-Fried Crab Cakes and Oven Fries

I have posted crab cakes and oven fries recipes on the blog before, but I did make them a little differently this past week when we had them for dinner. This time, I decided to use the Cook’s Illustrated Cookbook, which I find I used for many different things. It has lots of great recipes in it, both basic and a little more technical see you can cover just about everything. The cookbook also has a lot of great hints as far as equipment, kitchen accessories, techniques, and more. I highly recommend it if you are looking for a cookbook batting compresses everything. The crab cakes recipe that I used is pretty basic and easy to follow.

Pan-Fried Crab Cakes

1 pound jumbo lump crab meat, picked over to remove cartilage and shell fragments
4 scallions, green parts only, minced
1 tablespoon chopped fresh parsley, cilantro, dill, or basil
1/4 cup mayonnaise
2-4 tablespoons plain dried breadcrumbs
1 1/2 teaspoons Old Bay seasoning
Salt and ground white pepper
1 large egg, lightly beaten
1/4 cup flour
1/4 cup vegetable oil
Lemon wedges
Tartar sauce (recipe to follow)

Line a rimmed baking sheet with parchment paper. Gently mix the crab meat, scallions, parsley, mayonnaise, 2 tablespoons of breadcrumbs, and Old Bay in a medium bowl, being careful not to break up crab lumps. Season with salt and white pepper to taste. Carefully fold in the egg with a rubber spatula until the mixture just clings together. If the cakes do not bind, add more breadcrumbs, 1 tablespoon at a time, until they do.

Divide the crab mixture into four portions and shape each portion into a fat, round cake, about 3 inches in diameter and 1 1/2 inches thick. Arrange on a prepared baking sheet, cover, and refrigerate at least 30 minutes or up to 24 hours.

Place flour in a shallow baking dish or pie plate. Lightly dredge the cakes in the flour. Keep your loyal in a large nonstick skillet over medium-high heat until shimmering. Gently lay the flowered cakes in the skillet and cook until the exteriors are crisp and browned, about 4 to 5 minutes per side. Serve immediately with lemon wedges or sauce.

I’ve always found that the key to really good crab cakes is having less breadcrumbs, less filling and more crab. Most of the crab cakes you seem to get when you go out to a restaurant are just filled with breadcrumbs and don’t have much crab in them at all. Also, I have found many places tend overcook them so you really only need about four minutes per side just to crisp them up. Jumbo lump crabmeat can be quite expensive, so if you want a cheaper alternative you can certainly buy pasteurized crabmeat. That is what I used this time and I think the recipe turned out just fine. Another key is you really do need a good nonstick skillet to use to make these. There is nothing worse than trying to flip the crab cake that is stuck to the bottom of the pan. I served the crab cakes with that recipe that I also got from this cookbook for the tartar sauce. It’s really easy to make and it’s certainly better than anything you’re going to find in a store.

Homemade Tartar Sauce

3/4 cup mayonnaise
1/2 shallot, minced
2 tablespoons capers, rinsed and minced
2 tablespoons sweet pickle relish
1 1/2 teaspoons white vinegar
1/2 teaspoon Worcestershire sauce
1/2 teaspoon pepper

Mix all the ingredients together in a small bowl. Cover and let sit to blend of flavors together, about 15 minutes. Stir again before serving. The sauce can be refrigerated and stored for up to one week.

I didn’t have sweet pickle relish on hand, but I did have bread-and-butter pickles so I use them instead, I minced a few up and added a tiny bit of pickle juice to the mixture and I think it came out great. I also cut back a little bit on the mayonnaise as I am the only person leads tartar sauce in our house so this way we didn’t end up with a lot left over. The final piece of the dinner was one of Sean’s particular favorites for the night, which were the oven fries. I’ve tried making oven fries in the past with mixed results and this recipe is very similar to one I have tried before.

Oven Fries

2 1/4 pounds russet potatoes, peeled and cut lengthwise into 10 to 12 even wedges
5 tablespoons vegetable oil
Salt and pepper
Adjust an oven rack to the lowest position and heat the oven to 475°. Place the potatoes in a large bowl, cover with hot tap water, and soak for 10 minutes. Meanwhile, coat a large, heavy-duty rimmed baking sheet with 4 tablespoons of oil and sprinkle evenly with 3/4 teaspoon of salt and 1/4 teaspoon of pepper; set aside. Line the second baking sheet with triple layers of paper towels and set aside.

Drain the potatoes. Spread the potatoes out on the paper towel lined baking sheet, then thoroughly Pat dry the potatoes with additional paper towels. Rinse and wipe out the now empty bowl. Return the potatoes to the bowl and toss with the remaining 1 tablespoon of oil. Arrange the potatoes in a single layer on the oil baking sheet, cover tightly with aluminum foil, and bake for five minutes. Remove the foil and continue to bake until the bottoms of the potatoes are spotty golden brown, about 15 to 20 minutes, rotating the baking sheet after 10 minutes. Using a metal spatula and tongs, scraped to loosen the potatoes from the pan, then flip each wedge, keeping the potatoes in a single layer. Continue baking until the fries are golden and crisp, about 5 to 15 minutes longer, rotating the pan as needed if the fries are browning unevenly.

While the fries bake, line a baking sheet with a triple layer of paper towels. Transfer the baked fries to the prepared baking sheet to drain. Season with additional salt and pepper to taste and serve.

There seems to be a couple of keys to the recipe that made it turn out better for me this time than the past. First, I tried to cut the potatoes as evenly as possible so everything would cook at about the same time frame. Soaking the potatoes for the required amount of time really makes a big difference as it pulls out a lot of the starch from the potato and helps to keep them from sticking to the pan. Adding the oil to the pan and a little bit to the potato not only helps with the sticking but helps with the browning process. Finally, covering the potatoes with aluminum foil for five minutes at the beginning of cooking allows the potatoes to steam so you can then crisp them up the rest of the cooking time. I certainly think it was a pretty successful effort this time out.

That’s it for today. Time for me to get back to work after spending yesterday evening at Citi Field watching the Mets game. I’ll have another recipe for you tomorrow so check back and see if it’s something you are interested in giving a try. Until then, enjoy the rest of your day and hopefully you were not in the rain as we are here in New York. Enjoy your day and enjoy your meal!

002 001

 
4 Comments

Posted by on May 8, 2013 in Cookbooks, Cooking, Dinner, Potatoes, Sauce, Seafood


Tags: , , , , , , ,

 
National Day Calendar

Fun, unusual and forgotten designations on our calendar.

Jennifer Probst

a little bit naughty a little bit nice

Laissez Faire

Letting Life Lead

What To Have For Dinner Tonight

Simple and delicious dinner inspiration