RSS

Category Archives: Snacks

31 Great Labor Day Grilling Recipes | Kitchen Daily

31 Great Labor Day Grilling Recipes | Kitchen Daily.

Planning on doing some grilling on Labor Day but what to go beyond the usual hamburgers and hot dogs? Kitchen Daily has put together 31 great grilling recipes for you that cover everything from your appetizers and main courses to side dishes and dessert so you can grill every part of your meal and make the most of that last unofficial day of summer. Check out the recipes and find one to try this weekend!


Tags: , , , , ,

13 Leftovers That Taste Better Cold – Bon Appétit

13 Leftovers That Taste Better Cold – Bon Appétit.

Sometimes leftovers just hit the spot when you need a quick snack, lunch or are on a midnight forage through the refrigerator. Bon Appetit has put together 13 items that tastes even better when they are cold so you know what to look for when you really want something fast. Check it out!

 
Leave a comment

Posted by on August 20, 2014 in Cooking, Cooking Websites, Leftovers, Snacks


Tags: , ,

15 Carnival Recipes You Can Make at Home – Bon Appétit

15 Carnival Recipes You Can Make at Home – Bon Appétit.

Half the fun of going to a carnival or street fair is all of the different foods they have available. It seems like the food that you can get there is found in no other place and has a certain taste to it thanks to the event all on its own. Bon Appetit has put together 15 recipes here of famous carnival foods that you can enjoy right in your kitchen to being back the tastes, smells and memories. All you need are some rides and carnival games and you are all set. Check it out!

 
1 Comment

Posted by on July 27, 2014 in Cooking, Cooking Websites, Eating Out, Snacks


Tags: , , ,

Everyone Screams for These Homemade Ice Cream Sandwiches

Summertime and ice cream just go hand in hand, though some people will tell you that ice cream is pretty much perfect any time of the year. I am not a huge ice cream eater myself but I do appreciate it every now and then and Michelle and Sean both love it, so I decided to make a simple and easy treat of some homemade ice cream sandwiches. The recipe is from Bon Appetit and when I first saw the picture of their finished product and how easy it was to make these I knew I would have to give it a try. They take a little time, but if you start them in the morning you can have your own ice cream sandwiches for dessert that same night.

Homemade Ice Cream Sandwiches

3/4 cup plus 2 tablespoons all-purpose flour

1/4 cup unsweetened cocoa powder

1/2 teaspoon baking soda

1/2 teaspoon kosher salt

6 tablespoons (3/4 stick) butter, room temperature

1/2 cup sugar

1 tablespoon light corn syrup

1 egg yolk

1 teaspoon vanilla extract

1 tablespoon sour cream

1 pint ice cream (any flavor)

Whisk the flour, cocoa powder, baking soda and kosher salt together in a medium bowl. Using an electric mixer, beat the butter, sugar and corn syrup together in another medium bowl until the mixture is light and fluffy, about 3 minutes. Add the egg yolk and vanilla and beat until they are well combined.

Reduce the mixer speed to low and add the dry ingredients; mix the ingredients until they are just combined. Mix in the sour cream. Form the dough into a 3/4-inch square and wrap it tightly with plastic wrap. Chill the dough in the refrigerator until it is firm, about 2 to 3 hours.

Preheat the oven to 350 degrees. Roll out the dough between 2 sheets of parchment paper to about 1/8-inch thickness. Transfer the dough (still between the sheets of parchment paper) to a large baking sheet and chill the dough again in the refrigerator until it is firm, at least for about 30 minutes. Remove the top sheet of the parchment paper. If the dough is well chilled the top sheet will remove very easily. Trim the dough into a 14-inch by 10-inch rectangle. Bake the dough until it is dry and just set at the edges, about 8 to 10 minutes. Transfer the baking sheet to a wire rack and let the dough cool completely.

Trim the cookie to a 12-inch by 9-inch rectangle, then cut the cookie into twelve 3-inch squares. Scoop some ice cream into a medium bowl and mix it until it is just softened, about 2 to 3 minutes. Turn 6 cookies bottom side up. Dividing the ice cream evenly, scoop the ice cream on top of the cookie and press down on it lightly. top the ice cream with the remaining cookies, pressing down gently. Place the ice cream sandwiches on a parchment paper-lined baking sheet and freeze them until they are firm, at least 4 hours. Cut the sandwiches in half diagonally to make triangles, if you wish. Wrap the sandwiches in parchment, if desired, and freeze them until you are ready to serve them.

They are very easy to make and I can tell you that the dough smells and tastes just like what you get if you bought an ice cream sandwich from a store or the ice cream man. The best part is that you can make them with any type of ice cream that you like, so you can really vary them to suit your particular liking or your family’s and make them in different flavors if you wish. I cut them small to make smaller sandwiches, just he right bite-size snack that we could all enjoy. Of course you could always make them completely homemade and make your own ice cream to put inside them, but any of your favorite flavors work just as well.They are very easy to make and worth the wait, so I would certainly make these again.

That’s all I have for today. Check back next time for another recipe. Until then, enjoy the rest of your day and enjoy your meal!

IMG_0600


Leave a comment

Posted by on July 11, 2014 in Cooking, Dessert, Snacks


Tags: , , , ,

A New Twist on Chicken Fingers – Pretzel-Crusted Chicken Fingers

I had made some classic chicken fingers not that long ago along with some homemade dipping sauces and the grocery store was having a really good sale on chicken tenderloins so I picked up another batch of them and was looking for something else to do. Sure, I could have just cut up the chicken and used it for something like a stir-fry or a warm chicken salad, but I wanted to try something else with chicken fingers again. Lo and behold along came the newest issue of Cook’s Country magazine in the mail shortly after and in it was a recipe for pretzel-crusted chicken fingers. I thought this was a good one to try to see if I could get some extra crunch and flavor out of the chicken. The recipe is very simple and only takes a few minutes to make, so you can easily make this anytime you want some chicken fingers.

Pretzel-Crusted Chicken Fingers

6 ounces thin pretzel sticks

1/2 cup all-purpose flour

2 eggs

2 tablespoons Dijon mustard

1 1/2 pounds chicken tenderloins, trimmed

Salt and pepper

6 tablespoons vegetable oil

Process the pretzel sticks in a food processor until they are finely ground, about 20 seconds. you should end up with about 1 1/2 cups of pretzel crumbs. Transfer the pretzel crumbs to a shallow dish. Spread the all-purpose flour in a second shallow dish. Beat the eggs and the Dijon mustard in a third shallow dish.

Pat the chicken dry with paper towels and season it well with salt and pepper. Dredge the chicken pieces in the flour, shaking off any excess. Then dip the chicken pieces in the egg mixture, allowing any excess to drip off. Finally, dip the chicken pieces in the pretzel crumbs, pressing on the chicken gently in the crumbs so the crumbs adhere well.

Heat 3 tablespoons of the vegetable oil in a large nonstick skillet over medium-high heat until the oil is shimmering. Cook half of the breaded chicken tenderloins until they are golden brown and cooked through, about 5 minutes per side. Adjust the heat along the way if the crust seems like it is beginning to burn. Transfer the chicken fingers to a paper towel-lined plate, discard the oil, and wipe out the skillet with paper towels. Repeat the process with the remaining 3 tablespoons of vegetable oil and the remaining chicken tenderloins. Serve the chicken fingers with your favorite dipping sauces.

You want to make sure you use the thin pretzel sticks for this recipe and not the thick pretzel rods. The thin pretzels will grind easier and are not as dense and hard as the rods, giving you better crumbs for the crust. You get a really nice flavor from the pretzel crust and just a hint of the Dijon mustard along the way to give them great flavor. This is a great recipe to offer up for the kids who love chicken fingers but want something a little different or as a quick dinner or to serve at a party. You can make large batches of them and freeze them cooked for later use at another time.

That’s all I have for today. Check back next time for another recipe. until then, enjoy the rest of your day and enjoy your meal!

pretzel crusted chicken fingers


1 Comment

Posted by on May 30, 2014 in Appetizers, Cooking, Dinner, Lunch, Picnic Fare, Poultry, Snacks


Tags: , , , , ,

A Treat for the Whole Family – Baked Honey Barbecue Chicken Fingers

For many adults, just hearing the words “chicken fingers” is enough to make them cringe. They immediately think back to the days when the only things their young children would eat were chicken fingers, tenders, McNuggets or whatever else that happened to be called that are sold in the frozen food aisle of your grocery store, at the local fast food restaurant or any of the dozens of family style convenience restaurants around today. While you may not be thrilled with the notion of what you get in those frozen bags, there are plenty of alternatives out there that you can try making on your own that taste good so that everyone in the family will enjoy them. This particular recipe, that I picked up from Sally’s Baking Addiction, covers just that, giving you a tasty chicken fingers alternative that get away from the frying and offer you a baked alternative that tastes great.

Baked Honey Barbecue Chicken Fingers

3/4 cup barbecue sauce (whatever your favorite may be)

1/4 cup honey

1/2 cup whole wheat or all-purpose flour

1 teaspoon salt

1/2 teaspoon black pepper

1/2 teaspoon smoked paprika

2 eggs, beaten

1 1/2 cups panko breadcrumbs (or more, if needed)

1 1/2 pounds boneless, skinless chicken breasts or chicken tenders

Nonstick cooking spray

Combine the barbecue sauce and the honey in a large bowl. If you are using chicken breasts, pound the chicken breasts between two sheets of plastic wrap to 1/4-inch thickness and cut the breasts into strips. If you are using chicken tenders, cut them in half lengthwise. Add the chicken strips to the bowl with the barbecue sauce and honey and stir so all of the chicken is evenly coated. Cover the bowl tightly and marinate the chicken in the refrigerator for at least 30 minutes and up to 6 hours. The longer you marinade, the more flavorful the chicken will be.

Preheat the oven to 400 degrees. Line a baking sheet with parchment paper or a silicon baking mat or coat the sheet with nonstick cooking spray.

Combine the flour. salt, pepper and the smoked paprika in a shallow dish. Pour the beaten eggs into another shallow dish. Pour the panko breadcrumbs into a third shallow dish. Coat each chicken strip with flour, shaking off any excess. Next. dip the floured chicken in the egg and allow any excess egg to drip off. Then roll the chicken strip in the panko breadcrumbs, coating completely before shaking off any excess. Place the chicken strips on the prepared baking sheet and repeat the process until all of the chicken has been coated. Spray each chicken strip with the nonstick cooking spray to help seal the breading to the chicken, preventing the breading from staying raw and allowing it to bake into the chicken strips.

Bake the chicken fingers in the preheated oven for 10 minutes. Turn each piece over and continue baking until the outside of the chicken is crisp and the centers of the chicken pieces are cooked through, about another 10 to 12 minutes. Serve the chicken fingers with extra barbecue sauce for dipping.

The great thing about this recipe is that you can make a large batch and freeze any extras that you may have to use when you need a quick dinner for the kids or yourself or just want an easy snack. These are perfect for a meal any night with some homemade fries (I made some homemade baked sweet potato fries with ours) or you can use these for any type of buffet when you are having a party and you know kids may be around. They are also great snacks for watching the game or when you have a crowd over. You get good crunch from the breadcrumb mixture and underneath is great flavor from the barbecue sauce and the honey. This is definitely one to remember and you can experiment with this also, perhaps making the chicken fingers ranch flavored instead of barbecue with some spices, or maybe even adding some Parmesan to the breadcrumbs, eliminating the barbecue sauce and substituting tomato sauce to have an Italian-style chicken fingers. There’s lots of room to use your imagination with this one and the best part is you have control over the ingredients so you know what goes into each one, and they are baked, making them a better choice for you.

That’s all I have for today. Check back next time for another recipe. Until then, enjoy the rest of your day and enjoy your meal!

IMG_0540


Tags: , , , , , , ,

It’s National Pretzel Day! Make These Alton Brown Soft Pretzels!

Since there seems to be a day for just about everything you can make or cook these days, I shouldn’t be surprised that it is National Pretzel Day today. There is nothing like a soft pretzel when you want a tasty snack. One of my favorite memories of all-time is getting a hot pretzel on the streets of New York City or just outside of Shea Stadium when we would go to see a ballgame. Guys would heat them right in a shopping cart and while it may not have been the most sanitary thing in the world, the taste and the smell were fantastic. I have made soft pretzels before, but when I saw this recipe from Alton Brown it sounded easier than what I had done in the past and they looked great, so I had to give them a try today.

Homemade Soft Pretzels

1 1/2 cups warm (110 to 115 degrees F) water
1 tablespoon sugar
2 teaspoons kosher salt
1 package active dry yeast
22 ounces all-purpose flour, approximately 4 1/2 cups
2 ounces unsalted butter, melted
Vegetable oil, for pan
10 cups water
2/3 cup baking soda
1 large egg yolk beaten with 1 tablespoon water
Salt

Combine the water, sugar and kosher salt in the bowl of a stand mixer and sprinkle the yeast on top. Allow the yeast to sit for 5 minutes or until the mixture begins to foam. Add the flour and butter and, using the dough hook attachment of your mixer, mix on low-speed until the dough is well combined. Change the mixer to medium speed and knead until the dough is smooth and pulls away from the side of the bowl, approximately 4 to 5 minutes. Remove the dough from the bowl, clean the bowl and then oil it well with vegetable oil. Return the dough to the bowl, cover it with plastic wrap and sit in a warm place for approximately 50 to 55 minutes or until the dough has doubled in size.

Preheat the oven to 450 degrees. Line 2 half-sheet pans with parchment paper and lightly brush the pans with the vegetable oil. Set the pans aside.

Bring the 10 cups of water and the baking soda to a rolling boil in an 8-quart saucepan or roasting pan.

In the meantime, turn the dough out onto a slightly oiled work surface and divide the dough into 8 equal pieces. Roll out each piece of dough into a 24-inch rope. Make a U-shape with the rope, holding the ends of the rope, cross them over each other and press onto the bottom of the U in order to form the shape of a pretzel. Place the pretzels onto the parchment-lined half sheet pan.

Place the pretzels into the boiling water, 1 by 1, for 30 seconds. Remove them from the water using a large flat spatula. Return the pretzels to the half sheet pan, brush the top of each pretzel with the beaten egg yolk and water mixture and sprinkle each pretzel with the salt. Bake the pretzels until they are dark golden brown in color, approximately 12 to 14 minutes. Transfer the pretzels to a cooling rack for at least 5 minutes before serving.

Wow, those were really easy to make and they taste fantastic! You can throw these together in under two hours and have a great snack anytime you want them for a party, watching the game or just because you feel like having them. Michelle, Sean and I loved them and we still have a few left over to enjoy tomorrow, if they last that long. I will definitely be using this recipe from now on when I make pretzels.

That’s all I have for today. Check back next time for another recipe. Until then, enjoy the rest of your day and enjoy your meal!

IMG_0525 IMG_0524

 
2 Comments

Posted by on April 26, 2014 in Cooking, Snacks


Tags: , , , , ,

It’s a Snack Attack, Part 3 – Pork Dumplings

Okay, here is the last of the snacks I made this past week. This one also comes from Kelsey Nixon of the Cooking Channel and is for pork dumplings. Sean has been asking me to make these for quite a while now and I finally had some ground pork and wonton wrappers on hand so I thought I would give it a try. There are only a few ingredients to these and they are very simple to make as an easy snack or appetizer if you are planning an Asian-style meal for dinner or just feel like having some kind of a snack.

Pork Dumplings

For the Pork Dumplings:

1 tablespoon minced garlic

2 teaspoons minced ginger

2 teaspoons sesame oil

1 small bunch, scallions, white and green parts, chopped

12 ounces ground pork

3 tablespoons hoisin sauce

2 teaspoons soy sauce

1 teaspoon Chinese five-spice powder

1 egg

1 package dumpling or wonton wrappers

1 tablespoon vegetable oil, for frying

For the Dipping Sauce:

1 cup soy sauce

2 1/2 tablespoons Sriracha sauce

Juice of 3 lemons

For the dipping sauce, combine the soy sauce, Sriracha and lemon juice in a bowl and set the sauce aside until you are ready to serve the dumplings.

For the pork dumplings, heat a large nonstick skillet over medium-high heat. Add the garlic, ginger, sesame oil and scallions and cook until the mixture is fragrant, about 1 to 2 minutes. Remove the skillet from the heat and allow the mixture to cool for about 1 minute.

Combine the cooked garlic, ginger and scallions with the ground pork, hoisin sauce, soy sauce, Chinese five-spice powder and the egg in a large bowl.

Working with the dumpling wrappers, start with the floured surface of the wrappers facing down. Place about 1 1/2 teaspoons of the filling in the center of a wrapper. Wet the edge of the dumpling with water, using your  finger, and fold the dumpling in half without sealing it, like a taco. Pinch one end closed. Create the pleats of the dumpling on one side using your thumb and forefinger, pressing against the other flat edge to seal the dumpling as you go. Flatten the bottoms so that the bottom surface of the dumpling can get a good sear on it when you pan fry them. Repeat the process until all the dumplings are filled. Keep the dumplings on a lightly-floured sheet tray to keep them from sticking and cover the dumplings with a slightly damp towel to keep them from drying out while you make the rest of the batch.

Heat the vegetable oil over high heat in a large nonstick skillet. Working in batches, pan fry the dumplings by placing them bottom-side down and frying them until they are golden brown, about 1 to 2 minutes.

Once the dumplings are golden brown, working carefully, pour 1/2 cup of water into the skillet to cover the dumplings halfway. Immediately cover the skillet with a lid, leaving a small crack for steam to escape. Cook the dumplings until the water has evaporated, about 5 to 7 minutes. Transfer the dumplings to a paper towel-lined plate to soak up any excess oil and repeat the process with the remaining dumplings.

I can tell you that this recipe makes a lot of dumplings, so you can certainly freeze them and heat them up any time you want to have a little snack. We all enjoyed the dumplings as they had some great flavor with the ginger, scallions and hoisin sauce. They were pretty easy to make and while the recipe calls for round dumpling wrappers, i only had square wonton wrappers and I think they worked out just fine for my purposes. It is a perfect party snack you can make pretty easily and I think you could substitute out the pork for beef, chicken, turkey, shrimp or even just vegetables and get great results.

That’s all I have for today. Check back next time for another recipe. I have some other great recipes we have tried lately and I still have my recipes I am making on Valentine’s Day this year to share as well. Until next time, enjoy the rest of your day and enjoy your meal!

004

 
2 Comments

Posted by on February 12, 2014 in Appetizers, Cooking, Pork, Sauce, Snacks


Tags: , , , , ,

It’s a Snack Attack, Part 2 – Buttery Garlic Knots

Here is the second of the snacks I decided to try out this past weekend. This one is really easy and comes from Kelsey Nixon on the Cooking Channel. It is for a batch of very easy to make buttery garlic knots. This is one that you can use with some quick made pizza dough in the food processor or you can just as easily use some store-bought pizza dough and whip these up in no time at all. The actual preparation of the garlic knots and the cooking takes no time at all, so this is a great quick snack you can make just about anytime you want.

Buttery Garlic Knots

1 recipe Food Processor Pizza Dough, or 1 package of store-bought pizza dough

16 tablespoons (2 sticks) butter, room temperature

2 tablespoons fresh thyme leaves, minced

2 tablespoons fresh rosemary leaves, minced

3/4 cup grated Parmesan cheese, divided

8 cloves garlic, grated

All-purpose flour, for dusting

2 teaspoons kosher salt

Prepare the recipe for the food processor pizza dough or take the store-bought pizza dough and let it come to room temperature. Preheat the oven to 375 degrees.

Mix the softened butter with the thyme, rosemary, 2 tablespoons of the Parmesan cheese and the grated garlic. Set the mixture aside.

Turn the pizza dough out onto a lightly floured work surface. Stretch the pizza dough into a rectangle. Spread half of the butter mixture on half of the dough. Fold the dough in half, covering the butter with the pizza dough. Using a pizza wheel, divide the dough into 18 strips. First cut through the middle of the dough and then you can cut each half into 9 separate pieces to get your 18 strips. Stretch each strip of dough and then tie it into a knot and tuck the ends underneath the center of the knot. Place the knots on a baking sheet.

Sprinkle the knots with some of the Parmesan cheese and bake until they are a golden brown color, about 15 to 20 minutes. Meanwhile, in a small saucepan over low heat, melt the remaining herb butter. Once the knots come out of the oven, baste them with the melted butter and sprinkle them with the remaining Parmesan cheese. Serve warm.

I actually basted the knots with some of the butter after they had been baking for about 10 minutes and then again at the end of the baking so they had a really nice baked in garlic flavor. They came out perfectly and has a nice crunch on the outside with a soft and buttery inside. These would go great with any Italian dinner you might be having like spaghetti and meatballs, baked ziti, lasagna, pizza, sausage and peppers or really just about any meal. They also make a great snack or appetizer and you could even put some together as a great afterschool snack for something a little different. You could certainly do a lot of different things with it and even use different herbs if there are some you would prefer instead, like basil or oregano.

That’s all I have for today. Check back next time for another recipe. I have one more good snack I tried recently to come for tomorrow so check back for that one. Until then, enjoy the rest of your day and enjoy your meal!

006

 
2 Comments

Posted by on February 11, 2014 in Appetizers, Breads, Cooking, Pizza, Snacks


Tags: , , , , ,

It’s a Snack Attack, Part 1 – Southwestern Egg Rolls with Avocado-Ranch Dipping Sauce

Since I spent most of the weekend working I did not have a chance to do any posting on here. However I did find the time to try out some new snack recipes that I had been wanting to make for a while and we all sat down and tested them out last night to see how they were. This first one I think was the real hit and turned out the best. It is a take on Chili’s Southwestern eggrolls  recipe. If you have ever eaten at Chili’s or many other places just like it now, you have likely seen this one listed on their menu and perhaps have tried it out. It has always been one of Michelle’s favorites and when I came across it at Chef’s Catalog website I knew I had to give it a try and see how it was. Though they might seem complicated to make, they are actually pretty easy and I think worth the time to put into it.

Southwestern Eggrolls

1 boneless, skinless chicken breast

1 tablespoon vegetable oil

2 tablespoons minced red bell pepper

2 tablespoons minced green onion

1/3 cup frozen corn kernels

1/4 cup canned black beans, rinsed and drained

2 tablespoons frozen spinach, thawed and drained

2 tablespoons diced jalapeno peppers

1/2 tablespoon minced fresh parsley

1/2 teaspoon cumin

1/2 teaspoon chili powder

1/4 teaspoon salt

Dash cayenne pepper

3/4 cup shredded Monterey Jack cheese

5 7-inch flour tortillas

1 egg, beaten

6 cups vegetable oil, for frying

For the Avocado-Ranch Dipping Sauce:

1/4 cup fresh avocado, smashed (about half an avocado)

1/4 cup mayonnaise

1/4 cup sour cream

1 tablespoon buttermilk

1 1/2 teaspoons white vinegar

1/8 teaspoon salt

1/8 teaspoon dried parsley

1/8 teaspoon onion powder

Dash dried dill weed

Dash garlic powder

Dash pepper

Heat a large skillet over high heat with 1 tablespoon of the vegetable oil until it is shimmering. Saute the chicken breast until it is cooked through, about 4 to 5 minutes per side. Set the chicken aside until it cools down enough for you to handle. Wash and dry the skillet to use for the next step.

In the now-empty skillet, heat 1 tablespoon of vegetable oil over medium-high heat until it is shimmering. Add the red pepper and the green onions and saute for 2 to 3 minutes until the vegetables are tender. Dice the cooked and cooled chicken into small cubes and add it to the pan. Add the frozen corn, black beans, spinach, jalapeno peppers, parsley, cumin, chili powder, salt and cayenne pepper to the pan and mix thoroughly. Saute the mixture until it is heated through, about 4 to 5 minutes. Stir the mixture well so that the spinach breaks up and is incorporated into the mixture. Remove the pan from the heat and add the Monterey Jack cheese. Stir until the cheese has melted into the mixture.

Wrap the flour tortillas in a moist cloth and microwave them on high for 1 1/2 minutes or until they are hot. Spoon approximately 1/5 of the mixture into the center of a warm tortilla. Fold in the ends of the tortilla and then roll the tortilla over the mixture. Roll the tortilla very tightly but before you finish rolling brush some of the beaten egg on the inside edge of the tortilla. Finish rolling the eggroll, then set the eggroll with the “glued” seam facing down until the egg sets. Repeat the process with the remaining tortillas and filling until you have five large eggrolls. Arrange the eggrolls on a plate with the sealed edges facing down, cover the plate with plastic wrap and freeze for at least 4 hours or overnight.

While the eggrolls freeze, prepare the avocado-ranch dipping sauce by combining the avocado, mayonnaise,, sour cream, buttermilk, white vinegar, salt, dried parsley, onion powder, dill weed, garlic powder and pepper in a small bowl and mixing until everything is well combined. Refrigerate the dipping sauce until you are ready to serve the eggrolls.

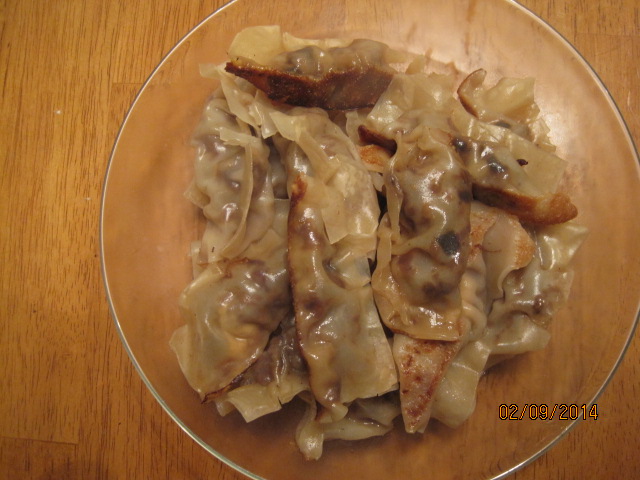
Preheat the 6 cups of vegetable oil in a deep cast iron pan or Dutch oven until the temperature reaches 350 degrees. Deep fry the eggrolls, in batches if necessary, in the hot oil for 8 to 10 minutes until they are golden brown. Remove the eggrolls to a paper towel-lined plate or a cooling rack to drain for about 2 minutes. Slice each eggroll diagonally lengthwise and arrange them on a plate around a small bowl of the dipping sauce and serve.

Just a couple of quick notes about this recipe. If you don’t want to use the jalapenos, leave them out. I didn’t have any on hand when I made them and the final results were fine, but if you want more heat put them in. Also, I never use as much oil as they recommend when deep-frying. I just hate using that much oil and I try not to deep fry very often, but for something like this I think they came out much better than if we tried them in the oven first. We all loved the results of this recipe. It tastes a lot like what you get at the restaurant and was not hard to make at all. Letting them freeze really does help things to set up nicely and you get a nice dark color when they are deep-fried because of it, but to be honest I only froze them for a little over and hour and I think they turned out fine with that little time. Five may not sound like a lot to get but they are a decent size. If you are making these for a crowd you may want to make a double batch, though I actually got 7 out of the filling I made, so it really depends on how you want to go about it. Michelle has always loved the avocado ranch sauce they serve and this home version did not disappoint. It has the nice mix of flavor you like in the sauce and is perfect not just for egg rolls but for anything else you may want to dip in there, like chips or vegetables. Overall, this recipe is definitely a keeper.

That’s all I have for today. Check back next time for another a recipe. I have a couple of more snack foods I just tried out that you may like to try and I do have some plans for a nice Valentine’s Day dinner involving some steak, lobster tails, a beet salad and molten lava cakes, so check back for those. Until next time, enjoy the rest of your day and enjoy your meal!

005


6 Comments

Posted by on February 10, 2014 in Appetizers, Cooking, Sauce, Snacks


Tags: , , , , ,

 
National Day Calendar

Fun, unusual and forgotten designations on our calendar.

Jennifer Probst

a little bit naughty a little bit nice

Laissez Faire

Letting Life Lead

What To Have For Dinner Tonight

Simple and delicious dinner inspiration