RSS

Category Archives: Vegetables

Getting Primed for the Holidays: One-Pan Prime Rib and Roasted Vegetables

When we decided to host Christmas dinner this year, I knew immediately that I wanted to make a classic prime rib dinner. To me, nothing says Christmas better than a prime rib roast, and I had just seen a recipe in  December issue of Cook’s Country that seemed perfect to try out and that would save some room in the oven as well. This is a recipe for prime rib and roasted vegetables all in one pan. The vegetables get roasted at a high temperature while the meat is resting so everything can be done at the same time perfectly.

One-Pan Prime Rib and Roasted Vegetables

1 (7-pound) first-cut beef standing rib roast (3 bones), fat trimmed to 1/4-inch

Kosher salt and pepper

Vegetable oil

2 pounds carrots, peeled, cut into 2-inch lengths, halved or quartered lengthwise to create 1/2-inch-diameter pieces

1 pound parsnips, peeled and sliced to 1/2-inch thick on bias

1 pound Brussels sprouts, trimmed and halved

1 red onion, halved and sliced through the root end into 1/2-inch wedges

2 teaspoons minced fresh thyme

Using a sharp knife, cut through the roast’s fat cap in a 1-inch crosshatch pattern, being careful not to cut into the meat. Rub 2 tablespoons of kosher salt over the entire roast and into the crosshatch. Transfer the roast to a large plate and refrigerate, uncovered, for at least 24 hours and up to 96 hours.

Adjust an oven rack to the lower-middle position and heat the oven to 250 degrees. Season the roast with pepper and arrange the roast, fat side up, on a V-rack set inside a large roasting pan. Roast the meat until it registers 115 degrees for rare, 120 degrees for medium-rare or 125 degrees for medium, about 3 to 3 1/2 hours. Transfer the V-rack with the roast to a carving board, tent the roast loosely with aluminum foil and allow it to rest for about 1 hour.

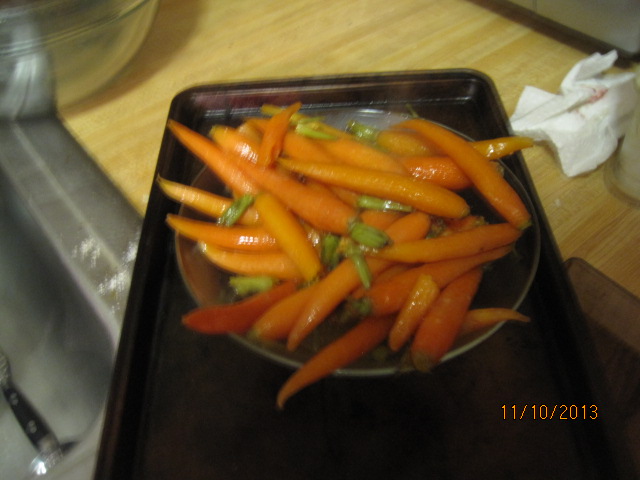
Meanwhile, increase the oven temperature to 425 degrees. Pour off all but 2 tablespoons of fat from the pan. If there is not enough fat in the pan, add some vegetable oil to equal 2 tablespoons. Toss the carrots, parsnips, Brussels sprouts, onion, thyme 1 teaspoon of kosher salt and 1/2 teaspoon of pepper with the fat in the pan. Roast the vegetables, stirring halfway through the roasting process, until they are tender and browned, about 45 to 50 minutes.

Remove the pan from the oven and heat the broiler. Carefully nestle the V-rack with the roast among the vegetables in the pan. Broil the roast until the fat cap is evenly browned, rotating the pan if necessary, about 5 minutes. Transfer the roast to the carving board, carve the meat from the bones and cut the meat into 3/4-inch-thick slices. Season the vegetables with salt and pepper to taste and serve the roast with the vegetables.

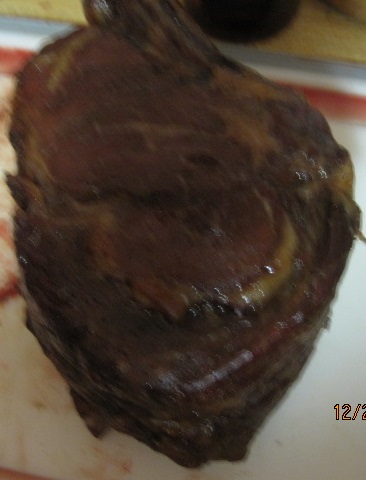
This prime rib tasted amazing. It was buttery soft to cut and tasted amazing, as prime should. The vegetables were perfectly roasted as well to get great flavor from them. Don’t forget to save those bones once you cut them away as well. you can go ahead and make some incredible beef stock with those for soups later on.

I also made a quick chimichurri sauce to go with the beef. This recipe was with the prime rib recipe in Cook’s Country and really gave a nice bold taste to the dish as a whole. It is very easy to put together and would be great to go with any type of steak,

Red Chimichurri Sauce

1 onion, chopped fine

1/2 cup minced fresh parsley

1/2 cup red wine vinegar

1/2 cup extra-virgin olive oil

3 garlic cloves, minced

1 tablespoon paprika

1/2 teaspoon kosher salt

1/4 teaspoon red pepper flakes

Whisk all the ingredients together in a bowl. Cover with plastic wrap and let stand at room temperature at least 30 minutes. Whisk again before serving.

You can make the sauce up to 3 days in advance and just let it come to room temperature while the meat rests. It is also a great addition to your morning scrambled eggs. One more thing about the roast: don’t skip out on the salting a few days before or at least one day before. It really makes a difference in drawing out the moisture of the beef so that it is nice and dry and browns really nicely at the low cooking temperature and the final 5 minute browning under the broiler really finishes it off.

That’s all I have for today. Check back next time for another recipe as I still have lots to share from my holiday cooking. Until then, enjoy the rest of your day and enjoy your meal!

016 014

 
4 Comments

Posted by on December 27, 2013 in Beef, Cooking, Dinner, Holidays, Sauce, Vegetables


Tags: , , , , , , , ,

How About An Elegant Thanksgiving Side? Winter Squash Bowls

While I did not make this side dish with the turkey I made recently, it is one that would go well with your Thanksgiving meal and look really nice on the table. Any type of winter squash would work well for Thanksgiving or any Fall or winter meal, and doing one like this can make a Sunday dinner look nice or your holiday table. I got this recipe from Bon Appetit and you really have your choice of what type of winter squash you want to use, so use what you like best and what is most available in your area.

Winter Squash Bowl

1 medium butternut squash ( about 1 1/2 pounds)

5 small winter squash (about 1 pound each; such as acorn squash, carnival, delicata or sugar pumpkins), divided

4 1/2 teaspoons olive oil, divided

3 teaspoons pure maple syrup, divided

Kosher salt and freshly ground black pepper

1 tablespoon butter, room temperature

1 teaspoon fresh thyme leaves

Preheat the oven to 400 degrees. Line 2 rimmed baking sheets with parchment paper. Cut the butternut squash in half crosswise. Set the top half of the butternut squash aside. Remove the seeds and strings from the bottom half of the butternut squash and discard them. Place the bottom half of the butternut squash on 1 baking sheet. Remove the caps from 3 of the small squash by cutting a circle 1 inch around the stems with a small serrated knife (just like you were carving a pumpkin). Slice off and discard the strings from the bottom sides of the caps. Scoop out the seeds and strings from the centers of the squash and discard.

Cut a thin slice off the bottom of the 3 hollowed-out small squash so the squash will sit evenly on a flat surface; place (with the caps on) the squash on a baking sheet along with the bottom of the butternut squash. Drizzle the insides of the squash with 1/4 teaspoon of olive oil and 1/4 teaspoon of maple syrup. Season the cavities with salt and pepper. Bake the squash until a paring knife inserted into the squash meets no resistance, about 1 hour.

Meanwhile, remove the stems from the remaining 2 small squash and cut the squash in half lengthwise. Remove the seeds and strings from the small squash and the top half of the butternut squash and discard. Peel and chop the squash into 1/4-inch pieces and place them in a large bowl. Add the remaining 4 1/4 teaspoons of olive oil and toss to coat them well. Season the squash pieces with salt and pepper. Spread the squash pieces in a single layer on the remaining baking sheet and bake, stirring once, until the squash is tender, about 30 minutes. Transfer the baked squash to a large bowl and toss it with the remaining 2 3/4 teaspoons of maple syrup, the butter and the thyme leaves. Divide the baked squash among the hollowed-out butternut and small squash and serve warm or at room temperature.

I did change this recipe up just slightly. Since I was making this for less people, I did not need to use all this squash. What I actually did since I had a very large butternut squash is cut it into 3 sections, hollow out part of it, and used 2 sections of the butternut squash and one acorn squash to fill with the remaining squash. I have to say the squash I had was pretty solid and did have a lot of seeds, so I had to do some hollowing out on my own, which took a little work, but it was worth it. The squash was wonderfully roasted and tender and had great flavor from the maple syrup. It also looked very nice in the squash bowls itself. I think you could easily do this with just one squash of any size if you wanted something smaller and elegant for a weeknight meal.

That’s all I have for today. Check back next time for some more recipes. I have a pork chop casserole recipe I just tried, some homemade french bread, a great turkey pot pie for your turkey leftovers, another turkey recipe, chicken and waffles and much more to come so stay tuned. Until next time, enjoy the rest of your day and enjoy your meal!

003

 
1 Comment

Posted by on November 19, 2013 in Cooking, Dinner, Holidays, Vegetables, Vegetarian


Tags: , , , , , ,

The Never-Ending Thanksgiving Side Dishes – Maple Glazed Carrots and…Lanttulaatikko?

I still have some side dishes that I made recently that would be great for your Thanksgiving table. I made both of these recently for Michelle’s birthday dinner and both were very simple to do. I think you want to try to keep the side dishes as easy as you can and even make them ahead of time if at all possible to save yourself some time on Thanksgiving when you are focused on family and the turkey. You can always simply re-heat your sides in the oven while the turkey is resting. This can give you more than enough time to get your sides heated properly and get everything on the table while it is hot. The first one for today is a very easy recipe for some maple glazed carrots.

Maple Glazed Carrots

12 medium carrots, with the greens attached

3 tablespoons butter

1 teaspoon sugar

3/4 cup water

Salt

2 tablespoons maple syrup

Trim off all but 2 inches of the green tops of the carrots. Put the carrots, butter, sugar, water and salt to taste in a large skillet. Cover the skillet and bring to a boil over medium-high heat. Maintain the boiling until nearly all the liquid evaporates, about 8 to 10 minutes.

Uncover the skillet and add the maple syrup. Cook, shaking the skillet over the heat frequently, until the carrots have obtained a nice glaze on them, about 2 to 3 minutes. Serve.

You could certainly leave out the maple syrup and still get something of a glaze on the carrots using this method and they would be good, but I think the maple syrup adds a really nice flavor to the carrots. You could also substitute honey for the maple syrup and get a nice glaze from that as well. Since this recipe was so easy, I did not need to make it ahead of time and simply made these on the stove top while the turkey was resting.

The second recipe is one I picked up from the cooking blog A Wee Bit of Cooking. It is a Finnish dish that is often used for the holidays called Lanttulaatikko. This is a turnip casserole that makes use of rutabaga, or yellow turnip. We have often eaten rutabaga on Thanksgiving in my family. It has a very distinct flavor to it and some people are put off by the aroma it can give off, but I love the flavor that you get from it. I often make it during the year, simply mashing it up, but this recipe adds a little bit more and is just as easy.

Lanttulaatikko (Turnip Casserole)

1 large rutabaga or yellow turnip

2/3 cup cream

1 egg

1 tablespoon honey

1/2 teaspoon nutmeg

Salt and freshly ground black pepper

2 tablespoons butter, softened

Peel the turnip and cut it into 1/2-inch chunks. In a medium saucepan, place the turnip and cover with salted water. Bring the turnips to a boil and boil until they are completely tender, about 15 to 20 minutes. Drain the turnips.

Heat the oven to 350 degrees. Mash the turnips well with a potato masher and then run them through a potato ricer. Combine the cream, butter, honey, nutmeg and egg and mix until blended. Add the mixture to the mashed turnips and mix well. Season with salt and pepper to taste.

Add the turnip mixture to a small casserole dish and smooth the top with a fork or spatula and dot with the butter. Bake in the 350 degree oven for 40 minutes until golden and crisp on the top. Serve.

Since the turnip can take a long time to soften and get tender and then to bake, I made this dish the day before our meal and simply re-heated it in the oven while the turkey rested. You get the flavor of the turnips along with the honey and nutmeg and it is a simple, sweet flavor. I would make this any time of year as a side dish for poultry or beef.

That’s all I have for today. Check back next time for even more recipes. There’s still time before Thanksgiving and I still have recipes to share. Until next time, enjoy the rest of your day and enjoy your meal!

009 004 005


Tags: , , , , , , ,

More Thanksgiving Day Sides: Creamed Pearl Onions and Roasted Brussels Sprouts

There seems to be an endless supply of Thanksgiving side dish possibilities. There are so many great Fall vegetables that you can use in so many different ways that the combinations you can come up with can help you to tailor your meal to fit whatever likes you may have or whoever may be coming over for dinner on that day. In my trail run dinner that I made for Michelle’s birthday, I made a lot of side dishes this year so I could try different things. One of her absolute favorites is one that often gets overlooked on the dinner table – creamed pearl onions. I actually got this very simple recipe from chef Thomas Keller and with just a few ingredients, you can have this dish made easily.

Creamed Pearl Onions

2 cups peeled pearl onions

2 cups chicken stock

1 1/2 teaspoons sugar

1/2 teaspoon kosher salt

2/3 cup heavy cream

1 tablespoon minced chives

Combine the pearl onions, chicken stock, sugar and salt in a medium saucepan over medium heat. Simmer the mixture until all the liquid has evaporated and the onions are tender, about 15 to 20 minutes. Add the heavy cream and cook until the cream has thickened. Stir in the chives and season with salt and freshly ground black pepper to taste before serving.

It is very easy to make and you can do this while your turkey is resting so you can get it ready easily or you can even make it the day before and just lightly simmer it on the stove to heat it through. You get a nice, thick creamy sauce with the great flavor of the pearl onions. If you can get frozen pearl onions, you can save yourself the aggravation of having to peel the onions yourself. I couldn’t find any frozen onions, so I did buy the fresh ones, but there is an easy way to peel them. Simply place the onions in two cups of boiling water for 2 or three minutes. Remove the onions to an ice water bath or cold water bath to cool them off when you strain them off the stove. Once they are cool enough to the touch, simply cut off the root end of the onion and give the onion a gentle squeeze and it will pop right out of the skin. It still takes some time to do all of them, but it is a lot easier than trying to peel the paper off of all those tiny onions.

I also made a simple Brussels sprouts recipe. Even though sprouts may get a bad rap, we love them in our house and they make a great Fall or holiday side dish. And nothing seems to be better than some roasted Brussels sprouts with a little bit of bacon to add some flavor. This quick recipe is from chef Marcus Samuelsson.

Roasted Brussels Sprouts with Maple Bacon

1 pound Brussels sprouts, bottom trimmed and cut in half lengthwise

1 ounce maple syrup

1 teaspoon smoked paprika

Salt and pepper, to taste

1/2 ounce olive oil

4 ounces bacon, cut into quarters in strips

Heat the oven to 400 degrees. Toss the Brussels sprouts in the olive oil, salt, peppers and smoked paprika.Place the Brussels sprouts on a baking sheet and roast until they are browned and cooked through, about 15 minutes.

In a medium skillet over medium heat, fry the bacon until it is crispy, about 5 minutes. Drain the bacon of the fat and toss it with the maple syrup and the roasted Brussels sprouts. Finish the dish with a pat of butter over the top or just serve immediately.

Again, you can roast the Brussels sprouts a day ahead of time, like I did, and while the turkey rests before carving simply place them in the oven to warm them through with any other side dishes you are also warming to save yourself some time. The maple flavor along with the smokiness of the bacon and the paprika make this a fantastic side dish. If you want to try to keep it lighter and vegetarian, you can simply omit the bacon and roast the Brussels sprouts alone on a baking sheet or even in a cast iron pan and make them that way.

Unfortunately, I had so many side dishes when I made everything that there were a few things I forgot to take pictures of in all the rush to get things on the table. Sorry about that, but the pearl onions and Brussels sprouts got away from me. I do have pictures of the next 2 sides I will be posting tomorrow though.

That’s all I have for today. Keep checking back for some more holiday recipes and ideas. Until next time, enjoy the rest of your day and enjoy your meal!

 
2 Comments

Posted by on November 16, 2013 in Cooking, Holidays, Produce, Side Dishes, Vegetables


Tags: , , , , , , ,

An Easy Holiday Appetizer – Broccoli Dip in a Bread Bowl

You want to try to remember to have some appetizers on hand for your holiday or Thanksgiving meal to keep everyone happy before the big meal comes out. There are lots of things that you can do that are easy, like making a simple antipasto platter, some shrimp cocktail, crackers and cheese or even just some onion dip and chips. One thing that can be a little different and look fancy is this recipe I got from Cook’s Country for broccoli dip in a bread bowl. It is really easy to make and you can make the dip a day or two in advance and then just put it all together right before you serve it.

Broccoli Dip in a Bread Bowl

12 ounces broccoli, florets cut into 1-inch pieces, stalks peeled and cut into 1/2-inch pieces

2/3 cup mayonnaise

1/4 cup grated Parmesan cheese

2 tablespoons minced shallot

1 garlic clove, minced

1/2 teaspoon salt

1/4 teaspoon pepper

1/8 teaspoon cayenne pepper

2/3 cup whole Greek yogurt

1 (8-inch) round bread (whatever type you like)

Combine the broccoli stalks and 1 tablespoon of water in a bowl. Cover the bowl and microwave it until the stalks are tender, about 5 minutes. Transfer the stalks to a colander, rinse under cold water, and drain thoroughly. Transfer the stalks to a clean dish towel and pat dry. Combine the broccoli florets and 1 tablespoon of water in the same now-empty bowl. Cover the florets and microwave until just tender, about 3 minutes.Transfer the florets to a colander, rinse them under cold water and allow them to drain thoroughly. Transfer the florets to a clean dish towel and pat them dry. Keep the stalks and the florets separate.

Combine the stalks, mayonnaise, Parmesan cheese, shallot, garlic, salt, pepper and cayenne pepper in a food processor and process until the mixture is finely ground, about 30 seconds., scraping down the sides of the bowl as needed. Add the florets and pulse until the florets are finely chopped, about 4 pulses. Transfer the mixture to a bowl, stir in the Greek yogurt, and refrigerate the dip for at least 30 minutes or up to 24 hours.

Using a paring knife, cut into the top of the loaf of bread at a 45-degree angle, about 1 1/2 inches from the edge. Continue to slice around the bread at a 45-degree angle in approximately a 5-inch circle. Remove the cut top of the bread and cut it into bite size pieces. Make vertical slices through the perimeter of the bread bowl at 1 1/2-inch intervals, stopping just shy of the bottom crust. Transfer the broccoli dip to the bread bowl. Serve, using bread pieces and crudites to dip.

I did make one slight change to the recipe itself. Instead of using mayonnaise I used some sour cream and I think it came out just fine. The slices into the bread bowl allow people to pull out pieces of the bread to dip into the dip itself. The goal is that you won’t actually have anything leftover from the whole set up, though I did have some extra broccoli dip left that did not fit into the bread bowl, so we have been able to have that with some cut-up vegetables like carrots, celery, peppers and the like. I think you could also easily substitute spinach for the broccoli in this if you prefer to have a spinach dip to serve. In either case, I really liked the texture thanks to the yogurt and the flavor of the broccoli and shallots was great. You really do need to blanch the broccoli for this to work out well. Raw broccoli would be too woody and I think frozen broccoli is just too mushy to use.

That’s all I have for today. Check back next time for some more recipes. There’s still lots to come that you can use to help plan your Thanksgiving. Until next time, enjoy the rest of your day and enjoy your meal!

002

 
Leave a comment

Posted by on November 14, 2013 in Appetizers, Cooking, Holidays, Snacks, Vegetables, Vegetarian


Tags: , , , , ,

Thanksgiving Planning: Baked Ginger Sweet Potatoes and Mashed Butternut Squash

Since I won’t be cooking the actual Thanksgiving meal myself this year, I thought I would get the month started early and try to make a bunch of Thanksgiving side dishes all month long so you have some new things to choose and try for your Thanksgiving meal this year. I recently made two side dishes that would be perfect to use for Thanksgiving. The first is a very simple baked ginger sweet potatoes dish that I got from Chow.com. it is very simple to make, with a wonderful glaze that adds some great flavor to the potatoes.

Baked Ginger Sweet Potatoes

3/4 cup apricot preserves

1/3 cup freshly squeezed orange juice (from 1 medium orange)

3 tablespoons butter

1 tablespoon peeled and grated fresh ginger

1 tablespoon kosher salt

4 pounds medium sweet potatoes, peeled and sliced into 1/2-inch rounds

Heat the oven to 425 degrees and arrange an oven rack in the middle position of the oven.

Place the apricot preserves, orange juice, butter, ginger and salt in a small saucepan over medium heat. Bring the mixture to a simmer, stirring occasionally, and cook until the butter and the preserves are melted and smooth, about 6 minutes.

Place the sweet potatoes in a large bowl and drizzle them with about 1/3 of the apricot mixture, and, using your hands, toss the potatoes to coat them well with the mixture. Shingle the slices in a 13-by-9-inch baking dish. Cover the dish tightly with aluminum foil and bake for 25 minutes.

Remove the baking dish from the oven and remove the aluminum foil. Drizzle the potatoes with another 1/3 of the apricot mixture and bake the potatoes uncovered for 10 minutes. Drizzle the potatoes again with the remaining 1/3 of the apricot mixture and bake uncovered until the sweet potatoes are tender and the glaze has thickened, about 10 minutes more. Transfer the baking dish to a wire rack and cool for 10 minutes before serving.

The sweetness of the potatoes is enhanced even more by the apricot preserves and orange juice and the ginger adds a nice little bite of spice to the dish. It’s a great tasting dish that goes well not just with your Thanksgiving meal but with any weeknight meal of something like chicken or pork chops.

The second side dish I had made recently is another orange vegetable that is perfect for your Thanksgiving table. It is a very simple mashed butternut squash recipe that I got from Cook’s Country that has a great earthy flavor thanks to the spices it uses in the recipe.

Mashed Butternut Squash

4 pounds butternut squash, peeled, seeded and cut into 1-inch pieces

3 tablespoons vegetable oil

Salt and pepper

4 tablespoons butter

2 apples, peeled and shredded (about 2 cups)

1 onion, chopped fine

1 garlic clove, minced

1/2 teaspoon ground cumin

1/2 teaspoon ground coriander

1/4 teaspoon ground cinnamon

1/8 teaspoon cayenne pepper

3 tablespoons maple syrup

Adjust an oven rack to the upper-middle position and heat the oven to 425 degrees. Line a rimmed baking sheet with parchment paper. Combine the squash, vegetable oil, 1 teaspoon of salt, and 1/2 teaspoon of pepper in a bowl. Spread the squash out evenly on the prepared baking sheet. Roast the squash until it is tender and starting to brown, about 40 to 50 minutes, rotating the sheet halfway through the roasting process.

Meanwhile, melt the butter in a Dutch oven over medium-low heat. Add the apples, onion, and 1/4 teaspoon of salt and cook, covered, until the apples are soft, about 5 minutes. Uncover the pot and continue to cook, stirring occasionally, until the apples and onion are golden brown, about 5 to 7 minutes longer. Add the garlic, cumin, coriander, cinnamon and cayenne pepper and cook until the mixture is fragrant, about 30 seconds. Remove from the heat, cover and set the pot aside while the squash finishes roasting.

Add the roasted squash and maple syrup to the Dutch oven with the apple mixture. Mash the mixture with a potato masher until it is mostly smooth. Season with salt and pepper to taste and serve.

The mashed squash has great consistency and flavor and will go well with your turkey and other side dishes if you want to make something a little bit different. The apples really help to add some great depth of flavor to the dish and the maple syrup just gives it a final touch that we all really enjoyed. I actually served this with the slow cooker pepper pork chops I made the other night and the whole meal was fantastic.

That’s all I have for today. Check back next time for some more recipes. I have lots more ideas for your Thanksgiving side dishes, a good turkey recipe, a wonderful lemon cake I making for Michelle’s birthday, a great burger recipe we tried yesterday, some simple battered shrimp and a whole lot more. Until next time, enjoy the rest of your day and enjoy your meal!

002 001

 
2 Comments

Posted by on November 4, 2013 in Cooking, Holidays, Potatoes, Side Dishes, Vegetables


Tags: , , , , , , ,

Sunday Dinner on a Saturday, Part 2 – Braised Cauliflower and Yorkshire Pudding

To go along with the slow-roasted chuck roast dinner I made this past Saturday I chose a couple of new side dishes to give a try. The first comes from the Cook’s Illustrated Cookbook and is for a browned and braised cauliflower with garlic, ginger and soy. Cauliflower is in season right now so the price is not bad for a fresh head if you can get one. I like fresh much better than frozen as the frozen seems to get very limp and soggy quickly while if you cook the fresh right it was stay nice and crisp. This is a very easy recipe that only takes a few minutes to put together.

Browned and Braised Cauliflower with Garlic, Ginger and Soy

1 1/2 tablespoons vegetable oil

1 head cauliflower (about 2 pounds), cored and cut into 1-inch florets

2 tablespoons grated fresh ginger

2 garlic cloves, minced

1 teaspoon toasted sesame oil

1/4 cup water

2 tablespoons soy sauce

2 tablespoons rice vinegar

1 tablespoon dry sherry

2 scallions, minced

Pepper

Heat the vegetable oil in a large skillet over medium-high heat until just smoking. Add the cauliflower and cook, stirring occasionally, until it is beginning to brown, about 6 to 8 minutes.

Clear the center of the skillet and add the ginger, garlic and sesame oil. Cook, mashing the mixture into the pan, until it is fragrant, about 1 minute. Stir the ginger mixture into the cauliflower and cook for 30 seconds more. Reduce the heat to low and add the water, soy sauce, rice vinegar and sherry. Cover the skillet and cook until the florets are tender but still offer some resistance when they are poked with a paring knife, about 4 to 5 minutes. Add the scallions and toss lightly to distribute. Season with pepper to taste and serve.

I really enjoyed the Asian flavor that this dish had. The ginger and soy really come through nicely and the garlic adds just the right touch, making this a great side dish. I would use this side again, perhaps with a chicken dish next time as I think it would lend itself quite nicely to that type of meal.

I also decided to take a shot at making Yorkshire pudding. Now I can remember having this as a kid and it was pretty good, but I had never attempted to make it before myself. I saw various recipes out there to give it a try, but I decided to go with this one from Alton Brown. It seemed the most basic and the one that I could least screw up, so I figured I would give it a shot. The worst that could happen is that I ended up throwing everything away. Thankfully, it all turned okay.

Yorkshire Pudding

2 cups all-purpose flour

1 1/2 teaspoons kosher salt

4 large eggs, room temperature

2 cups milk, room temperature

1/4 cup beef drippings, divided

Preheat the oven to 400 degrees. Leave 2 tablespoons of the beef drippings in the pan and place it in the oven.

Place the flour, salt, eggs, milk and the remaining 2 tablespoons of drippings into the bowl of a food processor or blender and process for 30 seconds. Pour the batter into the hot roasting pan and bake for 35 to 40 minutes or until it is puffed and golden brown. While the pudding is cooking, carve the roast and then serve the pudding with the roast.

For my first try at this, I think it went okay. The taste was there as I remembered it, but it did not puff up nearly as high as I thought it would. Everyone else thought it was okay, but I think I will need to try this one again at some point to try for better results. It could be that my oven temperature is a little off and that made the difference in the height of the puff. Whatever the case, it still turned out okay.

That’s all I have for today. Check back next time for some more recipes. I still have a sausage in the slow cooker recipe I tried, Michelle’s apple pie that she made this weekend, a new banana bread recipe and a few other things to try out this week. until next time, enjoy the rest of your day and enjoy your meal!

007 004


3 Comments

Posted by on October 7, 2013 in Cooking, Dinner, Side Dishes, Vegetables


Tags: , , , , ,

Soup Season in Full Bloom – Roasted Butternut Squash Soup

The weather has started to get a little more Fall-like around here the last few days so I had planned to make a couple of soups this week to fit the occasion. Soups make a great dinner because they are filling, delicious and nutritious all in one. I had bought a butternut squash at our friend’s farmstand this past weekend and then I found this great recipe from Michael Chiarello for a different butternut squash soup recipe than I had made before. It makes use of some different spices to give a different flavor and roasting the squash with some of these ingredients really added something to the meal.

Roasted Butternut Squash Soup

For the Toasted Spice Rub:

1/4 cup fennel seeds

1 tablespoon coriander seeds

1 tablespoon peppercorns

1 1/2 teaspoons red pepper flakes

1/4 cup chili powder

2 tablespoons kosher salt

2 tablespoons ground cinnamon

For the Roasted Squash:

3 pounds butternut squash (about 1 large squash)

Kosher salt

Freshly ground black pepper

1/2 cup (1 stick) butter

2 tablespoons chopped fresh sage leaves

2 tablespoons granulated sugar

1/4 cup balsamic vinegar

1/4 cup dark molasses

2 teaspoons Toasted Spice Rub

For the Soup:

2 tablespoons extra-virgin olive oil

1/2 cup diced onion

1/4 cup diced celery

1/4 cup diced carrot

1 cinnamon stick

Salt and freshly ground black pepper

4 cups chicken or vegetable stock

1 1/2 cups Roasted Winter Squash

1/2 cup half-and-half

For the spice rub: Toast the fennel seeds, coriander seeds and peppercorns in a small, heavy pan over medium heat. When the fennel turns light brown, turn on the exhaust fan above your stove, add the red pepper flakes and toss the mixture vigorously. Immediately turn the mixture out into a bowl to cool.

When the mixture has cooled, place it in a blender or spice mill with the chili powder, salt and cinnamon and blend until all the spices are evenly ground. Keep the spice mix in a glass jar in a  cool, dry place.

For the squash: Preheat the oven to 400 degrees. Peel the squash with a vegetable peeler, halve lengthwise and discard any of the seeds. Cut the squash into 1-inch diced pieces. Place the squash in a large bowl and season with salt and pepper.

Heat the butter in a medium skillet over medium-high heat. When the butter stops foaming and has turned a light brown, pull the pan off the heat and add the sage, sugar, vinegar (keep your face back when you add the vinegar), molasses and the toasted spice rub. Mix well and allow it to simmer over medium-low heat for 1 to 2 minutes to meld the flavors.

Pour the  vinegar mixture over the squash and toss well. Transfer the squash to a heavy, rimmed baking sheet or baking dish large enough to hold the squash in a single layer. Place the squash in the oven and roast, tossing at least once, until it is very tender and caramelized, about 45 minutes to 1 hour. Set the squash aside until it is cool enough to handle but still warm, so the liquids are still runny.

Working in batches, if necessary, transfer the warm squash and all the cooking liquids to a food processor and process until the mixture is smooth. You can use the squash immediately or refrigerate it for up to 5 days or freeze it for up to 2 months.

For the soup: Heat the olive oil in a large saucepan over medium heat until hot. Add the onion, celery, carrot and cinnamon stick and saute until the vegetables are soft but not brown, about 10 minutes. Season with salt and pepper.

Add the chicken or vegetable stock and bring the mixture to a boil. Simmer for several minutes. Stir in the squash until it is smooth, then simmer gently, allowing the flavors to meld, about 10 minutes. Discard the cinnamon stick.

Puree the soup in a blender, in batches if necessary, until it is smooth. Return the soup to the pan and re-heat it gently. Add the half-and-half and adjust the seasoning with salt and pepper to taste. Keep warm until you are ready to serve.

A couple of things about this recipe. The toasted spice rub makes quite a bit of spice mix. If you think you will use it again later on, it’s great to have on hand. I cut the recipe in half and still had plenty leftover so you can do that if you don’t want a lot of spice mix. You can use the squash puree for other things as well if you didn’t want to make soup with it. I think it would be a great side dish for chicken or turkey just as it is. You could also use other winter squash if you prefer, like acorn squash, and I think it would do just as well. The soup itself has a very roasted, toasty flavor to it. You can certainly taste the spices coming through in the soup but they do not over power the dish at all. I loved the creaminess of the squash and found it to be a very hearty meal. If you use vegetable stock or water instead of the chicken stock, you can make this a vegetarian meal.

That’s all I have for today. Check back next time for another soup recipe I just tried. This one was made in the slow cooker and can also be a vegetarian dish, so check back for that one tomorrow. Until next time, enjoy the rest of your day and enjoy your meal!

IMG_1682


Tags: , , , , , , ,

Twisting a Classic: Spaghetti (Squash) and Meatballs

As sacrilegious as it may sound, I don’t like pasta. I have never eaten it, even when I was a little kid. I don’t know if it’s the taste, flavor, texture or what, but I just don’t like it. Don’t get me wrong; if I am at someone’s home and that’s what they serve, I am eating it without a fuss. Do I go out of my way to make it at home? No, not for me. I do make it for Michelle and Sean, who both love pasta, but I make something else for myself. So when I decided I was making meatballs this week, I wanted to try something different. It was lucky that I had come across this recipe from Food Network recently to give me the inspiration.

Spaghetti Squash and Meatballs

1 medium spaghetti squash (about 2 pounds)

Kosher salt

3 tablespoons extra-virgin olive oil, plus more for brushing

2 stalks celery, chopped

1 medium carrot, roughly chopped

1 medium onion, roughly chopped

6 cloves garlic

1 cup fresh parsley leaves

1 pound ground beef

1 pound ground pork

2 large eggs

1 cup Italian-style breadcrumbs

1 cup plus 3 tablespoons grated Parmesan cheese

2 28-ounce cans tomato puree

2 large sprigs basil

1 teaspoon dried oregano

Preheat the oven to 425 degrees. Halve the squash lengthwise and scoop out the seeds. Sprinkle the cut sides with 1/2 teaspoon of kosher salt and then brush both sides with olive oil. Put the squash, cut side up, in a baking dish and cover it tightly with aluminum foil. Roast for 20 minutes, then uncover the squash and continue roasting until the squash is tender, about 35 more minutes.

Meanwhile, make the meatballs: Brush a baking sheet with olive oil. Pulse the celery, carrot, onion, garlic and parsley in a food processor to make a paste. Transfer half of the vegetable paste to a bowl; add the ground beef, ground pork, eggs, breadcrumbs, 1 cup of the Parmesan cheese and 1 teaspoon of salt and mix with your hands until it is just combined. Form the mixture into about 24 two-inch meatballs; transfer the meatballs to the prepared baking sheet. Bake the meatballs until they are firm but not cooked all the way through, about 10 minutes.

To make the sauce, heat 3 tablespoons of the olive in a large pot over medium-high heat. Add the remaining vegetable paste and cook, stirring occasionally, until it looks dry, about 5 minutes. Stir in the tomato puree; rinse each can with 1 cup of water and add it to the pot. Stir in the basil, oregano and 1 1/2 teaspoons of salt. Bring the sauce to a simmer, then add the meatballs and simmer until the sauce thickens and the meatballs are cooked through, about 15 to 20 minutes. Remove the basil.

Use a fork to scrape the spaghetti squash flesh into strands; transfer the squash to a large bowl and toss with 2 tablespoons of grated Parmesan cheese. Season with salt to taste.  Divide the squash among plates or bowls and top each with some meatballs, sauce and the remaining 1 tablespoon of Parmesan cheese.

A couple of notes about this recipe. This particularly recipe makes a lot of sauce and meatballs, so you will have leftovers to store or freeze if you like. You can store the sauce and meatballs for up to a month in the freezer. You can always skip making the sauce and just use your favorite jarred sauce if you choose to go that route. I have tried multiple meatball recipes and posted several of them on here. This one is one of the more flavorful I have tried, so it’s worth a shot. Everyone really liked the spaghetti squash as an alternative. I thought Sean would resist, but he really liked it too. There is a great flavor from the squash and it goes well with the meatballs.

That’s all I have for today. Check back tomorrow for another recipe. I did make the lemon icebox pie, so you’ll want to check back for that one. Until next time, enjoy the rest of your day and enjoy your meal!

001


1 Comment

Posted by on September 12, 2013 in Beef, Cooking, Dinner, Sauce, Vegetables


Tags: , , ,

Side Dish or Main Dish – Polenta with Roasted Vegetables

I saw this recipe from Williams-Sonoma about 2 weeks ago and knew I wanted to give it a try. I have been trying to introduce more things polenta into our meals to cut back on starches like potatoes, bread and white rice. Sean isn’t exactly thrilled with it so far, so I try to do things with it to make it a little more palatable to him. This recipe could easily be a main course on its own if you wanted a vegetarian meal or you can use it as a side dish for a meal, which is what I did.

Polenta with Roasted Vegetables

3 tablespoons olive oil, plus more for the pans

1 small eggplant, cunt into 3/4-inch pieces

2 small zucchini, cut into 3/4-inch pieces

2 small yellow squash, cut into 3/4-inch pieces

1/2 red onion, cut into 3/4-inch pieces

1 orange bell pepper, seeded and cut into 3/4-inch pieces

Salt and freshly ground black pepper

1 cup stone ground cornmeal (polenta)

2 tablespoons butter

1 cup grated Parmesan cheese

Pre-heat the oven to 450 degrees. Oil a rimmed baking sheet and an 8-inch baking dish with olive oil

In a large bowl, combine the eggplant, zucchini, summer squash, red onion and bell pepper. Drizzle with the 3 tablespoons of olive oil, season with salt and pepper, and toss to combine. Arrange the vegetables in a single layer on the prepared baking sheet. Roast, tossing once, until the vegetables are caramelized, about 20 to 25 minutes. Set the vegetables aside and reduce the oven temperature to 350 degrees.

Meanwhile, in a heavy saucepan, bring 4 cups of salted water to a boil over medium heat. Stirring constantly, very slowly add the polenta. Cook, stirring constantly, until the polenta begins to thicken, about 5 minutes. Reduce the heat to low and continue cooking the polenta, stirring frequently, until the polenta is soft, about 25 minutes. Add the butter and Parmesan  cheese and stir until the cheese has melted. Pour the polenta into the prepared baking dish and smooth the top.

Bake the polenta just until it begins to set, about 15 minutes. Remove the dish from the oven and top the polenta evenly with the roasted vegetables. Place the polenta back in the oven and continue to bake it until the vegetables are heated through, about 15 minutes. Serve the polenta directly from the dish.

I did change a few things about the original recipe. The original recipe also calls for 2 cups of Fontina cheese to be added at the same time as the Parmesan. I did not have any on hand, so I just used the Parmesan instead and I think it turned out fine. Since I am not a cheese eater, this was more than enough for me but you may like it even better with the Fontina. Also, I did not use the eggplant or the pepper. Michelle and Sean are not big eggplant fans, so I omitted it from the recipe and used extra zucchini and squash instead. I also did not have an orange pepper so I added a diced carrot instead for similar color. You could easily make this as a main course for a meal and it would be quite filling. We have leftovers to use as side dishes for other meals this week. I loved the creaminess of the polenta and the vegetables added just the right texture and flavor to the dish.

That’s all I have for today. Check back next time for some more recipes I have been working on. Until then, enjoy the rest of your day and enjoy your meal!

004


1 Comment

Posted by on September 5, 2013 in Cooking, Dinner, Side Dishes, Vegetables, Vegetarian


Tags: , , ,

 
National Day Calendar

Fun, unusual and forgotten designations on our calendar.

Jennifer Probst

a little bit naughty a little bit nice

Laissez Faire

Letting Life Lead

simple cooking recipes

a blog to share with you the best